
Search results for "Doctors specializing" in Home Design Ideas
 Tile Doctor Ltd
Along with internal tiled floors at residential and commercial properties, we also specialise in the cleaning, restoration and sealing of all types of external tiled floors, including patios.
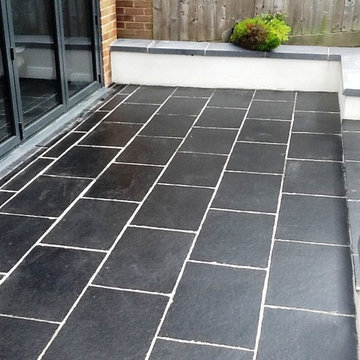
This customer, who lives in the small town of Brackley in Northamptonshire, had made the unfortunate mistake of sealing a brand new Slate tiled patio without removing the layer of grout haze smeared across the surface of the tile first. With the grout trapped between the tile and the new sealant the sealer was unable to fulfil its potential and the entire floor appeared really dull and patchy. The customer contacted me about setting the situation right.
My initial course of action was to remove the new sealer using Tile Doctor Remove & Go, which is specially designed to strip away sealant, as well as adhesives and paints in cases where building and decorating works have left the tiles stained. The product was applied liberally across the surface area of the patio and agitated using a rotary machine fitted with a special stripping pad. Of course, this was necessary because the grout haze could not be treated without removing the sealant first. The soiled cleaning solution was promptly soaked up using a wet-vac machine.
Once the tiles were exposed I applied Tile Doctor Acid Gel, which is a blend of phosphoric and hydrochloric acids in more manageable gel form, all over the patio and allowed it to dwell for ten minutes to begin neutralising the grout haze. I then added a little water and worked the product into the patio with a stiff scrubbing brush and a rotary machine to ensure all grout haze was removed from the surface of the tiles. The remaining slurry was then removed using the wet vacuum, and I rinsed the area twice with plain water to ensure all cleaning products had been removed. It was them left to dry completely.
I returned to the property several days later to give the patio a fresh seal now that it was free from grout haze. First, I gave the patio a vacuum and light mop to remove any dust and debris. The customer wanted the tiles as dark as possible, therefore I suggested we use Tile Doctor Stone Oil before sealing, as this would darken the Slate significantly.
Once this was agreed, I applied one coat of Stone Oil, allowed an hour for the product to dry, and then followed this applying two coats of Tile Doctor Colour Grow sealer. This is our impregnating, colour enhancing sealant which provides maximum protection against ingrained dirt and stains, as well as a durable no-sheen finish.
As you can see from the photographs, the Slate tiles experienced an impressive transformation. The fresh sealant, combined with the Stone Oil, really took the appearance of the tiles to a new level and, what’s more, it will be easier for the happy customer to keep it clean in the future.
Phil Vissian
Northamptonshire Tile Doctor


Find the right local pro for your project

 Jennifer Gilmer Kitchen & Bath
Downtown Washington DC Small Contemporary Condo Refresh Design by #SarahTurner4JenniferGilmer. Photography by Bob Narod. http://www.gilmerkitchens.com/
 FineLine Kitchens, Inc.
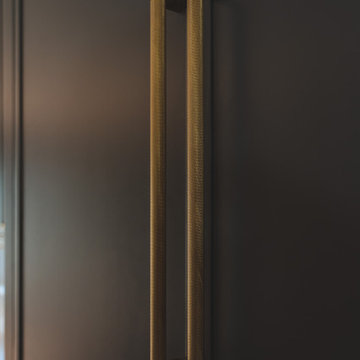
Our designer has achieved a stylish look by combining dark cabinets and light-colored marbles.

 The Dock Doctors
The end sections of this custom permanent pile dock articulate (raise) for winter storage. The piles descend 25 feet into the water and are anchored with 4500 lb. concrete blocks. We specialize in difficult sites.
 The House Doctor
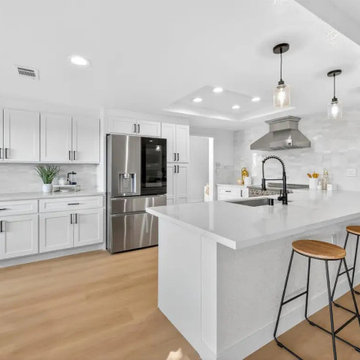
Full Kitchen Remodel | Complete Kitchen Transformation
This full kitchen remodel by The House Doctor Inc. transformed an outdated space into a beautiful, modern, and functional kitchen built to last.
From cabinetry and countertops to flooring, backsplash, lighting, and finishing details, every aspect of this renovation was completed with quality craftsmanship and attention to detail. Our goal was to create a clean, inviting space that enhances both the home's appearance and everyday functionality.
At The House Doctor Inc., we specialize in kitchen remodeling, bathroom remodeling, whole-home renovations, and residential home repairs throughout Pleasanton, Dublin, Livermore, San Ramon, Danville, Alamo, and the surrounding Tri-Valley area.
Thinking about remodeling your kitchen or another part of your home? Contact us today for an estimate!
The House Doctor Inc.
Design • Remodel • Repair
Honesty • Integrity • Service Driven
CA Lic. #1146193
Call/Text: 925-495-3761
TriValleyHouseDoctor.com
 Interior Accents
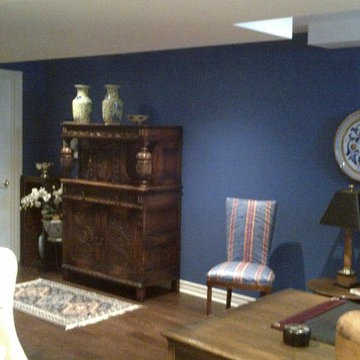
Lower level office space was created specially to provide a warm and inviting room for a retired Doctor to put his beautiful office furniture and display artifacts he had collected. His favorite colour - of course - blue! The space turned out so pleasing for him it also became an entertaining space for a glass of wine with guests.
 The Dock Doctors
Custom U-shaped pile dock which is installed in an extremely deep and exposed area of Lake George. The end sections articulate (raise) for winter storage. The piles descend 25 feet into the water and are anchored with 4500 lb. concrete blocks. We specialize in difficult sites.
 The Dock Doctors
Custom U-shaped pile dock which is installed in an extremely deep and exposed area of Lake George. The end sections articulate (raise) for winter storage. The piles descend 25 feet into the water and are anchored with 4500 lb. concrete blocks. We specialize in difficult sites.

 Adrienne DeRosa
At the far end of the building, the "sitting room" is a quiet, contemplative space that seems almost hidden from the rest of the house. As the former waiting room of the dentist's office, this space is completely intact, right down to the integrated yellow seating.
Separating this room from the rest of the house is a series of smaller rooms, once former exam rooms and a reception area. Since starting At Home Modern, this side of the house has acted as storage for inventory, although someday the couple can see turning it into extra living quarters or office space.
Side Chairs: Bertioa Side Chairs, Knoll
Adrienne DeRosa Photography © 2013 Houzz
 Pure Design House
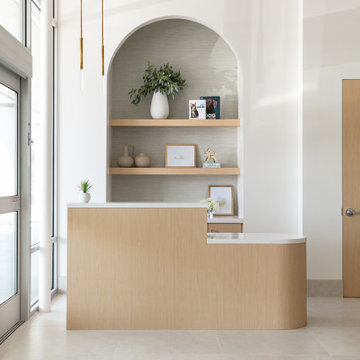
Specialty health care re-imagined. We joined forces with a developer looking to change the face of a very specialized approach to health care. Utilizing some of our well honed trauma-informed design techniques, we not only created a 20,000 sf surgery center but also a space that doctors and staff could thrive in. The concept was to create a wellness-driven environment that puts patients first.

 Soho Kitchen Studio Inc.
The designer wanted to make an innovative use of this office/media room space. Due to the small office area, the designer used glass walls as a sort of memo/schedule board. Photos by Soho Kitchen Studio Inc.
 Viking Renovations LLC
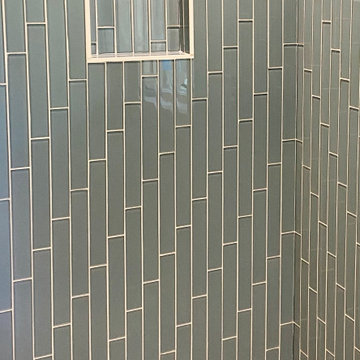
The niche in this shower has the same glass tile throughout so that the look retains a continuity. The vertical stacked pattern of the tile is achieved through pain staking measurements, constant leveling and use of an advanced leveling system like Spin Doctor. While a glass tile wall is a beautiful addition to any home, it also requires special adhesives, grout and skill.

 Muretto Custom Homes
Example of a transitional light wood floor kitchen design in Calgary with a double-bowl sink, recessed-panel cabinets, white cabinets, quartz countertops, white backsplash, paneled appliances, two islands and white countertops
 Tile Doctor Ltd
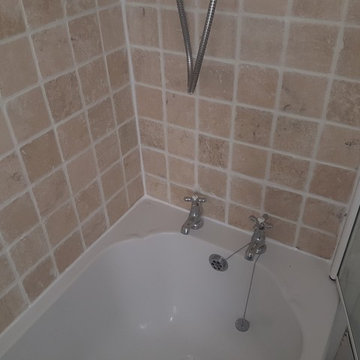
Here’s a quick example of an interesting tiled shower cubicle at a property in Edinburgh that was well overdue for a refresh, including deep cleaning and recolouring do the grout lines that had become stained and mouldy. This is a problem that the majority of property owners experience due to the simple fact that shower cubicles come into contact with damaging acid-based shampoos and soaps on a daily basis.
The short-term solution for this is to wash the shower cubicle down with water after each use, however busy people do not always remember to do so! The prognosis is bad discolouration, mould growth and staining if the problem if proper care isn’t taken. In this case, the problem had worsened to the point that the property owner decided to contact Tile a Doctor to provide a thorough refresh of the tiles.
Our process for refreshing shower cubicles in a similar state to this one is simple, but highly effective. I started by mixing a strong solution of our high alkaline cleaner, known as Tile Doctor Pro Clean (diluted to an appropriate level with water), before applying it directly to the tile and grout.
Next, I worked it in using specialised handheld grout brushes , with the alkaline in the Pro Clean neutralising the acidic staining and mould growth had leaving the area clean and fresh. Pro Clean is suitable for use on all kinds of natural stone, and on both verticals and horizontal surfaces. Once satisfied the grout had been cleaned to the best of my abilities, I quickly dried the entire area using a heat gun.
To restore the appearance of the installation back to it’s optimal appearance I chose to recolour the grout lines with our Light Grey grout colourant, which matched in very nicely. This is just one of ten different colours of grout colourant we offer. The colourant was left to dry for a short period before I cleaned off any excess. The final stage of the refresh involved stripping off the old discoloured silicone from around the bath and replacing it with fresh silicone.
The customer was very impressed by the speed and efficiency of the refresh. With the work completed to a high standard in just a few hours, she now has one less problem to worry about – and a very smart looking shower cubicle! Another satisfied customer.
Thomas Wilson
Edinburgh Tile Doctor

 Tile Doctor Ltd
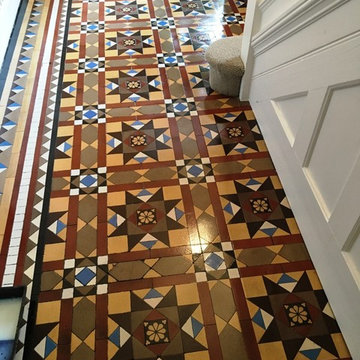
Apologies in advance but I forgot to take the usual before photograph of this Victorian tiled hallway in Twickenham that I worked on recently. It’s a shame really as it was certainly in need of a good clean and re-seal after years of inadequate maintenance and I’m sure a photo would have helped.
Victorian tiles are porous and do need a sealer to stop dirt becoming ingrained, as once that happens they can be difficult to clean and a Hallway is an especially high traffic area that will see a lot of dirt being tramped in. That activity also wears down the sealer over time so it’s important to keep it topped up.
On these tiles, we used a 50:50 combination of Tile Doctor Pro-Clean mixed with Tile Doctor Remove and Go. This combination of products works very well to break down old sealers and also to clean the general soil away from the tile. As usual it was left to soak into the tiles for ten minutes before using a heavy duty scrubbing machine to scrub the floor clean. This achieved a good result and the soil and products were then flushed away using our special flushing tool which fires a jet of water onto the tile whilst vacuuming at the same time (no mess!) to an external tank.
After allowing the tiles to dry off overnight with some heating on, the floor was ready to accept a new seal the next day. Our customer decided to have a sheen finish so we opted to apply Tile Doctor Seal and Go. These tiles are very porous and so need seven coats to be applied to the floor before it was completely sealed.
Apologies again for not taking a before photo so you can compare the difference however hopefully you can see how health the floor looks following the deep cleaning and application of a fresh sealer which will ensure future maintenance is a lot easier for the customer.
Jonathan Oldham
South Middlesex Tile Doctor
 Tile Doctor Ltd
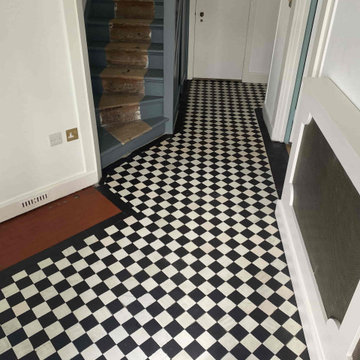
This client from North London had recently bought a property in Highgate N6 and during renovation had discovered an original Victorian tiled floor in the hallway. The floor was laid in a classic black and white diamond pattern but unfortunately a large section was missing and had been filled with concrete. Furthermore, most of the remaining floor had been covered in cement and glue.
I carried out a survey of the floor to determine the main issues and was then able to email over a quote later that day that included rebuilding the missing section of flooring. I suspect the floor had been excavated at some point in the past to install central heating and then rather than have the excavated section restored it was simply back filled and then levelled with a cement screed before finally gluing down a carpet on top.
Once the quote was accepted, I sourced replacement tiles from the Vintage Floor Tile company. Situated in Kent they are a reclamation yard that specialises in supplying original geometric and encaustic tiles including the major historical makers such as Minton and Craven Dunnill.
Armed with replacement tiles I started by removing the concrete that had been used to backfill the missing section and prepare a new surface for tiling with quick drying cement. When ready I was able to carefully build back the original pattern using the replacements. The tiles were secured with tile adhesive and once that had gone off, they were grouted.
The floor was left to set fully overnight and then the next day I was able to return and clean the whole floor using a strong dilution of Tile Doctor Remove and Go. As usual this was left to soak into the tiles for a good ten minutes before being scrubbed into the tiles using a black scrubbing pad. The Tile Doctor Remove and Go did a good job of cleaning the floor and the cleaning solution soon turned black with dirt during the scrubbing. The floor was rinsed with water and the soil extracted with a wet vacuum. After inspecting the floor any areas that needed further work were hand scrubbed and rinsed again until I was happy the floor was clean.
The last part of the cleaning process was to give the tiles an acid wash using Tile Doctor Acid Gel which further cleans the floor by removing old cement residue and grout haze. It also neutralises efflorescent salts in the tiles which are a common issue with floors of this age with no damp proof membrane. After another rinse and extraction, the floor was given a final rinse and then dried as much as possible using the wet vacuum.
I left the floor to dry out for a couple of days before returning to apply a protective sealer. Tile and Stone should be dry before sealing so I use a damp meter first to double check. All was well so to seal the tiles I proceeded to apply the first of what would be three coats of sealer. I used Tile Doctor Colour Grow for this, it works by impregnating the tile occupying the pores and thereby preventing dirt from becoming ingrained there. This product also enhances the black and white colour of the tiles and makes the floor much easier to clean.
Once done the floor was transformed and needless to say my customer was very pleased with the result. For the aftercare of Victorian Tiled floors, I recommend the use of a ph neural tile cleaner such as Tile Doctor Neutral Cleaner; most supermarket tile cleaners are simply too strong for use on sealed floors and can strip off the sealer prematurely.
Andrew Newstead
North London Tile Doctor
 Tile Doctor Ltd
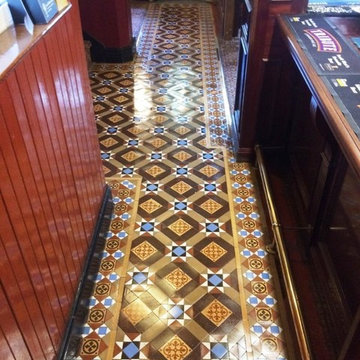
Here’s a really interesting commercial job for you, which I recently completed in the town of Hinckley, Leicestershire. I was asked to take a look at a Victorian Geometric and Encaustic tiled floor in the historic Queen’s Head pub.
This floor is over a century old and although in good condition for its age had suffered significant wear over the years, along with some cracked tiles and slight inherent moisture issues. What the pub landlord requested was a restorative clean to alleviate the aesthetically damaging effect of the wear, and to enhance the natural colours of the stone. I was also asked to seal the floor following the clean to achieve a semi-gloss finish.
The first step in the cleaning process was to mix a strong solution of one part Tile Doctor Pro-Clean to four parts clean water. Pro-Clean is a high alkaline cleaner which also contains stripping properties, allowing it to break down old sealer and tackle heavy soil build-up. The solution was applied to the floor and left to dwell for 15 minutes, giving it times to seep into the stone, get underneath the dirt and lift it to the surface.
I addressed several paint spots and areas suffering from glue contamination by using Tile Doctor Remove & Go, which is specially formulated to break down paint and adhesives on unpolished natural stone floors, amongst others. The entire floor was then scrubbed using a special floor cleaning pad, and the resulting slurry was vacuumed away using a wet-vac machine.
The final issue to deal with was the inherent efflorescence staining. This was treated using Tile Doctor Grout Clean-Up, an acid-based product which removes not just efflorescence but also grout haze, mineral deposits, and rust stains. The solution here was one part Grout Clean-Up diluted with four parts water.
After completing the clean, I thoroughly rinsed the floor with clean water to remove any trace of cleaning product and dried the floor as much as possible with a wet vacuum, then before leaving for the day i installed a couple of air movers to assist with drying overnight.
Upon my return the following day, I checked the floor for any excess moisture before sealing it with our topical, semi-gloss finish sealer, known as Seal & Go Extra which due to its formula is ideal for external or old internal floors where there is unlikely to be damp from membrane.
This unique product provides excellent protection, and allows the tiles to breath where floors are suffering from inherent moisture issues. It is suitable for both internal and external use, on Victorian floor tiles, Sandstone, Flagstones, Terracotta, and rough Slate.
As you can see from the photo, I was able to fulfil my client’s request to a high standard, bringing the pub’s old yet characterful Victorian tiled floor back to life again.
Kay Sylvester
Leicestershire Tile Doctor
1