
Search results for "E remove" in Home Design Ideas
 John Donkin Architect Inc.
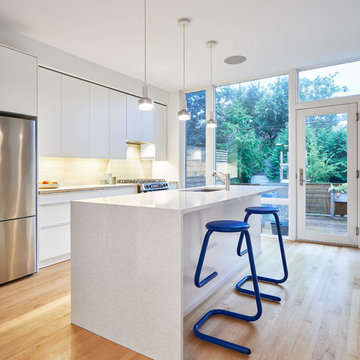
By removing an underutilized second staircase from the ground to second floor allowed us to completely reorient and modernize this kitchen. A budget friendly alternative to a full custom kitchen is using IKEA base cabinets and accessories with custom cupboard fronts.
 catlin stothers design
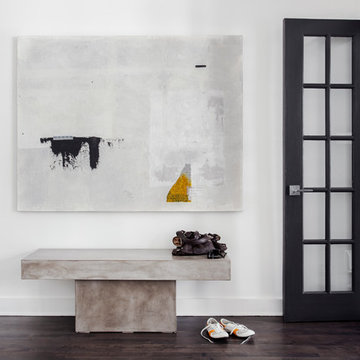
Well situated in Mont Royal, this split-level home had many positives apart from its dated interior, and layout of many small and inefficient rooms. This was all at odds with the owners’ lifestyle and aesthetic.
The client had architectural plans designed for a third floor addition that were to include a master bedroom and ensuite bathroom. The desired look for the entire house influenced all aspects of construction. Apart from the removal most walls on the main floor, everything was stripped back to the most simple and pure of finishing materials.
The existing floors were refinished in a smoked grey matte palette and offset the rich warm walnut accents in the kitchen and soft white walls.
With an abundance of white walls throughout, feature walls were essential in both the master bedroom and ensuite. The deep charcoal wall in the bedroom provides dramatic contrast to the teak headboard and hammered silver light fixture. The ensuite’s feature wall is made of pewter ceramic tiles that add texture and elegance to this simple space.
Materials and furnishings throughout were selected for their simplicity and form.
Photo : Drew Hadley
 Tile Doctor Ltd
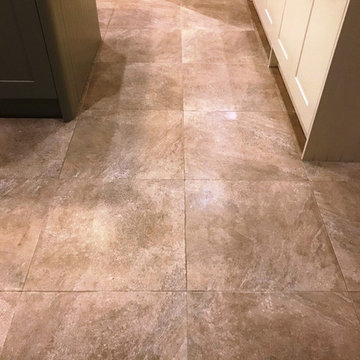
This request came from a client who lives in the Newcastle district of Jesmond who was unhappy with the appearance of their Textured Porcelain floor tiles. The problem was that the Porcelain Tiles were grouted in whilst the underfloor heating was switched on. This resulted in the grout drying out quicker than expected and the tiler struggled to get the excess grout off the tiles. To rectify the problem, the tiler tried to get the dried grout off with acid, but it didn’t work, and the floor was left looking dark and dull. Unable to rectify the problem the client was left with a disappointing pale floor and had searched around the internet for a solution.
Normally grout smears like these (aka Grout Haze) can be removed with an acidic product and Tile Doctor sell Grout Clean-up specially for this purpose. However, some grouts contain acid resistant polymers which need to broken down first. Fortunately, we have a solution for everything tile related and the system we use does not affect the main grout lines only the excess grout. I called in to do a site visit and having surveyed the problem I was confident it could resolved, I gave them a price for the work and agreed a date to return to do the job.
My first task was to spray the tiles with Tile Doctor Remove and Go, this was left to soak into the tile for around ten minutes before being scrubbed in. Remove and Go is a coatings remover that is safe to use on tile and grout; normally we use it to remove old sealers but in this case I applied it to break down the polymers. To work the product into the tile I use a buffing machine fitted with a black scrubbing pad, the mechanical advantage this gives makes the job a lot quicker. Then the slurry generated is rinsed off with water and removed with a wet vacuum. The floor was then left to dry for 30 minutes.
We were then able to remove the excess grout which was done by applying Tile Doctor Grout Clean-Up which I mentioned earlier. The process was the same, i.e. using the buffing machine and a wet vacuum to scrub the floor and extract the soil. The floor was rinsed with water to remove any trace of the products used and dried as much as possible using the wet vacuum. The underfloor heating really helped at this point to dry out the floor.
Once the floor was fully dry including the grout lines a single thin coat of Tile Doctor Colour Grow sealer was applied. The tiles were textured porcelain, so the dirt gets trapped into the textured surface if it is not sealed. We usually find one coat of Tile Doctor Colour Grow is more than enough for this, anything that hadn’t soaked in after three to five minutes was then polished off with clean dry cloths.
The client was very happy with the floor and pleased that the excess grout had been cleaned up and the floor looked as it should. Before leaving I recommended the use a pH Neutral tile cleaner for general cleaning such as Tile Doctor Neutral Tile Cleaner. There is no point sealing the tiles only to have it stripped off later with the use of a bleach based cleaner.
Raf Barrett
Tyneside Tile Doctor
Find the right local pro for your project
 C.E. Pontz Sons
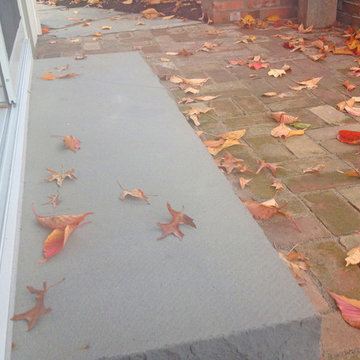
This Project consisted of lifting the existing bricks and storing them on site, remove a portion of the existing brick walls and remove wall caps, install new flagstone wall caps to provide 1″ overhang on each side, pressure wash sitting walls, excavate the existing patio stone dust base and discard of it, excavate patio to proper base depth of 8″+- and install a proper 2A Modified stone base. We then installed a 1″ sand setting bed and reinstalled the existing brick pavers. The new installation also included drainage pipe and catches to allow water to escape the patio and drain beyond the foot print of the patio, house and shed.
Also included were removal the existing upper flagstone patio and walking path, leveling the path and lay larger pieces of flagstone in the upper patio. We will also install proper joint material between the flagstone for a more uniform walking surface. We also used the existing flagstone to make small garden paths in place of the brick paths.
Lastly, included was grading a small swale in the back lawn to divert water around to the sides of the house and away from the rear patio area.
A drainage system along the right side of the shed to collect ground water as well as downspouts along that side of the shed and carport and move the water to the street through 4″ solid drainage pipes was also installed.
 C.E. Pontz Sons
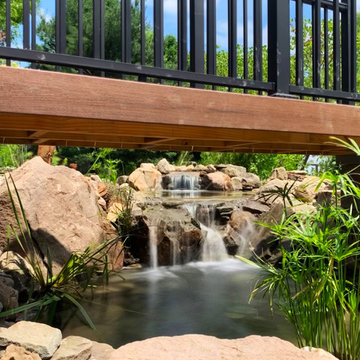
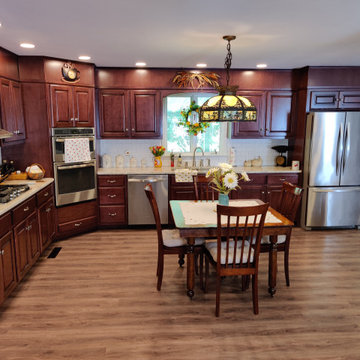
This Project included bringing an 18 year old pond back to life. We began this project by dismantling the existing pond and removing all rocks, gravel, liner and catching the fish and frogs and stored them in a safe aeration tank during the construction of the new pond. We ran into a ton of cement blocks from the existing pond which were a nightmare to remove, but none the less we prevailed. After everything was removed we shaped up the the soil for the new pond installation. A fabric underlayment is first installed beneath the liner to protect it. A new 45 mil fish safe epdm liner was installed on top and we then began to rock in the pond using larger rocks so that kids can enter safely and access for pond plant maintenance. Shelves were installed at different elevations for aquatic plants. The skimmer installation makes for easier pond maintenance and to keep the pond pump free from pond debris. An overflow was plumbed from the skimmer to the downspout to allow the pond to take on rain water and dewater more cleanly. A biofalls filtration unit was installed on the top pond to filter the system and is also the upper waterfall area that aims towards the dining room window for viewing from inside the home and upper patio area. What an amazing transformation.

 WD Smith Construction, LLC
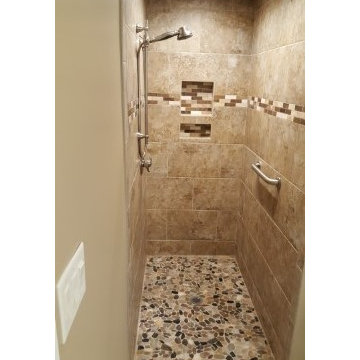
A remodel of a small master bath. A lot of the older 70's and 80's homes around Raleigh have nice floor plans with small masters. e removed the old drop ceiling in this cave shower and remodeled the entire bathroom.


 C.E. Pontz Sons
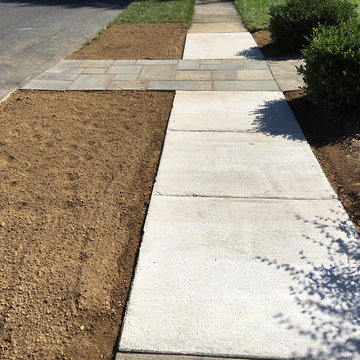
This project consisted of a concrete sidewalk repair and flagstone walkway install in Lancaster, PA. We started by removing the existing broken and settled pieces of concrete. Total repaired concrete sidewalk measured approximately 172 sq.ft. We also removed the existing concrete at the flagstone path and installed new flagstone in that area to the street. New concrete slabs were poured in the areas that were removed. Lastly areas were repaired where the lawn was disturbed.
 C.E. Pontz Sons
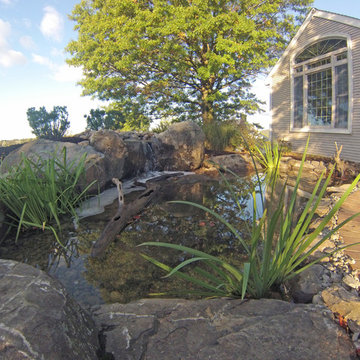
We were called in, in hopes our Pond Reconstruction skills could fix this customers woes. The existing pond was problematic and a bit of an eyesore. There were various leaks, section of random concrete as well as DIY pond implements. The overall construction of the pond was also far from These are just a few of the reasons why it’s imperative that you never hire a contractor based on price. Shortcuts lead to short term solutions. Always seek out a Certified Aquascape Contractor for any water feature project.
-anyway- We vowed to rectify the situation with a reconstructed and remodeled work of art.
After all the water was pumped out we began disassembling the pond. All aquatic life was removed with some being salvaged for reuse. Next was on to the large boulders as well as other rock and gravel throughout the pond. The random concrete and DIY implement creation abominations were removed along with the liner. Fortunately an Aquascape skimmer was installed, which we were able to re-use. Once everything was removed we began excavating for the new pond. New liner, underlayment, and biofalls were installed. We reused the existing boulders as well as brought in more since the pond was made larger. Driftwood was installed to naturalize the pond and aquatic plants and fish were reintroduced. a few landscape boulders were placed around the pond and it was finished off with a bit of fresh mulch.
This pond reconstruction project is located in Ephrata, PA Lancaster County.
 C.E. Pontz Sons
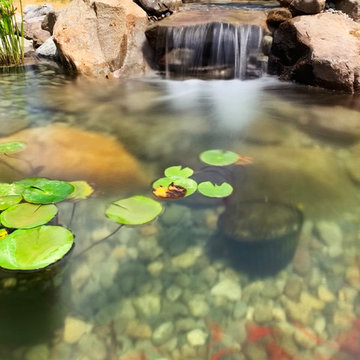
This Project included bringing an 18 year old pond back to life. We began this project by dismantling the existing pond and removing all rocks, gravel, liner and catching the fish and frogs and stored them in a safe aeration tank during the construction of the new pond. We ran into a ton of cement blocks from the existing pond which were a nightmare to remove, but none the less we prevailed. After everything was removed we shaped up the the soil for the new pond installation. A fabric underlayment is first installed beneath the liner to protect it. A new 45 mil fish safe epdm liner was installed on top and we then began to rock in the pond using larger rocks so that kids can enter safely and access for pond plant maintenance. Shelves were installed at different elevations for aquatic plants. The skimmer installation makes for easier pond maintenance and to keep the pond pump free from pond debris. An overflow was plumbed from the skimmer to the downspout to allow the pond to take on rain water and dewater more cleanly. A biofalls filtration unit was installed on the top pond to filter the system and is also the upper waterfall area that aims towards the dining room window for viewing from inside the home and upper patio area. What an amazing transformation.
 E2E Inc.
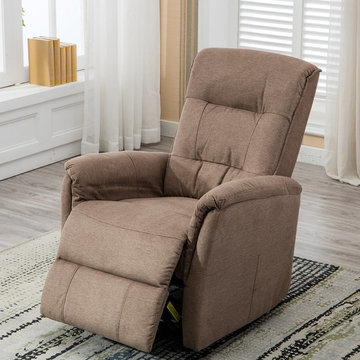
With a clean-lined profile and stylish modern design elements, this recliner could easily update any room in the house. With attached hardwood legs, removable backrest, this recliner can save your home space well. Easily recline and restore to origin position, this recliner could also fit well in your home and office for reading or relaxing.
 LUX Design | Interior Design Build
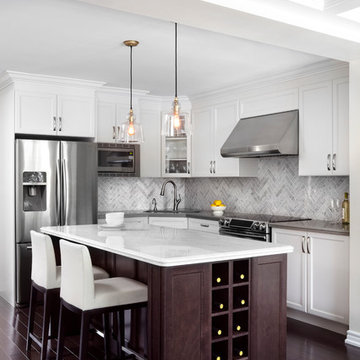
This white kitchen is grounded by the dark espresso island. Carrara marble island with wine storage on the side create a beautiful contrast to the white cabinets with the silestone grey countertops and herringbone backsplash tile. This kithchen renovation included the removal of a load bearing wall to open it up and make it feel bright and airy.


 C.E. Pontz Sons
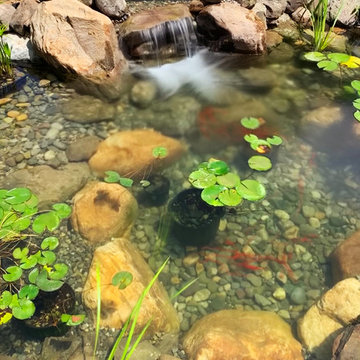
This Project included bringing an 18 year old pond back to life. We began this project by dismantling the existing pond and removing all rocks, gravel, liner and catching the fish and frogs and stored them in a safe aeration tank during the construction of the new pond. We ran into a ton of cement blocks from the existing pond which were a nightmare to remove, but none the less we prevailed. After everything was removed we shaped up the the soil for the new pond installation. A fabric underlayment is first installed beneath the liner to protect it. A new 45 mil fish safe epdm liner was installed on top and we then began to rock in the pond using larger rocks so that kids can enter safely and access for pond plant maintenance. Shelves were installed at different elevations for aquatic plants. The skimmer installation makes for easier pond maintenance and to keep the pond pump free from pond debris. An overflow was plumbed from the skimmer to the downspout to allow the pond to take on rain water and dewater more cleanly. A biofalls filtration unit was installed on the top pond to filter the system and is also the upper waterfall area that aims towards the dining room window for viewing from inside the home and upper patio area. What an amazing transformation.
 C.E. Pontz Sons
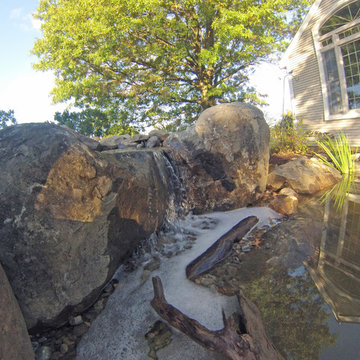
We were called in, in hopes our Pond Reconstruction skills could fix this customers woes. The existing pond was problematic and a bit of an eyesore. There were various leaks, section of random concrete as well as DIY pond implements. The overall construction of the pond was also far from These are just a few of the reasons why it’s imperative that you never hire a contractor based on price. Shortcuts lead to short term solutions. Always seek out a Certified Aquascape Contractor for any water feature project.
-anyway- We vowed to rectify the situation with a reconstructed and remodeled work of art.
After all the water was pumped out we began disassembling the pond. All aquatic life was removed with some being salvaged for reuse. Next was on to the large boulders as well as other rock and gravel throughout the pond. The random concrete and DIY implement creation abominations were removed along with the liner. Fortunately an Aquascape skimmer was installed, which we were able to re-use. Once everything was removed we began excavating for the new pond. New liner, underlayment, and biofalls were installed. We reused the existing boulders as well as brought in more since the pond was made larger. Driftwood was installed to naturalize the pond and aquatic plants and fish were reintroduced. a few landscape boulders were placed around the pond and it was finished off with a bit of fresh mulch.
This pond reconstruction project is located in Ephrata, PA Lancaster County.
 C.E. Pontz Sons
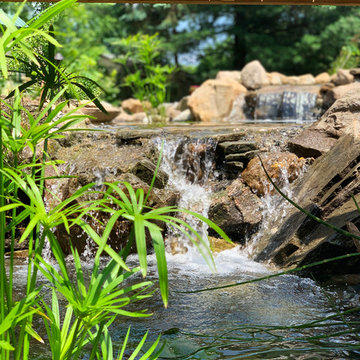
This Project included bringing an 18 year old pond back to life. We began this project by dismantling the existing pond and removing all rocks, gravel, liner and catching the fish and frogs and stored them in a safe aeration tank during the construction of the new pond. We ran into a ton of cement blocks from the existing pond which were a nightmare to remove, but none the less we prevailed. After everything was removed we shaped up the the soil for the new pond installation. A fabric underlayment is first installed beneath the liner to protect it. A new 45 mil fish safe epdm liner was installed on top and we then began to rock in the pond using larger rocks so that kids can enter safely and access for pond plant maintenance. Shelves were installed at different elevations for aquatic plants. The skimmer installation makes for easier pond maintenance and to keep the pond pump free from pond debris. An overflow was plumbed from the skimmer to the downspout to allow the pond to take on rain water and dewater more cleanly. A biofalls filtration unit was installed on the top pond to filter the system and is also the upper waterfall area that aims towards the dining room window for viewing from inside the home and upper patio area. What an amazing transformation.
 C.E. Pontz Sons
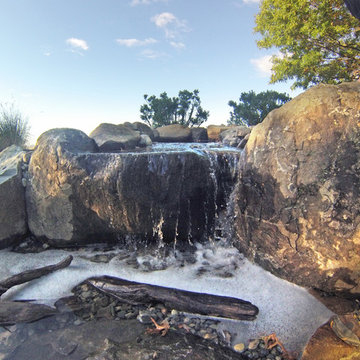
We were called in, in hopes our Pond Reconstruction skills could fix this customers woes. The existing pond was problematic and a bit of an eyesore. There were various leaks, section of random concrete as well as DIY pond implements. The overall construction of the pond was also far from These are just a few of the reasons why it’s imperative that you never hire a contractor based on price. Shortcuts lead to short term solutions. Always seek out a Certified Aquascape Contractor for any water feature project.
-anyway- We vowed to rectify the situation with a reconstructed and remodeled work of art.
After all the water was pumped out we began disassembling the pond. All aquatic life was removed with some being salvaged for reuse. Next was on to the large boulders as well as other rock and gravel throughout the pond. The random concrete and DIY implement creation abominations were removed along with the liner. Fortunately an Aquascape skimmer was installed, which we were able to re-use. Once everything was removed we began excavating for the new pond. New liner, underlayment, and biofalls were installed. We reused the existing boulders as well as brought in more since the pond was made larger. Driftwood was installed to naturalize the pond and aquatic plants and fish were reintroduced. a few landscape boulders were placed around the pond and it was finished off with a bit of fresh mulch.
This pond reconstruction project is located in Ephrata, PA Lancaster County.

 C.E. Pontz Sons
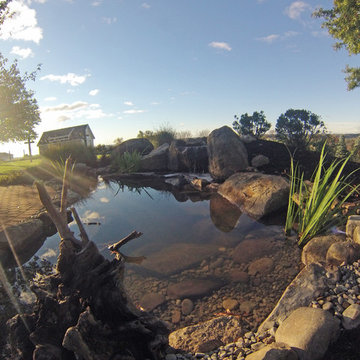
We were called in, in hopes our Pond Reconstruction skills could fix this customers woes. The existing pond was problematic and a bit of an eyesore. There were various leaks, section of random concrete as well as DIY pond implements. The overall construction of the pond was also far from These are just a few of the reasons why it’s imperative that you never hire a contractor based on price. Shortcuts lead to short term solutions. Always seek out a Certified Aquascape Contractor for any water feature project.
-anyway- We vowed to rectify the situation with a reconstructed and remodeled work of art.
After all the water was pumped out we began disassembling the pond. All aquatic life was removed with some being salvaged for reuse. Next was on to the large boulders as well as other rock and gravel throughout the pond. The random concrete and DIY implement creation abominations were removed along with the liner. Fortunately an Aquascape skimmer was installed, which we were able to re-use. Once everything was removed we began excavating for the new pond. New liner, underlayment, and biofalls were installed. We reused the existing boulders as well as brought in more since the pond was made larger. Driftwood was installed to naturalize the pond and aquatic plants and fish were reintroduced. a few landscape boulders were placed around the pond and it was finished off with a bit of fresh mulch.
This pond reconstruction project is located in Ephrata, PA Lancaster County.
7