
Search results for "Electrical installation" in Home Design Ideas
 Oran Remodeling Inc.
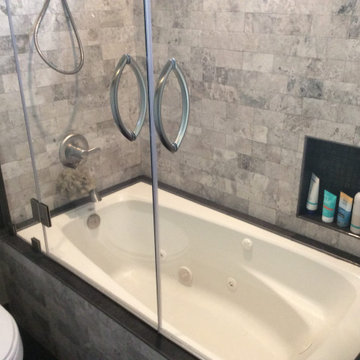
We began this project by having the client meet with our kitchen designer and coming up with the best use of their galley/wall style kitchen and bathroom. We ended on a layout that relocated some of the appliances and installed a new kitchen island and vanity for the bathroom. We also added electrical and gas lines for an oven, cook-top, outlets and hood vent.
In addition we also:
Demo all heater, cap, patch, and repair wall.
Replace 6 cans in small office space- customer to provide cans and lightbulbs.
Install new light fixture in the hall.
Move hall receptacle down.
Remove door, molding hinges between kitchen and front room. (NOT MAIN STUDIO. Enlarge opening/ move light switch and Recep. Remove molding around bath door and main studio door (one side), no patching needed- painters will do.
Demo all tile on walls and in shower in the bathroom, hand bars, soap dispenser, medicine cabinet, mirror, 4 light fixtures, paper towel holder, the cabinet on the wall over toilet, shelf over toilet, toilet paper holder, towel holder on door and walls.
Enlarge opening of the shower,- Ok to demo shower for all glass enclosure- If the cost is the same- as just enlarging opening with new glass door.
Install new tile on walls in bathroom from top to bottom (exclude floor and ceiling).
Create a place in the shower for shower niche and install niche.
Install tile on shower walls and floor.
Install shower door – customer to supply.
Install bath hardware- TP holder, towel rod, bath hooks, tower shelf.
Replace shower head and knobs (like for like).
New hot mop, new wood stud as necessary, replace fan to code install new shower door (customer will supply).
Install new toilet, vanity, mirrored medicine cabinet, replace 2 light fixtures.
Install in the kitchen faucet and sink.
Replace current light with chandelier light (like for like).
Replace kitchen track light with new track light.
Install 9 LED fluorescent lights in loft space (above small office)- customer to supply.
Build and install a 8’x10’ wall, drywall both sides. Reduced size of the wall- Revise Bid (was 12’x12).
Move 2 track lights in the main workspace.
Replace (4) fluorescents lights in the studio.
Install Polycarbonate cover over bath skylight.
Replace dimmer switches and timers (4).
Install vinyl cove base under kitchen cabinets.
Remove black cabinet conversing fire sprinkler pipes- install modify existing bookcase cabinets.
Bury electrical flexible conduit and box (next to back door).
 Oran Remodeling Inc.
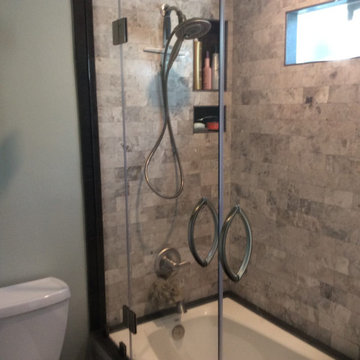
We began this project by having the client meet with our kitchen designer and coming up with the best use of their galley/wall style kitchen and bathroom. We ended on a layout that relocated some of the appliances and installed a new kitchen island and vanity for the bathroom. We also added electrical and gas lines for an oven, cook-top, outlets and hood vent.
In addition we also:
Demo all heater, cap, patch, and repair wall.
Replace 6 cans in small office space- customer to provide cans and lightbulbs.
Install new light fixture in the hall.
Move hall receptacle down.
Remove door, molding hinges between kitchen and front room. (NOT MAIN STUDIO. Enlarge opening/ move light switch and Recep. Remove molding around bath door and main studio door (one side), no patching needed- painters will do.
Demo all tile on walls and in shower in the bathroom, hand bars, soap dispenser, medicine cabinet, mirror, 4 light fixtures, paper towel holder, the cabinet on the wall over toilet, shelf over toilet, toilet paper holder, towel holder on door and walls.
Enlarge opening of the shower,- Ok to demo shower for all glass enclosure- If the cost is the same- as just enlarging opening with new glass door.
Install new tile on walls in bathroom from top to bottom (exclude floor and ceiling).
Create a place in the shower for shower niche and install niche.
Install tile on shower walls and floor.
Install shower door – customer to supply.
Install bath hardware- TP holder, towel rod, bath hooks, tower shelf.
Replace shower head and knobs (like for like).
New hot mop, new wood stud as necessary, replace fan to code install new shower door (customer will supply).
Install new toilet, vanity, mirrored medicine cabinet, replace 2 light fixtures.
Install in the kitchen faucet and sink.
Replace current light with chandelier light (like for like).
Replace kitchen track light with new track light.
Install 9 LED fluorescent lights in loft space (above small office)- customer to supply.
Build and install a 8’x10’ wall, drywall both sides. Reduced size of the wall- Revise Bid (was 12’x12).
Move 2 track lights in the main workspace.
Replace (4) fluorescents lights in the studio.
Install Polycarbonate cover over bath skylight.
Replace dimmer switches and timers (4).
Install vinyl cove base under kitchen cabinets.
Remove black cabinet conversing fire sprinkler pipes- install modify existing bookcase cabinets.
Bury electrical flexible conduit and box (next to back door).

Find the right local pro for your project
 iTrust Electrical
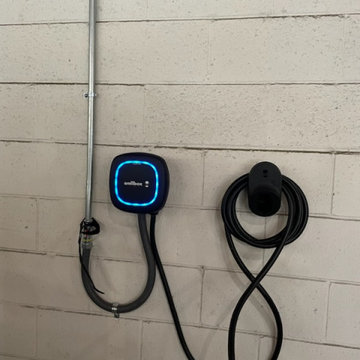
Electrical labor to install Wallbox charger for Tesla EV. Ran copper wire from panel to desired charger location.
Relocated location of breaker box to be positioned higher than existing meter stands to allow for future expansion by other owners.
Utilized a single breaker box that can support four (4) separate circuits rated at 50A each. The sub-panel will have the provisions for those breakers.
Run conduit lines in parallel and as close as possible to to existing conduits.
 Andra Birkerts Design
Eric Roth Photography
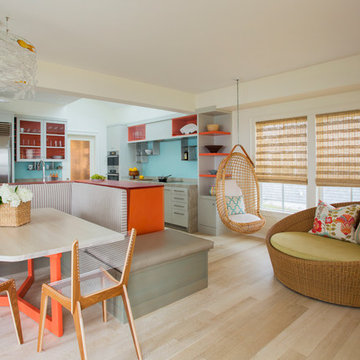
Beach style light wood floor kitchen/dining room combo photo in Providence with white walls
Beach style light wood floor kitchen/dining room combo photo in Providence with white walls
 Omega Remodels
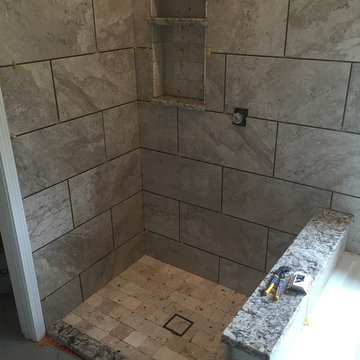
Ok week one
Demo
3 slabs of granite installed kitchen, master bath, hall bath, up stairs bath installed
5 faucets and drain systems installed
Master bath Heated floor installed
Shower and jacuzzi new plumbing installed
Shower floor pan installed
Tile shower walls installed
Jacuzzi splash installed
Kitchen backsplash installed
Rough electrical installed
Ran new breaker for heated floor.
ALL IN A WEEKS WORK If it's not an www.omegaremodels.com job its NOT 110%
 Mr. Electric of Pensacola
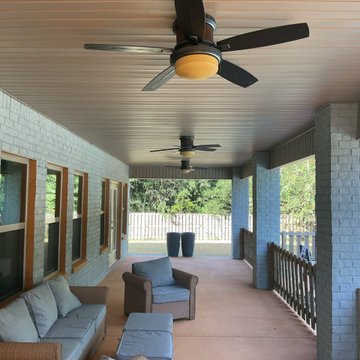
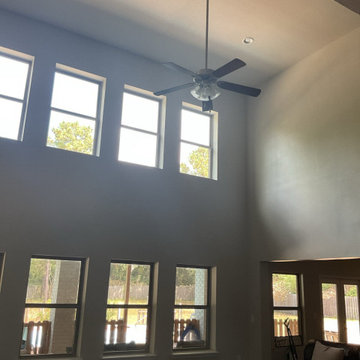
A Pace homeowner contacted Mr. Electric of Pensacola after a handyman had installed several ceiling fans and a light fixture incorrectly. Two ceiling fans were visibly crooked, and another was located on a ceiling higher than 9 feet that required special equipment to install properly. Our licensed and insured electricians carefully adjusted the crooked fans, ensured all wiring was safe, and provided a professional plan for the high-ceiling fan installation. By choosing a professional electrician instead of a handyman, the homeowner gained peace of mind knowing the fans were installed securely, safely, and up to code. Whether it’s ceiling fan installation, lighting upgrades, or electrical troubleshooting, our team delivers professional results you can trust.

 Mr. Electric of Pensacola
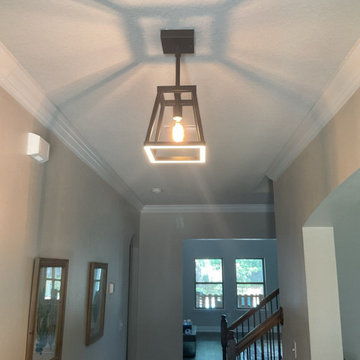
A Pace homeowner contacted Mr. Electric of Pensacola after a handyman had installed several ceiling fans and a light fixture incorrectly. Two ceiling fans were visibly crooked, and another was located on a ceiling higher than 9 feet that required special equipment to install properly. Our licensed and insured electricians carefully adjusted the crooked fans, ensured all wiring was safe, and provided a professional plan for the high-ceiling fan installation. By choosing a professional electrician instead of a handyman, the homeowner gained peace of mind knowing the fans were installed securely, safely, and up to code. Whether it’s ceiling fan installation, lighting upgrades, or electrical troubleshooting, our team delivers professional results you can trust.
 Mr. Electric of Pensacola
A Pace homeowner contacted Mr. Electric of Pensacola after a handyman had installed several ceiling fans and a light fixture incorrectly. Two ceiling fans were visibly crooked, and another was located on a ceiling higher than 9 feet that required special equipment to install properly. Our licensed and insured electricians carefully adjusted the crooked fans, ensured all wiring was safe, and provided a professional plan for the high-ceiling fan installation. By choosing a professional electrician instead of a handyman, the homeowner gained peace of mind knowing the fans were installed securely, safely, and up to code. Whether it’s ceiling fan installation, lighting upgrades, or electrical troubleshooting, our team delivers professional results you can trust.
 Pete's Paints, LLC
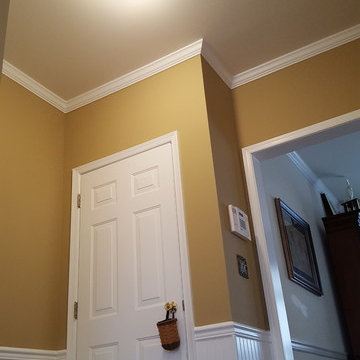
High end Re-paint on walls , ceilings, trim, chair rail, and wains
Trendy single front door photo in Other with beige walls and a brown front door
Trendy single front door photo in Other with beige walls and a brown front door

 Allreno
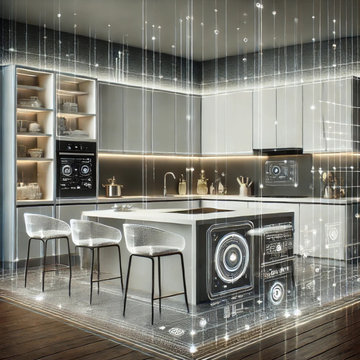
In What Order Should You Renovate a Kitchen? Revolutionizing Kitchen and Bath Renovation with Allreno's Design AI
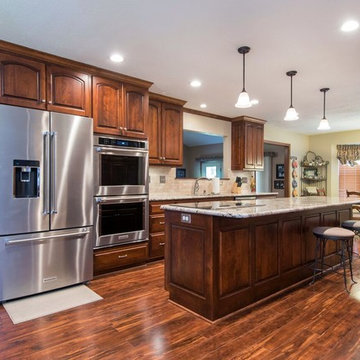
Renovating a kitchen can be one of the most exciting and rewarding home improvement projects. However, with so many decisions to make, it can also be overwhelming. From selecting kitchen cabinets to choosing countertops and appliances, the process often involves careful planning and organization. So, how do you ensure the renovation goes smoothly? One important factor is knowing the right order in which to tackle the project.
The Right Order for Kitchen Renovation
Renovating a kitchen involves multiple steps, and knowing the proper order of operations is crucial for both time efficiency and cost savings. Here’s a general guideline for how to approach your kitchen renovation:
1. Planning and Design: The first step in any renovation is planning. This includes deciding on the layout, design, and features you want in your kitchen. At this stage, you’ll also need to think about your budget and timeline. It’s essential to finalize these details before moving forward with the actual work.
2. Demolition: Once the design is set, it’s time to remove old fixtures, cabinets, appliances, and flooring. Demolition can be a messy process, but it’s necessary for starting fresh. Having a professional handle this phase is often a smart move to ensure everything is safely removed.
3. Structural Work: If you plan on altering the layout of the kitchen by knocking down walls or adding new plumbing or electrical work, now is the time to do it. Structural changes can be complicated and costly, so it’s important to ensure these are completed before installing any new elements.
4. Plumbing and Electrical Work: With the structure in place, you can begin installing plumbing and electrical systems. This might include adding new water lines, sinks, or electrical outlets for appliances. It’s best to bring in licensed professionals for this stage, as electrical and plumbing work requires expert knowledge.
5. Cabinet Installation: Once the plumbing and electrical work are in place, you can install the kitchen cabinets. Cabinets are one of the most important elements of the kitchen, and the Allreno design AI can make this process easier. Allreno's AI-driven platform allows you to visualize how different kitchen cabinets will fit into your space, ensuring you make the best choice based on your preferences and layout.
6. Countertops: After the cabinets are installed, it’s time to add countertops. Whether you choose granite, quartz, or a more budget-friendly option, countertops are a focal point of the kitchen, and they should complement the cabinets and other design elements.
7. Flooring: Now that the major structural elements are in place, it’s time to install your flooring. Whether you opt for tile, hardwood, or vinyl, flooring should be installed after the cabinets and countertops to prevent any damage during the installation process.
8. Appliances and Fixtures: With the foundation in place, you can now add your appliances (oven, refrigerator, dishwasher, etc.) and fixtures (sink, faucets, lighting). Allreno’s AI can also help here by offering kitchen design recommendations based on available appliances and space dimensions.
9. Final Touches: The last step is adding the finishing touches to your kitchen. This includes painting the walls, adding backsplash tiles, and installing accessories like handles and knobs on your cabinets. This is also the stage where you can implement any stylistic choices to make the space uniquely yours.
How Allreno's AI Transforms the Renovation Process
One of the biggest challenges of a kitchen renovation is visualizing how everything will come together. Allreno’s design AI changes that by offering an intuitive platform that brings your ideas to life. Here’s how:
• Personalized Design Recommendations: Allreno’s AI suggests design elements based on your preferences, style, and space dimensions. Whether it’s selecting the perfect kitchen cabinets or countertop finishes, the AI ensures everything works together cohesively.
• 3D Visualization: With Allreno’s AI-driven design tools, you can visualize your kitchen layout in 3D before any work begins. This allows you to see how different elements will fit into your space and make adjustments as needed.
• Efficient Project Management: Allreno helps you streamline the entire renovation process by generating accurate material lists, estimates, and timelines. This means you can avoid costly errors and keep your renovation on track.
Conclusion
Renovating a kitchen is an exciting project, but it requires careful planning and organization to ensure it’s done right. By following a strategic order of operations and leveraging cutting-edge technology like Allreno’s design AI, homeowners can streamline the process, save time and money, and bring their dream kitchen to life with ease. Allreno not only simplifies the design process but also provides innovative solutions that make kitchen and bath renovations faster and more efficient than ever before.
Ready to get started with your kitchen renovation? Allreno's AI-powered design platform is here to help you every step of the way.
 Barbara Wilson Landscape Architect, LLC
Photo by Barbara Wilson Landscape Architect, LLC
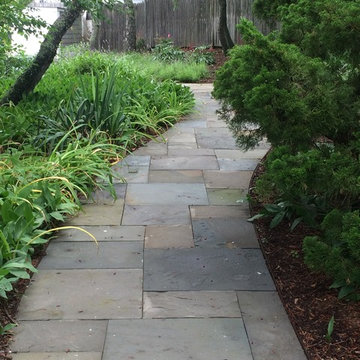
A small residential, seaside property located on Fairfield Beach, Fairfield was renovated by the new owners and adapted for their active family. Barbara was the landscape architect in charge of all of the landscape elements upgrades. She designed new bluestone curving paths to access the front and side doors and designed new landscape lighting to enhance the walks. The existing trees were saved and she designed new shade and salt-tolerant plantings which were added to provide seasonal color and interest while respecting the existing plantings. Along the beach front additional native beach grasses were added to stabilize the dunes while removing some invasive plantings. This work will be phased over the next few years in an effort to keep the sand stable. Beach roses were incorporated into a hollow in the dunes. A small lawn area was renovated and the surrounding Black Pines pruned to provide a small play area and respite from the sun. Beautiful reblooming hydrangeas line the edge of the gravel driveway. Rounded beach stones were used instead of mulch in the island planting along the edge of the adjacent road planted with Miscanthus, Mugo pine and yucca.
Barbara designed a custom kayak rack, custom garbage enclosure, a new layout of the existing wooden deck to facilitate access to the side doors, and detailed how to renovate the front door into only an emergency access with new railings and steps.
She coordinating obtaining bids and then supervised the installation of all elements for the new landscape the project.
The interiors were designed by Jack Montgomery Design of Greenwich, CT and NYC . Tree work was completed by Bartlett Tree Experts. Freddy’s Landscape Company of Fairfield, CT installed the new plantings, installed all the new masonry work and provides landscape maintenance services. JT Low Voltage and Electric installed the landscape lighting.
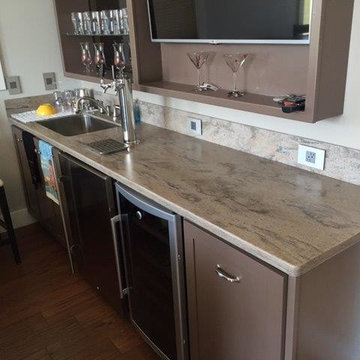
 Maxwell Counters Inc.
Corian Riverbed
Mid-sized elegant single-wall dark wood floor and brown floor wet bar photo in Chicago with an undermount sink, solid surface countertops, open cabinets and brown cabinets
Mid-sized elegant single-wall dark wood floor and brown floor wet bar photo in Chicago with an undermount sink, solid surface countertops, open cabinets and brown cabinets
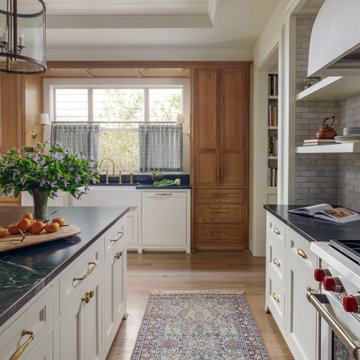
 Wood Customs
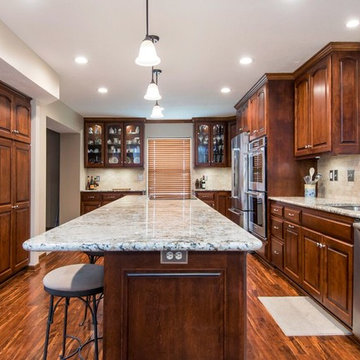
Full Kitchen Remodel, Custom Built Cabinets, Tile Backsplash, Countertops, Paint, Stain, Plumbing, Electrical, Wood Floor Install, Electrical Fixture Install, Plumbing Fixture Install
17