
Search results for "Electrical installation" in Home Design Ideas
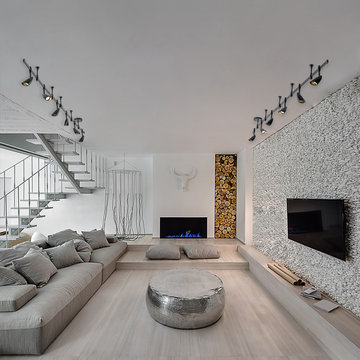
 Globe Electric
With the popularity of functional spaces and industrial interiors, track lighting is a key essential to interior illumination. Using a single electrical box, the Flexigon Track Lighting Kit can be configured into the coolest arrangements making it an easy way to brighten up your room by adding more light with a single electrical install. The moveable canopy allows you to place it wherever you see fit and the six-track heads are moveable and adjustable to help direct light wherever you need it most. Plus, this light can be installed in any room - shape it in a u-shape for your bedroom, in an s-shape for your kitchen or even place two parallel to each other in your living room to create a stellar additional layer of light.

 TOC design & construction inc.
DESIGNED BY TOC design
CONSTRUCTION BY TOC design & Construction inc.
PHOTOS BY : Tania Scardellato
I was fortunate to have a young family approach me in desperate need to renovate there only 3 piece bathroom. This space was In dire need of a remodel, with old brown wall to wall tiles and a dated bulky yellow brown single sink vanity.
Storage was a must, lighting a necessity, and proper accessibility to the shower bath area.
We had a tight budget to respect, but a full gut of this bathroom was required. And a good thing too, once we started doing the demolition we noticed that mildew and rotting floors and walls had accumulated throughout the years. Doing it right the first time is no joke when dealing with water and electrical issues.
We discarded all reminisce of old and built from scratch, new walls, new plumbing, new electrical ,new insulation and a new window, a new fan that actually exhausted outside ( I say this laughing as you would be amazed at how many fans are installed but don’t exhaust outside, and you the client would never know unless you go inside the attic space.
Once all the hard stuff was done, the rest is just a matter of smart design. If you have a small bathroom here are some tips to guide you.
10 tips for making a small bathroom feel larger
Is your tiny bathroom cramping your functionality and style, leaving you longing for the enormous bathrooms gracing the pages of design magazines? Even if your bathroom is a fraction of the size, all it takes is some design savvy to make the most of the space you have. Consider these 10 smart tips that will help your bathroom look, feel and function like those larger contenders.
1-Get creative with corners
Space is at a premium in small bathrooms, so it's important to maximize every inch. Corners, for example, provide extra space for shelving, storage units and even hooks. Get creative and install unique design solutions that are not only functional, but also eye-catching. If you love the airiness of floating cabinets, add baskets or decorative boxes under for extra storage. If you are installing floating cabinets insure that they are installed securely to studs or plywood at wall.
2- Let solid colors shine
Busy patterns have a shrinking effect and make small bathrooms seem even smaller. Conversely, light natural hues make a space feel more open. If you're itching to get creative with design, experiment with textures but keep overpowering patterns to a minimum. Tone on tone is the best to achieve this.
3 - Maximize your bathtub
A bathtub takes up a significant portion of the room, but modern, compact options with curved basins, can make the tub feel larger when in use, all while conserving space.
4 - Select a smaller faucet
A faucet is jewelry for the bathroom. And just as accessories can overpower an outfit, a big bulky faucet isn't flattering in a small bath. Single-handle designs conserve counter space, while a wall-mount installation frees it up all together and can create quite the wow-factor, if the budget can accommodate the required changes to plumbing behind the wall.
5 - Make vanity storage simple
If you're in a storage war with your small bathroom, you're not alone in the battle. Toiletries and personal supplies without a place to call home only add clutter and chaos. Store smart with a space-saving vanity, the dual sink vanity shown here, looks quite simple, but in reality it has 4 sets of full extension drawers, and the vanity tower adds extra storage without overpowering the use of space.
6 - Show off the shower
Shower curtains may be pretty, but they interrupt the visual flow of a bathing space and make it feel significantly smaller. In bathrooms with small footprints, opt for a clear glass sliding shower door that doesn't require the clearance of one with a hinged design. Or as shown in this design and for fraction less expensive a half hinged panel installed on a fixed tempered glass panel. If you're embarking on a big remodel, create the illusion of more space by using same tile in the shower that's used throughout; instead of seeing them as two separate zones, the eye will read them as one.
7 - Discover the treasure of hidden storage
Work with a contractor, and you just might find some serious storage potential hidden behind your walls. Whether it's utilizing space between the studs for shallow shelving or a creating a small linen closet by annexing space from an adjacent room, even small additions can make a big difference.
8 - Focal Point
Tile is a beautiful, durable addition to any bathroom. For dainty spaces, consider installing tile at a diagonal to accentuate the focal point or as in this bathroom I used an oversized textured pattern to bring depth to the space at the window wall.
9 - Choose the right lights
Strategically install light to reflect and brighten a small bathroom to make it appear larger. Recessed lighting is an affordable solution for tiny rooms, offering ample light while taking up little space. Wall sconces alongside a mirror also reflect off the walls and make a room feel bright and airy. I always recommend going with LED lighting at 2800 to 3000K.
10 – Accessorize
This is your time to shine in your decorating skills, have fun with your towels, you can change the color scheme daily just by adding pops of color in your accessories, make sure to get items that serve a dual purpose, like baskets, boxes they can always be used as hampers, storing of towels and even a nice display for your guest.
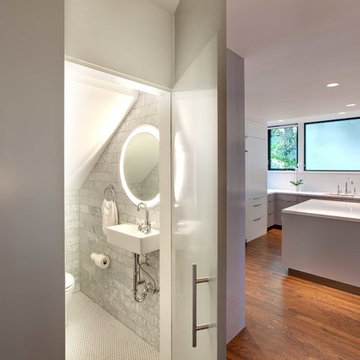
 Electric Mirror
Photo by JH Jackson Photography; Design by Hugh Randolph Architects; Trinity Mirror by Electric Mirror.
For more info about purchasing our mirrors, visit www.electricmirror.com.
Find the right local pro for your project
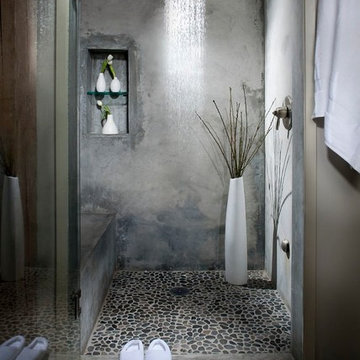
 Melissa Winn Interiors
Urban gray tile pebble tile floor alcove shower photo in San Francisco with gray walls
 TOC design & construction inc.
DESIGNED BY TOC design
CONSTRUCTION BY TOC design & Construction inc.
PHOTOS BY : Tania Scardellato
I was fortunate to have a young family approach me in desperate need to renovate there only 3 piece bathroom. This space was In dire need of a remodel, with old brown wall to wall tiles and a dated bulky yellow brown single sink vanity.
Storage was a must, lighting a necessity, and proper accessibility to the shower bath area.
We had a tight budget to respect, but a full gut of this bathroom was required. And a good thing too, once we started doing the demolition we noticed that mildew and rotting floors and walls had accumulated throughout the years. Doing it right the first time is no joke when dealing with water and electrical issues.
We discarded all reminisce of old and built from scratch, new walls, new plumbing, new electrical ,new insulation and a new window, a new fan that actually exhausted outside ( I say this laughing as you would be amazed at how many fans are installed but don’t exhaust outside, and you the client would never know unless you go inside the attic space.
Once all the hard stuff was done, the rest is just a matter of smart design. If you have a small bathroom here are some tips to guide you.
10 tips for making a small bathroom feel larger
Is your tiny bathroom cramping your functionality and style, leaving you longing for the enormous bathrooms gracing the pages of design magazines? Even if your bathroom is a fraction of the size, all it takes is some design savvy to make the most of the space you have. Consider these 10 smart tips that will help your bathroom look, feel and function like those larger contenders.
1-Get creative with corners
Space is at a premium in small bathrooms, so it's important to maximize every inch. Corners, for example, provide extra space for shelving, storage units and even hooks. Get creative and install unique design solutions that are not only functional, but also eye-catching. If you love the airiness of floating cabinets, add baskets or decorative boxes under for extra storage. If you are installing floating cabinets insure that they are installed securely to studs or plywood at wall.
2- Let solid colors shine
Busy patterns have a shrinking effect and make small bathrooms seem even smaller. Conversely, light natural hues make a space feel more open. If you're itching to get creative with design, experiment with textures but keep overpowering patterns to a minimum. Tone on tone is the best to achieve this.
3 - Maximize your bathtub
A bathtub takes up a significant portion of the room, but modern, compact options with curved basins, can make the tub feel larger when in use, all while conserving space.
4 - Select a smaller faucet
A faucet is jewelry for the bathroom. And just as accessories can overpower an outfit, a big bulky faucet isn't flattering in a small bath. Single-handle designs conserve counter space, while a wall-mount installation frees it up all together and can create quite the wow-factor, if the budget can accommodate the required changes to plumbing behind the wall.
5 - Make vanity storage simple
If you're in a storage war with your small bathroom, you're not alone in the battle. Toiletries and personal supplies without a place to call home only add clutter and chaos. Store smart with a space-saving vanity, the dual sink vanity shown here, looks quite simple, but in reality it has 4 sets of full extension drawers, and the vanity tower adds extra storage without overpowering the use of space.
6 - Show off the shower
Shower curtains may be pretty, but they interrupt the visual flow of a bathing space and make it feel significantly smaller. In bathrooms with small footprints, opt for a clear glass sliding shower door that doesn't require the clearance of one with a hinged design. Or as shown in this design and for fraction less expensive a half hinged panel installed on a fixed tempered glass panel. If you're embarking on a big remodel, create the illusion of more space by using same tile in the shower that's used throughout; instead of seeing them as two separate zones, the eye will read them as one.
7 - Discover the treasure of hidden storage
Work with a contractor, and you just might find some serious storage potential hidden behind your walls. Whether it's utilizing space between the studs for shallow shelving or a creating a small linen closet by annexing space from an adjacent room, even small additions can make a big difference.
8 - Focal Point
Tile is a beautiful, durable addition to any bathroom. For dainty spaces, consider installing tile at a diagonal to accentuate the focal point or as in this bathroom I used an oversized textured pattern to bring depth to the space at the window wall.
9 - Choose the right lights
Strategically install light to reflect and brighten a small bathroom to make it appear larger. Recessed lighting is an affordable solution for tiny rooms, offering ample light while taking up little space. Wall sconces alongside a mirror also reflect off the walls and make a room feel bright and airy. I always recommend going with LED lighting at 2800 to 3000K.
10 – Accessorize
This is your time to shine in your decorating skills, have fun with your towels, you can change the color scheme daily just by adding pops of color in your accessories, make sure to get items that serve a dual purpose, like baskets, boxes they can always be used as hampers, storing of towels and even a nice display for your guest.
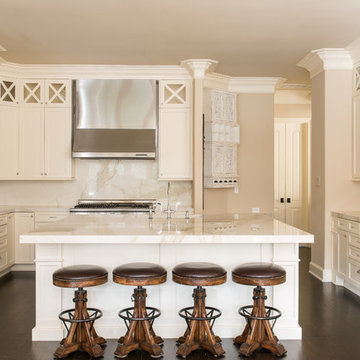
 Monarch & Maker
Large transitional u-shaped dark wood floor and brown floor eat-in kitchen photo in Houston with white cabinets, white backsplash, stainless steel appliances, an island, stone slab backsplash, recessed-panel cabinets, a double-bowl sink, quartz countertops and white countertops
 Bill Fry Construction - Wm. H. Fry Const. Co.
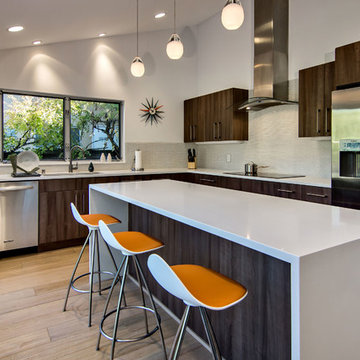
This kitchen design in a whole house remodel in Palo Alto started with the sunburst kitchen clock.
Example of a mid-sized 1960s l-shaped light wood floor and brown floor eat-in kitchen design in San Francisco with an undermount sink, flat-panel cabinets, dark wood cabinets, quartz countertops, gray backsplash, glass tile backsplash, stainless steel appliances, an island and white countertops
Example of a mid-sized 1960s l-shaped light wood floor and brown floor eat-in kitchen design in San Francisco with an undermount sink, flat-panel cabinets, dark wood cabinets, quartz countertops, gray backsplash, glass tile backsplash, stainless steel appliances, an island and white countertops

 MasterBrand Cabinets
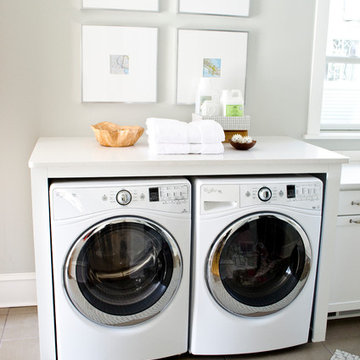
The Curbly #remodel added a #countertop above the washer and dryer for a place to fold #laundry.
Small transitional single-wall ceramic tile laundry room photo in Other with white cabinets, white walls, a side-by-side washer/dryer and white countertops
Small transitional single-wall ceramic tile laundry room photo in Other with white cabinets, white walls, a side-by-side washer/dryer and white countertops
 ED Enterprises, Inc.
We understood the customer's dream to remove an existing closet and several walls.
We began with the removal of several structural walls and closet. We found that the previous contractor had incorrectly removed structural wood posts. We secured the structural integrity of the building with wood and steel.
We proceeded to expand the opening between
the Kitchen and Butler Pantry, which included relocating waste and water lines from the second floor.
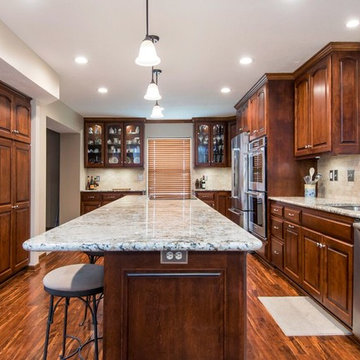
We upgraded the existing electrical and installed a 440-volt electrical system for the entire home.
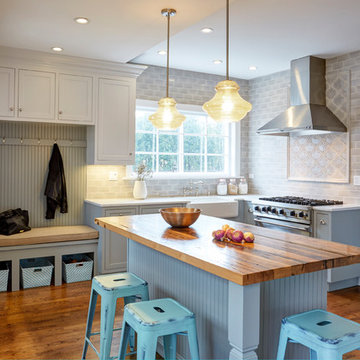
You can enjoy the illumination of the cabinetry and kitchen, by the pendant lights, recessed lights, under cabinet lights, and curio lights in the glass door cabinets,
Note the brick pattern Subway tile from the counter top to the ceiling, in the kitchen and the Butler Pantry. Take special notice of the decorative tile area above the range.
The chimney style hood was vented to the exterior.
The unique sitting area, near the rear entry, was finished with beadboard paneling and wall cabinets up to the ceiling., trimmed with crown molding.
General Contractor / Remodel: E D Enterprises, Inc.
Michael Alan Kaskel Photography
 Dream Builderz
In this latest project, our talented team at Dream Builderz is hard at work crafting a custom finished basement that includes a full bath, truly transforming this home into a more functional and beautiful living space. The picture showcases our crew meticulously framing walls, installing plumbing, and wiring the electrical system to perfection. We’re utilizing high-quality materials, ensuring proper insulation, and preparing for drywall installation, demonstrating our attention to detail and commitment to excellence.
Our customer, who trusted us last year to build their half bath, has returned to us for this larger remodel, a testament to our dedication to customer satisfaction and superior craftsmanship. Every element, from the state-of-art waterproofing techniques to prevent future basement moisture issues, to the custom tile work that will soon go in, speaks to the exceptional quality we bring to every job.
By integrating modern plumbing systems and upgrading the electrical panel to accommodate the new space, we ensure that this remodel not only looks beautiful but also functions efficiently for years to come. Our expertise in framing, drywall installation, electrical, and plumbing, combined with our experience in creating custom home solutions, positions us as the local leader in home renovations.
Whether it’s installing top-tier materials, finishing intricate trim work, or ensuring seamless transitions between spaces, Dream Builderz continues to stand out for our dedication to the craft. This basement will soon be a fully functional living area, adding significant value to the home, with the centerpiece being a beautifully designed full bath. Every detail matters, and our clients know they can count on us to deliver results that exceed their expectations.
#DreamBuilderz #DreamHome #BuildingDreams #LoveYourHome #FinishedBasement #HomeRemodel #BasementRemodel #Bathroom Remodel #Renovation #PlumbingUpgrade #ElectricalInstallation #RepeatCustomer #CustomConstruction #ExpertCraftsmanship #NorwoodRemodel #TheBestAroundMA
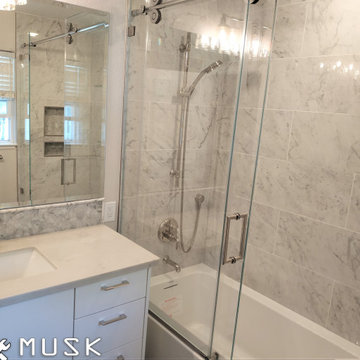
 RISE Construction INC
Scope of work:
- Prep work
- Cover work areas as necessary (consult with homeowner)
- Confirm staging area for all materials & cutting / debris area
- Demo and Haul Away all Debris
- Begin to update all rough trades in exposed areas (vertical plumbing, electrical & mechanical)
- Rough plumbing
- Upgrade all vertical plumbing to city code
- Run new supply, drainage & venting for new double sink
- Install new wax O ring for toilet (check for leaks to prevent mold)
- Rough mechanical
- Fan to be on humidistat switch per code
- Install new customer provided fan
- Rough electrical
- GFI’s to be on a dedicated 20amp circuit to electrical panel per city code
- Provide & Install outlets per city code
- Install one outlet by toilet for heated toilet seat
- Pass all rough and special inspections
- Finishes
- Close opening of downstairs closet seiling
- Frame & install shampoo niche (size & location TBD)
- Install new customer provided medicine cabinet (if desired)
- Install new customer provided tile flooring & baseboards (tile baseboards)
- Install new customer provided tub wall tile
- Apply Grout to all tile
- Tape, mud & texture drywall in necessary areas (match existing spray texture)
- Paint complete bathroom
- Install existing customer door
- Install new customer provided tub fixtures
- Install customer provided toilet
- Install new customer provided vanity, countertop, sinks, faucets & backsplash
- Install new customer provided accessories (mirror, towel bars, TP holders, etc.)
- Install new customer provided light fixtures in both Hall Bathroom and Master
- Shower glass to be installed by third party company (if desired)
- Pass final inspections
-
Duration of project: 20 days
Price: $12,000
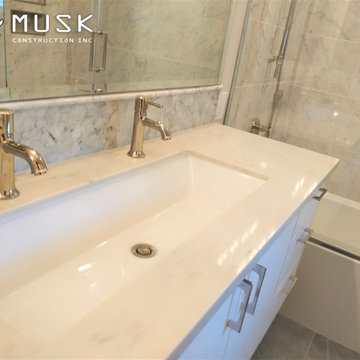 RISE Construction INC
Scope of work:
- Prep work
- Cover work areas as necessary (consult with homeowner)
- Confirm staging area for all materials & cutting / debris area
- Demo and Haul Away all Debris
- Begin to update all rough trades in exposed areas (vertical plumbing, electrical & mechanical)
- Rough plumbing
- Upgrade all vertical plumbing to city code
- Run new supply, drainage & venting for new double sink
- Install new wax O ring for toilet (check for leaks to prevent mold)
- Rough mechanical
- Fan to be on humidistat switch per code
- Install new customer provided fan
- Rough electrical
- GFI’s to be on a dedicated 20amp circuit to electrical panel per city code
- Provide & Install outlets per city code
- Install one outlet by toilet for heated toilet seat
- Pass all rough and special inspections
- Finishes
- Close opening of downstairs closet seiling
- Frame & install shampoo niche (size & location TBD)
- Install new customer provided medicine cabinet (if desired)
- Install new customer provided tile flooring & baseboards (tile baseboards)
- Install new customer provided tub wall tile
- Apply Grout to all tile
- Tape, mud & texture drywall in necessary areas (match existing spray texture)
- Paint complete bathroom
- Install existing customer door
- Install new customer provided tub fixtures
- Install customer provided toilet
- Install new customer provided vanity, countertop, sinks, faucets & backsplash
- Install new customer provided accessories (mirror, towel bars, TP holders, etc.)
- Install new customer provided light fixtures in both Hall Bathroom and Master
- Shower glass to be installed by third party company (if desired)
- Pass final inspections
-
Duration of project: 20 days
Price: $12,000
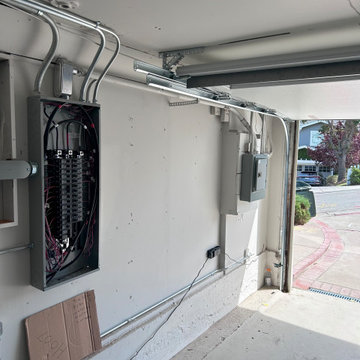
 Sugar Bear Home Services
Sugar Bear Home Services specializes in electric panel installation in South San Francisco, CA. Our certified team ensures your electric panel works safely and efficiently.
Learn More: https://www.sugarbearplumbing.com/electrician-pacifica-ca


 CID Builders & Developers Inc
Transitional Kitchen. Full Remodel.
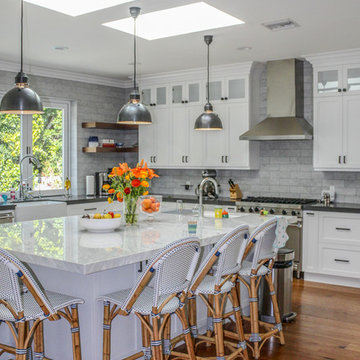
Inspiration for a large transitional u-shaped medium tone wood floor and brown floor eat-in kitchen remodel in Los Angeles with white cabinets, marble countertops, gray backsplash, stone tile backsplash, black countertops, a farmhouse sink, shaker cabinets, stainless steel appliances and an island
Inspiration for a large transitional u-shaped medium tone wood floor and brown floor eat-in kitchen remodel in Los Angeles with white cabinets, marble countertops, gray backsplash, stone tile backsplash, black countertops, a farmhouse sink, shaker cabinets, stainless steel appliances and an island
 Coddington Design
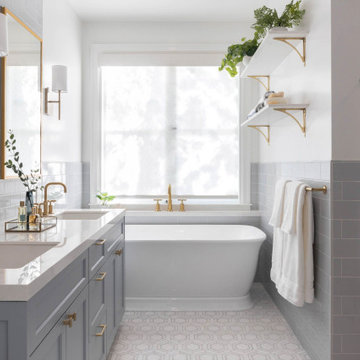
Inspiration for a large transitional master gray tile and glass tile ceramic tile, white floor, double-sink and wainscoting bathroom remodel in San Francisco with flat-panel cabinets, blue cabinets, white walls, an undermount sink, marble countertops, a hinged shower door, white countertops and a built-in vanity
 Next Stage Design + Build
Scott DuBose Photography
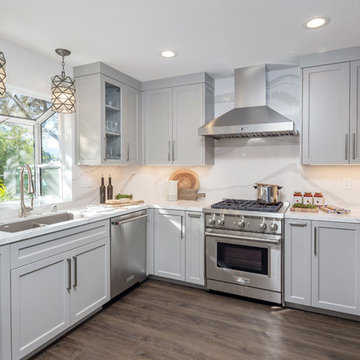
Example of a mid-sized transitional u-shaped medium tone wood floor and brown floor kitchen design in San Francisco with quartz countertops, white backsplash, stainless steel appliances, no island, white countertops, a double-bowl sink, shaker cabinets and gray cabinets
Example of a mid-sized transitional u-shaped medium tone wood floor and brown floor kitchen design in San Francisco with quartz countertops, white backsplash, stainless steel appliances, no island, white countertops, a double-bowl sink, shaker cabinets and gray cabinets
 TOC design & construction inc.
DESIGNED BY TOC design
CONSTRUCTION BY TOC design & Construction inc.
PHOTOS BY : Tania Scardellato
I was fortunate to have a young family approach me in desperate need to renovate there only 3 piece bathroom. This space was In dire need of a remodel, with old brown wall to wall tiles and a dated bulky yellow brown single sink vanity.
Storage was a must, lighting a necessity, and proper accessibility to the shower bath area.
We had a tight budget to respect, but a full gut of this bathroom was required. And a good thing too, once we started doing the demolition we noticed that mildew and rotting floors and walls had accumulated throughout the years. Doing it right the first time is no joke when dealing with water and electrical issues.
We discarded all reminisce of old and built from scratch, new walls, new plumbing, new electrical ,new insulation and a new window, a new fan that actually exhausted outside ( I say this laughing as you would be amazed at how many fans are installed but don’t exhaust outside, and you the client would never know unless you go inside the attic space.
Once all the hard stuff was done, the rest is just a matter of smart design. If you have a small bathroom here are some tips to guide you.
10 tips for making a small bathroom feel larger
Is your tiny bathroom cramping your functionality and style, leaving you longing for the enormous bathrooms gracing the pages of design magazines? Even if your bathroom is a fraction of the size, all it takes is some design savvy to make the most of the space you have. Consider these 10 smart tips that will help your bathroom look, feel and function like those larger contenders.
1-Get creative with corners
Space is at a premium in small bathrooms, so it's important to maximize every inch. Corners, for example, provide extra space for shelving, storage units and even hooks. Get creative and install unique design solutions that are not only functional, but also eye-catching. If you love the airiness of floating cabinets, add baskets or decorative boxes under for extra storage. If you are installing floating cabinets insure that they are installed securely to studs or plywood at wall.
2- Let solid colors shine
Busy patterns have a shrinking effect and make small bathrooms seem even smaller. Conversely, light natural hues make a space feel more open. If you're itching to get creative with design, experiment with textures but keep overpowering patterns to a minimum. Tone on tone is the best to achieve this.
3 - Maximize your bathtub
A bathtub takes up a significant portion of the room, but modern, compact options with curved basins, can make the tub feel larger when in use, all while conserving space.
4 - Select a smaller faucet
A faucet is jewelry for the bathroom. And just as accessories can overpower an outfit, a big bulky faucet isn't flattering in a small bath. Single-handle designs conserve counter space, while a wall-mount installation frees it up all together and can create quite the wow-factor, if the budget can accommodate the required changes to plumbing behind the wall.
5 - Make vanity storage simple
If you're in a storage war with your small bathroom, you're not alone in the battle. Toiletries and personal supplies without a place to call home only add clutter and chaos. Store smart with a space-saving vanity, the dual sink vanity shown here, looks quite simple, but in reality it has 4 sets of full extension drawers, and the vanity tower adds extra storage without overpowering the use of space.
6 - Show off the shower
Shower curtains may be pretty, but they interrupt the visual flow of a bathing space and make it feel significantly smaller. In bathrooms with small footprints, opt for a clear glass sliding shower door that doesn't require the clearance of one with a hinged design. Or as shown in this design and for fraction less expensive a half hinged panel installed on a fixed tempered glass panel. If you're embarking on a big remodel, create the illusion of more space by using same tile in the shower that's used throughout; instead of seeing them as two separate zones, the eye will read them as one.
7 - Discover the treasure of hidden storage
Work with a contractor, and you just might find some serious storage potential hidden behind your walls. Whether it's utilizing space between the studs for shallow shelving or a creating a small linen closet by annexing space from an adjacent room, even small additions can make a big difference.
8 - Focal Point
Tile is a beautiful, durable addition to any bathroom. For dainty spaces, consider installing tile at a diagonal to accentuate the focal point or as in this bathroom I used an oversized textured pattern to bring depth to the space at the window wall.
9 - Choose the right lights
Strategically install light to reflect and brighten a small bathroom to make it appear larger. Recessed lighting is an affordable solution for tiny rooms, offering ample light while taking up little space. Wall sconces alongside a mirror also reflect off the walls and make a room feel bright and airy. I always recommend going with LED lighting at 2800 to 3000K.
10 – Accessorize
This is your time to shine in your decorating skills, have fun with your towels, you can change the color scheme daily just by adding pops of color in your accessories, make sure to get items that serve a dual purpose, like baskets, boxes they can always be used as hampers, storing of towels and even a nice display for your guest.

13