
Search results for "Embarking" in Home Design Ideas
 Design Lifestyles, LLC
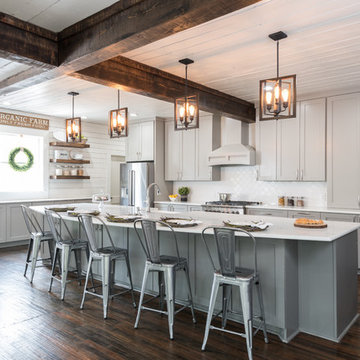
This growing family of six embarked on a first floor remodel of a 1910 farmhouse in Lewisville, Texas.
Kim Bailey Interiors designed the space to include a family-sized entertaining kitchen. Custom gray cabinets, quartz counter tops, white arabesque back splash, under-cabinet lighting, and upgraded appliances were just a few of the incredible additions to this space. Original features that were kept included the original hardwood flooring, the original windows, and the original pantry door that was reused for a new walk-in pantry behind the refrigerator. The over-sized custom designed island is flanked on one side with a custom built-in display cabinet to house family china and the other side has open shelving, a serving bar, and additional storage.
Michael Hunter Photography
 MA Peterson Design Build, Inc.
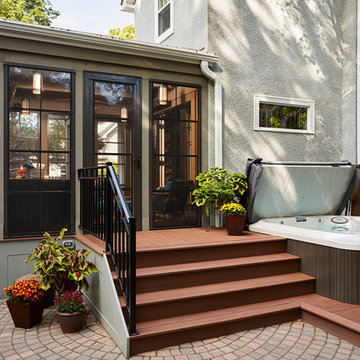
Our Minneapolis homeowners chose to embark on the new journey of retirement with a freshly remodeled home. While some retire in pure peace and quiet, our homeowners wanted to make sure they had a welcoming spot to entertain; A seasonal porch that could be used almost year-round.
The original home, built in 1928, had French doors which led down stairs to the patio below. Desiring a more intimate outdoor place to relax and entertain, MA Peterson added the seasonal porch with large scale ceiling beams. Radiant heat was installed to extend the use into the cold Minnesota months, and metal brackets were used to create a feeling of authenticity in the space. Surrounded by cypress-stained AZEK decking products and finishing the smooth look with fascia plugs, the hot tub was incorporated into the deck space.
Interiors by Brown Cow Design. Photography by Alyssa Lee Photography.
 Jack Calderone
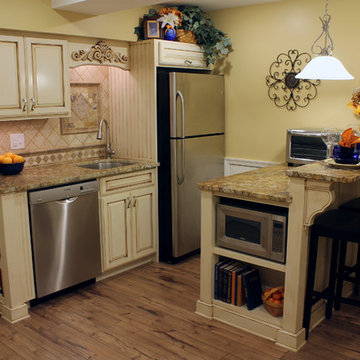
This custom kitchen is part of an adventuresome project my wife and I embarked upon to create a complete apartment in the basement of our townhouse. We designed a floor plan that creatively and efficiently used all of the 385-square-foot-space, without sacrificing beauty, comfort or function – and all without breaking the bank! To maximize our budget, we did the work ourselves and added everything from thrift store finds to DIY wall art to bring it all together.
We designed and built custom kitchen cabinets to maximize every inch of space. The island/bar provides a comfortable eating area as well as lots of extra counter space and storage.
Find the right local pro for your project

 Closet Factory
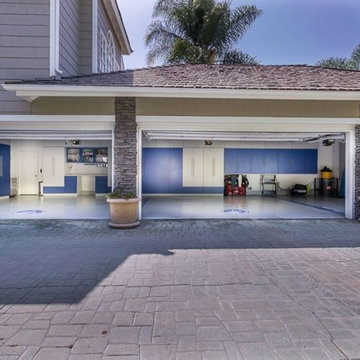
Embarking on a garage remodeling project is a transformative endeavor that can significantly enhance both the functionality and aesthetics of the space.
By investing in tailored storage solutions such as cabinets, wall-mounted organizers, and overhead racks, one can efficiently declutter the area and create a more organized storage system. Flooring upgrades, such as epoxy coatings or durable tiles, not only improve the garage's appearance but also provide a resilient surface.
Adding custom workbenches or tool storage solutions contributes to a more efficient and user-friendly workspace. Additionally, incorporating proper lighting and ventilation ensures a well-lit and comfortable environment.
A remodeled garage not only increases property value but also opens up possibilities for alternative uses, such as a home gym, workshop, or hobby space, making it a worthwhile investment for both practicality and lifestyle improvement.

 TOC design & construction inc.
DESIGNED BY TOC design
CONSTRUCTION BY TOC design & Construction inc.
PHOTOS BY : Tania Scardellato
I was fortunate to have a young family approach me in desperate need to renovate there only 3 piece bathroom. This space was In dire need of a remodel, with old brown wall to wall tiles and a dated bulky yellow brown single sink vanity.
Storage was a must, lighting a necessity, and proper accessibility to the shower bath area.
We had a tight budget to respect, but a full gut of this bathroom was required. And a good thing too, once we started doing the demolition we noticed that mildew and rotting floors and walls had accumulated throughout the years. Doing it right the first time is no joke when dealing with water and electrical issues.
We discarded all reminisce of old and built from scratch, new walls, new plumbing, new electrical ,new insulation and a new window, a new fan that actually exhausted outside ( I say this laughing as you would be amazed at how many fans are installed but don’t exhaust outside, and you the client would never know unless you go inside the attic space.
Once all the hard stuff was done, the rest is just a matter of smart design. If you have a small bathroom here are some tips to guide you.
10 tips for making a small bathroom feel larger
Is your tiny bathroom cramping your functionality and style, leaving you longing for the enormous bathrooms gracing the pages of design magazines? Even if your bathroom is a fraction of the size, all it takes is some design savvy to make the most of the space you have. Consider these 10 smart tips that will help your bathroom look, feel and function like those larger contenders.
1-Get creative with corners
Space is at a premium in small bathrooms, so it's important to maximize every inch. Corners, for example, provide extra space for shelving, storage units and even hooks. Get creative and install unique design solutions that are not only functional, but also eye-catching. If you love the airiness of floating cabinets, add baskets or decorative boxes under for extra storage. If you are installing floating cabinets insure that they are installed securely to studs or plywood at wall.
2- Let solid colors shine
Busy patterns have a shrinking effect and make small bathrooms seem even smaller. Conversely, light natural hues make a space feel more open. If you're itching to get creative with design, experiment with textures but keep overpowering patterns to a minimum. Tone on tone is the best to achieve this.
3 - Maximize your bathtub
A bathtub takes up a significant portion of the room, but modern, compact options with curved basins, can make the tub feel larger when in use, all while conserving space.
4 - Select a smaller faucet
A faucet is jewelry for the bathroom. And just as accessories can overpower an outfit, a big bulky faucet isn't flattering in a small bath. Single-handle designs conserve counter space, while a wall-mount installation frees it up all together and can create quite the wow-factor, if the budget can accommodate the required changes to plumbing behind the wall.
5 - Make vanity storage simple
If you're in a storage war with your small bathroom, you're not alone in the battle. Toiletries and personal supplies without a place to call home only add clutter and chaos. Store smart with a space-saving vanity, the dual sink vanity shown here, looks quite simple, but in reality it has 4 sets of full extension drawers, and the vanity tower adds extra storage without overpowering the use of space.
6 - Show off the shower
Shower curtains may be pretty, but they interrupt the visual flow of a bathing space and make it feel significantly smaller. In bathrooms with small footprints, opt for a clear glass sliding shower door that doesn't require the clearance of one with a hinged design. Or as shown in this design and for fraction less expensive a half hinged panel installed on a fixed tempered glass panel. If you're embarking on a big remodel, create the illusion of more space by using same tile in the shower that's used throughout; instead of seeing them as two separate zones, the eye will read them as one.
7 - Discover the treasure of hidden storage
Work with a contractor, and you just might find some serious storage potential hidden behind your walls. Whether it's utilizing space between the studs for shallow shelving or a creating a small linen closet by annexing space from an adjacent room, even small additions can make a big difference.
8 - Focal Point
Tile is a beautiful, durable addition to any bathroom. For dainty spaces, consider installing tile at a diagonal to accentuate the focal point or as in this bathroom I used an oversized textured pattern to bring depth to the space at the window wall.
9 - Choose the right lights
Strategically install light to reflect and brighten a small bathroom to make it appear larger. Recessed lighting is an affordable solution for tiny rooms, offering ample light while taking up little space. Wall sconces alongside a mirror also reflect off the walls and make a room feel bright and airy. I always recommend going with LED lighting at 2800 to 3000K.
10 – Accessorize
This is your time to shine in your decorating skills, have fun with your towels, you can change the color scheme daily just by adding pops of color in your accessories, make sure to get items that serve a dual purpose, like baskets, boxes they can always be used as hampers, storing of towels and even a nice display for your guest.
 Bruns Architecture
Tricia Shay Photography
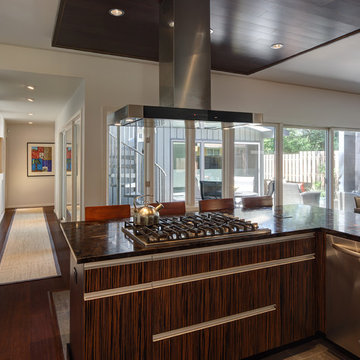
Trendy u-shaped kitchen photo in Milwaukee with flat-panel cabinets, medium tone wood cabinets and stainless steel appliances
Trendy u-shaped kitchen photo in Milwaukee with flat-panel cabinets, medium tone wood cabinets and stainless steel appliances
 Jack Calderone
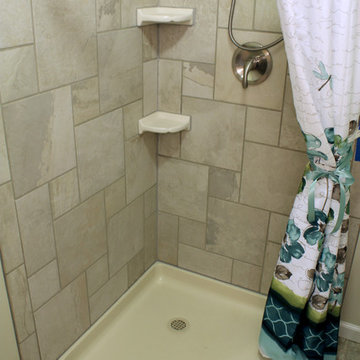
This bedroom and full bathroom are part of an adventuresome project my wife and I embarked upon to create a complete apartment in the basement of our townhouse. We designed a floor plan that creatively and efficiently used all of the 385-square-foot-space, without sacrificing beauty, comfort or function – and all without breaking the bank! To maximize our budget, we did the work ourselves and added everything from thrift store finds to DIY wall art to bring it all together.
The small footprint of this bathroom made it a challenge to include all the necessities. This neo-angle shower was the perfect solution. We are not fans of standard square tile so we dressed up the shower walls with this more interesting pattern.
 Dana Benson Construction
Collaboration with Bryan Wark Designs
Photography by Bethany Nauert
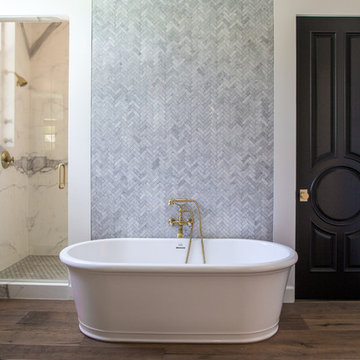
Bathroom - transitional stone slab dark wood floor and brown floor bathroom idea in Los Angeles with white walls and a hinged shower door
Bathroom - transitional stone slab dark wood floor and brown floor bathroom idea in Los Angeles with white walls and a hinged shower door
 Jack Calderone
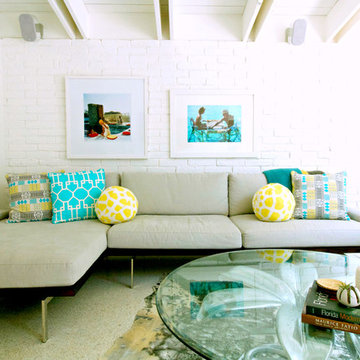
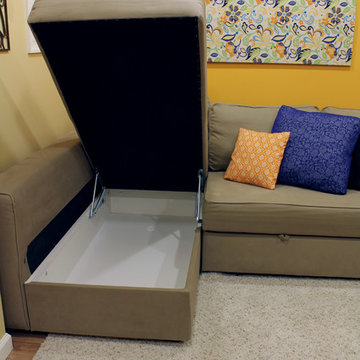
This entryway and living area are part of an adventuresome project my wife and I embarked upon to create a complete apartment in the basement of our townhouse. We designed a floor plan that creatively and efficiently used all of the 385-square-foot-space, without sacrificing beauty, comfort or function – and all without breaking the bank! To maximize our budget, we did the work ourselves and added everything from thrift store finds to DIY wall art to bring it all together.
The chaise section of the couch opens to provide extra storage.
 Jack Calderone
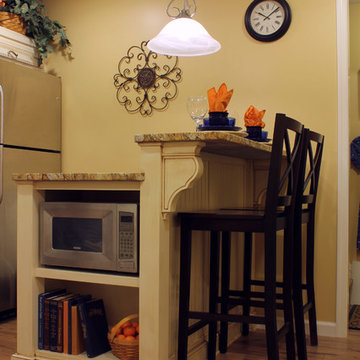
This custom kitchen is part of an adventuresome project my wife and I embarked upon to create a complete apartment in the basement of our townhouse. We designed a floor plan that creatively and efficiently used all of the 385-square-foot-space, without sacrificing beauty, comfort or function – and all without breaking the bank! To maximize our budget, we did the work ourselves and added everything from thrift store finds to DIY wall art to bring it all together.
Since the kitchen / living room has no windows, we wanted to be sure that it felt warm and comfortable. We used a combination of recessed lights, under-cabinet lights, and this pendant light to create a bright welcoming space. We bought both the under-cabinet and pendant lights secondhand for $7.50 and $20 respectively.
 Design Lifestyles, LLC
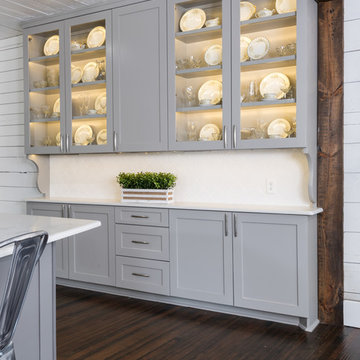
This growing family of six embarked on a first floor remodel of a 1910 farmhouse in Lewisville, Texas.
Kim Bailey Interiors designed the space to include a family-sized entertaining kitchen. Custom gray cabinets, quartz counter tops, white arabesque back splash, under-cabinet lighting, and upgraded appliances were just a few of the incredible additions to this space. Original features that were kept included the original hardwood flooring, the original windows, and the original pantry door that was reused for a new walk-in pantry behind the refrigerator. The over-sized custom designed island is flanked on one side with a custom built-in display cabinet to house family china and the other side has open shelving, a serving bar, and additional storage.
Michael Hunter Photography
 MA Peterson Design Build, Inc.
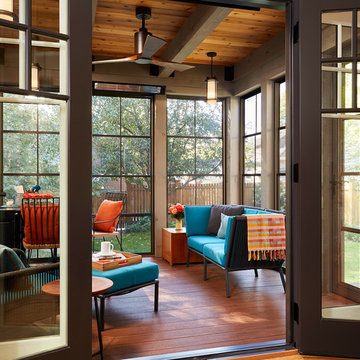
Our Minneapolis homeowners chose to embark on the new journey of retirement with a freshly remodeled home. While some retire in pure peace and quiet, our homeowners wanted to make sure they had a welcoming spot to entertain; A seasonal porch that could be used almost year-round.
The original home, built in 1928, had French doors which led down stairs to the patio below. Desiring a more intimate outdoor place to relax and entertain, MA Peterson added the seasonal porch with large scale ceiling beams. Radiant heat was installed to extend the use into the cold Minnesota months, and metal brackets were used to create a feeling of authenticity in the space. Surrounded by cypress-stained AZEK decking products and finishing the smooth look with fascia plugs, the hot tub was incorporated into the deck space.
Interiors by Brown Cow Design. Photography by Alyssa Lee Photography.
 Windhill+Co.
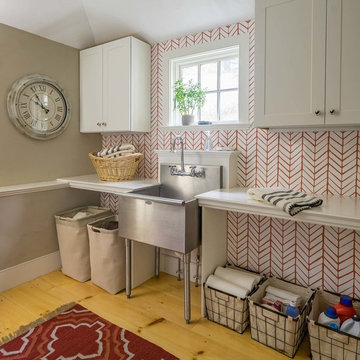
The Johnson-Thompson House, built c. 1750, has the distinct title as being the oldest structure in Winchester. Many alterations were made over the years to keep up with the times, but most recently it had the great fortune to get just the right family who appreciated and capitalized on its legacy. From the newly installed pine floors with cut, hand driven nails to the authentic rustic plaster walls, to the original timber frame, this 300 year old Georgian farmhouse is a masterpiece of old and new. Together with the homeowners and Cummings Architects, Windhill Builders embarked on a journey to salvage all of the best from this home and recreate what had been lost over time. To celebrate its history and the stories within, rooms and details were preserved where possible, woodwork and paint colors painstakingly matched and blended; the hall and parlor refurbished; the three run open string staircase lovingly restored; and details like an authentic front door with period hinges masterfully created. To accommodate its modern day family an addition was constructed to house a brand new, farmhouse style kitchen with an oversized island topped with reclaimed oak and a unique backsplash fashioned out of brick that was sourced from the home itself. Bathrooms were added and upgraded, including a spa-like retreat in the master bath, but include features like a claw foot tub, a niche with exposed brick and a magnificent barn door, as nods to the past. This renovation is one for the history books!
Eric Roth
 MANDARINA STUDIO interior design
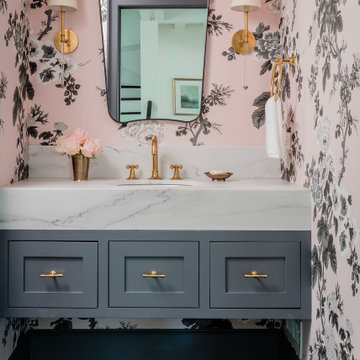
Summary of Scope: gut renovation/reconfiguration of kitchen, coffee bar, mudroom, powder room, 2 kids baths, guest bath, master bath and dressing room, kids study and playroom, study/office, laundry room, restoration of windows, adding wallpapers and window treatments
Background/description: The house was built in 1908, my clients are only the 3rd owners of the house. The prior owner lived there from 1940s until she died at age of 98! The old home had loads of character and charm but was in pretty bad condition and desperately needed updates. The clients purchased the home a few years ago and did some work before they moved in (roof, HVAC, electrical) but decided to live in the house for a 6 months or so before embarking on the next renovation phase. I had worked with the clients previously on the wife's office space and a few projects in a previous home including the nursery design for their first child so they reached out when they were ready to start thinking about the interior renovations. The goal was to respect and enhance the historic architecture of the home but make the spaces more functional for this couple with two small kids. Clients were open to color and some more bold/unexpected design choices. The design style is updated traditional with some eclectic elements. An early design decision was to incorporate a dark colored french range which would be the focal point of the kitchen and to do dark high gloss lacquered cabinets in the adjacent coffee bar, and we ultimately went with dark green.
 Jack Calderone
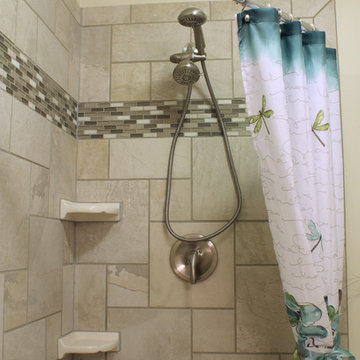
This bedroom and full bathroom are part of an adventuresome project my wife and I embarked upon to create a complete apartment in the basement of our townhouse. We designed a floor plan that creatively and efficiently used all of the 385-square-foot-space, without sacrificing beauty, comfort or function – and all without breaking the bank! To maximize our budget, we did the work ourselves and added everything from thrift store finds to DIY wall art to bring it all together.
The strip of accent tile includes various shades of gray and green glass, which picks up the color of the floor tile -- and it even has some brushed nickel tiles that match the shower fixtures! We wanted to avoid glass doors, which constrict free space and are harder to clean, so instead we found this specialty neo-angle curtain rod.
 robertcabrera
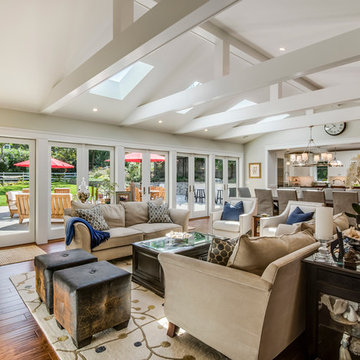
Example of a mid-sized transitional open concept and formal living room design in Los Angeles with a wall-mounted tv, gray walls, a standard fireplace and a wood fireplace surround
 Jack Calderone
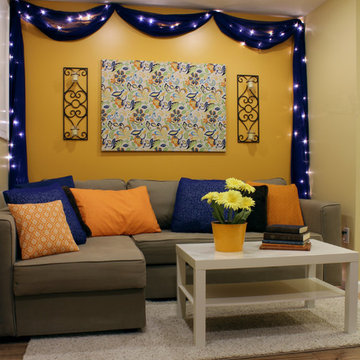
This entryway and living area are part of an adventuresome project my wife and I embarked upon to create a complete apartment in the basement of our townhouse. We designed a floor plan that creatively and efficiently used all of the 385-square-foot-space, without sacrificing beauty, comfort or function – and all without breaking the bank! To maximize our budget, we did the work ourselves and added everything from thrift store finds to DIY wall art to bring it all together.
We added a swag of sheer chiffon and twinkle lights to frame the orange wall, adding accent lighting and a touch of Arabian flavor.
 At Home Design LLC
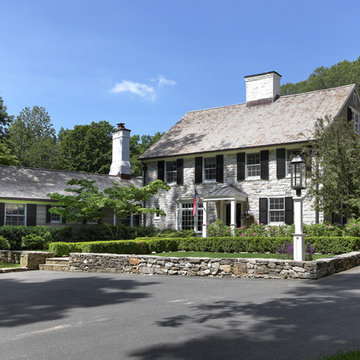
Clean and classic exterior with textural elements.
2010 A-List Award for Best Home Remodel
Originally the interior of the house consisted of small, dark rooms, low ceilings and dyed in the wool traditional furnishings. Recognizing the “solid bones” of the house the couple embarked on a renovation to expand the living space, reconfigure existing rooms and bring light into the structure.
The overarching plan was to bring fresh, modern, sustainable materials to use in every room. This would create a unique contrast to traditional materials like dry stacked stone and reclaimed wood floors and ceilings. A subtle play of unexpected textures is apparent throughout the house.
 MANDARINA STUDIO interior design
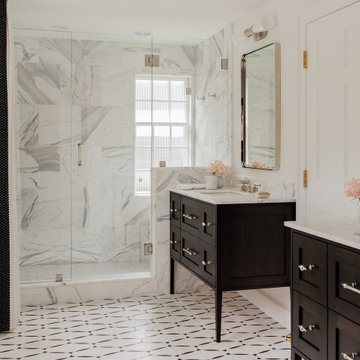
Summary of Scope: gut renovation/reconfiguration of kitchen, coffee bar, mudroom, powder room, 2 kids baths, guest bath, master bath and dressing room, kids study and playroom, study/office, laundry room, restoration of windows, adding wallpapers and window treatments
Background/description: The house was built in 1908, my clients are only the 3rd owners of the house. The prior owner lived there from 1940s until she died at age of 98! The old home had loads of character and charm but was in pretty bad condition and desperately needed updates. The clients purchased the home a few years ago and did some work before they moved in (roof, HVAC, electrical) but decided to live in the house for a 6 months or so before embarking on the next renovation phase. I had worked with the clients previously on the wife's office space and a few projects in a previous home including the nursery design for their first child so they reached out when they were ready to start thinking about the interior renovations. The goal was to respect and enhance the historic architecture of the home but make the spaces more functional for this couple with two small kids. Clients were open to color and some more bold/unexpected design choices. The design style is updated traditional with some eclectic elements. An early design decision was to incorporate a dark colored french range which would be the focal point of the kitchen and to do dark high gloss lacquered cabinets in the adjacent coffee bar, and we ultimately went with dark green.
16