
Search results for "Ensure safe" in Home Design Ideas


 CertaPro Painters - Main Line
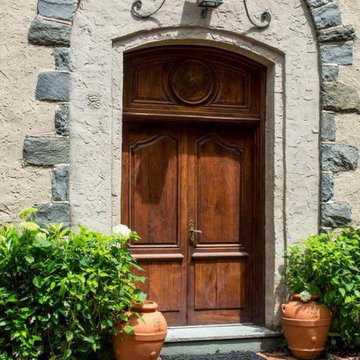
On the Main Line, few homes capture the romance of European design like Au Vallon in Villanova. Featured in Philadelphia Magazine, this estate blends French Normandy architecture with Pennsylvania stone and classic detailing—a masterpiece that deserves the highest level of care and craftsmanship.
When CertaPro Painters of the Main Line was entrusted with painting Au Vallon inside and out, we knew this was more than just a project—it was a responsibility to preserve a one-of-a-kind residence.
Exterior Painting: Stone, Stucco, and Sky-High Detail
The home’s exterior showcases steep rooflines, tall gables, and stone accents that required expert access solutions. Using professional lifts, our crew safely reached tough sections to ensure every inch was protected and finished to perfection.
Historic-style shutters, wood trim, and wrought-iron details were carefully prepped and painted with premium coatings designed for longevity. By respecting the original design while using modern products, we created a finish that enhances curb appeal while protecting the home for decades.
Interior Painting: European Elegance Restored
Inside, Au Vallon’s grand rooms called for the same meticulous approach. From arched ceilings and wood beams to paneled libraries and plaster walls, each surface was prepared with care to preserve the architectural beauty.
We collaborated closely with the homeowners to select colors that complement the stone and woodwork, balancing historic authenticity with modern warmth. Accent trim, window casings, and built-ins were refinished to highlight the craftsmanship that makes this estate extraordinary.
What Sets Us Apart
Painting a home like Au Vallon isn’t just a job—it’s a craft. Our team’s decades of experience with historic and luxury properties on the Main Line ensures:
Respect for architectural integrity
Specialized equipment (lifts, scaffolding, dust containment) for safe access
Knowledge of historic substrates like plaster, stone, and old-growth wood
Long-lasting finishes that honor the home’s legacy
Preserving Main Line History, One Brushstroke at a Time
From The Androssan Estate to Merion Cricket Club to Au Vallon, CertaPro Painters of the Main Line has become the trusted choice for painting the region’s most historic and celebrated properties.
For Mauricio and our team, the reward isn’t just in the finished product—it’s in knowing we’ve protected and preserved a piece of Main Line history.
 Light it Up AV & Turf
Project Description
Govee Permanent Outdoor Lights 2 Precision Home Installation
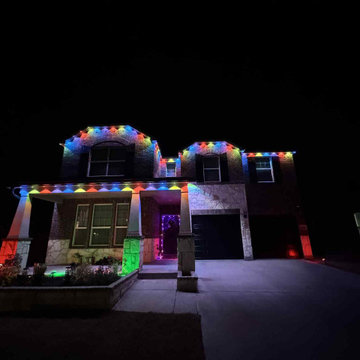
This project features the professional installation of the next-generation Govee Permanent Outdoor Lights 2 system. Known for their upgraded brightness and enhanced color rendering, these lights require a precise, calculated layout—especially since the manufacturer guidelines restrict cutting into the main line, presenting a unique installation challenge.
Key Features of This Installation:
Next-Gen Exterior Illumination: Outfitted with the newly released Govee Permanent Outdoor Lights 2, delivering brilliant architectural down-lighting, incredible holiday presets, and daily accent lighting.
Creative Technical Problem Solving: Because these specialized strands could not be cut without voiding the integrity of the system, we meticulously engineered the run layout. To achieve a perfectly flush finish at the roofline edge, we successfully executed a custom shortening and capping technique on the final strands.
Flawless Eave Integration: The lights were mounted at the optimal distance from the fascia to ensure a perfectly uniform, triangular cone wash down the home's exterior walls, eliminating hot spots and dark gaps.
Smart Ecosystem Control: Fully integrated into the homeowner's smart ecosystem, allowing for voice control, scheduled automation, and endless customization through the native app interface.
Our Specialized Lighting Expertise
Smart lighting systems require more than just hanging a strand—they require precision planning. We specialize in handling high-end retail and commercial systems, providing:
Advanced Layout Mapping: Ensuring your runs look symmetrical and perfectly tailored to your roofline before a single clip is mounted.
Out-of-the-Box Troubleshooting: Finding safe, manufacturer-approved technical workarounds for complex roof lines where standard plug-and-play methods fall short.
Clean Wire Management: Tucking and hiding all jump wires and power supplies for a seamless daytime appearance.
Find the right local pro for your project

 Cuckooland
We ship globally! Contact us for a shipping quote +44 (01305 231231) or email: customerservice@cuckooland.com.
The Adventure Hang-Out Bed for girls by Lifetime is made from the best solid knot free pine and hand crafted in Denmark. Safe and also beautiful, It features a whitewash finish applied on the solid pine, to preserve the natural beauty of solid wood, treated with a combination of lacquer, wax and pigments. This luxury bunk bed features a top cabin with window, inner 2 step ladder, bottom bunk and pull out drawer. This drawer can be converted into a third tier guest bed. These beds are handmade to order and you will need to allow 6 weeks for delivery.
Features and Benefits:
Made from knot free Scandinavian Pine from certified and sustainable forest.
Hand crafted in Denmark.
Top Cabin with windows that open.
Open bottom bunk with safety rail sides.
Measures: Total Height 227cm (with 100cm gap between lower bunk and upper frame), Length: 207cm (237cm if ladder purchased), Depth: 102cm.
Includes 2 step inner ladder.
Pull out storage drawer that can be converted into a guest bed.
Mattresses not include.
Excludes container box.
Fits mattress size: 90 x 200cm.
These unique children's beds are hand made to order, please allow 6 weeks for delivery.
Please note that top and rear back of the upper frame roof are covered in anthracite fabric.
The bottom part of the roof frame consists of solid pine planks.
Optional Extras:
Hanging Box: £64.99
Slanted 4 step ladder: £125.
Personalised Name Plate: £50.
Matching Wardrobe with 2 Drawers: £895.
Book case: £495.
90 x 200 x 20cm Body comfort mattress (British Made, high density quality reflex foam): £230
90 x 200 x 13cm option for pull out drawer: £210.
Slatted Base for pull out drawer:
These unique kids beds are made with robust joints, excellent stability, non-toxic paints to ensure safety is put first at all times.

 E. F. San Juan
Coastal Shingle Style on St. Andrew Bay
Private Residence / Panama City Beach, Florida
Architect: Eric Watson
Builder: McIntosh-Myers Construction
For this lovely Coastal Shingle–style home, E. F. San Juan supplied Loewen impact-rated windows and doors, E. F. San Juan Invincia® impact-rated custom mahogany entry doors, exterior board-and-batten siding, exterior shingles, and exterior trim and millwork. We also supplied all the interior doors, stair parts, paneling, mouldings, and millwork.
Challenges:
At over 10,000 square feet, the sheer size of this home—coupled with the extensive amount of materials we produced and provided—made for a great scheduling challenge. Another significant challenge for the E. F. San Juan team was the homeowner’s desire for an electronic locking system on numerous Invincia® doors we custom manufactured for the home. This was a first-time request for us, but a challenge we gladly accepted!
Solution:
We worked closely with the builder, Cliff Myers of McIntosh-Myers Construction, as well as the architect, Eric Watson, to ensure the timeliness of decisions as they related to the home’s critical production timeline. We also worked closely with our design engineer and the home’s engineer of record, Allen Barnes of Apex Engineering Group, to provide a solution that allowed for an electronic lock on our custom Invincia® mahogany doors. The completed home is a stunning example of coastal architecture that is as safe and secure as it is beautiful.
---
Photography by Jack Gardner
 E. F. San Juan
Coastal Shingle Style on St. Andrew Bay
Private Residence / Panama City Beach, Florida
Architect: Eric Watson
Builder: McIntosh-Myers Construction
For this lovely Coastal Shingle–style home, E. F. San Juan supplied Loewen impact-rated windows and doors, E. F. San Juan Invincia® impact-rated custom mahogany entry doors, exterior board-and-batten siding, exterior shingles, and exterior trim and millwork. We also supplied all the interior doors, stair parts, paneling, mouldings, and millwork.
Challenges:
At over 10,000 square feet, the sheer size of this home—coupled with the extensive amount of materials we produced and provided—made for a great scheduling challenge. Another significant challenge for the E. F. San Juan team was the homeowner’s desire for an electronic locking system on numerous Invincia® doors we custom manufactured for the home. This was a first-time request for us, but a challenge we gladly accepted!
Solution:
We worked closely with the builder, Cliff Myers of McIntosh-Myers Construction, as well as the architect, Eric Watson, to ensure the timeliness of decisions as they related to the home’s critical production timeline. We also worked closely with our design engineer and the home’s engineer of record, Allen Barnes of Apex Engineering Group, to provide a solution that allowed for an electronic lock on our custom Invincia® mahogany doors. The completed home is a stunning example of coastal architecture that is as safe and secure as it is beautiful.
---
Photography by Jack Gardner
 E. F. San Juan
Coastal Shingle Style on St. Andrew Bay
Private Residence / Panama City Beach, Florida
Architect: Eric Watson
Builder: McIntosh-Myers Construction
For this lovely Coastal Shingle–style home, E. F. San Juan supplied Loewen impact-rated windows and doors, E. F. San Juan Invincia® impact-rated custom mahogany entry doors, exterior board-and-batten siding, exterior shingles, and exterior trim and millwork. We also supplied all the interior doors, stair parts, paneling, mouldings, and millwork.
Challenges:
At over 10,000 square feet, the sheer size of this home—coupled with the extensive amount of materials we produced and provided—made for a great scheduling challenge. Another significant challenge for the E. F. San Juan team was the homeowner’s desire for an electronic locking system on numerous Invincia® doors we custom manufactured for the home. This was a first-time request for us, but a challenge we gladly accepted!
Solution:
We worked closely with the builder, Cliff Myers of McIntosh-Myers Construction, as well as the architect, Eric Watson, to ensure the timeliness of decisions as they related to the home’s critical production timeline. We also worked closely with our design engineer and the home’s engineer of record, Allen Barnes of Apex Engineering Group, to provide a solution that allowed for an electronic lock on our custom Invincia® mahogany doors. The completed home is a stunning example of coastal architecture that is as safe and secure as it is beautiful.
---
Photography by Jack Gardner

 Adaptiv DC
THEME At some point, every little boy imagines himself a cowboy riding horseback, herding cattle over the wooded plains and warring with ferocious outlaws. High noon or not, in this room, the Wild West is brought to life in fantastic detail with a Chuck Wagon bed, Western-style drawers and a variety of room accents. FOCUS The room’s central feature is the Chuck Wagon bed, a companion to Kidtropolis’ signature Princess bed. Replicating a Chuck Wagon in every respect, this version of Old West transport comes complete with wagon wheels, a canvas canopy, and even a ladder. Accessories such as a frying pan, lantern, bucket, rope and milk barrel set the stage for life on the range; while pictures of cowboys, Indians, teepees, campfires and tengallon hats evoke images of the OK Corral. Stuffed horses, a small wagon and pup tent add to the atmosphere. STORAGE The wagon’s front high seat serves as a changing table complete with pad. Convenient storage areas are located in the back and in the side box. GROWTH The Chuck Wagon bed works as a baby crib and is suitable for a toddler up to the age of four. SAFETY A safety railing around the walls of the bed prevent baby from falling out, and can be removed when needed. Wheels and accessories are immobile to ensure the wagon is safe for rest and play.
 Windy City Painters
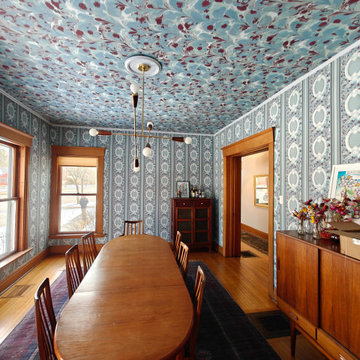
Professional wallpaper installation Chicago dining room showcases expert craftsmanship in this stunning transformation that perfectly complements the home's architectural character.
## Project Overview
This comprehensive wallpaper installation project involved both walls and ceiling application in a formal dining room within a vintage Chicago greystone. The intricate pattern required precise alignment and professional techniques to achieve seamless results that honor the home's historic charm while adding contemporary elegance.
## Materials and Products
We utilized premium wallpaper adhesive specifically formulated for Chicago's climate variations, along with professional-grade smoothing tools and precision cutting equipment. High-quality primer ensured optimal surface preparation for lasting adhesion across both vertical and horizontal applications.
## Installation Process
First, comprehensive surface preparation included removing existing materials and repairing any imperfections. Second, application of specialized primer designed for wallpaper adhesion. Third, precise measurement and cutting with careful attention to pattern alignment. Finally, professional installation with meticulous corner work and ceiling transitions.
## Chicago-Specific Challenges
Chicago homes present unique wallpaper installation challenges including settling foundations that affect wall surfaces, humidity fluctuations impacting adhesive performance, and older plaster surfaces requiring specialized preparation techniques. Additionally, vintage buildings often have irregular walls demanding expert adjustment skills.
## Results and Quality
The completed wallpaper installation creates a sophisticated dining environment that seamlessly integrates with the home's architectural character. Perfect pattern matching across walls and ceiling demonstrates the precision possible with professional installation techniques.
## Professional Tips
Before starting wallpaper installation, always test adhesion in inconspicuous areas first. Maintain consistent room temperature throughout the process. Choose quality materials designed for Chicago's climate. Plan pattern layout carefully to minimize waste and ensure optimal visual flow.
See more work and request free estimate at windypainters.com - Windy City Painters delivers exceptional results.
Q: How long does wallpaper installation take?
A: Professional wallpaper installation typically requires 1-2 days depending on room size, pattern complexity, and surface preparation needs.
Q: Can you install wallpaper on textured walls?
A: Yes, textured wall wallpaper installation requires proper surface preparation and specialized techniques for optimal adhesion results.
Q: Do you remove old wallpaper first?
A: Complete old wallpaper removal is essential before new wallpaper installation to ensure proper adhesion and smooth finish.
Q: What about ceiling wallpaper installation?
A: Ceiling wallpaper installation requires specialized equipment and techniques - Windy City Painters handles this expertly and safely.
Q: How do you ensure pattern matching?
A: Professional wallpaper installation includes precise measuring, cutting, and alignment techniques for seamless pattern matching throughout the space.
Q: Can wallpaper installation work in humid areas?
A: Proper wallpaper installation with quality adhesives designed for humidity variations ensures lasting results in Chicago's climate.
Q: What surfaces accept wallpaper installation?
A: Most properly prepared surfaces including drywall, plaster, and previously painted walls can accept professional wallpaper installation successfully.
Q: Do you handle corner installations?
A: Corner wallpaper installation requires specialized techniques for inside and outside corners - we ensure perfect alignment.
Q: What's included in the service?
A: Complete wallpaper installation service includes surface preparation, removal if needed, professional application, cleanup, and quality guarantee.
Q: How do you prepare surfaces?
A: Surface preparation for wallpaper installation includes cleaning, repairing imperfections, priming, and ensuring optimal conditions for adhesion.
 TAM INTERIORS LLC
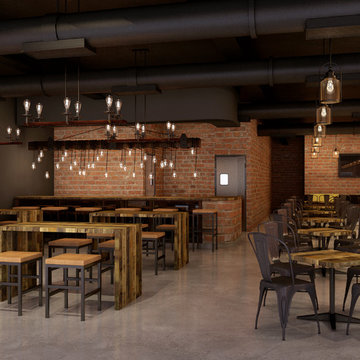
Renovated an optometry office into a casual quick service restaurant.
Minimalist home design photo in Denver
Minimalist home design photo in Denver
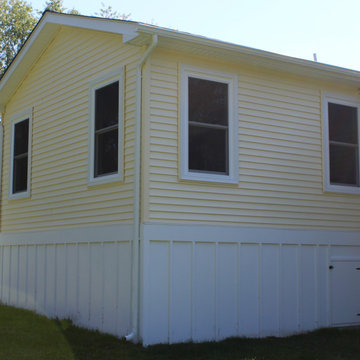
 Talon Construction Inc.
Designing and building a kitchen addition is a complex process that involves multiple steps and considerations. Here is a general outline to help you get started on your kitchen addition project:
Define Your Goals and Budget:
• Determine the purpose of the kitchen addition. Is it for more cooking space, a dining area, or a combination of both?
• Establish a realistic budget for your project. Consider all costs, including construction, permits, materials, and furnishings.
Hire a Design Professional:
• Seek the services of a design build company who specializes in kitchen additions.
• Discuss your vision, needs, and budget with the design professional to create a design concept.
Site Evaluation:
• Assess the existing space and structural condition of your home to ensure it can support the addition.
• Consider factors like zoning regulations, setbacks, and building codes.
Design Development:
• Collaborate with your design professional to refine the concept, including the layout, size, and architectural style.
• Choose materials, finishes, and fixtures that fit your design and budget.
Obtain Permits:
• Consult with your local design build contractor to determine the necessary permits and approvals.
• Prepare and submit all required documents, including architectural drawings and engineering plans.
Create Construction Documents:
• Work with your design build professional to develop detailed construction drawings and specifications.
• These documents will serve as a guide for contractors during construction.
Hire a design build contractor:
• Check references, credentials, and licenses before selecting a contractor.
• Sign a detailed contract that outlines the scope of work, timeline, and payment schedule.
Construction Phase:
• Demolition: If needed, remove any existing structures or walls.
• Foundation: Construct the foundation for the addition.
• Framing: Build the structural framework of the addition.
• Plumbing, Electrical, and HVAC: Install or update utilities as required.
• Insulation: Ensure proper insulation for energy efficiency.
• Drywall and Finish Work: Complete the walls and ceilings.
• Flooring and Cabinetry: Install flooring and kitchen cabinets.
• Appliances and Fixtures: Add appliances, plumbing fixtures, and lighting.
• Paint and Finish: Apply paint and finishes to achieve the desired look.
• Final Inspection: Schedule inspections to ensure compliance with building codes.
Final Inspections and Approvals:
• Arrange for final inspections to ensure the addition meets all safety and code requirements.
• Obtain any necessary certificates of occupancy or compliance.
Move In and Enjoy:
• Once all inspections and approvals are received, you can move into your new kitchen addition and start enjoying it.
Remember that every kitchen addition project is unique, so adapt this outline to your specific needs and circumstances. Consulting with professionals and obtaining the required permits and inspections is crucial to a successful and safe project.
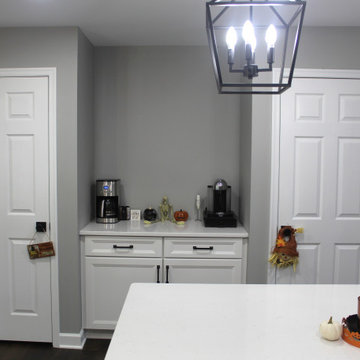 Talon Construction Inc.
Designing and building a kitchen addition is a complex process that involves multiple steps and considerations. Here is a general outline to help you get started on your kitchen addition project:
Define Your Goals and Budget:
• Determine the purpose of the kitchen addition. Is it for more cooking space, a dining area, or a combination of both?
• Establish a realistic budget for your project. Consider all costs, including construction, permits, materials, and furnishings.
Hire a Design Professional:
• Seek the services of a design build company who specializes in kitchen additions.
• Discuss your vision, needs, and budget with the design professional to create a design concept.
Site Evaluation:
• Assess the existing space and structural condition of your home to ensure it can support the addition.
• Consider factors like zoning regulations, setbacks, and building codes.
Design Development:
• Collaborate with your design professional to refine the concept, including the layout, size, and architectural style.
• Choose materials, finishes, and fixtures that fit your design and budget.
Obtain Permits:
• Consult with your local design build contractor to determine the necessary permits and approvals.
• Prepare and submit all required documents, including architectural drawings and engineering plans.
Create Construction Documents:
• Work with your design build professional to develop detailed construction drawings and specifications.
• These documents will serve as a guide for contractors during construction.
Hire a design build contractor:
• Check references, credentials, and licenses before selecting a contractor.
• Sign a detailed contract that outlines the scope of work, timeline, and payment schedule.
Construction Phase:
• Demolition: If needed, remove any existing structures or walls.
• Foundation: Construct the foundation for the addition.
• Framing: Build the structural framework of the addition.
• Plumbing, Electrical, and HVAC: Install or update utilities as required.
• Insulation: Ensure proper insulation for energy efficiency.
• Drywall and Finish Work: Complete the walls and ceilings.
• Flooring and Cabinetry: Install flooring and kitchen cabinets.
• Appliances and Fixtures: Add appliances, plumbing fixtures, and lighting.
• Paint and Finish: Apply paint and finishes to achieve the desired look.
• Final Inspection: Schedule inspections to ensure compliance with building codes.
Final Inspections and Approvals:
• Arrange for final inspections to ensure the addition meets all safety and code requirements.
• Obtain any necessary certificates of occupancy or compliance.
Move In and Enjoy:
• Once all inspections and approvals are received, you can move into your new kitchen addition and start enjoying it.
Remember that every kitchen addition project is unique, so adapt this outline to your specific needs and circumstances. Consulting with professionals and obtaining the required permits and inspections is crucial to a successful and safe project.
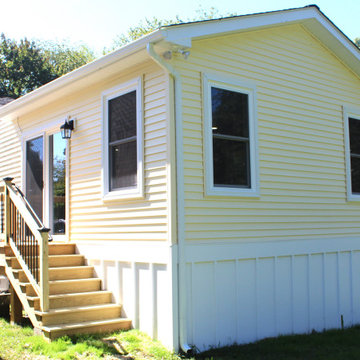 Talon Construction Inc.
Designing and building a kitchen addition is a complex process that involves multiple steps and considerations. Here is a general outline to help you get started on your kitchen addition project:
Define Your Goals and Budget:
• Determine the purpose of the kitchen addition. Is it for more cooking space, a dining area, or a combination of both?
• Establish a realistic budget for your project. Consider all costs, including construction, permits, materials, and furnishings.
Hire a Design Professional:
• Seek the services of a design build company who specializes in kitchen additions.
• Discuss your vision, needs, and budget with the design professional to create a design concept.
Site Evaluation:
• Assess the existing space and structural condition of your home to ensure it can support the addition.
• Consider factors like zoning regulations, setbacks, and building codes.
Design Development:
• Collaborate with your design professional to refine the concept, including the layout, size, and architectural style.
• Choose materials, finishes, and fixtures that fit your design and budget.
Obtain Permits:
• Consult with your local design build contractor to determine the necessary permits and approvals.
• Prepare and submit all required documents, including architectural drawings and engineering plans.
Create Construction Documents:
• Work with your design build professional to develop detailed construction drawings and specifications.
• These documents will serve as a guide for contractors during construction.
Hire a design build contractor:
• Check references, credentials, and licenses before selecting a contractor.
• Sign a detailed contract that outlines the scope of work, timeline, and payment schedule.
Construction Phase:
• Demolition: If needed, remove any existing structures or walls.
• Foundation: Construct the foundation for the addition.
• Framing: Build the structural framework of the addition.
• Plumbing, Electrical, and HVAC: Install or update utilities as required.
• Insulation: Ensure proper insulation for energy efficiency.
• Drywall and Finish Work: Complete the walls and ceilings.
• Flooring and Cabinetry: Install flooring and kitchen cabinets.
• Appliances and Fixtures: Add appliances, plumbing fixtures, and lighting.
• Paint and Finish: Apply paint and finishes to achieve the desired look.
• Final Inspection: Schedule inspections to ensure compliance with building codes.
Final Inspections and Approvals:
• Arrange for final inspections to ensure the addition meets all safety and code requirements.
• Obtain any necessary certificates of occupancy or compliance.
Move In and Enjoy:
• Once all inspections and approvals are received, you can move into your new kitchen addition and start enjoying it.
Remember that every kitchen addition project is unique, so adapt this outline to your specific needs and circumstances. Consulting with professionals and obtaining the required permits and inspections is crucial to a successful and safe project.
 Talon Construction Inc.
Designing and building a kitchen addition is a complex process that involves multiple steps and considerations. Here is a general outline to help you get started on your kitchen addition project:
Define Your Goals and Budget:
• Determine the purpose of the kitchen addition. Is it for more cooking space, a dining area, or a combination of both?
• Establish a realistic budget for your project. Consider all costs, including construction, permits, materials, and furnishings.
Hire a Design Professional:
• Seek the services of a design build company who specializes in kitchen additions.
• Discuss your vision, needs, and budget with the design professional to create a design concept.
Site Evaluation:
• Assess the existing space and structural condition of your home to ensure it can support the addition.
• Consider factors like zoning regulations, setbacks, and building codes.
Design Development:
• Collaborate with your design professional to refine the concept, including the layout, size, and architectural style.
• Choose materials, finishes, and fixtures that fit your design and budget.
Obtain Permits:
• Consult with your local design build contractor to determine the necessary permits and approvals.
• Prepare and submit all required documents, including architectural drawings and engineering plans.
Create Construction Documents:
• Work with your design build professional to develop detailed construction drawings and specifications.
• These documents will serve as a guide for contractors during construction.
Hire a design build contractor:
• Check references, credentials, and licenses before selecting a contractor.
• Sign a detailed contract that outlines the scope of work, timeline, and payment schedule.
Construction Phase:
• Demolition: If needed, remove any existing structures or walls.
• Foundation: Construct the foundation for the addition.
• Framing: Build the structural framework of the addition.
• Plumbing, Electrical, and HVAC: Install or update utilities as required.
• Insulation: Ensure proper insulation for energy efficiency.
• Drywall and Finish Work: Complete the walls and ceilings.
• Flooring and Cabinetry: Install flooring and kitchen cabinets.
• Appliances and Fixtures: Add appliances, plumbing fixtures, and lighting.
• Paint and Finish: Apply paint and finishes to achieve the desired look.
• Final Inspection: Schedule inspections to ensure compliance with building codes.
Final Inspections and Approvals:
• Arrange for final inspections to ensure the addition meets all safety and code requirements.
• Obtain any necessary certificates of occupancy or compliance.
Move In and Enjoy:
• Once all inspections and approvals are received, you can move into your new kitchen addition and start enjoying it.
Remember that every kitchen addition project is unique, so adapt this outline to your specific needs and circumstances. Consulting with professionals and obtaining the required permits and inspections is crucial to a successful and safe project.
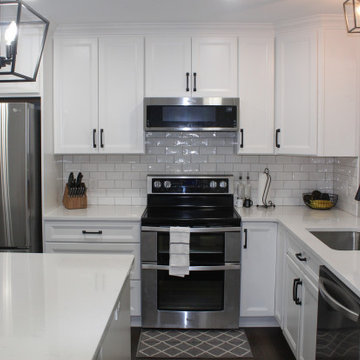 Talon Construction Inc.
Designing and building a kitchen addition is a complex process that involves multiple steps and considerations. Here is a general outline to help you get started on your kitchen addition project:
Define Your Goals and Budget:
• Determine the purpose of the kitchen addition. Is it for more cooking space, a dining area, or a combination of both?
• Establish a realistic budget for your project. Consider all costs, including construction, permits, materials, and furnishings.
Hire a Design Professional:
• Seek the services of a design build company who specializes in kitchen additions.
• Discuss your vision, needs, and budget with the design professional to create a design concept.
Site Evaluation:
• Assess the existing space and structural condition of your home to ensure it can support the addition.
• Consider factors like zoning regulations, setbacks, and building codes.
Design Development:
• Collaborate with your design professional to refine the concept, including the layout, size, and architectural style.
• Choose materials, finishes, and fixtures that fit your design and budget.
Obtain Permits:
• Consult with your local design build contractor to determine the necessary permits and approvals.
• Prepare and submit all required documents, including architectural drawings and engineering plans.
Create Construction Documents:
• Work with your design build professional to develop detailed construction drawings and specifications.
• These documents will serve as a guide for contractors during construction.
Hire a design build contractor:
• Check references, credentials, and licenses before selecting a contractor.
• Sign a detailed contract that outlines the scope of work, timeline, and payment schedule.
Construction Phase:
• Demolition: If needed, remove any existing structures or walls.
• Foundation: Construct the foundation for the addition.
• Framing: Build the structural framework of the addition.
• Plumbing, Electrical, and HVAC: Install or update utilities as required.
• Insulation: Ensure proper insulation for energy efficiency.
• Drywall and Finish Work: Complete the walls and ceilings.
• Flooring and Cabinetry: Install flooring and kitchen cabinets.
• Appliances and Fixtures: Add appliances, plumbing fixtures, and lighting.
• Paint and Finish: Apply paint and finishes to achieve the desired look.
• Final Inspection: Schedule inspections to ensure compliance with building codes.
Final Inspections and Approvals:
• Arrange for final inspections to ensure the addition meets all safety and code requirements.
• Obtain any necessary certificates of occupancy or compliance.
Move In and Enjoy:
• Once all inspections and approvals are received, you can move into your new kitchen addition and start enjoying it.
Remember that every kitchen addition project is unique, so adapt this outline to your specific needs and circumstances. Consulting with professionals and obtaining the required permits and inspections is crucial to a successful and safe project.
 Talon Construction Inc.
Designing and building a kitchen addition is a complex process that involves multiple steps and considerations. Here is a general outline to help you get started on your kitchen addition project:
Define Your Goals and Budget:
• Determine the purpose of the kitchen addition. Is it for more cooking space, a dining area, or a combination of both?
• Establish a realistic budget for your project. Consider all costs, including construction, permits, materials, and furnishings.
Hire a Design Professional:
• Seek the services of a design build company who specializes in kitchen additions.
• Discuss your vision, needs, and budget with the design professional to create a design concept.
Site Evaluation:
• Assess the existing space and structural condition of your home to ensure it can support the addition.
• Consider factors like zoning regulations, setbacks, and building codes.
Design Development:
• Collaborate with your design professional to refine the concept, including the layout, size, and architectural style.
• Choose materials, finishes, and fixtures that fit your design and budget.
Obtain Permits:
• Consult with your local design build contractor to determine the necessary permits and approvals.
• Prepare and submit all required documents, including architectural drawings and engineering plans.
Create Construction Documents:
• Work with your design build professional to develop detailed construction drawings and specifications.
• These documents will serve as a guide for contractors during construction.
Hire a design build contractor:
• Check references, credentials, and licenses before selecting a contractor.
• Sign a detailed contract that outlines the scope of work, timeline, and payment schedule.
Construction Phase:
• Demolition: If needed, remove any existing structures or walls.
• Foundation: Construct the foundation for the addition.
• Framing: Build the structural framework of the addition.
• Plumbing, Electrical, and HVAC: Install or update utilities as required.
• Insulation: Ensure proper insulation for energy efficiency.
• Drywall and Finish Work: Complete the walls and ceilings.
• Flooring and Cabinetry: Install flooring and kitchen cabinets.
• Appliances and Fixtures: Add appliances, plumbing fixtures, and lighting.
• Paint and Finish: Apply paint and finishes to achieve the desired look.
• Final Inspection: Schedule inspections to ensure compliance with building codes.
Final Inspections and Approvals:
• Arrange for final inspections to ensure the addition meets all safety and code requirements.
• Obtain any necessary certificates of occupancy or compliance.
Move In and Enjoy:
• Once all inspections and approvals are received, you can move into your new kitchen addition and start enjoying it.
Remember that every kitchen addition project is unique, so adapt this outline to your specific needs and circumstances. Consulting with professionals and obtaining the required permits and inspections is crucial to a successful and safe project.
 Talon Construction Inc.
Designing and building a kitchen addition is a complex process that involves multiple steps and considerations. Here is a general outline to help you get started on your kitchen addition project:
Define Your Goals and Budget:
• Determine the purpose of the kitchen addition. Is it for more cooking space, a dining area, or a combination of both?
• Establish a realistic budget for your project. Consider all costs, including construction, permits, materials, and furnishings.
Hire a Design Professional:
• Seek the services of a design build company who specializes in kitchen additions.
• Discuss your vision, needs, and budget with the design professional to create a design concept.
Site Evaluation:
• Assess the existing space and structural condition of your home to ensure it can support the addition.
• Consider factors like zoning regulations, setbacks, and building codes.
Design Development:
• Collaborate with your design professional to refine the concept, including the layout, size, and architectural style.
• Choose materials, finishes, and fixtures that fit your design and budget.
Obtain Permits:
• Consult with your local design build contractor to determine the necessary permits and approvals.
• Prepare and submit all required documents, including architectural drawings and engineering plans.
Create Construction Documents:
• Work with your design build professional to develop detailed construction drawings and specifications.
• These documents will serve as a guide for contractors during construction.
Hire a design build contractor:
• Check references, credentials, and licenses before selecting a contractor.
• Sign a detailed contract that outlines the scope of work, timeline, and payment schedule.
Construction Phase:
• Demolition: If needed, remove any existing structures or walls.
• Foundation: Construct the foundation for the addition.
• Framing: Build the structural framework of the addition.
• Plumbing, Electrical, and HVAC: Install or update utilities as required.
• Insulation: Ensure proper insulation for energy efficiency.
• Drywall and Finish Work: Complete the walls and ceilings.
• Flooring and Cabinetry: Install flooring and kitchen cabinets.
• Appliances and Fixtures: Add appliances, plumbing fixtures, and lighting.
• Paint and Finish: Apply paint and finishes to achieve the desired look.
• Final Inspection: Schedule inspections to ensure compliance with building codes.
Final Inspections and Approvals:
• Arrange for final inspections to ensure the addition meets all safety and code requirements.
• Obtain any necessary certificates of occupancy or compliance.
Move In and Enjoy:
• Once all inspections and approvals are received, you can move into your new kitchen addition and start enjoying it.
Remember that every kitchen addition project is unique, so adapt this outline to your specific needs and circumstances. Consulting with professionals and obtaining the required permits and inspections is crucial to a successful and safe project.

 Advaning
’s PN series adds a classic style to a modern concept. Fixed awnings with transparent polycarbonate materials enhance the exterior aesthetics of homes and businesses. In addition to quality UV protection, Advaning’s PN Series diverts rain and snow away from your windows and doors using the best products on the market today. The PN series’ solid polycarbonate canopy panel is made from 100% Bayer virgin raw material. Many brands use lesser grade recycled materials that often have impurities mixed in. Beware of polycarbonate panels that are hollow and not solid. Cutting corners short-changes you with products that do not stand up to the elements for long. Hollow spaces are gathering points for mold, dust, and condensation. Advaning takes pride in its product lines, ensuring that customers get solid panels of pure material from the source to protect the windows and doorways of each installation. The panels are clear, safe, clean, and attach to their frames using an EPDM grade rubber seal that omits moisture penetration.
 Futuro Futuro Kitchen Range Hoods
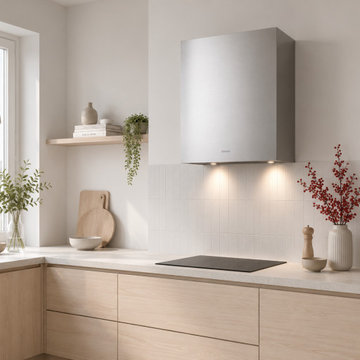
Futuro Futuro 36-Inch Amalfi Wall Range Hood – Modern Italian Design with Powerful Ventilation
The Futuro Futuro 36-Inch Amalfi Wall Range Hood combines contemporary Italian design, premium materials, and advanced ventilation technology to create a statement piece for modern kitchens. Featuring a sleek cubist-inspired design, this luxury wall-mounted range hood delivers both exceptional performance and timeless style.
Premium Italian Craftsmanship and Durable Stainless Steel Construction
Designed and handcrafted in Italy, the Amalfi Series is built with high-quality AISI 304 stainless steel, a material known for its outstanding resistance to rust, corrosion, and everyday wear. This durable construction ensures long-lasting performance while maintaining its elegant appearance for years to come.
The Amalfi’s refined geometric design adds a sophisticated modern touch to any kitchen while providing the reliability expected from premium Italian craftsmanship.
Powerful and Quiet 940 CFM Ventilation System
The Futuro Futuro Amalfi Wall Range Hood features a high-performance 940 CFM internal Whisper tangential blower designed to efficiently remove smoke, grease, steam, and cooking odors from your kitchen.
Despite its powerful airflow, the hood operates quietly thanks to an advanced multi-layer sound-absorbing system. This innovative technology helps reduce operating noise, allowing you to enjoy a cleaner, fresher kitchen environment without unnecessary distractions.
Advanced Perimeter Suction Filtration Technology
The Amalfi Series uses a perimeter suction filtration system that creates an air curtain around your cooktop. This design improves capture efficiency by directing smoke, grease, and odors toward the edges of the hood for more effective filtration.
The hidden metal mesh grease filters maintain the hood’s clean, minimalist appearance while providing reliable grease collection. The filters are easy to remove and dishwasher safe for convenient maintenance.
Smart Controls and Energy-Efficient LED Lighting
The illuminated electronic control panel makes operating the Amalfi Wall Range Hood simple and intuitive. With the push of a button, you can adjust ventilation settings and access built-in features.
A convenient filter-cleaning reminder helps ensure your hood continues performing at its best. Two energy-efficient LED lights provide bright, focused illumination over your cooktop while enhancing visibility during food preparation.
Why Choose the Futuro Futuro Amalfi 36-Inch Wall Range Hood?
36-inch modern wall-mounted range hood design
Premium Italian craftsmanship
Durable AISI 304 stainless steel construction
Powerful 940 CFM internal blower
Quiet operation with advanced sound absorption technology
Perimeter suction filtration system for improved smoke and odor capture
Dishwasher-safe metal mesh grease filters
Energy-efficient LED cooktop lighting
Sleek cubist design for contemporary kitchens
What makes the Futuro Futuro Amalfi range hood different?
The Amalfi stands out with its combination of Italian craftsmanship, premium stainless steel construction, powerful ventilation, quiet operation, and modern architectural design.
How powerful is the Amalfi 36-Inch range hood?
This model features a 940 CFM internal blower designed to handle heavy cooking, smoke, grease, and odors effectively.
Is the Amalfi range hood easy to maintain?
Yes. The removable metal mesh grease filters are dishwasher safe, and the electronic controls include a cleaning reminder for easier upkeep.
What kitchen styles work best with the Amalfi Wall Range Hood?
Its sleek cubist design complements contemporary, modern, minimalist, and luxury kitchen designs.

 Five Star Tree Care
Using a chainsaw is a quick way to make work of fallen branches, damaged trees, and more. However, unless you have been plenty of experience, you may not be able to use this tool safely. For those who have never used a chainsaw before, it is a good idea to start with a lighter saw to prevent injury. It is also a good idea to enroll in a training course. If you plan to use a chainsaw in a professional company, it is even mandatory. Five Star Tree Services has created a quick guide that will help you decide if using a chainsaw is the best option for you.
Chainsaw Maintenance
Before you start using a chainsaw, you need to know if the blades are properly sharpened. Dull blades can cause jagged cuts or even cause injury. A sharp blade allows the saw to cut smoothly and produce straight cuts. The next step is to review is the cutting chain. It should be adjusted to the right tension, so the chain doesn’t move when the engine is idle. Make sure there are no loose screws and that the chain brake is in proper working order.
Operating a Chainsaw
Once you ensure that the chainsaw is safe to operate, it is time to get it started. Do you know the right amount of throttle and pressure to use? What about which cut would be best for your current project? Each type of cut will affect the wood differently, so it is important to keep these factors in mind when using a chainsaw. Situational awareness is also an important part of chainsaw use. No one should be within 10 feet while you are cutting. Also, avoid getting distracted by people seeking your attention since it only takes a second for a grave mistake to occur.
Protection During Chainsaw Operation
Proper protection is essential when operating machinery. When using a chainsaw, you should have on personal protection equipment such as; chainsaw pants, steel toe boots, gloves, ear protection, high visibility clothing, a helmet, and eye protection. All of these items should be in good working order and made from high-quality materials. Protecting your face, neck, chest, and abdomen is critical when working with any type of cutting tool.
The best way to keep yourself protected while wearing your personal protective equipment (PPE) is to maintain control over the chainsaw. Gloves may reduce control for many people, but a firm stance and proper balance can work wonders for maintaining control. PPE usage is very important, but it is equally important not to get lulled into a false sense of security by wearing it.
Practice Makes Perfect
It is best to practice using your chainsaw before taking on big projects. This will help you learn to move your body and your head in a safe way and a way that supports a clean cut. Most often, work with chainsaws is completed on ground that is uneven or covered in obstacles. Practicing will ensure that you can adapt to your environment without risking damage to your property or bodily harm.
How We Can Help
Working with chainsaws can make tree care simpler, but without the proper training and protection, it can be hazardous. Instead of taking the risk, hire the professionals here at Five Star Tree Services for all of your Richmond Hill tree removal and tree care needs. Give us a call at (416) 990-3355 to find out more about our rates and services.
41