
Search results for "Ensured" in Home Design Ideas
 Tile Doctor Ltd
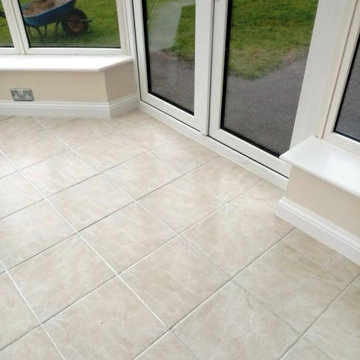
This customer from Stroud was soon to be re-letting her house but the Ceramic tiled floor and especially the grout had been left in a poor and dirty condition by the previous tenant. The ceramic tiled floor was installed throughout the Kitchen and through into the adjacent conservatory. Conscious this would affect future lettings she contacted Tile Doctor to see if we could help.
I paid a visit to the property to survey the floor and discuss how we would restore the Ceramic tiles and get them looking clean again. She was happy to hear we could help and agreed to my quote and we booked the work in for the following week. It would only take a day which suited her perfectly as she was keen to get the property back on the market.
Stroud is a lovely market town and in the centre of Gloucestershire. It is the main town in Stroud District and forms the centre for numerous surrounding market towns.
The Cotswold Area of Outstanding Natural Beauty surrounds the town, and the Cotswold Way path passes by it to the west, so it really is a desirable place to live with lots of lovely walks.
The first job was to protect all the walls and units to ensure they did not get splashed by the products we would be using. I then sprayed Tile Doctor Remove and Go all over the floor and the grout lines, this was left for a short time to dwell and get to work breaking down the dirt. The floor was then scrubbed using a black buffing pad fitted to a buffing machine finishing off by scrubbing the grout lines with a stiff brush. The soil released from the floor was then rinsed off with water and extracted with a wet vacuum. Once I was happy with the result the floors were speed dried with a blow heater. The alternative was to leave the floor overnight, but as time was of the essence speed drying was the best option.
Later that day the floor was dry, and I was able to seal the grout lines with Tile Doctor Ultra Seal. I used a pipette to apply the sealer directly to the grout to ensure maximum coverage. The tiles themselves did not require any sealant as ceramic tiles are sealed at the factory when they are produced. Grout being cementitious however does attract dirt and so sealing it will keep it looking fresh for some time to come and make it easier to clean.
The client was very pleased with the results and relieved she could re-let the house again. Now the floor was clean and much more attractive it would ensure she could achieve the best rental value.
I suggested she left a bottle of Tile Doctor Neutral Tile Cleaner for the new tenants as this would be the best product to keep the floor clean moving forward, you only need a small amount to dilute and it has a pleasant fresh fragrance. At least if the product is on site the tenant is more likely to keep the floor looking good and not resort to everyday household cleaners which eventually break down the grout and its’ seal. She thought this was a great idea.
Malcolm Crowther
Gloucester Tile Doctor
 Leisure Lounges
A Design That Flows Seamlessly
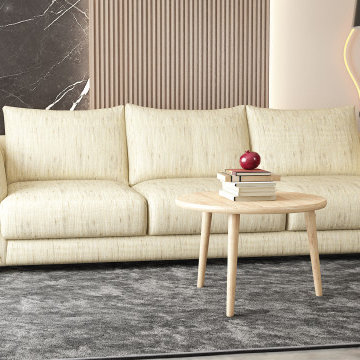
The Serene Sofa features a unique rounded silhouette that brings a soft, flowing aesthetic to any living space. Its clean, curved lines make it versatile enough to complement a variety of home styles, from classic to contemporary. The beauty of this design lies in its simplicity—it’s understated yet sophisticated, allowing it to blend effortlessly into your home without overpowering your existing décor. Named Serene for the peaceful bliss it evokes, this lounge offers a tranquil retreat in the comfort of your own home.
The Natural Choice
A standout feature of the Serene Sofa is its upholstery. We've carefully selected Warwick Linia fabric, known for its natural fibres, to enhance this design. This fabric isn’t just about appearance; it’s a practical choice for those with allergies or anyone who prefers the quality and feel of natural materials. The experience of sitting on the Serene Sofa is something special—it’s soft to the touch and extremely comfortable yet durable enough to withstand everyday life.
Australian Made and Designed To Last
At Leisure Lounges, we’re committed to supporting Australian manufacturing. The Serene Sofa is proudly Australian-made, crafted from the finest local materials. From its sturdy timber frame, to its robust steel spring base, and Dunlop Luxura foam cushioning backed by a Lifetime Warranty, every element of this lounge is designed to last. Our meticulous attention to detail and high standards ensure that the Serene Sofa is not only durable but also a timeless addition to your home.
Customisable to Suit Your Lifestyle
Every home is unique, which is why the Serene Sofa is fully customisable. Whether you need a spacious 4-seater or a more compact modular design, we can configure the Serene Sofa to fit your space perfectly. This flexibility ensures that, no matter your living situation, the Serene Sofa can be tailored to meet your needs. And our friendly staff are here to help you find exactly what you’re looking for, ensuring Serene meets your specific requirements. Our team is always up for a chat, and we take pride in offering personalised service to guarantee you get the perfect fit for your home and lifestyle.

 LEDER illumination Manufacturer
Elevating the Field: A Masterclass in Professional Sports Lighting
After two decades leading LED product development and global exports, I’ve learned that stadium lighting isn't just about brightness—it’s about precision, player comfort, and long-term economic viability.
Our latest installation showcased here represents the perfect synergy between advanced optical engineering and rugged durability. Here is why this project stands as a benchmark for modern sports infrastructure.
1. Professional-Grade Optical Precision
For this project, we didn't just "flood" the field with light. We engineered a solution:
Asymmetric Beam Control: We utilized custom-engineered lenses to direct light strictly onto the playing surface. This eliminates "sky glow" and light pollution for the surrounding community.
Anti-Glare Technology: By controlling the peak intensity angles, we’ve ensured that athletes can track the ball in the air without being blinded, a critical factor for high-speed sports performance.
Uniformity Excellence: The lighting distribution achieves a high uniformity ratio, eliminating dark spots and shadows that can lead to player injury.
2. Industrial-Strength Thermal Management
The secret to a 10-year lifespan isn't the LED chip; it's the heat dissipation.
Aero-Grade Heat Sinks: These fixtures feature high-purity aluminum housing with a vertical thermal flow design.
Longevity in Harsh Conditions: Designed to withstand extreme outdoor temperatures, the system ensures that lumen depreciation is kept to a minimum, protecting the client’s investment for years to come.
3. Global Compliance & Export Quality
From a trade perspective, we understand that reliability is the only currency that matters in international projects.
Certified Durability: The system carries full IP66 waterproof and IK08 impact ratings, making it resilient against heavy storms and physical impact.
International Standards: Fully compliant with CE, RoHS, and DLC Premium requirements, ensuring seamless integration into power grids worldwide and eligibility for green-energy subsidies.
4. The ROI: Efficiency Meets Sustainability
Switching to this high-efficiency LED system resulted in a 65% reduction in energy consumption compared to the previous metal halide installation. With integrated smart-control compatibility, the facility can now manage lighting levels based on usage, further accelerating the payback period.
The Bottom Line:
Lighting a sports facility is an investment in the community and the athletes. We don't just provide lamps; we provide a professional environment where the game can be played at its best, long after the sun goes down.
Are you looking to upgrade your facility to international standards? Let’s discuss how our 20 years of expertise can illuminate your next project.
Find the right local pro for your project
 The Myers Touch
In collaboration with the client’s architect, AR Design the layout of the kitchen was already in place. However, upon meeting the client it was clear she wanted a ‘wow’ island, symmetry in design and plenty of functional storage.
As well as a contemporary, family-friendly space it was also important the space that still respected the heritage of the house. The original walls of the property had many angled walls and featured some tight spaces, so careful consideration of SieMatic's cabinetry choices was given to ensure maximum functionality in those spaces. After much consideration, The Myers Touch specified SieMatic’s SC10 Cabinetry in a Provence Oak Laminate finish which was placed in a framed-style at the rear wall.
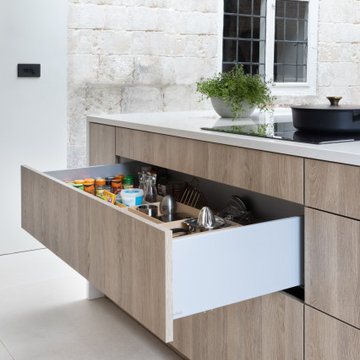
The same cabinetry was specified for under the island to create contrast with the new and original material features in the space. In order for the family to keep the kitchen uncluttered, careful planning of internal storage systems was considered in the form of using SieMatic’s internal Drawer boxes and their MultiMatic internal storage system which were used to store smaller items such as spices and sauces, as well whilst providing space for slide-out drawers and storage baskets.
To ensure an elegant yet ‘wow’ factor central island, The Myers Touch combined contrasting textures by using 30mm Silestone Eternal Calacatta natural stone, polished worktops with ‘waterfall island’ edges and a Corian solid surface back panel. The distinctive geometric patterned Corian panel in Cameo White looks particularly spectacular at night when the owner's turn on the architectural-toned lighting under the island.
Appliances chosen for the island included a sophisticated Elica Illusion extractor hood so it could be totally integrated in the new architectural space without visual distraction, a Siemens iQ500 Induction Hob with touch-slide control and a Caple Under-counter Wine cabinet.
To maximise every inch of the new space, and to ensure the owners had a place for everything, The Myers Touch also used additional cabinetry and storage options in the island such as extra deep drawers to store saucepans, cutlery, and everyday crockery.
The eye-catching Antique-bronze mirrored splashback not only helps to provide the illusion of extra space, but reinforces family ‘togetherness’ as it reflects and links the rear of the kitchen ‘snug’ area where family members can sit and relax or work when not in the main kitchen extension area.
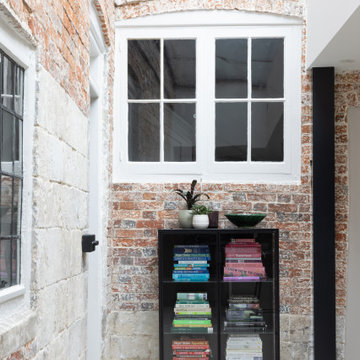
The original toned brickwork and 18th Century steel windows in the original part of the extension also helps to tell the story about the older part of the house which now juxtaposes to the new, contemporary kitchen living extension. A handy door was also included in the extension which leads to the garage on the main road for family convenience and over-flow storage.
Photography by Paul Craig (Reproduction of image by request only - joy@bakerpr.co.uk)
 Ernest M. Ferizi
German Embassy in Pristina - Kosovo, contracted the architecture office “Ferizi + Ferizi Architects” to plan and implement an Annex Office building for their purposes. As detached part of this building is designed the waiting area, as alone standing structure.
This Office Building is constructed by assembling of Eight used office containers that were delivered on trucks and set up after only a few hours on the basis of the LEGO principle, according to the planning on strip foundations.
By removing the flexible exterior wall panels, a large room of 115 m² was created, with the counter wall as a room partition between two office spaces, each with seven workstations as well as three counters for agents on one side and a room for visitors on the other side.
With this system, room solutions can be easily implemented in all dimensions.
The container, seen as a geometric shape, is a simple, octagonal, solid box.
The standardized perfection of its dimensions is striking: 2.44 meters wide, 2.59 meters high and 6.06 meters or 12.19 meters long.
Since its introduction in 1956 by the American transport entrepreneur Malcom McLean, the container has become a standardized transport module worldwide, whether on ships, trucks or construction sites.
The shipping containers have additionally revolutionized the transport industry, pushed the globalization noticeably, and thus directly or indirectly influenced all our lives.
But after only a few years, when the first overseas containers wore out, many engineers recognized the positive properties of used shipping containers for building houses, especially since they are robust, flexible, multifunctional and second-hand relatively inexpensive to purchase. The time has long passed by to treat containers exclusively as transport objects.
As a "measure of all things", containers can hardly be ignored in construction.
Their use is no longer limited to temporary use since school containers, information containers, office containers or entire residential buildings are now part of our everyday life in the construction industry.
However, current examples of the container architecture prove that even the most demanding solutions for container building are feasible. For their specific aesthetic and spatial qualities, containers also serve as design parameters for the development of new forms of architecture and urbanity.
The office building as an extension of the visa section, characterized by modern materials and contemporary aesthetics has been designed and built mainly as a low-energy building.
Extensive insulation to achieve a comfortable and sustainable constant temperature in the interior, high window quality and low energy consumption make the building energy-efficient.
The sophisticated lighting technology, networks, heating systems and air-conditioning systems are also components of this equipment.
It creates an overall harmonic picture and guarantees the highest standard in sustainable construction, taking into consideration the fact that environmentally friendly recycling and reutilization have become an increasingly important issue in our society.
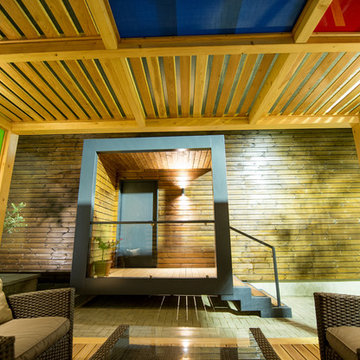
West and East side of the wooden facade is compact and has few openings, while the southern facade is completely open with lot of glass. Its spatial openness ensures a transparent, friendly work environment, which allows a lot of light into the space.
This openness allows an uninterrupted, pleasant and close-to-nature view from interior spaces into the beautiful garden. During the installation of sophisticated light sources in the garden, emphasis was not only put on functionality and security, but also on the beauty of the garden shown through the illumination in the evening.
Large, horizontal white “brisole” serve as external sun protection systems, mounted on the canopies of the entrance areas of the modular construction and the enclosure, adeptly cast shade on these areas and at the same time shape the entire architectural language.
While on one hand, the two quadratic ledges suspended in the air, are docked with steel stairs and match the wooden façade, lead the staff to their office space, the artful modern interior, on the other hand, perfectly unites the functionality, innovative technology, culture and positive effects on the employees' efficiency and wellbeing.
A lot of white, interjected by warm wooden and colored accents, determines the ambience.
In the case of the lighting solution, the mainly linear ceiling lighting is used as the overlapping design element both for the offices of the visa section as well as for the counters and the waiting area for the visitors.
They underline the puristic design in order to create a pleasant light for a desired general illumination and ensure optimal light conditions without causing disturbing reflections on the computer screens.
In addition, precisely positioned pendant luminaires are installed at the workstations, which ensure pleasant room brightness.
In the entrance area, the harmonic and uniform lighting effect from the ground highlights the integration of photography and architecture.
Photographs of landscapes, people, places, expressing unforgettable, impressive moments and memories have been lovingly engraved on 8 x 8cm square oak blocks.
The idea of an effective, impressive environment that stimulates and inspires the work was the premiss on which the whole design concept was based. Consequently, the modular construction was no longer viewed through its history of utilization and scars, but rather as a structure of work ambiance, art and elegance.
FERIZI + FERIZI Architects
Photo: Arben Llapashtica
 The Myers Touch
In collaboration with the client’s architect, AR Design the layout of the kitchen was already in place. However, upon meeting the client it was clear she wanted a ‘wow’ island, symmetry in design and plenty of functional storage.
As well as a contemporary, family-friendly space it was also important the space that still respected the heritage of the house. The original walls of the property had many angled walls and featured some tight spaces, so careful consideration of SieMatic's cabinetry choices was given to ensure maximum functionality in those spaces. After much consideration, The Myers Touch specified SieMatic’s SC10 Cabinetry in a Provence Oak Laminate finish which was placed in a framed-style at the rear wall.
The same cabinetry was specified for under the island to create contrast with the new and original material features in the space. In order for the family to keep the kitchen uncluttered, careful planning of internal storage systems was considered in the form of using SieMatic’s internal Drawer boxes and their MultiMatic internal storage system which were used to store smaller items such as spices and sauces, as well whilst providing space for slide-out drawers and storage baskets.
To ensure an elegant yet ‘wow’ factor central island, The Myers Touch combined contrasting textures by using 30mm Silestone Eternal Calacatta natural stone, polished worktops with ‘waterfall island’ edges and a Corian solid surface back panel. The distinctive geometric patterned Corian panel in Cameo White looks particularly spectacular at night when the owner's turn on the architectural-toned lighting under the island.
Appliances chosen for the island included a sophisticated Elica Illusion extractor hood so it could be totally integrated in the new architectural space without visual distraction, a Siemens iQ500 Induction Hob with touch-slide control and a Caple Under-counter Wine cabinet.
To maximise every inch of the new space, and to ensure the owners had a place for everything, The Myers Touch also used additional cabinetry and storage options in the island such as extra deep drawers to store saucepans, cutlery, and everyday crockery.
The eye-catching Antique-bronze mirrored splashback not only helps to provide the illusion of extra space, but reinforces family ‘togetherness’ as it reflects and links the rear of the kitchen ‘snug’ area where family members can sit and relax or work when not in the main kitchen extension area.
The original toned brickwork and 18th Century steel windows in the original part of the extension also helps to tell the story about the older part of the house which now juxtaposes to the new, contemporary kitchen living extension. A handy door was also included in the extension which leads to the garage on the main road for family convenience and over-flow storage.
Photography by Paul Craig (Reproduction of image by request only - joy@bakerpr.co.uk)
 highland
Renovating a bathroom is one of the most rewarding home improvement projects you can undertake. It adds immediate value to your property and elevates your daily routine. However, designing the perfect space requires balancing aesthetics with practical utility. At the heart of this balance is the vanity — it is the functional hub where you get ready each morning, a vital storage unit, and the visual centerpiece of the room.
To ensure you make the right investment, here is an in-depth look at choosing a bathroom vanity that blends style, longevity, and everyday functionality.
1. Assessing the Layout and Space Constraints
Before you fall in love with a specific design or finish, you must determine what your bathroom can physically handle. Scale is everything. A vanity that is too large disrupts traffic flow, while one that is too small gets lost visually and lacks adequate storage.
The next major step is determining the scale of your plumbing fixtures. Understanding how to choose a bathroom sink and vanity setup comes down to a simple choice: single or double sinks. Your choice will depend on who uses the bathroom and the overall footprint of the space.
Single Sink Vanities
Typically ranging from 20 to 48 inches (50–120 cm) in width, single vanities are the ideal choice for powder rooms, guest bathrooms, or small master suites. For very compact spaces, you can find narrower options starting around 16 inches (40 cm). The major advantage of a single-sink layout is that it provides more usable countertop space for cosmetics, toiletries, and decorative items. If you want to skip the guesswork and invest in a premium, beautifully handcrafted fixture, explore the luxury collections at Willow Bath and Vanity. From elegant single vanities to spacious double setups, their masterfully built furniture combines solid wood construction with elite styling to transform any bathroom into a spa-like retreat.
Double Sink Vanities
Usually starting at 48 inches (120 cm) and extending up to 72 inches (180 cm) or more, double vanities are a lifesaver for shared master bathrooms. They allow two people to get ready simultaneously without fighting for sink space. Keep in mind that a double vanity naturally reduces both cabinet storage space and countertop real estate since a second sink basin and plumbing lines take up substantial interior room.
Sink Types to Consider
The countertop is the workhorse of the bathroom. It regularly comes into contact with running water, toothpaste, soapy residue, and high-heat styling tools. Knowing how to choose a bathroom vanity top requires evaluating how much maintenance you are willing to perform against the look you want to achieve. Material Pros Cons Maintenance Level Quartz Highly durable, non-porous, stain and scratch-resistant. Offers the look of stone without the hassle. Premium pricing; can show seams on very large custom layouts. Low (No sealing required) Marble Timeless, elegant, and luxurious. Every slab features a completely unique veining pattern. Porous; prone to scratching, etching from acids, and water stains. Requires careful daily use. High (Requires regular sealing) Granite Naturally strong, heat-resistant, and chemically stable. Unique earthy patterns. Porous; can chip if subjected to heavy impacts. Medium (Requires occasional sealing) When coordinating your countertop, ensure it complements your bathroom’s floor tiles, shower surround, and plumbing hardware to maintain visual harmony.
4. Selecting the Core Vanity Style and Finish
Once the functional components are locked in, you can focus on the architectural style of the vanity base. The base dictates the design theme of the entire room.
Conclusion
Choosing the perfect vanity is a step-by-step process that combines precise measurements with your personal design taste. By taking careful measurements, choosing between a single- or double-sink setup, and picking a durable counter material like quartz or granite, you can transform your bathroom into a beautiful, organized retreat. Prioritize high-quality materials and smart craftsmanship, and your new vanity will look spectacular and serve your household reliably for years to come.
1. Assessing the Layout and Space Constraints
Before you fall in love with a specific design or finish, you must determine what your bathroom can physically handle. Scale is everything. A vanity that is too large disrupts traffic flow, while one that is too small gets lost visually and lacks adequate storage.
- Take Precise Measurements: measure the available width, depth, and height. Remember to account for surrounding fixtures.
- Check Clearance Zones: ensure there is enough clearance for the bathroom door to swing open, for shower glass doors to clear the vanity, and for drawers and cabinet doors to extend fully without hitting the toilet or walls.
-
Locate Existing Plumbing: moving pipes can significantly increase renovation costs. If you want a seamless installation, look for a vanity configuration that aligns easily with your current plumbing setup.
The next major step is determining the scale of your plumbing fixtures. Understanding how to choose a bathroom sink and vanity setup comes down to a simple choice: single or double sinks. Your choice will depend on who uses the bathroom and the overall footprint of the space.
Single Sink Vanities
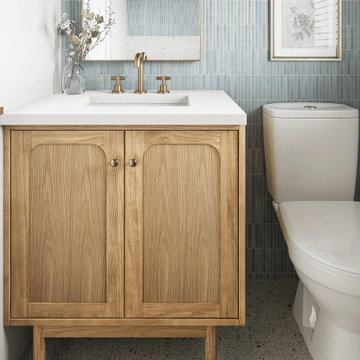
Typically ranging from 20 to 48 inches (50–120 cm) in width, single vanities are the ideal choice for powder rooms, guest bathrooms, or small master suites. For very compact spaces, you can find narrower options starting around 16 inches (40 cm). The major advantage of a single-sink layout is that it provides more usable countertop space for cosmetics, toiletries, and decorative items. If you want to skip the guesswork and invest in a premium, beautifully handcrafted fixture, explore the luxury collections at Willow Bath and Vanity. From elegant single vanities to spacious double setups, their masterfully built furniture combines solid wood construction with elite styling to transform any bathroom into a spa-like retreat.
Double Sink Vanities
Usually starting at 48 inches (120 cm) and extending up to 72 inches (180 cm) or more, double vanities are a lifesaver for shared master bathrooms. They allow two people to get ready simultaneously without fighting for sink space. Keep in mind that a double vanity naturally reduces both cabinet storage space and countertop real estate since a second sink basin and plumbing lines take up substantial interior room.
Sink Types to Consider
- Undermount: installed beneath the counter for a smooth, seamless surface that is incredibly easy to wipe down.
- Vessel: sits atop the counter like a decorative bowl. It makes a bold style statement but raises the overall height of the counter surface.
- Drop-In: features a lip that rests on the counter cutout. It is easier to install, but its edges can catch dirt.
-
The countertop is the workhorse of the bathroom. It regularly comes into contact with running water, toothpaste, soapy residue, and high-heat styling tools. Knowing how to choose a bathroom vanity top requires evaluating how much maintenance you are willing to perform against the look you want to achieve. Material Pros Cons Maintenance Level Quartz Highly durable, non-porous, stain and scratch-resistant. Offers the look of stone without the hassle. Premium pricing; can show seams on very large custom layouts. Low (No sealing required) Marble Timeless, elegant, and luxurious. Every slab features a completely unique veining pattern. Porous; prone to scratching, etching from acids, and water stains. Requires careful daily use. High (Requires regular sealing) Granite Naturally strong, heat-resistant, and chemically stable. Unique earthy patterns. Porous; can chip if subjected to heavy impacts. Medium (Requires occasional sealing) When coordinating your countertop, ensure it complements your bathroom’s floor tiles, shower surround, and plumbing hardware to maintain visual harmony.
4. Selecting the Core Vanity Style and Finish
Once the functional components are locked in, you can focus on the architectural style of the vanity base. The base dictates the design theme of the entire room.
- Freestanding vanities: sit directly on the floor, supported by legs or a solid kickboard base. This is a traditional, stable configuration that offers the maximum hidden cabinet and drawer storage space.
- Wall-Mounted (Floating) vanities: anchored directly onto the wall studs, leaving the floor underneath completely clear. Floating vanities are staples of modern, minimalist design. They create an illusion of space, making small rooms look larger, and make cleaning the bathroom floor incredibly easy.
- Console vanities: feature an open shelving design supported by a metal or wood frame. It offers a light, airy look reminiscent of a boutique hotel, though it sacrifices hidden storage.
Conclusion
Choosing the perfect vanity is a step-by-step process that combines precise measurements with your personal design taste. By taking careful measurements, choosing between a single- or double-sink setup, and picking a durable counter material like quartz or granite, you can transform your bathroom into a beautiful, organized retreat. Prioritize high-quality materials and smart craftsmanship, and your new vanity will look spectacular and serve your household reliably for years to come.
 Great American Landscapes
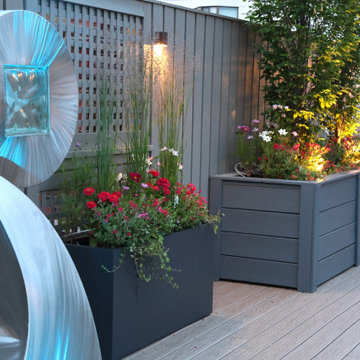
Being part of a team of that transformed a newly built DC rooftop deck into a year-round outdoor retreat required a seamless collaboration of talents. Together with the acclaimed Tomi Landis and Landis Architects-Builders, we added layered beauty to planters surrounding this gorgeous rooftop space, blending lush greenery, modern design, and thoughtful details. To achieve this, we introduced a mix of perennial shrubs, trees, and vibrant seasonal annuals, creating layers of texture and color that change with the seasons. A custom water feature and expertly placed lighting added both tranquility and ambiance, elevating the overall experience of the space.
Executing this project involved meticulous planning and precision logistics. All materials—including large containers, trees, shrubs, soil, and structural elements—were craned to the rooftop, ensuring no detail was overlooked. Dark, contemporary planters were selected to create a cohesive perimeter around the expansive deck, offering a polished and unified look while framing the breathtaking city views. With the rooftop fully exposed to the sun, plant selection focused on hardy, sun-loving species to ensure long-term vitality. Multiple crews worked in tandem to deliver a seamless installation, balancing efficiency with craftsmanship.
Beyond installation, our commitment to the space continues through tailored maintenance, ensuring the plantings thrive and evolve beautifully over time. This rooftop deck now serves as a vibrant oasis, offering its owners a perfect balance of urban sophistication and natural serenity.
 Mayer's Construction and Remodeling
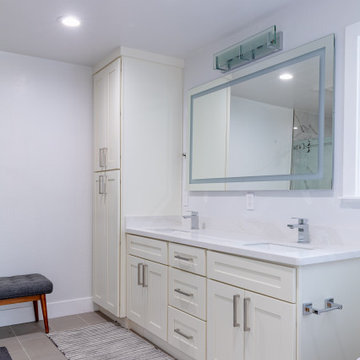
Our recent home remodeling project in San Jose, CA was truly one-of-a-kind. We worked closely with our client to create a space that was not only functional but reflected their unique style and personality. The project included a complete kitchen remodel, as well as two full bathroom remodels. We also demolished and replaced the flooring throughout the house, as well as completed a detailed painting job. To open up the space even more, we removed skylights and walls that were no longer needed.
Our team at Mayer's Construction was committed to ensuring that every aspect of this project was executed flawlessly. Project manager Mike Mayer worked tirelessly to ensure that the final result exceeded our client's expectations. We pride ourselves on open communication with our clients and this project was no exception. We worked with our client every step of the way to ensure that their needs were met and their vision was brought to life. We're proud to have created a space that our client can enjoy for years to come.

 Do Arch LLC
Our Process
Every siding project we complete follows a structured, detail-focused approach to ensure long-term performance and a clean, high-end finish:
1. Preparation & Protection
We begin by protecting all surrounding areas, including landscaping, walkways, and entry points. This ensures a safe and clean job site from start to finish.
2. Removal of Existing Siding
The old siding is carefully removed and disposed of. During this stage, we inspect the underlying structure for any signs of damage or moisture issues.
3. Surface Inspection & Repairs
We address any compromised sheathing or framing as needed to create a solid, secure base for the new installation.
4. Weather Barrier Installation
A proper moisture barrier is installed to improve energy efficiency and protect the home from water intrusion.
5. Siding Installation
We install Double 4.5" Encore Dutch Lap siding in Natural Clay with precision, ensuring straight lines, tight seams, and consistent spacing throughout.
6. Trim, Shutters & Moldings
All shutters and exterior moldings are carefully reinstalled and aligned, maintaining the home’s original character while enhancing the updated look.
7. Final Detailing & Cleanup
We complete all finishing touches, conduct a full quality check, and leave the property clean and ready to enjoy.
 Patagonia Development, LLC
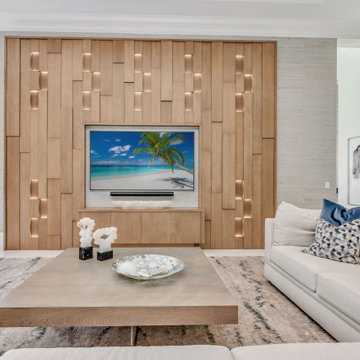
This custom made three dimensional feature wall made entirely with European oak in our shop has recessed LED lights, a matching credenza and is 12'x17'. The client—a highly successful luxury builder himself—had exceptionally high expectations. The team developed detailed CAD drawings and life-like renderings, ensuring every aspect of the design was clearly visualized. Over the course of three design meetings, the team refined the concept based on the client’s feedback until he was fully satisfied. During fabrication, the team replicated the approved design with precision, ensuring every detail was meticulously looked after. The team built the wall in sections, ensuring they could be transported efficiently and seamlessly assembled on-site. Before staining, the team fully assembled the wall to verify perfect alignment and eliminate any margin for error. When the final structure was put together on-site, the result was so seamless that it appeared to be carved from a single solid piece of wood.
 Kaestner Designs - Kitchens, Baths & Interiors
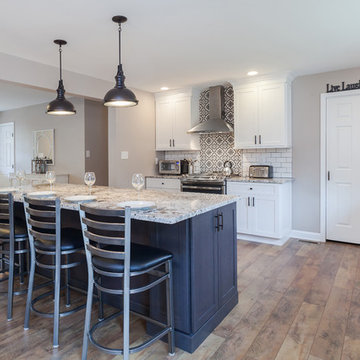
My concept for this kitchen was to collaborate with my client for this complete home renovation and ensure that the kitchen was the focal point of the open concept home. We strategically worked together to ensure proper wall dimensions, island placement and function, and symmetry to meet the wants and needs of my clients. White perimeter cabinetry helped to achieve a traditional feel for the space, while the gray stained island cabinetry allowed for a lovely transition to make the cozy kitchen work seamlessly with the distressed wide plank farmhouse style floating floor. In order to relieve the stark whiteness of the perimeter, I had suggested using contrast grout for the subway tile and the ultimate choice of cement tiles for the accent backsplash behind the range created a cathartic scene in this modestly stated design. Throw in some owls, books, and some fun pendant lighting and we were smiling through the finish line, together!!! My goal is to ensure that my client's needs are met and that their lives are improved through my designs. I hope you like the images of the new space!
 HOMEREDI
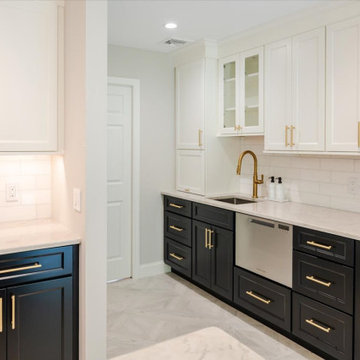
Imagine walking into a beautifully renovated kitchen in Great Neck, New York, where contemporary style meets classical elegance while adhering to kosher principles. The space is thoughtfully designed, blending modern functionality with timeless charm. This Exquisite Kitchen Extension features an open-concept layout that maximizes space and flow. A large central island takes center stage, providing ample prep space and serving as a gathering spot. The island is topped with pristine quartzite, offering both durability and a sleek, clean look.
The combination of Light & Dark cabinetry combines contemporary clean lines with classical details. High-gloss light top cabinets with Black Mat base cabinets and intricate molding create a sophisticated backdrop. Glass-fronted cabinets and open shelves offers the Home owner to showcase their elegant glassware and Collection of fine China, adding a touch of classic beauty.
The main attraction backsplash on top of the gas range is a beautiful mix of custom cut marble and gold alloy creating a show stopping focal point in this magnificent kitchen combined with classic subway tiles in a glossy finish framing the surround area around the Custom fabricated Hood. The countertops is a high-end and durable quartzite material that is both practical and stylish.
This kitchen is outfitted with state-of-the-art, kosher-compliant appliances. Stainless steel appliances blend seamlessly with the cabinetry. The double ovens and a separate cooktop with a sleek vent hood ensure efficiency while maintaining a clean look.
Ample LED Lighting was designed to create a very efficient and comfortable cooking and gathering areas that not only is very functional but also designed to promote family gathering. Recessed ceiling lights provide ample illumination, while a stylish pendant lights over the island add a touch of glamour. Under-cabinet lighting was installed to highlight the countertops and backsplash in several areas of the kitchen enhancing the kitchen’s elegance.
The special herringbone designed porcelain tile is a timeless material that resembles French high quality hardwood that was sourced from GENROSE Tile & Stone chosen for both its durability and aesthetic appeal. Warm tones and a classic herringbone pattern complement the kitchen’s overall design.
To adhere to kosher practices, the kitchen includes separate sinks for meat and dairy, and there is careful attention to ensuring that all surfaces and appliances can be easily cleaned and maintained. A designated area for meat and dairy preparation, along with ample storage solutions was our primary goal to ensure that the kitchen was both functional and respectful of kosher laws.
For finishing touches, the very talented Home Owner, chose Elegant hardware as seen in this images, such as brushed gold handles and knobs which add a great deal of sophisticated finish.
Overall, this contemporary yet classical kosher kitchen in Great Neck represents a perfect blend of modern functionality and timeless elegance, designed to be both beautiful and practical.
 Mayer's Construction and Remodeling
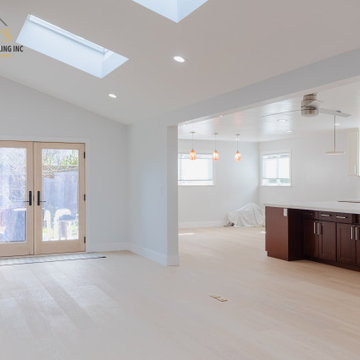
Our recent home remodeling project in San Jose, CA was truly one-of-a-kind. We worked closely with our client to create a space that was not only functional but reflected their unique style and personality. The project included a complete kitchen remodel, as well as two full bathroom remodels. We also demolished and replaced the flooring throughout the house, as well as completed a detailed painting job. To open up the space even more, we removed skylights and walls that were no longer needed.
Our team at Mayer's Construction was committed to ensuring that every aspect of this project was executed flawlessly. Project manager Mike Mayer worked tirelessly to ensure that the final result exceeded our client's expectations. We pride ourselves on open communication with our clients and this project was no exception. We worked with our client every step of the way to ensure that their needs were met and their vision was brought to life. We're proud to have created a space that our client can enjoy for years to come.
 Louline Interiors
Modern Luxe Bathroom
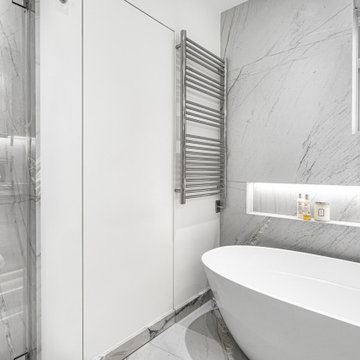
*A concealed toilette room door*
A harmonious blend of modern minimalism and refined luxury, this spa-inspired bathroom was designed to evoke a sense of serenity and sophistication. Wrapped in exquisite marble, every surface seamlessly flows, enhancing the sense of continuity and elegance.
The floating vanity, framed with natural stone and featuring under-cabinet lighting, creates a soft, ambient glow, adding to the airy and weightless aesthetic. A sculptural freestanding tub serves as the room’s centerpiece, reinforcing the spa-like atmosphere.
Thoughtfully integrated built-in shelving ensures functionality without disrupting the clean, streamlined design, while custom glass sconces add warmth and a touch of timeless elegance. The result is a sanctuary of relaxation and contemporary refinement, where every detail is meticulously curated for both beauty and practicality.
Bringing visions to life. ✨
This stunning project began with the plans of the renowned architect Philip Hazan, and I had the honor of turning those plans into reality by managing the project and handling the interior design.
It started with guiding the clients through selecting the perfect stone, materials, color palette, plumbing fixtures, and other essential elements. I worked closely to tweak the cabinetry and millwork designs to reflect their unique style while ensuring functionality.
For this ensuite transformation, I began by meticulously planning the execution—creating a detailed budget, timeline, and schedule—and selecting the best skilled teams to deliver an upscale result. From complete demolition to rebuilding from the skeleton, I was on-site every single day, ensuring every design detail was executed to perfection.

 Mayer's Construction and Remodeling
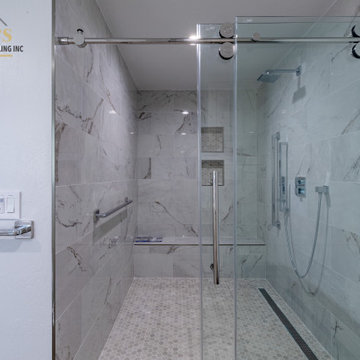
Our recent home remodeling project in San Jose, CA was truly one-of-a-kind. We worked closely with our client to create a space that was not only functional but reflected their unique style and personality. The project included a complete kitchen remodel, as well as two full bathroom remodels. We also demolished and replaced the flooring throughout the house, as well as completed a detailed painting job. To open up the space even more, we removed skylights and walls that were no longer needed.
Our team at Mayer's Construction was committed to ensuring that every aspect of this project was executed flawlessly. Project manager Mike Mayer worked tirelessly to ensure that the final result exceeded our client's expectations. We pride ourselves on open communication with our clients and this project was no exception. We worked with our client every step of the way to ensure that their needs were met and their vision was brought to life. We're proud to have created a space that our client can enjoy for years to come.
 Drury Design
THE SETUP
Client Background: Our clients, a couple who have transitioned into the empty nest phase, have cherished their home for over three decades without undergoing any significant renovations. With a newfound desire to adapt their living space to better suit their current lifestyle, they’ve embarked on a journey to reimagine their kitchen — the heart of their home. Their aspiration is to cultivate a serene, neutral-toned sanctuary on the first floor that seamlessly merges with their family room, ensuring a harmonious and inviting environment.
Design Inspiration: The renovation is inspired by the couple’s penchant for soft, calming neutrals, using their cherished family room and the kitchen’s existing tile flooring as the cornerstone for the color scheme. This approach aims to foster a sense of warmth and tranquility throughout.
Design Objectives:
Harmonize the kitchen with the family room by adopting a soothing, neutral color scheme, ensuring a seamless flow across the first floor.
Enhance kitchen functionality with thoughtfully designed cabinetry, providing a designated place for every item and maximizing storage efficiency.
Cultivate an inviting and comfortable atmosphere that reflects the homeowners’ desire for a calm and relaxing space.
Design Challenges:
The homeowners wish to retain the existing kitchen tile flooring and integrate it into a refreshed, modern design.
Accommodating a dining area spacious enough for family visits without compromising the kitchen’s open feel or functional layout.
Despite liking the current placement of plumbing and appliances, the homeowners aspire for a more open floor plan to facilitate better movement and interaction.
The need to amplify natural light in the kitchen, especially around the sink area, where existing lighting is insufficient.
Preserving the half-wall between the kitchen and family room, a feature the homeowners want to keep, while ensuring it complements the new design.
THE RENEWED SPACE
Design Solutions:
By choosing a neutral color palette that complements the existing tile, the design unifies the kitchen with the adjacent spaces. The tile’s grout was cleaned and restored, enhancing the floor’s appearance and integrating it seamlessly with the new kitchen aesthetic.
The inclusion of a larger island with seating for two, alongside maintaining a substantial dining table, was achieved by optimizing the spatial layout. This allowed for a sociable yet functional kitchen, accommodating large family gatherings without feeling crowded.
Minor adjustments to the kitchen’s layout maintained the preferred locations for plumbing and appliances while introducing an ‘open’ design concept. Strategic modifications, such as angling the pantry wall, improved the flow and accessibility within the space.
Replacing the garden window with a broader, standard window significantly increased natural light, transforming the sink area into a bright, welcoming space with enhanced views of the outdoors.
The decision to keep the half-wall was ingeniously leveraged to define the dining area while maintaining an open connection to the family room. This feature not only serves as a visual separator but also ties the two spaces together through the shared color scheme and design elements.
The homeowners are thrilled with their newly remodeled kitchen, which has become a hub of warmth and hospitality. Hosting a wedding shower and a birthday party, they have shared their renewed space with friends and family, who have been equally enamored. This remodel has not only met their functional and aesthetic desires but has also enriched their home with a fresh sense of serenity and joy.
The upstairs part of the home is shaping up nicely. Here’s their newly remodeled primary bathroom.
 Editor
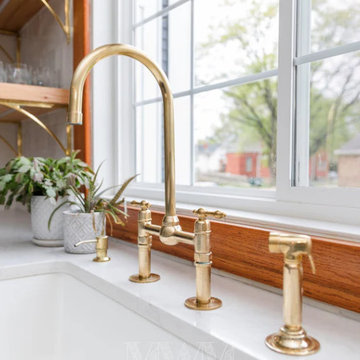
When it comes to selecting fixtures for your kitchen or bathroom, few options offer the blend of elegance, durability, and functionality like brass bridge faucets. These faucets, with their vintage charm and modern efficiency, bring a unique aesthetic and practical benefits to any space. This article explores the appeal of brass bridge faucets, their key features, benefits, and tips on how to choose and maintain them.
The Charm of Brass Bridge Faucets
Classic Aesthetic
Brass bridge faucets are known for their classic, timeless look. The warm, golden hue of brass adds a touch of luxury and sophistication, making these faucets a focal point in any kitchen or bathroom. Their vintage design can seamlessly blend with various décor styles, from rustic to contemporary.
Durability
One of the standout qualities of brass is its durability. Brass is resistant to corrosion and can withstand daily wear and tear, ensuring that your faucet remains in excellent condition for years. This makes brass bridge faucets a long-term investment for your home.
Versatility
Available in various finishes such as polished, brushed, or antique brass, these faucets can complement a wide range of design themes. Whether you want a shiny, reflective finish or a more subdued, matte look, there’s a brass bridge faucet to suit your taste.
Key Features of Brass Bridge Faucets
Elevated Bridge Design
The distinctive feature of bridge faucets is the elevated connecting pipe that links the hot and cold water lines. This bridge not only enhances the faucet's aesthetic appeal but also provides additional clearance, making it easier to clean large pots and pans or to accommodate larger sinks.
Dual Handles
Brass bridge faucets typically feature dual handles, allowing for precise control over water temperature. This functionality ensures a balanced mix of hot and cold water, providing you with the perfect temperature for your needs.
Classic Spout Designs
These faucets often come with high-arc or gooseneck spouts, which are both practical and stylish. The high spout design provides ample space for washing and filling containers, adding to the faucet’s functionality.
Benefits of Brass Bridge Faucets
Visual Appeal
Brass bridge faucets serve as a statement piece in any room. Their elegant design and warm finish add a touch of luxury and can elevate the overall aesthetic of your kitchen or bathroom.
Functionality
Beyond their beauty, brass bridge faucets are highly functional. The dual-handle design allows for precise temperature control, while the elevated bridge offers extra clearance for various tasks. This combination of form and function makes them a practical choice for busy households.
Hygienic Properties
Brass has natural antimicrobial properties, making it a hygienic choice for kitchen and bathroom fixtures. This can be particularly beneficial in spaces where cleanliness is paramount.
Choosing the Right Brass Bridge Faucet
Finish Options
When selecting a brass bridge faucet, consider the finish that best matches your existing décor. Polished brass offers a shiny, reflective surface, while antique brass provides a more vintage, weathered look. Brushed brass has a matte finish that hides fingerprints and water spots.
Coordination with Other Fixtures
Ensure that your brass bridge faucet complements other fixtures in your kitchen or bathroom. Coordinating the faucet with cabinet handles, lighting fixtures, and other hardware can create a cohesive and harmonious look.
Installation Requirements
Check the installation requirements before purchasing a brass bridge faucet. These faucets typically require a three-hole installation, so make sure your sink or countertop is compatible.
Maintenance Tips
Regular Cleaning
To maintain the luster of your brass bridge faucet, clean it regularly with a soft cloth and mild soap. Avoid using abrasive cleaners or scrubbers that can scratch the surface.
Preventing Water Spots
After cleaning, dry the faucet thoroughly to prevent water spots. This is particularly important for polished brass finishes, which are more prone to showing spots and fingerprints.
Addressing Tarnish
Brass can tarnish over time. To address this, use a brass cleaner or a mixture of lemon juice and baking soda to gently polish the surface. Regular polishing can keep your faucet looking its best.
Conclusion
Brass bridge faucets are a beautiful and functional addition to any home. Their timeless design, durability, and practicality make them a worthwhile investment for your kitchen or bathroom. By choosing the right finish and maintaining it properly, you can enjoy the elegance and charm of a brass bridge faucet for years to come. Embrace the classic appeal of brass and elevate the look of your home with this stunning fixture.
 Trinity Builders & Design, Inc.
Photo by Ori Sayag
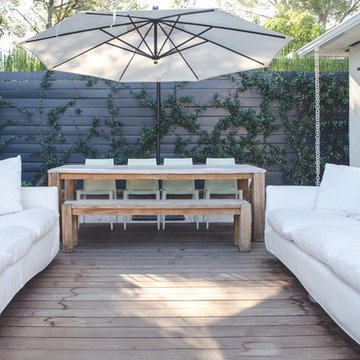
Epay wood deck, sandstone tile and midnight gray plaster come together very tastefully, making this backyard an elegant space to complement the house.
54