
Search results for "Evaluation unit" in Home Design Ideas

 Landis Architects | Builders
A large island and built-in bench provide seating for casual dining at the island and breakfast nook. French doors in the family room and full light door in the breakfast nook connect the open living space to the patio. The perimeter cabinets are white with Caesarstone Raven countertops. The island is blue with Caesarstone Calacatta Nuvo countertop. There is a prep sink on the island.

 Mitra Designs Studio Collaborative
All windows were re-positioned strategically to take full advantage of the view, for example, the living room new windows were positioned to take full advantage of the beautiful views of the property. The linear layout of the new windows in the living room was designed to frame and echo the panoramic view of the beautiful pond, farm fields, tree lines and the Adirondack mountains seen beyond As part of architectural and interiors design, here Mitra paid careful attention to use green building products as much as possible, which was done by selecting and using environmentally friendly and low VOC emission products, as well as sing salvaged products where possible, and using as much local products as possible.
Aside from using green building products as much as possible, another very important goal of this project was to dramatically improve and maximize the energy efficiency of this home. To meet the specific and mechanical needs, a team of independent expert energy efficient consultants was assembled at the early phase of the design, so that energy solutions were studied and evaluated to the fullest. After extensive energy audits and study of the existing conditions and after extensive evaluation and brainstorming between all parties, Mitra compiled all the information and findings and incorporated them in her design solutions. In short, during construction, extensive energy upgrading measures were achieved by constructing a tight insulating envelope on the interior sides of all exterior walls and roofs, installing the most efficient heating and cooling system along with the introduction of a geothermal system installation. All windows and doors were replaced by state of the art and modern design energy efficient product available in the market which also visually modernized the design and maximized the beautiful westerly view of the landscape outside. To further address the energy efficiency of this project Mitra designed a concrete and steel and concrete fireplace box for it so that it can act as a chase for the mechanical needs of this new super energy efficient fireplace unit. - Photo credit: Susan Teare
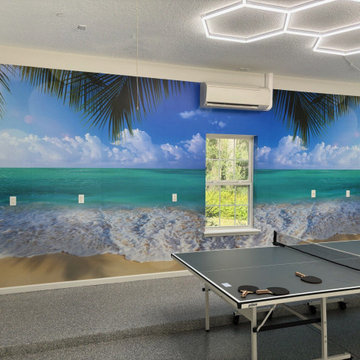
 Shane Matthews Wallpaper Installation Team
Expert commercial wallcovering services engineered for corporate offices, luxury retail storefronts, hospitality venues, healthcare facilities, and high-traffic commercial developments. Specializing in the heavy-duty installation of high-performance wall materials that unite structural durability, strict building safety compliance, and sophisticated design aesthetics.
As a master commercial wallcovering specialist and technical fitter, every project is executed in full alignment with commercial building standards while minimizing operational downtime. Our comprehensive technical workflow includes thorough substrate evaluation, wall repair and smoothing, specialized moisture-barrier priming, heavy-duty adhesive application, and vertical laser-plumb calibration across expansive wall spans. Handling the complete spectrum of heavy-duty commercial materials—including Type II and Type III vinyls, acoustic wall panels, dry-erase surfaces, natural wood veneers, and custom corporate murals—we deliver zero-tolerance seam matching, razor-sharp edge trimming around architectural reveals, and a pristine, long-lasting finish built for high-wear utility and enduring professional appeal.
Find the right local pro for your project
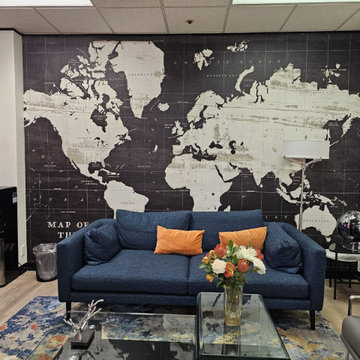 Shane Matthews Wallpaper Installation Team
Expert commercial wallcovering services engineered for corporate offices, luxury retail storefronts, hospitality venues, healthcare facilities, and high-traffic commercial developments. Specializing in the heavy-duty installation of high-performance wall materials that unite structural durability, strict building safety compliance, and sophisticated design aesthetics.
As a master commercial wallcovering specialist and technical fitter, every project is executed in full alignment with commercial building standards while minimizing operational downtime. Our comprehensive technical workflow includes thorough substrate evaluation, wall repair and smoothing, specialized moisture-barrier priming, heavy-duty adhesive application, and vertical laser-plumb calibration across expansive wall spans. Handling the complete spectrum of heavy-duty commercial materials—including Type II and Type III vinyls, acoustic wall panels, dry-erase surfaces, natural wood veneers, and custom corporate murals—we deliver zero-tolerance seam matching, razor-sharp edge trimming around architectural reveals, and a pristine, long-lasting finish built for high-wear utility and enduring professional appeal.

 ZeroEnergy Design
This renovated brick rowhome in Boston’s South End offers a modern aesthetic within a historic structure, creative use of space, exceptional thermal comfort, a reduced carbon footprint, and a passive stream of income.
DESIGN PRIORITIES. The goals for the project were clear - design the primary unit to accommodate the family’s modern lifestyle, rework the layout to create a desirable rental unit, improve thermal comfort and introduce a modern aesthetic. We designed the street-level entry as a shared entrance for both the primary and rental unit. The family uses it as their everyday entrance - we planned for bike storage and an open mudroom with bench and shoe storage to facilitate the change from shoes to slippers or bare feet as they enter their home. On the main level, we expanded the kitchen into the dining room to create an eat-in space with generous counter space and storage, as well as a comfortable connection to the living space. The second floor serves as master suite for the couple - a bedroom with a walk-in-closet and ensuite bathroom, and an adjacent study, with refinished original pumpkin pine floors. The upper floor, aside from a guest bedroom, is the child's domain with interconnected spaces for sleeping, work and play. In the play space, which can be separated from the work space with new translucent sliding doors, we incorporated recreational features inspired by adventurous and competitive television shows, at their son’s request.
MODERN MEETS TRADITIONAL. We left the historic front facade of the building largely unchanged - the security bars were removed from the windows and the single pane windows were replaced with higher performing historic replicas. We designed the interior and rear facade with a vision of warm modernism, weaving in the notable period features. Each element was either restored or reinterpreted to blend with the modern aesthetic. The detailed ceiling in the living space, for example, has a new matte monochromatic finish, and the wood stairs are covered in a dark grey floor paint, whereas the mahogany doors were simply refinished. New wide plank wood flooring with a neutral finish, floor-to-ceiling casework, and bold splashes of color in wall paint and tile, and oversized high-performance windows (on the rear facade) round out the modern aesthetic.
RENTAL INCOME. The existing rowhome was zoned for a 2-family dwelling but included an undesirable, single-floor studio apartment at the garden level with low ceiling heights and questionable emergency egress. In order to increase the quality and quantity of space in the rental unit, we reimagined it as a two-floor, 1 or 2 bedroom, 2 bathroom apartment with a modern aesthetic, increased ceiling height on the lowest level and provided an in-unit washer/dryer. The apartment was listed with Jackie O'Connor Real Estate and rented immediately, providing the owners with a source of passive income.
ENCLOSURE WITH BENEFITS. The homeowners sought a minimal carbon footprint, enabled by their urban location and lifestyle decisions, paired with the benefits of a high-performance home. The extent of the renovation allowed us to implement a deep energy retrofit (DER) to address air tightness, insulation, and high-performance windows. The historic front facade is insulated from the interior, while the rear facade is insulated on the exterior. Together with these building enclosure improvements, we designed an HVAC system comprised of continuous fresh air ventilation, and an efficient, all-electric heating and cooling system to decouple the house from natural gas. This strategy provides optimal thermal comfort and indoor air quality, improved acoustic isolation from street noise and neighbors, as well as a further reduced carbon footprint. We also took measures to prepare the roof for future solar panels, for when the South End neighborhood’s aging electrical infrastructure is upgraded to allow them.
URBAN LIVING. The desirable neighborhood location allows the both the homeowners and tenant to walk, bike, and use public transportation to access the city, while each charging their respective plug-in electric cars behind the building to travel greater distances.
OVERALL. The understated rowhouse is now ready for another century of urban living, offering the owners comfort and convenience as they live life as an expression of their values.

 Turbo Beds
Your student will earn top marks & fly to the top of their class while studying at this intricately detailed airplane motif study desk !!!
• Simulated cockpit controls enhance upper unit
• Top display shelf for treasured collectibles
• LED lighting directly above study surface
• Large Working Area
• Music player with Bluetooth, USB, Aux.
• Build in speakers
• Built In Drawers
• High Detail Finish
• 5 – year warranty
 Nakamoto Forestry
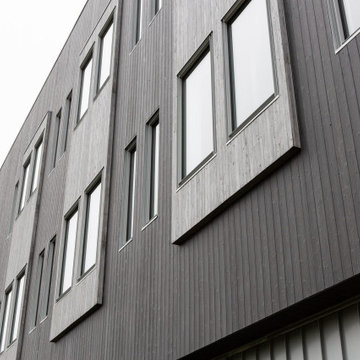
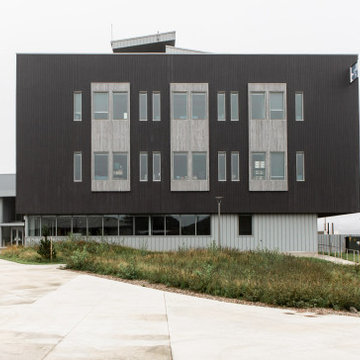
The Marine Studies Building is heavily engineered to be a vertical evaluation structure with supplies on the rooftop to support over 920 people for up to two days post a Cascadia level event. The addition of this building thus improves the safety of those that work and play at the Hatfield Marine Science Center and in the surrounding South Beach community.
The MSB uses state-of-the-art architectural and engineering techniques to make it one of the first “vertical evacuation” tsunami sites in the United States. The building will also dramatically increase the Hatfield campus’ marine science education and research capacity.
The building is designed to withstand a 9+ earthquake and to survive an XXL tsunami event. The building is designed to be repairable after a large (L) tsunami event.
A ramp on the outside of the building leads from the ground level to the roof of this three-story structure. The roof of the building is 47 feet high, and it is designed to serve as an emergency assembly site for more than 900 people after a Cascadia Subduction Zone earthquake.
OSU’s Marine Studies Building is designed to provide a safe place for people to gather after an earthquake, out of the path — and above the water — of a possible tsunami. Additionally, several horizontal evacuation paths exist from the HMSC campus, where people can walk to avoid the tsunami inundation. These routes include Safe Haven Hill west of Highway 101 and the Oregon Coast Community College to the south.

 Nakamoto Forestry
The Marine Studies Building is heavily engineered to be a vertical evaluation structure with supplies on the rooftop to support over 920 people for up to two days post a Cascadia level event. The addition of this building thus improves the safety of those that work and play at the Hatfield Marine Science Center and in the surrounding South Beach community.
The MSB uses state-of-the-art architectural and engineering techniques to make it one of the first “vertical evacuation” tsunami sites in the United States. The building will also dramatically increase the Hatfield campus’ marine science education and research capacity.
The building is designed to withstand a 9+ earthquake and to survive an XXL tsunami event. The building is designed to be repairable after a large (L) tsunami event.
A ramp on the outside of the building leads from the ground level to the roof of this three-story structure. The roof of the building is 47 feet high, and it is designed to serve as an emergency assembly site for more than 900 people after a Cascadia Subduction Zone earthquake.
OSU’s Marine Studies Building is designed to provide a safe place for people to gather after an earthquake, out of the path — and above the water — of a possible tsunami. Additionally, several horizontal evacuation paths exist from the HMSC campus, where people can walk to avoid the tsunami inundation. These routes include Safe Haven Hill west of Highway 101 and the Oregon Coast Community College to the south.
 Nakamoto Forestry
The Marine Studies Building is heavily engineered to be a vertical evaluation structure with supplies on the rooftop to support over 920 people for up to two days post a Cascadia level event. The addition of this building thus improves the safety of those that work and play at the Hatfield Marine Science Center and in the surrounding South Beach community.
The MSB uses state-of-the-art architectural and engineering techniques to make it one of the first “vertical evacuation” tsunami sites in the United States. The building will also dramatically increase the Hatfield campus’ marine science education and research capacity.
The building is designed to withstand a 9+ earthquake and to survive an XXL tsunami event. The building is designed to be repairable after a large (L) tsunami event.
A ramp on the outside of the building leads from the ground level to the roof of this three-story structure. The roof of the building is 47 feet high, and it is designed to serve as an emergency assembly site for more than 900 people after a Cascadia Subduction Zone earthquake.
OSU’s Marine Studies Building is designed to provide a safe place for people to gather after an earthquake, out of the path — and above the water — of a possible tsunami. Additionally, several horizontal evacuation paths exist from the HMSC campus, where people can walk to avoid the tsunami inundation. These routes include Safe Haven Hill west of Highway 101 and the Oregon Coast Community College to the south.
 Nakamoto Forestry
The Marine Studies Building is heavily engineered to be a vertical evaluation structure with supplies on the rooftop to support over 920 people for up to two days post a Cascadia level event. The addition of this building thus improves the safety of those that work and play at the Hatfield Marine Science Center and in the surrounding South Beach community.
The MSB uses state-of-the-art architectural and engineering techniques to make it one of the first “vertical evacuation” tsunami sites in the United States. The building will also dramatically increase the Hatfield campus’ marine science education and research capacity.
The building is designed to withstand a 9+ earthquake and to survive an XXL tsunami event. The building is designed to be repairable after a large (L) tsunami event.
A ramp on the outside of the building leads from the ground level to the roof of this three-story structure. The roof of the building is 47 feet high, and it is designed to serve as an emergency assembly site for more than 900 people after a Cascadia Subduction Zone earthquake.
OSU’s Marine Studies Building is designed to provide a safe place for people to gather after an earthquake, out of the path — and above the water — of a possible tsunami. Additionally, several horizontal evacuation paths exist from the HMSC campus, where people can walk to avoid the tsunami inundation. These routes include Safe Haven Hill west of Highway 101 and the Oregon Coast Community College to the south.

 User
Photo: Ten Ten Creative
Wet bar - transitional single-wall dark wood floor and brown floor wet bar idea in Dallas with shaker cabinets, black cabinets, black backsplash, subway tile backsplash and gray countertops
Wet bar - transitional single-wall dark wood floor and brown floor wet bar idea in Dallas with shaker cabinets, black cabinets, black backsplash, subway tile backsplash and gray countertops
 Spark Architecture & Interiors
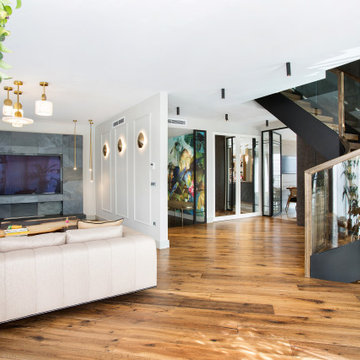
Located in Florya, Istanbul, Ihlamur Apartment House has a total living area of 280 square meters consisting of kitchen, living room, bathroom, bedroom, children’s room and youth room.
The harmony of wood and black is dominant in its kitchen. By applying separate lighting to the food preparation and eating areas, both adequate lighting is provided and the kitchen appears to be separated according to its purpose. In addition, the use of pendant lighting made both the ceiling higher and the environment feel spacious. Instead of a dark color, light marble tiles are used on the floor. Color balance is achieved in the kitchen with tiles that match the marble-patterned matte black color used in the under-counter cabinets.
Thanks to the glass doors, the spaces are made to feel wider and more spacious than they are. In addition, this feeling is supported by the mirror in the hallway. Dark wood and matt black color dominate the staircase, which is desired to form a whole with the design of the house.
As in almost the whole house, pendant lightings are preferred in the living room. The bookcase, consisting of circular shaped matte black shelves in the living room, gave an aesthetic appearance to the environment. In addition, the mirror passing through the middle of the circular form not only supports the aesthetic image, but also appeals to the perception of width, making the room feel wider. The design of the living room was completed with the television unit designed in gray tones and simply.
A richer design has been made in the bathroom. A simple yet elegant bathroom design has been achieved by utilizing the harmony of black and gold.
A surface-mounted rail fixture is used in the youth room. Thus, the need for light is met. An L-shaped desk is placed in the corner and a work area is created. In this way, space was saved and an environment suitable for other activities and activities that could be done in the room was provided.
Blue tones and lighter colors are preferred in the children’s room. The wall was evaluated in two parts and boring was avoided.
In the bedroom, it is more minimalistic compared to other areas. The perfect harmony of white and wood was used.

 FMSProjects, Inc.
Latch hardware in upper cabinets.
Inspiration for a mid-sized craftsman u-shaped medium tone wood floor eat-in kitchen remodel in San Francisco with a single-bowl sink, shaker cabinets, white cabinets, quartz countertops, green backsplash, ceramic backsplash, stainless steel appliances and a peninsula
Inspiration for a mid-sized craftsman u-shaped medium tone wood floor eat-in kitchen remodel in San Francisco with a single-bowl sink, shaker cabinets, white cabinets, quartz countertops, green backsplash, ceramic backsplash, stainless steel appliances and a peninsula


 Highland Builders LLC
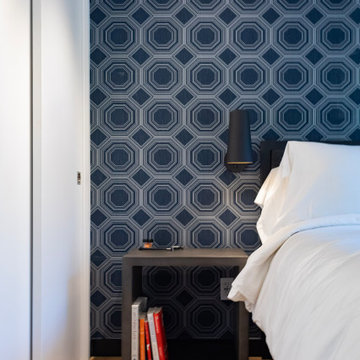
Powder room with glam geometric wallpaper complimented with a vessel sink rustic vanity with riveted hardware. Counter top is quartz Viatera - Truffle. Mirror framed wall mirror.
Ryan Hainey
 Armada Design & Build
When the family first reached out to Armada Design & Build, they were excited but apprehensive. They had just purchased a sprawling 2-acre lot in the peaceful enclave of Packwood, WA, envisioning their forever home. The lot, though rich with potential, was a blank canvas—a space once occupied by a dilapidated structure, now waiting to be transformed into a custom-built sanctuary. Turning this vacant lot into a warm, inviting home seemed daunting to them, but to us, it was an opportunity to create something truly special.
As a one-stop design and build firm, we knew this project was about more than construction—it was about understanding their dreams and translating them into a home blending contemporary charm with rustic elegance. Our journey began with in-depth discussions to explore their lifestyle, preferences, and vision. They wanted a modern, comfortable, and functional home full of character. With these insights, we began sketching a design that would rise from the blank slate.
The process started with site evaluations and architectural planning, considering the natural landscape, privacy needs, and creating a connection with the surroundings. They had many ideas but needed guidance to bring them to life. Our expertise helped them navigate every decision, from layout to details, ensuring each choice aligned with their vision.
The kitchen, the heart of the home, was designed for both style and functionality. Custom flat-panel glossy white cabinets provided ample storage with pull-out shelves for easy organization. MSI Quartz countertops became a striking focal point, while the Kraus Single Basin Stainless Steel Kitchen Sink and Hansgrohe Talis S² Pull-Down Kitchen Faucet added both style and practicality. Complementary Benjamin Moore paint harmonized the space with the stainless steel appliances. Elegant lighting fixtures, including a West Elm Mobile Chandelier and an Everly Quinn 8-Light Crystal Sputnik Sphere Chandelier, brought a sophisticated flair, perfect for daily living and entertaining.
Before breaking ground, we meticulously planned every aspect, ensuring the materials and brands would meet aesthetic desires and withstand the test of time. Top-of-the-line appliances, such as a KitchenAid gas range and fully integrated dishwasher, ensured the kitchen was both beautiful and functional. Every detail extended to the rest of the home. The laundry room combined practicality with style, featuring Architectural Surfaces tiles, Bravada Hardwood flooring, and sleek KES hardware.
In the master bathroom, we created a serene retreat with Green Needle Laminated panels, Kohler fixtures, and United Tile Fez by WOW tiles, transforming it into a luxurious sanctuary. Consistent Bravada Hardwood flooring throughout the home added cohesiveness, while thoughtful touches like NearMoon fixtures enhanced the spa-like ambiance.
The exterior was equally well-planned. Benjamin Moore paint highlighted architectural features, and custom doors and Milgard Windows welcomed natural light while connecting the indoors to the surrounding beauty. Outdoor spaces were designed as extensions of the home, featuring a hot tub, BBQ area, and EV charging station.
Throughout the process, we worked hand-in-hand with the family, ensuring every detail aligned with their vision. The result was a stunning custom home that exceeded expectations—a testament to quality, craftsmanship, and client satisfaction. What began as a blank canvas became a beautiful, warm home they can proudly call their own.


 Zelaya Properties LLC
We used: Custom cherry cabinetry in Arts & Crafts Shaker style by Kabinart in Boulder and Espresso stains. Liberty Hardware Venetian bronze 1-1/2" cabinet knobs. KitchenAid Architect II Series 22 CF counter-depth French door refrigerator. KitchenAid Architect Series II 27" convection single wall oven. KitchenAid 36" 6-burner dual fuel freestanding commercial-style range. KitchenAid Architect II Series 24" dishwasher. Sharp Insight Pro Series 24" built-in microwave drawer (Model #KB6524PS). Crystorama Solaris 12" wide pendant lights in English bronze. Granite countertops in Brown Fantasy. 3"x6" polished marble backsplash.
Paint colors:
Walls: Glidden Silver Cloud 30YY 63/024
Ceilings/Trims/Doors: Glidden Swan White GLC23
Robert B. Narod Photography

 Kestrel Shutters & Doors
These traditional closet doors feature smaller, fixed louvers in the top and colonial raised panels in the bottom and are custom sized to fit your openings.
To receive a quote on our Fixed Louver over Raised Panel doors follow the "Visit Store" link: below.

 Warm Timber Saunas & Wine Cellars
This previously unused attic space is now a sauna/yoga room. The left sauna wall follows the attic rafters down diagonally to allow a wider space for leg room on the twin sauna benches.
 highland
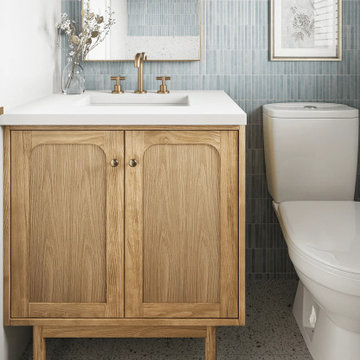
Renovating a bathroom is one of the most rewarding home improvement projects you can undertake. It adds immediate value to your property and elevates your daily routine. However, designing the perfect space requires balancing aesthetics with practical utility. At the heart of this balance is the vanity — it is the functional hub where you get ready each morning, a vital storage unit, and the visual centerpiece of the room.
To ensure you make the right investment, here is an in-depth look at choosing a bathroom vanity that blends style, longevity, and everyday functionality.
1. Assessing the Layout and Space Constraints
Before you fall in love with a specific design or finish, you must determine what your bathroom can physically handle. Scale is everything. A vanity that is too large disrupts traffic flow, while one that is too small gets lost visually and lacks adequate storage.
The next major step is determining the scale of your plumbing fixtures. Understanding how to choose a bathroom sink and vanity setup comes down to a simple choice: single or double sinks. Your choice will depend on who uses the bathroom and the overall footprint of the space.
Single Sink Vanities
Typically ranging from 20 to 48 inches (50–120 cm) in width, single vanities are the ideal choice for powder rooms, guest bathrooms, or small master suites. For very compact spaces, you can find narrower options starting around 16 inches (40 cm). The major advantage of a single-sink layout is that it provides more usable countertop space for cosmetics, toiletries, and decorative items. If you want to skip the guesswork and invest in a premium, beautifully handcrafted fixture, explore the luxury collections at Willow Bath and Vanity. From elegant single vanities to spacious double setups, their masterfully built furniture combines solid wood construction with elite styling to transform any bathroom into a spa-like retreat.
Double Sink Vanities
Usually starting at 48 inches (120 cm) and extending up to 72 inches (180 cm) or more, double vanities are a lifesaver for shared master bathrooms. They allow two people to get ready simultaneously without fighting for sink space. Keep in mind that a double vanity naturally reduces both cabinet storage space and countertop real estate since a second sink basin and plumbing lines take up substantial interior room.
Sink Types to Consider
The countertop is the workhorse of the bathroom. It regularly comes into contact with running water, toothpaste, soapy residue, and high-heat styling tools. Knowing how to choose a bathroom vanity top requires evaluating how much maintenance you are willing to perform against the look you want to achieve. Material Pros Cons Maintenance Level Quartz Highly durable, non-porous, stain and scratch-resistant. Offers the look of stone without the hassle. Premium pricing; can show seams on very large custom layouts. Low (No sealing required) Marble Timeless, elegant, and luxurious. Every slab features a completely unique veining pattern. Porous; prone to scratching, etching from acids, and water stains. Requires careful daily use. High (Requires regular sealing) Granite Naturally strong, heat-resistant, and chemically stable. Unique earthy patterns. Porous; can chip if subjected to heavy impacts. Medium (Requires occasional sealing) When coordinating your countertop, ensure it complements your bathroom’s floor tiles, shower surround, and plumbing hardware to maintain visual harmony.
4. Selecting the Core Vanity Style and Finish
Once the functional components are locked in, you can focus on the architectural style of the vanity base. The base dictates the design theme of the entire room.
Conclusion
Choosing the perfect vanity is a step-by-step process that combines precise measurements with your personal design taste. By taking careful measurements, choosing between a single- or double-sink setup, and picking a durable counter material like quartz or granite, you can transform your bathroom into a beautiful, organized retreat. Prioritize high-quality materials and smart craftsmanship, and your new vanity will look spectacular and serve your household reliably for years to come.
1. Assessing the Layout and Space Constraints
Before you fall in love with a specific design or finish, you must determine what your bathroom can physically handle. Scale is everything. A vanity that is too large disrupts traffic flow, while one that is too small gets lost visually and lacks adequate storage.
- Take Precise Measurements: measure the available width, depth, and height. Remember to account for surrounding fixtures.
- Check Clearance Zones: ensure there is enough clearance for the bathroom door to swing open, for shower glass doors to clear the vanity, and for drawers and cabinet doors to extend fully without hitting the toilet or walls.
-
Locate Existing Plumbing: moving pipes can significantly increase renovation costs. If you want a seamless installation, look for a vanity configuration that aligns easily with your current plumbing setup.
The next major step is determining the scale of your plumbing fixtures. Understanding how to choose a bathroom sink and vanity setup comes down to a simple choice: single or double sinks. Your choice will depend on who uses the bathroom and the overall footprint of the space.
Single Sink Vanities
Typically ranging from 20 to 48 inches (50–120 cm) in width, single vanities are the ideal choice for powder rooms, guest bathrooms, or small master suites. For very compact spaces, you can find narrower options starting around 16 inches (40 cm). The major advantage of a single-sink layout is that it provides more usable countertop space for cosmetics, toiletries, and decorative items. If you want to skip the guesswork and invest in a premium, beautifully handcrafted fixture, explore the luxury collections at Willow Bath and Vanity. From elegant single vanities to spacious double setups, their masterfully built furniture combines solid wood construction with elite styling to transform any bathroom into a spa-like retreat.
Double Sink Vanities
Usually starting at 48 inches (120 cm) and extending up to 72 inches (180 cm) or more, double vanities are a lifesaver for shared master bathrooms. They allow two people to get ready simultaneously without fighting for sink space. Keep in mind that a double vanity naturally reduces both cabinet storage space and countertop real estate since a second sink basin and plumbing lines take up substantial interior room.
Sink Types to Consider
- Undermount: installed beneath the counter for a smooth, seamless surface that is incredibly easy to wipe down.
- Vessel: sits atop the counter like a decorative bowl. It makes a bold style statement but raises the overall height of the counter surface.
- Drop-In: features a lip that rests on the counter cutout. It is easier to install, but its edges can catch dirt.
-
The countertop is the workhorse of the bathroom. It regularly comes into contact with running water, toothpaste, soapy residue, and high-heat styling tools. Knowing how to choose a bathroom vanity top requires evaluating how much maintenance you are willing to perform against the look you want to achieve. Material Pros Cons Maintenance Level Quartz Highly durable, non-porous, stain and scratch-resistant. Offers the look of stone without the hassle. Premium pricing; can show seams on very large custom layouts. Low (No sealing required) Marble Timeless, elegant, and luxurious. Every slab features a completely unique veining pattern. Porous; prone to scratching, etching from acids, and water stains. Requires careful daily use. High (Requires regular sealing) Granite Naturally strong, heat-resistant, and chemically stable. Unique earthy patterns. Porous; can chip if subjected to heavy impacts. Medium (Requires occasional sealing) When coordinating your countertop, ensure it complements your bathroom’s floor tiles, shower surround, and plumbing hardware to maintain visual harmony.
4. Selecting the Core Vanity Style and Finish
Once the functional components are locked in, you can focus on the architectural style of the vanity base. The base dictates the design theme of the entire room.
- Freestanding vanities: sit directly on the floor, supported by legs or a solid kickboard base. This is a traditional, stable configuration that offers the maximum hidden cabinet and drawer storage space.
- Wall-Mounted (Floating) vanities: anchored directly onto the wall studs, leaving the floor underneath completely clear. Floating vanities are staples of modern, minimalist design. They create an illusion of space, making small rooms look larger, and make cleaning the bathroom floor incredibly easy.
- Console vanities: feature an open shelving design supported by a metal or wood frame. It offers a light, airy look reminiscent of a boutique hotel, though it sacrifices hidden storage.
Conclusion
Choosing the perfect vanity is a step-by-step process that combines precise measurements with your personal design taste. By taking careful measurements, choosing between a single- or double-sink setup, and picking a durable counter material like quartz or granite, you can transform your bathroom into a beautiful, organized retreat. Prioritize high-quality materials and smart craftsmanship, and your new vanity will look spectacular and serve your household reliably for years to come.
3