
Search results for "Excessive return" in Home Design Ideas
 Tile Doctor Ltd
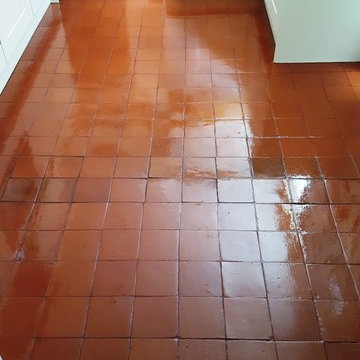
If you’re a first time buyer in the process of renovating or redecorating your new property, you may well discover some fantastic tiled floors hidden under your carpets. Certainly in my experience this happens quite often, so it came as no surprise when I got a call from a couple who had pulled up the carpet in the kitchen of their new house in Chester to find Quarry tiles, along with some fantastic Victorian tiles in the hallway.
While the Quarry tiles were in relatively good condition – having been shielded by carpet for many years – the couple were still understandably keen to get them back to looking their very best. I was more than happy to help them do just that.
Before beginning the restoration, I removed the kick boards from the kitchen cupboards so as not to damage them. I then applied a solution of our versatile, high alkaline cleaner, Tile Doctor Pro Clean, and let it soak into the tiles for a short period before scrubbing it in using a rotary machine fitted with a black scrubbing pad. Pro Clean is suitable for use on most natural stone tiles, including Quarry, Victorian and Slate, doing the trick to break down medium to heavy soil buildup.
The floor was then rinsed off with clean water, and the resulting slurry was promptly removed using a wet vac. I then left the floor dry out overnight.
I returned to the property the next morning, and started out by taking a couple of damp meter readings to make sure the floor was dry enough to seal. This is an essential task before sealing any tiled floor as even the smallest amount of excess moisture can cloud the sealer and damage its performance.
To seal the floor, I firstly applied one coat of Tile Doctor Colour Grow, which really brought out the natural reddish shades in the Quarry. As an impregnating sealer, Colour Colour fills the pores in the stone and prevents dirt from becoming ingrained. I followed the application of Colour Grow by applying three coats of Tile Doctor Seal and Go Extra. As a topical sealer, Seal and Go Extra forms an additional stain resistant seal on the surface of the tiles to protect against dirt and stains. It also gave the tiles a quality sheen finish as requested by the customer.
The customers were very happy with their newly restored Quarry tiled floor. They left the following feedback:
“We were both thrilled to bits with how nice the Quarry tiled kitchen floor looked, after being cleaned and sealed. Alastair was a pleasure to deal with and we would highly recommend him to anyone considering having their floor done.”
Alastair Robb
West Cheshire Tile Doctor
 Tile Doctor Ltd
Terrazzo is a quite a bit different from the natural stone floors we most commonly work with. It’s a type of flooring material that was made popular by Venetian builders in Italy in the 1920s, but is ultimately descended from styles of design that date back hundreds of years. A typical Terrazzo floor consists of chips of marble or granite set in concrete and polished to result in a smooth surface.
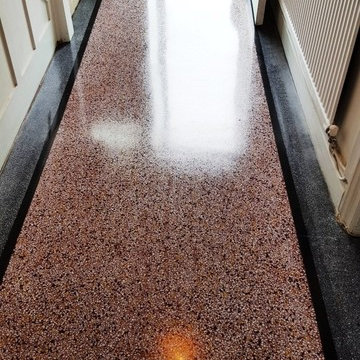
This Terrazzo floor, installed in the hallway of a property in Bridgend, South Wales, was in relatively good physical condition, but it had clearly lost its shine due to the build-up of dirt and muck over the years. In fact, it was first installed in around 1940! The owner was keen to have it rejuvenated to its best possible condition, so they asked me to come in to see what I could do.
My first course of action was to apply Tile Doctor Pro Clean liberally across the floor and leave it to dwell for a short period. This is a high alkaline cleaner that is designed to deal with light to moderate soil build-up, and to strip away any old sealer remaining on the floor. I scrubbed the product in using a black pad fitted to a rotary machine and vacuumed up the resulting cleaning with a wet-vac machine.
Next, to restore the shine to the floor, I undertook a process known as burnishing, which involves the application of diamond encrusted polishing pads. We will typically start with a Coarse grit pad to level off any uneven areas of the floor and grind down any particularly stubborn marks and stains. Then, we gradually refine the polish on the floor using Medium and Fine grit pads. A small amount of water is used as lubrication with each pad.
After I had finished applying the first three pads in our four-pad system, I gave the floor a thorough rinse and left it to dry overnight.
I returned to the property the next day and immediately ran some damp tests to check for excess moisture issues, which one might expect with an old floor like this one. Thankfully, the floor proved dry – and I could finish the burnishing process with the fourth and final Very Fine diamond encrusted burnishing pad, which achieved a beautiful shine finish.
Finally, I sealed the floor with three coats of Tile Doctor Colour Grow, an impregnating sealer which provides robust protection and enhances the coloured patterns in the Terrazzo.
As you can see from the photos above, the floor is looking so much more colourful and bright after a deep clean, polish and a fresh seal. The customer was over the moon!
Julian Iancono
South East Wales Tile Doctor

 TVL Creative Ltd.
These wonderful clients returned to us for their newest home remodel adventure. Their newly purchased custom built 1970s modern ranch sits in one of the loveliest neighborhoods south of the city but the current conditions of the home were out-dated and not so lovely. Upon entering the front door through the court you were greeted abruptly by a very boring staircase and an excessive number of doors. Just to the left of the double door entry was a large slider and on your right once inside the home was a soldier line up of doors. This made for an uneasy and uninviting entry that guests would quickly forget and our clients would often avoid. We also had our hands full in the kitchen. The existing space included many elements that felt out of place in a modern ranch including a rustic mountain scene backsplash, cherry cabinets with raised panel and detailed profile, and an island so massive you couldn’t pass a drink across the stone. Our design sought to address the functional pain points of the home and transform the overall aesthetic into something that felt like home for our clients.
For the entry, we re-worked the front door configuration by switching from the double door to a large single door with side lights. The sliding door next to the main entry door was replaced with a large window to eliminate entry door confusion. In our re-work of the entry staircase, guesta are now greeted into the foyer which features the Coral Pendant by David Trubridge. Guests are drawn into the home by stunning views of the front range via the large floor-to-ceiling glass wall in the living room. To the left, the staircases leading down to the basement and up to the master bedroom received a massive aesthetic upgrade. The rebuilt 2nd-floor staircase has a center spine with wood rise and run appearing to float upwards towards the master suite. A slatted wall of wood separates the two staircases which brings more light into the basement stairwell. Black metal railings add a stunning contrast to the light wood.
Other fabulous upgrades to this home included new wide plank flooring throughout the home, which offers both modernity and warmth. The once too-large kitchen island was downsized to create a functional focal point that is still accessible and intimate. The old dark and heavy kitchen cabinetry was replaced with sleek white cabinets, brightening up the space and elevating the aesthetic of the entire room. The kitchen countertops are marble look quartz with dramatic veining that offers an artistic feature behind the range and across all horizontal surfaces in the kitchen. As a final touch, cascading island pendants were installed which emphasize the gorgeous ceiling vault and provide warm feature lighting over the central point of the kitchen.
This transformation reintroduces light and simplicity to this gorgeous home, and we are so happy that our clients can reap the benefits of this elegant and functional design for years to come.
Find the right local pro for your project
 Tile Doctor Ltd
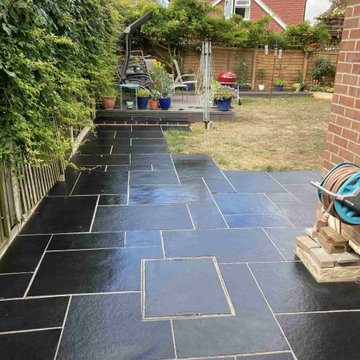
We were called out to look at this new Black Limestone patio in Ashford which was not looking as it should. The client had laid it himself but unfortunately had not managed to polish off all the grout from the surface of the Limestone thereby degrading the appearance of the stone.
Grout Smearing or Grout Haze is a common problem when it comes to tiling and this problem seems to be on the increase due to new grout formula’s which are tougher but dry a lot faster. Usually, the excess grout can be removed using a mild acid however it is not possible to do that on Limestone as this Stone is acid sensitive and as well as etching the stone can cause it to turn white. I know Tile Doctor has resolved a few jobs like this in the past for builders who do not always understand the unique characteristics of the stone.
I discussed with the client how Tile Doctor could help and gave him a quote for the work to be carried out. He was happy to go ahead so having consulted the weather forecast for a couple of dry days we agreed a date to return.
To remove the Grout Haze and clean the appearance of the Limestone I applied a Tile Doctor Brick and Patio Cleaner and worked it in with a coarse 400 grit diamond encrusted burnishing pad. The coarse pad does leave the stone looking a little rough, so the surface was then renovated using the finer burnishing pads of 800 and 1500 grit using water for lubrication. By using the pads in sequence, it gradually smooths the surface of the stone. Once done the tiles were rinsed with water and the soil removed with an industrial wet vacuum. The patio was looking good, the day was nice and bright, so we left the patio for a few hours to dry in the sun.
Once the stone was dry the patio was sealed with single coat of Tile Doctor Stone Oil which is an impregnating sealer that improves strength and restores colour to the stone.
Once dry the Stone Oil was followed by a coat of Tile Doctor Colour Grow sealer which like the Stone Oil penetrates the pores of the stone improving colour and adding protection. The treatment and combination of products transformed the appearance of the patio and provided the client with exactly the look he required.
As you can see from the after pictures the patio had a rich black colour and looked as it should. The client was over the moon with the result and was thankful that we had managed to rescue his work. Lesson learned for any future project he might take on, beware of grout haze!
Michael Conlon
South Kent Tile Doctor
 Tile Doctor Ltd
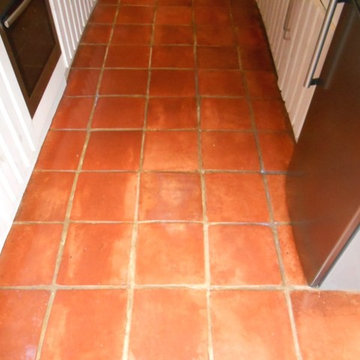
Not too long ago, I visited a house in the town of Fulwood in Preston, Lancashire. My client had a Terracotta tiled floor which had been neglected for many years and in their attempt to improve it had unfortunately been given some very poor advice by tile retailers, all of whom sold him different products, and each of which was unsuitable. Using these different products in succession had resulted in the depreciation of the floor’s texture and smoothness, in turn making the clay difficult to clean and maintain.
As per my usual process I ran a small test clean to demonstrate what could be done to improve the floor and I was commissioned to restore the floor back to its former glory.
I started by mixing a strong cleaning solution consisting of one part Tile Doctor Pro-Clean to three parts water. The solution was applied to the floor and left it to dwell for a short period. The high alkaline cleaner seeps into the pores of the tile getting underneath and lifting out the ingrained dirt and breaking down the old sealers. Then, I agitated the floor using a scrubbing pad fitted to a rotary floor machine before using a wet vacuum to suck up the resulting soiled solution.
There were a few paint marks dotted across the floor, but these were not noticeable until after I had given the Terracotta a deep clean. To remove the paint marks I used Tile Doctor Remove & Go, which is specially formulated to break down paint stains, adhesives and coatings. This product was used in combination with a steamer which, when applied directly to the tiles, helped to lift the paint out. Following this, I rinsed the entire floor a couple of times to remove any trace of cleaning product, and vacuumed up the excess moisture.
It’s always best to let the floor dry completely prior to sealing as applying sealer to a damp floor will affect the sealer. I left the house to allow this to take place overnight returning the next day. To get the best out of the Terracotta I sealed the floor using one coat of Tile Doctor Colour Grow, which is an impregnating sealer that soaks into the pores of the tile and acts as both as a bonding sealer enhancing the natural colours and darkening the clay (as requested by my client).
After the coat of Colour Grow had dried, I applied a further seven coats of Tile Doctor Seal & Go, which achieves a nice, low sheen Satin finish. Before leaving my happy client to enjoy his newly restored Terracotta floor, I made sure to provide some professional cleaning and long-term maintenance advice.
Russell Taylor
Lancashire Tile Doctor
 Tile Doctor Ltd
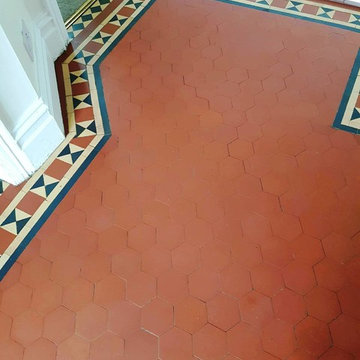
From The 1860s Victorian tiled floors started to appear in public buildings and by the 1890s they had become an essential feature in the most ordinary Victorian terraced houses. Although these floors fell out of fashion during the 1960s and ’70s, when many of them were covered over, they are now being rediscovered by their present owners and this is exactly what happened to my customer in the village of Littleover.
The customer had attempted to clean the floor by themselves but they couldn’t archive the result wanted, fortunately they discovered the Derbyshire Tile Doctor and after their call I went over and did a test for cleaning to make sure I can archive the needed results. They were happy with what they saw, so they booked me in to complete the work.
For cleaning the hallway I used a strong dilution of Tile Doctors Pro Clean which is strong multi-purpose high-alkaline cleaner. I left the Pro Clean to dwell for 10 minutes and then worked it in the tiles by using a strong black scrubbing pad fitted to my rotary machine. After scrubbing I rinsed the floor several times with clean water to remove any trace of cleaning product from the floor.
After successfully cleaning the hall I moved on to the porch which still had some old topical sealer on less walked areas. On these areas I had to use Tile Doctors own very effective stripper Remove and Go. Remove and Go has a long dwell time to remove any given sealer or wax so I left it to soak in for fifteen minutes followed by scrubbing it in with black pad fitted to rotary machine. The next step was to wash off the residue with water which was then removed using a wet vacuum.
Following this the tiles were given a rinse with Tile Doctor Grout Clean-up which is an acid based product that can remove grout smears and mineral deposits. Last step before sealing was to give the floor a thorough wash down with clean water to remove any cleaning product left on the tiles and then I left the floor to dry overnight.
Next day when I returned I used my damp tester to make sure that the floor is completely dry. Luckily for me floor was all dry and I started sealing. For sealing I used Tile Doctors Colour Grow Sealer which is colour enhancing breathable sealer. I applied 2 coats of the sealer and after every coat I polished off the excess with clean cotton cloths.
The result was really good and my customer was very happy with the work and said that now the floor looks transformed.
Tony Olmet
Derbyshire Tile Doctor
 TVL Creative Ltd.
These wonderful clients returned to us for their newest home remodel adventure. Their newly purchased custom built 1970s modern ranch sits in one of the loveliest neighborhoods south of the city but the current conditions of the home were out-dated and not so lovely. Upon entering the front door through the court you were greeted abruptly by a very boring staircase and an excessive number of doors. Just to the left of the double door entry was a large slider and on your right once inside the home was a soldier line up of doors. This made for an uneasy and uninviting entry that guests would quickly forget and our clients would often avoid. We also had our hands full in the kitchen. The existing space included many elements that felt out of place in a modern ranch including a rustic mountain scene backsplash, cherry cabinets with raised panel and detailed profile, and an island so massive you couldn’t pass a drink across the stone. Our design sought to address the functional pain points of the home and transform the overall aesthetic into something that felt like home for our clients.
For the entry, we re-worked the front door configuration by switching from the double door to a large single door with side lights. The sliding door next to the main entry door was replaced with a large window to eliminate entry door confusion. In our re-work of the entry staircase, guesta are now greeted into the foyer which features the Coral Pendant by David Trubridge. Guests are drawn into the home by stunning views of the front range via the large floor-to-ceiling glass wall in the living room. To the left, the staircases leading down to the basement and up to the master bedroom received a massive aesthetic upgrade. The rebuilt 2nd-floor staircase has a center spine with wood rise and run appearing to float upwards towards the master suite. A slatted wall of wood separates the two staircases which brings more light into the basement stairwell. Black metal railings add a stunning contrast to the light wood.
Other fabulous upgrades to this home included new wide plank flooring throughout the home, which offers both modernity and warmth. The once too-large kitchen island was downsized to create a functional focal point that is still accessible and intimate. The old dark and heavy kitchen cabinetry was replaced with sleek white cabinets, brightening up the space and elevating the aesthetic of the entire room. The kitchen countertops are marble look quartz with dramatic veining that offers an artistic feature behind the range and across all horizontal surfaces in the kitchen. As a final touch, cascading island pendants were installed which emphasize the gorgeous ceiling vault and provide warm feature lighting over the central point of the kitchen.
This transformation reintroduces light and simplicity to this gorgeous home, and we are so happy that our clients can reap the benefits of this elegant and functional design for years to come.
 Tile Doctor Ltd
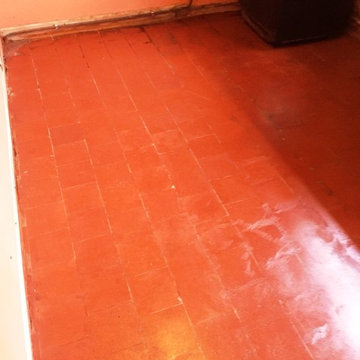
It’s been my experience that it’s not un-common to discover fantastic tiled floors hidden underneath an additional layer of flooring usually carpet or linoleum. This was the case with this property, situated in the town of Canley, Coventry, where the owner had found a Quarry tiled floor underneath Vinyl tiles which had been stuck down using an adhesive.
Quarry tiles are typically hard wearing and very durable and a sensible choice for flooring in high traffic areas of both residential and commercial properties, a tiled floor is of course a difficult to remove so it’s not surprising that tiles do get covered over rather than replaced during redecoration.
Taste’s change and like most property owners who unearth hidden tiled floors, my client was keen to restore them as an original feature. Despite the amount of adhesive and the poor state of the Quarry tiles, I was confident that the floor could be restored to new, so we agreed a date for me to come back to the property and complete the work.
The process of cleaning the Quarry tiled floor – including remove large amounts of adhesive – took a total of two days to complete.
I started by carefully removing the Vinyl tiles using a hand scraper which as you can imagine was a lot of manual effort and the adhesive proved quite difficult to remove. In the end I had to use a combination of a very coarse 50 grit pad fitted to a heavy rotary machine lubricated with water, to clear the area completely of the substance.
The resulting slurry was rinsed away, and the floor was then given a thorough acid rinse with Tile Doctor Grout Clean-Up. Grout Clean-Up is a cleaner which contains concentrated phosphoric acid, and is designed to dissolve minerals such as salts and cement left on the surface of the tile.
This was followed by a final thorough rinse with water, and the excess moisture was soaked up with a wet-vac machine.
After the cleaning process was complete, I left the floor to dry off completely for 24 hours. Upon my return to the house the next day, I checked for any dampness that could have damaged the performance of the sealer, thankfully, the floor was dry and ready to seal, and so I proceeded to apply several coats of Tile Doctor Seal & Go Extra.
Seal & Go Extra is a fully breathable sealer that provides for effective moisture transmission. It provides durable surface protection against dirt and stains, and is suitable for most kinds of internal, natural stone tiled floors, including Quarry, Victorian and Flagstone.
As you can see from the photographs the Quarry tiles came out really well and it’s hard to believe that this is the same floor.
Mick Gayton
Warwickshire Tile Doctor
 Tile Doctor Ltd
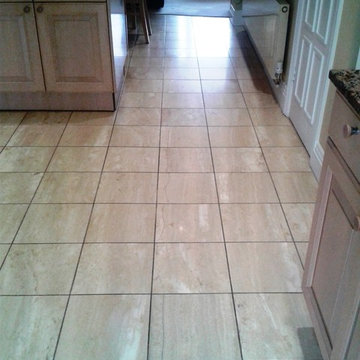
Every now and again, I get a call from a client located on the small peninsula of Sandbanks, Poole. Sandbanks, sometimes referred to as ‘Britain’s Palm Beach’, is known for its fantastic beach and high value property. My client asked me to take a look at a Travertine floor in his kitchen which was, in fact, more highly polished than he had wanted. The polished finish had worn off the travertine tiles where they had been walked on, leaving a dull trackway running down the centre of the kitchen. With its distinct characteristics, travertine is a popular choice for kitchen flooring, although it is also quite often used in bathrooms. In any case Travertine tiles will need regular maintenance to keep them looking their best.
Unfortunately, the kitchen floor must have experienced some sort of settlement or shrinkage as a long crack has appeared, which ran along the same line as the dull trackway. It is not uncommon for Travertine tiles to crack due to wear over time, or even bad fitting in some cases. While the exact cause of the crack was unclear, the homeowner concluded that the floor was certainly in need of restoration.
Repairing a crack in a Travertine tiled floor
Replacing the Travertine tiles was not an option due to a lack of spare tiles, so I opted instead to fill the crack in the floor using Harbro Stone Filler, an epoxy stone filler, matching the colour of the tile as closely as possible. I left this to set, before sanding down the excess filler.
My next action was to use a set of Tile Doctor Diamond burnishing pads to sand out any scratches and restore a more even shine to the floor, as per the client’s request. For polished stone, I recommend using a set of four burnishing pads applied in order: Coarse, Medium, Fine, and Very Fine. I used these one after the other with a little water to lubricate and restore the surface polish to the desired level.
Sealing a Travertine tiled floor
The next day, I returned to seal the floor with a couple of coats of Tile Doctor Colour Grow sealer. Colour Grow is a colour enhancing, impregnating sealer which penetrates deeply into the pores of the stone, thereby preventing dirt from becoming ingrained within. This particular sealer also enhances the natural colours within the Travertine tile, whilst also providing long term durable protection.
Although the crack could not be made to disappear completely, its appearance was much improved. The customer was also very pleased with the long-lasting lower sheen provided, describing it as “the finish I had wanted in the first place when the tiles were fitted”.
 Tile Doctor Ltd
Bridgwater is known to be one of Somerset’s liveliest towns. With a history dating back over 1000 years, it has many traditions, including a carnival which happens every November, and is hailed as the world’s largest illumination procession.
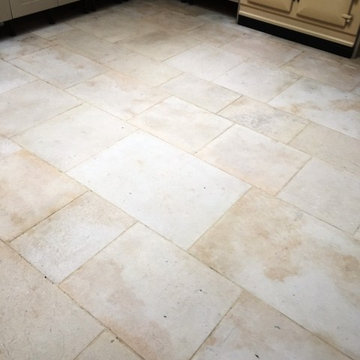
What wasn’t looking lively, however, was this Limestone tiled kitchen floor at a house in the town. It had been laid five years previously but at the time of laying hadn’t been sealed with adequate amounts of sealer.
As a result, the Limestone had absorbed a lot of wet footprints and other dirty stains. The sealer simply broke down after a while, leaving the homeowner with a floor that never looked clean no matter how much they cleaned it – using all kinds of products. In fact, the tiles looked blackened and mouldy, as you can see in the photos below.
It was time for the homeowner to seek out professional assistance, so she decided to contact her local Tile Doctor. I was asked to completely restore the look of the floor – something the homeowner had deemed impossible at this point.
In practice, I knew the floor could be restored using the right products and methods including a really deep clean and resealing with the right type of sealer for these tiles.
I scrubbed in Tile Doctor Remove and Go, which is a powerful coatings remover which draws out ingrained stains and strips away any old sealer remaining on the tiles. The floor was then rinsed thoroughly with plain water to neutralise it, and the resulting soiled solution was extracted using a wet vacuum. I repeated the process on stubborn areas, eventually transforming the floor back to its natural and clean state.
I allowed the Limestone to dry out completely overnight before returning to the property to seal the tiles. This is important as the slightest amount of excess moisture can damage the performance of the sealer, and we would’ve been back to square one!
After checking with a damp meter, I could see everything was fine, so I proceeded to seal the floor with Tile Doctor Colour Grow, which is not only a robust impregnating sealer that will protect the floor going forward but also enhancing the natural colours in the stone at the same time.
In the space of two days, the Limestone tiles had been completely transformed. Now it had been properly sealed, the floor will be much easier to clean and therefore should stay looking great for a long time to come. The customer was very happy to have finally resolved the problem with some assistance from the Somerset Tile Doctor!
Dave Hurst
Somerset Tile Doctor
 Tile Doctor Ltd
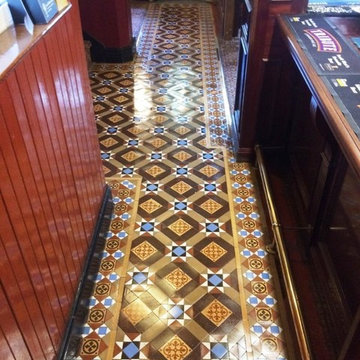
Here’s a really interesting commercial job for you, which I recently completed in the town of Hinckley, Leicestershire. I was asked to take a look at a Victorian Geometric and Encaustic tiled floor in the historic Queen’s Head pub.
This floor is over a century old and although in good condition for its age had suffered significant wear over the years, along with some cracked tiles and slight inherent moisture issues. What the pub landlord requested was a restorative clean to alleviate the aesthetically damaging effect of the wear, and to enhance the natural colours of the stone. I was also asked to seal the floor following the clean to achieve a semi-gloss finish.
The first step in the cleaning process was to mix a strong solution of one part Tile Doctor Pro-Clean to four parts clean water. Pro-Clean is a high alkaline cleaner which also contains stripping properties, allowing it to break down old sealer and tackle heavy soil build-up. The solution was applied to the floor and left to dwell for 15 minutes, giving it times to seep into the stone, get underneath the dirt and lift it to the surface.
I addressed several paint spots and areas suffering from glue contamination by using Tile Doctor Remove & Go, which is specially formulated to break down paint and adhesives on unpolished natural stone floors, amongst others. The entire floor was then scrubbed using a special floor cleaning pad, and the resulting slurry was vacuumed away using a wet-vac machine.
The final issue to deal with was the inherent efflorescence staining. This was treated using Tile Doctor Grout Clean-Up, an acid-based product which removes not just efflorescence but also grout haze, mineral deposits, and rust stains. The solution here was one part Grout Clean-Up diluted with four parts water.
After completing the clean, I thoroughly rinsed the floor with clean water to remove any trace of cleaning product and dried the floor as much as possible with a wet vacuum, then before leaving for the day i installed a couple of air movers to assist with drying overnight.
Upon my return the following day, I checked the floor for any excess moisture before sealing it with our topical, semi-gloss finish sealer, known as Seal & Go Extra which due to its formula is ideal for external or old internal floors where there is unlikely to be damp from membrane.
This unique product provides excellent protection, and allows the tiles to breath where floors are suffering from inherent moisture issues. It is suitable for both internal and external use, on Victorian floor tiles, Sandstone, Flagstones, Terracotta, and rough Slate.
As you can see from the photo, I was able to fulfil my client’s request to a high standard, bringing the pub’s old yet characterful Victorian tiled floor back to life again.
Kay Sylvester
Leicestershire Tile Doctor

 FLOORIANS
Natural colour sisal carpet with black edging on wood stairs. Custom workmanship,
Example of a large classic wooden straight staircase design in Toronto with wooden risers
Example of a large classic wooden straight staircase design in Toronto with wooden risers
 TVL Creative Ltd.
These wonderful clients returned to us for their newest home remodel adventure. Their newly purchased custom built 1970s modern ranch sits in one of the loveliest neighborhoods south of the city but the current conditions of the home were out-dated and not so lovely. Upon entering the front door through the court you were greeted abruptly by a very boring staircase and an excessive number of doors. Just to the left of the double door entry was a large slider and on your right once inside the home was a soldier line up of doors. This made for an uneasy and uninviting entry that guests would quickly forget and our clients would often avoid. We also had our hands full in the kitchen. The existing space included many elements that felt out of place in a modern ranch including a rustic mountain scene backsplash, cherry cabinets with raised panel and detailed profile, and an island so massive you couldn’t pass a drink across the stone. Our design sought to address the functional pain points of the home and transform the overall aesthetic into something that felt like home for our clients.
For the entry, we re-worked the front door configuration by switching from the double door to a large single door with side lights. The sliding door next to the main entry door was replaced with a large window to eliminate entry door confusion. In our re-work of the entry staircase, guesta are now greeted into the foyer which features the Coral Pendant by David Trubridge. Guests are drawn into the home by stunning views of the front range via the large floor-to-ceiling glass wall in the living room. To the left, the staircases leading down to the basement and up to the master bedroom received a massive aesthetic upgrade. The rebuilt 2nd-floor staircase has a center spine with wood rise and run appearing to float upwards towards the master suite. A slatted wall of wood separates the two staircases which brings more light into the basement stairwell. Black metal railings add a stunning contrast to the light wood.
Other fabulous upgrades to this home included new wide plank flooring throughout the home, which offers both modernity and warmth. The once too-large kitchen island was downsized to create a functional focal point that is still accessible and intimate. The old dark and heavy kitchen cabinetry was replaced with sleek white cabinets, brightening up the space and elevating the aesthetic of the entire room. The kitchen countertops are marble look quartz with dramatic veining that offers an artistic feature behind the range and across all horizontal surfaces in the kitchen. As a final touch, cascading island pendants were installed which emphasize the gorgeous ceiling vault and provide warm feature lighting over the central point of the kitchen.
This transformation reintroduces light and simplicity to this gorgeous home, and we are so happy that our clients can reap the benefits of this elegant and functional design for years to come.
 Tile Doctor Ltd
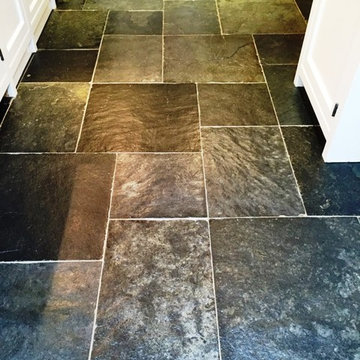
These photographs below are of a Slate Tiled Kitchen floor taken at a customer’s house in Henley-on-Thames which, as its name suggests, sits alongside the River Thames in Oxfordshire. My client’s Slate kitchen floor had recently been cleaned with unsuitable cleaning products which I suspect impacted the sealer leaving it looking dull. Sealers really to improve the look of a stone floor so unsurprisingly once the sealer had been damaged my client had been unable to find a cleaning product that could have any kind of positive effect on the tiles.
It’s fairly well known that many supermarket quality cleaners are only really designed for use on Ceramic or Porcelain tiled floors as they contain acids which strip away at sealers and acid sensitive stone floors, leaving the stone beneath vulnerable. So your select a cleaning product for your floor always read the small print on the back of the label and make sure you avoid anything that mentions not for use on acid sensitive stone; belter still Tile Doctor have a number of products for cleaning tiled floors including Neutral Cleaner and Stone Soap.
To clean the floor and remove any remaining sealer I first made a strong dilution of Tile Doctor Pro Clean which is a strong alkaline cleaner and then spread this over the floor, leaving it to dwell. This allows the cleaner to seep into the slate and get underneath, breakdown sealers and start to lift out ingrained dirt.
Following a dwelling period of roughly ten minutes, I agitated the floor periodically with a rotary machine fitted with a black scrubbing pad and scrubbed along the grout lines with a stiff grout brush. I then used a wet vacuum to extract the resultant slurry away and then followed up by rinsing the floor with clean water, and once again vacuumed up the residue.
Any stubborn areas were retreated until I was happy with the floor and then I left the floor to dry off completely overnight, in preparation for sealing the following day.
Upon my return to the house the following day, I ran some damp tests on different parts of the floor to check for any excess moisture which could potentially damage the performance of the sealer. Once I was satisfied that the floor was completely dry, I proceeded to seal the tiles using Tile Doctor Seal & Go. This will provide a robust surface seal for the future, along with an aesthetically pleasing low-sheen finish.
This sealer works particularly well on Slate tiles and, being a water-based sealant, additionally Seal & Go does not emit an unpleasant smell as it dries. Slate is quite a porous stone so I applied six coats of seal to provide long-lasting protection.
Barry Woodward
Oxfordshire Tile Doctor
 TVL Creative Ltd.
These wonderful clients returned to us for their newest home remodel adventure. Their newly purchased custom built 1970s modern ranch sits in one of the loveliest neighborhoods south of the city but the current conditions of the home were out-dated and not so lovely. Upon entering the front door through the court you were greeted abruptly by a very boring staircase and an excessive number of doors. Just to the left of the double door entry was a large slider and on your right once inside the home was a soldier line up of doors. This made for an uneasy and uninviting entry that guests would quickly forget and our clients would often avoid. We also had our hands full in the kitchen. The existing space included many elements that felt out of place in a modern ranch including a rustic mountain scene backsplash, cherry cabinets with raised panel and detailed profile, and an island so massive you couldn’t pass a drink across the stone. Our design sought to address the functional pain points of the home and transform the overall aesthetic into something that felt like home for our clients.
For the entry, we re-worked the front door configuration by switching from the double door to a large single door with side lights. The sliding door next to the main entry door was replaced with a large window to eliminate entry door confusion. In our re-work of the entry staircase, guesta are now greeted into the foyer which features the Coral Pendant by David Trubridge. Guests are drawn into the home by stunning views of the front range via the large floor-to-ceiling glass wall in the living room. To the left, the staircases leading down to the basement and up to the master bedroom received a massive aesthetic upgrade. The rebuilt 2nd-floor staircase has a center spine with wood rise and run appearing to float upwards towards the master suite. A slatted wall of wood separates the two staircases which brings more light into the basement stairwell. Black metal railings add a stunning contrast to the light wood.
Other fabulous upgrades to this home included new wide plank flooring throughout the home, which offers both modernity and warmth. The once too-large kitchen island was downsized to create a functional focal point that is still accessible and intimate. The old dark and heavy kitchen cabinetry was replaced with sleek white cabinets, brightening up the space and elevating the aesthetic of the entire room. The kitchen countertops are marble look quartz with dramatic veining that offers an artistic feature behind the range and across all horizontal surfaces in the kitchen. As a final touch, cascading island pendants were installed which emphasize the gorgeous ceiling vault and provide warm feature lighting over the central point of the kitchen.
This transformation reintroduces light and simplicity to this gorgeous home, and we are so happy that our clients can reap the benefits of this elegant and functional design for years to come.
 Tile Doctor Ltd
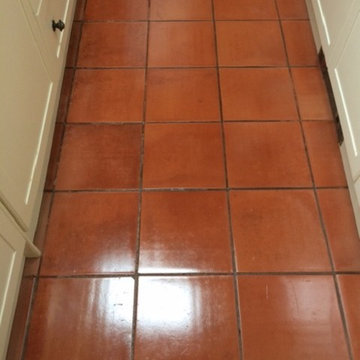
Terracotta is an interesting type of stone manufactured using a variety of techniques dependant on the country of origin which leads to a number of differences such as Spanish Terracotta being less porous than its Mexican counterpart: the former is semi-hand made and finished in a factory kiln, while the latter is completely handmade. Spanish Terracotta is therefore a lot less than porous and ultimately, of a higher quality.
But despite the Spanish Terracotta being less porous, and therefore being less prone to ingrained dirt, it still, like any other stone, needs regular maintenance to keep it looking smart. In the tiling trade, we quite often refer to this as a good old fashioned ‘Clean and Seal’ and this is exactly what was requested by this property owner in Halifax, for their Spanish Terracotta tiled floors in the kitchen and adjacent hallway.
I cleaned both sets of Terracotta tiles using the same process, which involved the application of our reliable alkaline cleaner known as Tile a Doctor Pro Clean, diluted with five parts of warm water. Once the solution had been left to dwell for a short period, it was scrubbed into the tiles to remove all dust, dirt, and general muck. This created a slurry of cleaning residue, which I promptly soaked up using a wet vac. A wet vac machine is an essential tool when it comes to cleaning porous tiles since, unlike a traditional mop and bucket, it sucks the excess trapped dirt out of the clay and thus provides a superior clean.
Following this, I applied a small amount of our heavy duty remover, known as Tile Doctor Remove & Go, to deal with some of the more stubborn stains and paint splashes, before rinsing with clean water and wet vaxing in a similar fashion to before.
Once the clean had been completed I left the tiles to dry completely. This can take 12 to 24 hours depending on numerous factors including whether a Damp proof Membrane and underfloor heating has been installed which can really help reduce drying times. Letting the tiles dry completely before sealing is paramount as moisture can cloud the sealer and affect its performance.
Upon my return to the property I ran some quick damp tests, which revealed the tiles were ready to be sealed. I then applied several coats of Tile Doctor Seal and Go, our topical sealer which provides a satin finish and accentuates colour. A new coat of this product is recommended every six months on Terracotta to ensure the continuous protection of the tiles’ soft clay particles.
My customer was extremely pleased with her refreshed Terracotta tiles. It goes to show what a big difference a bit of regular maintenance can make. I advised the customer that an everyday cleaner called Tile Doctor pH Neutral cleaner can also be used regularly to keep the tiles looking great without damaging the sealer.
Nigel Stoker
North West Yorkshire Tile Doctor

 CRC Builders Inc.
The homeowner wanted something different, out of the ordinary, as an entertainment center and bar combination that would add an unusual dimension to watching TV. It had to be in character with the rest of the residence, tastefully designed and executed to deliver the maximum effect.
A two-piece combination bar and seating, coupled with a fireplace and large screen TV was designed. A system was designed and custom built cabinet consisting of a radius front entertainment center houses a large flat screen TV and enclosed stereo speakers on the top level, and a gas log fireplace below.
A custom built see-through bar sports a matching radius front, plenty of storage, and room for three to eat, drink, and enjoy the warmth of the fireplace without missing any of the action on the TV. For even greater functionality, the TV is also viewable through the large opening in the bar while meals or snacks are prepared from the kitchen. Traffic flow is unique: access and egress between the bar front and TV can happen with ease around both sides of the bar, and the opening in the back of the bar provides for service both from and to the kitchen area. Because of the free and easy movement about the space, adequate lighting, and lack of combustibles at or on the fireplace, safety, as well as an ample use of space, are both achieved. Both pieces are custom fabricated from start to finish, and match each other identically in all respects. Both are constructed of clear cherry finish with a clear satin lacquer. Both enjoy chrome accents strips and custom crafted, glass cabinet doors with matching radii, and both are tastefully lit with accenting puck lights. The design and fabrication for both units shared issues in common as well as individually.
The entertainment center was fabricated in the shop in three units and then assembled onsite. The opening for the flat screen TV had to be carefully considered as it too had a radius and therefore had to be designed so that the TV would fit.
The entire bar system, except the countertop, had to be fabricated onsite due to the structural columns on either side between which the curved lower cabinets would rest. Then the countertop template was prepared, fabricated elsewhere, returned and installed. After the countertop was in place, the cabinetmaker had to wrap the two columns on either side as well as the overhead beam while making sure the joints at the columns and header maintained alignment. A complement of matching radii cabinet doors had to be constructed for both units. Radius glass inserts had to be ordered with precise dimensions to assure a perfect fit to openings with tight tolerances. Any mistake would have been expensive to correct. Because of the abundance of natural light into the space, the finishes had to be dead-on, otherwise every flaw would show. The custom walnut inlays were fabricated out of square stock, which protruded above the radius in each door. A jig matching the radius had to be designed and fabricated, then a router used to trim excess material and then sanded and finished.
Solving the multitude of challenges associated with the project was one of the parts that made the project fun and interesting. The homeowners now can entertain every night.
 TVL Creative Ltd.
These wonderful clients returned to us for their newest home remodel adventure. Their newly purchased custom built 1970s modern ranch sits in one of the loveliest neighborhoods south of the city but the current conditions of the home were out-dated and not so lovely. Upon entering the front door through the court you were greeted abruptly by a very boring staircase and an excessive number of doors. Just to the left of the double door entry was a large slider and on your right once inside the home was a soldier line up of doors. This made for an uneasy and uninviting entry that guests would quickly forget and our clients would often avoid. We also had our hands full in the kitchen. The existing space included many elements that felt out of place in a modern ranch including a rustic mountain scene backsplash, cherry cabinets with raised panel and detailed profile, and an island so massive you couldn’t pass a drink across the stone. Our design sought to address the functional pain points of the home and transform the overall aesthetic into something that felt like home for our clients.
For the entry, we re-worked the front door configuration by switching from the double door to a large single door with side lights. The sliding door next to the main entry door was replaced with a large window to eliminate entry door confusion. In our re-work of the entry staircase, guesta are now greeted into the foyer which features the Coral Pendant by David Trubridge. Guests are drawn into the home by stunning views of the front range via the large floor-to-ceiling glass wall in the living room. To the left, the staircases leading down to the basement and up to the master bedroom received a massive aesthetic upgrade. The rebuilt 2nd-floor staircase has a center spine with wood rise and run appearing to float upwards towards the master suite. A slatted wall of wood separates the two staircases which brings more light into the basement stairwell. Black metal railings add a stunning contrast to the light wood.
Other fabulous upgrades to this home included new wide plank flooring throughout the home, which offers both modernity and warmth. The once too-large kitchen island was downsized to create a functional focal point that is still accessible and intimate. The old dark and heavy kitchen cabinetry was replaced with sleek white cabinets, brightening up the space and elevating the aesthetic of the entire room. The kitchen countertops are marble look quartz with dramatic veining that offers an artistic feature behind the range and across all horizontal surfaces in the kitchen. As a final touch, cascading island pendants were installed which emphasize the gorgeous ceiling vault and provide warm feature lighting over the central point of the kitchen.
This transformation reintroduces light and simplicity to this gorgeous home, and we are so happy that our clients can reap the benefits of this elegant and functional design for years to come.
 TVL Creative Ltd.
These wonderful clients returned to us for their newest home remodel adventure. Their newly purchased custom built 1970s modern ranch sits in one of the loveliest neighborhoods south of the city but the current conditions of the home were out-dated and not so lovely. Upon entering the front door through the court you were greeted abruptly by a very boring staircase and an excessive number of doors. Just to the left of the double door entry was a large slider and on your right once inside the home was a soldier line up of doors. This made for an uneasy and uninviting entry that guests would quickly forget and our clients would often avoid. We also had our hands full in the kitchen. The existing space included many elements that felt out of place in a modern ranch including a rustic mountain scene backsplash, cherry cabinets with raised panel and detailed profile, and an island so massive you couldn’t pass a drink across the stone. Our design sought to address the functional pain points of the home and transform the overall aesthetic into something that felt like home for our clients.
For the entry, we re-worked the front door configuration by switching from the double door to a large single door with side lights. The sliding door next to the main entry door was replaced with a large window to eliminate entry door confusion. In our re-work of the entry staircase, guesta are now greeted into the foyer which features the Coral Pendant by David Trubridge. Guests are drawn into the home by stunning views of the front range via the large floor-to-ceiling glass wall in the living room. To the left, the staircases leading down to the basement and up to the master bedroom received a massive aesthetic upgrade. The rebuilt 2nd-floor staircase has a center spine with wood rise and run appearing to float upwards towards the master suite. A slatted wall of wood separates the two staircases which brings more light into the basement stairwell. Black metal railings add a stunning contrast to the light wood.
Other fabulous upgrades to this home included new wide plank flooring throughout the home, which offers both modernity and warmth. The once too-large kitchen island was downsized to create a functional focal point that is still accessible and intimate. The old dark and heavy kitchen cabinetry was replaced with sleek white cabinets, brightening up the space and elevating the aesthetic of the entire room. The kitchen countertops are marble look quartz with dramatic veining that offers an artistic feature behind the range and across all horizontal surfaces in the kitchen. As a final touch, cascading island pendants were installed which emphasize the gorgeous ceiling vault and provide warm feature lighting over the central point of the kitchen.
This transformation reintroduces light and simplicity to this gorgeous home, and we are so happy that our clients can reap the benefits of this elegant and functional design for years to come.
 Tile Doctor Ltd
Recently I was called to a house in the very small town of Marton in Warwickshire which is known for its proximity to the medieval “Marton Bridge”, which lies just to the north, crossing the River Leam.
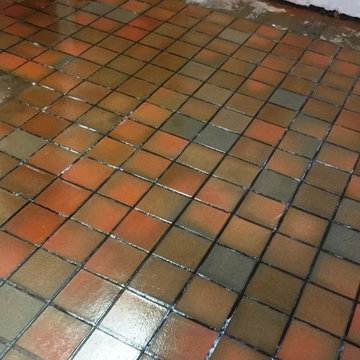
The entire downstairs flooring of my client’s house consisted of Quarry tiles apart from one room where the tiles had been covered by screed and then linoleum. Quarry tiles are a classic hard wearing tile used for both internal and external commercial and residential flooring due to its ability to withstand heavy usage. Reception areas, outdoor patios and porches, for example, are commonly tiled using Quarry.
My client wanted to restore the covered floor back to its original state so that it would match the rest of the downstairs. Realising that this would be a complex and physically demanding task, my client decided to call in Tile Doctor to carry out the restoration.
Removing the Linoleum covering was a relatively straightforward process, so I was able to do this relatively quickly. The main issue concerned removing the screed, which is far more difficult to remove, requiring a lot of physical scraping. Thus I opted to call in some extra manpower in the form of the Nottinghamshire Tile Doctor, Steve Carpenter. With the two of us armed with scrapers we set about removing the screed, taking extra care not to damage the Quarry tile underneath.
Once Steve and I had scraped off as much of the screed as physically possible, I applied a strong dilution of Tile Doctor Remove & Go, a stripper with cleaning properties that is particularly effective at breaking down coatings such as adhesives, plasters and sealers. The product was left to dwell for ten minutes before I worked it into the stone with a scrubbing pad.
After cleaning the tiles, I noticed a layer of grout haze on the surface of the exposed Quarry tiles, so I applied Tile Doctor Grout Clean-Up to remove it. Once the cleaning process was complete I gave the floor a thorough rinse with clean water, before soaking up the resulting residue with a wet-vac machine. The first day of work was a gruelling 12 hours long, but I was very pleased with the results and left the floor to dry overnight.
On day two I returned to finish the job by sealing the newly uncovered Quarry tiles, but not before using a damp meter to check that they were completely dry. Any excess moisture left on unsealed tiles can potentially effect the performance of any sealers that are applied. I sealed the tiles using Tile Doctor Colour Grow, an impregnating, colour-enhancing sealer which gave the surface an aesthetically pleasing shine, as well as durable protection against dirt and wear for the future.
After two long days of work the job was done and the transformation was fantastic and highly rewarding to see, the house now has a fantastic looking Quarry tiled floor running throughout the entirety of the lower level.
Mick Gayton
Warwickshire Tile Doctor
5