
Search results for "Excessive value installment" in Home Design Ideas
 CASA INC
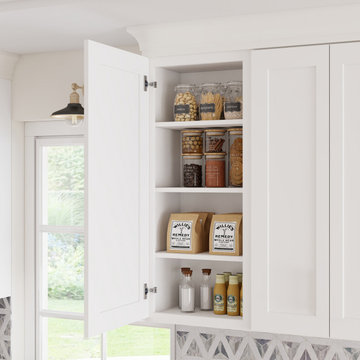
This White Shaker RTA kitchen cabinet combines timeless style with durable functionality, making it the perfect choice for modern kitchen remodels. Designed for DIY-friendly installation, it saves you professional labor costs while maintaining a high-end finish. Built with solid hardwood and CARB-certified plywood, dovetail drawers, and soft-close hardware, it delivers long-lasting quality and safety for your home. The UV scratch-resistant painted surface keeps its bright white look over time, while standard U.S. sizing ensures a perfect fit for mainstream kitchens. With factory-direct pricing, this cabinet brings premium craftsmanship and unbeatable value together in one package.
Features:
White Shaker RTA Cabinet: A popular cabinet style that’s DIY-friendly, easy to assemble without professional labor, and reduces installation costs.
Full Overlay 5-Piece HDF Doors & Drawers: Designed for a seamless, modern look with durable panels that resist warping and maintain a smooth finish.
Solid Hardwood & Plywood Construction: Features a ¾” solid hardwood frame and ½” CARB-compliant plywood box, reinforced with matching veneers for strength and durability.
Soft-Close Hardware: Equipped with undermount drawer slides and concealed 6-way adjustable hinges for a smooth, quiet, and premium user experience.
Solid Wood Dovetail Drawers: Built with 5/8” solid wood dovetail drawer boxes and ½” plywood bottoms for everyday durability and craftsmanship.
UV Scratch-Resistant Painted Finish: Water-based white paint with polyurethane clear coat provides a scratch-resistant, easy-to-clean surface that’s long-lasting and safe for your home.
 CASA INC
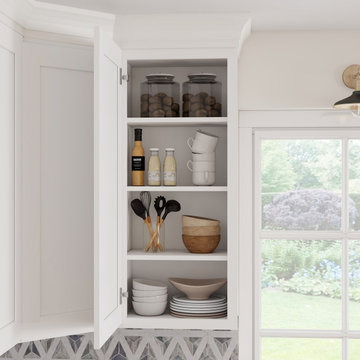
This White Shaker RTA kitchen cabinet combines timeless style with durable functionality, making it the perfect choice for modern kitchen remodels. Designed for DIY-friendly installation, it saves you professional labor costs while maintaining a high-end finish. Built with solid hardwood and CARB-certified plywood, dovetail drawers, and soft-close hardware, it delivers long-lasting quality and safety for your home. The UV scratch-resistant painted surface keeps its bright white look over time, while standard U.S. sizing ensures a perfect fit for mainstream kitchens. With factory-direct pricing, this cabinet brings premium craftsmanship and unbeatable value together in one package.
Features:
White Shaker RTA Cabinet: A popular cabinet style that’s DIY-friendly, easy to assemble without professional labor, and reduces installation costs.
Full Overlay 5-Piece HDF Doors & Drawers: Designed for a seamless, modern look with durable panels that resist warping and maintain a smooth finish.
Solid Hardwood & Plywood Construction: Features a ¾” solid hardwood frame and ½” CARB-compliant plywood box, reinforced with matching veneers for strength and durability.
Soft-Close Hardware: Equipped with undermount drawer slides and concealed 6-way adjustable hinges for a smooth, quiet, and premium user experience.
Solid Wood Dovetail Drawers: Built with 5/8” solid wood dovetail drawer boxes and ½” plywood bottoms for everyday durability and craftsmanship.
UV Scratch-Resistant Painted Finish: Water-based white paint with polyurethane clear coat provides a scratch-resistant, easy-to-clean surface that’s long-lasting and safe for your home.

 IronStrike Stoves & Inserts
The Performer™ ST210 is the solution to moderate heating needs. Its elegance and engineered simplicity makes it a pleasure to burn and a large cooktop surface allows for food preparation – even during power outages. The Performer will add efficiency, ambiance and warmth to your home.
Aesthetics
Unique, integral airwash system keeps the glass clean and clear for a wide-open view of the fire.
Constructed from premium materials, like heavy-gauge stainless steel for dependable performance and striking appearance.
Comfort
Ceramic-fiber blanket utilizes technology developed by NASA that has 10 times the insulation value of firebrick, radiating heat back into the firebox and creating higher efficiencies and cleaner gas.
Uniquely designed refractory baffle assists in igniting fuel-rich gases, increasing efficiency and reducing emissions.
Stainless steel afterburner tubes mix oxygen with unburned gases and smoke to create a secondary burn, lowering fuel costs.
Heavy-duty door contains no nuts or washers, forming a 360° seal for long-lasting durability.
EPA Phase II-certified for clean and efficient operation.
Ease of Operation
Singular draft control for simple operation and burn rate adjustment.
Design Versatility
Five unique door finishes to fit your style and home.
Pedestal or leg choices provide customizable appearance for personalized styling preference.
*Square-feet heating capacities are approximations only. Actual performance may vary depending upon home design and insulation, ceiling heights, climate, condition and type of wood used, appliance location, burn rate, accessories chosen, chimney installation and how the appliance is operated.
Find the right local pro for your project
 White Sands Coastal Development
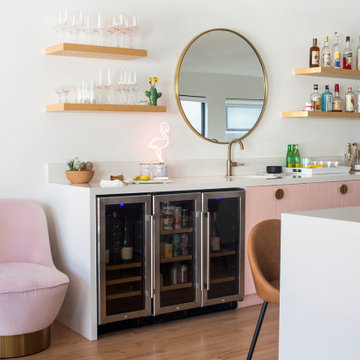
A few months after moving into this aging 2200 s.f. 3 bedroom 2 1/2 bath Spanish bungalow, a creative couple decided to renovate to better fit their lifestyle.
In phase one, we demo-ed the entire downstairs to create a sunny, open-concept living area with a bar, kitchen, and dining. We also added built-in storage and a powder room, to make the home more functional.
When we finished this space, not only did the rooms flow into each other, but the new interior stucco flowed throughout the house. The stucco curved around corners and the edges of ceilings, forming a seamless fireplace mantle and hood, arched passageways, and hollow storage nooks. Phase two included replacing rotting wooden doors and windows with aluminum windows and new French doors. We installed a bubble-gum pink front door with simple cut-outs that, combined with the sensual stucco, imbued a hint of coastal art deco, a la Miami. We re-stuccoed the home’s exterior and resurfaced the polished concrete roof deck.
Now the former Spanish bungalow is as bright, eclectic, playful, and immediate as Venice Beach itself. Its vibe is part-vintage twee, part California contemporary, with a hint of Mediterranean in the exterior entry tire. But even with these varied influences, the space feels cohesive, clean, and airy. It’s a unique home that radiates the values (health, wellbeing, originality, and good times) of its inhabitants.
 Talon Construction Inc.
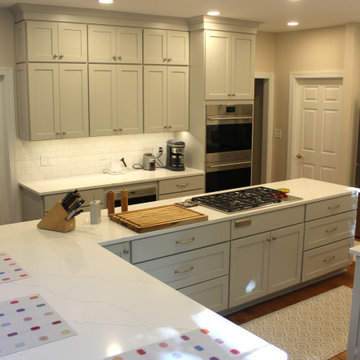
Renovating an open kitchen can be an exciting project that can improve the functionality, aesthetics, and value of your home. Here are some steps to guide you through the process:
Planning and Design:
Define your goals and budget for the renovation.
Determine the layout of your open kitchen. Consider factors like the work triangle (the relationship between the stove, sink, and refrigerator) and the flow of traffic.
Choose a design style and color scheme that suits your preferences and complements the rest of your home.
Research and Inspiration:
Collect inspiration from magazines, websites, and social media platforms to get ideas for your open kitchen design.
Create a mood board or vision board to help you visualize the final look.
Hiring Professionals:
Depending on the scale of your renovation, you may need to hire professionals, such as architects, interior designers, contractors, and electricians. Make sure to check references and get multiple quotes.
Demolition and Structural Work:
If your renovation involves structural changes, like removing walls, this is the time to do it. Ensure that the necessary permits are obtained.
Plumbing and Electrical Work:
Update or reconfigure plumbing and electrical systems as needed. This may include adding or moving outlets, switches, and lighting fixtures.
Cabinetry and Countertops:
Choose and install new kitchen cabinets and countertops. This is a significant part of your renovation and will greatly influence the kitchen's appearance and functionality.
Appliances:
Update or install new kitchen appliances, including the refrigerator, stove, oven, microwave, and dishwasher.
Flooring:
Select and install flooring that is suitable for a kitchen, such as hardwood, tile, laminate, or vinyl. Ensure it complements the overall design.
Backsplash and Wall Finishes:
Install a backsplash that matches your design and protects your walls. Consider materials like tile, glass, or stainless steel.
Lighting:
Choose and install various types of lighting, including ambient, task, and accent lighting. Pendant lights above an island or breakfast bar can add style and functionality.
Paint and Finishing Touches:
Paint the walls and ceiling in the colors you've selected. Add finishing touches like hardware, window treatments, and decorative elements.
Furniture and Accessories:
Bring in furniture, such as a dining table and chairs, barstools, and any other pieces you need to complete the space. Decorate with accessories like artwork, plants, and decorative items.
Final Inspection and Cleanup:
Ensure that all work meets safety and building code requirements. Clean the entire area thoroughly.
Enjoy Your New Kitchen:
Once the renovation is complete and everything is in its place, enjoy your beautiful, functional open kitchen.
Remember that open kitchen renovations can be complex and may require careful planning. It's essential to stay within your budget, communicate with your contractors and designers, and be flexible as unexpected issues may arise during the process. Ultimately, a well-executed open kitchen renovation can enhance the heart of your home and improve your overall living space.
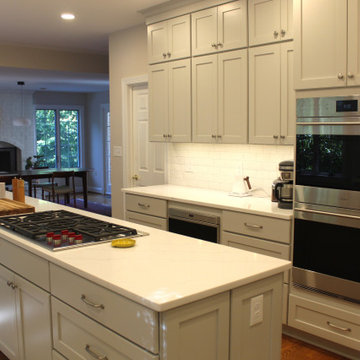 Talon Construction Inc.
Renovating an open kitchen can be an exciting project that can improve the functionality, aesthetics, and value of your home. Here are some steps to guide you through the process:
Planning and Design:
Define your goals and budget for the renovation.
Determine the layout of your open kitchen. Consider factors like the work triangle (the relationship between the stove, sink, and refrigerator) and the flow of traffic.
Choose a design style and color scheme that suits your preferences and complements the rest of your home.
Research and Inspiration:
Collect inspiration from magazines, websites, and social media platforms to get ideas for your open kitchen design.
Create a mood board or vision board to help you visualize the final look.
Hiring Professionals:
Depending on the scale of your renovation, you may need to hire professionals, such as architects, interior designers, contractors, and electricians. Make sure to check references and get multiple quotes.
Demolition and Structural Work:
If your renovation involves structural changes, like removing walls, this is the time to do it. Ensure that the necessary permits are obtained.
Plumbing and Electrical Work:
Update or reconfigure plumbing and electrical systems as needed. This may include adding or moving outlets, switches, and lighting fixtures.
Cabinetry and Countertops:
Choose and install new kitchen cabinets and countertops. This is a significant part of your renovation and will greatly influence the kitchen's appearance and functionality.
Appliances:
Update or install new kitchen appliances, including the refrigerator, stove, oven, microwave, and dishwasher.
Flooring:
Select and install flooring that is suitable for a kitchen, such as hardwood, tile, laminate, or vinyl. Ensure it complements the overall design.
Backsplash and Wall Finishes:
Install a backsplash that matches your design and protects your walls. Consider materials like tile, glass, or stainless steel.
Lighting:
Choose and install various types of lighting, including ambient, task, and accent lighting. Pendant lights above an island or breakfast bar can add style and functionality.
Paint and Finishing Touches:
Paint the walls and ceiling in the colors you've selected. Add finishing touches like hardware, window treatments, and decorative elements.
Furniture and Accessories:
Bring in furniture, such as a dining table and chairs, barstools, and any other pieces you need to complete the space. Decorate with accessories like artwork, plants, and decorative items.
Final Inspection and Cleanup:
Ensure that all work meets safety and building code requirements. Clean the entire area thoroughly.
Enjoy Your New Kitchen:
Once the renovation is complete and everything is in its place, enjoy your beautiful, functional open kitchen.
Remember that open kitchen renovations can be complex and may require careful planning. It's essential to stay within your budget, communicate with your contractors and designers, and be flexible as unexpected issues may arise during the process. Ultimately, a well-executed open kitchen renovation can enhance the heart of your home and improve your overall living space.

 Doors & Gables
During the design and restoration stage, the home underwent a massive alteration. Part of the fun was designing the details that would turn a previously dull cottage into a period cottage that included fun details.
A client purchased a rare beach cottage in Santa Cruz, CA. It still had the original lathe and plaster interior, the only bathroom was badly remodeled in the 50’s, and the kitchen was one large space that didn’t have a lot of cabinets. Areas of the home, like the hallway, chopped up the small cottage.
The challenge, to add a bathroom and make the home’s value increase without adding a second floor. The solution was to turn the project into a restoration, but also flipping the front to the back. The actual front of the home is along a street, but there is no direct access from the street. Everyone uses the alley way to access the homes along this street. Since both guests and owner arrived through the alley, my solution was to turn the back yard into an entry courtyard and add a new front porch area and new front door in the back of the home. We kept the original front door area that faced the street to preserver the street view.
Interior spaces were opened up to allow more natural light into the entire home. The hallway was converted into a 3/4 Bath and the other bathroom was restored to a vintage look. The original cabinets were kept but new doors were built. A really cool aspect of the kitchen was the original wood cooler (you call them ice boxes), which we kept, improved and now is used as a pantry area that keeps food naturally cool.
Vintage light fixtures were refurbished, new door hardware installed (bought through vintage hardware company), and the color scheme was to bring indoors the colors of the ocean outside. Now the home is bright, fun and usable for the owner. The value of the property is now in the fact that it is a vintage 1912 Beach Cottage.

 Astria Fireplaces
These vent-free Fireboxes combine performance, versatility and value to add the finishing touch and ambiance to any home. Choose circulating Flush Faced or rolled louvered paneled models. All models feature hidden screen pockets, full length nailing flanges and include a heat deflection hood, and convenient pre-wired dual access electrical "J" box. All models are equipped with a barometric damper for outside air capability.
Features
Available in 32”, 36” and 42” circulating radiant and louvered models
32” model has an 18” tall opening and accepts 18” vent-free gas logs
36” model has an 21” tall opening and accepts up to 24” vent-free gas logs
42” model has an 24” tall opening and accepts up to 30” vent-free gas logs
Refractory panels in a variety of colors and patterns, as well as Black Reflective Porcelain Liners available
Standard heat deflection hood (required)
Screens retract into hidden screen pockets
Optional outside air kit
Optional blower available for all models
Standard J-Box kit installed in firebox
Durable textured powder coat finish
Compatible with any listed ANSI Z21.11.2 vent-free log set. Choose an Astria vent-free unit for the best results.
20 Year Limited Warranty
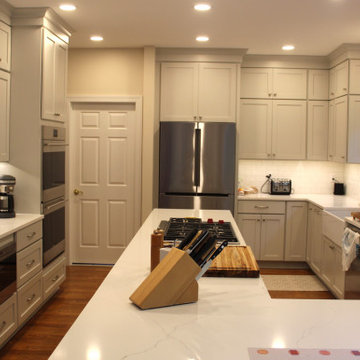 Talon Construction Inc.
Renovating an open kitchen can be an exciting project that can improve the functionality, aesthetics, and value of your home. Here are some steps to guide you through the process:
Planning and Design:
Define your goals and budget for the renovation.
Determine the layout of your open kitchen. Consider factors like the work triangle (the relationship between the stove, sink, and refrigerator) and the flow of traffic.
Choose a design style and color scheme that suits your preferences and complements the rest of your home.
Research and Inspiration:
Collect inspiration from magazines, websites, and social media platforms to get ideas for your open kitchen design.
Create a mood board or vision board to help you visualize the final look.
Hiring Professionals:
Depending on the scale of your renovation, you may need to hire professionals, such as architects, interior designers, contractors, and electricians. Make sure to check references and get multiple quotes.
Demolition and Structural Work:
If your renovation involves structural changes, like removing walls, this is the time to do it. Ensure that the necessary permits are obtained.
Plumbing and Electrical Work:
Update or reconfigure plumbing and electrical systems as needed. This may include adding or moving outlets, switches, and lighting fixtures.
Cabinetry and Countertops:
Choose and install new kitchen cabinets and countertops. This is a significant part of your renovation and will greatly influence the kitchen's appearance and functionality.
Appliances:
Update or install new kitchen appliances, including the refrigerator, stove, oven, microwave, and dishwasher.
Flooring:
Select and install flooring that is suitable for a kitchen, such as hardwood, tile, laminate, or vinyl. Ensure it complements the overall design.
Backsplash and Wall Finishes:
Install a backsplash that matches your design and protects your walls. Consider materials like tile, glass, or stainless steel.
Lighting:
Choose and install various types of lighting, including ambient, task, and accent lighting. Pendant lights above an island or breakfast bar can add style and functionality.
Paint and Finishing Touches:
Paint the walls and ceiling in the colors you've selected. Add finishing touches like hardware, window treatments, and decorative elements.
Furniture and Accessories:
Bring in furniture, such as a dining table and chairs, barstools, and any other pieces you need to complete the space. Decorate with accessories like artwork, plants, and decorative items.
Final Inspection and Cleanup:
Ensure that all work meets safety and building code requirements. Clean the entire area thoroughly.
Enjoy Your New Kitchen:
Once the renovation is complete and everything is in its place, enjoy your beautiful, functional open kitchen.
Remember that open kitchen renovations can be complex and may require careful planning. It's essential to stay within your budget, communicate with your contractors and designers, and be flexible as unexpected issues may arise during the process. Ultimately, a well-executed open kitchen renovation can enhance the heart of your home and improve your overall living space.
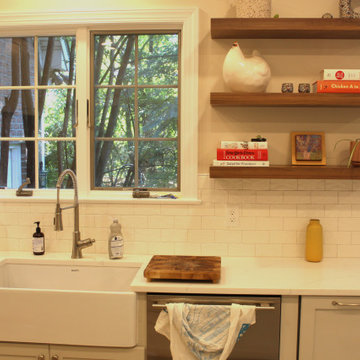 Talon Construction Inc.
Renovating an open kitchen can be an exciting project that can improve the functionality, aesthetics, and value of your home. Here are some steps to guide you through the process:
Planning and Design:
Define your goals and budget for the renovation.
Determine the layout of your open kitchen. Consider factors like the work triangle (the relationship between the stove, sink, and refrigerator) and the flow of traffic.
Choose a design style and color scheme that suits your preferences and complements the rest of your home.
Research and Inspiration:
Collect inspiration from magazines, websites, and social media platforms to get ideas for your open kitchen design.
Create a mood board or vision board to help you visualize the final look.
Hiring Professionals:
Depending on the scale of your renovation, you may need to hire professionals, such as architects, interior designers, contractors, and electricians. Make sure to check references and get multiple quotes.
Demolition and Structural Work:
If your renovation involves structural changes, like removing walls, this is the time to do it. Ensure that the necessary permits are obtained.
Plumbing and Electrical Work:
Update or reconfigure plumbing and electrical systems as needed. This may include adding or moving outlets, switches, and lighting fixtures.
Cabinetry and Countertops:
Choose and install new kitchen cabinets and countertops. This is a significant part of your renovation and will greatly influence the kitchen's appearance and functionality.
Appliances:
Update or install new kitchen appliances, including the refrigerator, stove, oven, microwave, and dishwasher.
Flooring:
Select and install flooring that is suitable for a kitchen, such as hardwood, tile, laminate, or vinyl. Ensure it complements the overall design.
Backsplash and Wall Finishes:
Install a backsplash that matches your design and protects your walls. Consider materials like tile, glass, or stainless steel.
Lighting:
Choose and install various types of lighting, including ambient, task, and accent lighting. Pendant lights above an island or breakfast bar can add style and functionality.
Paint and Finishing Touches:
Paint the walls and ceiling in the colors you've selected. Add finishing touches like hardware, window treatments, and decorative elements.
Furniture and Accessories:
Bring in furniture, such as a dining table and chairs, barstools, and any other pieces you need to complete the space. Decorate with accessories like artwork, plants, and decorative items.
Final Inspection and Cleanup:
Ensure that all work meets safety and building code requirements. Clean the entire area thoroughly.
Enjoy Your New Kitchen:
Once the renovation is complete and everything is in its place, enjoy your beautiful, functional open kitchen.
Remember that open kitchen renovations can be complex and may require careful planning. It's essential to stay within your budget, communicate with your contractors and designers, and be flexible as unexpected issues may arise during the process. Ultimately, a well-executed open kitchen renovation can enhance the heart of your home and improve your overall living space.
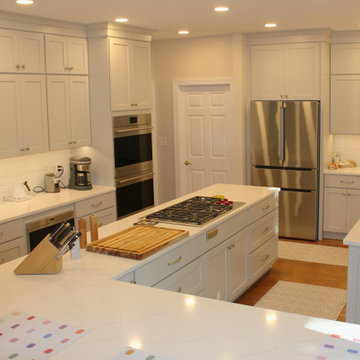 Talon Construction Inc.
Renovating an open kitchen can be an exciting project that can improve the functionality, aesthetics, and value of your home. Here are some steps to guide you through the process:
Planning and Design:
Define your goals and budget for the renovation.
Determine the layout of your open kitchen. Consider factors like the work triangle (the relationship between the stove, sink, and refrigerator) and the flow of traffic.
Choose a design style and color scheme that suits your preferences and complements the rest of your home.
Research and Inspiration:
Collect inspiration from magazines, websites, and social media platforms to get ideas for your open kitchen design.
Create a mood board or vision board to help you visualize the final look.
Hiring Professionals:
Depending on the scale of your renovation, you may need to hire professionals, such as architects, interior designers, contractors, and electricians. Make sure to check references and get multiple quotes.
Demolition and Structural Work:
If your renovation involves structural changes, like removing walls, this is the time to do it. Ensure that the necessary permits are obtained.
Plumbing and Electrical Work:
Update or reconfigure plumbing and electrical systems as needed. This may include adding or moving outlets, switches, and lighting fixtures.
Cabinetry and Countertops:
Choose and install new kitchen cabinets and countertops. This is a significant part of your renovation and will greatly influence the kitchen's appearance and functionality.
Appliances:
Update or install new kitchen appliances, including the refrigerator, stove, oven, microwave, and dishwasher.
Flooring:
Select and install flooring that is suitable for a kitchen, such as hardwood, tile, laminate, or vinyl. Ensure it complements the overall design.
Backsplash and Wall Finishes:
Install a backsplash that matches your design and protects your walls. Consider materials like tile, glass, or stainless steel.
Lighting:
Choose and install various types of lighting, including ambient, task, and accent lighting. Pendant lights above an island or breakfast bar can add style and functionality.
Paint and Finishing Touches:
Paint the walls and ceiling in the colors you've selected. Add finishing touches like hardware, window treatments, and decorative elements.
Furniture and Accessories:
Bring in furniture, such as a dining table and chairs, barstools, and any other pieces you need to complete the space. Decorate with accessories like artwork, plants, and decorative items.
Final Inspection and Cleanup:
Ensure that all work meets safety and building code requirements. Clean the entire area thoroughly.
Enjoy Your New Kitchen:
Once the renovation is complete and everything is in its place, enjoy your beautiful, functional open kitchen.
Remember that open kitchen renovations can be complex and may require careful planning. It's essential to stay within your budget, communicate with your contractors and designers, and be flexible as unexpected issues may arise during the process. Ultimately, a well-executed open kitchen renovation can enhance the heart of your home and improve your overall living space.

 Designer's Atelier
The owners wanted to feel super comfortable watching TV on their own as well as having friends around so a large lounge area was created in response to that. A request for a big TV screen came from our client’s son. Finding the comfortable sofa that fulfilled all the family’s requirements could have been a very stressful event were it not for our skill in sourcing the perfect item from our most valued contacts.

 Prime Realty
Maddox Photography
Mid-sized trendy open concept light wood floor and brown floor family room photo in Los Angeles with gray walls and a tv stand
Mid-sized trendy open concept light wood floor and brown floor family room photo in Los Angeles with gray walls and a tv stand

 Progressive Design Build
Challenge
As part-time residents of this Bonita Springs home, our clients were looking to update their outdoor entertainment area. They also planned to be away for the summer during the remodel and needed their renovation project to be finished prior to their return for the winter.
Their needs included:
Changing the color pallet to a monochromatic scheme, removing the yellow brick pavers, adding an outdoor kitchen area, adding an outdoor fireplace, resurfacing the pool and updating the tile, installing a new screen enclosure, and creating privacy from the neighbors, particularly the main sitting areas, pool and outdoor kitchen.
Although there was already a 1,221 sq. ft. lanai under the roof, it lacked functionality needed by the homeowners. Most of its amenities were located at one end of the lanai, and lacked privacy that the homeowners valued.
Solution
The final project design required two additions to the lanai area adding an accumulative 265 sq. ft. to the existing space expanding their sitting area and accommodating a much-needed outdoor kitchen. The new additions also needed to blend with the home’s existing style.
Addition #1—Sitting Area:
The first addition added approximately 145 sq. ft. to the end of the lanai. This allowed Progressive Design Build to tie into the existing gable room for the new space and create privacy from the neighbors.
Addition #2—Outdoor Kitchen:
The second addition was a bump out that added approximately 120 sq. ft. to the end of the house close to the interior kitchen. This allowed the client to add an outdoor over and 52” Viking grill (with a side burner) to their outdoor living space. Other amenities included a new sink and under counter fridge, granite countertops, tumbled stone stile and Cypress cabinetry, custom-fabricated with marine grade plywood boxes and marine grade finishes to withstand moisture, common in the Bonita Bay community.
Special attention was given to the preparation area on either side of the stove, the landing area next to the oven and the serving counter behind the bar. Bar seating was added to the outdoor kitchen, allowing guests to visit with the cook comfortably and easily.
Brick Pavers
During the design phase, we discovered that the original brick pavers were set in sand, with no concrete pad below. Consequently, the retaining wall and several pavers were starting to fail, caused by the shifting sands. To remedy the problem, we installed a new concrete deck and laid new nonslip pavers on top of the deck—ideal for wet area applications.
Pool Renovations
To dramatically improve the enjoyment and ambiance of their pool, Progressive Design Build completely re-plumbed it, putting in additional lighting and new water features. New decorative pool tile, coping, and a paver deck were also installed around the pool. The pool finish chosen by our clients was a nice tropical blue color.
Screen Enclosure
A new screen enclosure was installed in compliance with new local building codes, making it more stable and solid than the existing one. The color change from white to bronze coordinated well with the homeowners’ new color scheme; and the location of the service door and stairs provided convenient access to the new pool equipment.
Results
This project was completed on time and within budget before these homeowners returned for their winter holiday. They were thrilled with the weekly communication, which included two-way phone calls and email photo sharing. They always knew where their project was in the construction process and what was happening at all times—providing security and peace of mind.

 AirField Systems, LLC
AirField installed an AirPave grass fire lane for their porous flexible paving at Baptist Trinity Residential Hospice, creating a beautiful, functional, ecological friendly solution to facility access.
An installation of an AirField Systems grass fire lane at Baptist Trinity Residential Hospice brings green building benefits and incredible strength to a beautiful new facility. A time lapse photo series highlight the installation process of the 6,747 PSI sand filled 100% recycled geocell technology, providing the strength of asphalt and concrete while relieving some of the burden of costly storm sewers and drainage.
This new installation highlights the benefits of paving with grass, as well as the comparative ease of installation. Concrete and asphalt surfaces occupy twice the area of buildings and are the most detrimental to clean water. Concrete and asphalt surfaces dominate the landscape of our urban environments and prevent rainwater from being filtered naturally. They send harmful polluted water straight into our streams, rivers and lakes. In urban America, concrete and asphalt pavements produce two thirds of our excess water runoff. They are responsible for significant hydrocarbon pollutants on our ground and in our water, causing ground water decline, and resulting in local water shortages. These concrete and asphalt surfaces also create huge increases in temperature known as the urban “heat island effect”.
The pollution caused by impervious surfaces deteriorate the quality of our storm water runoff and create large overflows that our storm sewer systems cannot handle. It is also important to realize that the urban forest force is drastically diminishing, causing CO2 levels to rise, which in turn causes global warming. With all the negative influences of impervious pavements now is the time to turn our attention to alternatives for the benefit of the environment.
From fire lanes, overflow, and event parking, to temporary and stadium parking, reinforced grass parking systems deliver the same strength and durability of asphalt and concrete without the negative affects mentioned above. These incredibly strong geocells reinforce grass parking, prevent rutting from traffic, protect turf roots, and promote beautiful grass. Reinforced grass parking structures, also know as grass pavements, enhance the environment by naturally filtering auto and truck liquids such as oil drippings, antifreeze overflows and many other leaks and spills. They also help with air pollutants after they have been knocked to the ground by rainwater and greatly reduce hot surface temperatures thus fighting global warming and the “heat island effect”. Grass pavements allow our groundwater to be naturally replenished, the roots of trees to breathe, and they help our streams and rivers flow cleanly in dry hot summers. A large part of the solution to urban environmental problems is under our feet. By paying appropriate attention to the everyday materials on which we walk and drive, we can replenish renewable resources, restore the natural regenerative processes, and produce a cleaner, healthier, safer, more sustainable world in which we must live. Porous pavements are potentially the most important development in urban watersheds since the invention of storm sewers. By routing rainwater directly into the earth as nature intended, the need for costly storm water structures can be drastically reduced.
Reinforced grass parking has built in permeable spaces through which water and air can pass. Although some porous paving materials are nearly indistinguishable from nonporous materials in construction and superficial appearance, their environmental effects are qualitatively exponential. They allow air, water and heat to dissipate into the environment naturally helping to save the planet.
AirField reinforced grass parking provides beauty and comfort, and with the unbeatable price and performance of AirDrain you can’t go wrong. AirDrain is the reinforced grass pave system the industry has trusted for years !!!
Airfield Systems, LLC 8028 North May Avenue Oklahoma City, OK 73120 405-359-3775
Installer – GREENPRO Landscapes Kevin James 9847 Stewart Rd Arlington, TN 38002

 Black Lacquer Design
Photo by Mary Costa
Inspiration for a contemporary dining room remodel in Los Angeles
Inspiration for a contemporary dining room remodel in Los Angeles

 User
Reference: BB512A-US
Model: BALI MOON
Color: Gray
Shape: rectangular
Finish: honed-matte outside and inside
US Dimensions: 23-2/3" x 15-2/3" x 4-1/3"
US Drain size: standard hole size (1.5")
Shipping: CA=$39 - NY=$79 - FL=$73 - IL=$51...
Weight: 53 lbs - 24 Kgs
Material: Andesite grade A ( basalt family)
Our BALI MOON model is a rectangular single vessel sink stone - 23-2/3" x 15-2/3" x 4-1/3" made in genuine interior decoration gray andesite ( basalt). The "Exceptional" cut in the block without any comparison with plastic and other chemical resin market often unaffordable.
The outstanding opportunity to make your world unique! Add great value to your home by installing LivingRoc Creations and tell your stone story through the years of conception. Could you imagine one day installing a single vessel sink made from gray basalt, sought after by specialists around the world? We put the extra into the extraordinary by using this noble material.
You will definitely not let anyone feel indifferent with this 100% natural stone unique in the US and exclusively available on Living'ROC.net. This creation will give your bathroom a stunning look. Its gray color and its irresistible look ( trendy concrete look) make it one of the most incredible bathroom sink of the moment.
It is a superb design vanity vessel sink with beautiful, pure and elegant lines. BALI MOON will add class to your bathroom. Our talented masons work shows BALI MOON perfect curves, its Asian-style look and the quality of handcrafted work. BALI MOON's generous perfect proportion will bring you great comfort. It is double waterproofed so the maintenance is easy. We have selected only the most beautiful stones for an exceptional quality.
This vessel sink is ready to use, sitting on a vanity counter top and Highly resistant to chipping and scratching, Withstands hot temperatures, Tolerant to very high temperature changes. All exposed parts of the stone have been double waterproofed.
At LivingRoc we have chosen the most beautiful stones. All our basins are made from high quality, pure genuine materials that will last for years to come. Granite, Basalt, Marble are materials perfectly adapted to bathroom use.
Our creation is delivered without an overflow drain (not included) - every US drains models you can find on the market will fit perfectly on Living'ROC vessel sink. This model is ready to use over the countertop.
The photos you see online have been taken with extreme care by our Founder CEO - Florent LEPVREAU, because without them we would not be one of the natural stone business key player of the online European continent. Once you have encountered the product in your home you will always have pure happiness for the love of the materials. It will be beyond your expectations because what you see online at livingroc.net is what you will receive. This is why we always guarantee a degree of quality (Grade A) and impeccable finish as can attest with the reviews filed by our customers. We also draw your attention to the fact that veining, flames, small variations of colors and various stone particularities make all the charm of the stone and distinguish it from non-natural materials! Simply our living'ROC style.

 MHM LIVING
Our client's goal for this project was a more functional kitchen for cooking with the family as well as an open space for entertaining friends and family. They further had a very specific vision for an old world feel while trying to be budget and environmentally conscious.
Upper cabinets with glass fronts add visual interest, provide useful storage and create the perception of a higher ceiling. We crafted the arched stonework around the cook-top that created a focal point and disguises the built in vent hood.
The finishing on the cabinets was customized to match the antique furniture the client had.
Looking across the kitchen, the dated fireplace needed an update to match an Old World feel. We accomplished this by installing stonework similar to that around the cook-top area. We also added crown molding in the living room to flow with the kitchen, all while remaining budget conscious.
This was also a very environmentally conscious project superbly fitting the client's request and matching our company’s values:
• 75% of the cabinets are original or resized from original cabinets.
• The center island remained and had cabinets refinished and a new countertop installed.
• All lighting including task lights, under cabinet lights and recessed lights are LED.
• All Energy Star appliances.
• Brick and stonework around cook-top is from salvaged brick and stone.
• Cedar beam above the arch is salvaged from a past project and stained to fit the kitchen’s decor.
• Existing wood floors were refinished and hand scraped to give a more Old World look.
With this project we were particularly pleased to work within the constraints of budget, environmentally conscious requirements, and building a beautiful Old Word kitchen that perfectly match our client's desires.

 Ronnette Riley Architect
The goal for this project was to reconfigure the spaces to accommodate the lifestyle of the client while maintaining the classic seven layout of this pre-war Upper West Side apartment. The large book collection was the driving force in the renovation. Excess doors in a long corridor were converted to bookshelves flanking the clients study. The renovation included a large master bedroom (combining two bedrooms), new fixtures and finishes in all three bathrooms and a more functional kitchen. All plaster moldings and column capitals were stripped and restored. Stain glass windows were placed back in as the original intent. The dining area paneling was stripped entirely to expose the rich oak wood and plaster detailing. The foyer received new marble flooring and fine detailing revealed rich motifs. New wood oak flooring was installed throughout and new bordered stone tiling was placed in the bathrooms. The kitchen was reconfigured which allowed for a fully functioning space using wolf and subzero appliances and open eating area with a 3’ by 7’ marble slab island. The new layout provides the formal yet casual feeling the client desired while maintaining an elegance worthy of its grand south views of the neo-romanesque building of the Natural History Museum.
 Tile Doctor Ltd
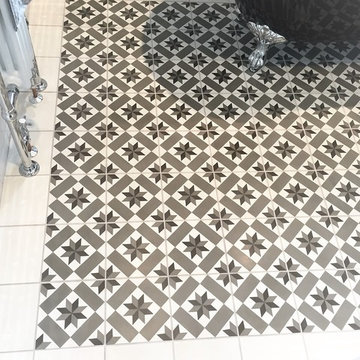
I’m often asked if you should seal a tile before grouting and the answer is a definite yes, and this Encaustic Cement tiled bathroom floor installation in Stockport is a great example as to why. The tiles had not been sealed before grouting and then, once the tiler went to grout the newly installed tiles with a grey grout, the colour ran into the tiles, staining them and leaving them looking grubby and dirty. Had the tiles been sealed it would of made the process of removing the grout from the surface of the tile much easier.
If you haven’t come across them before Encaustic cement tiles are often hand painted and are available in a range of beautifully artistic patterns, so it was a real shame that these tiles were allowed to be spoilt by an avoidable mistake. As you can imagine, the property owner was keen to have the tiles professionally restored, and she contacted me to get the job done. I took some photographs but I’m not sure that they do justice to the problem.
Rather than use a liquid cleaning product, I opted to use diamond encrusted handheld burnishing pads to remove the grout stains. Our burnishing system comprises four pads of varying grits. I started with the Coarse grit burnishing pads applying to the tiles it with a small amount of water as lubricant to grind down the grubby marks. Following this I worked my way through the system, applying Medium, Fine and Very Fine pads to gradually restore the appearance of the floor. Once the burnishing process has been completed I rinsed the tiles and then accelerated the drying process using a heat gun to prepare them to be sealed.
Removing any excess moisture before sealing is essential as even a small amount can cloud the sealer and prevent it from properly protecting the tiles from dirt and stains. Once satisfied that the floor was dry, I proceeded to seal it using Tile Doctor Colour Grow. As an impregnating sealer Colour Grow penetrates deep into the pores of the stone to fill them and thus prevent dirt from becoming ingrained. Colour Grow’s colour intensifying properties also really accentuated the patterns of the Encaustic Cement tiles.
Now that these fantastic tiles have been properly sealed it will be far easier for the customer to keep them clean in future. Needless to say, she was very happy with the result. We recommend topping up your sealer on a regular basis to ensure problems like those which occurred here do not damage the appearance of your tiles.
Steve Keary
Greater Manchester Tile Doctor
148