
Search results for "Existing lines" in Home Design Ideas
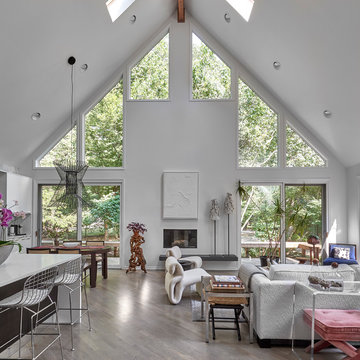
 Dresner Design | Chicago Custom Kitchens Cabinets
A Lake Michigan Home gets a Modern Refresh from Dresner Design.
Photos by Tony Soluri.
This couple moved from Chicago’s Wicker Park to a rural setting but wanted to maintain their modern aesthetic. Scott Dresner of Dresner Design created a light bright clean-lined kitchen perfect for the couple’s need to entertain. Must have’s included a drawer for over sixty spices, storage for three sets of dishes, a coffee bar, and a huge island the couple uses for entertaining. The palette is mostly white to maximize outdoor views. Constraints were plenty both timeline and budgetary. Dresner came up with some creative solutions, which allowed the homeowners to save on cabinetry and materials and splurge on appliances.
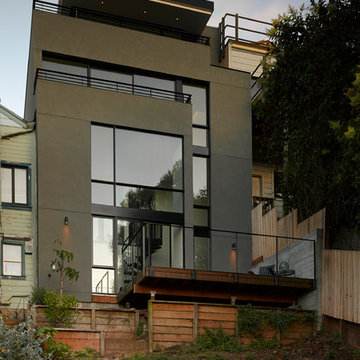
 Blair Burke General Contractors, Inc.
Featured in the 2013 AIA San Francisco Home Tour, this Bernal Heights residence was transformed from a drab stucco box to an architectural gem prominently positioned to take in bridge to bridge views. Scope of work consisted of a complete gut of the existing house and adding a third story to capture kitchen, dining and living room functions. An exterior Skatelite rainscreen system provides street side privacy while modest materials and simple glass box bring in the views without distraction.
 Route Design : Ashley Winn
Kate Osborne
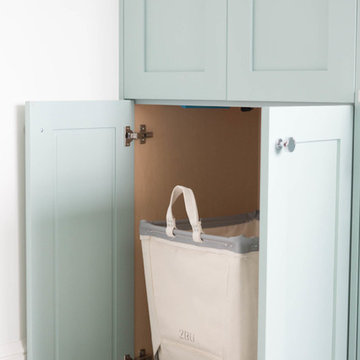
Laundry room - transitional laundry room idea in Salt Lake City
Laundry room - transitional laundry room idea in Salt Lake City
Find the right local pro for your project
 Twelve Stones Designs, LLC
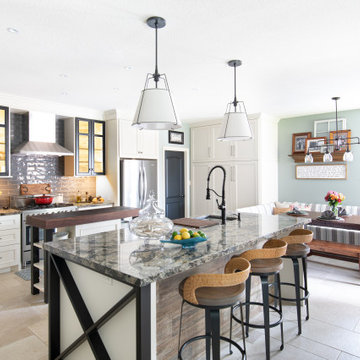
The owners of this kitchen had spent the money to upgrade the finishes in their kitchen upon building the home 12 years ago, but after living in the space for several years they realized how nonfunctional the layout really was. The (then) two preschool aged children had grown into busy, hungry teenagers with many friends who also liked to hang out at the house. So the family needed a more functional kitchen with better traffic flow, space for daily activities revolving around the kitchen at different times of day, and a kitchen that could accommodate cooking for and serving large groups. Furthermore, the dark, traditional finishes no longer reflected the homeowners’ style. They requested a brighter, more relaxed, coastal style that reflected their love of the seaside cities they like to visit.
Originally, the kitchen was U-shaped with a narrow island in the middle. The island created narrow aisles that bottle-necked at the dishwasher, refrigerator, and cooktop areas. There was a pass-through from the foyer into the kitchen, but the owners never liked that the pass-through was also located so close to the powder room. The awkward proximity was unappealing and made guests feel uncomfortable.
The kitchen’s storage was made up of lots of narrow cabinets, apothecary drawers, clipped corner units, and very few drawers. It lacked useful storage for the larger items the family used on a daily basis. And the kitchen’s only pantry was small closet that had only builder-grade, narrow shelving with no illumination to be able to see the contents inside.
Overall, the kitchen’s lighting plan was poorly executed. Only six recessed cans illuminated the entire kitchen and nook areas. The under cabinet lighting was not evenly distributed either. In fact, the builder had mis-placed the under cabinet lighting around the decorative pilasters which made for choppy, dark cubbies. Further, the builder didn’t include any lighting over the sink or the bar area, which meant whoever was doing the dishes was always in their own shadow. That, coupled with the steep overhang of the game room above made the bar area feel like a dim, cavernous space that wasn’t inviting or task oriented. The kitchen looked out into the main living space, but the raised bar and a narrow wall (which held the only large cabinet in the kitchen) created more of a barrier than a relationship to the living room or breakfast nook. In fact, one couldn’t even see the breakfast nook from the cooktop or sink areas due to its orientation. The raised bar top was too narrow to comfortably sit to either dine at or chat from due to the lack of knee space. The the homeowners confided that the kitchen felt more like a dark, dirty prison than place where the family, or their guests, wanted to gather and commune.
The clients' needs and desires were:
➢ to create a kitchen that would be a space the family loved to be in; to relate to the adjacent spaces all around, and to have better flow for entertaining large groups
➢ to remove the walls between the breakfast nook and living area and to be able to utilize the natural light from the windows in both those areas
➢ to incorporate a functional chopping block for prepping fresh food for home cooked meals, an island with a large sink and drain board, 2 pull out trash cans, and seating for at least the 2 teens to eat or do homework
➢ to design a kitchen and breakfast nook with an airy, coastal, relaxed vibe that blended with the rest of the house's coastal theme
➢ to integrate a layered lighting plan which would include ample general illumination, specific task lighting, decorative lighting, and lots of illuminated storage
➢ to design a kitchen with not only more storage for all the husband’s kitchen gadgets and collection of oils and spices, but smart storage, including a coffee/breakfast bar and a place to store and conceal the toaster oven and microwave
➢ to find a way to utilize the large open space between the kitchen, pantry area, and breakfast nook
Twelve Stones Designs achieved the owner's goals by:
➢ removing the walls between the kitchen and living room to allow the natural light to filter in from the adjacent rooms and to create a connection between the kitchen, nook, and living spaces for a sense of unity and communion
➢ removing the existing pantry and designing 3 large pantry style cabinets with LED tape lights and rollout drawers to house lots of kitchen appliances, gadgets, and tons of groceries. We also took the cabinets all the way up to the 9’ ceiling for additional storage for seasonal items and bulk storage.
➢ designing 2 islands - 1 with a gorgeous black walnut chopping block that houses a drawer for chopping and carving knives and a custom double pull out trash unit for point of use utilization - and 1 that houses the dishwasher, a large Blanco Gourmet sink with integrated drain board, woven baskets for fresh root vegetables and kitchen towels, plenty of drawer storage for kitchen items, and bar seating for up to 4 diners.
➢ closing off the space between the kitchen and the powder room to create a beautiful new private alcove for the powder room as well as adding some decorative storage. This also gave us space to include more tall storage near the new range for precision placement of the husband’s extensive oil and spice collection as well as a location for a combo-steam oven the wife wanted for baking and cooking healthy meals.
The project is enhanced functionally by:
➢ incorporated USB and standard receptacles for the kids’ laptops and phone charging in the large island
➢ designing the small island to include additional open shelving for items used on a daily basis such as a variety of bowls, plates, and colanders. This set up also works well for the husband who prefers to “plate” his dinners in restaurant-style fashion before presenting them to the table.
➢ the integration of specific storage units, such as double stacked cutlery drawers, a custom spice pull-out, a Kuerig coffee and tea pod drawer, and custom double stacked utensil drawers
➢ moving the refrigerator to the old oven location - this eliminated the bottle neck as well as created a better relationship to the eating table. It also utilizes the floor space between the pantry, nook, and kitchen
➢ creating a banquet style breakfast nook - this banquette seating not only doubles the amount of seating for large gatherings but it better utilizes the odd space between the kitchen and the previous nook area. It also helps to create a distinct pathway from the mudroom room through the pantry area, kitchen, nook, and living room.
➢ the coffee/breakfast bar area which includes the perfect location for the concealed microwave and toaster oven, convenient storage for the coffee pods and tea accoutrements. Roll-out drawers below also house the smoothie maker, hot water kettle, and a plethora of smoothie-making ingredients such as protein powders, smoothie additives, etc. Furthermore, the drawers below the Keurig house measuring utensil, cutlery, baking supplies and tupperware storage.
➢ incorporating lots of wide drawers and pullouts to accommodate large cookware.
➢ utilizing as much vertical space as possible by building storage to the ceiling which accommodates the family’s abundant amount of serving platters, baking sheets, bakeware, casserole dishes, and additional cutting boards.
The project is enhanced aesthetically by:
➢ new 5-piece Versailles pattern porcelain tile that now seamlessly joins the entire down stairs area together creating a bright, cohesiveness feeling instead of choppy separated spaces - it also adds a coastal feeling
➢ designing a cabinet to conceal the microwave and toaster oven
➢ the coastal influenced light fixtures over the nook table and island
➢ the sandy colors of the Langdon Cambria countertops. The swirling pattern and sparkling quartz pieces remind the homeowner of black-and-tan sandy beaches
➢ the striped banquet seating whose creamy white background and blue-green stripes were the inspiration for the cabinet and wall colors.
➢ All the interior doors were painted black to coordinate with the blacks and grays in the backsplash tile and countertop. This also adds a hint of tailored formality to an otherwise casual space.
➢ the use of WAC's Oculux small aperture LED units for the overhead lighting complimented with Diode LED strips for task lighting under the cabinets and inside the pantry and glass wall cabinets. All of the lighting applications are on separate dimmer switches.
Innovative uses of materials or construction methods by Realty Restoration LLC:
➢ Each 1-1/2” x 3” block of reclaimed end-grain black walnut that makes up the center island chopping block was hand milled and built in the shop. It was designed to look substantial and proportional to the surrounding elements, executed by creating the 4 inch tall top with a solid wood chamfered edge band.
➢ The metal doors on either side of the vent hood were also custom designed for this project and built in the Realty Restoration LLC shop. They are made 1x2, 11-gauge mild steel with ribbed glass. Weighing 60 lbs a piece, heavy duty cabinet hinges were added to support the weight of the door and keep them from sagging.
➢ Under-cabinet receptacles were added along the range wall in order to have a clean, uninterrupted backsplash.
Design obstacles to overcome:
➢ Because we were removing the demising walls between the kitchen and living room, we had to find a way to plumb and vent the new island. We did this by tunneling through the slab (the slab had post tension cables which prevented us from just trenching) to run a new wet vent through a nearby structural wall. We pulled the existing hot and cold lines between upper floor joists and ran them down the structural wall as well and up through a conduit in the tunnel.
➢ Since we were converting from wall overs to a gas range it allowed us to utilize the 220 feed for the wall ovens to provide a new sub panel for all the new kitchen circuits
➢ Due to framing deficiencies inherited from the original build there was a 1-1/2” differential in the floor-to-ceiling height over a 20 foot span; by utilizing the process of cutting and furring coupled with the crown moulding details on the cabinet elevations we were able to mask the problem and provide seamless transitions between the cabinet components.
Evidence of superior craftsmanship:
➢ uniquely designed, one-of-a-kind metal “X” end panels on the large island. The end panels were custom made in the Realty Restoration LLC shop and fitted to the exact dimensions of the island. The welding seams are completely indistinguishable - the posts look like they are cut from a single sheet of metal
➢ square metal posts on the small island were also custom made and designed to compliment and carry through the metal element s throughout the kitchen
➢ the beautiful, oversized end panels on the pantry cabinets which give the breakfast nook a tailored look
➢ integrating a large format 5 piece Versailles tile pattern to seamlessly flow from the existing spaces into the new kitchen space
➢ By constructing a custom cabinet that jogged around a corner we could not remodel (housing the entry way coat closet) we were able to camouflage the adjacent wall offset within the upper and lower cabinets. By designing around the existing jog in the structural walls we accomplished a few things: we were able to find the space to house, and hide, the microwave and toaster oven yet still have a clean cohesive appearance from the kitchen side. Additionally, the owners were able to keep their much needed coat closet and we didn’t have to increase the budget with unnecessary structural work.
 Xtreme Renovations, LLC
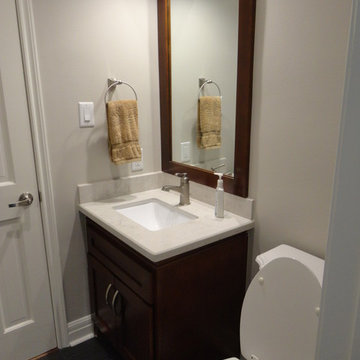
Xtreme Renovations has completed a Major Renovation Project near the Tomball area of Harris County. This project required demolition of the existing Kitchen Cabinetry and removing fur downs, rerouting HVAC Registers, Electrical and installation of Natural Gas lines for converting from an All Electric Kitchen to Natural Gas cooktop with an Xtreme Exhaust System above the new gas cooktop. Existing walls wear moved during the demolition process to expand the original footprint of the Kitchen to include additional cabinetry and relocation of the new Double Oven as well as an open Pantry area. All new Custom Built Cabinetry were installed made from Maple wood and stained to the specification of our clients. New Quartz countertops were fabricated and installed throughout the Kitchen as well as a Bar Area in the Great Room which also included Custom Built Cabinetry. New tile flooring was installed throughout the Mud Room, Kitchen, Breakfast Area, Hall Way adjoining the Formal Dining Room and Powder Bath. Back splash included both Ceramic and Glass Tile to and a touch of class and the Wow Factor our clients desired and deserved. Major drywall work was required throughout the Kitchen, Great Room, Powder Bath and Breakfast Area. Many added features such as LED lighting on dimmers were installed throughout the Kitchen including under cabinet lighting. Installation of all new appliances was included in the Kitchen as well as the Bar Area in the Great Room. Custom Built Corner Cabinetry was also installed in the Formal Dining Room.
Custom Built Crown Molding was also part of this project in the Great Room designed to match Crown Molding above doorways. Existing paneling was removed and replaced with drywall to add to this Major Update of the 1970’s constructed home. Floating, texturing and painting throughout both levels of this 2 Story Home was also completed.
The existing stairway in the Great Room was removed and new Wrought Iron Spindles, Handrails, Hardwood Flooring were installed. New Carpeting and Hardwood Flooring were included in the Renovation Project.
State of the Art CAT 6 cabling was installed in the entire home adding to the functionality of the New Home Entertainment and Computer Networking System as well as connectivity throughout the home. The Central hub area for the new cabling is climate controlled and vented for precise temperature control. Many other items were addressed during this Renovation Project including upgrading the Main Electrical Service, Custom Built Cabinetry throughout the Mud Room and creating a closet where the existing Double Oven was located with access to new shelving and coat racks in the Mud Room Area. At Xtreme Renovations, “It’s All In The Details” and our Xtreme Team from Design Concept to delivering the final product to our clients is Job One.
 kimberly peck architect
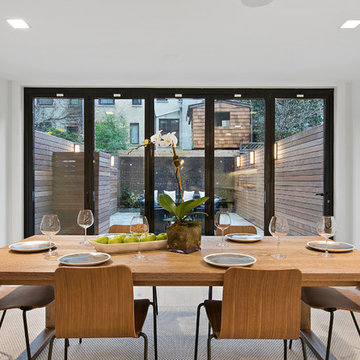
When the developer found this brownstone on the Upper Westside he immediately researched and found its potential for expansion. We were hired to maximize the existing brownstone and turn it from its current existence as 5 individual apartments into a large luxury single family home. The existing building was extended 16 feet into the rear yard and a new sixth story was added along with an occupied roof. The project was not a complete gut renovation, the character of the parlor floor was maintained, along with the original front facade, windows, shutters, and fireplaces throughout. A new solid oak stair was built from the garden floor to the roof in conjunction with a small supplemental passenger elevator directly adjacent to the staircase. The new brick rear facade features oversized windows; one special aspect of which is the folding window wall at the ground level that can be completely opened to the garden. The goal to keep the original character of the brownstone yet to update it with modern touches can be seen throughout the house. The large kitchen has Italian lacquer cabinetry with walnut and glass accents, white quartz counters and backsplash and a Calcutta gold arabesque mosaic accent wall. On the parlor floor a custom wetbar, large closet and powder room are housed in a new floor to ceiling wood paneled core. The master bathroom contains a large freestanding tub, a glass enclosed white marbled steam shower, and grey wood vanities accented by a white marble floral mosaic. The new forth floor front room is highlighted by a unique sloped skylight that offers wide skyline views. The house is topped off with a glass stair enclosure that contains an integrated window seat offering views of the roof and an intimate space to relax in the sun.
 Trout Design Studio
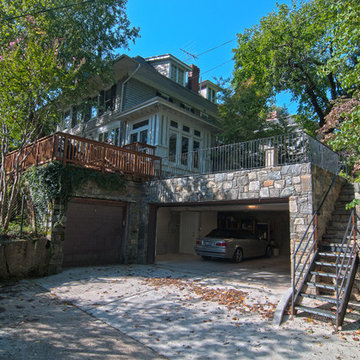
the existing historic stone walls were meticulously dismantled and salvaged so they could be re-used. Using small bobcat excavation equipment and hand shovels, the rear yard was removed entirely, the rear of the house was underpinned and a new reinforced concrete garage was built from property line to property line in place of the entire rear yard of the home with deep planting wells at the north property line for larger planning specimens. The historic stone walls were meticulously re-built, the existing historic metal stair from the yard to the alley was replaced, a new black steel picket safety fence was installed and the rear yard and the landscaping was restored.
Kathy Ma, Studio By Mak http://www.studiobymak.com/#/special/splash/studio-by-mak/
Sponsored
Sunbury, OH

J.Holderby - Renovations
Franklin County's Leading General Contractors - 2X Best of Houzz!
 Framestudio
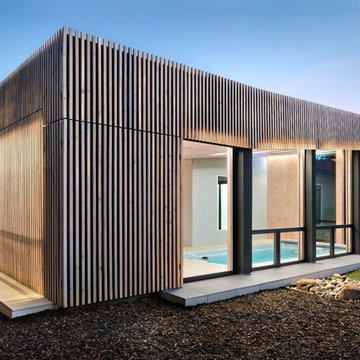
This project began as a design-build proposal to build an addition for an indoor swim spa and exercise room to a ranch style house. The Clients were seeking a functional and inviting space reminiscent of the luxury resorts and space they have visited during their international travels.
One of the biggest challenges was to fit the program within the site and buildable area constraints. In order to maximize floor area, the exterior walls of the addition were located parallel to the property lines along the required setbacks, which resulted in a non-orthagonal geometry in plan. The volume of the addition began to take shape with large floor to ceiling openings strengthening the connection to the outdoors with roof line that rises northward to capture daylight. A series of operable skylights ventilate the room and allow more daylight to penetrate into the adjacent existing den.
Inspired by modern additions made to historic structures in Europe, we made a conscious decision to not try to blend the addition into the language of the existing ranch house, choosing instead to juxtapose a structure that was layered and felt light next to the cement tile roof and framed picture windows. The interior walls were finished with a marine grade plywood to withstand a humid environment, and the exteriors were clad with a cedar rainscreen to give privacy where needed and gradually reduced to allow for more glass and visibility.
The Clients are immersed in the technological environment of Silicon Valley and appreciated the simple geometries and aesthetics of modern design.
c david wakely
 Western DuPage Landscaping, Inc.
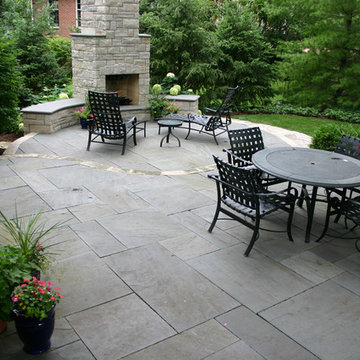
After years of enjoying their backyard, the clients of this property enlisted our firm to improve the original landscape we had completed over ten years ago. Our goal was to update the patio and further develop their backyard by creating a garden with a variety of color and texture.
Over time the existing patio had settled, plantings grew, and an existing Oak thrived. During the initial home and landscape construction our clients were particularly concerned about the health of the mature Oak located just off the home. Special care was given when the patio was first built. Precautions were again taken in working around the Oak as the existing patio was removed and replaced. Surrounding trees and shrubs had grown and enclosed the backyard limiting access. This required almost all work and transport of material to be done by hand.
The old concrete paver patio was replaced with bluestone. Existing mortared limestone around the edges of the patio levels were cleaned and tuck-pointed. A new stoop was constructed with mortared limestone risers and bluestone treads. A built-in grill and fireplace further updated the backyard space. The fireplace was designed to follow the organic curve of the patio. Mortared limestone and bluestone material were repeated on all elements, tying them together.
Along with the updated patio, many additions were made in transforming the modest backyard into a lush garden. Masses of annuals, ornamental grasses, and perennials along with mixed shrubs created sweeps of color and texture in front of a new arborvitae hedge and other existing trees and shrubs.
After careful planning and execution the completed landscape gave our clients the updated landscape they desired. The completion of the project was a rewarding and fulfilling experience as we transformed a good past project into a fantastic new project.
 Granit Architects + Interiors
Photo Credit: Andrew Beasley
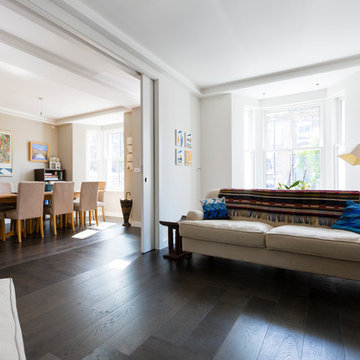
Living room - contemporary living room idea in London
Living room - contemporary living room idea in London
 EW Architecture Inc.
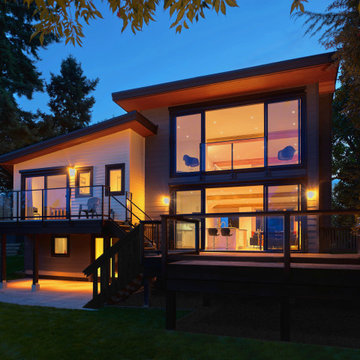
At roughly 1,600 sq.ft. of existing living space, this modest 1971 split level home was too small for the family living there and in need of updating. Modifications to the existing roof line, adding a half 2nd level, and adding a new entry effected an overall change in building form. New finishes inside and out complete the alterations, creating a fresh new look. The sloping site drops away to the east, resulting in incredible views from all levels. From the clean, crisp interior spaces expansive glazing frames the VISTA.
 Dynamic Garage Door
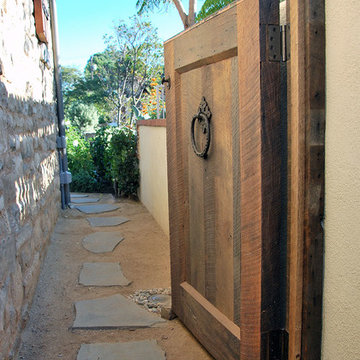
This Tuscan style gate in reclaimed wood gate could have easily been pulled out of a villa in Tuscany! Nonetheless, it was custom designed and hand made by Dynamic Garage Door's skilled designers and experienced craftsmen. Working with centuries-old reclaimed wood is a skill that requires a taste for the finer things in life much like aged wine. We strive to conserve the authentic and natural characteristics that mother nature has given every piece of lumber we collect from our supplying lumber yards in California. Our rustic style gates are intricately crafted to showcase the charming characteristics of the century-old wood used to fabricate our gates.
This particular gate was made by hand using reclaimed oak wood, a species that commonly yields earthy brown tones that played well with this home's existing rock walls and natural landscaping. Beefy knocker pulls were used to decorate and reinforce that rough, rustic appearance you would find on doors located in the Tuscan Riviera. Our designer, Mario Collazo, pulled his knowledge of authentic Tuscan architecture fusing it together with the home's existing color scheme and surfaces as an art canvas to further elaborate and enhance the home's Tuscan architectural taste. The curb appeal of this Tuscan Style home in Newport Beach, CA was automatically enhanced adding old world charm and artistic appeal.
Get custom designed gates that go with YOUR home, not ones that will resonate your neighbor's taste onto your home. Let Dynamic Garage Door create something unique, out-of-the-box that will harmonize with your home, express your personal taste and demonstrate true and accurate custom design!
Get a price or design consultation on any of our gate, shutter or garage door projects by calling our design and manufacturing center in Orange County, CA: (855) 343-3667


 Board & Vellum
Landscape contracting by Avid Landscape.
Carpentry by Contemporary Homestead.
Photograph by Meghan Montgomery.
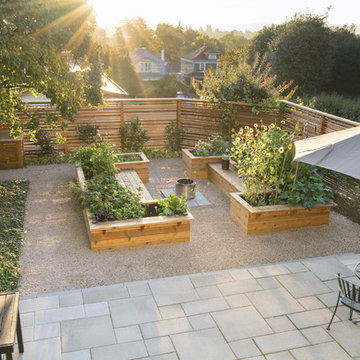
This is an example of a mid-sized transitional full sun backyard gravel vegetable garden landscape in Seattle.
This is an example of a mid-sized transitional full sun backyard gravel vegetable garden landscape in Seattle.
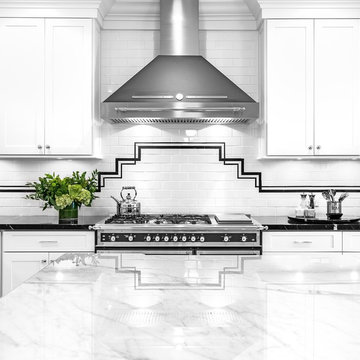
 Zieba Builders, Inc.
The use of ornate lighting fixture, black tiles, geometric forms, and chrome has really captured the Art Deco style in the space.
Example of a trendy kitchen design in Los Angeles
Example of a trendy kitchen design in Los Angeles
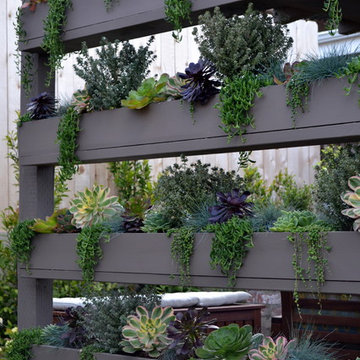
 Living Gardens Landscape Design
Succulent wall
Photo of a small contemporary backyard landscaping in Orange County.
Photo of a small contemporary backyard landscaping in Orange County.
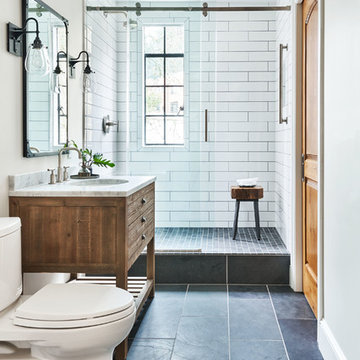
Example of a small transitional 3/4 white tile and ceramic tile bathroom design in Portland with distressed cabinets, a two-piece toilet, white walls, a console sink, marble countertops, gray countertops and flat-panel cabinets
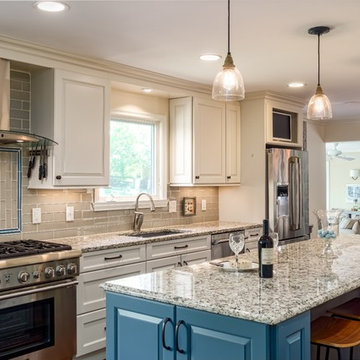
Sponsored
Columbus, OH

Trish Takacs Design
Award Winning & Highly Skilled Kitchen & Bath Designer in Columbus
 Tile Doctor Ltd
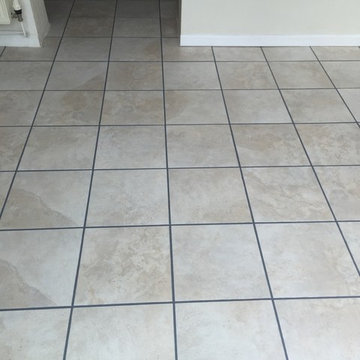
The task of keeping these white Ceramic Kitchen and Conservatory tiles clean was proving very challenging for this customer, who lives in the town of Somerton in Somerset. Somerton is known for its bustling market, which has supposedly been run on a weekly basis since the Middle Ages, and its famous ‘Market Cross’ at the centre of the beautiful marketplace is a popular tourist attraction for visitors to the West Country.
It probably comes as no surprise to anyone that white tiles are often more difficult to keep clean than others. However, in this case, rather than being badly marked or damaged, these Ceramic tiles had become dirty due to the surface being pitted rather than smooth which trapped ground in marks from spills and dirty footprints etc. The pitted rough surface is very characteristic and provides better grip however they do trap dirt are therefore more difficult to keep clean.
The grout had also suffered over the years, losing a lot of its colour in the process so as well as cleaning the tiles we agreed to give the grout a really deep clean and also to colour the grout to make it more uniform.
To clean the tiles, I firstly created a strong diluted of Tile Doctor Pro Clean and applied it liberally across the entire floor, leaving it to dwell and soak into the tile for a short period in order to soften the ingrained dirt. I then used my heavy weight rotary machine fitted with a black scrubbing pad to agitate the solution and break down the muck.
Once satisfied with the condition of the tiles I turned my attention to the grout lines, cleaning them carefully by hand using a stiff tile cleaning brush and the same solution of Pro Clean and water. This provided a deep, penetrating that clean that left the grout lines clean and free from the dirt and grease that had dulled their appearance for so long.
With some great results achieved through the cleaning, I rinsed the whole floor to wash away any leftover Pro-Clean and left it to dry fully overnight.
I returned to the property the next day to check on the floor and after ensuring the floor was completely dry, proceeded to recolour the grout lines using Tile Doctor’s Grout Colourant. Our Grout Colourants are a waterborne epoxy that recolours, seals and rejuvenates existing grout joints and is available in ten different colours ranging from white to dark greys. The scrubbing with Pro-Clean the day before would also ensure the surface of the grout was clean and would make a good surface for the colourant to bond with.
Since in the past the grout lines had undergone a number of repairs, the existing colour was a mix of different greys. It made most sense then that they picked our ‘Natural Grey’ Grout Colourant for me to use. I painted the Colourant on carefully and waited for 30 minutes before removing any excess, leaving the grout lines perfectly covered in a uniform colour.
The difference was really noticeable and the property owner was really happy with the results. As you can see from the photos, the new grey Colourant really made the grout lines stand out against the clean white Ceramic tiles. Another satisfied customer.
Dave Hurst
Somerset Tile Doctor
 Twelve Stones Designs, LLC
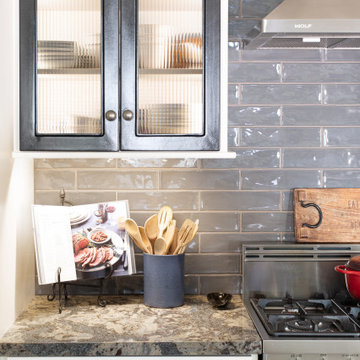
The owners of this kitchen had spent the money to upgrade the finishes in their kitchen upon building the home 12 years ago, but after living in the space for several years they realized how nonfunctional the layout really was. The (then) two preschool aged children had grown into busy, hungry teenagers with many friends who also liked to hang out at the house. So the family needed a more functional kitchen with better traffic flow, space for daily activities revolving around the kitchen at different times of day, and a kitchen that could accommodate cooking for and serving large groups. Furthermore, the dark, traditional finishes no longer reflected the homeowners’ style. They requested a brighter, more relaxed, coastal style that reflected their love of the seaside cities they like to visit.
Originally, the kitchen was U-shaped with a narrow island in the middle. The island created narrow aisles that bottle-necked at the dishwasher, refrigerator, and cooktop areas. There was a pass-through from the foyer into the kitchen, but the owners never liked that the pass-through was also located so close to the powder room. The awkward proximity was unappealing and made guests feel uncomfortable.
The kitchen’s storage was made up of lots of narrow cabinets, apothecary drawers, clipped corner units, and very few drawers. It lacked useful storage for the larger items the family used on a daily basis. And the kitchen’s only pantry was small closet that had only builder-grade, narrow shelving with no illumination to be able to see the contents inside.
Overall, the kitchen’s lighting plan was poorly executed. Only six recessed cans illuminated the entire kitchen and nook areas. The under cabinet lighting was not evenly distributed either. In fact, the builder had mis-placed the under cabinet lighting around the decorative pilasters which made for choppy, dark cubbies. Further, the builder didn’t include any lighting over the sink or the bar area, which meant whoever was doing the dishes was always in their own shadow. That, coupled with the steep overhang of the game room above made the bar area feel like a dim, cavernous space that wasn’t inviting or task oriented. The kitchen looked out into the main living space, but the raised bar and a narrow wall (which held the only large cabinet in the kitchen) created more of a barrier than a relationship to the living room or breakfast nook. In fact, one couldn’t even see the breakfast nook from the cooktop or sink areas due to its orientation. The raised bar top was too narrow to comfortably sit to either dine at or chat from due to the lack of knee space. The the homeowners confided that the kitchen felt more like a dark, dirty prison than place where the family, or their guests, wanted to gather and commune.
The clients' needs and desires were:
➢ to create a kitchen that would be a space the family loved to be in; to relate to the adjacent spaces all around, and to have better flow for entertaining large groups
➢ to remove the walls between the breakfast nook and living area and to be able to utilize the natural light from the windows in both those areas
➢ to incorporate a functional chopping block for prepping fresh food for home cooked meals, an island with a large sink and drain board, 2 pull out trash cans, and seating for at least the 2 teens to eat or do homework
➢ to design a kitchen and breakfast nook with an airy, coastal, relaxed vibe that blended with the rest of the house's coastal theme
➢ to integrate a layered lighting plan which would include ample general illumination, specific task lighting, decorative lighting, and lots of illuminated storage
➢ to design a kitchen with not only more storage for all the husband’s kitchen gadgets and collection of oils and spices, but smart storage, including a coffee/breakfast bar and a place to store and conceal the toaster oven and microwave
➢ to find a way to utilize the large open space between the kitchen, pantry area, and breakfast nook
Twelve Stones Designs achieved the owner's goals by:
➢ removing the walls between the kitchen and living room to allow the natural light to filter in from the adjacent rooms and to create a connection between the kitchen, nook, and living spaces for a sense of unity and communion
➢ removing the existing pantry and designing 3 large pantry style cabinets with LED tape lights and rollout drawers to house lots of kitchen appliances, gadgets, and tons of groceries. We also took the cabinets all the way up to the 9’ ceiling for additional storage for seasonal items and bulk storage.
➢ designing 2 islands - 1 with a gorgeous black walnut chopping block that houses a drawer for chopping and carving knives and a custom double pull out trash unit for point of use utilization - and 1 that houses the dishwasher, a large Blanco Gourmet sink with integrated drain board, woven baskets for fresh root vegetables and kitchen towels, plenty of drawer storage for kitchen items, and bar seating for up to 4 diners.
➢ closing off the space between the kitchen and the powder room to create a beautiful new private alcove for the powder room as well as adding some decorative storage. This also gave us space to include more tall storage near the new range for precision placement of the husband’s extensive oil and spice collection as well as a location for a combo-steam oven the wife wanted for baking and cooking healthy meals.
The project is enhanced functionally by:
➢ incorporated USB and standard receptacles for the kids’ laptops and phone charging in the large island
➢ designing the small island to include additional open shelving for items used on a daily basis such as a variety of bowls, plates, and colanders. This set up also works well for the husband who prefers to “plate” his dinners in restaurant-style fashion before presenting them to the table.
➢ the integration of specific storage units, such as double stacked cutlery drawers, a custom spice pull-out, a Kuerig coffee and tea pod drawer, and custom double stacked utensil drawers
➢ moving the refrigerator to the old oven location - this eliminated the bottle neck as well as created a better relationship to the eating table. It also utilizes the floor space between the pantry, nook, and kitchen
➢ creating a banquet style breakfast nook - this banquette seating not only doubles the amount of seating for large gatherings but it better utilizes the odd space between the kitchen and the previous nook area. It also helps to create a distinct pathway from the mudroom room through the pantry area, kitchen, nook, and living room.
➢ the coffee/breakfast bar area which includes the perfect location for the concealed microwave and toaster oven, convenient storage for the coffee pods and tea accoutrements. Roll-out drawers below also house the smoothie maker, hot water kettle, and a plethora of smoothie-making ingredients such as protein powders, smoothie additives, etc. Furthermore, the drawers below the Keurig house measuring utensil, cutlery, baking supplies and tupperware storage.
➢ incorporating lots of wide drawers and pullouts to accommodate large cookware.
➢ utilizing as much vertical space as possible by building storage to the ceiling which accommodates the family’s abundant amount of serving platters, baking sheets, bakeware, casserole dishes, and additional cutting boards.
The project is enhanced aesthetically by:
➢ new 5-piece Versailles pattern porcelain tile that now seamlessly joins the entire down stairs area together creating a bright, cohesiveness feeling instead of choppy separated spaces - it also adds a coastal feeling
➢ designing a cabinet to conceal the microwave and toaster oven
➢ the coastal influenced light fixtures over the nook table and island
➢ the sandy colors of the Langdon Cambria countertops. The swirling pattern and sparkling quartz pieces remind the homeowner of black-and-tan sandy beaches
➢ the striped banquet seating whose creamy white background and blue-green stripes were the inspiration for the cabinet and wall colors.
➢ All the interior doors were painted black to coordinate with the blacks and grays in the backsplash tile and countertop. This also adds a hint of tailored formality to an otherwise casual space.
➢ the use of WAC's Oculux small aperture LED units for the overhead lighting complimented with Diode LED strips for task lighting under the cabinets and inside the pantry and glass wall cabinets. All of the lighting applications are on separate dimmer switches.
Innovative uses of materials or construction methods by Realty Restoration LLC:
➢ Each 1-1/2” x 3” block of reclaimed end-grain black walnut that makes up the center island chopping block was hand milled and built in the shop. It was designed to look substantial and proportional to the surrounding elements, executed by creating the 4 inch tall top with a solid wood chamfered edge band.
➢ The metal doors on either side of the vent hood were also custom designed for this project and built in the Realty Restoration LLC shop. They are made 1x2, 11-gauge mild steel with ribbed glass. Weighing 60 lbs a piece, heavy duty cabinet hinges were added to support the weight of the door and keep them from sagging.
➢ Under-cabinet receptacles were added along the range wall in order to have a clean, uninterrupted backsplash.
Design obstacles to overcome:
➢ Because we were removing the demising walls between the kitchen and living room, we had to find a way to plumb and vent the new island. We did this by tunneling through the slab (the slab had post tension cables which prevented us from just trenching) to run a new wet vent through a nearby structural wall. We pulled the existing hot and cold lines between upper floor joists and ran them down the structural wall as well and up through a conduit in the tunnel.
➢ Since we were converting from wall overs to a gas range it allowed us to utilize the 220 feed for the wall ovens to provide a new sub panel for all the new kitchen circuits
➢ Due to framing deficiencies inherited from the original build there was a 1-1/2” differential in the floor-to-ceiling height over a 20 foot span; by utilizing the process of cutting and furring coupled with the crown moulding details on the cabinet elevations we were able to mask the problem and provide seamless transitions between the cabinet components.
Evidence of superior craftsmanship:
➢ uniquely designed, one-of-a-kind metal “X” end panels on the large island. The end panels were custom made in the Realty Restoration LLC shop and fitted to the exact dimensions of the island. The welding seams are completely indistinguishable - the posts look like they are cut from a single sheet of metal
➢ square metal posts on the small island were also custom made and designed to compliment and carry through the metal element s throughout the kitchen
➢ the beautiful, oversized end panels on the pantry cabinets which give the breakfast nook a tailored look
➢ integrating a large format 5 piece Versailles tile pattern to seamlessly flow from the existing spaces into the new kitchen space
➢ By constructing a custom cabinet that jogged around a corner we could not remodel (housing the entry way coat closet) we were able to camouflage the adjacent wall offset within the upper and lower cabinets. By designing around the existing jog in the structural walls we accomplished a few things: we were able to find the space to house, and hide, the microwave and toaster oven yet still have a clean cohesive appearance from the kitchen side. Additionally, the owners were able to keep their much needed coat closet and we didn’t have to increase the budget with unnecessary structural work.

22