
Search results for "Experience carefully" in Home Design Ideas
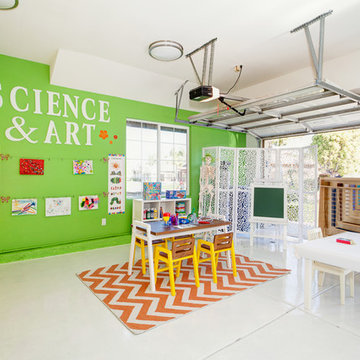


 TOM WILLIAMSON LANDSCAPING
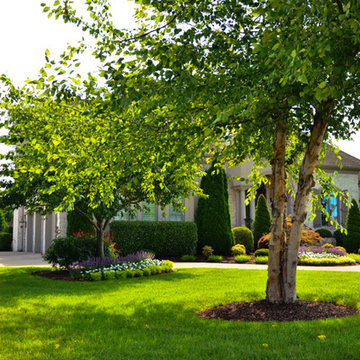
Full home landscaping from Design which lead to excavation, new bed areas, driveway and masonry in front, and side yards,
About:
Tom Williamson Landscaping, Inc.
Simple. Elegant. Landscaping.
When preserving or remodeling your outdoor inspirational gardens, entertainment areas, or read-a-book oasis, you can rely on a professional landscaper for the best in beautiful design. As your advocates, they shop multiple nurseries to ensure that you get the healthiest of shrubs, trees, flowers, ground cover, and seed for your installations. Other design elements professionals consider are strong defining rock walls, delightful three-season blooming beds, and healthy rolling lawns. Plus, their planning and project management are additional skills that significantly affect the look and life of your garden.
Years of experience and training and working alongside horticultural experts develop the important skills of the trade. But, the ability to turn a home into a representation of the family’s successes and accomplishments is the artistry that only a seasonal professional landscaper can deliver.
Welcome to Tom Williamson Landscaping. We design, install and maintain brilliant gardens and lawns, providing this high level of beauty. Our 30 years of servicing Westchester County’s fine homes and families is a testament to our ability to listen and respond to your visions and needs. We have the artists, the muscle, and the management to provide — not only gardens and lawns your neighbors will envy — but the “experience” that ensures you hired the right landscaper.
So, if you are planning on refreshing your home and outdoors with stone or living environments, visit our gallery to see our work. We are here, happy to answer your questions. Call us today at 914-762-4927 or email us.
More Services offered
Landscaping and Masonry; Ground cover, Pachysandra, Rose bush installation, Boxwood installation, Tree installation, Bushes, Plantings, Trees, Seasonal plantings, Urns, Pruning, Fertilization, Lawn care & Maintenance, Mulching, Installation of Large Trees, Holiday Trimming, Snowplowing, Landscape Design and construction, Lawn Installation: sod, hydro seeding, spot seeding, Lawn Fertilizing, Lyme application, design plans
Extended Services provided are everything great gardening:
Landscaping and Masonry; Ground cover, Pachysandra installation, Rose bush installation, Boxwood installation, Tree installation, Bushes, Plantings, Trees, Seasonal plantings, Urns, Pruning, Fertilization, Lawn care & Maintenance, Mulching, Installation of Large Trees, Holiday Trimming, Snowplowing to keep your home enjoyable even in the winter. Landscape Design and construction, Lawn care and maintenance, Lawn Installation: sod, hydro seeding, spot seeding, Lawn Fertilizing and Lyme application, Landscape design plans and installation, Masonry: stone walls, patios, walkways, garden paths, boulder steps, Planting Bed Care: mulching, weeding, edging, trimming, Pruning: trees & shrubs, Deep Root Feeding: Trees and shrubs, Tree Installation: dwarf to large, ornamental, flowering, evergreen, Maple, Cedar, Dogwood, Cherry, Apple, Red Bud, Shrub Installation: Boxwood, Holly, Juniper, Cypress, Dogwood twig, Leucothoe, Andromeda, Viburnum, Hydrangea, Lylac, Installation Ornamental Grasses: Fountain grass, Fox Tail grass, Hakone grass, ferns, Ground Cover Installation: Pachysandra, Ivy, Vinca, Perennial Installation: Daffodils, Tulips, Lilies, Lavender, Hibiscus, Black-eyed Susan, Bleeding Heart, Peony, Sage, Clematis, Sedum, Hosta, Sage, Iris, Plumbago, Astilbe, and Ferns, Flowering Annuals Installation: Pansies, Begonias, Petunias, Daises, Geraniums, Impatiens, Lantana, Fushia, Bacopa, Flower Pots, Urns and Boxes: Overflowing mixture of annuals, perennials and hangers for spring, summer, fall and winter, Gutter Cleaning: Late fall, Snow Removal: Plowing, salting, walkways shoveled, roofs raked, Winter Holiday Trimming
Areas cover:
10504, 10506, 10510, 10514, 10546, 10549, 10562, 10570, 10510, 10506
Servicing Chappaqua, Briarcliff Manor, Ossining, Scarborough, Pleasantville, Armonk, and Mt. Kisco and Bedford
Chappaqua 10514 Landscaping: http://www.tomwilliamsonlandscaping.com/photos
Scarsdale landscaping: http://www.tomwilliamsonlandscaping.com/photos
Masonry in Chappaqua: http://www.tomwilliamsonlandscaping.com/photos
Masonry in Pleasantville: http://www.tomwilliamsonlandscaping.com/photos
Armonk landscaping specialists: http://www.tomwilliamsonlandscaping.com/photos
Mt. Kisco landscaping specialists: http://www.tomwilliamsonlandscaping.com/photos
Briarcliff Manor 10510 landscaping contractors: http://www.tomwilliamsonlandscaping.com/photos
Braircliff masonry 10510 contractors: http://www.tomwilliamsonlandscaping.com/photos
Armonk Masonry contractors: http://www.tomwilliamsonlandscaping.com/photos
Chappaqua rock wall specialists: http://www.tomwilliamsonlandscaping.com/photos
Ossining landscaping: http://www.tomwilliamsonlandscaping.com/photos
Ossining Masonry: http://www.tomwilliamsonlandscaping.com/photos
Scarborough Landscaper: http://www.tomwilliamsonlandscaping.com/photos
Scarborough Stone Wall and Mason: http://www.tomwilliamsonlandscaping.com/photos
Pleasantville land design and installation of large trees: http://www.tomwilliamsonlandscaping.com/photos
Pleasantville landscaper: http://www.tomwilliamsonlandscaping.com/photos
Mt. Kisco masonry contractors: http://www.tomwilliamsonlandscaping.com/photos
Armonk stone wall, driveway and pathway designer: http://www.tomwilliamsonlandscaping.com/photos
Best Landscaper in Westchester, NY : http://www.tomwilliamsonlandscaping.com/photos
Hottest landscape business in Westchester, NY: http://www.tomwilliamsonlandscaping.com/photos
Photo by: Tom Williamson & Kevin Williamson
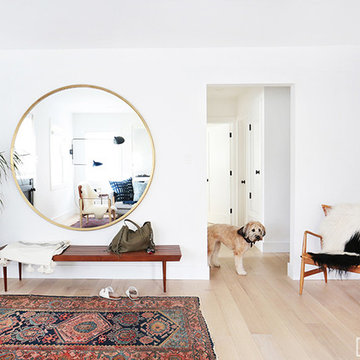
 Amber Interiors
Tessa Neustadt http://tessaneustadt.com
Inspiration for a scandinavian entryway remodel in Los Angeles
Inspiration for a scandinavian entryway remodel in Los Angeles
Find the right local pro for your project
 Thinkterior LLC
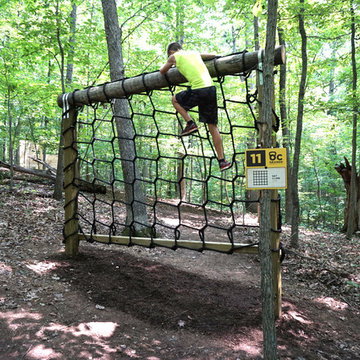
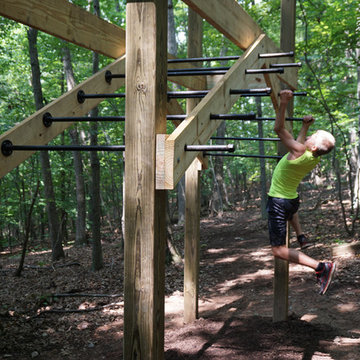
For a family who believes fitness is not only an essential part of life but also a fun opportunity for the whole family to connect, build and achieve greatness together there is nothing better than a custom designed obstacle course right in your back yard.
THEME
The theme of this half mile trail through the woods is evident in the fun, creative and all-inclusive obstacles hidden in the natural flow of the land around this amazing family home. The course was created with adults and children, advanced and beginner athletes, competitive and entertaining events all accounted for. Each of the 13 obstacles was designed to be challenging no matter the size, skill or ability of the athlete lucky enough to run the course.
FOCUS
The focus for this family was to create an outdoor adventure that could be an athletic, social and personal outlet for their entire family while maintaining the natural beauty of the landscape and without altering the sweeping views from the home. The large scale of the challenging obstacles is camouflaged within the landscape using the rolling hills and mature trees as a natural curtain in every season. The beauty of the course does not diminish the functional and demanding nature of the obstacles which are designed to focus on multiple strength, agility, and cardio fitness abilities and intensities.
STORAGE
The start of the trail includes a raised training area offering a dedicated space clear from the ground to place bags, mats and other equipment used during the run. A small all-terrain storage cart was provided for use with 6 yoga mats, 3 medicine balls of various weights, rings, sprinting cones, and a large digital timer to record laps.
GROWTH
The course was designed to provide an athletic and fun challenge for children, teens and adults no matter their experience or athletic prowess. This course offers competitive athletes a challenge and budding athletes an opportunity to experience and ignite their passion for physical activity. Initially the concept for the course was focused on the youngest of the family however as the design grew so did the obstacles and now it is a true family experience that will meet their adapting needs for years. Each obstacle is paired with an instructional sign directing the runners in proper use of the obstacle, adaptations for skill levels and tips on form. These signs are all customized for this course and are printed on metal to ensure they last for many years.
SAFETY
Safety is crucial for all physical activity and an obstacle course of this scale presents unique safety concerns. Children should always be supervised when participating in an adventure on the course however additional care was paid to details on the course to ensure everyone has a great time. All of the course obstacles have been created with pressure treated lumber that will withstand the seasonal poundings. All footer pilings that support obstacles have been placed into the ground between 3 to 4 feet (.9 to 1.2 meters) and each piling has 2 to 3 bags of concrete (totaling over 90 bags used throughout the course) ensuring stability of the structure and safety of the participants. Additionally, all obstacle lumber has been given rounded corners and sanded down offering less splintering and more time for everyone to enjoy the course.
This athletic and charismatic family strives to incorporate a healthy active lifestyle into their daily life and this obstacle course offers their family an opportunity to strengthen themselves and host some memorable and active events at their amazing home.

 Thinkterior LLC
For a family who believes fitness is not only an essential part of life but also a fun opportunity for the whole family to connect, build and achieve greatness together there is nothing better than a custom designed obstacle course right in your back yard.
THEME
The theme of this half mile trail through the woods is evident in the fun, creative and all-inclusive obstacles hidden in the natural flow of the land around this amazing family home. The course was created with adults and children, advanced and beginner athletes, competitive and entertaining events all accounted for. Each of the 13 obstacles was designed to be challenging no matter the size, skill or ability of the athlete lucky enough to run the course.
FOCUS
The focus for this family was to create an outdoor adventure that could be an athletic, social and personal outlet for their entire family while maintaining the natural beauty of the landscape and without altering the sweeping views from the home. The large scale of the challenging obstacles is camouflaged within the landscape using the rolling hills and mature trees as a natural curtain in every season. The beauty of the course does not diminish the functional and demanding nature of the obstacles which are designed to focus on multiple strength, agility, and cardio fitness abilities and intensities.
STORAGE
The start of the trail includes a raised training area offering a dedicated space clear from the ground to place bags, mats and other equipment used during the run. A small all-terrain storage cart was provided for use with 6 yoga mats, 3 medicine balls of various weights, rings, sprinting cones, and a large digital timer to record laps.
GROWTH
The course was designed to provide an athletic and fun challenge for children, teens and adults no matter their experience or athletic prowess. This course offers competitive athletes a challenge and budding athletes an opportunity to experience and ignite their passion for physical activity. Initially the concept for the course was focused on the youngest of the family however as the design grew so did the obstacles and now it is a true family experience that will meet their adapting needs for years. Each obstacle is paired with an instructional sign directing the runners in proper use of the obstacle, adaptations for skill levels and tips on form. These signs are all customized for this course and are printed on metal to ensure they last for many years.
SAFETY
Safety is crucial for all physical activity and an obstacle course of this scale presents unique safety concerns. Children should always be supervised when participating in an adventure on the course however additional care was paid to details on the course to ensure everyone has a great time. All of the course obstacles have been created with pressure treated lumber that will withstand the seasonal poundings. All footer pilings that support obstacles have been placed into the ground between 3 to 4 feet (.9 to 1.2 meters) and each piling has 2 to 3 bags of concrete (totaling over 90 bags used throughout the course) ensuring stability of the structure and safety of the participants. Additionally, all obstacle lumber has been given rounded corners and sanded down offering less splintering and more time for everyone to enjoy the course.
This athletic and charismatic family strives to incorporate a healthy active lifestyle into their daily life and this obstacle course offers their family an opportunity to strengthen themselves and host some memorable and active events at their amazing home.
 Advance Design Studio, Ltd.
Scott and Janet of Elgin have had four design to build renovations with Advance Design over the last decade. We got the chance to sit down and talk with Janet about her experience working with Advance Design on so many different areas of her home. Starting with her kitchen in 2009, Janet proclaimed, “The reason we kept coming back is because our first [renovation] went so extremely well, exceeding all of my expectations.”
Since their kitchen renovation with Advance Design ten years ago, Scott and Janet have also worked with Advance to remodel their master bedroom, their power room, a wet bar, and most recently their master bath. Having renovated practically every major room in the house with the team, we asked Janet what made her experience with Advance Design so special. “We went with Advance Design because we trusted them so much more, their experience, and everything that they brought. We were confident they were giving us what we wanted for the money we were spending.”
For their most recent renovation, Scott and Janet clearly knew what to expect going into their master bath renovation. They were familiar with Advance’s step by step design process that epitomizes the “Common Sense Remodeling” philosophy applied in every project Advance creates. After once again experiencing the careful budgeting analysis, the pointed design meetings, and the clear documentation that leads up the a thoroughly managed installation, Janet’s simple summary of their experience is this; “The word I would use to describe the process is – collaboration!”
Working closely with Advance Design kitchen designer Michelle Lecinski, together they were able to develop a new master bath design that not only worked with their investment goal, but also made sense for their lifestyle. “Oh Michelle, my designer! I connected with her immediately. She spent time getting to know us, our lifestyle, even the setting of our house.” The threesome had a great experience designing and producing yet another successful project together.
When it came to their new project plans, Scott and Janet were interested in creating a relaxing “spa-like” experience in their master bath. One of the many ideas Michelle introduced during the design process was installing a Kohler Alteo series showerhead for a rain-like shower experience. This designer showerhead, mixed with the warm ambiance of the lighting and pebble accent running throughout the shower make for what Janet calls a “luxury spa essence”. From the oversized glass sliding door to the recessed niche for accessories, each special detail was considered and implemented intentionally so as to create the maximumly optimized use of the compact space. Not only was this transformation one of beauty and luxury, but special attention was given to every way possible to provide additional storage to maximize the functionality of the bath area as a whole.
Once design was complete and the bath construction project began in their home, making sure everything happened efficiently and on schedule became new priority number one. “Having a project manager made an enormous difference,” Janet said, “It was so worth it to hire professionals that knew exactly what they were doing. Even after all of these years, I wouldn’t change a thing.”
“It was a pleasure working together with Janet and Scott to create this beautiful space that will enhance their lives for many years,” says Michelle. “It is so much fun to get to do this job every day, I love that I can have this sort of impact on their lives by doing something for them [Janet & Scott] that comes so naturally to me!”
After reviewing the long-term relationship with clients like Scott and Janet, owner Todd Jurs had this to say, “Clients returning and asking us to transform that next area of their home really warms my heart. It reaffirms that every decision to please clients no matter what is always the right choice, and that our honesty and integrity along with the immense collective talent of this team is recognized and appreciated by those who continue to return to us year after year.” He continued to say, “I always say how blessed we truly are to be able to do what we do, and experiences like this one put a smile on my face every time.”
 Carpenter & MacNeille
Michael J. Lee Photography
Inspiration for a small country home design remodel in Boston
Inspiration for a small country home design remodel in Boston

 Rock Paper Hammer
Construction by Deep Creek Builders
Photography by Andrew Hyslop
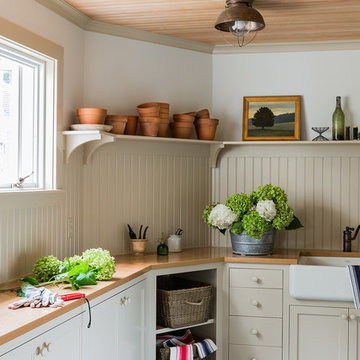
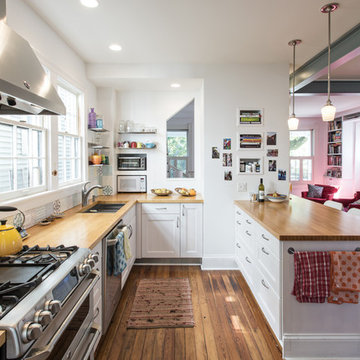
Kitchen - small transitional u-shaped medium tone wood floor kitchen idea in Louisville with an undermount sink, shaker cabinets, white cabinets, wood countertops, multicolored backsplash, ceramic backsplash, stainless steel appliances and a peninsula
Kitchen - small transitional u-shaped medium tone wood floor kitchen idea in Louisville with an undermount sink, shaker cabinets, white cabinets, wood countertops, multicolored backsplash, ceramic backsplash, stainless steel appliances and a peninsula
 Advance Design Studio, Ltd.
Scott and Janet of Elgin have had four design to build renovations with Advance Design over the last decade. We got the chance to sit down and talk with Janet about her experience working with Advance Design on so many different areas of her home. Starting with her kitchen in 2009, Janet proclaimed, “The reason we kept coming back is because our first [renovation] went so extremely well, exceeding all of my expectations.”
Since their kitchen renovation with Advance Design ten years ago, Scott and Janet have also worked with Advance to remodel their master bedroom, their power room, a wet bar, and most recently their master bath. Having renovated practically every major room in the house with the team, we asked Janet what made her experience with Advance Design so special. “We went with Advance Design because we trusted them so much more, their experience, and everything that they brought. We were confident they were giving us what we wanted for the money we were spending.”
For their most recent renovation, Scott and Janet clearly knew what to expect going into their master bath renovation. They were familiar with Advance’s step by step design process that epitomizes the “Common Sense Remodeling” philosophy applied in every project Advance creates. After once again experiencing the careful budgeting analysis, the pointed design meetings, and the clear documentation that leads up the a thoroughly managed installation, Janet’s simple summary of their experience is this; “The word I would use to describe the process is – collaboration!”
Working closely with Advance Design kitchen designer Michelle Lecinski, together they were able to develop a new master bath design that not only worked with their investment goal, but also made sense for their lifestyle. “Oh Michelle, my designer! I connected with her immediately. She spent time getting to know us, our lifestyle, even the setting of our house.” The threesome had a great experience designing and producing yet another successful project together.
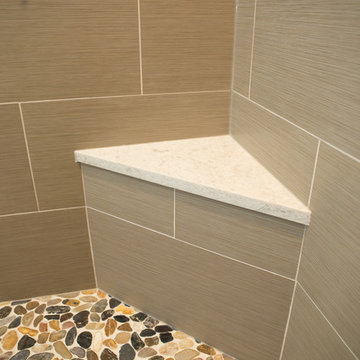
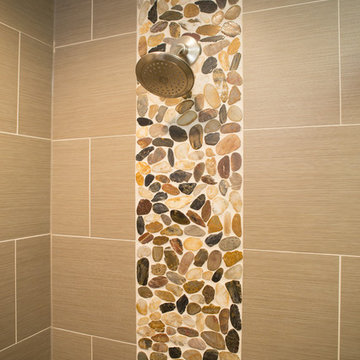
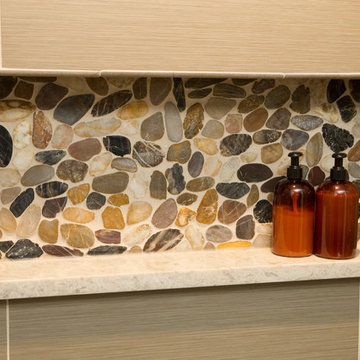
When it came to their new project plans, Scott and Janet were interested in creating a relaxing “spa-like” experience in their master bath. One of the many ideas Michelle introduced during the design process was installing a Kohler Alteo series showerhead for a rain-like shower experience. This designer showerhead, mixed with the warm ambiance of the lighting and pebble accent running throughout the shower make for what Janet calls a “luxury spa essence”. From the oversized glass sliding door to the recessed niche for accessories, each special detail was considered and implemented intentionally so as to create the maximumly optimized use of the compact space. Not only was this transformation one of beauty and luxury, but special attention was given to every way possible to provide additional storage to maximize the functionality of the bath area as a whole.
Once design was complete and the bath construction project began in their home, making sure everything happened efficiently and on schedule became new priority number one. “Having a project manager made an enormous difference,” Janet said, “It was so worth it to hire professionals that knew exactly what they were doing. Even after all of these years, I wouldn’t change a thing.”
“It was a pleasure working together with Janet and Scott to create this beautiful space that will enhance their lives for many years,” says Michelle. “It is so much fun to get to do this job every day, I love that I can have this sort of impact on their lives by doing something for them [Janet & Scott] that comes so naturally to me!”
After reviewing the long-term relationship with clients like Scott and Janet, owner Todd Jurs had this to say, “Clients returning and asking us to transform that next area of their home really warms my heart. It reaffirms that every decision to please clients no matter what is always the right choice, and that our honesty and integrity along with the immense collective talent of this team is recognized and appreciated by those who continue to return to us year after year.” He continued to say, “I always say how blessed we truly are to be able to do what we do, and experiences like this one put a smile on my face every time.”
 TOM WILLIAMSON LANDSCAPING
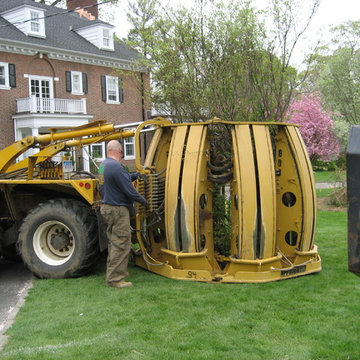
Full home landscaping from Design which lead to excavation, new bed areas, driveway and masonry in front, and side yards,
About:
Tom Williamson Landscaping, Inc.
Simple. Elegant. Landscaping.
When preserving or remodeling your outdoor inspirational gardens, entertainment areas, or read-a-book oasis, you can rely on a professional landscaper for the best in beautiful design. As your advocates, they shop multiple nurseries to ensure that you get the healthiest of shrubs, trees, flowers, ground cover, and seed for your installations. Other design elements professionals consider are strong defining rock walls, delightful three-season blooming beds, and healthy rolling lawns. Plus, their planning and project management are additional skills that significantly affect the look and life of your garden.
Years of experience and training and working alongside horticultural experts develop the important skills of the trade. But, the ability to turn a home into a representation of the family’s successes and accomplishments is the artistry that only a seasonal professional landscaper can deliver.
Welcome to Tom Williamson Landscaping. We design, install and maintain brilliant gardens and lawns, providing this high level of beauty. Our 30 years of servicing Westchester County’s fine homes and families is a testament to our ability to listen and respond to your visions and needs. We have the artists, the muscle, and the management to provide — not only gardens and lawns your neighbors will envy — but the “experience” that ensures you hired the right landscaper.
So, if you are planning on refreshing your home and outdoors with stone or living environments, visit our gallery to see our work. We are here, happy to answer your questions. Call us today at 914-762-4927 or email us.
More Services offered
Landscaping and Masonry; Ground cover, Pachysandra, Rose bush installation, Boxwood installation, Tree installation, Bushes, Plantings, Trees, Seasonal plantings, Urns, Pruning, Fertilization, Lawn care & Maintenance, Mulching, Installation of Large Trees, Holiday Trimming, Snowplowing, Landscape Design and construction, Lawn Installation: sod, hydro seeding, spot seeding, Lawn Fertilizing, Lyme application, design plans
Extended Services provided are everything great gardening:
Landscaping and Masonry; Ground cover, Pachysandra installation, Rose bush installation, Boxwood installation, Tree installation, Bushes, Plantings, Trees, Seasonal plantings, Urns, Pruning, Fertilization, Lawn care & Maintenance, Mulching, Installation of Large Trees, Holiday Trimming, Snowplowing to keep your home enjoyable even in the winter. Landscape Design and construction, Lawn care and maintenance, Lawn Installation: sod, hydro seeding, spot seeding, Lawn Fertilizing and Lyme application, Landscape design plans and installation, Masonry: stone walls, patios, walkways, garden paths, boulder steps, Planting Bed Care: mulching, weeding, edging, trimming, Pruning: trees & shrubs, Deep Root Feeding: Trees and shrubs, Tree Installation: dwarf to large, ornamental, flowering, evergreen, Maple, Cedar, Dogwood, Cherry, Apple, Red Bud, Shrub Installation: Boxwood, Holly, Juniper, Cypress, Dogwood twig, Leucothoe, Andromeda, Viburnum, Hydrangea, Lylac, Installation Ornamental Grasses: Fountain grass, Fox Tail grass, Hakone grass, ferns, Ground Cover Installation: Pachysandra, Ivy, Vinca, Perennial Installation: Daffodils, Tulips, Lilies, Lavender, Hibiscus, Black-eyed Susan, Bleeding Heart, Peony, Sage, Clematis, Sedum, Hosta, Sage, Iris, Plumbago, Astilbe, and Ferns, Flowering Annuals Installation: Pansies, Begonias, Petunias, Daises, Geraniums, Impatiens, Lantana, Fushia, Bacopa, Flower Pots, Urns and Boxes: Overflowing mixture of annuals, perennials and hangers for spring, summer, fall and winter, Gutter Cleaning: Late fall, Snow Removal: Plowing, salting, walkways shoveled, roofs raked, Winter Holiday Trimming
Areas cover:
10504, 10506, 10510, 10514, 10546, 10549, 10562, 10570, 10510, 10506
Servicing Chappaqua, Briarcliff Manor, Ossining, Scarborough, Pleasantville, Armonk, and Mt. Kisco and Bedford
Chappaqua 10514 Landscaping: http://www.tomwilliamsonlandscaping.com/photos
Scarsdale landscaping: http://www.tomwilliamsonlandscaping.com/photos
Masonry in Chappaqua: http://www.tomwilliamsonlandscaping.com/photos
Masonry in Pleasantville: http://www.tomwilliamsonlandscaping.com/photos
Armonk landscaping specialists: http://www.tomwilliamsonlandscaping.com/photos
Mt. Kisco landscaping specialists: http://www.tomwilliamsonlandscaping.com/photos
Briarcliff Manor 10510 landscaping contractors: http://www.tomwilliamsonlandscaping.com/photos
Braircliff masonry 10510 contractors: http://www.tomwilliamsonlandscaping.com/photos
Armonk Masonry contractors: http://www.tomwilliamsonlandscaping.com/photos
Chappaqua rock wall specialists: http://www.tomwilliamsonlandscaping.com/photos
Ossining landscaping: http://www.tomwilliamsonlandscaping.com/photos
Ossining Masonry: http://www.tomwilliamsonlandscaping.com/photos
Scarborough Landscaper: http://www.tomwilliamsonlandscaping.com/photos
Scarborough Stone Wall and Mason: http://www.tomwilliamsonlandscaping.com/photos
Pleasantville land design and installation of large trees: http://www.tomwilliamsonlandscaping.com/photos
Pleasantville landscaper: http://www.tomwilliamsonlandscaping.com/photos
Mt. Kisco masonry contractors: http://www.tomwilliamsonlandscaping.com/photos
Armonk stone wall, driveway and pathway designer: http://www.tomwilliamsonlandscaping.com/photos
Best Landscaper in Westchester, NY : http://www.tomwilliamsonlandscaping.com/photos
Hottest landscape business in Westchester, NY: http://www.tomwilliamsonlandscaping.com/photos
Photo by: Tom Williamson & Kevin Williamson
 Advance Design Studio, Ltd.
Scott and Janet of Elgin have had four design to build renovations with Advance Design over the last decade. We got the chance to sit down and talk with Janet about her experience working with Advance Design on so many different areas of her home. Starting with her kitchen in 2009, Janet proclaimed, “The reason we kept coming back is because our first [renovation] went so extremely well, exceeding all of my expectations.”
Since their kitchen renovation with Advance Design ten years ago, Scott and Janet have also worked with Advance to remodel their master bedroom, their power room, a wet bar, and most recently their master bath. Having renovated practically every major room in the house with the team, we asked Janet what made her experience with Advance Design so special. “We went with Advance Design because we trusted them so much more, their experience, and everything that they brought. We were confident they were giving us what we wanted for the money we were spending.”
For their most recent renovation, Scott and Janet clearly knew what to expect going into their master bath renovation. They were familiar with Advance’s step by step design process that epitomizes the “Common Sense Remodeling” philosophy applied in every project Advance creates. After once again experiencing the careful budgeting analysis, the pointed design meetings, and the clear documentation that leads up the a thoroughly managed installation, Janet’s simple summary of their experience is this; “The word I would use to describe the process is – collaboration!”
Working closely with Advance Design kitchen designer Michelle Lecinski, together they were able to develop a new master bath design that not only worked with their investment goal, but also made sense for their lifestyle. “Oh Michelle, my designer! I connected with her immediately. She spent time getting to know us, our lifestyle, even the setting of our house.” The threesome had a great experience designing and producing yet another successful project together.
When it came to their new project plans, Scott and Janet were interested in creating a relaxing “spa-like” experience in their master bath. One of the many ideas Michelle introduced during the design process was installing a Kohler Alteo series showerhead for a rain-like shower experience. This designer showerhead, mixed with the warm ambiance of the lighting and pebble accent running throughout the shower make for what Janet calls a “luxury spa essence”. From the oversized glass sliding door to the recessed niche for accessories, each special detail was considered and implemented intentionally so as to create the maximumly optimized use of the compact space. Not only was this transformation one of beauty and luxury, but special attention was given to every way possible to provide additional storage to maximize the functionality of the bath area as a whole.
Once design was complete and the bath construction project began in their home, making sure everything happened efficiently and on schedule became new priority number one. “Having a project manager made an enormous difference,” Janet said, “It was so worth it to hire professionals that knew exactly what they were doing. Even after all of these years, I wouldn’t change a thing.”
“It was a pleasure working together with Janet and Scott to create this beautiful space that will enhance their lives for many years,” says Michelle. “It is so much fun to get to do this job every day, I love that I can have this sort of impact on their lives by doing something for them [Janet & Scott] that comes so naturally to me!”
After reviewing the long-term relationship with clients like Scott and Janet, owner Todd Jurs had this to say, “Clients returning and asking us to transform that next area of their home really warms my heart. It reaffirms that every decision to please clients no matter what is always the right choice, and that our honesty and integrity along with the immense collective talent of this team is recognized and appreciated by those who continue to return to us year after year.” He continued to say, “I always say how blessed we truly are to be able to do what we do, and experiences like this one put a smile on my face every time.”

 Advance Design Studio, Ltd.
Scott and Janet of Elgin have had four design to build renovations with Advance Design over the last decade. We got the chance to sit down and talk with Janet about her experience working with Advance Design on so many different areas of her home. Starting with her kitchen in 2009, Janet proclaimed, “The reason we kept coming back is because our first [renovation] went so extremely well, exceeding all of my expectations.”
Since their kitchen renovation with Advance Design ten years ago, Scott and Janet have also worked with Advance to remodel their master bedroom, their power room, a wet bar, and most recently their master bath. Having renovated practically every major room in the house with the team, we asked Janet what made her experience with Advance Design so special. “We went with Advance Design because we trusted them so much more, their experience, and everything that they brought. We were confident they were giving us what we wanted for the money we were spending.”
For their most recent renovation, Scott and Janet clearly knew what to expect going into their master bath renovation. They were familiar with Advance’s step by step design process that epitomizes the “Common Sense Remodeling” philosophy applied in every project Advance creates. After once again experiencing the careful budgeting analysis, the pointed design meetings, and the clear documentation that leads up the a thoroughly managed installation, Janet’s simple summary of their experience is this; “The word I would use to describe the process is – collaboration!”
Working closely with Advance Design kitchen designer Michelle Lecinski, together they were able to develop a new master bath design that not only worked with their investment goal, but also made sense for their lifestyle. “Oh Michelle, my designer! I connected with her immediately. She spent time getting to know us, our lifestyle, even the setting of our house.” The threesome had a great experience designing and producing yet another successful project together.
When it came to their new project plans, Scott and Janet were interested in creating a relaxing “spa-like” experience in their master bath. One of the many ideas Michelle introduced during the design process was installing a Kohler Alteo series showerhead for a rain-like shower experience. This designer showerhead, mixed with the warm ambiance of the lighting and pebble accent running throughout the shower make for what Janet calls a “luxury spa essence”. From the oversized glass sliding door to the recessed niche for accessories, each special detail was considered and implemented intentionally so as to create the maximumly optimized use of the compact space. Not only was this transformation one of beauty and luxury, but special attention was given to every way possible to provide additional storage to maximize the functionality of the bath area as a whole.
Once design was complete and the bath construction project began in their home, making sure everything happened efficiently and on schedule became new priority number one. “Having a project manager made an enormous difference,” Janet said, “It was so worth it to hire professionals that knew exactly what they were doing. Even after all of these years, I wouldn’t change a thing.”
“It was a pleasure working together with Janet and Scott to create this beautiful space that will enhance their lives for many years,” says Michelle. “It is so much fun to get to do this job every day, I love that I can have this sort of impact on their lives by doing something for them [Janet & Scott] that comes so naturally to me!”
After reviewing the long-term relationship with clients like Scott and Janet, owner Todd Jurs had this to say, “Clients returning and asking us to transform that next area of their home really warms my heart. It reaffirms that every decision to please clients no matter what is always the right choice, and that our honesty and integrity along with the immense collective talent of this team is recognized and appreciated by those who continue to return to us year after year.” He continued to say, “I always say how blessed we truly are to be able to do what we do, and experiences like this one put a smile on my face every time.”
 PETER E DESIGNS
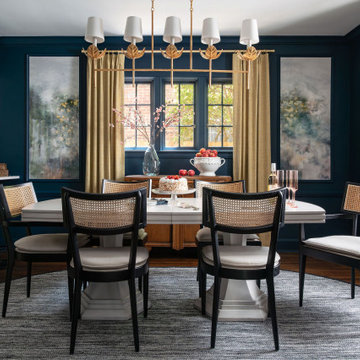
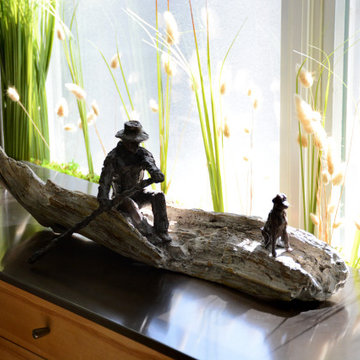
Dining Room for a Luxury Beach House. We design experiences! Carefully selected accents and materials work together to celebrate a sense of place. Even whimsical details, like seagrass window boxes act to the overall aim and effect.
 Make A Dream Home
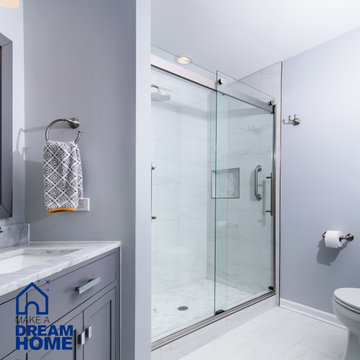
Make a Dream Home proudly presents a magnificent showcase of our recently completed master bathroom remodeling project in Bloomingdale, IL. With meticulous attention to detail and a commitment to creating luxurious and functional spaces, we have transformed an ordinary master bathroom into a captivating oasis of relaxation and elegance.
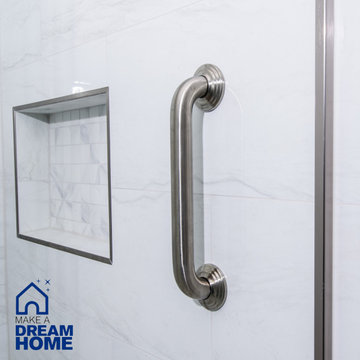
Upon entering the remodeled master bathroom, you will be greeted by the seamless integration of style and functionality. The centerpiece of the bathroom is a stunning standing shower, designed to provide a rejuvenating and invigorating experience. With carefully chosen tiles and fixtures, the shower exudes a sense of luxury and sophistication.
Flanking the shower are two exquisite sink cabinets, offering both elegance and practicality. These beautifully crafted cabinets provide ample storage space, ensuring a clutter-free environment while enhancing the overall aesthetic of the bathroom. The countertop materials have been thoughtfully selected to complement the design, creating a harmonious balance of form and function.
Every aspect of the design has been carefully curated to create a serene and inviting atmosphere. The color palette, lighting fixtures, and carefully placed accents come together to create a space that exudes tranquility and indulgence. Our goal was to ensure that the master bathroom becomes a sanctuary within the home, providing a haven for relaxation and rejuvenation.
Make a Dream Home's commitment to quality is evident throughout the project. From the selection of premium materials to the meticulous installation process, we have created a master bathroom that not only reflects our dedication to craftsmanship but also withstands the test of time.
The completed master bathroom remodeling project in Bloomingdale, IL is a testament to our expertise and attention to detail. With our careful design choices and skilled execution, we have achieved a harmonious blend of style and functionality. The remodeled bathroom now stands as a symbol of luxury and refinement, surpassing expectations and elevating the overall home experience.
If you seek a master bathroom that combines elegance, functionality, and relaxation, trust Make a Dream Home to bring your vision to life. Experience the joy of a beautifully remodeled master bathroom that exceeds your expectations and transforms your daily routines into moments of indulgence and tranquility.

 Temecula TreeCare Pros
Temecula TreeCare Pros offers expert tree service solutions tailored to the needs of the Temecula community. Our dedicated team specializes in comprehensive tree care, ensuring the health and longevity of your trees through maintenance and pruning. When it comes to tree removal, we handle each project with precision and care, prioritizing safety and environmental responsibility. Whether you need routine care or emergency services, our knowledgeable professionals are here to assist. Trust Temecula TreeCare Pros for all your tree service needs, and experience our commitment to quality and customer satisfaction. Enhance your landscape with our expert touch.

 Industrial Projects
Creating a comfortable outdoor living space is a priority for many homeowners and DIY enthusiasts. With rising summer temperatures, installing a shade tarp in your backyard offers an affordable and effective solution for sun protection. We’ve developed this detailed, step-by-step guide to help you confidently install a shade tarp that not only shields you from the sun but also adds aesthetic appeal to your outdoor area.
Benefits of Installing a Backyard Shade Tarp
Before diving into the installation process, let’s explore the key benefits of having a backyard shade tarp:
Provides UV Protection: Keeps your family and guests safe from harmful sun exposure.
Reduces Outdoor Temperatures: Creates a cooler, more enjoyable outdoor space.
Protects Outdoor Furniture: Extends the life of patio furniture by reducing sun damage.
Enhances Outdoor Aesthetics: Adds a modern, stylish look to your yard.
Budget-Friendly: More affordable compared to permanent structures like pergolas.
Materials and Tools You’ll Need
To begin your DIY backyard shade project, gather the following materials and tools:
Materials:
Shade tarp (UV-resistant and breathable)
Sturdy posts or existing structures (trees, fences, walls)
Mounting hardware (eye bolts, D-rings, turnbuckles, snap hooks)
Nylon or polyester rope, or stainless-steel wire
Concrete (if installing new posts)
Tools:
Power drill
Measuring tape
Level
Ladder
Wrench or adjustable spanner
Post hole digger (if installing new posts)
Step 1: Plan Your Shade Tarp Layout
The first step in installing your backyard shade tarp is careful planning. Take time to assess your outdoor area and answer these key questions:
Where is the sun’s path throughout the day?
What size and shape of tarp best suits your space?
Will you anchor the tarp to existing structures or install new posts?
What height do you want the tarp to sit at for maximum shade and airflow?
Pro Tip: Use string or garden hoses to visualize the tarp layout on the ground before making permanent decisions.
Step 2: Measure and Mark Anchor Points
Once you’ve determined the tarp’s location and orientation:
Measure the tarp dimensions.
Mark the exact points where each corner of the tarp will be anchored.
Ensure that the anchor points are at least 5–10% longer than the tarp size to allow for tensioning and slight adjustments.
Consider slope angles for water runoff. Aim for at least a 20-degree angle to prevent water pooling on the tarp.
Step 3: Install Support Posts (If Necessary)
If your backyard lacks existing anchor points like trees or fences, you’ll need to install sturdy support posts:
Dig post holes at least 24 inches deep and 8-12 inches wide for stability.
Set posts in concrete, making sure they remain plumb and level.
Allow the concrete to cure for at least 24–48 hours before applying tension from the tarp.
We recommend using pressure-treated wood, galvanized steel poles, or aluminum posts for longevity and strength.
Step 4: Install Mounting Hardware
With your anchor points ready, it’s time to install the necessary hardware:
Attach eye bolts or pad eyes securely into walls, posts, or other fixed structures.
For added flexibility and adjustability, install turnbuckles or tensioners to fine-tune the tarp’s tightness.
Connect snap hooks, D-rings, or carabiners to make assembly and disassembly easier.
Make sure all hardware is rated for outdoor use to prevent rust and corrosion.
Step 5: Attach and Tension the Shade Tarp
Now it’s time for the most satisfying part—mounting the shade tarp:
Begin by attaching one corner of the tarp to an anchor point.
Gradually attach the remaining corners, moving diagonally for even tension.
Adjust each connection point using your turnbuckles, ropes, or cables.
Pull the tarp tight enough to avoid sagging, but not so tight that it risks tearing.
Check that the tarp maintains the desired slope for rainwater runoff and adjust tension as needed.
Step 6: Final Adjustments and Safety Check
Before enjoying your new shaded area:
Inspect all anchor points and hardware for stability.
Test the tarp’s tension and make adjustments for even distribution.
Ensure that no sharp edges or loose connections remain that could damage the tarp or pose a safety hazard.
Confirm that the tarp is secure in windy conditions by giving it a gentle tug.
If you live in an area with frequent high winds, consider removing the tarp during storms to prevent damage.
Step 7: Enjoy Your Shaded Backyard Oasis
Once installed, your backyard shade tarp provides a comfortable and protective space for outdoor gatherings, relaxation, or family activities. You can decorate underneath with outdoor furniture, string lights, or potted plants to create a personalized outdoor retreat.
Maintenance Tips for Long-Lasting Shade Tarp Performance
To extend the life of your shade tarp, follow these maintenance guidelines:
Regularly check for wear and tear, especially around anchor points and seams.
Clean the tarp periodically with mild soap and water to prevent mildew buildup.
Store the tarp indoors during harsh weather seasons if it's not designed for year-round use.
Tighten hardware as needed to maintain proper tension and avoid sagging.
By following these simple care steps, your shade tarp will continue to deliver years of sun protection and outdoor comfort.
Conclusion: Upgrade Your Outdoor Space with a DIY Shade Tarp
Installing a shade tarp in your backyard is a cost-effective and rewarding DIY project. With careful planning, quality materials, and proper installation techniques, you’ll enjoy cool, shaded outdoor living all season long. This step-by-step guide ensures your project goes smoothly from start to finish.
 Make A Dream Home
Make a Dream Home proudly presents a magnificent showcase of our recently completed master bathroom remodeling project in Bloomingdale, IL. With meticulous attention to detail and a commitment to creating luxurious and functional spaces, we have transformed an ordinary master bathroom into a captivating oasis of relaxation and elegance.
Upon entering the remodeled master bathroom, you will be greeted by the seamless integration of style and functionality. The centerpiece of the bathroom is a stunning standing shower, designed to provide a rejuvenating and invigorating experience. With carefully chosen tiles and fixtures, the shower exudes a sense of luxury and sophistication.
Flanking the shower are two exquisite sink cabinets, offering both elegance and practicality. These beautifully crafted cabinets provide ample storage space, ensuring a clutter-free environment while enhancing the overall aesthetic of the bathroom. The countertop materials have been thoughtfully selected to complement the design, creating a harmonious balance of form and function.
Every aspect of the design has been carefully curated to create a serene and inviting atmosphere. The color palette, lighting fixtures, and carefully placed accents come together to create a space that exudes tranquility and indulgence. Our goal was to ensure that the master bathroom becomes a sanctuary within the home, providing a haven for relaxation and rejuvenation.
Make a Dream Home's commitment to quality is evident throughout the project. From the selection of premium materials to the meticulous installation process, we have created a master bathroom that not only reflects our dedication to craftsmanship but also withstands the test of time.
The completed master bathroom remodeling project in Bloomingdale, IL is a testament to our expertise and attention to detail. With our careful design choices and skilled execution, we have achieved a harmonious blend of style and functionality. The remodeled bathroom now stands as a symbol of luxury and refinement, surpassing expectations and elevating the overall home experience.
If you seek a master bathroom that combines elegance, functionality, and relaxation, trust Make a Dream Home to bring your vision to life. Experience the joy of a beautifully remodeled master bathroom that exceeds your expectations and transforms your daily routines into moments of indulgence and tranquility.
7