
Search results for "Extract" in Home Design Ideas
 Tile Doctor Ltd
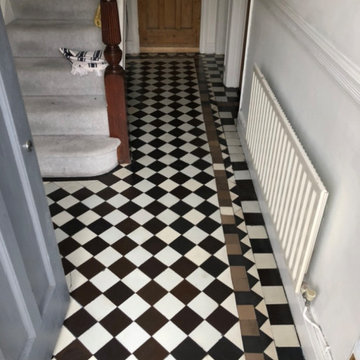
This job was carried out in a terraced property in Llanelli which had a Victorian Tiled Hallway laid in a diamond pattern that looking worse for wear and in need of some attention. The clients were a young couple who had moved in two years previously and had only recently decided they wanted the floor renovated. This was earlier in the year, so I was able to pop over to the property and take a detailed look at the floor before recommending a course of action to renovate the tiles.
Upon arrival the first thing we noticed was that the border had been laid with an inconsistent pattern, non- matching tiles had been patched in essentially filling voids as you can see in the images. The floor wasn’t terribly dirty however it wasn’t very clean either.
I discussed with the client replacing the non-matching tiles, so the floor pattern was uniform however they decided against it and were happy to just to have it cleaned and sealed. We can usually source either reclaimed original tiles or some great reproduction ones, so most floors can be restored if needed. I worked out a quote for the work and they were happy to go ahead.
If you have never been you should know that Llanelli is the largest town in the county of Carmarthenshire and famous for Rugby and the production of Tin. It is located on the Loughor Estuary, some 10 miles from Swansea and 12 miles from Carmarthen.
With no tiling to do the first job was to protect the woodwork such as skirting and staircase with tape. Once done the process of cleaning began with the application of a 400-grit burnishing pad fitted to a buffing machine. The process is lubricated with water and the pad run over the whole floor two to three times to remove dirt and refine the appearance of the tile. Even after the first application of the pad we could see a massive improvement to the appearance of the tiles. To get right into the edges of the tiled floor we use a 400-grit handheld diamond block, this proved especially useful under the stairs where our buffer machine could not reach.
During this process, the water turns into a fine slurry which is rinsed off with more water and extracted with a wet vacuum. On this occasion the floor was not dirty enough to require any chemicals, the use of water and the machine was enough to get the floor cleaned up.
This job was very straight forward, and we did not run into any problems at all. After allowing the floor to dry out for 24 hours we returned to seal the tiles checking first that the floor was sufficiently dry first using a damp meter. Fortunately, the burnishing method uses a lot less water than a chemical clean, so I was able to get straight on with sealing.
The client wanted a satin sheen finish, so I applied four coats of Tile Doctors Seal and Go which works well on Victorian tiles. The sealer really put the life back into the tiles and will protect them from staining going forward. It will also make the floor much easier to maintain and keep it looking good for much longer.
I’m pleased to say the owners were very happy with the floor and recommended us to one of their friends who we also did some work for. For aftercare I recommended the use of Tile Doctor Neutral Tile Cleaner. This is an everyday tile cleaning product that is sealer friendly and not prematurely reduce the life of the sealer which can happen with many household cleaning products which are simply too strong.
Adrian Iacono
Swansea Tile Doctor

 CLR Design Services, Inc.
Corner shower - large contemporary master marble floor and gray floor corner shower idea in Houston with shaker cabinets, white cabinets, multicolored walls, an undermount sink, quartz countertops, a hinged shower door and gray countertops

Find the right local pro for your project
 Abodeacious
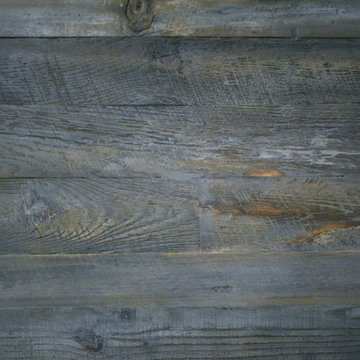
Close up of the weathered grey finish
Example of a large mountain style kitchen/dining room combo design in Chicago
Example of a large mountain style kitchen/dining room combo design in Chicago
 Manhattan Comfort
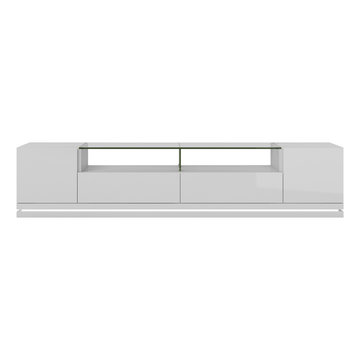
The freestanding Vanderbilt TV Stand is an elegant choice for your contemporary space, featuring a beautiful tempered glass stand to fit up to an 80” screen and components. It includes 2 doors, 2 full extension drawers, 2 open shelves, and the option for LED lighting around the stand. In your choice of White Gloss, Maple Cream-Off White, Nut Brown, and Black with Pro Touch. The unique paint is protected by the Microban Antibacterial Protection.
 CnS Contracting LLC
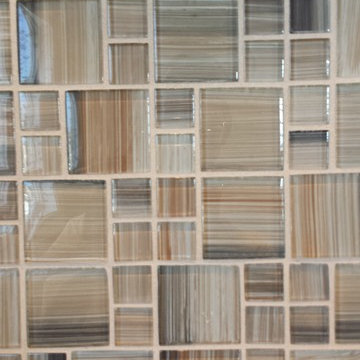
Master Bathroom Shower wall tile
Alcove shower - mid-sized coastal master green tile and glass tile pebble tile floor alcove shower idea in New York with an integrated sink, recessed-panel cabinets, beige cabinets, solid surface countertops, a one-piece toilet and gray walls
Alcove shower - mid-sized coastal master green tile and glass tile pebble tile floor alcove shower idea in New York with an integrated sink, recessed-panel cabinets, beige cabinets, solid surface countertops, a one-piece toilet and gray walls
 Cherry City Interiors & Design
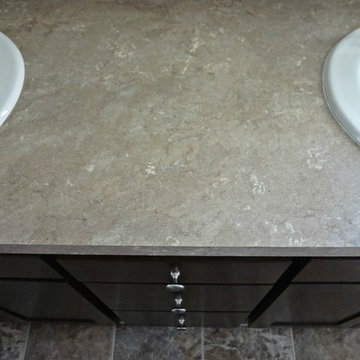
Builder: Mike Riddle Construction Materials provided by: Cherry City Interiors & Design
Bathroom - mid-sized traditional master beige tile and stone tile bathroom idea in Portland with a drop-in sink, shaker cabinets, dark wood cabinets, laminate countertops, a one-piece toilet and gray walls
Bathroom - mid-sized traditional master beige tile and stone tile bathroom idea in Portland with a drop-in sink, shaker cabinets, dark wood cabinets, laminate countertops, a one-piece toilet and gray walls
 New Design Inc.
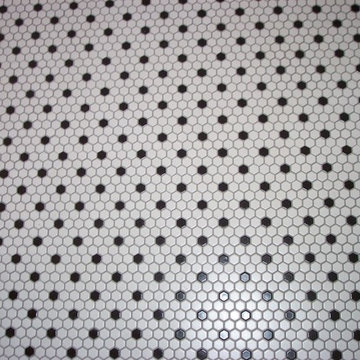
Example of a mid-sized master black and white tile and subway tile claw-foot bathtub design in Detroit with white walls
 Tile Doctor Ltd
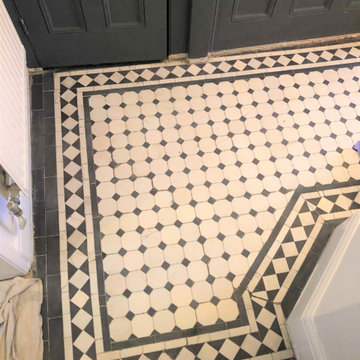
The owners of this Edwardian property in Finchley had purchased it a couple of years prior and since then had slowly been renovating it to restore its original character. The project was almost complete and now attention had turned to the tiled floor. The tiles were in quite a state and I was asked to work our Tile Doctor magic and bring it back to its original condition.
When they moved in the hallway had been covered with carpet which gave the tiles underneath some protection. Unfortunately, however the carpet has been secured with carpet grippers that had been glued to the tiles around the edges. There were also paint splashes on the surface that would need dealing with. On top of that the floor had a few missing tiles that had been back filled by cement to provide a level base for the carpet, the client wanted like them replaced if possible.
After surveying the floor, I explained what could be done and ever completed a small test clean to demonstrate how the tiles would look once deep cleaned. I was confident on being able to source very similar reclaimed tiles so replacing the missing should not be a problem. The client was very happy with the initial test result and my quotation so booked me in to restore the floor.
On my return I started by applying Tile Doctor Remove and Go to soften up the glue which allowed it to be carefully peeled off the tiles with scrappers. Once all the carpet adhesive was gone, I worked a strong dilution of Tile Doctor Remove and Go into the tiles using a black pad to work the cleaning solution deeper into the tiles. A wet vacuum was used to remove the slurry created, and I followed this by giving the tiles an extra clean using a 200-grit diamond burnishing pad lubricated with water.
The last step in the cleaning process was to give the floor an acid rinse using Tile Doctor Grout Clean-up, I did this for several reasons, first it removes old grout smears from the surface of the tile and second it neutralised any efflorescent salts lying dormant in the floor. This can be quite a problem for old floors which don’t have the benefit of a protective damp proof membrane under the floor. The floor was given a final rinse with water which was again extracted with a wet vacuum.
I then set about lifting all the loose tiles (approximately ten) and carefully removing the concrete infills. I had previously managed to source replacements for these holes from original features. Unfortunately, they didn’t sell the correct sized octagon tiles, so I had bought 150mm square tiles and then needed to cut them on site to get the right size.
After cutting and fixing the tiles I fixed them in place and regrouted the rest of the floor.
I then left the floor to dry out overnight and returned in the morning. Before applying a sealer, I took several moisture readings with the damp meter to make sure the tiles were dry enough to take the sealer.
I was able to confirm the floor was dry, so went ahead and applied three coats of Tile Doctor Colour Grow sealant. Colour Grow is an impregnating sealer that is fully breathable sealer which is important when it comes to old floors like these that don’t have a damp proof membrane installed.
My client was very happy with the renovated floor and for aftercare I left them with a bottle of Tile Doctor Neutral Tile Cleaner and gave advice on how best to clean the floor going forward.
Andrew Newstead
North London Tile Doctor
 Act 1 Flooring, Inc.
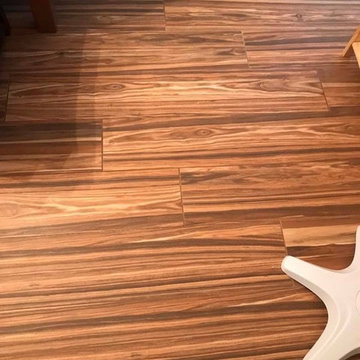
This is a Happy Floors wood look tile called Teja Amazonas.
Living room - small contemporary open concept porcelain tile and brown floor living room idea in Miami
Living room - small contemporary open concept porcelain tile and brown floor living room idea in Miami

 Jon Allen Fine Metal Art
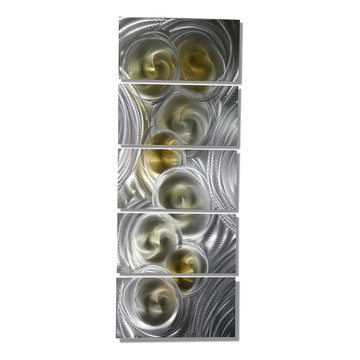
Metallic Vision Deuxième by Jon Allen
My signature-defined hand textured intricacies and carvings into the metal capture and reflect surrounding light sources creating enhanced interaction with dramatic illusions of depth and 3D movement as viewed from different angles. Hang it in your living room, bedroom, kitchen, bathroom, office, or outdoors. This abstract metal art will wow and impress your guests. Display under natural lighting or make this original artwork the show stopping centerpiece of any room with track lighting or gallery spot lights for dramatic effect. Lighting and other environmental factors interact with metal artwork in a unique, organic way.
Along with this signed piece of original metal art, every package includes easy mounting instructions, a measuring tool guide for simple installation, tips on lighting and other helpful information, and a Certificate of Authenticity. Unique pre-installed brackets for hanging are mounted to the back of each piece and "float" the artwork off the wall approximately 2". You can display this piece horizontally or vertically. Due to a wide variety of wall types, nails / screws for hanging are not provided. Every piece is quality inspected, gallery wrapped, and prepared carefully for safe global transit.
This five panel piece measures 64" x 24" x 2" (162.56 cm x 60.96 cm x 5.08 cm) including 1" spacing between panels.

 Hester Painting & Decorating
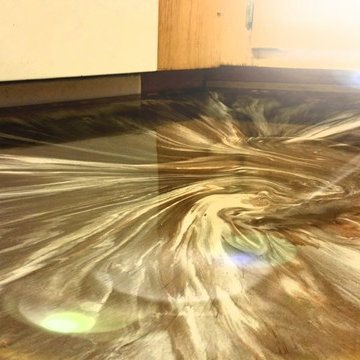
Hester Painting & Decorating hand finished this Starburst style wall in the kitchen of a Downtown Chicago Condo.
Small urban kitchen photo in Chicago
Small urban kitchen photo in Chicago


 Delpino Custom Homes
Photography by Colin Grey Voigt
Inspiration for a contemporary bathroom remodel in Charleston
Inspiration for a contemporary bathroom remodel in Charleston



 Soda Pop Design Inc.
Custom design by Cynthia Soda of Soda Pop Design Inc. in Toronto, Canada. Photography by Stephani Buchman Photography.
Construction by: Master Edge Homes Markham

 Dwellings Design Group
Example of a mid-sized eclectic master beige tile and limestone tile porcelain tile and gray floor freestanding bathtub design in Orange County with flat-panel cabinets, medium tone wood cabinets, a one-piece toilet, beige walls, quartz countertops, a vessel sink and a hinged shower door
 Tile Doctor Ltd
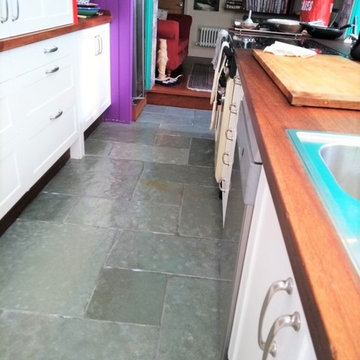
I recently helped a homeowner from my home town of Dursley who got in touch about her kitchen Flagstone floor. The problem revolved around an accident she had with raspberries which had stained the flagstones and the problem became compounded when a house hold clearing product was applied neat to clean up the mess. If you follow any of our Tile Doctor blogs, you will know that using strong household cleaning products can damage the sealer and, in this case, it had left white marks on the floor.
I called round to the property to survey the floor as was surprised to find out that the floor had been cleaned and sealed only four months prior by another company. I don’t like to comment on other people’s work, but I found the grout lines and flagstones were still badly ingrained with dirt, so it wasn’t a through job.
I completed by survey and demonstrated the process I would follow to resolve the issues on one of the flagstone tiles. She could not believe the difference I was able to make and booked me in straight away to restore the entire floor.
My first task was to protect the wooden kitchen units from splashing that can happen when cleaning the floor. Once that was done, I set about stripping the sealer from the floor and deep cleaning the tile and grout with a strong dilution of Tile Doctor Pro-Clean. Pro-Clean is a concentrated, multi-purpose high-alkaline cleaner, stripper and degreaser which is safe to use on all types of tile, stone and grout including natural stone.
Working in sections across the Kitchen and adjacent dining room I diluted one part Pro-Clean to two parts water and mopped it onto the flagstones and grout where I left it to soak in for roughly fifteen minutes. Then using a rotary floor buffer fitted with a black scrubbing pad I scrubbed the solution into the floor into the old sealer and trapped dirt came away turning the cleaning fluid black in the process. The soil was then rinsed off with water and then extracted with a powerful 3,000 watt wet and dry vacuum. This process was repeated until I was satisfied the floor was clean and I ran a stiff grout brush along the grout lines to ensure they also received a good scrub. After I was satisfied the section was clean it was rinsed thoroughly with water to neutralise the floor and remove any trace of product and then dried with the wet and dry vacuum.
The cleaning process took up the whole day, but the flagstones would need to be dry before sealing so after giving the owner an update I left the floor for two days, so it could dry out thoroughly.
On my return I tested the floor was dry in multiple places with a damp meter to ensure it was ready to be sealed. The readings showed that the wet and dry vacuum had done a good job in removing the moisture, so all was well. To seal I applied several coats of Tile Doctor Seal and Go allowing each coat to dry before applying the next however with such a large area to cover I was able to work in sections around the floor.
Seal and Go works really well on Flagstones and leaves a very appealing sheen finish, also being water based it doesn’t leave a smell as it dries.
The results were amazing, and the customer thanked me for making such a massive improvement on her floor. Before leaving I made sure to discuss after-care and to avoid the use of hash cleaning products.
Malcolm Crowther
Gloucester Tile Doctor
 User
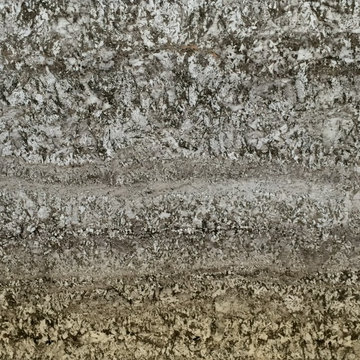
UserBianco Antico Granite is a stone loved for its crisp cream bedrock and stunning brown mineral deposits. It is quarried in Ceara, Brazil and is not commonly known by any other industry names.
(Bundle #2)
39