
Search results for "Extracting" in Home Design Ideas
 Roger J. Berent Architects
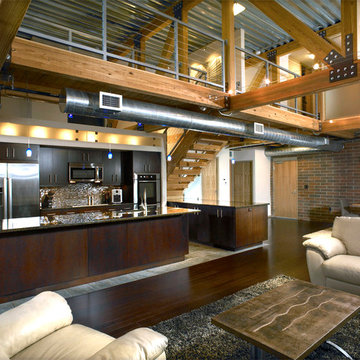
Loft kitchen with view of mezzanine catwalk. Open tread stair extends over bar area. Translucent panels to the left (first floor) and right (second floor) delineate the bedroom areas of the loft.
 The CRAFTSMAN FINE WOODWORKING INCORPORATED
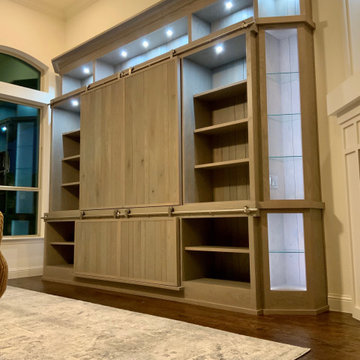
This Frisco Texas , custom white oak , double barn door unit creates many different configurations options for the owners . 3 different lighting scenes , consisting of 12 LED puck lights and 32 linear feet of LED strip lights compliment the flexibility of this custom unit. Sleek satin nickel barn door hardware effortlessly carry the heavy custom random width planked white oak doors. A/V equipment, on soft close pull outs are hidden behind the 4 soft close inset doors. 2 heat censored fans extract heat from the A/V equipment. Lots of room for storage , and glass shelves for display . The 65” tv is mounted on a articulating double arm mount for many different viewing angles and a breeze for accessing behind the tv. All wiring is hidden , accessible and managed.
 ttschoonover
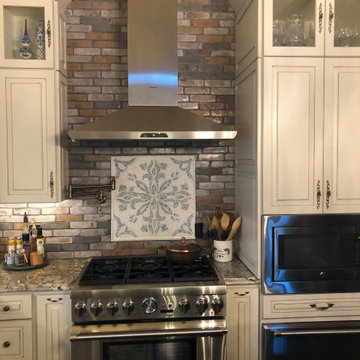
Inspiration for a mid-sized french country l-shaped dark wood floor and brown floor kitchen remodel with granite countertops, multicolored backsplash, brick backsplash, stainless steel appliances, an island and multicolored countertops
Find the right local pro for your project
 User
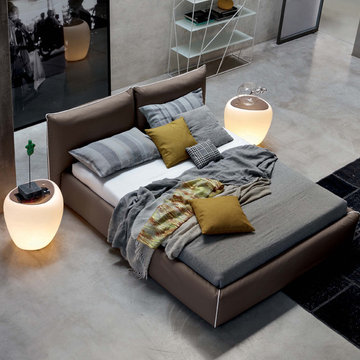
UserEDEN is a family of products for relaxation and slumber, including a chaise longue, a bed and a sofa-bed. The particular feature of the collection is the original frame in metal and wood, entirely covered with cowhide, giving the product a precise connotation of luxury, functioning as the back of the chaise longue or the headboard of the bed and sofa-bed. In the daybed version the L-shaped back forms a support for soft down cushions. The bed comes with a base in wooden slats, with or without a storage compartment, and the headboard can be enhanced by two adjustable lateral wings that open to accommodate small bedside tables. The sofa-bed has a wooden slat platform and comes as a double bed or two twin beds; in the latter solution, the second extractable bed is raised off the ground with a simple touch of the foot, thanks to a patented mechanism that greatly facilitates the operation.
 HotShotPros.com Photography
HotShotPros.com
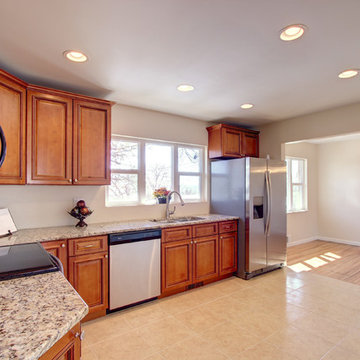
Mid-sized trendy l-shaped porcelain tile eat-in kitchen photo in Denver with raised-panel cabinets, granite countertops, white backsplash, stainless steel appliances, white walls and no island
Mid-sized trendy l-shaped porcelain tile eat-in kitchen photo in Denver with raised-panel cabinets, granite countertops, white backsplash, stainless steel appliances, white walls and no island
 Interior360
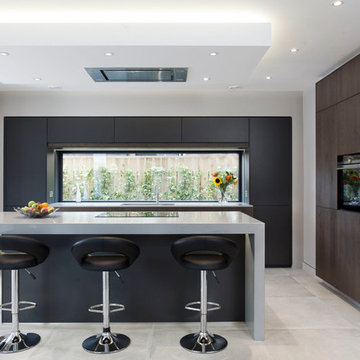
Eat-in kitchen - mid-sized contemporary l-shaped gray floor eat-in kitchen idea in Belfast with a double-bowl sink, flat-panel cabinets, black cabinets, quartzite countertops, black appliances, an island, window backsplash and gray countertops
 Jamestown Estate Homes
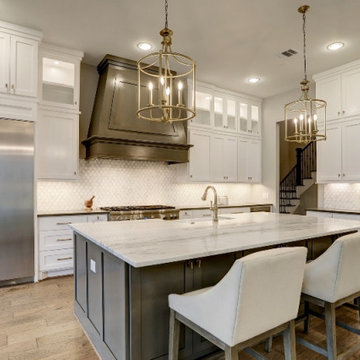
Kitchen - large transitional l-shaped kitchen idea in Houston with a farmhouse sink, shaker cabinets, white cabinets, quartzite countertops, white backsplash, an island and gray countertops
 Merits Design Group, Inc.
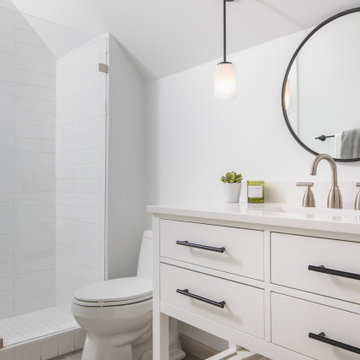
Transitional 3/4 white tile and porcelain tile porcelain tile, gray floor and single-sink alcove shower photo in Atlanta with beige cabinets, white walls, quartz countertops, a hinged shower door, white countertops and a freestanding vanity
 User
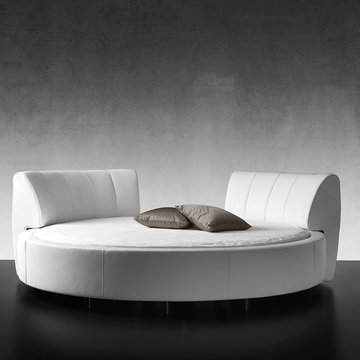
UserEDEN is a family of products for relaxation and slumber, including a chaise longue, a bed and a sofa-bed. The particular feature of the collection is the original frame in metal and wood, entirely covered with cowhide, giving the product a precise connotation of luxury, functioning as the back of the chaise longue or the headboard of the bed and sofa-bed. In the daybed version the L-shaped back forms a support for soft down cushions. The bed comes with a base in wooden slats, with or without a storage compartment, and the headboard can be enhanced by two adjustable lateral wings that open to accommodate small bedside tables. The sofa-bed has a wooden slat platform and comes as a double bed or two twin beds; in the latter solution, the second extractable bed is raised off the ground with a simple touch of the foot, thanks to a patented mechanism that greatly facilitates the operation.
 IL Decor
W 44 x D 37 x H 13
Quick Overview
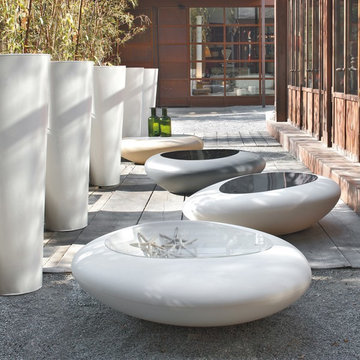
The coffee table Kos was born from the polyethylene rotational moulding technology. Perfect both for external and inside usage. Kos is a mix of design and functionality, as a matter of fact the simple extraction of the perspex top reveals an internal storage for magazines and objects.
 South Lyon Carpet Cleaning
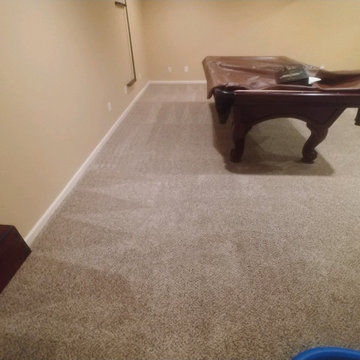
South Lyon Carpet Cleaning offers truck mounted hot water extraction (steam cleaning), upholstery cleaning, pet stain & odor removal, 3M carpet protection, encapsulation cleaning, as well as flood and water restoration. Not all carpet cleaning services are created equally; choose a company with a great reputation for service and excellence, and one with years of experience behind them. Our pictures speak for themselves! Residential/Commercial. Family Owned & Operated Since 1991. Licensed, Bonded, & Insured.
Free Estimates! (734) 635-8124
 The CRAFTSMAN FINE WOODWORKING INCORPORATED
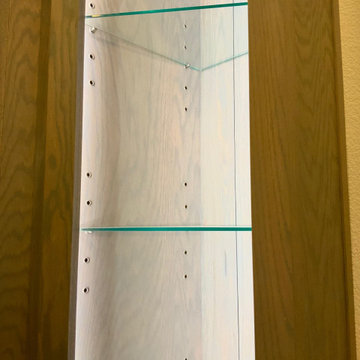
This Frisco Texas , custom white oak , double barn door unit creates many different configurations options for the owners . 3 different lighting scenes , consisting of 12 LED puck lights and 32 linear feet of LED strip lights compliment the flexibility of this custom unit. Sleek satin nickel barn door hardware effortlessly carry the heavy custom random width planked white oak doors. A/V equipment, on soft close pull outs are hidden behind the 4 soft close inset doors. 2 heat censored fans extract heat from the A/V equipment. Lots of room for storage , and glass shelves for display . The 65” tv is mounted on a articulating double arm mount for many different viewing angles and a breeze for accessing behind the tv. All wiring is hidden , accessible and managed.
 IL Decor
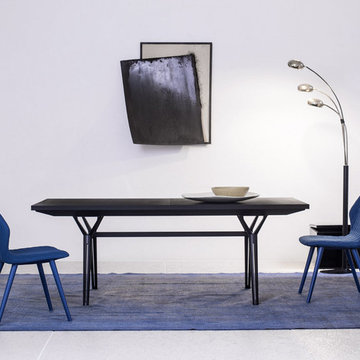
Epsilon distinctive marks are an elegant structure in which the solid wood-legs are lightened by the binding-steel frame, available in satin-nickel finish or black stained.
Epsilon is an extensible table with a user friendly mechanism, a particular opening system which allows the automatic extraction of the central extension.
A formal simplicity and a deep attention for details make Epsilon a flexible table suitable for a wide range of environments. Manufactured By Bross.
 The CRAFTSMAN FINE WOODWORKING INCORPORATED
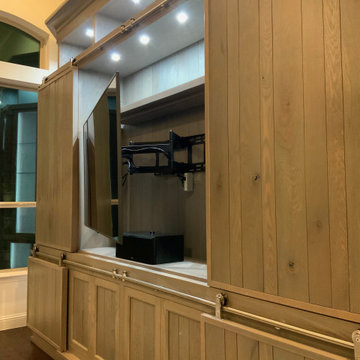
This Frisco Texas , custom white oak , double barn door unit creates many different configurations options for the owners . 3 different lighting scenes , consisting of 12 LED puck lights and 32 linear feet of LED strip lights compliment the flexibility of this custom unit. Sleek satin nickel barn door hardware effortlessly carry the heavy custom random width planked white oak doors. A/V equipment, on soft close pull outs are hidden behind the 4 soft close inset doors. 2 heat censored fans extract heat from the A/V equipment. Lots of room for storage , and glass shelves for display . The 65” tv is mounted on a articulating double arm mount for many different viewing angles and a breeze for accessing behind the tv. All wiring is hidden , accessible and managed.
 User
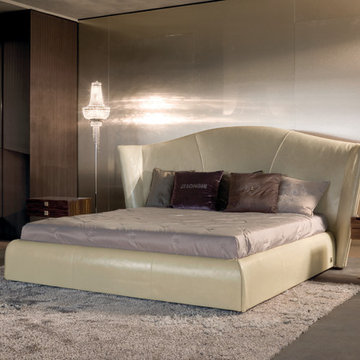
UserEDEN is a family of products for relaxation and slumber, including a chaise longue, a bed and a sofa-bed. The particular feature of the collection is the original frame in metal and wood, entirely covered with cowhide, giving the product a precise connotation of luxury, functioning as the back of the chaise longue or the headboard of the bed and sofa-bed. In the daybed version the L-shaped back forms a support for soft down cushions. The bed comes with a base in wooden slats, with or without a storage compartment, and the headboard can be enhanced by two adjustable lateral wings that open to accommodate small bedside tables. The sofa-bed has a wooden slat platform and comes as a double bed or two twin beds; in the latter solution, the second extractable bed is raised off the ground with a simple touch of the foot, thanks to a patented mechanism that greatly facilitates the operation.
 Tile Doctor Ltd
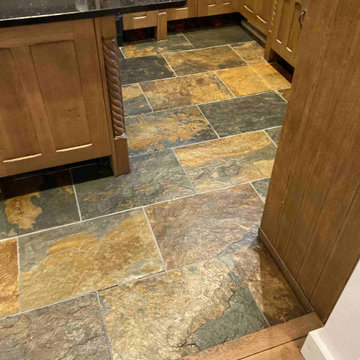
This Multi-Coloured Slate floor looks nice in the Kitchen of this property in Hythe, however due to the riven surface of the tile and the deep grout lines my customer had struggled to keep it clean. Additionally, the Slate has lost all of its lustre over the years since it had been installed and it was now due a deep clean and reseal.
The combination of durability and price makes Slate a popular choice for floor covering, it is also available in a number of colours, ranging from plain black to a more diverse array of shades. Like any natural stone floor though it need sealing to keep the dirt out of the pores of the stone however sealers wear off with use
Hythe by the way is a lovely medieval coastal market town with its own beach on the edge of Romney Marsh and close to Folkestone.
Before starting I removed the kickboards underneath the kitchen units and protected the exposed woodwork with a thin film. To deep clean the Slate floor and remove any remaining sealer I applied Tile Doctor Remove and Go and left it to soak in for ten minutes before scrubbing it in with a light carbide brush. As well as removing the old sealer this process releases the dirt from the pores of the stone and brings it to the surface where it can be extracted.
I have probably mentioned this before, but I’ve invested in a powerful van mounted pressure extraction system for removing the dirt, old sealer and emulsified soils released from the stone. The system works by applying water at high pressure on the floor via a spinner tool and then simultaneously extracts the waste under suction back to a grey water tank on the van. From the customers point of view, it makes light work of cleaning the floor and more importantly leaves the floor dry and leaves no mess.
Having a dry floor at this stage is important as it means I can usually seal the floor on the same day. Its not a good idea to apply a sealer to damp floor as it will affect the way it cures and lead to an undesirable finish. The way to make sure the floor its dry is to use a moisture meter and take readings in several places around the floor. You can use an air mover to improve drying times however older floors can take a very long time to dry and for those I tend to book another day to apply the sealer.
With the floor dry I set about applying the first of two coats of Tile Doctor X-Tra Seal which provides both a hardwearing sheen to the slate as well as enhancing its natural colourings. It has strong water repellency characteristics which makes it ideal for use in a kitchen where spillages are quite common.
This was quite a small kitchen, so the work was completed in one day. My client was amazed at the transformation and grateful for our advice on continued maintenance which for this floor I recommended the use of Tile Doctor Stone Soap for daily cleaning.
Michael Conlon
South Kent Tile Doctor
 The CRAFTSMAN FINE WOODWORKING INCORPORATED
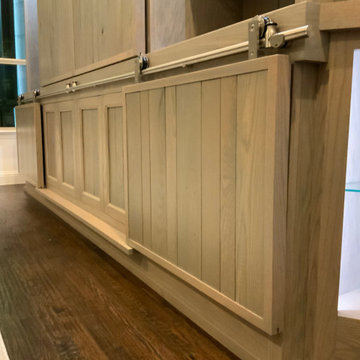
This Frisco Texas , custom white oak , double barn door unit creates many different configurations options for the owners . 3 different lighting scenes , consisting of 12 LED puck lights and 32 linear feet of LED strip lights compliment the flexibility of this custom unit. Sleek satin nickel barn door hardware effortlessly carry the heavy custom random width planked white oak doors. A/V equipment, on soft close pull outs are hidden behind the 4 soft close inset doors. 2 heat censored fans extract heat from the A/V equipment. Lots of room for storage , and glass shelves for display . The 65” tv is mounted on a articulating double arm mount for many different viewing angles and a breeze for accessing behind the tv. All wiring is hidden , accessible and managed.
 South Lyon Carpet Cleaning
South Lyon Carpet Cleaning offers truck mounted hot water extraction (steam cleaning), upholstery cleaning, pet stain & odor removal, 3M carpet protection, encapsulation cleaning, as well as flood and water restoration. Not all carpet cleaning services are created equally; choose a company with a great reputation for service and excellence, and one with years of experience behind them. Our pictures speak for themselves! Residential/Commercial. Family Owned & Operated Since 1991. Licensed, Bonded, & Insured.
Free Estimates! (734) 635-8124
 The CRAFTSMAN FINE WOODWORKING INCORPORATED
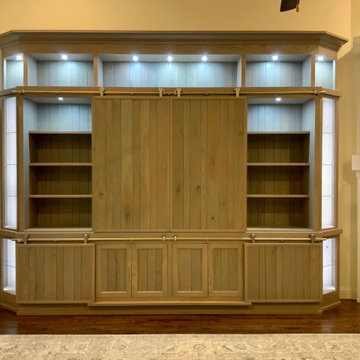
This Frisco Texas , custom white oak , double barn door unit creates many different configurations options for the owners . 3 different lighting scenes , consisting of 12 LED puck lights and 32 linear feet of LED strip lights compliment the flexibility of this custom unit. Sleek satin nickel barn door hardware effortlessly carry the heavy custom random width planked white oak doors. A/V equipment, on soft close pull outs are hidden behind the 4 soft close inset doors. 2 heat censored fans extract heat from the A/V equipment. Lots of room for storage , and glass shelves for display . The 65” tv is mounted on a articulating double arm mount for many different viewing angles and a breeze for accessing behind the tv. All wiring is hidden , accessible and managed.
 The CRAFTSMAN FINE WOODWORKING INCORPORATED
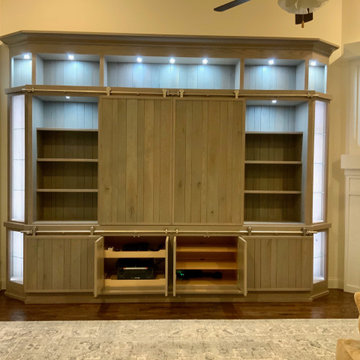
This Frisco Texas , custom white oak , double barn door unit creates many different configurations options for the owners . 3 different lighting scenes , consisting of 12 LED puck lights and 32 linear feet of LED strip lights compliment the flexibility of this custom unit. Sleek satin nickel barn door hardware effortlessly carry the heavy custom random width planked white oak doors. A/V equipment, on soft close pull outs are hidden behind the 4 soft close inset doors. 2 heat censored fans extract heat from the A/V equipment. Lots of room for storage , and glass shelves for display . The 65” tv is mounted on a articulating double arm mount for many different viewing angles and a breeze for accessing behind the tv. All wiring is hidden , accessible and managed.
18