
Search results for "Extracting" in Home Design Ideas
 Tile Doctor Ltd
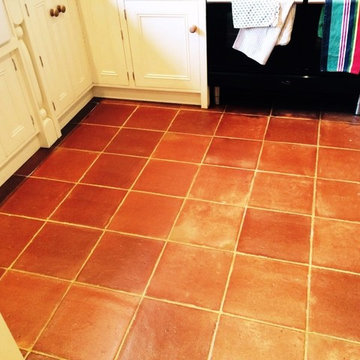
This customer in Henfield was contemplating digging up her Terracotta kitchen floor and replacing it, the tiles were ingrained with dirt which had proved impossible to remove and as a consequence were left looking flat, dull and very un-appealing. Additionally she had an elderly dog that had been ill several times in the corner area and she really struggled to make it look decent again. Following a quick test I was able to persuade her to try a clean and re-seal first.
The first step was to deep clean the floor to remove the ingrained dirt and any previous sealers. As well as the dog I had two rugby playing sons to deal with so to make it easier for the family I split the floor up into areas and worked on one area at a time.
The tiles were first soaked in a strong solution of Tile Doctor Pro-Clean before scrubbing it into the tile and grout with a black pad fitted to a buffing machine. The tiles were rinsed, the now dirty cleaning solution extracted and the process repeated until I was happy that the Pro-Clean had done its trick and the floor was as clean as it could be.
The Terracotta tiles now looked clean but completely washed out so I assured the customer that once the tiles had been sealed the colour would return and more. Unsealed Terracotta marks easily so given I left the customer dust sheets to walk on.
I returned after two days to ensure any moisture had left the tile and proceeded to seal with six coats of Tile Doctor Pro-Seal which is highly recommended for use in food preparation areas and gives a high gloss finish whilst providing maximum stain protection. As each coat takes 40 minutes to dry I took the opportunity to clean her slate front door step as well.
The customer was very happy with the finished floor and I’m glad to report she has decided to keep the floor.
 Tile Doctor Ltd
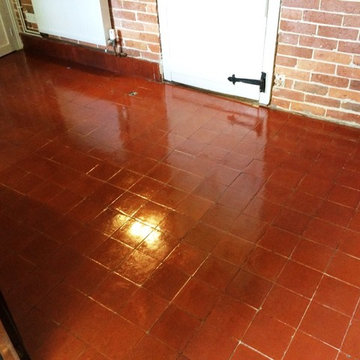
Let me start by saying this was by far the hardest job I’ve ever done and as you read on you will soon realise why. The customer called me out to quote on a Quarry tiled floor at a house in Danehill that was covered in concrete screed. She said it had always been there and she’s lived there for years always meaning to get it bought back to a state that she could live with. Undaunted by the state of the floor (see photo below) we agreed a price and fixed a date to do the work.
For the next two days I spent all my time pouring neat Tile Doctor Grout Clean-up onto small areas and working it in with a metal scraper and wire brush. Once removed the resultant muck was rinsed and extracted using a wet vacuum, laborious work as you can imagine although I was kept entertained by playing the occasional game of fetch with a very keen Collie dog who seemed fascinated by the bloke sitting on his floor all day. After two days of this my hands were throbbing but I could see red quarry tile emerging. The final two hours on the second day were spent making good any areas under the washing machine and fridge and giving the floor a thorough rinse to remove any trace of cleaning product.
The floor dried off overnight and I came back the third day to seal the tiles making sure that my canine companion had been sent next door first. To seal the floor I used six coats of Tile Doctor Seal and Go which really brought back the colour in the floor and gave it an amazingly shiny surface.
Once sealed the floors transformation was complete and when the customer returned from work she was utterly speechless. I’d turned what looked like a building site into a stunning tiled floor.
 Tile Doctor Ltd
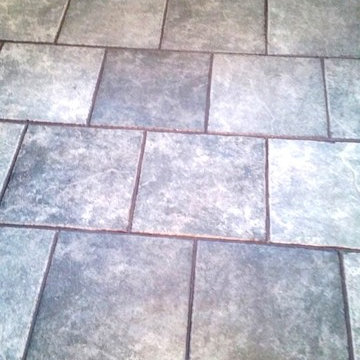
Here’s a quick grout cleaning and re-colouring job I completed in the town of Canvey Island, Essex. Canvey Island lies on the south east coast, and lies just above sea level which in my job is always worth noting as the area can be prone to flooding. This wasn’t the problem here though, simply put, my client was unhappy with the colour of their grout, and wanted it re-coloured to a darker shade to match the grey Ceramic floor tiles.
Cleaning the grout before re-colouring is essential because, as many readers are probably well aware, grouts are porous and therefore can very easily absorb dirt and grease. Most often this will result in grout discolouration if not dealt with promptly.
So, as mentioned above the first step in the re-colouring process involved cleaning the grout lines. For this Tile Doctor has a special Pre-Treat Cleaner which is sprayed on and scrubbed into the grout to both remove any existing dirt and also to prepare the grout joints for a superior bond with the Grout Colourant. Once complete the grout lines looked clean and refreshed.
To clean the ceramic I diluted one part Tile Doctor Pro-Clean to three parts water, and used it to wash down the Ceramic tiles, leaving a consistent level of cleanliness across the entire floor. I then rinsed the floor with water which was then extracted using a wet vacuum and waited for 3 hours for the floor to dry.
Once dry, I began the process of applying the Charcoal Grey (as chosen by the client) Grout Colourant to the grout lines. As well as changing the colour the colourant also forms a barrier over the grout sealing it in and protecting it from future staining for years to come.
Then, once dry, the floor was given another quick clean using a light spray of water and a white buffing pad, resulting in an aesthetically pleasing sheen finish. My client was very happy with the outcome and now has the floor they wanted.
Nick Murphy
South Essex Tile Doctor
Find the right local pro for your project
 Futuro Futuro Kitchen Range Hoods
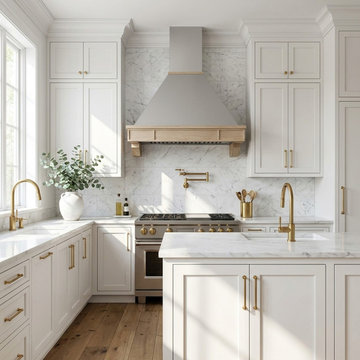
Discover a captivating fusion of tradition and modernity with the Futuro Futuro 36-inch Sphinx Wall Range Hood. Featuring a unique blend of stainless steel and wood, it adds a chic touch to any kitchen setup. The minimalist wooden frame comes unstained, offering you the flexibility to tailor it to your liking and match any kitchen design.
Equipped with a robust 940 CFM blower, this range hood effectively draws away cooking fumes, steam, and odors, ensuring a clean and fresh kitchen environment. The energy-efficient LED lights provide ample illumination to your cooking area, enhancing visibility and adding a warm ambiance.
In terms of functionality, this hood has a 4-speed control to adjust the extraction speed based on your cooking demands. The dishwasher-safe filters make maintenance a breeze, helping to keep your hood performing at its best while saving time and effort.
Versatility is at the heart of the Sphinx Wall Range Hood's design. It can be installed as a ducted or ductless unit, dependent on your kitchen's configuration. Moreover, it allows for usage with or without the chimney, providing various installation options to suit your aesthetic preferences.
Despite its powerful performance, the hood maintains quiet operation, thanks to Futuro Futuro’s innovative sound-absorbing technology. Plus, its automated reminders will notify you when it's time for filter cleaning, further enhancing the ease of maintenance. With a one-year US standard and two-year parts warranty, the Futuro Futuro 36-inch Sphinx Wall Range Hood assures you of quality and reliability. Add a touch of elegance to your kitchen while ensuring consistently effective performance with this range hood.
 Tile Doctor Ltd
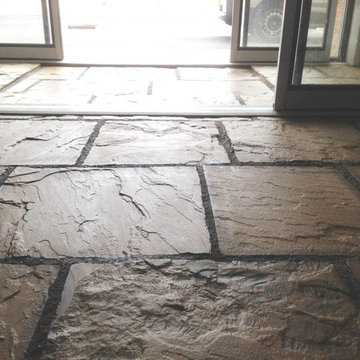
We work on a lot of residential tile installations but also cover commercial properties too, such as this new farm office which was in the process of being built in the market town of Driffield, East Yorkshire where a Flagstone tiled floor had been laid at the entrance. Driffield is known as the ‘Capital of the Yorkshire Wolds’ and lies near the source of the River Hull.
The farm office project was very big and, with the pressure on to complete it in time, the floor had been laid without being sealed first. As a result, the floor was getting dirty very easily, and was proving difficult to keep clean. It was clear that the Flagstone tiles would need to be cleaned and sealed, and I was called upon to get the job done.
To clean the floor I first mixed a 50:50 solution of clean water and Tile Doctor Pro Clean. Pro Clean is a high-alkaline cleaner which is safe to use on a wide range of natural stone floors. The cleaning solution was worked in using a rotary machine fitted with a black buffing pad which proved an effective method, lifting off the dust and residue that had been left on the surface of the Flagstone tiles during the course of construction work.
The excess residue was extracted using a wet-vac machine. I then repeated the whole process over again several times in order to get the floor as clean as possible.
To seal the floor I used a combination of two different Tile Doctor sealers. Firstly, I applied a layer of Tile Doctor Colour Grow to the floor. This colour intensifying sealer is specially formulated to enhance the fantastic natural colours in the stone, while at the same time providing durable surface protection.
The floor was then finished off with a couple of coats of Tile Doctor Seal & Go. This added to the stain resistance of the floor, while also delivering a very nice subtle shine on the surface.
All signs of building work have been removed from the stone floor and it is now looking presentable ready for the opening of the new office, the combination sealer applied to the floor will also make sure it stays that way for some time to come.
Ronnie Phipps
East Yorkshire Tile Doctor
 Natural Stone Institute
Tucker Design Awards celebrate the innovation and vision that designers bring to their projects through the specification and use of natural stone materials. For members of the Natural Stone Institute, acknowledgement as a contributor to a Tucker Design Awards winning project is a genuine tribute to their traditional values, physicality of work and dedication to precise specifications required in the realization of such accomplished architectural design.
Landscape Architect
Design Workshop, Aspen, CO
Architect
Poss Architecture, Aspen, CO
Landscape Contractor
Landscape Workshop, Carbondale, CO
Stone Supplier/Installer
Gallegos Corporation, Wolcott, CO
Stone Quarry
Arkins Park Stone, Loveland, CO
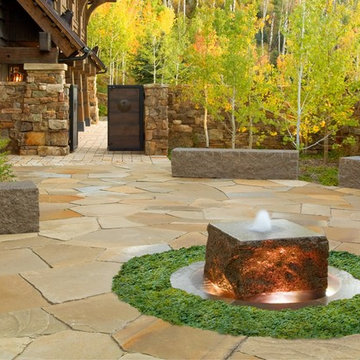
Within walled boundaries, Woody Creek Garden embraces its high alpine environment through explorations of stone and water that serve as unifying elements of form in the design of the various outdoor spaces. Through striking and distinctively detailed stonework, water is portrayed in its various states and forms – atmospheric mist, single rivulets, cascades, and still pools. Two courtyards interlink the residence allowing each room to enjoy the visual landscape. In the entrance courtyard, the sound from a carved 24”x 24” cut-granite fountain reverberates throughout the walled space. Placed for gathering and quiet contemplation, a pin-wheel arrangement of sculptural, granite slabs provide a honed surface for sitting while providing year-round interest. Each stone was individually specified with intentionally spaced core fractures, utilizing the extraction method to serve as sculpted details. Large sandstone pavers, set in sand and cut in an irregular, but geometric fashion bring a sense of modernity to the space. Throughout the property, stone detailing seek to heighten one’s experience of the landscape and views. Upon the home’s entry, an 18” rectilinear cut in the freestanding stone wall frames a distant peak, creating a singular reference to the outside world in this encased space. Emerging from the center of an organically-shaped carved sandstone slab, water is carried along a narrow 2” runnel sandstone cap, disappearing into the framed horizon. This glimpse to the west is the only opening in the tightly enclosed courtyard. From its opposite aspect, the feature creates a welcoming gesture at the home’s front entrance. The slender rivulet of water trickles from the sandstone slab above onto a honed granite plane, set within a sandstone terrace In contrast, a second promontory courtyard commands a strong presence over its alpine setting, leaving the steeply sloping site undisturbed. A 12’x 40’ reflecting pool – a thin sheet of water over honed black granite – captures the form and silence of the everchanging natural environment on its taut surface. Along its edge, water flows over a ½” radius edge, disappearing into a recirculating slot. Commissioned by Italian artist Bruno Romeda, a bronze sculpture rests upon an elevated granite plinth. Along its western edge, designers crafted a two-tiered, infinity edge detail. In the first vertical drop, water flows between the pool and perimeter stone walls, landing onto an intermediate bench, while the second drop introduces a chamfered edge, allowing water to embrace the vertical relief without splashing. Sandstone terraces provide continuous access to the various landscape features of the garden. At the base of the battered perimeter walls, a sandstone path leads to a fire pit, encircled by lichen-covered boulders. Along the courtyard’s eastern perimeter, water appears to emerge from the hillside, fracturing and falling against the irregular vertical stone wall, melting in a curtain-like formation behind the spa. The colors, distinctive detailing and striking stonework were selected based on their appropriateness to the context. From above, a rectilinear pool lies behind the wall, silently mirroring the sky above and offering no ostensible connection to the structure or to its source.
 Tile Doctor Ltd
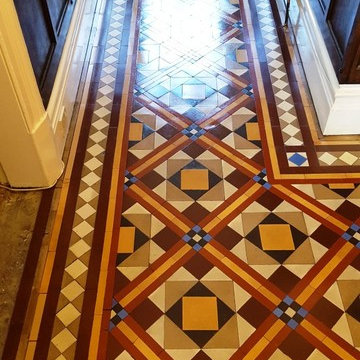
The colourful and diverse geometric patterns of a Victorian tiled floor can give a property a regal, elegant and timeless feel, making it a popular choice even in the 21st century. However, as time passes without regular care and maintenance, Victorian tiles can quickly lose their colour and appear deadened by the buildup of dirt and dust over several months (and sometimes years).
This property owner in Hebden a very small village in North Yorkshire of less than 300 people, had this common problem. Her Victorian tiled hallway had not been adequately maintained and was now more difficult to keep clean than ever. To add to the problem, most of the tiles along the edges were either broken, cracked, or filled with holes, probably I suspect from the installation of carpet grippers at some point in the past.
At this point, the property owner turned to Tile Doctor to see what could be done.
Before beginning a deep clean of the entire length of the hallway, it was first necessary to source and install replacement tiles for those that had been broken and damaged. I also relaid any that were loose.
When finished, I left the tiles to set and returned the next day to start the clean. My choice of cleaner in this situation was Tile Doctor Pro Clean, which was scrubbed into the floor with a special pad fitted to a rotary machine to break down ingrained dirt and stains. Pro Clean does this very effectively on all types of tile, including natural stone and of course Victorian tiles.
The floor was then rinsed with water and the soiled cleaning solution extracted from the floor using a vet vacuum. Stubborn areas were re-treated with more Pro Clean, and when I was satisfied with the condition of the tiles the floor was given a final but thorough rinse to remove any trace of cleaning product.
The floor was then left to dry completely overnight to ensure all excess moisture had disappeared, leaving it fresh to be sealed. I returned in the morning for a third day of work to seal the Victorian tiles with four coats of Tile Doctor Seal and Go, a topical sealer which provides a rich satin finish to really add depth to the colours in the tile while protecting it against dirt and stains.
The customer was delighted with the restoration and couldn’t quite believe the huge improvement in the appearance of the tiles, especially in regards to the enhancement in the different colours. Another satisfied customer!
Nigel Stoker
North West Yorkshire Tile Doctor
 Tile Doctor Ltd
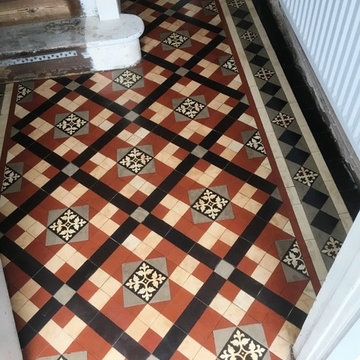
The owner of this house in Chaplefields near Coventry had bought this property as an investment and was keen to improve its appearance. As part of this work he had lifted the vinyl tiles in the hallway and discovered a lovely Edwardian tiled floor. Unfortunately, whoever had laid the Vinyl tiles had decided to use Tar as an adhesive and this had left a black mess all over the floor.
Realising the potential value an original feature such as this could add to the property he was keen to restore the tiles but not so keen to deal with the Tar, so we were asked to deal with the problem and restore the floor as close to its original condition as possible.
To get the tiles clean and remove the horrible tar I applied a strong dilution of Tile Doctor Remove and Go, which as its name suggest is great for removing coverings from tiles. I applied the Remove and Go with a mop, left it to soak in for a few minutes and then worked it in using a rotary machine fitted with a black scrubbing pad. The soil was extracted off the floor using a wet and dry vacuum and then the process repeated until I was happy all the tar was gone.
I then gave the tiles an acid wash using Tile Doctor Acid Gel; this serves to break down alkaline mineral deposits such as cement and grout smears, it also counters any efflorescence problems which can be an issue with these old floors where no damp proof membrane has been installed.
Finally, the floor was given a rinse with clean water and a steam clean to remove any trace of cleaning products and to neutralise the tiles in preparation for sealing.
I left the floor to dry off overnight and returned to the property to seal the tiles the next day. To seal the tiles, I used three coats of Tile Doctor Seal and Go which is a water based sealer that leaves a subtle sheen finish and being water based doesn’t leave a smell as it dries. The sealer will provide durable protection going forward preventing dirt from becoming ingrained into the pores of the tile and ensuring it remains easy to clean and keeping its appearance for some time to come.
The floor now looks fantastic and gives a great impression when you come into the property which is exactly what the owner wanted.
Mick Gayton
Warwickshire Tile Doctor
 Tile Doctor Ltd
I was contacted about a Georgian property in the Kent village of Leeds , to see if I could do anything to improve a Travertine tiled floor. The use of Travertine was extensive and had been installed throughout the ground floor including the kitchen, dining room, utility and bathroom WC. Travertine is probably my favourite stone, but it is acid sensitive and attracts dirt easily, due to its ‘holey’ composition.
Initially we discussed the floor over the phone where I got to know about the issues they were experiencing, and I detailed the renovation process I normally use to restore it including the products and timelines. Naturally they wanted to me to provide a quote for the work however its tricky to do that accurately without seeing the floor, so I arranged a date to pop over.
Upon arriving I could see the tiles and the wide grout joints had extensive, ingrained dirt indicating the previous sealer had long since worn away. This is a common issue with stone floors, and to re-assure myself and the client it could be resolved I cleaned a small area in the utility room with pleasing results!
This test clean helped me to understand which products and methods would work best on the floor and later that day I emailed over a detailed quote for the renovation. Happy with the quote I received a reply the same day asking when I could start.
My colleague and I arrived on the agreed date and work started with adding protection to all areas that required it. We use a lot of water during the cleaning process and some materials such as MDF can become damaged with water ingress, so it makes sense to do this.
To get the floor clean, a coarse Carbide Brush fitted to a rotary machine was run over the Travertine tiles to scrub in a strong solution of Tile Doctor Pro-Clean. This process generates a lot of slurry as the dirt was washed out of the stone and grout which is extracted with a wet vacuum as we progressed.
Next it was on hands and knees with more Tile Doctor Pro-Clean and handheld brushes run over stubborn areas and along the grout lines to take them from 80% up to 100%.
Happy with the results, the next step was to renovate the stone using a series of diamond encrusted burnishing pads. Using only water for lubrication this process starts with the application of a coarse 400-grit burnishing pad attached to the floor buffer. This produces a lot of slurry which again was removed with a wet vacuum.
This left the Travertine clean, but the pores of the stone had been opened giving the floor a matt finish and more absorbent than it was originally. To further refine the appearance of the stone the next two burnishing pads were applied which are 800 and 1500-grit. These pads polish the stone and close the pores, restoring the natural sheen in the process. After each pad was applied the slurry was rinsed off the floor with water and extracted with the wet vacuum. Once complete the floor was left to dry off fully overnight.
I arrived the next day and took several moisture readings from the floor to check that it had dried off sufficiently overnight. The results were good, so work moved onto sealing the Travertine with two coats of Tile Doctor Ultra Seal which is a natural look impregnating sealer. It works by soaking into the stone, occupying the pores and thereby preventing dirt from becoming ingrained there. This ensures dirt remains on the surface where it is easily cleaned away.
The final step in the floor’s renovation was to apply the last of the diamond polishing pads which is a very fine 3000-grit. This pad further improves the polished appearance of the stone resulting in a satisfying sheen.
The work made a massive difference to the floor, and I received an email the next day from one of the owners who was really pleased with the transformation:
”Floors look brilliant. Very pleased.”
For the care and maintenance of polished sealed floors I recommend the use of Tile Doctor’s Stone Soap which is a gentle but effective cleaning product that won’t impact the sealer and contains a patina enhancer. When it comes to sealed floors my mantra is:
“If you look after the sealer, the sealer will look after the floor!”
Graham Davis
North Kent Tile Doctor
 Tile Doctor Ltd
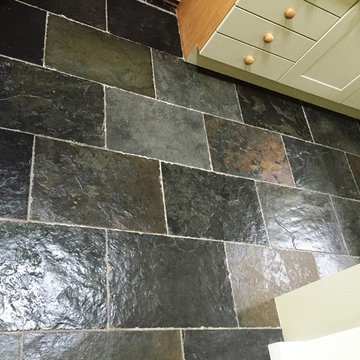
This small rough Chinese Slate floor in the kitchen of a house in the village of Cheadle near Stockport in Greater Manchester had not had any sealer put on it for many years and was very grubby (dishevelled as described by the customer) looking even after the customer had tried to clean it.
Sealers do take a lot of punishment, especially in a high traffic area such as a small kitchen and will wear off over time and once this happens the floor will start to lose its appearance as dirt becomes ingrained in the stone and it can no longer be cleaned effectively.
As we have to apply a liberal amount of water with this sort of work, the first step was to remove the Kicker boards at the bottom of the Kitchen units and silicone the Kitchen units that were fixed; this stops water seeping in and blowing the MDF allowing us to concentrate on cleaning the Slate without causing any damage.
I started the cleaning process by applying a strong dilution of Tile Doctor Pro-Clean to get rid of the built up dirt and any remaining sealer, leaving it to soak into the Slate before scrubbing the floor with a black scrub pad fitted to buffing machine running at slow speed. Tile Doctor Pro-Clean is a strong alkaline cleaner/stripper that is safe to use on natural stone, we do have stronger products available if required but in this case a strong dilution of Pro-Clean was sufficient to tackle any remaining sealer.
This process gave the Slate and grout lines a good deep clean and after rinsing the floor with water which was then extracted using a wet vacuum I repeated the process on stubborn areas until satisfied the floor was as clean and free of old sealer. Last stage of the cleaning process was to give the floor a final rinse and then get it as dry as possible using the wet vacuum to soak up the moisture.
The floor was quite small so I was able to leave the floor to dry off over lunch time and then on my return managed to get it fully dry with a little heat from a heat gun. The customer wanted a mat finish so once dry I applied Tile Doctor Colour Grow sealer which impregnates into the pores of the natural stone protecting it from within and enhancing the natural colours of the Slate at the same time.
For general cleaning of Sealed stone floors, we recommend the use of a PH Neutral Cleaner as anything with a strong PH will degrade the life of the sealer over time.
Steve Keary
Greater Manchester Tile Doctor
 Tile Doctor Ltd
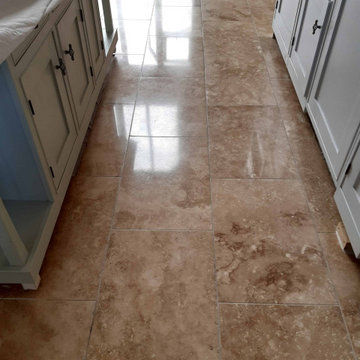
Located in Burgh Castle West of Great Yarmouth, this Travertine stone floor was a classic example of an incomplete installation. By incomplete I mean the tiler had done a fine job of laying and grouting the tiles but had left it at that and not sealed the stone. Natural stone like Travertine is porous and needs a sealer to stop dirt becoming ingrained in its pores, a sealer will also improve its appearance.
Without a sealer this floor now looked very dull, pale, rather damaged with pitting and heavily soiled with ingrained dirt. Pitting in stone like this is a natural feature of Travertine however it can be exacerbated with the use of acid cleaning products. This was a floor in urgent need of a face lift, and I was confident it could be transformed into a very beautiful floor.
I think it is true to say that most tilers will skilfully lay a floor for you but usually don’t have the knowledge, experience or equipment to finish the surface properly and when it comes to sealing many will recommend a product and suggest you take care of it yourself. Naturally if your find yourself in that position don’t insist the tiler does it, better to give us a call and have it done properly.
Our first job was to backfill the larger pits in the stone which as I mentioned are a natural feature of travertine material, but they can trap dirt and so its best if they are plugged with a suitably rigid filler. Also, if left alone the larger holes can quickly become larger as their edges crumble and break up leading to the entire tile becoming unstable. Replacing a tile in a floor like this is possible however its an extremely awkward job to do and it can be difficult to find an exact match for replacement.
Filling was done using a two-part, neutral cream-coloured polyester compound which gels in about fifteen minutes after addition of the catalyst. After this initial period, the excess product is trimmed off level with the surface of the tile before it sets harder than the stone itself in around sixty minutes. The fully cured compound can then be cut and machined as though it were part of the stone structure.
Our second job was to remove deep scratches caused by the unprotected feet of workmen’s ladders. This was done using Tile Doctor 50-grit and 100-grit diamond hand burnishing pads with a little water as a cutting medium. Shallower scratching present across the rest of the floor was removed using a Tile Doctor 200-grit soft milling pad driven by our Klindex 17″ rotary machine.
This abrasive action produces a fine slurry which was then rinsed with water and extracted using our 400psi Ninja machine in preparation for the next stage of the refinishing process. These machines were an expensive investment for our business however they are very robust and effective producing a good result that saves time.
Next task was to restore the polished appearance of the Travertine which was done using the application of a set of Tile Doctor burnishing pads. The process starts by applying a coarse 400-grit diamond pad, again fitted to the Klindex rotary machine. This cleans the tile and improves the matt finish left by the milling pad; again, the slurry was rinse-extracted before moving on to the next pad in the set. Next came the finer diamond polishing stages of 800 grit and 1500 grit, slurry being removed as before between the grades. By this time, all the scratches had been removed and the Travertine floor had visually pleasing even sheen across the whole surface. The last pad in the set is applied dry with a little water sprayed onto the tile so we left the area to dry out thoroughly overnight with the assistance of our large capacity dehumidifier.
Returning the following morning, we found that the floor had dried out perfectly and was ready to be vacuumed and spray burnished with the last pad in the set which is a 3000-grit very fine pad applied using a small amount of water sprayed from a trigger bottle resulting in a deep, rich shine across the floor surface.
Last step in the face lift was to seal the floor with a generous coat of Tile Doctor Ultra-Seal, a premium grade penetrating sealer recommended for use in Kitchens and food preparation areas. Having left the floor to soak up as much of the Tile Doctor Ultra-Seal as it could, the excess product was removed and the whole area allowed to dry completely with the assistance of our industrial air moving fan. Finally, the floor was spray buffed to a deep shine using a white maintenance pad.
The client was extremely pleased with our results and was amazed at the variation of colours within the stone which had never been visible previously.
Nick White
Norfolk Tile Doctor
 The Masons Co and Dionysian Artificers Landscape
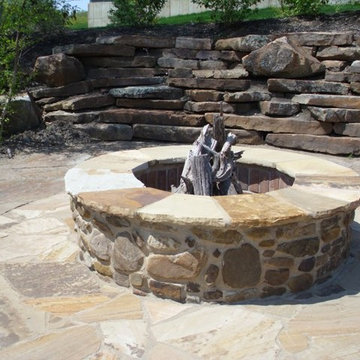
Kansas City Brick & Masonry is the craft of shaping rough pieces of rock into accurate geometrical shapes, at times simple, but some of considerable complexity, and then arranging the resulting stones, often together with mortar, to form structures.
Quarrymen split veins, or sheets of rock, and extract the resulting blocks of stone from the ground.
Sawyers cut these rough blocks into cuboids, to required size with diamond-tipped saws. The resulting block if ordered for a specific component is known as sawn six sides (SSS).
Banker masons are workshop based, and specialize in working the stones into the shapes required by a building's design, this set out on templets and a bed mould. They can produce anything from stones with simple chamfers to tracery windows, detailed mouldings and the more classical architectural building masonry. When working a stone from a sawn block, the mason ensures that the stone is bedded in the right way, so the finished work sits in the building in the same orientation as it was formed on the ground. Occasionally though some stones need to be orientated correctly for the application; this includes voussoirs, jambs, coping sand cornice.
The basic tools, methods and skills of the banker mason have existed as a trade for thousands of years.
Carvers cross the line from craft to art, and use their artistic ability to carve stone into foliage, figures, animals or abstract designs.
Fixer masons specialize in the fixing of stones onto buildings, using lifting tackle, and traditional lime mortars and grouts. Sometimes modern cements, mastics and epoxy resins are used, usually on specialist applications such as stone cladding. Metal fixings, from simple dowels and cramps to specialised single application fixings, are also used. The precise tolerances necessary make this a highly skilled job.
Memorial masons or monumental masons carve gravestones and inscriptions.
The modern stonemason undergoes comprehensive training, both in the classroom and in the working environment. Hands-on skill is complemented by intimate knowledge of each stone type, its application and best uses, and how to work and fix each stone in place. The mason may be skilled and competent to carry out one or all of the various branches of stonemasonry. In some areas the trend is towards specialization, in other areas towards adaptability.
 Renovation Q.C.
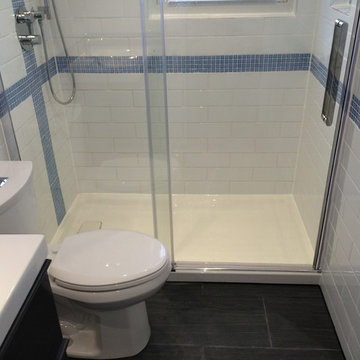
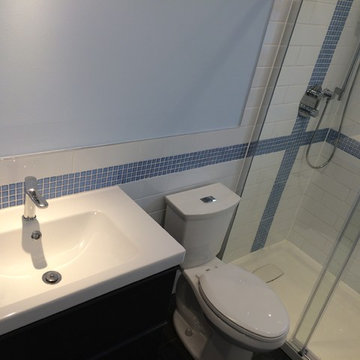
Nous sommes des experts dans la conception et la rénovation de salle de bains. Nous vous aidons à planifier votre budget pour vous offrir la salle de bain que vous pouvez vous permettre. Nous nous occupons de la gestion de votre projet de salle de bains tout en gardant un œil sur les coûts du projet. D’un design traditionnel à un style plus moderne, nous pouvons reproduire n’importe quelle conception que vous pouvez imaginer, y compris tout ce que vous avez pu voir sur le web ou dans des magazines. Nous pouvons même transformer toute salle de bains en une pièce luxueuse pour vote relaxation et votre bien-être. Nous sommes des experts dans le choix et l’installation des tourbillons, spas, saunas, douches de vapeur, des articles de bain Hi-Tech et tout ce dont vous pourriez avoir besoin pour faire de votre salle de bains un espace de détente et de bien-être.
Nous faisons un travail de qualité en ce qui concerne les installations de plomberie, les baignoires, les éviers, les robinets, les toilettes et même les bidets et les installations de douche. Nous nous occupons du carrelage, des sols, des murs, des accents décoratifs en porcelaine, de la céramique, du verre, de la pierre ou du bois. Nos installations de lavabos, d’éviers, d’armoires, de comptoirs et de dosserets combinent qualité et esthétique. Nous faisons aussi l’éclairage, les porte-serviettes, les distributeurs de papier hygiénique, les paniers et les ventilateurs d’extraction, et nous créons aussi de très belles enceintes en verre de toute taille.
 Renovation Q.C.
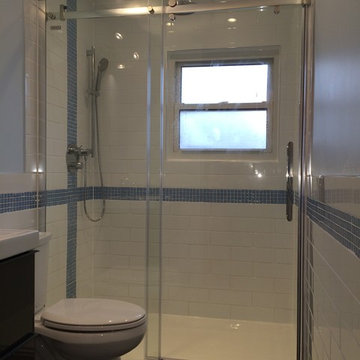
Nous sommes des experts dans la conception et la rénovation de salle de bains. Nous vous aidons à planifier votre budget pour vous offrir la salle de bain que vous pouvez vous permettre. Nous nous occupons de la gestion de votre projet de salle de bains tout en gardant un œil sur les coûts du projet. D’un design traditionnel à un style plus moderne, nous pouvons reproduire n’importe quelle conception que vous pouvez imaginer, y compris tout ce que vous avez pu voir sur le web ou dans des magazines. Nous pouvons même transformer toute salle de bains en une pièce luxueuse pour vote relaxation et votre bien-être. Nous sommes des experts dans le choix et l’installation des tourbillons, spas, saunas, douches de vapeur, des articles de bain Hi-Tech et tout ce dont vous pourriez avoir besoin pour faire de votre salle de bains un espace de détente et de bien-être.
Nous faisons un travail de qualité en ce qui concerne les installations de plomberie, les baignoires, les éviers, les robinets, les toilettes et même les bidets et les installations de douche. Nous nous occupons du carrelage, des sols, des murs, des accents décoratifs en porcelaine, de la céramique, du verre, de la pierre ou du bois. Nos installations de lavabos, d’éviers, d’armoires, de comptoirs et de dosserets combinent qualité et esthétique. Nous faisons aussi l’éclairage, les porte-serviettes, les distributeurs de papier hygiénique, les paniers et les ventilateurs d’extraction, et nous créons aussi de très belles enceintes en verre de toute taille.
 Renovation Q.C.
Nous sommes des experts dans la conception et la rénovation de salle de bains. Nous vous aidons à planifier votre budget pour vous offrir la salle de bain que vous pouvez vous permettre. Nous nous occupons de la gestion de votre projet de salle de bains tout en gardant un œil sur les coûts du projet. D’un design traditionnel à un style plus moderne, nous pouvons reproduire n’importe quelle conception que vous pouvez imaginer, y compris tout ce que vous avez pu voir sur le web ou dans des magazines. Nous pouvons même transformer toute salle de bains en une pièce luxueuse pour vote relaxation et votre bien-être. Nous sommes des experts dans le choix et l’installation des tourbillons, spas, saunas, douches de vapeur, des articles de bain Hi-Tech et tout ce dont vous pourriez avoir besoin pour faire de votre salle de bains un espace de détente et de bien-être.
Nous faisons un travail de qualité en ce qui concerne les installations de plomberie, les baignoires, les éviers, les robinets, les toilettes et même les bidets et les installations de douche. Nous nous occupons du carrelage, des sols, des murs, des accents décoratifs en porcelaine, de la céramique, du verre, de la pierre ou du bois. Nos installations de lavabos, d’éviers, d’armoires, de comptoirs et de dosserets combinent qualité et esthétique. Nous faisons aussi l’éclairage, les porte-serviettes, les distributeurs de papier hygiénique, les paniers et les ventilateurs d’extraction, et nous créons aussi de très belles enceintes en verre de toute taille.
 Tile Doctor Ltd
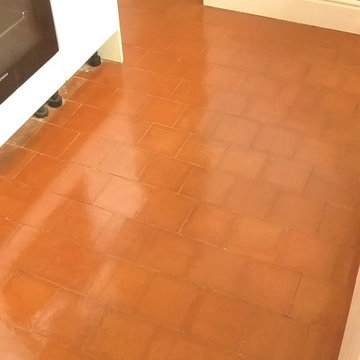
Here’s a job I recently completed in the heartland of the English pottery industry, Stoke-on-Trent. In this particular instance I was commissioned by my client to restore the appearance of the Quarry tiled floor in her kitchen which as you can see from the photo below was far from looking it’s best. Quarry tiles are typically a very hard wearing stone, but in high traffic areas like a kitchen, even this type of tile will require regular maintenance.
My first task, before beginning the restoration, was to remove the kickboards from around the bottom of the kitchen units, to prevent them from being damaged during the process. The next step was to acid wash the tiles using Tile Doctor Grout Clean-Up which was scrubbed into the tiles to remove old grout and plaster that had become stuck to the surface of the tiles at some point in the past. Once this had done its job I rinsed the entire floor with water washing away the excess soiled residue and any trace of acid.
The next step was to give the tiles a good clean using Tile Doctor Pro Clean, which is a high alkaline cleaner suitable for use on a range of natural stone floors. This was left to dwell on the tiles for ten minutes, allowing it time to seep into the stone to get underneath – and lift out – the ingrained dirt. I then agitated the solution with a scrubbing brush to remove the muck from the surface of the tiles. The floor was then given another rinse with water, and this was extracted using a wet vacuum.
I left the floor to dry after cleaning for more than 24 hours, making sure that it would be ready for sealing the next day. Upon my return to the house I checked the floor was dry and then sealed the floor using four coats of Tile Doctor Seal & Go, which provides a robust surface seal and a durable low-sheen finish. The product is suitable for use on internal, unsealed, porous surfaces.
The photographs above bears witness to the massive improvement which has been made to the quarry tiles, which has not only completely transformed the look of the tiles but also the appearance of the kitchen.
Trevor Preece
Staffordshire Tile Doctor
 Tile Doctor Ltd
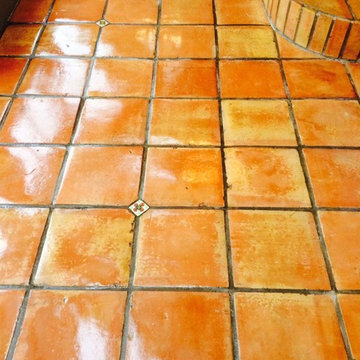
This Terracotta tiled floor was installed in the conservatory of a house in the old market town of Garstang, Lancashire, famous for being the world’s first ever ‘Fairtrade Town’.
There were quite a few problems with this floor; for one, my client had not re-sealed the tiles in many years and had therefore allowed the existing seal to become very worn and almost completely ineffectual. This had subsequently allowed the floor to become very dirty and marked with white blotches. These white blotches had occurred where the fertilizer held in decorative plant pots had started to eat away at the sealer.
The tiles were cleaned with a strong solution of Tile Doctor Pro-Clean, which is a strong alkaline cleaner. The solution was liberally applied to the floor and left to dwell for a short period, allowing time for the cleaner to seep into the pores of the Terracotta and lift the ingrained dirt to the surface. The solution was then agitated using a black scrubbing pad fitted to a heavy rotary machine, making a marked difference to the appearance of the tiles within a matter of minutes.
Tile Doctor Acid Gel was then used to spot treat the white marks, the acid content in the product breaks down the alkaline salts that had developed, left behind by the leaked plant fertilizer.
The entire floor was then rinsed several times to remove the soiled cleaning residue and the excess moisture was extracted using a wet-vac machine.
The Terracotta tiles were left to dry for an entire week as there was no evident damp proof membrane in place at the property. I used damp testers to approximate when the tiles would be dry enough to seal, which was very important as any excess moisture can upset the performance of the sealer.
My first choice of sealer was Tile Doctor Colour Grow, an impregnating sealer that also intensifies the natural colours in the stone. A single coat of Colour Grow was applied, before I opted to follow this up with six coats of Tile Doctor Seal & Go, which provides a very robust surface seal and also helped to give the Terracotta the aesthetically pleasing my client had requested.
Before leaving the property with its newly restored Terracotta tiled conservatory, I made sure to give my client some tile maintenance advice. Needless to say, she was very pleased with the results.
Russell Taylor
Lancashire Tile Doctor
 Tile Doctor Ltd
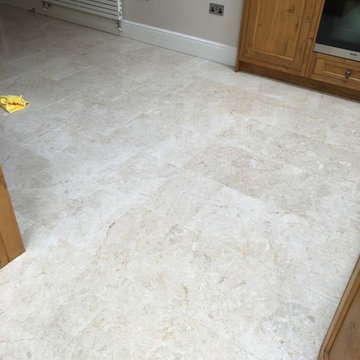
Marble tiles can be tumbled in large drums to achieve an aged and softened effect, and this can look very nice providing that the stone is adequately maintained.
In the case of this floor at a property in Twickenham South West London, the Marble tiles that had been laid over five years ago, and in that time the sealer had worn down offering the floor little protection. Dirt had now become ingrained in the pores of the stone and grout, and a deep clean and fresh seal were required to restore the stone’s original colour and lustre. The property owner asked me to complete the job and I was more than happy to oblige.
To begin the restoration, I applied both Tile Doctor Pro-Clean, which is a high alkaline cleaner, and Tile Doctor Remove and Go, which a heavy-duty stripper and remover, to the floor and scrubbed the products in using a scrubbing pad fitted to a professional rotary machine.
The chemical solvents in the Remove and Go helped to break down any old sealer that remained inside the stone, allowing the Pro Clean to then work its magic on the stubborn ingrained dirt the customer had struggled to remove previously. Some of the deeper veins and grout lines I chose to scrub by hand to ensure the fullest and most meticulous clean possible.
The resulting soiled cleaning solution was then pressure rinsed with water and the soil extracted with a wet-vacuum, leaving a completely clean floor that was now ready to be sealed using a new sealant.
I returned to the property the following day after allowing the Marble tiles to dry fully. Drying the tiles is a crucial part of the restoration process, since even a small quantity of excess moisture can cloud the sealer and prevent it from working to its fullest capabilities.
I applied two coats of our solvent-based impregnating sealer known as Tile Doctor Colour Grow. As the name of the product suggests, Colour Grow not only protects the tiles against ingrained soil, it also thoroughly lifts and enhances the natural colours in the stone.
The new seal will make it easy for our customer to maintain the floor, making daily cleaning easier. It will also protect the stone against the nasty spillages that are common in kitchens and living rooms.
The customer was thrilled with the much-improved appearance of the Marble tiles and is very reassured that they will now stay in great condition for a long time. Another satisfied client!
Jonathan Oldham
South Middlesex Tile Doctor
 Tile Doctor Ltd
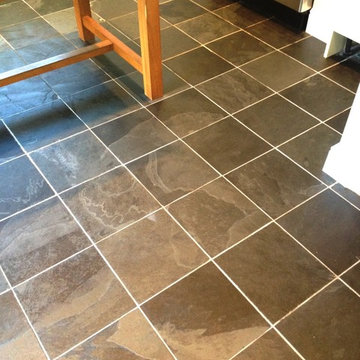
Slate is a popular choice for tiled kitchen floors and when properly maintained looks fantastic, however like all natural stone products without an effective cleaning plan dirt will become ingrained in the stone and will start to lose its appearance.
This was the case with this fantastic Slate tiled kitchen floor in Twickenham which had the potential to look really nice, but hadn’t received the proper maintenance for a long while, leaving it looking very tired. It now needed what was left of its old surface sealer stripped off, followed by a deep cleaning of the tile and grout before having a fresh seal applied.
To begin the restoration, I mixed a 50:50 solution of Tile Doctor Remove and Go and Tile Doctor Pro Clean. This was applied to the floor and allowed to dwell. Remove and Go functions as a stripper that breaks down the old sealer, while Pro Clean is a versatile, high alkaline cleaner that is safe to use on all types of natural stone flooring.
To use it to full effect, I machine scrubbed this solution into the floor to completely remove all dirt, stains, and old sealer. I also ran a stiff brush along the grout lines to remove the particularly stubborn dirt ingrained in the grout. The resulting cleaning slurry was then rinsed with water and extracted using a wet vacuum and the floor checked for stubborn marks which were retreated using the same process.
The floor was left to dry overnight and I came back the next day to apply a new seal. It’s important to leave a tiled floor to dry completely before sealing and at this time of year 24 hours is usually enough. This is necessary to ensures there is no excess moisture in the tile as this has the potential to cloud the sealer and affect its effectiveness.
The customer required a low sheen finish and a floor that was easy to maintain. I opted to use Seal & Go, which provides exactly that. It is a water-based with a high sheen blend of acrylic polymers that offers a both a stain resistant surface seal and a durable low sheen finish, also being water based it doesn’t leave a smell as it dries. Seal and Go is also a breathable sealer that will allow moisture to rise up through the tile and allow the floor to breathe.
As you can see from the pictures, the lustre has been completely restored to the Slate tiles and the sealer will allow for easy maintenance for the customer in the future.
Jonathan Oldham
South Middlesex Tile Doctor
 Renovation Q.C.
Nous sommes des experts dans la conception et la rénovation de salle de bains. Nous vous aidons à planifier votre budget pour vous offrir la salle de bain que vous pouvez vous permettre. Nous nous occupons de la gestion de votre projet de salle de bains tout en gardant un œil sur les coûts du projet. D’un design traditionnel à un style plus moderne, nous pouvons reproduire n’importe quelle conception que vous pouvez imaginer, y compris tout ce que vous avez pu voir sur le web ou dans des magazines. Nous pouvons même transformer toute salle de bains en une pièce luxueuse pour vote relaxation et votre bien-être. Nous sommes des experts dans le choix et l’installation des tourbillons, spas, saunas, douches de vapeur, des articles de bain Hi-Tech et tout ce dont vous pourriez avoir besoin pour faire de votre salle de bains un espace de détente et de bien-être.
Nous faisons un travail de qualité en ce qui concerne les installations de plomberie, les baignoires, les éviers, les robinets, les toilettes et même les bidets et les installations de douche. Nous nous occupons du carrelage, des sols, des murs, des accents décoratifs en porcelaine, de la céramique, du verre, de la pierre ou du bois. Nos installations de lavabos, d’éviers, d’armoires, de comptoirs et de dosserets combinent qualité et esthétique. Nous faisons aussi l’éclairage, les porte-serviettes, les distributeurs de papier hygiénique, les paniers et les ventilateurs d’extraction, et nous créons aussi de très belles enceintes en verre de toute taille.
31