
Search results for "Extraction process" in Home Design Ideas

 SUBU Design Architecture
Kitchen remodel with reclaimed wood cabinetry and industrial details. Photography by Manolo Langis.
Located steps away from the beach, the client engaged us to transform a blank industrial loft space to a warm inviting space that pays respect to its industrial heritage. We use anchored large open space with a sixteen foot conversation island that was constructed out of reclaimed logs and plumbing pipes. The island itself is divided up into areas for eating, drinking, and reading. Bringing this theme into the bedroom, the bed was constructed out of 12x12 reclaimed logs anchored by two bent steel plates for side tables.


 TKS Design Group
Free ebook, Creating the Ideal Kitchen. DOWNLOAD NOW
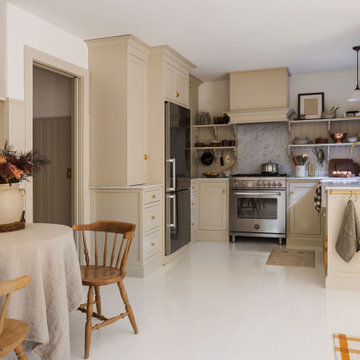
Our clients and their three teenage kids had outgrown the footprint of their existing home and felt they needed some space to spread out. They came in with a couple of sets of drawings from different architects that were not quite what they were looking for, so we set out to really listen and try to provide a design that would meet their objectives given what the space could offer.
We started by agreeing that a bump out was the best way to go and then decided on the size and the floor plan locations of the mudroom, powder room and butler pantry which were all part of the project. We also planned for an eat-in banquette that is neatly tucked into the corner and surrounded by windows providing a lovely spot for daily meals.
The kitchen itself is L-shaped with the refrigerator and range along one wall, and the new sink along the exterior wall with a large window overlooking the backyard. A large island, with seating for five, houses a prep sink and microwave. A new opening space between the kitchen and dining room includes a butler pantry/bar in one section and a large kitchen pantry in the other. Through the door to the left of the main sink is access to the new mudroom and powder room and existing attached garage.
White inset cabinets, quartzite countertops, subway tile and nickel accents provide a traditional feel. The gray island is a needed contrast to the dark wood flooring. Last but not least, professional appliances provide the tools of the trade needed to make this one hardworking kitchen.
Designed by: Susan Klimala, CKD, CBD
Photography by: Mike Kaskel
For more information on kitchen and bath design ideas go to: www.kitchenstudio-ge.com
Find the right local pro for your project

 Cascade Builders & Associates Inc.
Chandler Photography
Inspiration for a mid-sized rustic u-shaped medium tone wood floor kitchen remodel in Other with a double-bowl sink, shaker cabinets, red cabinets, solid surface countertops, brown backsplash, stone tile backsplash, paneled appliances and an island
Inspiration for a mid-sized rustic u-shaped medium tone wood floor kitchen remodel in Other with a double-bowl sink, shaker cabinets, red cabinets, solid surface countertops, brown backsplash, stone tile backsplash, paneled appliances and an island

 Hoi Ning Wong
Photo: Hoi Ning Wong © 2014 Houzz
Architect: square three design studios
Interior designer: GoGo Creations
Builder: Clarum Homes
Inspiration for a contemporary exterior home remodel in San Francisco
Inspiration for a contemporary exterior home remodel in San Francisco
 Environmental Solutions Services(ESS)
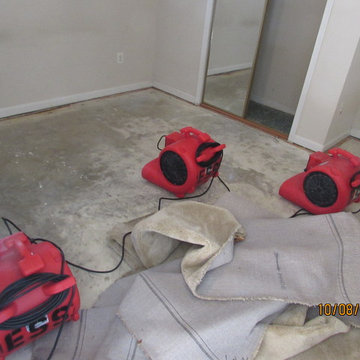
These dryers are facing the most saturated area of the room.
Home design - traditional home design idea in DC Metro
Home design - traditional home design idea in DC Metro

 Sunset Air Conditioning and Heating
AC4Less & Lee & Collier County's best value for AC/air conditioner repair since 1997. Expert service on Ruud, Trane, Carrier, Rheem, York, Goodman air conditioners. Scheduled maintenance contracts.

 Homefront Farmers
Compost is a natural, long-lasting way to feed your soil, and a wonderfully sustainable way to dispose of kitchen and garden waste. These spacious bins are big enough to fit plenty of vegetable scraps as well as lawn clippings and leaves. Systems are made entirely of rot-resistant cedar and enclosed on all sides with sturdy wire mesh that allows air to flow to and through the compost. Removable front panels and hinged lids make for easy access. Systems are available in triple, double, and single bin configurations. Comes with the classic book about composting Let it Rot!: The Gardener's Guide to Composting by Stu Campbell.
 Elletipi Inc.
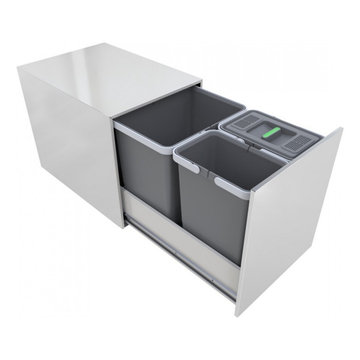
Elegant and luxurious pull out system ELLETIPI for waste separation, provided with metal sliders for total extraction, and soft closing return mechanism. The buckets are installed inside a stainless steel structure (AISI 430) which is 100% recyclable, as are all its components. The simple lines, the finishes, the materials and processing, render this series the top of the range. It contains a bucket with a special anti-odor lid with a filter (washable cloth that can be regenerated many times using soap and water). You can install these bins in kitchen bases, specifically under the sink. Its installation on the bottom of the kitchen base with the 8 supplied self-tapping screws is easy and practical.
 Tile Doctor Ltd
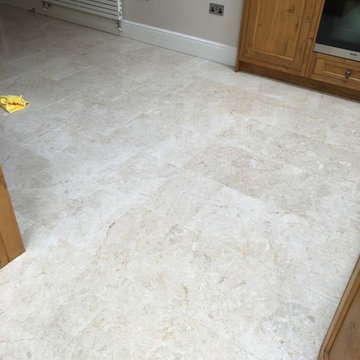
Marble tiles can be tumbled in large drums to achieve an aged and softened effect, and this can look very nice providing that the stone is adequately maintained.
In the case of this floor at a property in Twickenham South West London, the Marble tiles that had been laid over five years ago, and in that time the sealer had worn down offering the floor little protection. Dirt had now become ingrained in the pores of the stone and grout, and a deep clean and fresh seal were required to restore the stone’s original colour and lustre. The property owner asked me to complete the job and I was more than happy to oblige.
To begin the restoration, I applied both Tile Doctor Pro-Clean, which is a high alkaline cleaner, and Tile Doctor Remove and Go, which a heavy-duty stripper and remover, to the floor and scrubbed the products in using a scrubbing pad fitted to a professional rotary machine.
The chemical solvents in the Remove and Go helped to break down any old sealer that remained inside the stone, allowing the Pro Clean to then work its magic on the stubborn ingrained dirt the customer had struggled to remove previously. Some of the deeper veins and grout lines I chose to scrub by hand to ensure the fullest and most meticulous clean possible.
The resulting soiled cleaning solution was then pressure rinsed with water and the soil extracted with a wet-vacuum, leaving a completely clean floor that was now ready to be sealed using a new sealant.
I returned to the property the following day after allowing the Marble tiles to dry fully. Drying the tiles is a crucial part of the restoration process, since even a small quantity of excess moisture can cloud the sealer and prevent it from working to its fullest capabilities.
I applied two coats of our solvent-based impregnating sealer known as Tile Doctor Colour Grow. As the name of the product suggests, Colour Grow not only protects the tiles against ingrained soil, it also thoroughly lifts and enhances the natural colours in the stone.
The new seal will make it easy for our customer to maintain the floor, making daily cleaning easier. It will also protect the stone against the nasty spillages that are common in kitchens and living rooms.
The customer was thrilled with the much-improved appearance of the Marble tiles and is very reassured that they will now stay in great condition for a long time. Another satisfied client!
Jonathan Oldham
South Middlesex Tile Doctor

 Dry-Tech Water Damage Flood Restoration Services
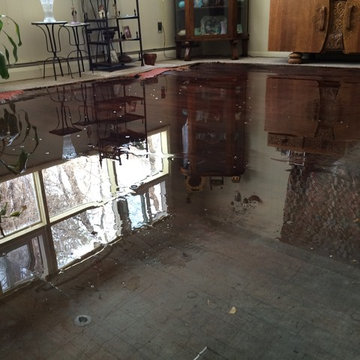
Contact Dry-Tech Water Damage Restoration Services for fast 24/7 emergency water damage restoration, mold remediation and smoke and fire damage in the western suburbs of Philadelphia and surrounding areas. Our IICRC trained restoration specialists are qualified and have the equipment to handle any size restoration job. At Dry-Tech Water Damage Restoration Services, we know water, mold and/or smoke and fire damage can be overwhelming for you and costly to your home or commercial building, so our restoration specialists will work with you step-by-step through the entire process.
Call 610-304-5117 to Contact Us Today! Dry-Tech Restoration Services 24 hr Service, Basement Flood, Basement Water Removal, Broken Pipes, Building Drying, Carpet Cleaning, Carpet Drying, Carpet Extraction, Carpet Repair, Carpet Restoration,
Carpet Water Extraction, Cleaning, Damage Repair, Damage Restoration, Dehumidification, Disaster Restoration, Disinfecting, Drying, Emergency Service, Extraction,
Fire, Fire Restoration, Flood, Flood Clean Up, Flood Damage, Flood Damage Repair, Flood Restoration, Flood Water Removal, Flooded Basement, Floor Drying, Free Estimates,
Leak Detection, Moisture, Odor Removal, Plumbing, Plumbing Repairs, Rain Damage, Remediation, Repairs, Restorations, Roof Leak, Sanitizing, Sewage Clean Up,
Sewage Extraction, Sewage Removal, Sewer Back Up, Sewer Damage Restoration,Smoke, Smoke Damage Repair, Smoke Removal, Steam Cleaning, Storm Damage Repair,
Structural Drying, Sump Pump Failure, Tile Cleaning, Toilet Overflow, Upholstery Cleaning, Wall Drying, Water Damage Clean Up, Water Damage Company,
Water Damage Repair, Water Damage Restoration, Water Drying, Water Extraction, Water Removal, Wind Damage, Wet Carpet, Wood Floor Drying, Wet Basement http://www.restore-911.com
 Wood Vitalize
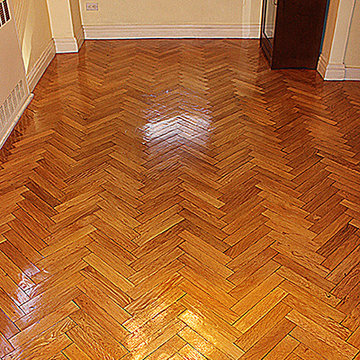
After: Our Sandless Finish Hardwood Floor Refinishing Process extracts all of the dirt and debris from a wood floor with the use of special machinery and eco-friendly compounds.

 DRB Homes and Design
DRB Homes and Design: Modern Kitchen featuring Fumed Eucalyptus cabinetry. "Fuming" is the process of exposing thin wood veneers to ammonia in a large vacuum chamber. This method extracts deeper colors from the wood's tannin that a stain alone could not accomplish. We designed the rest of this kitchen remodel allowing natural light to pair with the Fumed Eucalyptus, in order to give off the vibrancy and deep, rich colors the fuming process achieves.

 John
JohnCoco coir is a versatile and sustainable growing medium that is gaining popularity among gardeners. Made from the fibrous husk of coconuts, it’s an eco-friendly alternative to peat moss and can greatly enhance the quality of your soil. In gardening, it is often utilized in systems like Coco Coir Hydroponic, where it helps create an efficient water and nutrient delivery system.
What is Coco Coir?
Coco coir is a natural fiber extracted from coconut husks. It has a neutral pH, excellent water retention, and is reusable, making it a favorite among gardeners who prefer organic and sustainable practices. It is available in different forms such as blocks, bricks, or loose coir, each requiring some preparation before use in gardening.
Benefits of Using Coco Coir in Gardening
Coco coir offers several advantages for gardening. Here are the benefits of using coco coir in gardening:
Holds up to 10 times its weight in water, ensuring plants have consistent moisture.
Promotes oxygen flow to plant roots, leading to healthier root systems.
Coco coir is a renewable and eco-friendly alternative to peat moss.
It can be washed, rehydrated, and reused, reducing waste.
Naturally pH neutral, making it suitable for various plants without major adjustments.
Enhances the texture and moisture retention of garden soil.
How to Prepare Coco Coir for Planting
Preparing coco coir for planting involves a few essential steps. First, you need to hydrate the coir block, as it typically comes in a compressed form. Place the block in a large container and add warm water, allowing the block to expand and absorb the water. Once fully expanded, the coir should be fluffed up by breaking it apart with your hands or a tool to ensure it becomes loose and airy. After the coir has been fluffed, it is important to drain any excess water, as overly wet coir can lead to root suffocation. Finally, since coco coir is inert and does not contain nutrients, it’s a good idea to add organic compost or liquid fertilizer to enrich the coir before planting.
Do You Need to Soak Coco Coir Before Planting?
Yes, soaking coco coir before planting is necessary. Since it comes in a compressed form, it needs to be broken down and hydrated for proper use. The soaking process allows the coir to expand and release the fibers, making it usable as a growing medium. After soaking, the coir should be fluffed to ensure the water is evenly distributed. Draining any excess water is crucial because overly wet coir may impede plant root health.
How to Prepare Coco Peat for Planting
Coco peat, a fine, powdery form of coco coir, is highly beneficial for seed starting and improving water retention in soil. To prepare coco peat, it first needs to be hydrated, similar to how you prepare coir blocks. Slowly add water to the peat in a container and allow it to absorb and fluff up. Once hydrated, coco peat can be used on its own or mixed with other growing media such as perlite or vermiculite for added aeration and drainage. It is advisable to check the pH level of your final mix, as coco peat generally has a neutral pH, but adjustments may be necessary depending on the plants being grown.
Can You Use Just Coco Coir for Plants?
Yes, coco coir can be used by itself to grow plants, especially in hydroponic systems or as a seed-starting medium. However, because coco coir does not naturally contain nutrients, you will need to provide regular fertilizer to support plant growth. This makes it particularly suitable for plants grown in controlled environments, such as hydroponics, where nutrient solutions can be carefully managed. In traditional soil-based gardening, mixing coco coir with other organic materials like compost is recommended to provide essential nutrients and improve the overall soil structure.
How to Use Coco Coir in Hydroponics
Coco coir is widely used in hydroponic systems due to its water retention and aeration properties. To use coco coir in hydroponics, it first needs to be soaked and hydrated, as discussed earlier. Once the coir is fully prepared, it can be placed in the hydroponic system. Since coco coir does not contain natural nutrients, you will need to supply a balanced nutrient solution tailored for hydroponic plants. Regular monitoring of water and nutrient levels is essential to prevent nutrient imbalances or root rot. One of the benefits of coco coir in hydroponics is its reusability. After completing a growing cycle, the coir can be washed, rehydrated, and used again in future plantings.
Using Coco Coir as a Soil Amendment
Coco coir is also an excellent soil amendment, as it improves the texture and moisture retention of garden soil. To use coco coir in this way, mix loose coir with your existing garden soil at a ratio of one part coco coir to two parts soil. This will help retain moisture without compacting the soil, improving both water drainage and root growth. For optimal results, you can also add organic compost to the mix, ensuring that the nutrient levels are sufficient for plant growth. Coco coir works particularly well in raised beds, where it helps maintain proper soil structure over time.
Advantages of Using Coco Coir Over Peat Moss
While peat moss has been traditionally used as a growing medium, coco coir offers several advantages over it. Coco coir is a renewable resource, as it is a byproduct of coconut processing, while peat moss is harvested from peat bogs that take centuries to regenerate. Coco coir is also more durable, as it can be reused multiple times without breaking down, while peat moss disintegrates after a single use. Another key benefit is its neutral pH, whereas peat moss is more acidic and may require balancing to meet the needs of specific plants.
Conclusion
Coco coir is a highly versatile and sustainable growing medium that benefits both novice and experienced gardeners alike. Whether you are using it for hydroponics, as a soil amendment, or as a standalone medium for growing plants, knowing how to properly prepare and use it is key to maximizing its benefits. By following the steps detailed above, you can improve water retention, aeration, and overall plant health in your garden, all while contributing to eco-friendly gardening practices.
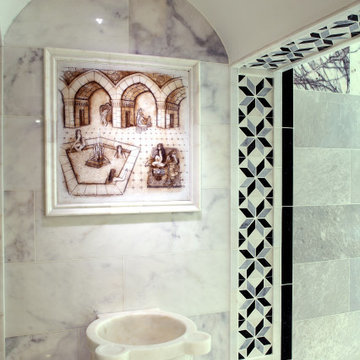
 Bursa Beige Marble
 The strength and pore widths of semi-fine-grained, medium-grained, coarse-grained, and large-grained marbles are measured. The marble’s quality is revealed as a result of this assessment. However, several factors influence marble quality. The mine’s extraction processes and the methods used during processing are at the top of the list.
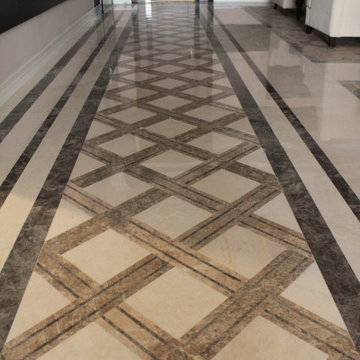
 Travertine
What Can You Use Marble For?
Marble, which has the richest mines in the world among natural stones, is preferred in different fields or sectors. A great variety can be observed in terms of usage area compared to other natural stones. Using this product in many different areas, from the construction industry to sculpture, is possible. It is possible to state that it has a large market thanks to its structural features and product variety obtained from different extraction processes.
Although marble usage is much more diverse than all other natural stones, at the beginning of the usage areas of marble, we can list;
Stair treads,
Kitchen counters,
Overall decoration,
Indoor and outdoor flooring,
Exterior coating,
Interior wall decoration,
Statues,
Ornamental items,
Tombstone.
 Tile Doctor Ltd
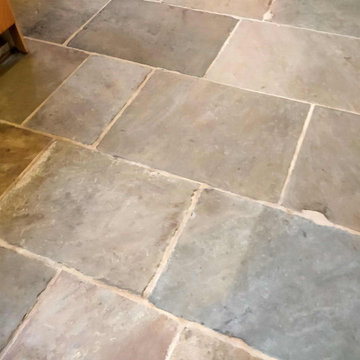
The owner of this period cottage in the old market town of Tadcaster near Leeds, had what was once a beautiful Yorkshire stone floor in the kitchen. It has been a long time since it had been given a proper clean so over the years and with the Kitchen being a high traffic area the whole floor including the grout had darkened and he now wanted it refurbished in time for Christmas.
I visited the property to assess what needed to be done and could see straight away that any protective sealer that was once on the floor had long since worn off. In fact, it was so consistently dirty with years of built-up grease and dirt I had to wonder if one had ever been applied.
I explained what the floor needed was a really deep intensive clean and then a sealer applied to make it easy to keep clean. The problem with most tile and stone is its porosity and if left unprotected dirt easily becomes lodged into its pores making cleaning a struggle.
To prove the difference that can be achieved and to allow me to work out a process on which I could base an accurate quote I ran a test clean on part of the kitchen floor. The test clean went very well, the difference was remarkable, and the cleaned section really stood out. Pleased with the potential of a clean floor they accepted my quote, and we pencilled a date in the diary.
I returned on the appointed date and began by removing the kickboards from under the kitchen units to protect them from splashing. Next, I set about spaying the floor with a strong dilution of Tile Doctor Pro-Clean, this is a purpose made tile and grout cleaner that eats into the grease and dirt so it can be removed. This product works best if you leave it for ten minutes before scrubbing in using a heavy-duty machine fitted with a heavy-duty brush. The soil released from the floor was then extracted using a wet vacuum.
The Pro-Clean did a good job on the grout however it was clear something stronger was required to really get the stone clean, so I stepped up a gear and applied Tile Doctor Remove and Go using the same process as before. This is a really good product for removing deeply ingrained grease and dirt.
The final step of the cleaning process was to give the stone and acid wash using Tile Doctor Grout Clean-Up to remove old grout haze and other mineral deposits; additionally, being an acidic product, it counters the alkaline cleaning products used earlier neutralising the pH level of the floor and leaving it ready for sealing.
Before sealing I like to discuss the different products available and the finishes they can provide. In this case my clients’ main concerns were that they wanted the stone to look natural and easy to maintain going forward.
With this in mind, Tile Doctor Seal & Go Extra was chosen, it’s a modern acrylic-based sealer that brings out the natural colours in the stone and gives a very slight smooth finish. The protection it provides will prevent dirt becoming ingrained int the pores of the stone and ensure the floor is easier to maintain. Several coats were applied, until we achieved the required finish.
The deep cleaning process and fresh sealer transformed the stone floor bringing out its original beauty and my customer couldn’t believe the difference in the floor and was highly delighted.
For aftercare I gave the client a bottle of Tile Doctor Neutral Cleaner, this product is pH neutral so it will clean the floor but won’t damage the sealer. Often people use household cleaners for cleaning tiled floors, but due to the strong chemicals they contain, they can do more harm than good by slowly stripping away the protective sealer and taking the floor back to square one. Tile Doctor Neutral Tile Cleaner is reasonably priced, and the concentrated formula means a small amount goes a long way so it’s well worth using.
This was a pleasurable job for me as it was good to see the floor transform from dull and lifeless to clean and showing the natural colour and beauty of the York stone, and always lovely to have another satisfied client.
Simon Testa
North East Yorkshire Tile Doctor
 Tile Doctor Ltd
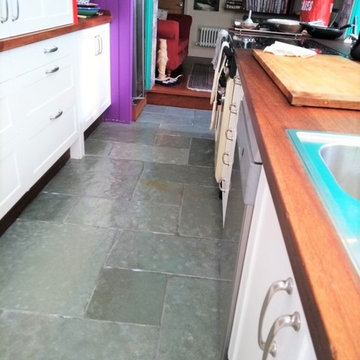
I recently helped a homeowner from my home town of Dursley who got in touch about her kitchen Flagstone floor. The problem revolved around an accident she had with raspberries which had stained the flagstones and the problem became compounded when a house hold clearing product was applied neat to clean up the mess. If you follow any of our Tile Doctor blogs, you will know that using strong household cleaning products can damage the sealer and, in this case, it had left white marks on the floor.
I called round to the property to survey the floor as was surprised to find out that the floor had been cleaned and sealed only four months prior by another company. I don’t like to comment on other people’s work, but I found the grout lines and flagstones were still badly ingrained with dirt, so it wasn’t a through job.
I completed by survey and demonstrated the process I would follow to resolve the issues on one of the flagstone tiles. She could not believe the difference I was able to make and booked me in straight away to restore the entire floor.
My first task was to protect the wooden kitchen units from splashing that can happen when cleaning the floor. Once that was done, I set about stripping the sealer from the floor and deep cleaning the tile and grout with a strong dilution of Tile Doctor Pro-Clean. Pro-Clean is a concentrated, multi-purpose high-alkaline cleaner, stripper and degreaser which is safe to use on all types of tile, stone and grout including natural stone.
Working in sections across the Kitchen and adjacent dining room I diluted one part Pro-Clean to two parts water and mopped it onto the flagstones and grout where I left it to soak in for roughly fifteen minutes. Then using a rotary floor buffer fitted with a black scrubbing pad I scrubbed the solution into the floor into the old sealer and trapped dirt came away turning the cleaning fluid black in the process. The soil was then rinsed off with water and then extracted with a powerful 3,000 watt wet and dry vacuum. This process was repeated until I was satisfied the floor was clean and I ran a stiff grout brush along the grout lines to ensure they also received a good scrub. After I was satisfied the section was clean it was rinsed thoroughly with water to neutralise the floor and remove any trace of product and then dried with the wet and dry vacuum.
The cleaning process took up the whole day, but the flagstones would need to be dry before sealing so after giving the owner an update I left the floor for two days, so it could dry out thoroughly.
On my return I tested the floor was dry in multiple places with a damp meter to ensure it was ready to be sealed. The readings showed that the wet and dry vacuum had done a good job in removing the moisture, so all was well. To seal I applied several coats of Tile Doctor Seal and Go allowing each coat to dry before applying the next however with such a large area to cover I was able to work in sections around the floor.
Seal and Go works really well on Flagstones and leaves a very appealing sheen finish, also being water based it doesn’t leave a smell as it dries.
The results were amazing, and the customer thanked me for making such a massive improvement on her floor. Before leaving I made sure to discuss after-care and to avoid the use of hash cleaning products.
Malcolm Crowther
Gloucester Tile Doctor
1