
Search results for "Flashing" in Home Design Ideas
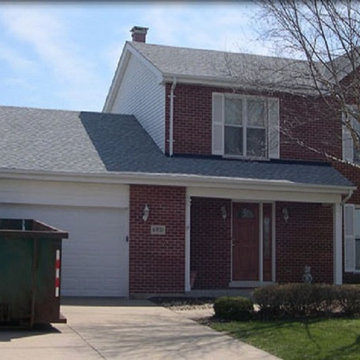
 G.C.W General Contractor Roofing & Remodeling
GCW Construction specializes in the installation or repair roofing, siding, soffits, replacement windows, doors, flashings, fencing, railing, decking, insulation. Not only does GCW Construction provide exceptional services to home owners in New Jersey,
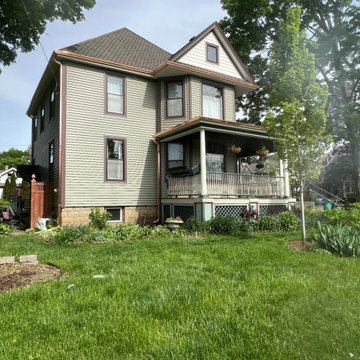

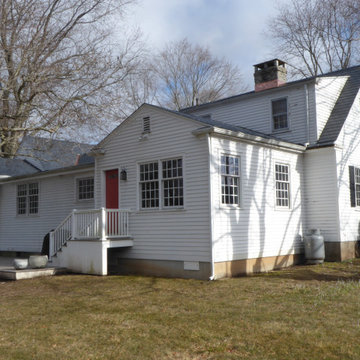
 Connecticut Roofcrafters Llc
Rear of a historic restoration on this late 1800s Guilford, CT Farmhouse-style residence. The owners wanted a traditional look but also wanted to take advantage of more modern materials so we recommended a synthetic slate roof with traditional copper flashing. After stripping the previous roof using Asbestos Removal protocols, we repaired roof decking as necessary, installed a glacier guard vapor barrier and then a course of Echostar Empire Slate 10" synthetic slate shingles in Manhattan Midnight color. We flashed valleys and protrusions with traditional copper flashing, and repointed the chimney.
Find the right local pro for your project
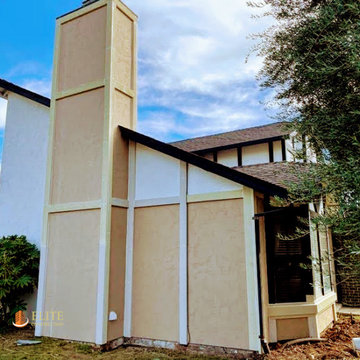
 Elite Construction and Remodel Corp
During our beginning stages for a standard chimney repair, we came across a bigger issue. We found poor roof flashing conducted by a roofer. Screws were used to secure roofing and flashing down around the chimney, this has damaged the home. This roof flashing system collected an excess of water and has caused dry rot down the chimney and wall next to the chimney. The chimney exterior wall needed to be cut out and replaced with new siding in all directions and replaced. We then installed new step flashing, and cricket to divert water and debris. Now, this chimney and roof, and siding are secure, safe, and will last for many more years.
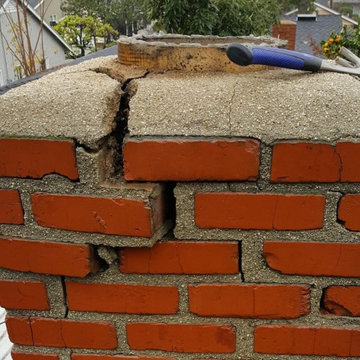
 SUPERIOR CHIMNEY SERVICES CORPORATION
Out of sight, out of mind. That’s what happens with the poor chimney. It stands up there, straight and tall, each day taking a beating from the sun, wind, rain, snow and freeze/thaw cycles of winter. Yet, we rely on the chimney each day to take away the smoke and gasses from the fireplace, furnace and water heater appliances.
What can we do as homeowners to ensure it continues to do its job without fail?
Sweep & Check the Chimney and Fireplace
A Certified Technician performs sweep and/or inspection of nearly/over a thousand chimneys annually. You may be familiar with the 14-point certified chimney inspection accompanied by photo documentation - I’ve shown you this graphic before, but it sure is a good one. It gives you the “what and where” of the overall condition of your chimney(s). If you have any questions, you can point to the picture and the certified technician can elaborate on the relative chimney inspection-point results.
Exterior Chimney
Part of the inspection, as you will see in the picture, is to inspect the exterior of the chimney. The Certified Chimney Technician will inspect the full chimney including the chimney flashing, bricks and mortar joints, chimney crown and cap. Let’s take a look at each one.
Chimney Flashing
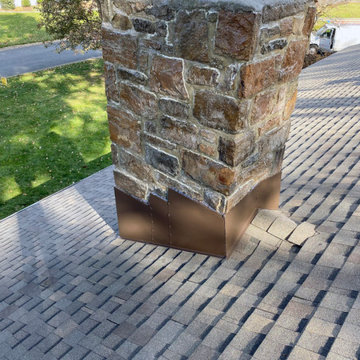
Chimney flashing plays a vital role to the protection of your home. It’s the piece of material that protects where chimney protrude out of the roof. To prevent water leaks and damage, the technician will inspect for any loose, missing, cracked or damaged flashing.
Brick & Mortar Joints
This is key. To prevent any type of major repairs, take care of minor repairs now. The technician will check for loose, cracked or spalling (chipped) bricks. If there are loose bricks and numerous cracks and chips, we’ll inspect further for any type of water leaks or water damage problems.
Chimney Crown
The concrete slab on top of the chimney is the chimney crown. It serves a very important purpose. The concrete slab acts like your chimney’s own personal roof. The technician will check if there are cracks, loose or missing pieces from the crown.
Chimney Cap
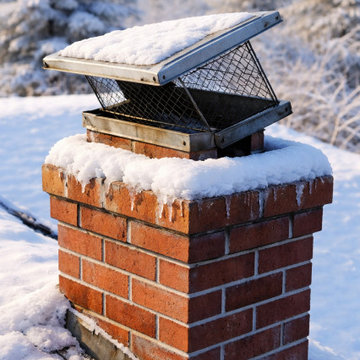
Chimney caps are also a critical component of the chimney - Every chimney needs a chimney cap for the same reasons every home needs a roof! It covers the opening of the flue. It prevents animals, debris and water from entering the chimney. The material of a chimney cap is usually made of stainless steel, as it will not rust.
Overall
If you’ve put-off getting the chimney inspected for some time, it’s best to get it checked. We’ve had some challenging weather this summer, and winter is not too far off. Take the time to give us a call and we’ll come out to give you a complete 14-point inspection with supporting photo documentation. If you don’t have a problem, fantastic, you’re ready for winter! If not, get the repairs done now so you don’t experience further damage to the interior or exterior of your home during the high-use months of winter.
Give us a call today at 877-CHIM-FIX (877-244-6349)
 NORDIC BUILDERS - MODERN TIMBERFRAME DESIGN BUILD
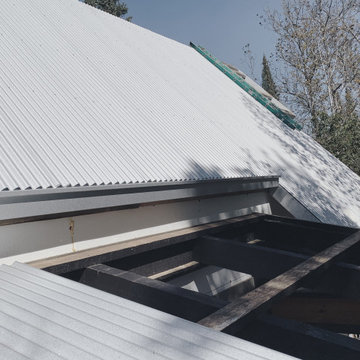
Wanted to show these galvalume gutters, beefy. And flashing where the rear porch roof collides with the wall. Ted takes flashing verrrrry seriously.. I'm not kidding, sometimes I don't even know what he is talking about. And I think he truly seems to enjoy flashing and talking about it. Try it sometime, get him going about flashing and ask him some questions.

 SUPERIOR CHIMNEY SERVICES CORPORATION
Is it crazy to think about chimney repairs in the winter? It’s cold and snowy outside and the rooftops are solid white, coated with a layer of ice. A homeowner called us with a concern about her home. She reported that a small stream of water was coming down the chimney and into the firebox. To keep the water from flooding the firebox, the homeowner placed a Tupperware container to collect the water. Not a good look. Can chimney repairs in the winter be done by a certified chimney technician?
Chimney Repairs in the Winter
Chimney repairs can be completed in the winter, although it depends on what type of chimney repair is needed. Let’s take a quick look at the different chimney repairs in our cold winter months.
Chimney Cap: If your chimney cap comes loose, or if the winter winds knocked it out of place or blew it off completely, our certified chimney technician can go up on the roof and take care of the chimney cap for you with a chimney cap replacement. Our technicians follow the guidelines for safety, especially in the winter months when roofing systems are the slipperiest.
Flashing: Flashing is the connector from the roofing system to the chimney. It is the barrier that protects water from finding its way into your home. However, if the flashing becomes loose or comes away from the roof and chimney, it is open season for the rain to come directly into your home and create chaos.
Chimney Crown: The chimney crown is the slab of cement that sits on top of the chimney and right below the chimney cap. Hairline cracks can form in the chimney crown allowing water, melted snow, to enter. Even the smallest hairline crack can cause the melted snow to find the weak spot on the chimney crown and make its way into your home.
Remember, hairline cracks can and will grow in width and length with the freeze thaw cycles. When the melted snow freezes at night, it expands inside of the crack. If the temperatures cooperate in the daytime, it melts the snow. But remember, it doesn’t necessarily dry out inside of the crack. It can remain moist and freeze again at night.
Chimney Tuckpointing: Tuckpointing the chimney can be done in the winter, but it certainly isn’t an easy process as we’re dealing with wet mortar. Cracks can create an entry point for melted snow to enter, further deteriorating the mortar.
Although it is not optimal to perform chimney repairs in the winter, Superior Chimney takes precautions to ensure a safe and effective repair. Now the homeowner can get rid of the streaming water in the firebox and enjoy the rest of the winter with a warm and dry fireplace.
Be sure to contact us today if you have a water leak in your fireplace. If you would like to have your chimney inspected and checked for water leaks coming this spring, contact us today to schedule it up in March. This way, you’ll be all set and not compete with others in the Spring.
 Weather Shielders
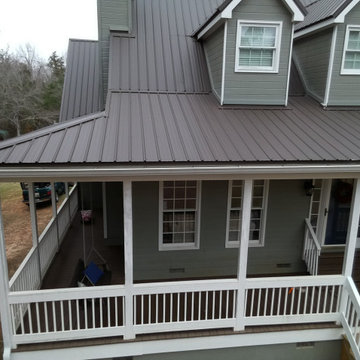
After the initial trim pieces and furr strips are all installed we install the lower section's panels. Next, the transition flashing, so we can then install the main roofs panels. This roof was a 12:12 pitch and pretty high up. On all elevated work it's best to use personal fall protection, but especially when a fall could be life threatening. After all the panels are installed, we can install the final trim pieces and flashings. The end wall flashing is first on the front of the dormers and then the side wall flashing above that. This house's siding was so old and unique, it would cost too much to remove the siding to install the flashing under it. So, we installed new trim pieces, instead of wood we used Mirratech, a composite trim material that has a 50-year warranty and beveled the top edge and caulked and painted it to match the siding.
 Benson Builders Inc
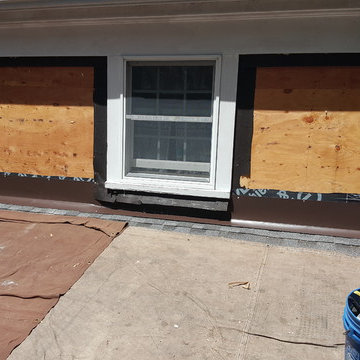
This wall/roof intersection was leaking because the existing rolled lead flashing was fracture and cracked. I removed the white cedars and all of the lead flashing. I applied ice and water barrier and made new flashing out of 12" aluminum coil stock. I then applied 30 pound felt over the plywood and flashing, and new white cedars.
 Weather Shielders
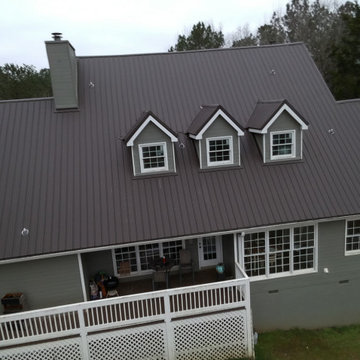
After the initial trim pieces and furr strips are all installed we install the panels. Next, this roof was a 12:12 pitch and pretty high up. On all elevated work it's best to use personal fall protection, but especially when a fall could be life threatening. After all the panels are installed, we can install the final trim pieces and flashings. The end wall flashing is first on the front of the dormers and then the side wall flashing above that. This house's siding was so old and unique, it would cost too much to remove the siding to install the flashing under it. So, we installed new trim pieces over the wall flashing to keep the top wall side watertight. Instead of wood we used Mirratech, a composite trim material that has a 50-year warranty and beveled the top edge and caulked and painted it to match the siding.
 Connecticut Roofcrafters Llc
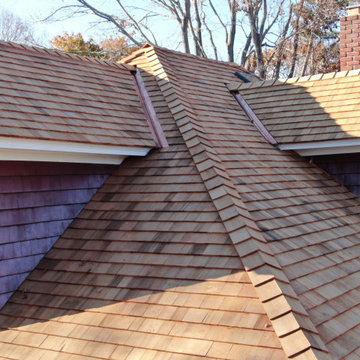
Detailed view of the ridge caps and copper valley flashing on this new Western Red cedar wood roof. The new roof on this historic 1909 residence, part of the Branford (CT) Center Historic District, involved a full rip of the existing asphalt roof, preparing the roof deck with vapor barrier and ice & water barrier, and then installing 3,000 square feet of perfection cedar shingles coupled with copper flashing for valleys and protrusions.
 Paradise Found Construction
Melissa and Steve purchased our National Award Winning Green Certified Remodeled Home. They had moved to Colorado previously to expand Business opportunities, but found that they missed being near their extended family members and Melissa’s native city and state. They wanted a home in a quiet neighborhood that suited their needs and had been updated to current design trends and amenities. With 2 young children a single-story home appealed to them.
Steve primarily worked from home, using the formal Living Room as his home office which was central to the Kitchen and main living areas. As their children grew, it became increasingly difficult to With 4 children, their daily activities were split between the 1st and second floors, making it difficult to coordinate activities amongst them. Also, with a large extended family close-by, get-togethers were cramped and uncomfortable.
With the added 1st floor living space, they are now able to all comfortably gather together and spend more quality time with their family and friends.
Design Features
Seamless Transition into the adjoining Kitchen and Living Room, separating the two with a light and bright 15-Lite Double French Door.
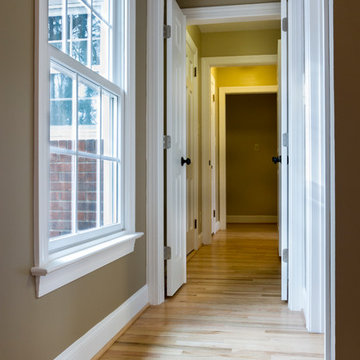
Light and bright natural hardwood flooring.
A bright and open floor plan achieved by introducing a double 15-Lite French door in the Kitchen and generous amount of double-hung low-e windows.
Window Well in the Roof to accommodate required foot-print placement.
Avoidance of installing a Pull-Down Attic Access.
No-VOC Paints and Finishes.
Durable Exterior Construction
No-Maintenance Composite and PVC Low-E Windows and Doors
Cement Fiber Siding
Cement Fiber and PVC Trim
Life-time Architectural Shingles
Metal Roof Flashing with Gutter Kick-Outs
Superior Window Flashing and Water Intrusion Sealing measures
Energy Efficient and Green Features
1st floor HVAC Compressor and Air Handler replaced with a more efficient 15 Seer unit.
Floor penetrations and perimeter bottom plates caulked and air sealed.
No-VOC Paints and Finishes.
Durable Exterior Construction
No-Maintenance Composite and PVC Low-E Windows
Cement Fiber Siding
Cement Fiber and PVC Trim
Life-time Architectural Shingles
Metal Roof Flashing with Gutter Kick-Outs
Superior Window Flashing and Water Intrusion sealing measures
 Connecticut Roofcrafters Llc
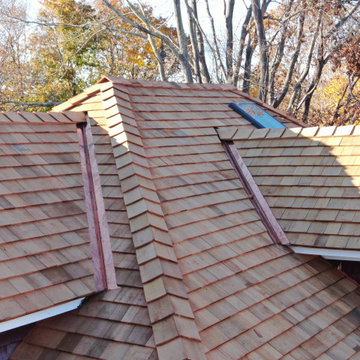
More valley flashing and ridge cap detail for this new Western Red cedar wood roof on this historic 1909 residence; part of the Branford (CT) Center Historic District. This expansive project involved a full rip of the existing asphalt roof, preparing the roof deck with vapor barrier and ice & water barrier, and then installing 3,000 square feet of perfection cedar shingles coupled with copper flashing for valleys and protrusions.
 Exterior Crew
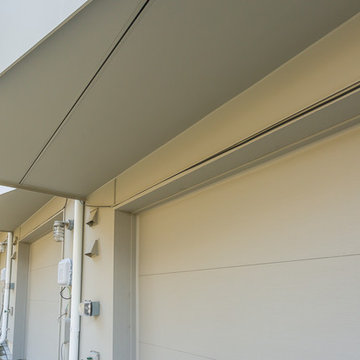
Smooth corners and beautiful edges clearly set this property apart with refined garage area trim wraps and metal flashings above the door and underneath the soffit panel.
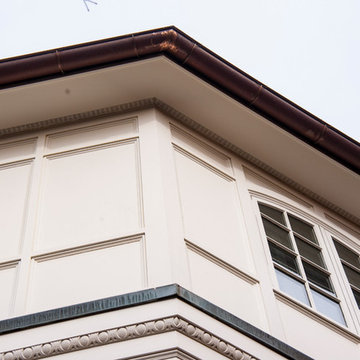
 WAGNER ROOFING
Large elegant white three-story wood house exterior photo in DC Metro with a gambrel roof and a shingle roof
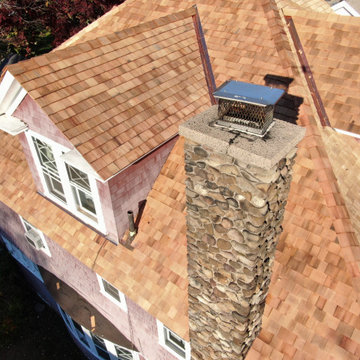 Connecticut Roofcrafters Llc
Side view of chimney, ridge caps, valley and protrusion flashing on a Western Red cedar wood roof installation for this historic 1909 residence; part of the Branford (CT) Center Historic District. This expansive project involved a full rip of the existing asphalt roof, preparing the roof deck with vapor barrier and ice & water barrier, and then installing 3,000 square feet of perfection cedar shingles coupled with copper flashing for valleys and protrusions.



8