
Search results for "Fortunate" in Home Design Ideas
 Chester County Kitchen & Bath
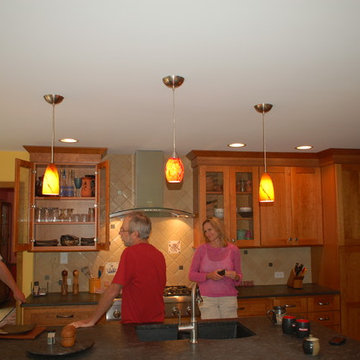
We contracted with Chester County Kitchen and Bath (CCKAB) to completely renovate our master bathroom first, followed by a complete kitchen renovation and the building of a family room addition off the kitchen. John Noland, the VP at CCKAB for such project development, was simply fantastic. He spent many hours with us, discussing our ideas of what we wanted the house to look like, and then he produced outstanding overall technical designs for each project before we ever signed the contract. John used his design software to develop dramatic and really useful drawings and graphic depictions of each aspect of the different projects; these drawings enabled us to refine the different projects over several weeks. John's initial cost estimates were spot-on, as was his proposed project timeline. When we added major changes to the original designs, John worked with us and the general (sub)contractor to incorporate the changes to the overall project without bursting the budget or blowing the timeline. John's able deputy, Stacy Nass, was simply amazing as the Project Manager. She juggled the scheduling of subcontractors, suppliers, cabinetry, appliance installation, etc. with aplomb and professionalism, and it was principally due to her careful attention to detail that the projects ran so smoothly and finished on time. The technical expertise of John, Stacy, and the rest of the staff at CCKAB are matched by their warm interpersonal skills. Having heard all the horror stories from friends about contractors they've used for home projects, we consider ourselves fortunate to have hired the folks from Chester County Kitchen and Bath. In the end, we were so very impressed with the final results - John and Stacy and their many collaborators really did help us create our dream home.
 Renovisions
This North Shore of Boston client wanted to make a change; she decided to purchase a seaside antique home and was up for the challenge to re-design and remodel. Her plan involved re-locating her mother from Florida to the newly added wing of the house when the remodel was in full swing.
We believed that what was standing between our client and the kitchen of her dreams was a well thought out, creative design and a wall or two…
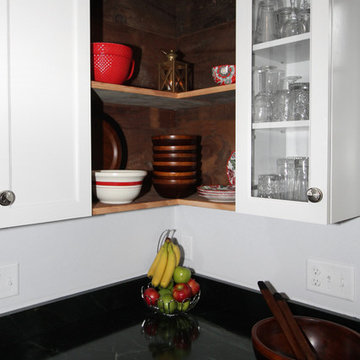
Once outdated and worn, this 1830 antique kitchen was closed off from the family room and dining spaces. The newly re-configured kitchen with re-claimed wide-plank wood floors and restorations to wood cladding on the ceiling, beam and open corner shelving really warmed up the room and welcomes friends, neighbors and relatives. Wood bead board paneling around the island cabinetry along with mixed metals, tie in nicely with the stunning soapstone countertops with distinctive copper-colored veining, creating a beautiful vintage appeal.
Styled to look like an old-fashioned stove, this steel range boasts modern conveniences such as dual-fuel (gas burners and electric oven) and a convection oven crowned by a custom steel hood adorned with rivets and metal trims.
To enrich the vintage feel, a white farm-style fire clay apron sink was installed that also evokes a classic and time- honored feel.
Although the process was daunting as it presented several challenges, it was a rewarding experience when the project was completed. Our client and her mother were absolutely thrilled with the final results.
“Thank you to Cathy and Ed very much for all your assistance with my kitchen planning! I’m fortunate to have had your input and expertise! It was great seeing you and spending time together and my mom really liked you both. I would welcome you to stop by and say hello when you’re headed to Portsmouth or the north shore. All the best!”
-Jill P.
 Home Sweet Stage
A new-to-me realtor calls Tuesday mid-day asking about my services. The phone call quickly turned into a 'yes' but I mentioned unless I do this 'tomorrow', it couldn't get done until next week Tuesday or Wednesday due to other obligations.
It's in Cayucos, which poses another issue - do I make the trip up to preview (it's an hour away, do I have time), or can I get what I need off of the internet?
AND we had rain to contend with... it's never easy to stage in the rain.
Fortunately I'm a very spatially-minded person and could make my plans based on the existing internet photos. A girl needs her plans!
So Wednesday, between the spurts of rain, my sons and I spend all morning packing for this stage, and Wednesday afternoon / into evening my sons and I head out, unload, and stage this beautiful.... no..... GORGEOUS home ON THE WATER in Cayucos. WOW!!!
The boys told me upon arrival: 'We should buy this!' I'm thinking the same thing!
So, in retrospect, this stage was a vacant, sight-unseen home, and within about 24 hours went from realtor request to stage-done status.
Please forgive the darkness of the photos, it was 6:30 at night when we were done, it was dark!
Find the right local pro for your project
 Revitalize Design by Val Valdez
The client’s most important request:
She wanted a “bling” kitchen, and he wanted an affordable makeover.
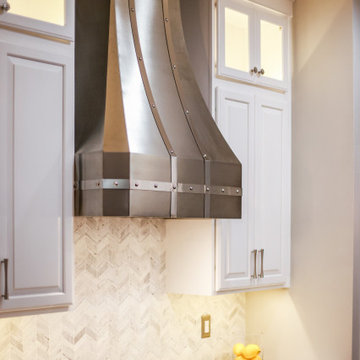
The Solution: The existing kitchen layouts satisfactory for the clients, but they wanted an updated space that stood out from the rest of the neighboring homes. With some research, I found new wall stacker cabinets made by their existing cabinet manufacturer, and added new doors to the existing cabinets which eliminated the arch detail on the doors. These are the SAME cabinets, I know it’s unbelievable, but fortunately the manufacturer still made this line so we added glass-front stacker cabinets over the existing wall cabinets; removed the existing wall cabinet over the cooktop to install a new custom hood; upgraded the hardware and refinished all the cabinets; and installed a luxe marble backsplash. How did we increase the island size? During the initial design consultation, I noticed that the existing kitchen island was set very far from the refrigerator. After drawing the plans, I was able to move all the existing island cabinets closer to the refrigerator wall and install new cabinets behind them, thus doubling the size of the island. Even after shifting the existing island cabinets closer to the refrigerator wall, there is still plenty of space to work comfortably in the kitchen. We took this opportunity to design a custom board and batten detail for the sides of the island. The before-and-after photo depicts the outcome of the the next challenge: How do we add stacker cabinets when there is an air vent in the wall? Since the wall cabinets are 24” deep (due to the wall ovens and refrigerator), I designed a bulkhead behind the new 12” deep wall stacker cabinets to reroute the ductwork, thus relocated the air vent to the side of the wall. Absolutely dazzling! Checkered crystal prisms on the pendant grace the kitchen island with glittering warm task lighting. An affordable and stunning kitchen transformation! The scope includes: augmenting new cabinets over all the existing wall cabinets; enlarging the island with new base cabinets and 7’ x 6’ stone countertop; refinishing the existing hardwood flooring and staircase; replacing the doors on the all the existing cabinets to match the new ones; updating hardware, lighting, backsplash, and hood; designing board and batten details on the sides of the island; adding new cabinet between the ovens and refrigerator creating a sleek and modern wall.
 Hull Historical
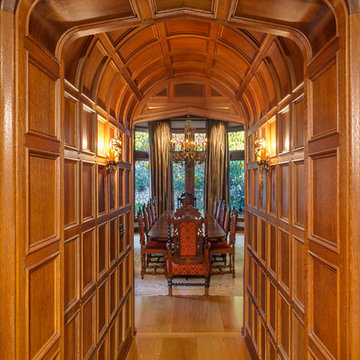
My clients had always been inspired by the grand Tudor Revival homes of the early 20th century and commissioned Hull Historical to recreate the authentic custom millwork, paneling and doors for their new Tudor Revival home. Our inspiration came from 2 great English homes, Stan Hywett, a great Tudor Revival home in Ohio, built for the founder of Goodyear Tires. Also, the Woodbine Mansion, built in 1911 for the son of the Pabst Brewing Company. We were fortunate to purchase three rooms of architectural millwork from the woodbine home, which was originally fabricated by the Huber Company of New York. Upon completion of this project, the architectural salvage comprised 15% of the final quantity of paneling installed. The remainder was custom fabricated by Hull Historical at our shop in Fort Worth, TX and installed at the clients home.
The commission, based on historic precedent, constituted antique paneling on the main floor, beamed ceilings and all the doors in the home. The new paneling, including the kitchen cabinetry is made from a combination of new quarter-sawn white oak and antique white oak salvaged from old barns and buildings. All the oak was fumed in an ammonia-filled chamber to produce a cocoa color and deep feel giving the millwork rough character and a timeless look that my client loved.
The millwork also served to give the home a hierarchy, with simple paneling combined with board and batten doors downstairs, then more ornate paneling, with carvings on the main floor. Additionally, the main floor features mostly 8 and 10 panel doors. All woodwork was hand-pegged with oak pegs. Some of the paneling features a unique Mason’s Miter, a historic joinery technique inspired from stone work.
For more information on residential renovation and new construction projects by Hull Historical, visit http://brenthullcompanies.com/residential.html
 Custom Design & Construction
Our homeowner approached us first in order to remodel her master suite. Her shower was leaking and she wanted to turn 2 separate closets into one enviable walk in closet. This homeowners projects have been completed in multiple phases. The second phase was focused on the kitchen, laundry room and converting the dining room to an office. View before and after images of the project here:
http://www.houzz.com/discussions/4412085/m=23/dining-room-turned-office-in-los-angeles-ca
https://www.houzz.com/discussions/4425079/m=23/laundry-room-refresh-in-la
https://www.houzz.com/discussions/4440223/m=23/banquette-driven-kitchen-remodel-in-la
We feel fortunate that she has such great taste and furnished her home so well!
Bedroom: The art on the wall is a piece that the homeowner brought back from a trip to France. The room feels luxe and romantic.
Walk in Closet: The walk in closet features built in cabinetry including glass doored cabinets. It offer shoe storage, purse storage and even linens. The walk in closet has recessed lighting.
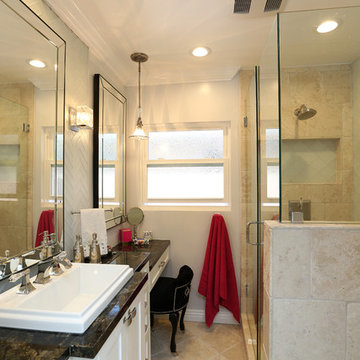
Master Bathroom: The master bathroom offers a make-up desk and plenty of lights and mirrors! Utilizing both pendant and recessed lighting, the bathroom feels bright and white even though it is a combination of white and beige. The white shaker cabinets are contrasted by a dark granite countertop. Favoring a large shower over a tub we were able to include a large niche for storage. The tile and floor are both limestone.
 ABK Today
Shelah Riley
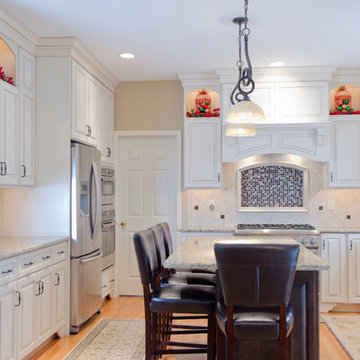
Example of a tuscan u-shaped eat-in kitchen design in Philadelphia with white cabinets, granite countertops, beige backsplash, subway tile backsplash and stainless steel appliances
Example of a tuscan u-shaped eat-in kitchen design in Philadelphia with white cabinets, granite countertops, beige backsplash, subway tile backsplash and stainless steel appliances
 KCD Staging Inc.
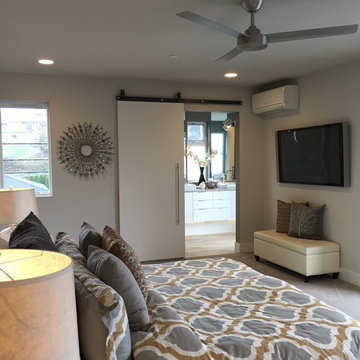
We are so fortunate to stage for Pete Granger, Inc. and many of the talented builders under the respected Granger Family Homes name. This stunning modern home by Pete Granger, Inc. is new on the market in Kirkland. The fresh and sleek fixtures and finishes throughout made staging a dream. Not surprisingly, the sister home that we transferred this stage from was under contract in only 2 days! Contact Windermere agent Tony Ferrelli at (206) 714-2785 for more info. MLS #888269

 Siller Treppen
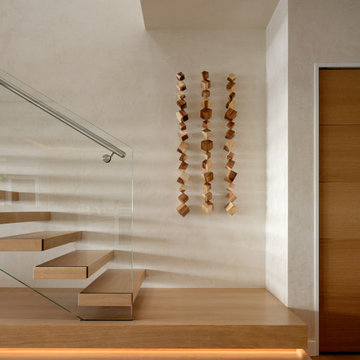
Wailea Point is an exclusive gated community located in the heart of Wailea's best real estate. Nestled between the famous Wailea Beach and Polo Beach, this pristine oceanfront property is close to world-renowned golf courses, fine dining and shopping. we were fortunate enough to build a beautiful desingn staircase there. The staircase is self-supporting and features floating wooden steps that give the space an airy and modern feel. The sophisticated design of the staircase includes load-bearing glass that extends up to 5 meters in one piece, ensuring a stable and safe construction. The glass stringers of the staircase not only provide a transparent and elegant look, but also serve as an important support for the steps. A special highlight is the elaborate landing at the start of the staircase, which is fitted with LED lights in the step overhang to provide atmospheric lighting. Overall, the staircase is an impressive and well thought-out design element that is both functional and aesthetically pleasing.
 Diehl Concrete
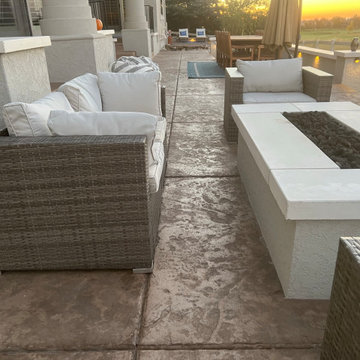
Diehl Concrete is a local Denver business that prides itself in quality decorative work such as custom stamped concrete patios. The owner, Ryan Diehl, plays a hands-on part throughout the entire process. With over 15 years of experience in creating beautiful outdoor spaces, along with his un-compromised integrity, Diehl Concrete is a wise choice for your project.
There are countless examples of his work throughout Colorado, including Denver, Aurora, Brighton, Boulder, and Evergreen. Call today and Ryan Diehl will personally evaluate your project, answer your questions, and provide a free quote.
Benefits of Stamped Concrete Patios:
Affordability: Stamped concrete patios are much more affordable when compared to brick pavers or natural stone. Fortunately, This lower cost doesn’t lack durability or beauty.
Longevity: Concrete typically lasts longer than alternative patio materials. To ensure durability, Diehl Concrete will take the extra steps to reduce cracking. We will take great care in preparing your concrete sub-grade with proper compaction, and road base as well as rebar reinforcement within the concrete. Finally, expansion joints will be strategically placed to minimize and prevent cracking.
Color and Pattern Options: The sky is truly the limit on color choices and patterns for stamped concrete patios.
Shape: Due to its versatility of the substance, concrete offers homeowners the ability to create any type of shape they would like. Would you like curves, planting beds, or even a fire pit incorporated into your stamped concrete patio? No problem.
Low Maintenance: To maintain the look and uphold the durability, a once yearly sealer may be applied. This is something you can do yourself, or we can seal your patio for you.
Increased home resale value. Decorative concrete adds curb appeal and aesthetic value to your home, allowing you to maximize the return on your investment.
 Diehl Concrete
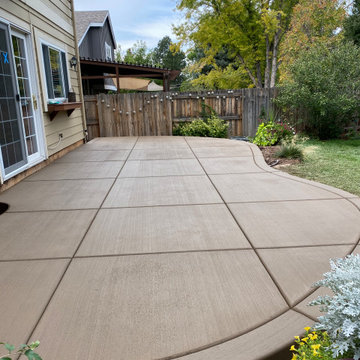
Diehl Concrete is a local Denver business that prides itself in quality decorative work such as custom stamped concrete patios. The owner, Ryan Diehl, plays a hands-on part throughout the entire process. With over 15 years of experience in creating beautiful outdoor spaces, along with his un-compromised integrity, Diehl Concrete is a wise choice for your project.
There are countless examples of his work throughout Colorado, including Denver, Aurora, Brighton, Boulder, and Evergreen. Call today and Ryan Diehl will personally evaluate your project, answer your questions, and provide a free quote.
Benefits of Stamped Concrete Patios:
Affordability: Stamped concrete patios are much more affordable when compared to brick pavers or natural stone. Fortunately, This lower cost doesn’t lack durability or beauty.
Longevity: Concrete typically lasts longer than alternative patio materials. To ensure durability, Diehl Concrete will take the extra steps to reduce cracking. We will take great care in preparing your concrete sub-grade with proper compaction, and road base as well as rebar reinforcement within the concrete. Finally, expansion joints will be strategically placed to minimize and prevent cracking.
Color and Pattern Options: The sky is truly the limit on color choices and patterns for stamped concrete patios.
Shape: Due to its versatility of the substance, concrete offers homeowners the ability to create any type of shape they would like. Would you like curves, planting beds, or even a fire pit incorporated into your stamped concrete patio? No problem.
Low Maintenance: To maintain the look and uphold the durability, a once yearly sealer may be applied. This is something you can do yourself, or we can seal your patio for you.
Increased home resale value. Decorative concrete adds curb appeal and aesthetic value to your home, allowing you to maximize the return on your investment.
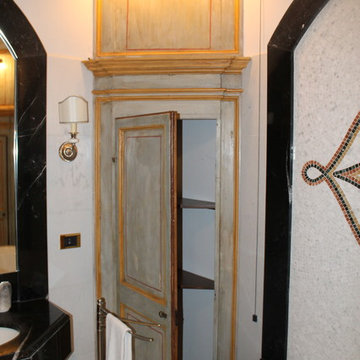
 KB International Realty
Villa Marchese del Grillo Relais-Restaurant-Enoteca
For more info & details visit:
http://relaismarchesedelgrillo.com/
Katerina Bucciarelli
Broker Associate
Fortune International Realty
2013 Top Producer.
kb@kbmiami.com
www.kbmiami.com
Photo Credits: Javier Ospina.
 Amethyst Home
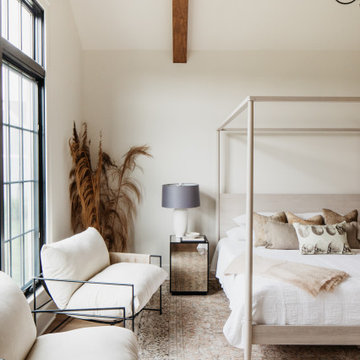
This fall, Amethyst had the opportunity to partner with Freeman Custom Homes of Kansas City to furnish this 5000 sq ft European Modern designed home for the Artisan Home Tour 2020!
Every square inch of this home was magical -- from the secret staircase in the master bath leading to a private shuttered plunge pool to the vaulted kitchen with sky high mushroom colored cabinetry and handmade zellige tile.
We met the builders during the cabinetry phase and watching their final, thoughtful design details evolve was such full of over-the-top surprises like the unique valet-like storage in the entry and limestone fireplace!
As soon as we saw their vision for the home, we knew our furnishings would be a great match as our design style celebrates handmade rugs, artisan handmade custom seating, old-meets-new art, and let's be honest -- we love to go big! They trusted us to do our thing on the entire main level and we enjoyed every minute.
The load in took 3 full trucks and fortunately for us -- the homeowners fell in love with several pieces so our uninstall trip was significantly lighter. I think we were all a little emotional leaving this masterpiece but sooooo happy for the owners and just hoping we get invited to a Christmas party...
Here are some of the highlights -- 90% of the furnishings and rugs were from our shop and we filled in the gaps with some extra special pieces!
 Groninger Custom Homes featuring Kg3d Home Designs
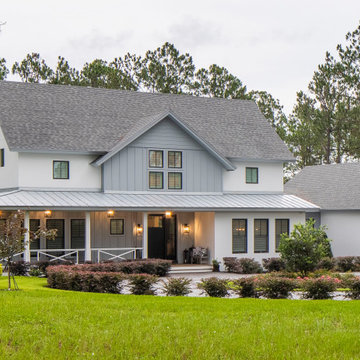
Designed by Kg3d Home as the "final" home for a fortunate couple that retired early from successful careers in the construction industry, we refer to this modern farmhouse as a "Legacy Home". This is the place where extended family and friends gather for holidays and special events. We joke sometimes that you don't want the guest spaces to be too nice or the guests may stay longer than they are welcome, but that's exactly what the owners wanted. Close enough to town when needed but far enough away to feel like an escape.
 Chapman Design Group, Inc.
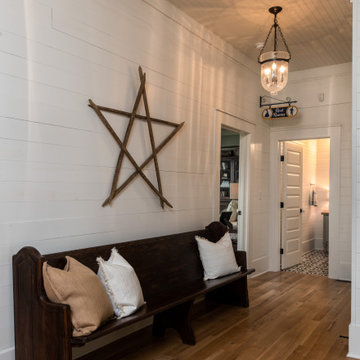
Originally Built in 1903, this century old farmhouse located in Powdersville, SC fortunately retained most of its original materials and details when the client purchased the home. Original features such as the Bead Board Walls and Ceilings, Horizontal Panel Doors and Brick Fireplaces were meticulously restored to the former glory allowing the owner’s goal to be achieved of having the original areas coordinate seamlessly into the new construction.
 Great American Landscapes
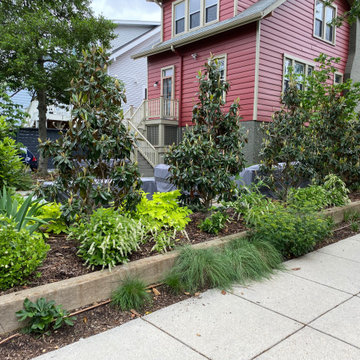
This full landscaping renovation didn’t come without its challenges. The project included plants, lawn area, natural boulder steps, flagstone on the concrete front walk, large flagstone patio on the stone dust, parged block walls, a paver driveway, a gravel drainage area, landscaping lighting and irrigation.
A sizable project for a small area, we wanted to focus on meeting the client’s expectations in both cost and end results. Some changes in scope were made but fortunately did not cause any delays in installation.
The final product resulted in a sanctuary like space for the client to enjoy for years to come.
 Bellingham Bay Builders
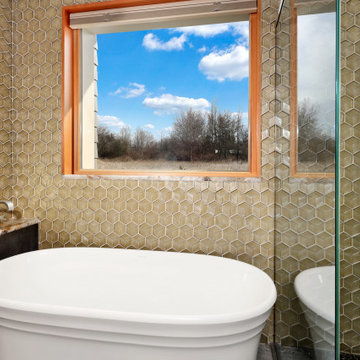
The Twin Peaks Passive House + ADU was designed and built to remain resilient in the face of natural disasters. Fortunately, the same great building strategies and design that provide resilience also provide a home that is incredibly comfortable and healthy while also visually stunning.
This home’s journey began with a desire to design and build a house that meets the rigorous standards of Passive House. Before beginning the design/ construction process, the homeowners had already spent countless hours researching ways to minimize their global climate change footprint. As with any Passive House, a large portion of this research was focused on building envelope design and construction. The wall assembly is combination of six inch Structurally Insulated Panels (SIPs) and 2x6 stick frame construction filled with blown in insulation. The roof assembly is a combination of twelve inch SIPs and 2x12 stick frame construction filled with batt insulation. The pairing of SIPs and traditional stick framing allowed for easy air sealing details and a continuous thermal break between the panels and the wall framing.
Beyond the building envelope, a number of other high performance strategies were used in constructing this home and ADU such as: battery storage of solar energy, ground source heat pump technology, Heat Recovery Ventilation, LED lighting, and heat pump water heating technology.
In addition to the time and energy spent on reaching Passivhaus Standards, thoughtful design and carefully chosen interior finishes coalesce at the Twin Peaks Passive House + ADU into stunning interiors with modern farmhouse appeal. The result is a graceful combination of innovation, durability, and aesthetics that will last for a century to come.
Despite the requirements of adhering to some of the most rigorous environmental standards in construction today, the homeowners chose to certify both their main home and their ADU to Passive House Standards. From a meticulously designed building envelope that tested at 0.62 ACH50, to the extensive solar array/ battery bank combination that allows designated circuits to function, uninterrupted for at least 48 hours, the Twin Peaks Passive House has a long list of high performance features that contributed to the completion of this arduous certification process. The ADU was also designed and built with these high standards in mind. Both homes have the same wall and roof assembly ,an HRV, and a Passive House Certified window and doors package. While the main home includes a ground source heat pump that warms both the radiant floors and domestic hot water tank, the more compact ADU is heated with a mini-split ductless heat pump. The end result is a home and ADU built to last, both of which are a testament to owners’ commitment to lessen their impact on the environment.
 Tile Doctor Ltd
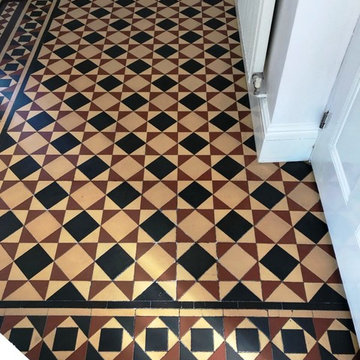
I was recently contacted by the owner of this Minton Victorian tiled floor in Kidderminster. The tiles had been covered over with carpet which I suspect was due to some the tiles being missing. Now uncovered it was stained with glue and carpet underlay was still stuck to the tiles in places. The owner was keen to have the floor fully restored including replacing damaged and missing tiles. We can replace missing or damaged tiles however the problem with old Victorian floors is finding matching replacements due to the unique patterns that many have. Fortunately, due to the popularity of Victorian tiles there are several suppliers who sell reproductions and occasionally you can find originals on ebay.
I went over to survey the floor an could see the tiles were certainly in need of some love and care. As part of the visit I carried out a test clean on a patch of the floor and the results were very satisfactory, so the owner asked me to go ahead.
On the day of arrival my first job was to spray the floor with neat Tile Doctor Remove and Go, this is a powerful cleaner/stripper which set to work on removing the glue and carpet underlay, this product will also remove any old sealer. I then left the solution to dwell and worked the chemical in with my buffer and a black pad removing the slurry with a wet and dry vacuum.
The tiles were then treated to an acid wash using Tile Doctor Acid Gel to further clean them and counter any potential efflorescence problem which is a problem with floors of this age that were installed without a damp-proof membrane. The product was scrubbed into the tile and grout, rinsed off with water and then extracted with the wet vacuum.
Once the floor was clean, I checked the colour of the tiles so I could cut and replace the missing section. I had managed to source some tiles that were a close match and set about cutting all the tiles to size and then fitted them using a flexible rapid set adhesive. The newly laid tiles needed to set, and the floor needed to dry out before we could apply the sealer.
The floor was left to dry overnight, on my return in the morning I tested the floor with a damp meter to check the moisture levels and ensure it was dry enough for sealing. I was satisfied it was dry so was able to proceed and seal the floor. Five coats of Tile Doctor Seal and Go Extra were applied which takes a lot of time as you need to wait for the previous coat to dry before applying the next. This product is a semi-gloss breathable sealer which gives a nice sheen to the tiles and fully protects them. It really allowed the colours and detail of the pattern to shine through and being breathable it will cope with any moisture rising though the floor.
The client was very happy with the overall finish and was really pleased that the Victorian tiles were now restored to their original appearance. It a fact that original features like these are in demand and add a lot of value to a property.
Mark Conway
Worcestershire Tile Doctor
 Robert Scott Visualization LLC
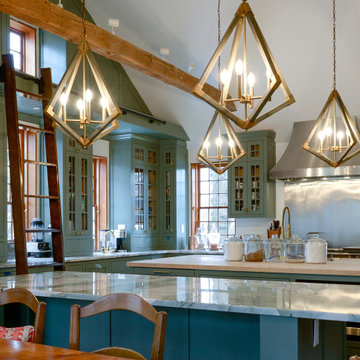
We were fortunate to work with Twig Perkins, Inc along with Ethan McMorrow Designs both of Nantucket, MA on this historic home remodel located on historic Milk Street on Nantucket, Island, MA. We used 3D modeling and "real-time rendering" software to visualize multiple options based on client feedback.
83