
Search results for "Hands on tool" in Home Design Ideas

 Sierra Living Concepts Inc
Dimension:
47" L X 16" D X 35" H
Rustic meets shabby chic in the visuals of our gorgeous Bonnieville 3 Drawer Reclaimed Wood Sideboard.
The bright cherry hand rubbed stain of this rustic buffet couples really well with its colorful mosaic accents. It features a highly unique design and offers versatile placement. You can set it up in your dining areas for storing serve-ware, in your living rooms to spruce up an accent wall, and even in a large foyer to emphasize a grandiose entrance. It has been entirely handcrafted from reclaimed solid wood, so you’ll also enjoy an eco-friendliness along with its superior heirloom quality.
The design of this reclaimed wood sideboard is subtly retro in its appeal. Its top, base, and sides enjoin seamlessly with rounded edges – you can even feature a number of decorative trinkets on its surface. The main façade consists of 3 pullout drawers at the top where you can keep small things like cutlery, stationery, documents, etc. handy. There is a single-door cabinet underneath each drawer that is characterized by its rounded edges and multicolor mosaic pattern. Inside all 3 cabinets are 2 organizational compartments for efficient use. Here, you can keep tool kits, first aid boxes, and other larger things. Stylish cylindrical feel at the base complete the whole look.
Special Features:
• 100% handcrafted, reclaimed sideboard
• Solid reclaimed wood craftsmanship
• Rustic retro visuals
• Rounded edges
• 3 drawers
• 3 single door cabinets
• Colorful mosaic accents
• Cylindrical feet
• Ample storage
• Heirloom quality
• Visually versatile
• Easy maintenance
Note: Custom Options such as Size, Shape, Shade & Design are not applicable to this item. Reclaimed Wood Furniture is subjected to have Slight Variations. Real wood is a product of nature, and as such, no two pieces are alike. Variations in solid wood grain patterns are to be expected and make each furniture uniquely beautiful, just like us humans.
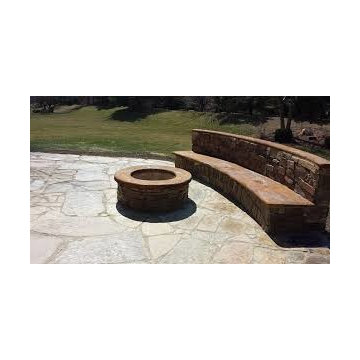
 The Masons Co and Dionysian Artificers Landscape
Kansas City Brick & Masonry is the craft of shaping rough pieces of rock into accurate geometrical shapes, at times simple, but some of considerable complexity, and then arranging the resulting stones, often together with mortar, to form structures.
Quarrymen split veins, or sheets of rock, and extract the resulting blocks of stone from the ground.
Sawyers cut these rough blocks into cuboids, to required size with diamond-tipped saws. The resulting block if ordered for a specific component is known as sawn six sides (SSS).
Banker masons are workshop based, and specialize in working the stones into the shapes required by a building's design, this set out on templets and a bed mould. They can produce anything from stones with simple chamfers to tracery windows, detailed mouldings and the more classical architectural building masonry. When working a stone from a sawn block, the mason ensures that the stone is bedded in the right way, so the finished work sits in the building in the same orientation as it was formed on the ground. Occasionally though some stones need to be orientated correctly for the application; this includes voussoirs, jambs, coping sand cornice.
The basic tools, methods and skills of the banker mason have existed as a trade for thousands of years.
Carvers cross the line from craft to art, and use their artistic ability to carve stone into foliage, figures, animals or abstract designs.
Fixer masons specialize in the fixing of stones onto buildings, using lifting tackle, and traditional lime mortars and grouts. Sometimes modern cements, mastics and epoxy resins are used, usually on specialist applications such as stone cladding. Metal fixings, from simple dowels and cramps to specialised single application fixings, are also used. The precise tolerances necessary make this a highly skilled job.
Memorial masons or monumental masons carve gravestones and inscriptions.
The modern stonemason undergoes comprehensive training, both in the classroom and in the working environment. Hands-on skill is complemented by intimate knowledge of each stone type, its application and best uses, and how to work and fix each stone in place. The mason may be skilled and competent to carry out one or all of the various branches of stonemasonry. In some areas the trend is towards specialization, in other areas towards adaptability.


Find the right local pro for your project

 TaskRabbit
Recently, TaskRabbit challenged a group of 10 Taskers to build a Tiny House in the middle of Manhattan in just 72 hours – all for a good cause.
Building a fully outfitted tiny house in 3 days was a tall order – a build like this often takes months – but we set out to prove the power of collaboration, showing the kind of progress that can be made when people come together, bringing their best insights, skills and creativity to achieve something that seems impossible.
It was quite a week. New York was wonderful (and quite lovely, despite a bit of rain), our Taskers were incredible, and TaskRabbit’s Tiny House came together in record time, due to the planning, dedication and hard work of all involved.
A Symbol for Change
The TaskRabbit Tiny House was auctioned off with 100% of the proceeds going to our partner, Community Solutions, a national nonprofit helping communities take on complex social challenges – issues like homelessness, unemployment and health inequity – through collaboration and creative problem solving. This Tiny House was envisioned as a small symbol of the change that is possible when people have the right tools and opportunities to work together. Through our three-day build, our Taskers proved that amazing things can happen when we put our hearts into creating substantive change in our communities.
The Winning Bid
We’re proud to report that we were able to raise $26,600 to support Community Solutions’ work. Sarah, a lovely woman from New Hampshire, placed the winning bid – and it’s nice to know our tiny home is in good hands.
#ATinyTask: Behind the Scenes
The Plans
A lot of time and effort went into making sure this Tiny Home was as efficient, cozy and welcoming as possible. Our master planners, designer Lesley Morphy and TaskRabbit Creative Director Scott Smith, maximized every square inch in the little house with comfort and style in mind, utilizing a lofted bed, lofted storage, a floor-to-ceiling tiled shower, a compost toilet, and custom details throughout. There’s a surprising amount of built-in storage in the kitchen, while a conscious decision was made to keep the living space open so you could actually exist comfortably without feeling cramped.
The Build
Our Taskers worked long, hard shifts while our team made sure they were well fed, hydrated and in good spirits. The team brought amazing energy and we couldn’t be prouder of the way they worked together. Stay tuned, as we’ll be highlighting more of our Tiny House Taskers’ stories in coming days – they were so great that we want to make sure all of you get to know them better.
The Final Product
Behold, the completed Tiny House! For more photos, be sure to check out our Facebook page.
This was an incredibly inspiring project, and we really enjoyed watching the Tiny House come to life right in the middle of Manhattan. It was amazing to see what our Taskers are capable of, and we’re so glad we were able to support Community Solutions and help fight homelessness, unemployment and health inequity with #ATinyTask.

 Murphy & Co. Design
Photo by: Landmark Photography
Example of a classic formal and open concept dark wood floor living room design in Minneapolis with beige walls, a standard fireplace, a stone fireplace and no tv
Example of a classic formal and open concept dark wood floor living room design in Minneapolis with beige walls, a standard fireplace, a stone fireplace and no tv

 Atelier Armbruster
Master bathroom
Photos: Natalia Lorca Ruiz
Mid-sized trendy master white tile and ceramic tile ceramic tile and black floor doorless shower photo in New York with flat-panel cabinets, white cabinets, a wall-mount toilet, white walls, an integrated sink, solid surface countertops and a hinged shower door
Mid-sized trendy master white tile and ceramic tile ceramic tile and black floor doorless shower photo in New York with flat-panel cabinets, white cabinets, a wall-mount toilet, white walls, an integrated sink, solid surface countertops and a hinged shower door

 Custom Surface Solutions
 (www.css-tile.com) - Owner Craig Thompson (512) 430-1215. This project shows a new construction master bathroom with two showers, and wall mounted vanities. Shower wall tile and vanity wall wainscots and floor base tile is 6" x 18" Carrera Marble on offset subway pattern. Shower floors are 5/8" Carrera Marble mosaic tile. All exposed edges including windows, shower walls, top wainscots and floor base are custom bull-nose profiled. Shower floor is custom mud set with SchluterSystems waterproofing and drain system.
Sponsored
Columbus, OH

Structural Remodeling
Franklin County's Heavy Timber Specialists | Best of Houzz 2020!

 Nicole Benveniste Interior Design
Photo by Renee Sweeney
Example of a classic master white tile and stone tile marble floor bathroom design in San Francisco with an undermount sink, marble countertops, an undermount tub and gray walls
Example of a classic master white tile and stone tile marble floor bathroom design in San Francisco with an undermount sink, marble countertops, an undermount tub and gray walls

 Wall Control
 metal pegboards work great for wood working tools and wood working storage and organization.
Home office - modern home office idea in Atlanta
Home office - modern home office idea in Atlanta
 Klise Manufacturing Company
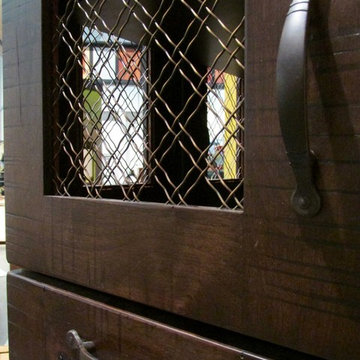
Our friends at Canyon Creek Cabinet Company, asked us to create several custom wire mesh grilles (Klise grille pattern #122) for use in their cabinet doors, which were showcased at their KBIS booth earlier this month.
Door style: Valley Forge/Rustic Alder/Caraway stain.
Enhancements: Artisan distressing with a Licorice Patina.
Photos: Courtesy of Canyon Creek Cabinet Co.
http://www.canyoncreek.com

 Dave Fox Design Build Remodelers
This remodel consisted of a whole house transformation. We took this 3 bedroom dated home and turned it into a 5 bedroom award winning showpiece, all without an addition. By reworking the awkward floor plan and lowering the living room floor to be level with the rest of the house we were able to create additional space within the existing footprint of the home. What was once the small lack-luster master suite, is now 2 kids bedrooms that share a jack and jill bath. The master suite was relocated to the first floor, and the kitchen that was located right at the front door, is now located in the back of the home with great access to the patio overlooking the golf course.
View more about this project and our company at our website: www.davefox.com
 Titan Homes
Entertainers dream chef's kitchen - 1500 square feet of custom Wolf and Subzero appliances. Large 14 x 4 ft quartz topped island has bar seating on one side and plenty of serving space. The prep area features a butcher block T shaped island for tons of space. There are four sinks located throughout the kitchen for easy cleanup. Grandma's framed recipe cards give a personal touch. Open shelving for everyday dishes along with beautiful pieces. Built in Wolf Espresso Machine.


Sponsored
Delaware, OH

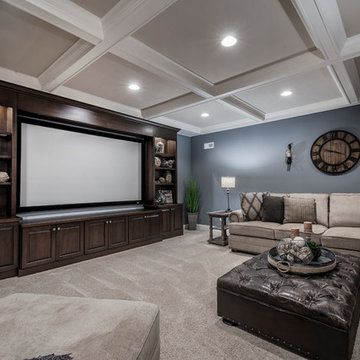
Buckeye Basements, Inc.
Central Ohio's Basement Finishing ExpertsBest Of Houzz '13-'21
 Tile Doctor Ltd
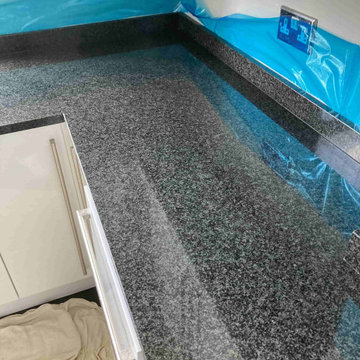
Although expensive Granite makes the most beautiful and practical stone worktop you can install in your kitchen. It gives real wow factor to a room and this kitchen in Folkestone was no different. Normally granite needs little maintenance however Folkestone has very hard water (often referred to as limescale) containing high levels of calcium and over time the calcium in the water gets deposited on nearby surfaces. According to the Affinity Water website the water in Folkestone contains 287.5 mg of calcium per litre which is classed as hard.
The owner of the property contacted us explaining that due to this problem the build-up of calcium deposits had overtaken her sink and countertop to a degree that she couldn`t deal with it through normal cleaning and a restoration was required. There are several household products on the market that can remove limescale however you need to be very careful when using these on natural stone as they use acids to break down the calcium and this can etch stone making the problem worse (always read the label). I went and had a look at the problem and gave her a quote for resolving the problem, which she was happy to accept.
Before starting the renovation, I protected the floor with dust sheets and the walls with a blue film that is easy to remove. Then to tackle the limescale I carefully went over each part of the Granite counter using a set of six-inch Tile Doctor Burnishing pads applying them in sequence from coarse to extra fine. To give extra cleaning power the coarser pads were applied with Tile Doctor Oxy-Gel which is an alkaline cleaning gel. The pads were fitted to a hand buffer and the soil generated by the abrasive pads was rinsed off between pads with water. For the finer detail such as the groves in the granite draining board, I used diamond encrusted handheld burnishing blocks of various grits. With the combination of diamond tooling and lots of elbow grease the job took around five hours to complete and the granite now has the polished look it deserves.
The granite worksurface does not require an actual sealer to be applied. However, maintenance is the key to keeping the stone in great condition so for aftercare I left the owner with a bottle of Tile Doctor Stone Patina Spray. This product is designed for cleaning stone worktops and contains a special ingredient that maintains the lustre. This should ensure the Limescale becomes manageable and can be cleaned more easily.
I made a striking difference to the appearance of the Granite Worktop and the owner was over the moon with the result.
Michael Conlon
South Kent Tile Doctor
 C&N Decorative Concrete
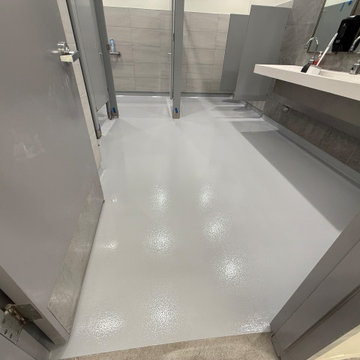
Project Showcase: Commercial Concrete Polishing & Sanitary Epoxy Restroom Restoration (Camarillo, CA)A detailed look at our commercial flooring restoration in Camarillo following a major plumbing leak and partial concrete slab replacement across the main corridor and public restrooms: Before — Raw Repoured Slab & Trench Patching: Following emergency water line repairs, new concrete sections were poured in both the main hallway and restrooms. Integrating new concrete into existing commercial finishes requires precise mechanical preparation and moisture control. Dustless Diamond Grinding & Mechanical Profiling: We eliminate acid washes and chemical etching entirely. Using commercial Husqvarna planetary diamond grinders connected directly to industrial HEPA dust extractors, we mechanically profiled the newly poured corridor patches and restroom slabs to achieve a clean, open concrete surface profile. Seamless Polished Concrete Corridor Tie-In: Through progressive diamond-tooling passes, we ground and polished the newly poured hallway sections to blend directly into the existing polished concrete slab—matching the aggregate exposure, clarity, and commercial sheen across the high-traffic walkway. Moisture-Block Epoxy Priming: Fresh concrete slabs retain high levels of internal moisture vapor. Rather than risking bond failure with rushed 1-day coatings, we primed the newly poured restroom slabs with an industrial moisture-block epoxy base coat engineered to deeply penetrate the concrete pores and withstand hydrostatic vapor pressure. Integral Sanitary Epoxy Cove Base: We hand-troweled a seamless vertical epoxy cove base around the entire perimeter of the restrooms, creating a continuous, watertight seal between the floor and tile walls with zero grout lines to trap moisture or bacteria. Slip-Resistant Commercial Finish: The restroom floors were finished with a heavy-duty commercial resinous system broadcast with a fine slip-resistant aggregate additive, providing reliable traction in wet environments while holding up to daily chemical sanitation. Contractor Specifications:C&N Decorative Concrete | CSLB #908395
25+ Years of Dedicated Trade CraftsmanshipServing Camarillo, Ventura, Oxnard, Thousand Oaks & Santa Barbara County



 Tile Doctor Ltd
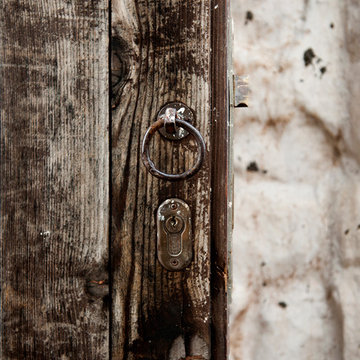
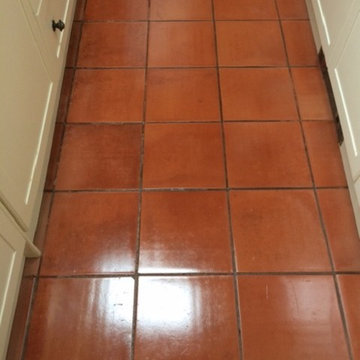
Terracotta is an interesting type of stone manufactured using a variety of techniques dependant on the country of origin which leads to a number of differences such as Spanish Terracotta being less porous than its Mexican counterpart: the former is semi-hand made and finished in a factory kiln, while the latter is completely handmade. Spanish Terracotta is therefore a lot less than porous and ultimately, of a higher quality.
But despite the Spanish Terracotta being less porous, and therefore being less prone to ingrained dirt, it still, like any other stone, needs regular maintenance to keep it looking smart. In the tiling trade, we quite often refer to this as a good old fashioned ‘Clean and Seal’ and this is exactly what was requested by this property owner in Halifax, for their Spanish Terracotta tiled floors in the kitchen and adjacent hallway.
I cleaned both sets of Terracotta tiles using the same process, which involved the application of our reliable alkaline cleaner known as Tile a Doctor Pro Clean, diluted with five parts of warm water. Once the solution had been left to dwell for a short period, it was scrubbed into the tiles to remove all dust, dirt, and general muck. This created a slurry of cleaning residue, which I promptly soaked up using a wet vac. A wet vac machine is an essential tool when it comes to cleaning porous tiles since, unlike a traditional mop and bucket, it sucks the excess trapped dirt out of the clay and thus provides a superior clean.
Following this, I applied a small amount of our heavy duty remover, known as Tile Doctor Remove & Go, to deal with some of the more stubborn stains and paint splashes, before rinsing with clean water and wet vaxing in a similar fashion to before.
Once the clean had been completed I left the tiles to dry completely. This can take 12 to 24 hours depending on numerous factors including whether a Damp proof Membrane and underfloor heating has been installed which can really help reduce drying times. Letting the tiles dry completely before sealing is paramount as moisture can cloud the sealer and affect its performance.
Upon my return to the property I ran some quick damp tests, which revealed the tiles were ready to be sealed. I then applied several coats of Tile Doctor Seal and Go, our topical sealer which provides a satin finish and accentuates colour. A new coat of this product is recommended every six months on Terracotta to ensure the continuous protection of the tiles’ soft clay particles.
My customer was extremely pleased with her refreshed Terracotta tiles. It goes to show what a big difference a bit of regular maintenance can make. I advised the customer that an everyday cleaner called Tile Doctor pH Neutral cleaner can also be used regularly to keep the tiles looking great without damaging the sealer.
Nigel Stoker
North West Yorkshire Tile Doctor
 Custom Surface Solutions
 (www.css-tile.com) - Owner Craig Thompson (512) 430-1215. This project shows the remodel of a master bathroom with before and after pictures of the project. 32" x 16" tile was used on the walls and 32 x 8" tile on the floor. The accent and shower pan tile is flat pebble stones. The faucets are Delta.
55