
Search results for "High return" in Home Design Ideas
 Tile Doctor Ltd
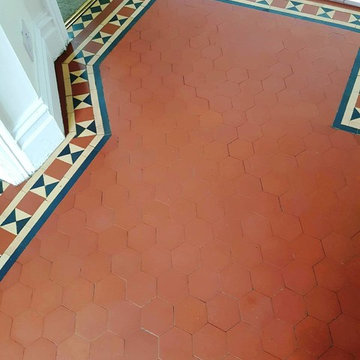
From The 1860s Victorian tiled floors started to appear in public buildings and by the 1890s they had become an essential feature in the most ordinary Victorian terraced houses. Although these floors fell out of fashion during the 1960s and ’70s, when many of them were covered over, they are now being rediscovered by their present owners and this is exactly what happened to my customer in the village of Littleover.
The customer had attempted to clean the floor by themselves but they couldn’t archive the result wanted, fortunately they discovered the Derbyshire Tile Doctor and after their call I went over and did a test for cleaning to make sure I can archive the needed results. They were happy with what they saw, so they booked me in to complete the work.
For cleaning the hallway I used a strong dilution of Tile Doctors Pro Clean which is strong multi-purpose high-alkaline cleaner. I left the Pro Clean to dwell for 10 minutes and then worked it in the tiles by using a strong black scrubbing pad fitted to my rotary machine. After scrubbing I rinsed the floor several times with clean water to remove any trace of cleaning product from the floor.
After successfully cleaning the hall I moved on to the porch which still had some old topical sealer on less walked areas. On these areas I had to use Tile Doctors own very effective stripper Remove and Go. Remove and Go has a long dwell time to remove any given sealer or wax so I left it to soak in for fifteen minutes followed by scrubbing it in with black pad fitted to rotary machine. The next step was to wash off the residue with water which was then removed using a wet vacuum.
Following this the tiles were given a rinse with Tile Doctor Grout Clean-up which is an acid based product that can remove grout smears and mineral deposits. Last step before sealing was to give the floor a thorough wash down with clean water to remove any cleaning product left on the tiles and then I left the floor to dry overnight.
Next day when I returned I used my damp tester to make sure that the floor is completely dry. Luckily for me floor was all dry and I started sealing. For sealing I used Tile Doctors Colour Grow Sealer which is colour enhancing breathable sealer. I applied 2 coats of the sealer and after every coat I polished off the excess with clean cotton cloths.
The result was really good and my customer was very happy with the work and said that now the floor looks transformed.
Tony Olmet
Derbyshire Tile Doctor
 Hom Personal Interiors
They had an Apartment in Tokyo.
They had an Estate in Dallas.
But what they really wanted was to be, "At the Lake".
So they bought a contractor-built house nestled by a pristine Lake.
They Sighed at the beautiful view. They Sighed at the inside of the house.
They wanted it to feel more like them, more like a home.
SO... they called HOM.
After just 3 Meetings all agreed on what to do!
Make it Warm, Modern, Cozy, and Striking.
The Family left for Tokyo.
And HOM. went to work.
HOM. added a New Metal Railing.
HOM. added reclaimed wooden beams from nearby Barns.
HOM. added Large Original Art Pieces that were interpretations of the Rocks in the nearby Stream running through their Property.
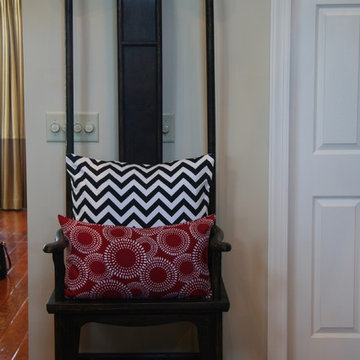
HOM. added multi-functional seating. More Dramatic Lighting. Accessories that were personal but did not over “ooze” the Lake idea. It became a Personal HOM.
A HOM. they wanted, “At the Lake”.
When the Family returned from Tokyo for a Thanksgiving Gathering, all were stunned.
They now had, at last, a HOM. “At the Lake”.
Two Years later... One of the daughters was getting married.
The Parents offered to throw her wedding anywhere in the world she would like.
Her answer was, I want to get married...
"At the Lake".
 DEANE Inc | Distinctive Design & Cabinetry
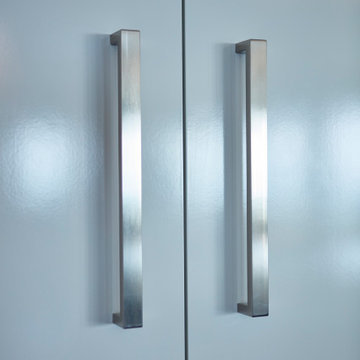
This collaboration was with a return client, who wanted to completely restore and renovate her over 100-year-old Victorian. It was key for the homeowner maintained the original footprint of the home with full front to back views of the sound. A contemporary vision translated into slab doors in a navy high-gloss finish for the island and smoky white for the perimeter and upper cabinetry. Simple, satin nickel contemporary hardware reiterates the linear elements throughout. Interior detailing features rich walnut to complement the herringbone floors. The custom hood is hammered stainless steel to play off the plinth block island legs. The undeniable focal point is the stunning Calacatta Corchia marble selected for the countertops and full-height backsplash and walls. The lighting is a unique, suspended adjustable LED fixture. The twin side-by-side Sub-Zero Pro Fridge/Freezer columns include a glass front to highlight interior storage. The Wolf 60" range with pro handles features 2 30" full-size ovens, 6 burners, and a double griddle. The retractable doors in the wet bar cleverly close to hide the sink and bottle storage. The many windows bring lots of light into the space to make it a warm and inviting place to entertain friends and family.
Find the right local pro for your project
 Tile Doctor Ltd
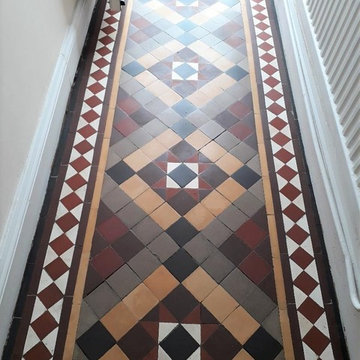
As is often the case in years past and for whatever reason many homeowners covered their decorative Victorian hallway tiles in a variety of products from carpet to laminate flooring. These days the trend has reversed and quite rightly many homeowners now realise the value a tiled floor can bring to a property and look to us to have it restored.
Our client had purchased a property in Norfolk seaport of Kings Lynn and, on lifting the dirty old carpet and decaying underlay in the hallway, discovered a beautiful tiled entrance hall. It was obvious that a previous owner had decided to lay carpet over the tiles as an easy way of hiding the result of careless renovation and decorating which had resulted in a thick coating of plaster, paint, carpet tape glue and various other contaminants which had become firmly stuck to the surface. There were also two small rectangular black and brown tiles missing behind the front door which had been damaged during the removal of some old lead pipes.
This was clearly a job which would need somewhat more than a scrubbing brush and a bottle of Flash!
Our first job was to remove as much of the solid contaminants as possible by hand with floor scrapers and a steamer which softened the more stubborn lumps. We then applied Tile Doctor Remove & Go which is a powerful alkaline stripper to the whole area, left it to dwell on the surface for twenty minutes and then scrubbed it in using a rotary machine fitted with a black scrubbing pad. The resulting slurry was then power rinsed and extracted away using our Ninja machine which is a high-power industrial vacuum. Any remaining patches where the carpet tape had been stuck down were spot treated using Tile Doctor Nanotech HBU which made short work of the hardened glue.
The result was a clean floor, but the surface still felt slightly rough and pitted, a problem which we resolved using the rotary machine fitted with a 200-grit diamond burnishing pad followed by a 400-grit pad with a little 400 grit honing powder which left the surface smooth, silky and ready for the application of a sealer.
Finally, we acid washed the whole area using Tile Doctor Acid Gel, a slow release product which would neutralise any remaining chemicals, improve new sealer adhesion and inhibit the future production of any efflorescence salts. We had used a fair amount of water during the cleaning process, so we left the floor to dry off thoroughly overnight with assistance from our commercial dehumidifier.
On our return the following day, we discussed the sealer options with the client and recommended using microporous Tile Doctor Colour Grow which is an impregnating sealer that seeps into the pores of the stone protecting it from within. It will provide an excellent fluid resistant seal whilst enhancing the natural colours in the stone, additionally it’s fully breathable thereby enabling any moisture trapped under the floor to rise through the floor and evaporate. This is important on old floors like this where no damp-proof membrane was installed. The sealer was applied with a paint pad in tow coats and allowed to dry for an hour before buffing the floor with a hog’s hair pad to give a rich natural-look sheen finish.
The Victorian tiles responded well to the treatments which were completed in two consecutive days. My client was extremely pleased with the results and left the following comment:
“My floor was in poor condition after being buried under carpet as well as many, many years of paint and muck. I enjoyed the time they spent at my home and wouldn’t hesitate to use (or recommend) the Tile Doctor service in the future.”
Nick White
Norfolk Tile Doctor
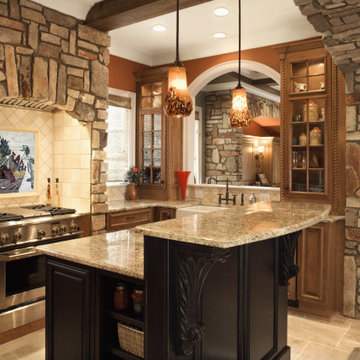
 Mosaics Lab
> At Mosaics Lab, we make mosaic artworks for you to walk all over, lean all over and look all over. We invest in high-quality handcrafted glass and marble mosaic tiles, offer infinite designs through customizations, deliver to your doorstep for free and offer great customer service, so you can be sure to love your mosaic.
> Find the Kitchen backsplash mosaic designs look you love and we will customize it for your space for free.
> If you have your own design, send us a picture and we will craft it into a gorgeous mosaic artwork to fit what you have in mind.
> All our mosaic artworks are covered by a lifetime warranty. > We have over 30 Years of Experience.
> We offer Fast & Free Shipping and Free Returns worldwide.
> We have over 1400 Verified Reviews.
 Mosswood Studios
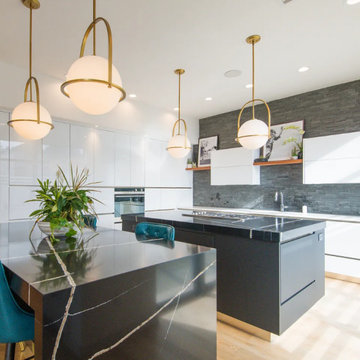
When the home's second owners wanted to better accommodate life with a growing family, we had the opportunity to return and build upon our original design. Rather than starting over, we enhanced what was already there by adding a second island finished in striking Marquina Noir quartz, creating additional prep space, seating, and storage. The original rotating island was also updated with matching quartz, blending the new addition seamlessly into the existing design. The result is a kitchen that maintains its architectural identity while functioning beautifully for an entirely new chapter.
 Shaker Shoppe, Inc.
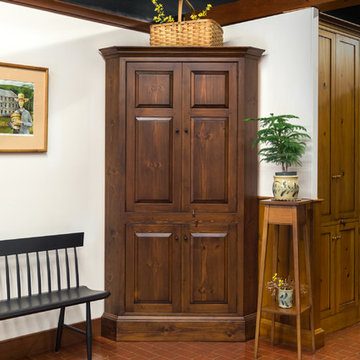
Available in a variety of woods & finishes.
Example shown is crafted in Sugar Pine wood in our Cinnamon finish.
Solid wood construction.
Finely finished inside & out.
Traditional joinery, raised-panel doors are built with pegged mortise & tenon construction.
Total of 4 adjustable shelves behind doors.
Signed and dated by the cabinetmaker.
Available options include adding glass doors and painting the interior antique white.
Built with a faceted back to enable passing through narrow doorways.
Can hold a Flat screen TV up to 34″wide.
Cabinet has provisions for running cables and cords for electronics.
36″ x 36″ x 85-1/2″high Over-all measured at upper molding.
Face of cabinet measures 36-1/2″ with 7″ returns left & right.

 JNJ Homes LLC
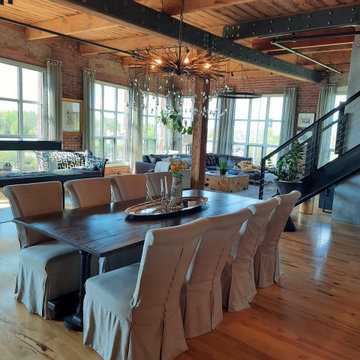
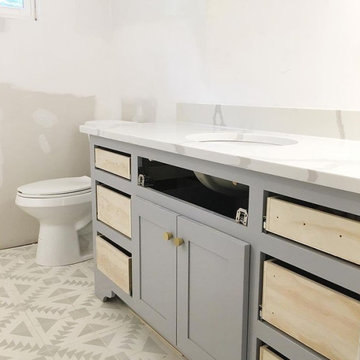
Are you looking to remodel your kitchen, build out a breathtaking garage or add home additions? If you are, JNJ Homes LLC is who you want to get in touch with.
Their captivating designs and professional craftsmanship serve as a testament to hard work, dedication and expertise of the highest magnitude. JNJ formed as a collaborative effort between two men (Jason and Chase), who were both making a name for themselves within the world of construction.
The duo paired up in 2016 and aimed to serve as the gold-standard for high-level construction and design in the Chattanooga area. Their satisfied clients and return customers act as the seal of approval for individuals that want to expand their homes.
While JNJ Homes LLC is up for any challenge that a potential client might have for them, here's where their expertise and skill shine the most:
Interior remodeling
Exterior kitchen remodel
Residential designs
Basement finishes
Garage builder services
Bathroom remodel and implementation
If you're ready to get started with your dream remodel or construction, contact JNJ Homes LLC. Remember: The journey towards your beautiful home starts today!
 Tile Doctor Ltd
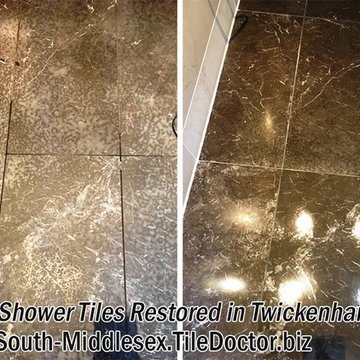
Here at Tile Doctor we can’t stress often enough how careful you have to be when choosing a cleaning product for use on natural stone. Acid bases cleaners in particular can etch the surface so always read the label before buying. Unfortunately, this customer, who lives in Twickenham, learned this the hard way.
Limescale build-up on shower tiles can be an unsightly problem in hard water areas and this customer’s house cleaner had attempted to treat it with Cillit Bang on their Marble tiled shower room floor. Whilst good at removing Limescale on ceramic tiles, the product is acid-based and in this case caused severe etching to the surface of the Marble.
This customer is not the first to experience this problem with Cillit Bang and we have looked into this before and I can confirm it does say on the back on the bottle that you should not use it on all natural stone including Marble and Granite.
The mistake had really damaged the appearance of this lovely floor however the good news is etched Marble can be refinished and we do offer this service. Fortunately, this customer found us on-line and called us in to rectify the problem as
With high quality, acid-sensitive stone we find that rather than cleaning with a liquid product, it is lot effective to use a process known as burnishing. This involves the application of abrasive diamond encrusted pads to cut back through the damaged stone. This removes a layer from the surface to expose the undamaged stone, which in then polished.
Using different grades of small diamond pads fitted to a hand buffer I began burnishing the floor tiles. I started the process with a Coarse pad and worked my way through to Medium, Fine and eventually the Very Fine pad. A small amount of lubrication in the form water is used with each pad, but no chemical products are needed, making this a completely natural process. The floor was rinsed with water afterwards to remove any slurry from the polishing.
After allowing the floor dry out overnight, I returned to apply two coats of Tile Doctor Colour Grow, which is a solvent-based, impregnating sealer designed to enhance the variety of natural colours and shades in the stone. It also protects the stone against daily exposure to chemical-based shampoo and soaps.
The customer was worried that the floor could not be restored, but she can now rest assured knowing not only knowing that the floor is back into top condition, but that professional help is at hand in case mistakes happen again in the future! Another happy customer for the Middlesex Tile Doctor.
Jonathan Oldham
South Middlesex Tile Doctor

 New Leaf Home Design
Every home is filled with meaning, but this one is especially significant to its owners. The clients were high school sweethearts and were returning back to Ohio to enjoy their retirement. They decided to build next door to the house she had grown up in, which happened to be on the property once owned by his grandparents! We worked together to develop a design that provided the classic detailing they wanted, while providing connected spaces filled with light. It was built with extra TLC too, with the homeowners doing everything from the rough framing to the interior trim themselves!
 Jami Abbadessa
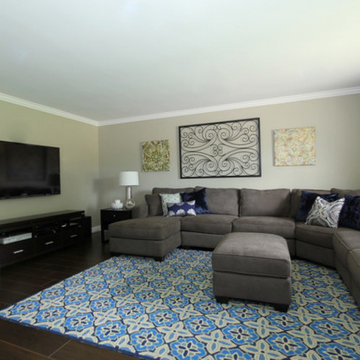
This young family was ready for a new, fresh and updated look to their house. They wanted a totally different color scheme and vibe and needed it finished within 6 weeks to be ready for a party of 100+ people they were hosting. I was happy to help! Even though many items that were selected were on back order and needed to be replaced, they kept their spirits high after countless returns and exchanges. Although art was being framed a day before the party and decor was being installed at the last minute, we pulled it together and accomplished our goal of finishing on time!
The easiest (and most cost effective!) way to change the feeling of a space is with color, so that’s what I did. I swapped out the tired burgundy/browns for a clean palette of blues and greys. In the family room, a new custom sectional in a neutral grey took place of the brown leatherette sofa. A blue accent chair was placed in the room to brighten that corner. Patterned drapes were hung for privacy and added texture. Colorful artwork and a Moroccan print area rug livened up the space. Many of the accessories and decor throughout the home were sourced at Home Goods, Target and Ikea.
The only piece of furniture that was kept in the entire home was the dining table, chairs and bar stools. The head chairs were swapped out for swanky upholstered navy ones with a nail head trim. A custom cornice to match the chairs was installed in the kitchen to hide the existing roller shades. The bar stools were reupholstered in the same fabric and some throw pillows for the sofa were made in the navy velvet as well. A Z Gallerie chandelier and blue pendants were installed for a little added drama. The fireplace got a makeover with a fresh coat of white paint and tile mosaic.
Their daughter wanted a beach theme bedroom, so that’s what she got! New blue walls, drapes and accessories brought the ocean to this room. Their son has taken a liking to super heroes and Legos. A red, blue and yellow color palette with bold stripes helped to create a fun, playful space for him to enjoy his Legos and super heroes. The master bedroom got a new look with updated furnishings and colorful, yet soothing, bedding. New drapes, an area rug and accessories help pull together this peaceful sanctuary. The bathroom got a makeover with a new vanity, tile mosaic back splash, new lighting and tile on the floor and shower.
 Intown Craftsmen
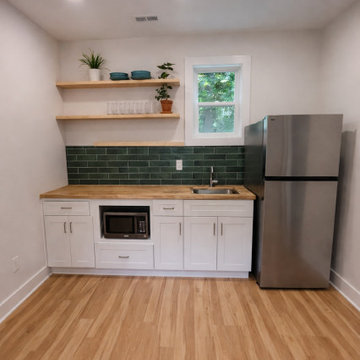
The space features a sleek kitchenette, durable high-quality finishes, and efficient layout planning to maximize usability within a compact footprint. Natural light and thoughtful design details create a productive work environment today, while the floor plan allows for an easy transition into a future rental unit or private guest suite.
This project highlights how a well-designed ADU can serve immediate lifestyle needs while adding measurable real estate value over time.
If you’re considering a backyard office, guest house, or income-producing ADU in ITP Atlanta, this build demonstrates the versatility and return on investment these spaces can offer.
 Crosspoint Contracting LLC
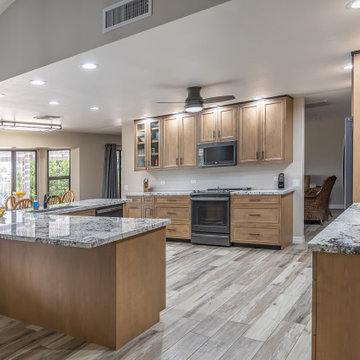
Removed walls between kitchen and living, removed soffited ductwork, cut down high bar wall, relocated master bedroom doorway, installed new HVAC felt ductwork with new returns, installed new 3 panel Craftsman doors & 366 4 1/4" FJP base throughout, and complete repaint.

 New Leaf Home Design
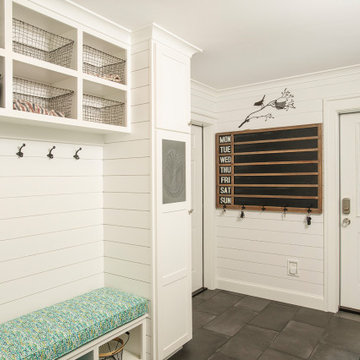
Every home is filled with meaning, but this one is especially significant to its owners. The clients were high school sweethearts and were returning back to Ohio to enjoy their retirement. They decided to build next door to the house she had grown up in, which happened to be on the property once owned by his grandparents! We worked together to develop a design that provided the classic detailing they wanted, while providing connected spaces filled with light. It was built with extra TLC too, with the homeowners doing everything from the rough framing to the interior trim themselves!
 Amy Troute Inspired Interior Design
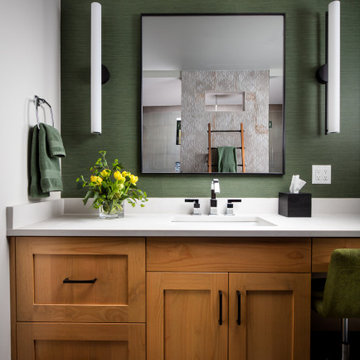
You know by now we love designing in Bend, and Caldera Springs just feels like home! This project, (a collaboration with Olsen Bros. Construction and Heidi Byrnes Design) is the “forever home” for a couple relocating from Lake Oswego. Soaring wood ceilings, open living spaces and ample bedroom suites informed the client’s classic/modern finish choices.
The furnishings aesthetic began with fabric to inspire pattern and color, and the story for each room unfolded from there. The great room is dressed in deep green, rust and cream, reflecting the natural palette outside every door and window. A pair of plush sofas large enough to nap on, swivel chairs to take in the view, and unique leather ottomans to tuck in where needed, invite lounging and conversation.
The primary and back guest suites offer the most incredible window seats for cozying up with your favorite book. Layered with custom cushions and a pile of pillows, they’re the best seat in the house.
Exciting wallpaper selections for each bathroom provided playful focal walls, from the deep green vinyl grass cloth in the primary bath, to a forest of sparkling tree lines in the powder bath. Amazing how wallpaper can define the personality of a space!
This home is full of color, yet minimal in the “extras” and easy to maintain. It’s always refreshing for us to return to a home we dressed months ago and have it look just like we left it! We know it will provide a warm welcome for the owners and their guests for years to come!
Photography by Chris Murray Productions
 Integrated Media Inc.
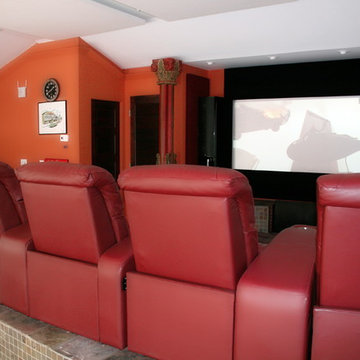
Our entertainment solutions create the ultimate video experience–no matter the size of your home. Home theater and video systems are one of the most requested from our clients. We believe it’s because of the outstanding return on investment and the amount of family enjoyment our high quality home theater systems offer. Often it’s best to arrange for one of our design concierge team members to take a look at your space. From there we will discuss what you would like to accomplish and what’s important to you and your family. With this information we will personalize a system that meets your needs and provide you with a project proposal. Once you approve the project we can get started on your dream room!
 Tile Doctor Ltd
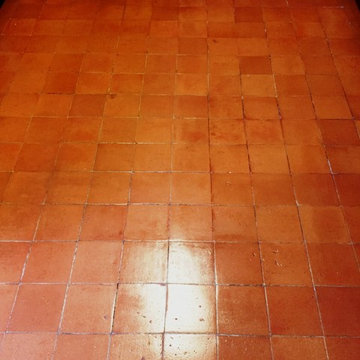
Not too long ago I visited a client who had just moved into a lovely old cottage in Milton, Oxfordshire. She wanted to restore many of the antique features of the building, including a fantastic Quarry tiled floor in the kitchen.
Quarry is typically a robust, hard wearing stone, but in a high traffic area like a kitchen, the tiles will need regular maintenance. These tiles clearly hadn’t seen a thorough clean and fresh seal in a long time, and so I was called in to provide just that.
On the first day of work, I gave the Quarry tiles a deep clean using a strong solution of Tile Doctor Pro-Clean and water. Pro-Clean is a versatile alkaline cleaner that also helps to break down any old and no longer effectual sealer remaining on the tiles.
The solution was applied evenly to the floor and left to dwell for half an hour, allowing time for it to seep into the stone to get underneath and lift out the ingrained dirt. I then removed the dirt by agitating the solution with a scrubbing pad fitted to a rotary floor scrubber. I worked in small sections at first, and gradually finished the entire floor.
After completing the initial clean, I rinsed away the soiled solution and vacuumed up the excess moisture using a wet-vac machine. I then scrubbed the floor an acid wash using a dilution of Tile Doctor Grout Clean-Up to remove grout smears and other mineral type deposits. The resulting solution was then removed in a similar fashion using a wet-vac.
The final step in the cleaning process was to rinse the floor with Tile Doctor pH Neutral Cleaner to remove any trace of product helps to tackle any remaining dirt and reset the pH balance of the tiles before sealing.
After leaving the floor to dry overnight, I returned the next day to the house to seal the floor with Tile Doctor Seal & Go, a water-based topical sealer which gives the floor an aesthetically pleasing sheen and a robust surface seal.
The photos demonstrate the results better than this short account can, needless to say the floor is now transformed.
Barry Woodward
Oxfordshire Tile Doctor
Sponsored
Columbus, OH

Structural Remodeling
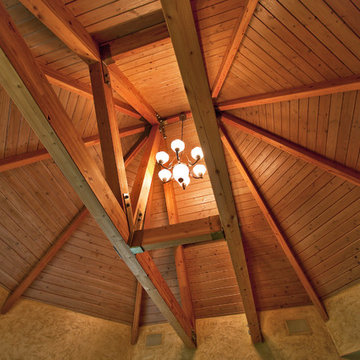
Franklin County's Heavy Timber Specialists | Best of Houzz 2020!
 The Renowned Group
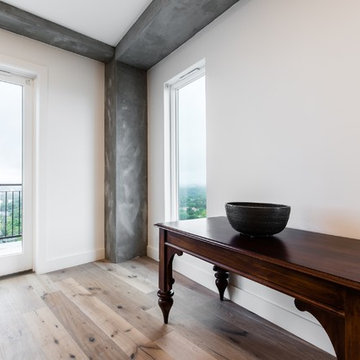
The window return is sheetrock, continuing the clean line design.
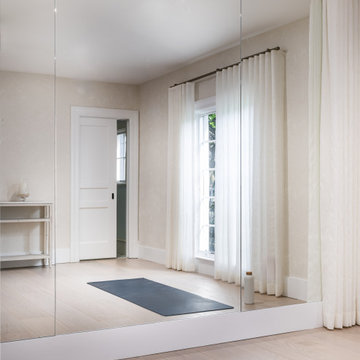
Example of a small transitional open concept light wood floor living room design in Dallas with white walls and a media wall
Example of a small transitional open concept light wood floor living room design in Dallas with white walls and a media wall
 DLT Interiors-Debbie Travin
We undertook a complete gut renovation and redesign of our client’s home while they enjoyed their summer residence. Working six days a week, we ensured the project was finished in time for their return to Palm Beach for the winter season. Every design detail was meticulously curated to reflect their unique style and needs. When they arrived for the big reveal, they were thrilled to discover a stunning, entirely transformed home tailored specifically for them.
 Amy Troute Inspired Interior Design
You know by now we love designing in Bend, and Caldera Springs just feels like home! This project, (a collaboration with Olsen Bros. Construction and Heidi Byrnes Design) is the “forever home” for a couple relocating from Lake Oswego. Soaring wood ceilings, open living spaces and ample bedroom suites informed the client’s classic/modern finish choices.
The furnishings aesthetic began with fabric to inspire pattern and color, and the story for each room unfolded from there. The great room is dressed in deep green, rust and cream, reflecting the natural palette outside every door and window. A pair of plush sofas large enough to nap on, swivel chairs to take in the view, and unique leather ottomans to tuck in where needed, invite lounging and conversation.
The primary and back guest suites offer the most incredible window seats for cozying up with your favorite book. Layered with custom cushions and a pile of pillows, they’re the best seat in the house.
Exciting wallpaper selections for each bathroom provided playful focal walls, from the deep green vinyl grass cloth in the primary bath, to a forest of sparkling tree lines in the powder bath. Amazing how wallpaper can define the personality of a space!
This home is full of color, yet minimal in the “extras” and easy to maintain. It’s always refreshing for us to return to a home we dressed months ago and have it look just like we left it! We know it will provide a warm welcome for the owners and their guests for years to come!
Photography by Chris Murray Productions
63