
Search results for "High traffic" in Home Design Ideas

 Gallery KBNY
For this Brooklyn condo renovation, Gallery Kitchen and Bath updated the entire kitchen and both bathrooms, as well as painted and laid out new flooring throughout the entire apartment. The owners wanted to unite the seeming medley of the existing space into a cohesive design more representative of their own style. With its ultra-high ceilings and exposed joints and beams, the space already lent itself to the farmhouse look. The end result is a modernized, eclectic farmhouse style that we keenly carried throughout the home.
MORE DETAILS
Compelling textures and color combos reign supreme. The kitchen features semi-custom Shaker-style stone gray cabinets, a white subway tile backsplash running all the way up the wall, and white quartz countertops. We built the island in part to create a pleasing yet efficient flow from the kitchen into the living and dining areas as the space was opened up. We also painted the plumbing stack white to not make it stand out.
We also redesigned the bathrooms, giving each a unique treatment. In the master bath, we took a Victorian-goes-modern approach with coral walls, champagne fixtures, and a clawfoot tub. In the guest bathroom, we stuck to a transitional style that approaches modern without becoming contemporary, pairing herringbone marble floor tiles with a mix of subway and penny tiles on the walls and in the shower. Both maintain elements, such as tiles, fixtures, and colors, that coordinate with the overall eclectic farmhouse look.
HOW WE COLLABORATE
Collaboration with our clients to their desired degree is one of our core pillars. In this condo renovation, the clients wanted central air and were initially considering a true central air system. We advised against it, as not only would it take away from the unique beauty of unusually tall ceilings by adding unsightly ductwork, but it would also significantly detract from the farmhouse look. Instead, we suggested a mini-split system. Our recommended units were both cost-effective and much more complementary to the comprehensive theme. Of course, we ultimately always honor the clients’ choices but it’s just as important to us that we make sure to provide all the necessary information so our clients can make educated decisions that are best for their needs.
SPACE PLANNING
Another key element of the renovation process is space planning. From this perspective, we consider the placement and positioning of objects with regard to the overall flow of space. The building where this renovation took place is U-shaped at one end, which happens to be where this particular apartment is located. Uniquely-shaped spaces naturally require more concentration than those built in the standard rectangular shape. Questions we consider include: Where will people really spend time in this space? What will the flow of foot traffic be? Is there easy access to the kitchen island? Does it flow well into the hallways? Does the island protrude into anything? Working in New York, with its variety of homes and architectural styles, has greatly developed our experience with standard spaces and unconventional ones alike.
SOME HIGHLIGHTS
- Ultra-tall ceilings, allowing for stacked cabinets in the kitchen, as well as long pendant light fixtures and more chandeliers than usual throughout the home
- Completely refurbished cast iron clawfoot tub in one bathroom, with a 270-degree shower curtain around the tub
- Vibrant color choices, including an all-blue bedroom in various shades
- Treated exposed brick walls
Fun Fact: A client once showed us inspiration photos that they sourced online of this exact project, having no idea it was one of ours.
Thinking about renovating your condo? Contact us today to find out how you can benefit from our expertise in remodeling New York City condos. We are a design-and-build firm with a full-scale approach that handles every single aspect of your condo renovation from start to finish.

 Alpentile
Tile design and Installation: www.alpentile.com
www.michaelwoodall.com
Trendy pool photo in Phoenix
Trendy pool photo in Phoenix
 Gallery KBNY
For this Brooklyn condo renovation, Gallery Kitchen and Bath updated the entire kitchen and both bathrooms, as well as painted and laid out new flooring throughout the entire apartment. The owners wanted to unite the seeming medley of the existing space into a cohesive design more representative of their own style. With its ultra-high ceilings and exposed joints and beams, the space already lent itself to the farmhouse look. The end result is a modernized, eclectic farmhouse style that we keenly carried throughout the home.
MORE DETAILS
Compelling textures and color combos reign supreme. The kitchen features semi-custom Shaker-style stone gray cabinets, a white subway tile backsplash running all the way up the wall, and white quartz countertops. We built the island in part to create a pleasing yet efficient flow from the kitchen into the living and dining areas as the space was opened up. We also painted the plumbing stack white to not make it stand out.
We also redesigned the bathrooms, giving each a unique treatment. In the master bath, we took a Victorian-goes-modern approach with coral walls, champagne fixtures, and a clawfoot tub. In the guest bathroom, we stuck to a transitional style that approaches modern without becoming contemporary, pairing herringbone marble floor tiles with a mix of subway and penny tiles on the walls and in the shower. Both maintain elements, such as tiles, fixtures, and colors, that coordinate with the overall eclectic farmhouse look.
HOW WE COLLABORATE
Collaboration with our clients to their desired degree is one of our core pillars. In this condo renovation, the clients wanted central air and were initially considering a true central air system. We advised against it, as not only would it take away from the unique beauty of unusually tall ceilings by adding unsightly ductwork, but it would also significantly detract from the farmhouse look. Instead, we suggested a mini-split system. Our recommended units were both cost-effective and much more complementary to the comprehensive theme. Of course, we ultimately always honor the clients’ choices but it’s just as important to us that we make sure to provide all the necessary information so our clients can make educated decisions that are best for their needs.
SPACE PLANNING
Another key element of the renovation process is space planning. From this perspective, we consider the placement and positioning of objects with regard to the overall flow of space. The building where this renovation took place is U-shaped at one end, which happens to be where this particular apartment is located. Uniquely-shaped spaces naturally require more concentration than those built in the standard rectangular shape. Questions we consider include: Where will people really spend time in this space? What will the flow of foot traffic be? Is there easy access to the kitchen island? Does it flow well into the hallways? Does the island protrude into anything? Working in New York, with its variety of homes and architectural styles, has greatly developed our experience with standard spaces and unconventional ones alike.
SOME HIGHLIGHTS
- Ultra-tall ceilings, allowing for stacked cabinets in the kitchen, as well as long pendant light fixtures and more chandeliers than usual throughout the home
- Completely refurbished cast iron clawfoot tub in one bathroom, with a 270-degree shower curtain around the tub
- Vibrant color choices, including an all-blue bedroom in various shades
- Treated exposed brick walls
Fun Fact: A client once showed us inspiration photos that they sourced online of this exact project, having no idea it was one of ours.
Thinking about renovating your condo? Contact us today to find out how you can benefit from our expertise in remodeling New York City condos. We are a design-and-build firm with a full-scale approach that handles every single aspect of your condo renovation from start to finish.
Find the right local pro for your project
 Gallery KBNY
For this Brooklyn condo renovation, Gallery Kitchen and Bath updated the entire kitchen and both bathrooms, as well as painted and laid out new flooring throughout the entire apartment. The owners wanted to unite the seeming medley of the existing space into a cohesive design more representative of their own style. With its ultra-high ceilings and exposed joints and beams, the space already lent itself to the farmhouse look. The end result is a modernized, eclectic farmhouse style that we keenly carried throughout the home.
MORE DETAILS
Compelling textures and color combos reign supreme. The kitchen features semi-custom Shaker-style stone gray cabinets, a white subway tile backsplash running all the way up the wall, and white quartz countertops. We built the island in part to create a pleasing yet efficient flow from the kitchen into the living and dining areas as the space was opened up. We also painted the plumbing stack white to not make it stand out.
We also redesigned the bathrooms, giving each a unique treatment. In the master bath, we took a Victorian-goes-modern approach with coral walls, champagne fixtures, and a clawfoot tub. In the guest bathroom, we stuck to a transitional style that approaches modern without becoming contemporary, pairing herringbone marble floor tiles with a mix of subway and penny tiles on the walls and in the shower. Both maintain elements, such as tiles, fixtures, and colors, that coordinate with the overall eclectic farmhouse look.
HOW WE COLLABORATE
Collaboration with our clients to their desired degree is one of our core pillars. In this condo renovation, the clients wanted central air and were initially considering a true central air system. We advised against it, as not only would it take away from the unique beauty of unusually tall ceilings by adding unsightly ductwork, but it would also significantly detract from the farmhouse look. Instead, we suggested a mini-split system. Our recommended units were both cost-effective and much more complementary to the comprehensive theme. Of course, we ultimately always honor the clients’ choices but it’s just as important to us that we make sure to provide all the necessary information so our clients can make educated decisions that are best for their needs.
SPACE PLANNING
Another key element of the renovation process is space planning. From this perspective, we consider the placement and positioning of objects with regard to the overall flow of space. The building where this renovation took place is U-shaped at one end, which happens to be where this particular apartment is located. Uniquely-shaped spaces naturally require more concentration than those built in the standard rectangular shape. Questions we consider include: Where will people really spend time in this space? What will the flow of foot traffic be? Is there easy access to the kitchen island? Does it flow well into the hallways? Does the island protrude into anything? Working in New York, with its variety of homes and architectural styles, has greatly developed our experience with standard spaces and unconventional ones alike.
SOME HIGHLIGHTS
- Ultra-tall ceilings, allowing for stacked cabinets in the kitchen, as well as long pendant light fixtures and more chandeliers than usual throughout the home
- Completely refurbished cast iron clawfoot tub in one bathroom, with a 270-degree shower curtain around the tub
- Vibrant color choices, including an all-blue bedroom in various shades
- Treated exposed brick walls
Fun Fact: A client once showed us inspiration photos that they sourced online of this exact project, having no idea it was one of ours.
Thinking about renovating your condo? Contact us today to find out how you can benefit from our expertise in remodeling New York City condos. We are a design-and-build firm with a full-scale approach that handles every single aspect of your condo renovation from start to finish.

 Renovisions
The owners of this 1980’s built-home wanted to create a completely new look for their outdated master bath and turned to Renovisions for design and build services. Having perused Renovisions website, they were confident they made the right choice to help them transform their ordinary space into something truly extraordinary. The design team created several configurations for the homeowners review until they nailed down one particular design that would create that wow factor.
The main challenges were creating an open, spacious feel and maximizing natural light and ventilation with plenty of storage and customizations. The addition of a second window allows ample light into the space throughout the day along with the recessed and sconce lights which were perfectly placed. Storage, which was a key element of this design, includes two separate vanity cabinets (his and hers) with plenty of space for needed toiletries, a matching framed medicine cabinet for her and a custom built cubby for him. Built on site was a linen closet with both roll out and stationary shelves for towels and shower supplies. The spacious walk-in, all tiled shower boasts ‘no door’ access with lineal drain, traditional fixed and hand-held shower heads and a rounded shower seat. Polished black granite was used inside the cubby and topping both the threshold and seat creating a nice contrast to and tying in with the floor. The decorative grab bar ensures safety for these homeowners while showering. The heated floors added throughout the bath take the edge off when stepping out of the warm shower and are conveniently operated by a 24 hour programmable thermostat. Classic white subway tile and chair rail trims adorne all walls and tie in nicely to each vanity station. Carrera look quartz was the perfect choice for countertops creating a clean fresh look. Stunning marble basket-weave mosaic floor tile set the stage in this exquisite bath as the beautiful white painted cabinetry softened the overall feel of the space.
These homeowners are not saving spa retreats for once-a-year vacations anymore, they now enjoy a relaxing spa-like shower experience every day in their own home!


 Tile Trends, Inc.
Subway Tile-Herringbone
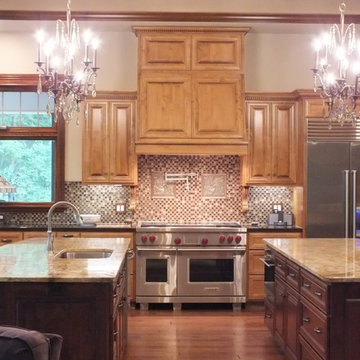
Inspiration for a mid-sized rustic l-shaped dark wood floor and brown floor eat-in kitchen remodel with a farmhouse sink, raised-panel cabinets, dark wood cabinets, quartz countertops, white backsplash, subway tile backsplash, stainless steel appliances, an island and beige countertops
Inspiration for a mid-sized rustic l-shaped dark wood floor and brown floor eat-in kitchen remodel with a farmhouse sink, raised-panel cabinets, dark wood cabinets, quartz countertops, white backsplash, subway tile backsplash, stainless steel appliances, an island and beige countertops
Sponsored
Fredericksburg, OH

High Point Cabinets
Columbus' Experienced Custom Cabinet Builder | 4x Best of Houzz Winner
 Gallery KBNY
For this Brooklyn condo renovation, Gallery Kitchen and Bath updated the entire kitchen and both bathrooms, as well as painted and laid out new flooring throughout the entire apartment. The owners wanted to unite the seeming medley of the existing space into a cohesive design more representative of their own style. With its ultra-high ceilings and exposed joints and beams, the space already lent itself to the farmhouse look. The end result is a modernized, eclectic farmhouse style that we keenly carried throughout the home.
MORE DETAILS
Compelling textures and color combos reign supreme. The kitchen features semi-custom Shaker-style stone gray cabinets, a white subway tile backsplash running all the way up the wall, and white quartz countertops. We built the island in part to create a pleasing yet efficient flow from the kitchen into the living and dining areas as the space was opened up. We also painted the plumbing stack white to not make it stand out.
We also redesigned the bathrooms, giving each a unique treatment. In the master bath, we took a Victorian-goes-modern approach with coral walls, champagne fixtures, and a clawfoot tub. In the guest bathroom, we stuck to a transitional style that approaches modern without becoming contemporary, pairing herringbone marble floor tiles with a mix of subway and penny tiles on the walls and in the shower. Both maintain elements, such as tiles, fixtures, and colors, that coordinate with the overall eclectic farmhouse look.
HOW WE COLLABORATE
Collaboration with our clients to their desired degree is one of our core pillars. In this condo renovation, the clients wanted central air and were initially considering a true central air system. We advised against it, as not only would it take away from the unique beauty of unusually tall ceilings by adding unsightly ductwork, but it would also significantly detract from the farmhouse look. Instead, we suggested a mini-split system. Our recommended units were both cost-effective and much more complementary to the comprehensive theme. Of course, we ultimately always honor the clients’ choices but it’s just as important to us that we make sure to provide all the necessary information so our clients can make educated decisions that are best for their needs.
SPACE PLANNING
Another key element of the renovation process is space planning. From this perspective, we consider the placement and positioning of objects with regard to the overall flow of space. The building where this renovation took place is U-shaped at one end, which happens to be where this particular apartment is located. Uniquely-shaped spaces naturally require more concentration than those built in the standard rectangular shape. Questions we consider include: Where will people really spend time in this space? What will the flow of foot traffic be? Is there easy access to the kitchen island? Does it flow well into the hallways? Does the island protrude into anything? Working in New York, with its variety of homes and architectural styles, has greatly developed our experience with standard spaces and unconventional ones alike.
SOME HIGHLIGHTS
- Ultra-tall ceilings, allowing for stacked cabinets in the kitchen, as well as long pendant light fixtures and more chandeliers than usual throughout the home
- Completely refurbished cast iron clawfoot tub in one bathroom, with a 270-degree shower curtain around the tub
- Vibrant color choices, including an all-blue bedroom in various shades
- Treated exposed brick walls
Fun Fact: A client once showed us inspiration photos that they sourced online of this exact project, having no idea it was one of ours.
Thinking about renovating your condo? Contact us today to find out how you can benefit from our expertise in remodeling New York City condos. We are a design-and-build firm with a full-scale approach that handles every single aspect of your condo renovation from start to finish.

 Jon Allen Fine Metal Art
Biscayne Bay Fish is an abstract take on a nature inspired painting. Jon truly captures the spirit of the tropics with these beautiful, bright colors. At Jon's studio near Palm Beach, Florida, there are several tanks with tropical fish and other sea life that inspire Jon on a daily basis and this beautiful, unique painting is a product of that inspiration. Hand-painted on aluminum, this stunning abstract piece will complement any contemporary or modern, decor.
Number of Pieces: 1
Dimensions: 48" x 12" x 2" off the wall
Care & Cleaning: Clean with a soft cloth and plain soap & water
Other Features: Hardware is pre-installed for simple hanging and art will “float” 2” off the wall
 Tile Doctor Ltd
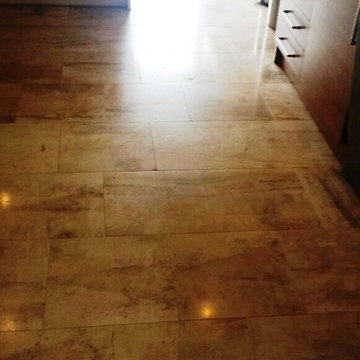
This customer from the historic city of Cardiff was keen to see what Tile Doctor could do to put some life back into their treasured Limestone kitchen floor that was laid in 2008. My first observations were mainly centred on the horrific condition of the surface which although adequately sealed initially the floor had not received any subsequent maintenance and its condition had deteriorated over time. The light shining in from the patio doors highlighted all the imperfections in the floor caused by surface wear and tear commonly seen in high traffic areas such as a kitchen.
Upon closer inspection, there were further problems: the floor was stained and scuffed, and in most places the sealer had worn off completely allowing the dirt to become ingrained into the pores of the Limestone. Additionally the grout was recessed but was now flush with the tile surface due to dirt build-up. There were also areas contaminated with grease and kitchen cooking oil.
The Limestone floor tiles were 20mm thick French Limestone, and had been laid very well so there was no requirement to do any tile or grout repairs however to get this floor back to its original condition the surface would need to be reconditioned using the Tile Doctor four stage burnishing system.
I started by giving the floor a wash with a medium dilution of Tile Doctor Pro-Clean, focusing mainly on the grout lines in order to remove the muck that had built-up there. I used a special stiff grout brush for this activity; it’s quite narrow and ideal for grout scrubbing.
This worked well, but the significant build-up of dirt along some of the grout lines meant more work was required. I tackled this problem with a hand scraper assisted with steam. At the end of this process, the whole floor was then rinsed down with water to remove any soil and the resulting slurry was then extracted using a wet vacuum.
The next step was to start the burnishing process, which basically involves applying four diamond encrusted floor pads in sequence over the floor. Each pad is a different grade, starting with the most abrasive coarse pad and moving through to the finer grades using a little water to lubricate and rinsing away any slurry between each pad.
I eventually finished with the extra fine pad which builds up shine and lustre on the tile; it had taken two days to clean the grout and burnish the Limestone but the floor was much improved and so after a final rinse down I left the floor to dry off overnight with the aid of the underfloor heating.
During this time, I also addressed the stained Limestone in the area of the kitchen where the dustbin was situated. This had been a major upset for the customer and I’m happy to report I managed to deal with it. However, it was quite an involved process, so I’ll write about this in a separate post.
On the third day I came back to seal the floor, checking first that it had dried sufficiently with a damp meter. Fortunately, the underfloor heating had done a great job of drying the stone and I was able to seal the floor using three coats of Tile Doctor Colour Grow sealant. This sealant not only provides a durable seal but also penetrates deep into the pores of the stone protecting it from within and enhancing the natural colours of the Limestone in the process.
After the final layer of sealant, I worked over the floor again with the extra fine burnishing pad both to add shine again following sealing, and to ensure that no smear marks were visible as the lighting conditions were unforgiving and highlighted any imperfections.
The customer was delighted with the results: so much so, in fact, that they booked me in to restore their Victorian hallway floor as well but that’s a story for another time!
Julian Iancono
SE Wales Tile Doctor

 Story Barns
Inspiration for a mid-sized rustic carpeted straight cable railing staircase remodel in Denver with carpeted risers


 Tile Doctor Ltd
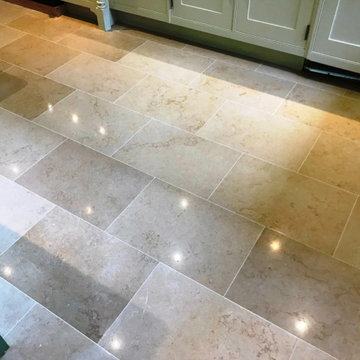
The owner of this recently purchased property in the Berkshire village of Twyford had inherited a Jerusalem limestone floor that had been installed throughout the ground floor including the Kitchen. The previous owner hadn’t maintained the stone floor very well and as a result it had become dull, patchy and the new owner was finding it impossible to keep clean. The floor was becoming a problem for them and they had been considering ripping it all up and getting it replaced. However due to the size of the floor and potential cost of replacing it they searched for other solutions and contacted Tile Doctor to see if it could be renovated.
I scheduled an appointment with the owners to survey the floor and it wasn’t long before I realised that we could achieve a great result by polishing the Limestone using a set of diamond burnishing pads. To prove how well I thought the floor would clean up I offered to complete a demo within the small utility room. This was arranged and completed a week later, as I expected once I had finished the demo the floor looked fantastic, more importantly the client was ecstatic with the results and couldn’t wait to book us in to complete the rest of the house.
It was a large floor so I estimated the process would take 4-5 days to complete and would need to work in sections starting with the kitchen then progressing into the study and cloakroom, dining room and finishing off with the entrance hall. Thankfully I had an empty house to work in which helped as I could start sealing the area I worked on the prior day.
The limestone had become quite pitted in the high traffic area, these pits had filled up with soil and become unsightly. My first task was to deep clean the dirt filled pits and grout, to do this I used a strong dilution of Tile Doctor Pro Clean and a stiff nylon brush making sure I could get into the pits releasing the dirt, then vacuuming up all the chemical slurry as I went along.
The next task was to fill these pits I used a two-part epoxy filler that matched the colour of the stone. Once the filler had dried, I worked through the hand burnishing blocks from 100 grit to 400 and I smoothed out the areas that had been filled.
Now the holes/pits had been filled I continued with the restoration of the floor by moving onto the burnishing process using diamond encrusted floor burnishing pads. This involves honing the Limestone with a set of burnishing pads starting at 400-grit. The pads are applied to the floor with a heavy floor buffing machine using water to lubricate the process. The pad is run over each tile around three times and the fine slurry this process generates is rinsed off afterwards with water and then extracted with a wet vacuum. You then move onto the 800-grit and then 1500-grit slowly building back the appearance of the stone.
As I had worked in sections/rooms at a time I was able to allow a full day drying time before sealing. Happy with the depth of colour from the pad system I opted to seal the floor with two coats of Tile Doctor Ultra-Seal. I had a range of sealers to choose from an in this case I felt Ultra-Seal would be most suited as it doesn’t change the natural appearance of the Limestone yet will provide years of protection and make it much easier to keep clean.
The owners were over the moon with how the limestone now looked and relieved that their problem floor had been restored. For aftercare cleaning I recommended Tile Doctor Stone Soap which is designed for maintaining the patina on polished stone floors.
Dennis Buckland
Berkshire Tile Doctor
Sponsored
Columbus, OH

Snider & Metcalf Interior Design, LTD
Leading Interior Designers in Columbus, Ohio & Ponte Vedra, Florida

 davidwardstickart
Angular Asian inspired branch art made of Acacia branches by Nevada City artist David Ward. Inspired by minimal lines and slightly out of balance zen design.
 Anam Interior
Introduction
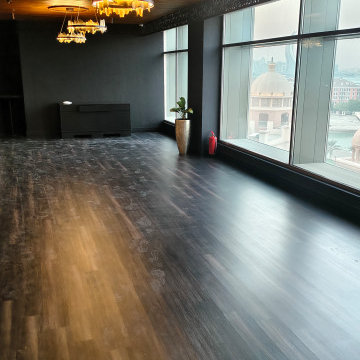
Flooring plays an important role in the appearance, comfort, and functionality of a villa. From elegant marble floors in living rooms to durable porcelain tiles in kitchens and bathrooms, the right flooring can transform any residential space.
For homeowners in Qatar, selecting suitable flooring requires consideration of design preferences, durability, maintenance, and room functionality. This guide explores popular flooring materials and how to choose the right options for luxury villa interiors.
1. Popular Flooring Options for Villas in Qatar
Different flooring materials offer different advantages. Understanding their characteristics helps homeowners make informed decisions.
Marble Flooring
Marble is a popular choice for luxury villas because of its natural patterns, elegant appearance, and timeless appeal. It is particularly suitable for living rooms, entrance halls, staircases, and formal majlis areas.
Benefits:
Unique natural patterns and colours.
Elegant appearance for luxury interiors.
Available in polished and honed finishes.
Can be professionally polished and restored.
However, marble requires appropriate maintenance and can be sensitive to acidic substances and staining. Polished marble may also become slippery when wet.
Porcelain Tiles
Porcelain tiles offer durability, low water absorption, and a wide range of designs. They are suitable for different residential areas, including kitchens, bathrooms and living spaces.
Benefits:
Generally easy to maintain.
Low water absorption.
Available in marble, stone, and wood-effect designs.
Suitable options for high-traffic areas.
Granite Flooring
Granite is a natural stone known for its hardness and distinctive appearance. It can be considered for entrances, staircases, and other areas where durability is important.
Ceramic Tiles
Ceramic tiles provide an affordable flooring option with various colours, patterns, and finishes. Their suitability depends on the specific product and intended application.
2. Choosing the Right Flooring for Different Villa Areas
Each area of a villa has different flooring requirements.
Living rooms and majlis: Marble and large-format porcelain tiles can create an elegant and spacious appearance.
Bedrooms: Neutral-coloured marble or porcelain can complement comfortable and relaxing interiors.
Kitchens: Durable, easy-to-clean porcelain tiles are often a practical choice.
Bathrooms: Textured or matte tiles with appropriate slip resistance are recommended.
Staircases and entrances: Marble and granite can create an attractive first impression, with suitable attention to safety and edge detailing.
Selecting materials according to the function of each space helps create a balanced villa interior.
3. Popular Marble Colours and Finishes
Marble colour and finish can influence the overall atmosphere of a villa.
White marble: Creates a bright, elegant appearance with natural veining.
Beige and cream marble: Adds warmth and complements neutral furniture.
Grey marble: Works well with contemporary and minimalist interiors.
Dark marble: Creates a dramatic appearance in selected feature areas.
Polished marble offers a reflective surface, while honed marble provides a softer, matte finish. The right option depends on the room's purpose, maintenance requirements, and safety considerations.
4. Marble vs. Porcelain: Which Is Better?
Both materials offer advantages for villa flooring.
Feature
Marble
Porcelain
Appearance
Natural patterns
Multiple designs
Durability
Varies by stone
Generally high
Maintenance
Requires specific care
Generally easier
Water absorption
Varies by stone
Very low
Design
Natural luxury
Versatile finishes
Marble is suitable for homeowners who prefer natural stone and distinctive patterns. Porcelain is a practical alternative for those seeking durability and easier maintenance. Both materials can also be combined in different areas of a villa.
5. Important Factors Before Installing Flooring
Before selecting flooring for your villa in Qatar, consider the following:
Material quality: Check the material specifications, finish, dimensions, and suitability for each room.
Slip resistance: Select appropriate finishes for bathrooms, kitchens, and other moisture-prone areas.
Installation quality: Proper subfloor preparation, adhesives, grout, and movement joints contribute to long-term performance.
Maintenance: Understand the cleaning and care requirements of the selected material.
Design coordination: Ensure the flooring complements furniture, lighting, wall finishes, and the overall interior design concept.
Professional material selection and installation can help prevent common flooring problems and improve the finished appearance.
6. What Affects Flooring Costs in Qatar?
The cost of marble and flooring installation depends on several factors:
Type and quality of material.
Origin and availability.
Flooring area and tile dimensions.
Existing floor removal and preparation.
Installation labour and materials.
Decorative patterns, skirting and finishing.
Homeowners planning a complete villa renovation should also consider flooring as part of the overall fit-out budget.
For more information, read our related guide on Interior Fit-Out Cost in Qatar.
7. Professional Villa Interior Design and Flooring Selection
Flooring should be selected as part of a complete interior design plan. The right combination of materials, colours, furniture and lighting helps create a cohesive residential environment.
At ANAM Interiors, villa interior design and fit-out solutions focus on combining aesthetics with functionality through space planning, material selection, and coordinated execution.
Explore our Villa Interior Design in Qatar guide to discover more residential design ideas.
 Get My Rugs LLC
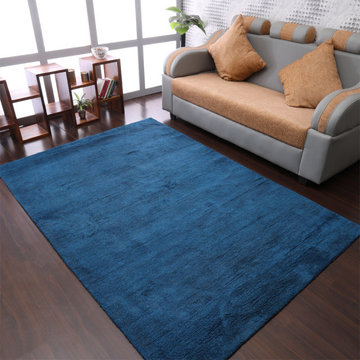
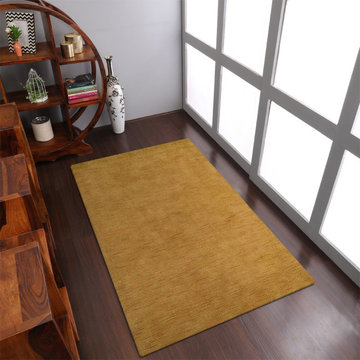
Decorate your home with the perfect area rugs to elevate the ambiance of your living room, bedroom, or any space that needs a touch of style and comfort. Rugs are essential elements in home decor, providing warmth, texture, and a visual anchor that can transform any room. Whether you’re looking to enhance a cozy living room or add a touch of elegance to your bedroom, the right rug can make a significant difference in your home’s overall aesthetic.
When it comes to living room rugs, the choices are vast and varied. From classic designs to modern styles, you can find rugs that fit any decor theme. For larger spaces, big rugs for the living room or huge carpets offer ample coverage, creating a cohesive look that unifies the room. Large carpets for living rooms not only define the space but also add a layer of comfort, making your living area more inviting and functional.
If you’re looking for something even more substantial, consider large living room carpet rugs. These rugs can cover significant portions of the floor, providing a plush, cushioned surface that is perfect for lounging or entertaining. The scale of large carpet rugs for living rooms makes them ideal for adding a sense of grandeur and comfort to expansive spaces.
For a more tailored approach, rugs for living rooms come in various sizes and styles to suit your needs. From traditional patterns to contemporary designs, you can find the perfect rug to complement your decor. Whether you prefer a subtle, neutral-toned rug or a bold, colorful statement piece, the right choice will enhance your living space's aesthetic appeal.
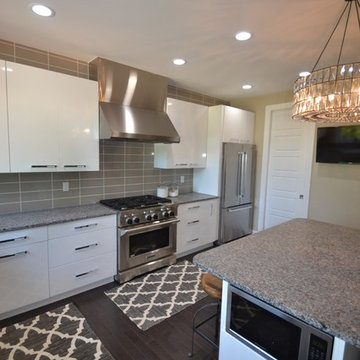
In addition to living room options, floor carpets and mats for kitchens offer practical and stylish solutions for other areas in your home. A durable, easy-to-clean mat can add a touch of coziness to your kitchen, while providing a comfortable surface for standing and working. Kitchen mats are designed to withstand spills and stains, ensuring that they remain functional and attractive over time.
When selecting rugs for any room, consider the material and maintenance requirements. For high-traffic areas like the living room, choose rugs that are durable and easy to clean. Many rugs are available with stain-resistant treatments or are machine washable, making them practical choices for busy households.
Additionally, consider the rug’s backing and padding. Non-slip or adhesive backings are crucial for safety, especially on hardwood or tile floors. For added comfort, cushioned rugs can provide a softer feel underfoot, enhancing your living space’s coziness.
The right rug can also reflect your personal style and add a unique touch to your home decor. Personalized or custom rugs allow you to select specific colors, patterns, and sizes that perfectly fit your space and taste. An 8x10 rug is a popular choice for larger rooms, offering ample coverage and versatility.
In summary, decorating with rugs is a fantastic way to enhance the beauty and functionality of your home. Whether you’re choosing a large rug for the living room, a floor carpet for the kitchen, or a big carpet for a spacious area, the right rug can transform your living space into a stylish and comfortable haven. Explore various styles, materials, and sizes to find the perfect rug that complements your decor and meets your practical needs.

 Kohn Shnier architects
This year round two-family cottage is comprised of seven modules which required just 25 days to construct in an off-site facility. When assembled, these prefabricated units form a building that is 38 metres long but less than 5 metres wide. The length offers a variety of living spaces while the constricted width maintains a level of intimacy and affords views of the lake from every room.
Sited along a north-south axis, the cottage sits obliquely on a ridge. Each of the three levels has a point of access at grade. The shared living spaces are entered from the top of the ridge with the sleeping spaces a level below. Facing the lake, the east elevation consists entirely of sliding glass doors and provides every room with access to the forest or balconies.
Materials fall into two categories: reflective surfaces – glazing and mirror, and those with a muted colouration – unfinished cedar, zinc cladding, and galvanized steel. The objective is to visually push the structure into the background. Photos by Tom Arban


 Get My Rugs LLC
Decorate your home with the perfect area rugs to elevate the ambiance of your living room, bedroom, or any space that needs a touch of style and comfort. Rugs are essential elements in home decor, providing warmth, texture, and a visual anchor that can transform any room. Whether you’re looking to enhance a cozy living room or add a touch of elegance to your bedroom, the right rug can make a significant difference in your home’s overall aesthetic.
When it comes to living room rugs, the choices are vast and varied. From classic designs to modern styles, you can find rugs that fit any decor theme. For larger spaces, big rugs for the living room or huge carpets offer ample coverage, creating a cohesive look that unifies the room. Large carpets for living rooms not only define the space but also add a layer of comfort, making your living area more inviting and functional.
If you’re looking for something even more substantial, consider large living room carpet rugs. These rugs can cover significant portions of the floor, providing a plush, cushioned surface that is perfect for lounging or entertaining. The scale of large carpet rugs for living rooms makes them ideal for adding a sense of grandeur and comfort to expansive spaces.
For a more tailored approach, rugs for living rooms come in various sizes and styles to suit your needs. From traditional patterns to contemporary designs, you can find the perfect rug to complement your decor. Whether you prefer a subtle, neutral-toned rug or a bold, colorful statement piece, the right choice will enhance your living space's aesthetic appeal.
In addition to living room options, floor carpets and mats for kitchens offer practical and stylish solutions for other areas in your home. A durable, easy-to-clean mat can add a touch of coziness to your kitchen, while providing a comfortable surface for standing and working. Kitchen mats are designed to withstand spills and stains, ensuring that they remain functional and attractive over time.
When selecting rugs for any room, consider the material and maintenance requirements. For high-traffic areas like the living room, choose rugs that are durable and easy to clean. Many rugs are available with stain-resistant treatments or are machine washable, making them practical choices for busy households.
Additionally, consider the rug’s backing and padding. Non-slip or adhesive backings are crucial for safety, especially on hardwood or tile floors. For added comfort, cushioned rugs can provide a softer feel underfoot, enhancing your living space’s coziness.
The right rug can also reflect your personal style and add a unique touch to your home decor. Personalized or custom rugs allow you to select specific colors, patterns, and sizes that perfectly fit your space and taste. An 8x10 rug is a popular choice for larger rooms, offering ample coverage and versatility.
In summary, decorating with rugs is a fantastic way to enhance the beauty and functionality of your home. Whether you’re choosing a large rug for the living room, a floor carpet for the kitchen, or a big carpet for a spacious area, the right rug can transform your living space into a stylish and comfortable haven. Explore various styles, materials, and sizes to find the perfect rug that complements your decor and meets your practical needs.
 Tile Doctor Ltd
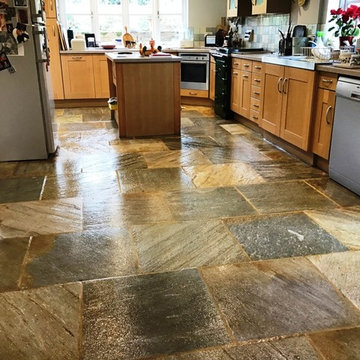
I recently visited a customer living in the village of Ravensthorpe, just outside Northampton to rejuvenate a 15-year-old multi coloured Chinese riven slate floor that needed a deep professional clean. Slate is a hard-wearing tile used for flooring high traffic areas but does need sealing to bring out its best features. In this case the sealer had long since worn off and dirt had become ingrained in the stone making it difficult to clean effectively.
We discussed the client’s requirements and the cleaning process I planned to follow to rejuvenate the floor. I had to check on availability, so I e-mailed over a quote and some dates later that day. They were happy with my proposal and agreed for the work to be done whilst the customers were on holiday.
My first task was to test a small area to determine which products would give the best results. In this case, I decided to start with a strong dilution of Tile Doctor Remove and Go which is a strong alkaline cleaner/coatings remover that’s safe to use on Tile and Stone. I spread this solution across a section of the floor and left it to seep into the pores of the stone and lift out the ingrained dirt.
After allowing the solution adequate time to dwell, I scrubbed the slate with a carbon brush fitted to a rotary machine to gradually reveal the fantastic natural colours of the Slate hidden beneath the dirt. Happy with my choice of cleaning product I repeated this process in sections until it had been carried out throughout the entire area. Following this, I rinsed the entire floor several times with clean water, before soaking up the resulting soiled residue with a wet vacuum.
The next part of the cleaning process entailed paying attention to the grout lines which were scrubbed using Tile Doctor Grout Clean-Up. The resulting residue was promptly extracted with the wet vacuum and I finished by giving the whole floor a rinse with Tile Doctor pH Neutral Tile Cleaner. This is a day to day tile cleaning product which is recommended for stone floors, many supermarket tile cleaning products are only suitable for ceramic tiles due to their acidic formula and can damage a floor over years of use so you should always read the label. However, I always leave my clients with a complimentary bottle of a suitable Tile Doctor product to maintain their floors.
The floor was left to dry off overnight and I returned on the second day to seal the floor. Before starting I checked the floor was dry using a damp meter which confirmed the Slate was dry and ready to seal. The floor must be completely dry before sealing as any excess moisture has the potential to the damage the performance of the sealer. Since my client had specifically requested a silk finish, I opted to use Tile Doctor Seal and Go which dries to leave a lovely subtle sheen that really enhances the look of the stone. Five coats were applied to ensure a good hard-wearing protection.
My client was very pleased with the results, particularly as they hadn’t realised how much colour it had lost over the years and left the following feedback on our website.
”I despaired of having a clean-looking floor again. Phil Vissian assured me that intensive deep cleaning and resealing could restore our fifteen year old, subtly coloured, Chinese riven slate kitchen floor. He has done a fantastic job. Looks like new, and I shall book Phil for an annual professional clean, so that it never gets as bad again.” Sally M, Northampton
Phil Vissian
Northamptonshire Tile Doctor
159