
Search results for "Improving energy" in Home Design Ideas
 Mottram Architecture
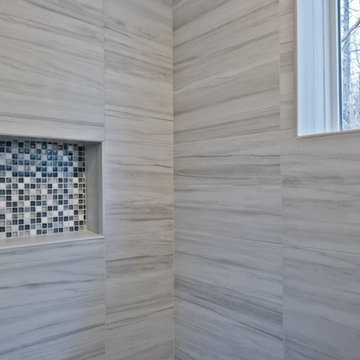
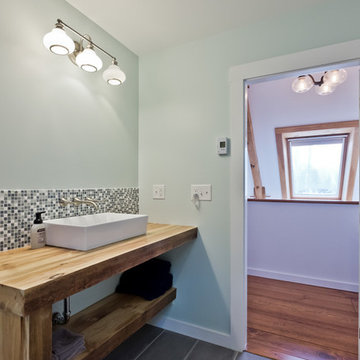
Timber frame homes offer unique challenges during a remodel. What often makes them beautiful and attractive to most homeowners, also makes them challenging for space requirements.
Context: The lovely couple that owned this home were struggling with some interesting floor plan challenges that just didn't work for their family. The loved the beautiful timbers and woodwork of their home, but the dramatically sloping ceilings on the second floor, particularly in the bathroom, just didn't work for this 1 1/2 bath home. Needing to use the skylight to approach the toilet was a less then ideal scenario. Although the bathroom footprint was more then adequate, the sloped ceiling only made half of the space useable. Check out the Before/After post on our blog to see the photos of the house pre-renovation. As much as they loved all the wood features in their home, another challenge they had was light. The wood ceiling made everything inside the house darker, even with a fantastic array of south facing windows, there were spaces in the home that felt dark and small. When they contacted us they wanted to know how could they make their brighter and more inviting, were there solutions to the 2nd floor sloped ceiling issues, and if they were going to do all of this work, how could they make their home more comfortable and efficient. A nagging water leak in the upstairs bathroom spurred them into action and here is how we solved their dilemma.
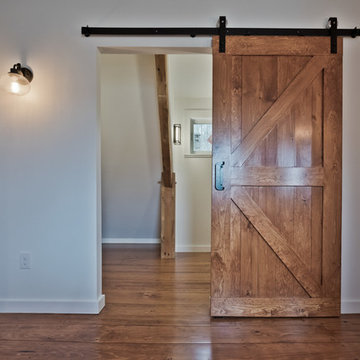
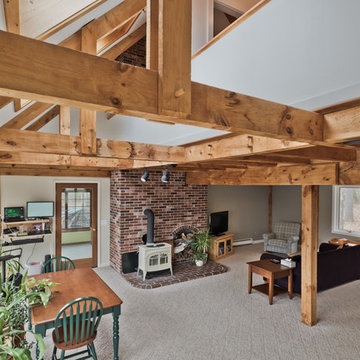
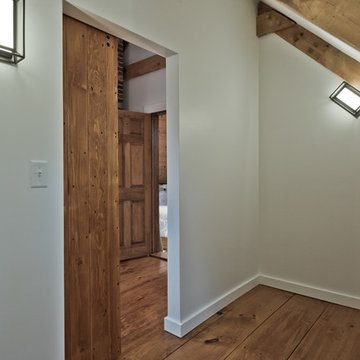
Conclusion: First, we added a little dormer to the rear of the house so we could get full headroom in nearly all of the upstairs bathroom! Then we decided to extend that dormer one more timber bay over to create a walk in closet with natural light and plenty of space. Since we were contemplating energy efficiency, we resolved a nagging issue that is present in a lot of timber frame construction, air tightness. Commonly found in timber frame construction, fiberglass insulation is installed in the rafter bays and board ceilings are installed over top. Unfortunately, board ceilings are anything but air tight, and fiberglass insulation needs to be in an airtight cavity for maximum effectiveness. So we were able to solve two issues at the same time for this homeowner. We removed the board ceiling and fiberglass insulation, we dense packed the rafter bays with cellulose insulation, and installed sheetrock in place of the boards. The boards were salvaged for re-use by the homeowner, and the space and light quality was dramatically improved. Some may think that losing the board ceiling took something away from the space, but what you'll see in the pictures is that it highly accentuates the heavy timbers and really makes them stand out in a beautiful way. Now with this added airtightness, better insulation, and brighter space, the homeowner hardly runs their wood stove, and it's so quiet in the space, an added bonus from changing the insulation. It became necessary to also add a sheetrock ceiling to the living room to hide the plumbing from the new bathroom layout above. Changing this ceiling gave the homeowner some real quality lighting that was lacking in the living room before. The brighter ceiling and new lighting layout completely transforms the living room into a space you want to hang out, even though the layout didn't change at all. When the homeowner saw the finished spaces she said "I can't believe this is my house, I want to live in this house"
Energy Efficiency: I touched a little on the efficiency above, but like all projects done with Mottram Architecture, we always want to leave you with a little extra. Timber frame construction with board ceilings and fiberglass insulation are notoriously leaky! If you want to know what we think about fiberglass insulation, check our our blog post on Why Fiberglass Insulation Sucks. By installing cellulose insulation and covering it with sheetrock we were able to greatly reduce the heat flowing out of this home. It not only improves cashflow it improves the comfort level in the space. Who wants to sit in their living room and feel a draft? Let us remind you, we are not saying cellulose insulation is an air barrier, we use the sheetrock to help with that, but it does significantly reduce the air flow over fiberglass insulation. And when we reduce the airflow, we reduce the heat flow. And when we reduce the heat flow, we reduce the need to re-heat that drafty air from outside. When it comes to energy efficiency the first and best place to start is air infiltration. We greatly reduced the air infiltration with the new insulation, but we also added a hat and warm boots. What I mean by that is, we improved the insulation in the roof, and we installed insulation in the basement. Maybe it's a silly analogy, but when you think about keeping warm, we always start with the hat and boots! With sustainability in mind, the next project will be to add a deck to the front of this house with rain catchment barrels from the metal roof. They are planning to plant a garden in the spring and the rain catchment system will help to irrigate the new garden.
Builder: East Shore Builders
Photographer: Michael Eric Berube
 Mottram Architecture
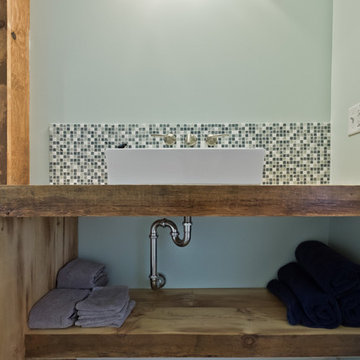
Timber frame homes offer unique challenges during a remodel. What often makes them beautiful and attractive to most homeowners, also makes them challenging for space requirements.
Context: The lovely couple that owned this home were struggling with some interesting floor plan challenges that just didn't work for their family. The loved the beautiful timbers and woodwork of their home, but the dramatically sloping ceilings on the second floor, particularly in the bathroom, just didn't work for this 1 1/2 bath home. Needing to use the skylight to approach the toilet was a less then ideal scenario. Although the bathroom footprint was more then adequate, the sloped ceiling only made half of the space useable. Check out the Before/After post on our blog to see the photos of the house pre-renovation. As much as they loved all the wood features in their home, another challenge they had was light. The wood ceiling made everything inside the house darker, even with a fantastic array of south facing windows, there were spaces in the home that felt dark and small. When they contacted us they wanted to know how could they make their brighter and more inviting, were there solutions to the 2nd floor sloped ceiling issues, and if they were going to do all of this work, how could they make their home more comfortable and efficient. A nagging water leak in the upstairs bathroom spurred them into action and here is how we solved their dilemma.
Conclusion: First, we added a little dormer to the rear of the house so we could get full headroom in nearly all of the upstairs bathroom! Then we decided to extend that dormer one more timber bay over to create a walk in closet with natural light and plenty of space. Since we were contemplating energy efficiency, we resolved a nagging issue that is present in a lot of timber frame construction, air tightness. Commonly found in timber frame construction, fiberglass insulation is installed in the rafter bays and board ceilings are installed over top. Unfortunately, board ceilings are anything but air tight, and fiberglass insulation needs to be in an airtight cavity for maximum effectiveness. So we were able to solve two issues at the same time for this homeowner. We removed the board ceiling and fiberglass insulation, we dense packed the rafter bays with cellulose insulation, and installed sheetrock in place of the boards. The boards were salvaged for re-use by the homeowner, and the space and light quality was dramatically improved. Some may think that losing the board ceiling took something away from the space, but what you'll see in the pictures is that it highly accentuates the heavy timbers and really makes them stand out in a beautiful way. Now with this added airtightness, better insulation, and brighter space, the homeowner hardly runs their wood stove, and it's so quiet in the space, an added bonus from changing the insulation. It became necessary to also add a sheetrock ceiling to the living room to hide the plumbing from the new bathroom layout above. Changing this ceiling gave the homeowner some real quality lighting that was lacking in the living room before. The brighter ceiling and new lighting layout completely transforms the living room into a space you want to hang out, even though the layout didn't change at all. When the homeowner saw the finished spaces she said "I can't believe this is my house, I want to live in this house"
Energy Efficiency: I touched a little on the efficiency above, but like all projects done with Mottram Architecture, we always want to leave you with a little extra. Timber frame construction with board ceilings and fiberglass insulation are notoriously leaky! If you want to know what we think about fiberglass insulation, check our our blog post on Why Fiberglass Insulation Sucks. By installing cellulose insulation and covering it with sheetrock we were able to greatly reduce the heat flowing out of this home. It not only improves cashflow it improves the comfort level in the space. Who wants to sit in their living room and feel a draft? Let us remind you, we are not saying cellulose insulation is an air barrier, we use the sheetrock to help with that, but it does significantly reduce the air flow over fiberglass insulation. And when we reduce the airflow, we reduce the heat flow. And when we reduce the heat flow, we reduce the need to re-heat that drafty air from outside. When it comes to energy efficiency the first and best place to start is air infiltration. We greatly reduced the air infiltration with the new insulation, but we also added a hat and warm boots. What I mean by that is, we improved the insulation in the roof, and we installed insulation in the basement. Maybe it's a silly analogy, but when you think about keeping warm, we always start with the hat and boots! With sustainability in mind, the next project will be to add a deck to the front of this house with rain catchment barrels from the metal roof. They are planning to plant a garden in the spring and the rain catchment system will help to irrigate the new garden.
Builder: East Shore Builders
Photographer: Michael Eric Berube

 Smart-Solutiions
The Science of Light and Learning
To understand the relationship between lighting and learning, it’s critical to grasp the concept of correlated colour temperature (CCT). CCT refers to the warmth or coolness of light, measured in Kelvin (K). Lower CCTs (around 3000K) provide a warm, cosy atmosphere, while higher CCTs (5000K or above) emit a cool, daylight-like glow. Studies have shown that cool white light, which mimics natural daylight, can increase alertness and mood, contributing to improved cognitive performance. LED lighting, with its ability to produce this desired CCT, makes an ideal choice for educational settings.
LED Lighting: Brightening the Future of Education
Energy Efficiency and Cost Effectiveness
One of the main advantages of LED lighting is its energy efficiency. Traditional lighting solutions like fluorescent and incandescent bulbs consume much more energy to produce the same amount of light as LEDs, which is not only environmentally harmful but also financially costly. Switching to LED lights can result in substantial cost savings for schools, enabling them to redirect funds to other critical areas of education.
Durability and Longevity
LED lights are renowned for their durability and longevity. They have a significantly longer lifespan compared to conventional lights, which means less frequent replacement and reduced maintenance costs. This durability also minimises disruptions caused by light failure, providing a consistent, well-lit learning environment.
Improved Visibility and Reduced Eye Strain
With their superior colour rendering index (CRI), LED lights render colours more accurately, leading to improved visibility. This is particularly beneficial in educational settings, where activities often require distinguishing fine details and colours. LED lights also emit less glare than traditional lighting solutions, reducing eye strain and fatigue. This can lead to better concentration and increased comfort for both students and teachers.
Incorporating LED Lighting in Classrooms: Practical Considerations
When transitioning to LED lighting in classrooms, a few key factors need to be taken into account. Firstly, the lighting design should ensure an even distribution of light, preventing shadowy or overly bright spots that could distract or discomfort students. Secondly, the integration of dimming capabilities can provide flexibility, allowing educators to adjust the lighting level based on the task at hand. Finally, lighting controls can be used to take advantage of natural light, automatically dimming or turning off the LEDs when sufficient daylight is present.
Conclusion: The Bright Promise of LED Lighting in Education
As education systems continue to evolve, it’s imperative to keep sight of the physical factors that significantly impact learning, one of which is lighting. LED technology, with its myriad benefits, offers an innovative and effective way to enhance the quality of lighting in classrooms. By prioritising investments in such improvements, we can take a significant step towards creating an optimised learning environment that nurtures the educational success of future generations.
Find the right local pro for your project
 Mottram Architecture
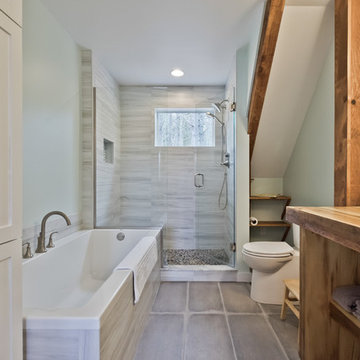
Timber frame homes offer unique challenges during a remodel. What often makes them beautiful and attractive to most homeowners, also makes them challenging for space requirements.
Context: The lovely couple that owned this home were struggling with some interesting floor plan challenges that just didn't work for their family. The loved the beautiful timbers and woodwork of their home, but the dramatically sloping ceilings on the second floor, particularly in the bathroom, just didn't work for this 1 1/2 bath home. Needing to use the skylight to approach the toilet was a less then ideal scenario. Although the bathroom footprint was more then adequate, the sloped ceiling only made half of the space useable. Check out the Before/After post on our blog to see the photos of the house pre-renovation. As much as they loved all the wood features in their home, another challenge they had was light. The wood ceiling made everything inside the house darker, even with a fantastic array of south facing windows, there were spaces in the home that felt dark and small. When they contacted us they wanted to know how could they make their brighter and more inviting, were there solutions to the 2nd floor sloped ceiling issues, and if they were going to do all of this work, how could they make their home more comfortable and efficient. A nagging water leak in the upstairs bathroom spurred them into action and here is how we solved their dilemma.
Conclusion: First, we added a little dormer to the rear of the house so we could get full headroom in nearly all of the upstairs bathroom! Then we decided to extend that dormer one more timber bay over to create a walk in closet with natural light and plenty of space. Since we were contemplating energy efficiency, we resolved a nagging issue that is present in a lot of timber frame construction, air tightness. Commonly found in timber frame construction, fiberglass insulation is installed in the rafter bays and board ceilings are installed over top. Unfortunately, board ceilings are anything but air tight, and fiberglass insulation needs to be in an airtight cavity for maximum effectiveness. So we were able to solve two issues at the same time for this homeowner. We removed the board ceiling and fiberglass insulation, we dense packed the rafter bays with cellulose insulation, and installed sheetrock in place of the boards. The boards were salvaged for re-use by the homeowner, and the space and light quality was dramatically improved. Some may think that losing the board ceiling took something away from the space, but what you'll see in the pictures is that it highly accentuates the heavy timbers and really makes them stand out in a beautiful way. Now with this added airtightness, better insulation, and brighter space, the homeowner hardly runs their wood stove, and it's so quiet in the space, an added bonus from changing the insulation. It became necessary to also add a sheetrock ceiling to the living room to hide the plumbing from the new bathroom layout above. Changing this ceiling gave the homeowner some real quality lighting that was lacking in the living room before. The brighter ceiling and new lighting layout completely transforms the living room into a space you want to hang out, even though the layout didn't change at all. When the homeowner saw the finished spaces she said "I can't believe this is my house, I want to live in this house"
Energy Efficiency: I touched a little on the efficiency above, but like all projects done with Mottram Architecture, we always want to leave you with a little extra. Timber frame construction with board ceilings and fiberglass insulation are notoriously leaky! If you want to know what we think about fiberglass insulation, check our our blog post on Why Fiberglass Insulation Sucks. By installing cellulose insulation and covering it with sheetrock we were able to greatly reduce the heat flowing out of this home. It not only improves cashflow it improves the comfort level in the space. Who wants to sit in their living room and feel a draft? Let us remind you, we are not saying cellulose insulation is an air barrier, we use the sheetrock to help with that, but it does significantly reduce the air flow over fiberglass insulation. And when we reduce the airflow, we reduce the heat flow. And when we reduce the heat flow, we reduce the need to re-heat that drafty air from outside. When it comes to energy efficiency the first and best place to start is air infiltration. We greatly reduced the air infiltration with the new insulation, but we also added a hat and warm boots. What I mean by that is, we improved the insulation in the roof, and we installed insulation in the basement. Maybe it's a silly analogy, but when you think about keeping warm, we always start with the hat and boots! With sustainability in mind, the next project will be to add a deck to the front of this house with rain catchment barrels from the metal roof. They are planning to plant a garden in the spring and the rain catchment system will help to irrigate the new garden.
Builder: East Shore Builders
Photographer: Michael Eric Berube
Michael Eric Berube, Maine Virtual Home Tours
 Grennan Construction
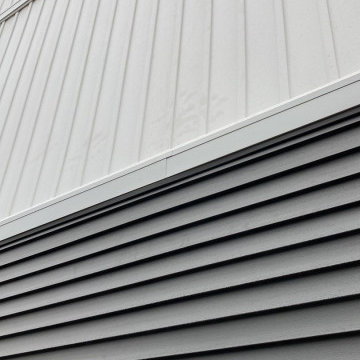
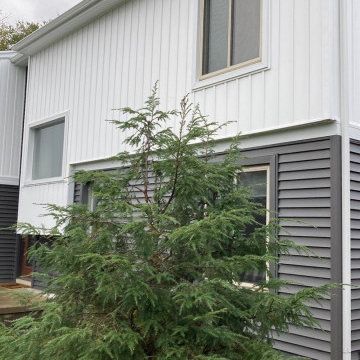
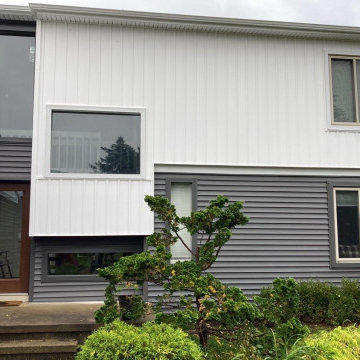
For this home exterior renovation, we removed the existing gutters and downspouts, inspected and replaced any damaged siding, and improved attic ventilation by cutting openings in the eave soffits. To enhance energy efficiency and create a smooth surface, we installed ¾” insulation board, followed by house wrap for added protection. The home was transformed with CertainTeed Monogram .046 vinyl siding in Smokey Gray (clapboard style) on the lower portion and white board and batten siding on the upper portion, separated by a stylish belly band. New vented vinyl soffits, custom bent aluminum trim, and detailed trim work around windows, doors, and fixtures add to the crisp, modern aesthetic. This stunning update improves both curb appeal and long-term durability.
Keywords: Home exterior renovation, vinyl siding installation, CertainTeed Monogram siding, Smokey Gray siding, board and batten siding, attic ventilation, custom aluminum trim, soffit and fascia installation, siding replacement, energy-efficient siding, house wrap, curb appeal upgrade, home improvement, Michigan exterior remodel.
 Mottram Architecture
Timber frame homes offer unique challenges during a remodel. What often makes them beautiful and attractive to most homeowners, also makes them challenging for space requirements.
Context: The lovely couple that owned this home were struggling with some interesting floor plan challenges that just didn't work for their family. The loved the beautiful timbers and woodwork of their home, but the dramatically sloping ceilings on the second floor, particularly in the bathroom, just didn't work for this 1 1/2 bath home. Needing to use the skylight to approach the toilet was a less then ideal scenario. Although the bathroom footprint was more then adequate, the sloped ceiling only made half of the space useable. Check out the Before/After post on our blog to see the photos of the house pre-renovation. As much as they loved all the wood features in their home, another challenge they had was light. The wood ceiling made everything inside the house darker, even with a fantastic array of south facing windows, there were spaces in the home that felt dark and small. When they contacted us they wanted to know how could they make their brighter and more inviting, were there solutions to the 2nd floor sloped ceiling issues, and if they were going to do all of this work, how could they make their home more comfortable and efficient. A nagging water leak in the upstairs bathroom spurred them into action and here is how we solved their dilemma.
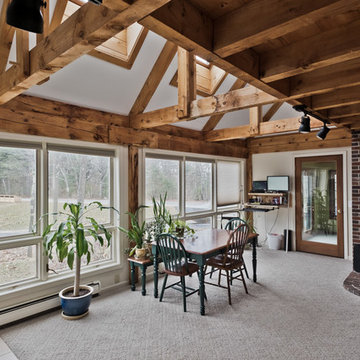
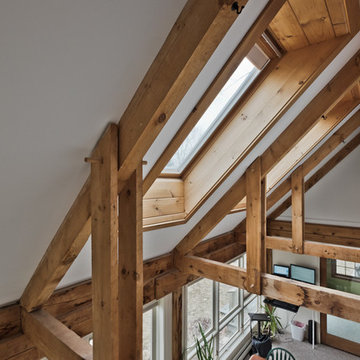
Conclusion: First, we added a little dormer to the rear of the house so we could get full headroom in nearly all of the upstairs bathroom! Then we decided to extend that dormer one more timber bay over to create a walk in closet with natural light and plenty of space. Since we were contemplating energy efficiency, we resolved a nagging issue that is present in a lot of timber frame construction, air tightness. Commonly found in timber frame construction, fiberglass insulation is installed in the rafter bays and board ceilings are installed over top. Unfortunately, board ceilings are anything but air tight, and fiberglass insulation needs to be in an airtight cavity for maximum effectiveness. So we were able to solve two issues at the same time for this homeowner. We removed the board ceiling and fiberglass insulation, we dense packed the rafter bays with cellulose insulation, and installed sheetrock in place of the boards. The boards were salvaged for re-use by the homeowner, and the space and light quality was dramatically improved. Some may think that losing the board ceiling took something away from the space, but what you'll see in the pictures is that it highly accentuates the heavy timbers and really makes them stand out in a beautiful way. Now with this added airtightness, better insulation, and brighter space, the homeowner hardly runs their wood stove, and it's so quiet in the space, an added bonus from changing the insulation. It became necessary to also add a sheetrock ceiling to the living room to hide the plumbing from the new bathroom layout above. Changing this ceiling gave the homeowner some real quality lighting that was lacking in the living room before. The brighter ceiling and new lighting layout completely transforms the living room into a space you want to hang out, even though the layout didn't change at all. When the homeowner saw the finished spaces she said "I can't believe this is my house, I want to live in this house"
Energy Efficiency: I touched a little on the efficiency above, but like all projects done with Mottram Architecture, we always want to leave you with a little extra. Timber frame construction with board ceilings and fiberglass insulation are notoriously leaky! If you want to know what we think about fiberglass insulation, check our our blog post on Why Fiberglass Insulation Sucks. By installing cellulose insulation and covering it with sheetrock we were able to greatly reduce the heat flowing out of this home. It not only improves cashflow it improves the comfort level in the space. Who wants to sit in their living room and feel a draft? Let us remind you, we are not saying cellulose insulation is an air barrier, we use the sheetrock to help with that, but it does significantly reduce the air flow over fiberglass insulation. And when we reduce the airflow, we reduce the heat flow. And when we reduce the heat flow, we reduce the need to re-heat that drafty air from outside. When it comes to energy efficiency the first and best place to start is air infiltration. We greatly reduced the air infiltration with the new insulation, but we also added a hat and warm boots. What I mean by that is, we improved the insulation in the roof, and we installed insulation in the basement. Maybe it's a silly analogy, but when you think about keeping warm, we always start with the hat and boots! With sustainability in mind, the next project will be to add a deck to the front of this house with rain catchment barrels from the metal roof. They are planning to plant a garden in the spring and the rain catchment system will help to irrigate the new garden.
Builder: East Shore Builders
Photographer: Michael Eric Berube
 Mottram Architecture
Timber frame homes offer unique challenges during a remodel. What often makes them beautiful and attractive to most homeowners, also makes them challenging for space requirements.
Context: The lovely couple that owned this home were struggling with some interesting floor plan challenges that just didn't work for their family. The loved the beautiful timbers and woodwork of their home, but the dramatically sloping ceilings on the second floor, particularly in the bathroom, just didn't work for this 1 1/2 bath home. Needing to use the skylight to approach the toilet was a less then ideal scenario. Although the bathroom footprint was more then adequate, the sloped ceiling only made half of the space useable. Check out the Before/After post on our blog to see the photos of the house pre-renovation. As much as they loved all the wood features in their home, another challenge they had was light. The wood ceiling made everything inside the house darker, even with a fantastic array of south facing windows, there were spaces in the home that felt dark and small. When they contacted us they wanted to know how could they make their brighter and more inviting, were there solutions to the 2nd floor sloped ceiling issues, and if they were going to do all of this work, how could they make their home more comfortable and efficient. A nagging water leak in the upstairs bathroom spurred them into action and here is how we solved their dilemma.
Conclusion: First, we added a little dormer to the rear of the house so we could get full headroom in nearly all of the upstairs bathroom! Then we decided to extend that dormer one more timber bay over to create a walk in closet with natural light and plenty of space. Since we were contemplating energy efficiency, we resolved a nagging issue that is present in a lot of timber frame construction, air tightness. Commonly found in timber frame construction, fiberglass insulation is installed in the rafter bays and board ceilings are installed over top. Unfortunately, board ceilings are anything but air tight, and fiberglass insulation needs to be in an airtight cavity for maximum effectiveness. So we were able to solve two issues at the same time for this homeowner. We removed the board ceiling and fiberglass insulation, we dense packed the rafter bays with cellulose insulation, and installed sheetrock in place of the boards. The boards were salvaged for re-use by the homeowner, and the space and light quality was dramatically improved. Some may think that losing the board ceiling took something away from the space, but what you'll see in the pictures is that it highly accentuates the heavy timbers and really makes them stand out in a beautiful way. Now with this added airtightness, better insulation, and brighter space, the homeowner hardly runs their wood stove, and it's so quiet in the space, an added bonus from changing the insulation. It became necessary to also add a sheetrock ceiling to the living room to hide the plumbing from the new bathroom layout above. Changing this ceiling gave the homeowner some real quality lighting that was lacking in the living room before. The brighter ceiling and new lighting layout completely transforms the living room into a space you want to hang out, even though the layout didn't change at all. When the homeowner saw the finished spaces she said "I can't believe this is my house, I want to live in this house"
Energy Efficiency: I touched a little on the efficiency above, but like all projects done with Mottram Architecture, we always want to leave you with a little extra. Timber frame construction with board ceilings and fiberglass insulation are notoriously leaky! If you want to know what we think about fiberglass insulation, check our our blog post on Why Fiberglass Insulation Sucks. By installing cellulose insulation and covering it with sheetrock we were able to greatly reduce the heat flowing out of this home. It not only improves cashflow it improves the comfort level in the space. Who wants to sit in their living room and feel a draft? Let us remind you, we are not saying cellulose insulation is an air barrier, we use the sheetrock to help with that, but it does significantly reduce the air flow over fiberglass insulation. And when we reduce the airflow, we reduce the heat flow. And when we reduce the heat flow, we reduce the need to re-heat that drafty air from outside. When it comes to energy efficiency the first and best place to start is air infiltration. We greatly reduced the air infiltration with the new insulation, but we also added a hat and warm boots. What I mean by that is, we improved the insulation in the roof, and we installed insulation in the basement. Maybe it's a silly analogy, but when you think about keeping warm, we always start with the hat and boots! With sustainability in mind, the next project will be to add a deck to the front of this house with rain catchment barrels from the metal roof. They are planning to plant a garden in the spring and the rain catchment system will help to irrigate the new garden.
Builder: East Shore Builders
Photographer: Michael Eric Berube
Sponsored
Delaware County, OH

Whisler Home Improvement
Franklin County's Committed Home Improvement Professionals
 Grennan Construction
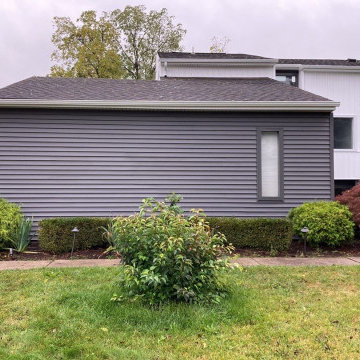
For this home exterior renovation, we removed the existing gutters and downspouts, inspected and replaced any damaged siding, and improved attic ventilation by cutting openings in the eave soffits. To enhance energy efficiency and create a smooth surface, we installed ¾” insulation board, followed by house wrap for added protection. The home was transformed with CertainTeed Monogram .046 vinyl siding in Smokey Gray (clapboard style) on the lower portion and white board and batten siding on the upper portion, separated by a stylish belly band. New vented vinyl soffits, custom bent aluminum trim, and detailed trim work around windows, doors, and fixtures add to the crisp, modern aesthetic. This stunning update improves both curb appeal and long-term durability.
Keywords: Home exterior renovation, vinyl siding installation, CertainTeed Monogram siding, Smokey Gray siding, board and batten siding, attic ventilation, custom aluminum trim, soffit and fascia installation, siding replacement, energy-efficient siding, house wrap, curb appeal upgrade, home improvement, Michigan exterior remodel.
 Grennan Construction
For this home exterior renovation, we removed the existing gutters and downspouts, inspected and replaced any damaged siding, and improved attic ventilation by cutting openings in the eave soffits. To enhance energy efficiency and create a smooth surface, we installed ¾” insulation board, followed by house wrap for added protection. The home was transformed with CertainTeed Monogram .046 vinyl siding in Smokey Gray (clapboard style) on the lower portion and white board and batten siding on the upper portion, separated by a stylish belly band. New vented vinyl soffits, custom bent aluminum trim, and detailed trim work around windows, doors, and fixtures add to the crisp, modern aesthetic. This stunning update improves both curb appeal and long-term durability.
Keywords: Home exterior renovation, vinyl siding installation, CertainTeed Monogram siding, Smokey Gray siding, board and batten siding, attic ventilation, custom aluminum trim, soffit and fascia installation, siding replacement, energy-efficient siding, house wrap, curb appeal upgrade, home improvement, Michigan exterior remodel.
 Mottram Architecture
Timber frame homes offer unique challenges during a remodel. What often makes them beautiful and attractive to most homeowners, also makes them challenging for space requirements.
Context: The lovely couple that owned this home were struggling with some interesting floor plan challenges that just didn't work for their family. The loved the beautiful timbers and woodwork of their home, but the dramatically sloping ceilings on the second floor, particularly in the bathroom, just didn't work for this 1 1/2 bath home. Needing to use the skylight to approach the toilet was a less then ideal scenario. Although the bathroom footprint was more then adequate, the sloped ceiling only made half of the space useable. Check out the Before/After post on our blog to see the photos of the house pre-renovation. As much as they loved all the wood features in their home, another challenge they had was light. The wood ceiling made everything inside the house darker, even with a fantastic array of south facing windows, there were spaces in the home that felt dark and small. When they contacted us they wanted to know how could they make their brighter and more inviting, were there solutions to the 2nd floor sloped ceiling issues, and if they were going to do all of this work, how could they make their home more comfortable and efficient. A nagging water leak in the upstairs bathroom spurred them into action and here is how we solved their dilemma.
Conclusion: First, we added a little dormer to the rear of the house so we could get full headroom in nearly all of the upstairs bathroom! Then we decided to extend that dormer one more timber bay over to create a walk in closet with natural light and plenty of space. Since we were contemplating energy efficiency, we resolved a nagging issue that is present in a lot of timber frame construction, air tightness. Commonly found in timber frame construction, fiberglass insulation is installed in the rafter bays and board ceilings are installed over top. Unfortunately, board ceilings are anything but air tight, and fiberglass insulation needs to be in an airtight cavity for maximum effectiveness. So we were able to solve two issues at the same time for this homeowner. We removed the board ceiling and fiberglass insulation, we dense packed the rafter bays with cellulose insulation, and installed sheetrock in place of the boards. The boards were salvaged for re-use by the homeowner, and the space and light quality was dramatically improved. Some may think that losing the board ceiling took something away from the space, but what you'll see in the pictures is that it highly accentuates the heavy timbers and really makes them stand out in a beautiful way. Now with this added airtightness, better insulation, and brighter space, the homeowner hardly runs their wood stove, and it's so quiet in the space, an added bonus from changing the insulation. It became necessary to also add a sheetrock ceiling to the living room to hide the plumbing from the new bathroom layout above. Changing this ceiling gave the homeowner some real quality lighting that was lacking in the living room before. The brighter ceiling and new lighting layout completely transforms the living room into a space you want to hang out, even though the layout didn't change at all. When the homeowner saw the finished spaces she said "I can't believe this is my house, I want to live in this house"
Energy Efficiency: I touched a little on the efficiency above, but like all projects done with Mottram Architecture, we always want to leave you with a little extra. Timber frame construction with board ceilings and fiberglass insulation are notoriously leaky! If you want to know what we think about fiberglass insulation, check our our blog post on Why Fiberglass Insulation Sucks. By installing cellulose insulation and covering it with sheetrock we were able to greatly reduce the heat flowing out of this home. It not only improves cashflow it improves the comfort level in the space. Who wants to sit in their living room and feel a draft? Let us remind you, we are not saying cellulose insulation is an air barrier, we use the sheetrock to help with that, but it does significantly reduce the air flow over fiberglass insulation. And when we reduce the airflow, we reduce the heat flow. And when we reduce the heat flow, we reduce the need to re-heat that drafty air from outside. When it comes to energy efficiency the first and best place to start is air infiltration. We greatly reduced the air infiltration with the new insulation, but we also added a hat and warm boots. What I mean by that is, we improved the insulation in the roof, and we installed insulation in the basement. Maybe it's a silly analogy, but when you think about keeping warm, we always start with the hat and boots! With sustainability in mind, the next project will be to add a deck to the front of this house with rain catchment barrels from the metal roof. They are planning to plant a garden in the spring and the rain catchment system will help to irrigate the new garden.
Builder: East Shore Builders
Photographer: Michael Eric Berube
 Construction And More Las Vegas
Expert Bathroom Remodel Services by Construction and More Las Vegas
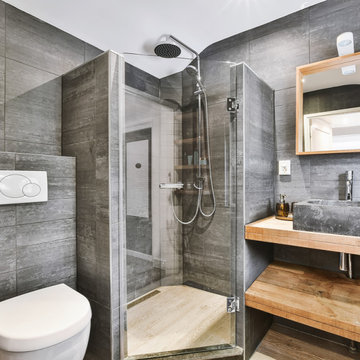
At Construction and More Las Vegas, we understand that the bathroom is one of the most essential and personal spaces in your home. Whether you’re looking to update an outdated bathroom, create a luxurious spa-like retreat, or improve functionality and storage, our expert bathroom remodel services are designed to bring your vision to life. With a focus on quality craftsmanship and personalized design, we serve homeowners throughout Las Vegas and the surrounding areas, including Summerlin, Henderson, Paradise, Spring Valley, and Boulder City.
Why Choose Construction and More Las Vegas for Your Bathroom Remodel?
Expertise and Experience
With years of experience in bathroom remodeling, our team has the knowledge and skills to handle projects of all sizes and complexities. We stay up-to-date with the latest design trends and technologies to ensure that your bathroom remodel not only meets but exceeds your expectations.
Customized Solutions
Every bathroom remodel is unique. We tailor our services to meet your specific needs and preferences, creating a custom bathroom design that reflects your personal style and complements your home’s aesthetic. From vanities to showers, every element is chosen with your vision in mind.
Quality Craftsmanship
Our commitment to quality craftsmanship ensures that your bathroom renovation stands the test of time. We use only the highest quality materials and employ precise techniques to deliver a finished product that is both beautiful and durable.
Comprehensive Services
Our comprehensive bathroom remodeling services cover everything from initial design and planning to final installation and finishing touches. Whether you need a full bathroom renovation or a simple makeover, we provide a seamless and stress-free experience.
Our Bathroom Remodeling Process
Initial Consultation and Planning
The process begins with a detailed consultation to understand your vision, needs, and budget. We provide expert advice on design, layout, and materials to create a plan that enhances both the functionality and aesthetics of your bathroom.
3D Design and Visualization
Using state-of-the-art 3D design software, we create realistic renderings of your proposed bathroom remodel. This allows you to visualize the space and make adjustments before construction begins, ensuring that every detail aligns with your vision.
Custom Vanities and Storage Solutions
Custom vanities are a cornerstone of any bathroom remodel. Our skilled craftsmen design and build vanities that maximize storage and reflect your style. Whether you prefer modern sleek designs or traditional classic looks, we create vanities that are both functional and beautiful.
Countertops and Backsplashes
The choice of countertops and backsplashes significantly impacts the look and feel of your bathroom. We offer a wide range of materials, including granite, quartz, and marble, to suit your style and budget. Our team helps you select the perfect combination that adds elegance and durability to your bathroom.
Lighting and Fixtures
Proper lighting is essential for both functionality and ambiance in your bathroom. We design and install lighting solutions that highlight key areas, such as vanity lighting, recessed lighting, and ambient lighting. Our selection of fixtures includes a variety of styles to match your bathroom design.
Shower and Bathtub Installation
Modern showers and bathtubs are integral to a functional and luxurious bathroom. We guide you in selecting high-quality, stylish options that meet your needs and complement your bathroom design. Our team ensures seamless installation for a cohesive and polished look.
Flooring and Finishes
The right flooring enhances the beauty and practicality of your bathroom. We offer a variety of flooring options, including tile, natural stone, and luxury vinyl, to suit your preferences. Our team ensures professional installation and finishes that withstand the rigors of daily use while adding elegance to your space.
Construction and Project Management
Once the design and materials are finalized, our experienced construction team takes over. We manage the entire remodeling process, from demolition to final touches, with meticulous attention to detail. Our project managers coordinate all aspects of the remodel, ensuring that the work is completed on time and within budget. We keep you informed throughout the process, addressing any concerns and ensuring your satisfaction.
Bathroom Renovation in Las Vegas and Surrounding Areas
If you’re searching for “bathroom renovation in my area,” look no further than Construction and More Las Vegas. We proudly serve Las Vegas and the surrounding communities, including Summerlin, Henderson, Paradise, Spring Valley, and Boulder City. Our local expertise and commitment to customer satisfaction make us the go-to choice for all your bathroom remodeling needs.
Why Bathroom Remodeling Matters
Enhanced Functionality
A well-designed bathroom maximizes space and improves functionality. Whether it’s adding more storage, upgrading fixtures, or reconfiguring the layout, our remodels ensure that your bathroom works better for your daily routine.
Increased Home Value
A bathroom remodel is one of the best investments you can make in your home. An updated, modern bathroom increases your property’s value and appeals to potential buyers if you decide to sell.
Improved Aesthetics
Our remodels transform outdated bathrooms into beautiful, contemporary spaces. From luxurious finishes to modern fixtures, we create a bathroom that is both stylish and inviting.
Energy Efficiency
Upgrading to energy-efficient fixtures and appliances can reduce your utility bills and environmental footprint. We offer a range of eco-friendly options that save water and energy without compromising on performance or style.
Our Commitment to Sustainability
At Construction and More Las Vegas, we are committed to sustainable practices in our bathroom remodels. We source eco-friendly materials and prioritize energy-efficient fixtures to reduce environmental impact. Our team is dedicated to creating beautiful, functional bathrooms that are also kind to the planet.
Testimonials and Case Studies
Our satisfied clients speak to the quality and reliability of our services. We have successfully completed numerous bathroom remodels, each tailored to meet the unique needs and preferences of our clients. Visit our website to read testimonials and view case studies of our work.
Contact Us Today
Ready to start your bathroom remodel? Contact Construction and More Las Vegas for expert bathroom remodeling services that combine functionality, beauty, and quality. Our experienced team is here to bring your vision to life, creating a bathroom that meets your needs and exceeds your expectations. Call us today for a free consultation and let us help you create the bathroom of your dreams. Whether you need a complete bathroom renovation or a custom bathroom remodel, Construction and More Las Vegas is your trusted partner for exceptional bathroom transformation services.
 Mottram Architecture
Timber frame homes offer unique challenges during a remodel. What often makes them beautiful and attractive to most homeowners, also makes them challenging for space requirements.
Context: The lovely couple that owned this home were struggling with some interesting floor plan challenges that just didn't work for their family. The loved the beautiful timbers and woodwork of their home, but the dramatically sloping ceilings on the second floor, particularly in the bathroom, just didn't work for this 1 1/2 bath home. Needing to use the skylight to approach the toilet was a less then ideal scenario. Although the bathroom footprint was more then adequate, the sloped ceiling only made half of the space useable. Check out the Before/After post on our blog to see the photos of the house pre-renovation. As much as they loved all the wood features in their home, another challenge they had was light. The wood ceiling made everything inside the house darker, even with a fantastic array of south facing windows, there were spaces in the home that felt dark and small. When they contacted us they wanted to know how could they make their brighter and more inviting, were there solutions to the 2nd floor sloped ceiling issues, and if they were going to do all of this work, how could they make their home more comfortable and efficient. A nagging water leak in the upstairs bathroom spurred them into action and here is how we solved their dilemma.
Conclusion: First, we added a little dormer to the rear of the house so we could get full headroom in nearly all of the upstairs bathroom! Then we decided to extend that dormer one more timber bay over to create a walk in closet with natural light and plenty of space. Since we were contemplating energy efficiency, we resolved a nagging issue that is present in a lot of timber frame construction, air tightness. Commonly found in timber frame construction, fiberglass insulation is installed in the rafter bays and board ceilings are installed over top. Unfortunately, board ceilings are anything but air tight, and fiberglass insulation needs to be in an airtight cavity for maximum effectiveness. So we were able to solve two issues at the same time for this homeowner. We removed the board ceiling and fiberglass insulation, we dense packed the rafter bays with cellulose insulation, and installed sheetrock in place of the boards. The boards were salvaged for re-use by the homeowner, and the space and light quality was dramatically improved. Some may think that losing the board ceiling took something away from the space, but what you'll see in the pictures is that it highly accentuates the heavy timbers and really makes them stand out in a beautiful way. Now with this added airtightness, better insulation, and brighter space, the homeowner hardly runs their wood stove, and it's so quiet in the space, an added bonus from changing the insulation. It became necessary to also add a sheetrock ceiling to the living room to hide the plumbing from the new bathroom layout above. Changing this ceiling gave the homeowner some real quality lighting that was lacking in the living room before. The brighter ceiling and new lighting layout completely transforms the living room into a space you want to hang out, even though the layout didn't change at all. When the homeowner saw the finished spaces she said "I can't believe this is my house, I want to live in this house"
Energy Efficiency: I touched a little on the efficiency above, but like all projects done with Mottram Architecture, we always want to leave you with a little extra. Timber frame construction with board ceilings and fiberglass insulation are notoriously leaky! If you want to know what we think about fiberglass insulation, check our our blog post on Why Fiberglass Insulation Sucks. By installing cellulose insulation and covering it with sheetrock we were able to greatly reduce the heat flowing out of this home. It not only improves cashflow it improves the comfort level in the space. Who wants to sit in their living room and feel a draft? Let us remind you, we are not saying cellulose insulation is an air barrier, we use the sheetrock to help with that, but it does significantly reduce the air flow over fiberglass insulation. And when we reduce the airflow, we reduce the heat flow. And when we reduce the heat flow, we reduce the need to re-heat that drafty air from outside. When it comes to energy efficiency the first and best place to start is air infiltration. We greatly reduced the air infiltration with the new insulation, but we also added a hat and warm boots. What I mean by that is, we improved the insulation in the roof, and we installed insulation in the basement. Maybe it's a silly analogy, but when you think about keeping warm, we always start with the hat and boots! With sustainability in mind, the next project will be to add a deck to the front of this house with rain catchment barrels from the metal roof. They are planning to plant a garden in the spring and the rain catchment system will help to irrigate the new garden.
Builder: East Shore Builders
Photographer: Michael Eric Berube
 Mottram Architecture
Timber frame homes offer unique challenges during a remodel. What often makes them beautiful and attractive to most homeowners, also makes them challenging for space requirements.
Context: The lovely couple that owned this home were struggling with some interesting floor plan challenges that just didn't work for their family. The loved the beautiful timbers and woodwork of their home, but the dramatically sloping ceilings on the second floor, particularly in the bathroom, just didn't work for this 1 1/2 bath home. Needing to use the skylight to approach the toilet was a less then ideal scenario. Although the bathroom footprint was more then adequate, the sloped ceiling only made half of the space useable. Check out the Before/After post on our blog to see the photos of the house pre-renovation. As much as they loved all the wood features in their home, another challenge they had was light. The wood ceiling made everything inside the house darker, even with a fantastic array of south facing windows, there were spaces in the home that felt dark and small. When they contacted us they wanted to know how could they make their brighter and more inviting, were there solutions to the 2nd floor sloped ceiling issues, and if they were going to do all of this work, how could they make their home more comfortable and efficient. A nagging water leak in the upstairs bathroom spurred them into action and here is how we solved their dilemma.
Conclusion: First, we added a little dormer to the rear of the house so we could get full headroom in nearly all of the upstairs bathroom! Then we decided to extend that dormer one more timber bay over to create a walk in closet with natural light and plenty of space. Since we were contemplating energy efficiency, we resolved a nagging issue that is present in a lot of timber frame construction, air tightness. Commonly found in timber frame construction, fiberglass insulation is installed in the rafter bays and board ceilings are installed over top. Unfortunately, board ceilings are anything but air tight, and fiberglass insulation needs to be in an airtight cavity for maximum effectiveness. So we were able to solve two issues at the same time for this homeowner. We removed the board ceiling and fiberglass insulation, we dense packed the rafter bays with cellulose insulation, and installed sheetrock in place of the boards. The boards were salvaged for re-use by the homeowner, and the space and light quality was dramatically improved. Some may think that losing the board ceiling took something away from the space, but what you'll see in the pictures is that it highly accentuates the heavy timbers and really makes them stand out in a beautiful way. Now with this added airtightness, better insulation, and brighter space, the homeowner hardly runs their wood stove, and it's so quiet in the space, an added bonus from changing the insulation. It became necessary to also add a sheetrock ceiling to the living room to hide the plumbing from the new bathroom layout above. Changing this ceiling gave the homeowner some real quality lighting that was lacking in the living room before. The brighter ceiling and new lighting layout completely transforms the living room into a space you want to hang out, even though the layout didn't change at all. When the homeowner saw the finished spaces she said "I can't believe this is my house, I want to live in this house"
Energy Efficiency: I touched a little on the efficiency above, but like all projects done with Mottram Architecture, we always want to leave you with a little extra. Timber frame construction with board ceilings and fiberglass insulation are notoriously leaky! If you want to know what we think about fiberglass insulation, check our our blog post on Why Fiberglass Insulation Sucks. By installing cellulose insulation and covering it with sheetrock we were able to greatly reduce the heat flowing out of this home. It not only improves cashflow it improves the comfort level in the space. Who wants to sit in their living room and feel a draft? Let us remind you, we are not saying cellulose insulation is an air barrier, we use the sheetrock to help with that, but it does significantly reduce the air flow over fiberglass insulation. And when we reduce the airflow, we reduce the heat flow. And when we reduce the heat flow, we reduce the need to re-heat that drafty air from outside. When it comes to energy efficiency the first and best place to start is air infiltration. We greatly reduced the air infiltration with the new insulation, but we also added a hat and warm boots. What I mean by that is, we improved the insulation in the roof, and we installed insulation in the basement. Maybe it's a silly analogy, but when you think about keeping warm, we always start with the hat and boots! With sustainability in mind, the next project will be to add a deck to the front of this house with rain catchment barrels from the metal roof. They are planning to plant a garden in the spring and the rain catchment system will help to irrigate the new garden.
Builder: East Shore Builders
Photographer: Michael Eric Berube

 Mottram Architecture
Timber frame homes offer unique challenges during a remodel. What often makes them beautiful and attractive to most homeowners, also makes them challenging for space requirements.
Context: The lovely couple that owned this home were struggling with some interesting floor plan challenges that just didn't work for their family. The loved the beautiful timbers and woodwork of their home, but the dramatically sloping ceilings on the second floor, particularly in the bathroom, just didn't work for this 1 1/2 bath home. Needing to use the skylight to approach the toilet was a less then ideal scenario. Although the bathroom footprint was more then adequate, the sloped ceiling only made half of the space useable. Check out the Before/After post on our blog to see the photos of the house pre-renovation. As much as they loved all the wood features in their home, another challenge they had was light. The wood ceiling made everything inside the house darker, even with a fantastic array of south facing windows, there were spaces in the home that felt dark and small. When they contacted us they wanted to know how could they make their brighter and more inviting, were there solutions to the 2nd floor sloped ceiling issues, and if they were going to do all of this work, how could they make their home more comfortable and efficient. A nagging water leak in the upstairs bathroom spurred them into action and here is how we solved their dilemma.
Conclusion: First, we added a little dormer to the rear of the house so we could get full headroom in nearly all of the upstairs bathroom! Then we decided to extend that dormer one more timber bay over to create a walk in closet with natural light and plenty of space. Since we were contemplating energy efficiency, we resolved a nagging issue that is present in a lot of timber frame construction, air tightness. Commonly found in timber frame construction, fiberglass insulation is installed in the rafter bays and board ceilings are installed over top. Unfortunately, board ceilings are anything but air tight, and fiberglass insulation needs to be in an airtight cavity for maximum effectiveness. So we were able to solve two issues at the same time for this homeowner. We removed the board ceiling and fiberglass insulation, we dense packed the rafter bays with cellulose insulation, and installed sheetrock in place of the boards. The boards were salvaged for re-use by the homeowner, and the space and light quality was dramatically improved. Some may think that losing the board ceiling took something away from the space, but what you'll see in the pictures is that it highly accentuates the heavy timbers and really makes them stand out in a beautiful way. Now with this added airtightness, better insulation, and brighter space, the homeowner hardly runs their wood stove, and it's so quiet in the space, an added bonus from changing the insulation. It became necessary to also add a sheetrock ceiling to the living room to hide the plumbing from the new bathroom layout above. Changing this ceiling gave the homeowner some real quality lighting that was lacking in the living room before. The brighter ceiling and new lighting layout completely transforms the living room into a space you want to hang out, even though the layout didn't change at all. When the homeowner saw the finished spaces she said "I can't believe this is my house, I want to live in this house"
Energy Efficiency: I touched a little on the efficiency above, but like all projects done with Mottram Architecture, we always want to leave you with a little extra. Timber frame construction with board ceilings and fiberglass insulation are notoriously leaky! If you want to know what we think about fiberglass insulation, check our our blog post on Why Fiberglass Insulation Sucks. By installing cellulose insulation and covering it with sheetrock we were able to greatly reduce the heat flowing out of this home. It not only improves cashflow it improves the comfort level in the space. Who wants to sit in their living room and feel a draft? Let us remind you, we are not saying cellulose insulation is an air barrier, we use the sheetrock to help with that, but it does significantly reduce the air flow over fiberglass insulation. And when we reduce the airflow, we reduce the heat flow. And when we reduce the heat flow, we reduce the need to re-heat that drafty air from outside. When it comes to energy efficiency the first and best place to start is air infiltration. We greatly reduced the air infiltration with the new insulation, but we also added a hat and warm boots. What I mean by that is, we improved the insulation in the roof, and we installed insulation in the basement. Maybe it's a silly analogy, but when you think about keeping warm, we always start with the hat and boots! With sustainability in mind, the next project will be to add a deck to the front of this house with rain catchment barrels from the metal roof. They are planning to plant a garden in the spring and the rain catchment system will help to irrigate the new garden.
Builder: East Shore Builders
Photographer: Michael Eric Berube
 Grennan Construction
For this home exterior renovation, we removed the existing gutters and downspouts, inspected and replaced any damaged siding, and improved attic ventilation by cutting openings in the eave soffits. To enhance energy efficiency and create a smooth surface, we installed ¾” insulation board, followed by house wrap for added protection. The home was transformed with CertainTeed Monogram .046 vinyl siding in Smokey Gray (clapboard style) on the lower portion and white board and batten siding on the upper portion, separated by a stylish belly band. New vented vinyl soffits, custom bent aluminum trim, and detailed trim work around windows, doors, and fixtures add to the crisp, modern aesthetic. This stunning update improves both curb appeal and long-term durability.
Keywords: Home exterior renovation, vinyl siding installation, CertainTeed Monogram siding, Smokey Gray siding, board and batten siding, attic ventilation, custom aluminum trim, soffit and fascia installation, siding replacement, energy-efficient siding, house wrap, curb appeal upgrade, home improvement, Michigan exterior remodel.
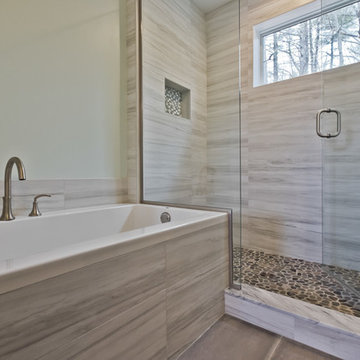 Mottram Architecture
Timber frame homes offer unique challenges during a remodel. What often makes them beautiful and attractive to most homeowners, also makes them challenging for space requirements.
Context: The lovely couple that owned this home were struggling with some interesting floor plan challenges that just didn't work for their family. The loved the beautiful timbers and woodwork of their home, but the dramatically sloping ceilings on the second floor, particularly in the bathroom, just didn't work for this 1 1/2 bath home. Needing to use the skylight to approach the toilet was a less then ideal scenario. Although the bathroom footprint was more then adequate, the sloped ceiling only made half of the space useable. Check out the Before/After post on our blog to see the photos of the house pre-renovation. As much as they loved all the wood features in their home, another challenge they had was light. The wood ceiling made everything inside the house darker, even with a fantastic array of south facing windows, there were spaces in the home that felt dark and small. When they contacted us they wanted to know how could they make their brighter and more inviting, were there solutions to the 2nd floor sloped ceiling issues, and if they were going to do all of this work, how could they make their home more comfortable and efficient. A nagging water leak in the upstairs bathroom spurred them into action and here is how we solved their dilemma.
Conclusion: First, we added a little dormer to the rear of the house so we could get full headroom in nearly all of the upstairs bathroom! Then we decided to extend that dormer one more timber bay over to create a walk in closet with natural light and plenty of space. Since we were contemplating energy efficiency, we resolved a nagging issue that is present in a lot of timber frame construction, air tightness. Commonly found in timber frame construction, fiberglass insulation is installed in the rafter bays and board ceilings are installed over top. Unfortunately, board ceilings are anything but air tight, and fiberglass insulation needs to be in an airtight cavity for maximum effectiveness. So we were able to solve two issues at the same time for this homeowner. We removed the board ceiling and fiberglass insulation, we dense packed the rafter bays with cellulose insulation, and installed sheetrock in place of the boards. The boards were salvaged for re-use by the homeowner, and the space and light quality was dramatically improved. Some may think that losing the board ceiling took something away from the space, but what you'll see in the pictures is that it highly accentuates the heavy timbers and really makes them stand out in a beautiful way. Now with this added airtightness, better insulation, and brighter space, the homeowner hardly runs their wood stove, and it's so quiet in the space, an added bonus from changing the insulation. It became necessary to also add a sheetrock ceiling to the living room to hide the plumbing from the new bathroom layout above. Changing this ceiling gave the homeowner some real quality lighting that was lacking in the living room before. The brighter ceiling and new lighting layout completely transforms the living room into a space you want to hang out, even though the layout didn't change at all. When the homeowner saw the finished spaces she said "I can't believe this is my house, I want to live in this house"
Energy Efficiency: I touched a little on the efficiency above, but like all projects done with Mottram Architecture, we always want to leave you with a little extra. Timber frame construction with board ceilings and fiberglass insulation are notoriously leaky! If you want to know what we think about fiberglass insulation, check our our blog post on Why Fiberglass Insulation Sucks. By installing cellulose insulation and covering it with sheetrock we were able to greatly reduce the heat flowing out of this home. It not only improves cashflow it improves the comfort level in the space. Who wants to sit in their living room and feel a draft? Let us remind you, we are not saying cellulose insulation is an air barrier, we use the sheetrock to help with that, but it does significantly reduce the air flow over fiberglass insulation. And when we reduce the airflow, we reduce the heat flow. And when we reduce the heat flow, we reduce the need to re-heat that drafty air from outside. When it comes to energy efficiency the first and best place to start is air infiltration. We greatly reduced the air infiltration with the new insulation, but we also added a hat and warm boots. What I mean by that is, we improved the insulation in the roof, and we installed insulation in the basement. Maybe it's a silly analogy, but when you think about keeping warm, we always start with the hat and boots! With sustainability in mind, the next project will be to add a deck to the front of this house with rain catchment barrels from the metal roof. They are planning to plant a garden in the spring and the rain catchment system will help to irrigate the new garden.
Builder: East Shore Builders
Photographer: Michael Eric Berube
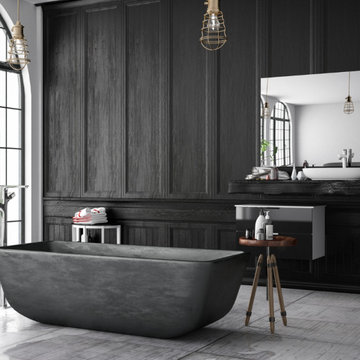 Construction And More Las Vegas
Expert Bathroom Remodel Services by Construction and More Las Vegas
At Construction and More Las Vegas, we understand that the bathroom is one of the most essential and personal spaces in your home. Whether you’re looking to update an outdated bathroom, create a luxurious spa-like retreat, or improve functionality and storage, our expert bathroom remodel services are designed to bring your vision to life. With a focus on quality craftsmanship and personalized design, we serve homeowners throughout Las Vegas and the surrounding areas, including Summerlin, Henderson, Paradise, Spring Valley, and Boulder City.
Why Choose Construction and More Las Vegas for Your Bathroom Remodel?
Expertise and Experience
With years of experience in bathroom remodeling, our team has the knowledge and skills to handle projects of all sizes and complexities. We stay up-to-date with the latest design trends and technologies to ensure that your bathroom remodel not only meets but exceeds your expectations.
Customized Solutions
Every bathroom remodel is unique. We tailor our services to meet your specific needs and preferences, creating a custom bathroom design that reflects your personal style and complements your home’s aesthetic. From vanities to showers, every element is chosen with your vision in mind.
Quality Craftsmanship
Our commitment to quality craftsmanship ensures that your bathroom renovation stands the test of time. We use only the highest quality materials and employ precise techniques to deliver a finished product that is both beautiful and durable.
Comprehensive Services
Our comprehensive bathroom remodeling services cover everything from initial design and planning to final installation and finishing touches. Whether you need a full bathroom renovation or a simple makeover, we provide a seamless and stress-free experience.
Our Bathroom Remodeling Process
Initial Consultation and Planning
The process begins with a detailed consultation to understand your vision, needs, and budget. We provide expert advice on design, layout, and materials to create a plan that enhances both the functionality and aesthetics of your bathroom.
3D Design and Visualization
Using state-of-the-art 3D design software, we create realistic renderings of your proposed bathroom remodel. This allows you to visualize the space and make adjustments before construction begins, ensuring that every detail aligns with your vision.
Custom Vanities and Storage Solutions
Custom vanities are a cornerstone of any bathroom remodel. Our skilled craftsmen design and build vanities that maximize storage and reflect your style. Whether you prefer modern sleek designs or traditional classic looks, we create vanities that are both functional and beautiful.
Countertops and Backsplashes
The choice of countertops and backsplashes significantly impacts the look and feel of your bathroom. We offer a wide range of materials, including granite, quartz, and marble, to suit your style and budget. Our team helps you select the perfect combination that adds elegance and durability to your bathroom.
Lighting and Fixtures
Proper lighting is essential for both functionality and ambiance in your bathroom. We design and install lighting solutions that highlight key areas, such as vanity lighting, recessed lighting, and ambient lighting. Our selection of fixtures includes a variety of styles to match your bathroom design.
Shower and Bathtub Installation
Modern showers and bathtubs are integral to a functional and luxurious bathroom. We guide you in selecting high-quality, stylish options that meet your needs and complement your bathroom design. Our team ensures seamless installation for a cohesive and polished look.
Flooring and Finishes
The right flooring enhances the beauty and practicality of your bathroom. We offer a variety of flooring options, including tile, natural stone, and luxury vinyl, to suit your preferences. Our team ensures professional installation and finishes that withstand the rigors of daily use while adding elegance to your space.
Construction and Project Management
Once the design and materials are finalized, our experienced construction team takes over. We manage the entire remodeling process, from demolition to final touches, with meticulous attention to detail. Our project managers coordinate all aspects of the remodel, ensuring that the work is completed on time and within budget. We keep you informed throughout the process, addressing any concerns and ensuring your satisfaction.
Bathroom Renovation in Las Vegas and Surrounding Areas
If you’re searching for “bathroom renovation in my area,” look no further than Construction and More Las Vegas. We proudly serve Las Vegas and the surrounding communities, including Summerlin, Henderson, Paradise, Spring Valley, and Boulder City. Our local expertise and commitment to customer satisfaction make us the go-to choice for all your bathroom remodeling needs.
Why Bathroom Remodeling Matters
Enhanced Functionality
A well-designed bathroom maximizes space and improves functionality. Whether it’s adding more storage, upgrading fixtures, or reconfiguring the layout, our remodels ensure that your bathroom works better for your daily routine.
Increased Home Value
A bathroom remodel is one of the best investments you can make in your home. An updated, modern bathroom increases your property’s value and appeals to potential buyers if you decide to sell.
Improved Aesthetics
Our remodels transform outdated bathrooms into beautiful, contemporary spaces. From luxurious finishes to modern fixtures, we create a bathroom that is both stylish and inviting.
Energy Efficiency
Upgrading to energy-efficient fixtures and appliances can reduce your utility bills and environmental footprint. We offer a range of eco-friendly options that save water and energy without compromising on performance or style.
Our Commitment to Sustainability
At Construction and More Las Vegas, we are committed to sustainable practices in our bathroom remodels. We source eco-friendly materials and prioritize energy-efficient fixtures to reduce environmental impact. Our team is dedicated to creating beautiful, functional bathrooms that are also kind to the planet.
Testimonials and Case Studies
Our satisfied clients speak to the quality and reliability of our services. We have successfully completed numerous bathroom remodels, each tailored to meet the unique needs and preferences of our clients. Visit our website to read testimonials and view case studies of our work.
Contact Us Today
Ready to start your bathroom remodel? Contact Construction and More Las Vegas for expert bathroom remodeling services that combine functionality, beauty, and quality. Our experienced team is here to bring your vision to life, creating a bathroom that meets your needs and exceeds your expectations. Call us today for a free consultation and let us help you create the bathroom of your dreams. Whether you need a complete bathroom renovation or a custom bathroom remodel, Construction and More Las Vegas is your trusted partner for exceptional bathroom transformation services.
 American Home Improvement Inc.
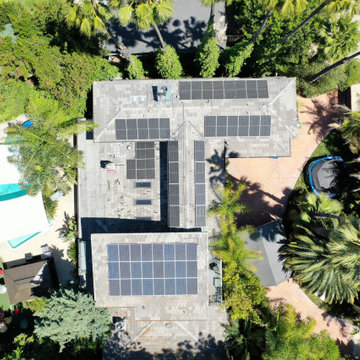
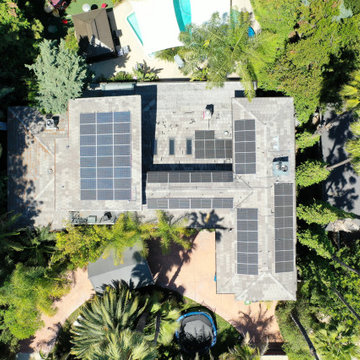
COMPLETE NEW SOLAR SYSTEM. GO GREEN. ENERGY EFFICIENT
Large minimalist pink two-story exterior home photo in Los Angeles with a tile roof and a gray roof
Large minimalist pink two-story exterior home photo in Los Angeles with a tile roof and a gray roof
 American Home Improvement Inc.
COMPLETE NEW SOLAR SYSTEM. GO GREEN. ENERGY EFFICIENT
Large minimalist pink two-story exterior home photo in Los Angeles with a tile roof and a gray roof
Large minimalist pink two-story exterior home photo in Los Angeles with a tile roof and a gray roof
 American Home Improvement Inc.
COMPLETE NEW SOLAR SYSTEM. GO GREEN. ENERGY EFFICIENT
Inspiration for a large modern pink two-story exterior home remodel in Los Angeles with a tile roof and a gray roof
Inspiration for a large modern pink two-story exterior home remodel in Los Angeles with a tile roof and a gray roof
19