
Search results for "Initial deposit" in Home Design Ideas
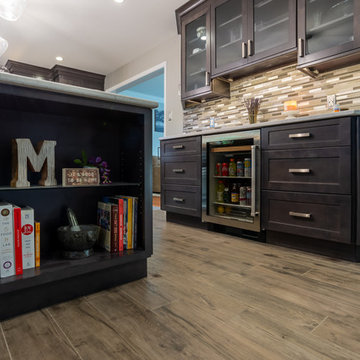
 Main Line Kitchen Design
Call Today and begin our process:
First, we cover any questions you have over the phone. Usually we can give you a close approximation of what you are likely to spend on your kitchen by simply asking you a few important questions. If you would like to proceed, we charge you a $150 deposit. For this deposit our expert designer will measure your kitchen, transfer the measurements to their computer and create your individual kitchen design. And at a second 2 hour appointment they will go over the detailed 3D designs with you.
At our second meeting we display and go over our completed designs and make changes to them on our laptops with you present. Depending on your and our availability, this meeting can take place within the following week. Pricing for the cabinetry you select is just the click of a button and if you are able to provide us preferences in counter tops, fixtures, appliances, flooring, and back splash, we can give you reliable pricing estimates for each area as well as estimates for the construction costs.
We are glad to work with a contractor you have selected or with one of the many we regularly refer on the basis of the quality of their work and with no remuneration to Main Line Kitchen Design.
Unless you require printouts of our work, everything to this point is included in our initial $150 deposit.
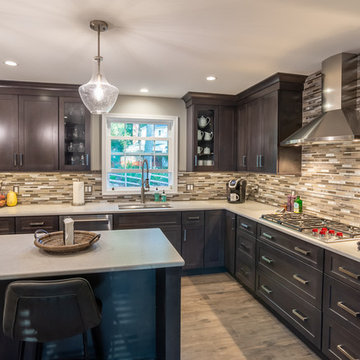 Main Line Kitchen Design
Call Today and begin our process:
First, we cover any questions you have over the phone. Usually we can give you a close approximation of what you are likely to spend on your kitchen by simply asking you a few important questions. If you would like to proceed, we charge you a $150 deposit. For this deposit our expert designer will measure your kitchen, transfer the measurements to their computer and create your individual kitchen design. And at a second 2 hour appointment they will go over the detailed 3D designs with you.
At our second meeting we display and go over our completed designs and make changes to them on our laptops with you present. Depending on your and our availability, this meeting can take place within the following week. Pricing for the cabinetry you select is just the click of a button and if you are able to provide us preferences in counter tops, fixtures, appliances, flooring, and back splash, we can give you reliable pricing estimates for each area as well as estimates for the construction costs.
We are glad to work with a contractor you have selected or with one of the many we regularly refer on the basis of the quality of their work and with no remuneration to Main Line Kitchen Design.
Unless you require printouts of our work, everything to this point is included in our initial $150 deposit.
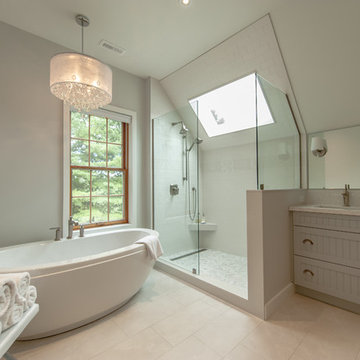
 Mary Dancey Interiors
Shower Stall With a View.
Mosaic tile used for the vanity backsplash was also installed in the shower surrounded by rows of soft white porcelain subway tile. A natural mosaic stone shower floor was installed with an infinity drain and a footrest doubles as a shelf. A glass enclosure and quartz clad skylight complete the look.
Lisa Piellusch Picture Your Life Photography
Find the right local pro for your project

 Zelaya Properties LLC
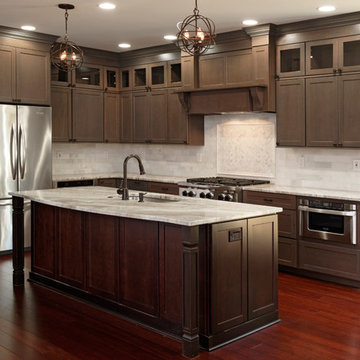
We used: Custom cherry cabinetry in Arts & Crafts Shaker style by Kabinart in Boulder and Espresso stains. Liberty Hardware Venetian bronze 1-1/2" cabinet knobs. KitchenAid Architect II Series 22 CF counter-depth French door refrigerator. KitchenAid Architect Series II 27" convection single wall oven. KitchenAid 36" 6-burner dual fuel freestanding commercial-style range. KitchenAid Architect II Series 24" dishwasher. Sharp Insight Pro Series 24" built-in microwave drawer (Model #KB6524PS). Crystorama Solaris 12" wide pendant lights in English bronze. Granite countertops in Brown Fantasy. 3"x6" polished marble backsplash.
Paint colors:
Walls: Glidden Silver Cloud 30YY 63/024
Ceilings/Trims/Doors: Glidden Swan White GLC23
Robert B. Narod Photography

 Tile Doctor Ltd
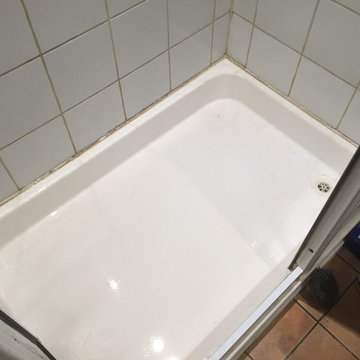
The photographs below are taken from a house in the old market town of Basingstoke which is now the largest town in Hampshire. I was asked to address a very severe case of Limescale build-up in a shower cubicle. The wall tiles were Ceramic and a shocking amount of Limescale had deposited itself on them and the shower tray over the years; the owners were going to have to replace everything if Tile Doctor could not come to the rescue!
The photos below really demonstrate the extent of the problem and needless to say the Gauntlet had been laid down and I was ready for a challenge!
My first task was to provide the Ceramic tiled walls with an initial clean. I did this by firstly mixing a diluted solution of the high alkaline cleaner known as Tile Doctor Pro Clean and then applying this on the tiles and leaving it to dwell for a while before scrubbing it in by hand in order to remove any surface dirt and scum. This was then washed off and I set my mind to the main task at hand: the Limescale removal.
To remove the Limescale it is necessary to apply an acidic product. However, there is an issue for homeowners that most products readily available on the market come in a liquid form, which of course simply drips down the tile, and therefore does not work to the best of its abilities. Fortunately, Tile Doctor recently launched a new product by the name of Acid Gel. Since it’s in a gel form it stays put on the surface and does not evaporate or dry out too quickly. This allows it time to break down the Limescale and other difficult stains.
Acid Gel was thus applied to the affected areas and left to dwell for a short while. I then scrubbed it deeply into the tile and grout lines, and follow up with an application of steam to tackle the stubborn areas and help the Acid Gel to tackle the Limescale.
The results were absolutely fantastic, and even the shower tray – which was in a very poor state indeed – came up very clean. Needless to say, my client was very pleased that they now do not have to replace the shower!
Charles Okwechime
Hampshire Tile Doctor
 Tile Doctor Ltd
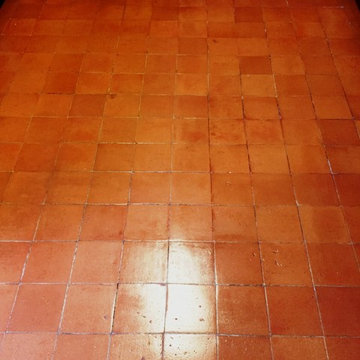
Not too long ago I visited a client who had just moved into a lovely old cottage in Milton, Oxfordshire. She wanted to restore many of the antique features of the building, including a fantastic Quarry tiled floor in the kitchen.
Quarry is typically a robust, hard wearing stone, but in a high traffic area like a kitchen, the tiles will need regular maintenance. These tiles clearly hadn’t seen a thorough clean and fresh seal in a long time, and so I was called in to provide just that.
On the first day of work, I gave the Quarry tiles a deep clean using a strong solution of Tile Doctor Pro-Clean and water. Pro-Clean is a versatile alkaline cleaner that also helps to break down any old and no longer effectual sealer remaining on the tiles.
The solution was applied evenly to the floor and left to dwell for half an hour, allowing time for it to seep into the stone to get underneath and lift out the ingrained dirt. I then removed the dirt by agitating the solution with a scrubbing pad fitted to a rotary floor scrubber. I worked in small sections at first, and gradually finished the entire floor.
After completing the initial clean, I rinsed away the soiled solution and vacuumed up the excess moisture using a wet-vac machine. I then scrubbed the floor an acid wash using a dilution of Tile Doctor Grout Clean-Up to remove grout smears and other mineral type deposits. The resulting solution was then removed in a similar fashion using a wet-vac.
The final step in the cleaning process was to rinse the floor with Tile Doctor pH Neutral Cleaner to remove any trace of product helps to tackle any remaining dirt and reset the pH balance of the tiles before sealing.
After leaving the floor to dry overnight, I returned the next day to the house to seal the floor with Tile Doctor Seal & Go, a water-based topical sealer which gives the floor an aesthetically pleasing sheen and a robust surface seal.
The photos demonstrate the results better than this short account can, needless to say the floor is now transformed.
Barry Woodward
Oxfordshire Tile Doctor
 Tile Doctor Ltd
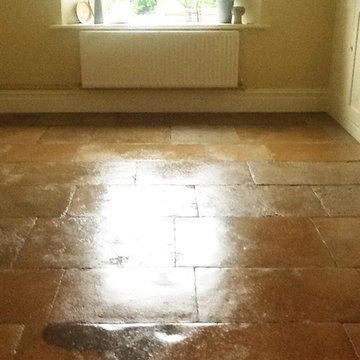
This property was situated in the tiny, yet picturesque village of Grafton Underwood in Kettering, Northamptonshire. The village has only a population numbering a few hundred and, interestingly enough, is the childhood home of the famous ‘Bridget Jones’ character. I have previously worked on a number of floors in Grafton Underwood, and on this particular occasion I was called to complete the job through a recommendation – which is always welcome!
This particular customer had two floors that needed re-finishing; the first was a polished Limestone tiled conservatory (which I will cover in a separate post as the process was different) and the second a Flagstone tiled living room; so on a rather dull day in November, I began my work.
The sealer on the Flagstone tiled living room had failed in certain places, resulting in the floor becoming difficult to clean due to dirt becoming ingrained in the stone. The decline in the sealer is not uncommon, as they do wear down over time – especially in an area of high traffic like a living room. To resolve this issue, the old surface seal needed to be stripped back and re-sealed.
To remove what was left of the old sealer, I applied a dilution of Tile Doctor Remove and Go and scrubbed it into the floor using a rotary machine fitted with black stripping pads. I then gave the floor an initial rinse, before paying special attention to scrubbing the stubborn spots, making sure all of the sealer was removed.
I then gave the floor an acid wash using Tile Doctor Grout Clean-Up in order to remove grout haze and other mineral deposits which were evident. Due to its acidic properties, you have to be very careful with this product on any type of stone, so I didn’t let it dwell for too long and made sure the floor was thoroughly rinsed down afterwards, with all solutions extracted using a wet-vac machine.
The floor was left to dry for more than 24 hours, before I returned to re-seal it using Tile Doctor Seal & Go. This product provides both a stain resistant surface seal and the durable low-sheen finish requested by my client. Seal & Go is suitable for use on internal unsealed, porous surfaces.
I guess the photographs don’t really do the transformation justice however the freshly re-sealed Flagstone living room certainly brightened up what was a very dreary autumn day!
Phil Vissian
Northamptonshire Tile Doctor
 DryAway by Jilidoni Designs
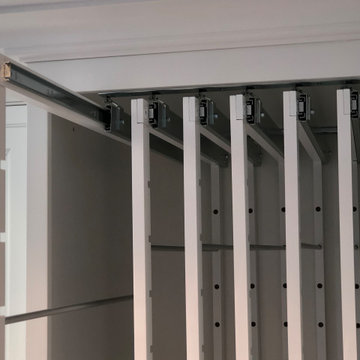
DryAway’s revolutionary and patented design is the smarter way to dry your clothes. DryAway is a series of drying racks that retract out of sight and out of the way, that saves you money while protecting the environment and your clothes! Easily installed in 2, 4, 6 or 8 frames and available in five colors. Visit us online at DryAway.net or Call us today! 855-379-2929
 KINGDOM WOODWORKS
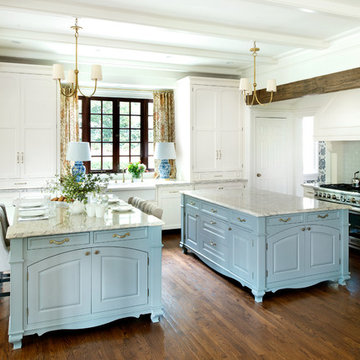
Collaboration with Canonbury Homes and Frank Neely Design Associates.
Inspiration for a timeless open concept kitchen remodel in Atlanta with beaded inset cabinets and two islands
Inspiration for a timeless open concept kitchen remodel in Atlanta with beaded inset cabinets and two islands

 Tile Doctor Ltd
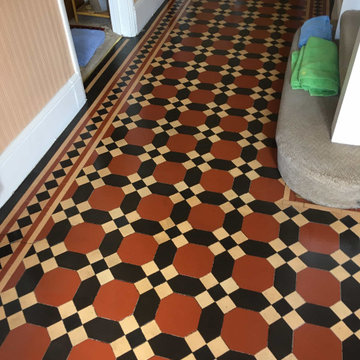
This Victorian floor in Twickenham, Middlesex was in good physical condition for its age but needed a good deep clean. Our customer had informed us that they had never cleaned or sealed the floor in the sixteen years that they had lived there so it was well overdue.
I went over to survey the floor and completed a test clean on a small section of tiling to see which products/techniques would work best. I like to do this as it demonstrates to the client what can be done, and it allows me to come up with an accurate price for doing the work.
As you can see from the pictures, there was quite a difference in the test patch compared to the rest of the floor. Years of foot traffic from the street had taken its’ toll and the floor was very dirty. Luckily, the floor was in very good condition and had not worn too badly.
Once they had seen the test patch, they were confident that it would be worth go ahead with my quote. It would ensure that the period feature was retained for many years to come. The colours on the floor were quite faded so it would be nice to get it restored.
I started the cleaning process by first taping up the surrounding skirting boards and doors to ensure they were protected from potential splashing. Cleaning involved spraying the Victorian tiles with a strong dilution of Tile Doctor Pro-Clean which is a dedicated Tile and Grout cleaning product. This was left to soak in for about ten minutes and then scrubbed in using a black pad fitted to a heavy-duty rotary scrubber.
This gives the floor a good mechanical scrub and works wonders releasing the ground-in dirt and soil from the tiles. The strong dilution of Pro-Clean will also remove any remaining sealers from the tile, however after sixteen years I doubted there would much trace of sealer left. Once done the floor was rinsed with water and all the soils removed with a wet vacuum.
Following the initial clean the colours were already much stronger. Next step however was to improve on that by giving the floor an acid rinse using Tile Doctor Grout Clean-Up. This removes mineral deposits and generally brightens up the appearance of the tile. After another round of scrubbing the floor was rinsed with our high-pressure washer and then vacuumed, extracting all of the dirty water and dirt away in one go. The floor was looking a lot better and was left to dry overnight.
After allowing the floor to dry overnight, we returned the next day to seal the floor. First, checking the floor was dry using the damp meter. Floors of this age can take a little longer to dry as there is no damp-proof membrane so it’s always worth checking as applying a sealer to damp tiles is not a good idea.
Once I was satisfied it was dry eight coats of Tile Doctor Seal and Go sheen finish sealer were applied. This takes a while to do as each coat needs to dry before applying the next. The sealer will protect the Victorian tiles for dirt and stains, it also enhanced the colours in the tile and will make it easier to keep the floor clean going forward.
My client was very pleased with the floor and mentioned that they should have called me in sooner! For aftercare cleaning I recommended Tile Doctor Neutral Clean which is an effective cleaner with a neutral pH, its designed for cleaning tiles without degrading the sealer.
Jonathan Oldham
South Middlesex Tile Doctor
 Jack Calderone
This bedroom and full bathroom are part of an adventuresome project my wife and I embarked upon to create a complete apartment in the basement of our townhouse. We designed a floor plan that creatively and efficiently used all of the 385-square-foot-space, without sacrificing beauty, comfort or function – and all without breaking the bank! To maximize our budget, we did the work ourselves and added everything from thrift store finds to DIY wall art to bring it all together.
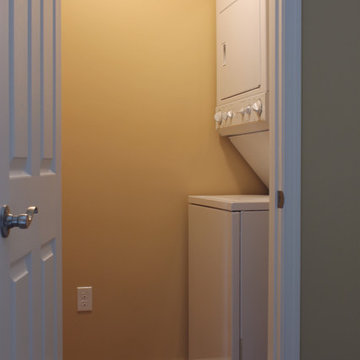
No need to share a laundry in this apartment. In fact, no need to own a laundry basket since the washer/dryer is right in the clothes closet! We found this stacked unit on craigslist for $200.
 Benson Designs LLC
Jane Benson
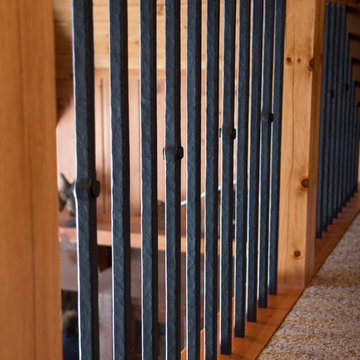
Example of a large mountain style wooden l-shaped staircase design with wooden risers
Example of a large mountain style wooden l-shaped staircase design with wooden risers
 DISC Interiors
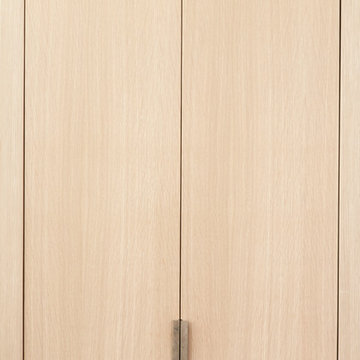
Inspiration for a modern kitchen remodel in Los Angeles with flat-panel cabinets and light wood cabinets


 Tile Doctor Ltd
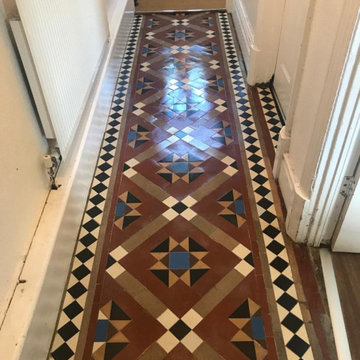
I recently worked on the restoration of a Victorian tiled hallway in Cwmbran Wales which is six miles North of Newport. As you can see from the photographs the floor was in quite a neglected dirty state and many of the the black and white border tiles needed removing and replacing. The worst part was the area by the front door where most of the tiles had been removed and then backfilled with concrete. I can only assume at some point in the past it was deemed to difficult or expensive to restore the floor, so they simply covered it up.
After visiting to survey the floor I did offer to source replacements for the concreted section and restore that as part of the work however my client’s budget would not stretch to that at the time. My quote was therefore focused on the main section of flooring and included replacing border tiles, deep cleaning the whole floor and then sealing the tiles to add protection. Although I did need to check that I could indeed source the replacement tiles before being able to provide the quote which as it turned out would not be an issue.
They were happy to go ahead and we arranged a suitable time to carry out the work which would enable me to work in the property whilst minimising contact with the owners due to the Covid-19 situation.
I spend the first day sorting out the black and white border tiles which needed to be gently prised out of position without upsetting the main part of the floor. The exposed subfloor was then cleaned up to remove old adhesive and replacements were fitted where required and secured into place. The floor would need to be solid before cleaning so that was left for day two so the new adhesive could go off overnight.
On day two I gave the floor an initial clean using a combination of Tile Doctor Pro-Clean and Remove and Go diluted with water. This produces a strong cleaner/stripper that will tackle dirt and remove coatings such as previous sealers. The old tiles had accumulated years of ingrained dirt, so I needed this extra power to remove the years of dirt and contaminates from the tile. It was sprayed onto the tiles and then left to soak in for ten minutes before being actively scrubbed into the tile using a rotary machine fitted with a black scrubbing pad. The soil was then rinsed off with water and extracted with a wet vacuum. The floor was inspected, and the process repeated on the tough stains until I was satisfied all the dirt had been removed.
Next the floor was treated to an acid wash using Tile Doctor Acid Gel using a similar method as before. This is an important treatment for these old Victorian floors that have no damp proof course as it neutralises efflorescent salts trapped in the tile which can appear as white salt deposits later. Once I was happy with the condition of the floor it was given a final rinse and left to dry off. I use a wet vacuum to remove liquids from the floor and on this last extraction I spent extra time to remove as much moisture from the tiles as possible.
I came back a few days later and after checking the tiles were dry using a damp meter, I started the application of the sealer. For this floor I applied seven coats of Tile Doctor Seal and Go for a satin finish. Tile Doctor Seal and Go is a specially formulated water-based sealer that provides both stain resistance and a durable low-sheen finish. It is perfect on a floor of this age where it leaves a lovely finish and will remain durable in what is a essentially a high traffic area.
Although we didn’t manage to sort out the area by the front door the client managed to fit a made to measure coir door mat along with carpet bar which was quite practical and looked fine so they were able to resolve that problem without blowing their budget.
The client was over the moon with results, the floor had a lovely pattern and the colours now shone through. I suggested the use of Tile Doctor Neutral Tile Cleaner to keep the floor clean and in good condition. It is neutral in pH so will ensure that the newly applied sealer stays in place and will ensure maintenance is nice and easy for them.
Paul Wales
Monmouthshire Tile Doctor
 Glenview Haus – Custom Doors & Wine Cellars
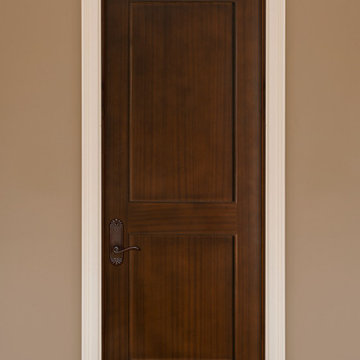
Don't let your interior doors be written off as some functional piece of hardware. Come to Glenview Haus and make your interior doors just as stunning as the rest of your home. Glenview Haus' Traditional Wood Interior Door Collection ensures that every door stands out with all the elegance and style. Our Traditional wooden doors are finely made by expert artisans and designed with all of your needs in mind.
 Village Home Stores
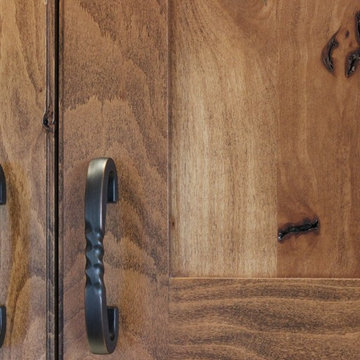
Full-overlay Rustic Beech cabinets in the "Charleston" door style and "Briarwood" finish.
Village Home Stores
Example of a large mountain style kitchen design in Chicago
Example of a large mountain style kitchen design in Chicago
2