
Search results for "Inspect supported" in Home Design Ideas
 Talon Construction Inc.
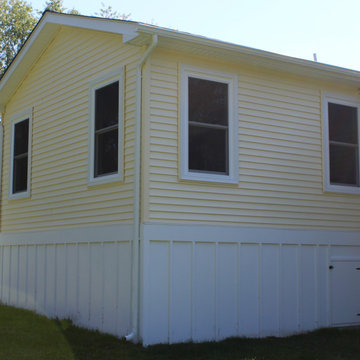
Designing and building a kitchen addition is a complex process that involves multiple steps and considerations. Here is a general outline to help you get started on your kitchen addition project:
Define Your Goals and Budget:
• Determine the purpose of the kitchen addition. Is it for more cooking space, a dining area, or a combination of both?
• Establish a realistic budget for your project. Consider all costs, including construction, permits, materials, and furnishings.
Hire a Design Professional:
• Seek the services of a design build company who specializes in kitchen additions.
• Discuss your vision, needs, and budget with the design professional to create a design concept.
Site Evaluation:
• Assess the existing space and structural condition of your home to ensure it can support the addition.
• Consider factors like zoning regulations, setbacks, and building codes.
Design Development:
• Collaborate with your design professional to refine the concept, including the layout, size, and architectural style.
• Choose materials, finishes, and fixtures that fit your design and budget.
Obtain Permits:
• Consult with your local design build contractor to determine the necessary permits and approvals.
• Prepare and submit all required documents, including architectural drawings and engineering plans.
Create Construction Documents:
• Work with your design build professional to develop detailed construction drawings and specifications.
• These documents will serve as a guide for contractors during construction.
Hire a design build contractor:
• Check references, credentials, and licenses before selecting a contractor.
• Sign a detailed contract that outlines the scope of work, timeline, and payment schedule.
Construction Phase:
• Demolition: If needed, remove any existing structures or walls.
• Foundation: Construct the foundation for the addition.
• Framing: Build the structural framework of the addition.
• Plumbing, Electrical, and HVAC: Install or update utilities as required.
• Insulation: Ensure proper insulation for energy efficiency.
• Drywall and Finish Work: Complete the walls and ceilings.
• Flooring and Cabinetry: Install flooring and kitchen cabinets.
• Appliances and Fixtures: Add appliances, plumbing fixtures, and lighting.
• Paint and Finish: Apply paint and finishes to achieve the desired look.
• Final Inspection: Schedule inspections to ensure compliance with building codes.
Final Inspections and Approvals:
• Arrange for final inspections to ensure the addition meets all safety and code requirements.
• Obtain any necessary certificates of occupancy or compliance.
Move In and Enjoy:
• Once all inspections and approvals are received, you can move into your new kitchen addition and start enjoying it.
Remember that every kitchen addition project is unique, so adapt this outline to your specific needs and circumstances. Consulting with professionals and obtaining the required permits and inspections is crucial to a successful and safe project.
 Talon Construction Inc.
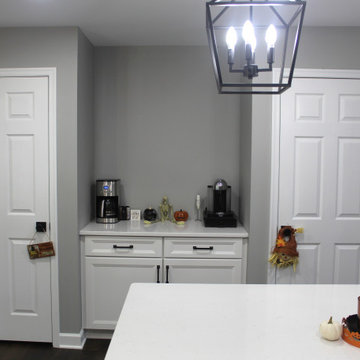
Designing and building a kitchen addition is a complex process that involves multiple steps and considerations. Here is a general outline to help you get started on your kitchen addition project:
Define Your Goals and Budget:
• Determine the purpose of the kitchen addition. Is it for more cooking space, a dining area, or a combination of both?
• Establish a realistic budget for your project. Consider all costs, including construction, permits, materials, and furnishings.
Hire a Design Professional:
• Seek the services of a design build company who specializes in kitchen additions.
• Discuss your vision, needs, and budget with the design professional to create a design concept.
Site Evaluation:
• Assess the existing space and structural condition of your home to ensure it can support the addition.
• Consider factors like zoning regulations, setbacks, and building codes.
Design Development:
• Collaborate with your design professional to refine the concept, including the layout, size, and architectural style.
• Choose materials, finishes, and fixtures that fit your design and budget.
Obtain Permits:
• Consult with your local design build contractor to determine the necessary permits and approvals.
• Prepare and submit all required documents, including architectural drawings and engineering plans.
Create Construction Documents:
• Work with your design build professional to develop detailed construction drawings and specifications.
• These documents will serve as a guide for contractors during construction.
Hire a design build contractor:
• Check references, credentials, and licenses before selecting a contractor.
• Sign a detailed contract that outlines the scope of work, timeline, and payment schedule.
Construction Phase:
• Demolition: If needed, remove any existing structures or walls.
• Foundation: Construct the foundation for the addition.
• Framing: Build the structural framework of the addition.
• Plumbing, Electrical, and HVAC: Install or update utilities as required.
• Insulation: Ensure proper insulation for energy efficiency.
• Drywall and Finish Work: Complete the walls and ceilings.
• Flooring and Cabinetry: Install flooring and kitchen cabinets.
• Appliances and Fixtures: Add appliances, plumbing fixtures, and lighting.
• Paint and Finish: Apply paint and finishes to achieve the desired look.
• Final Inspection: Schedule inspections to ensure compliance with building codes.
Final Inspections and Approvals:
• Arrange for final inspections to ensure the addition meets all safety and code requirements.
• Obtain any necessary certificates of occupancy or compliance.
Move In and Enjoy:
• Once all inspections and approvals are received, you can move into your new kitchen addition and start enjoying it.
Remember that every kitchen addition project is unique, so adapt this outline to your specific needs and circumstances. Consulting with professionals and obtaining the required permits and inspections is crucial to a successful and safe project.

 Paradise Found Construction
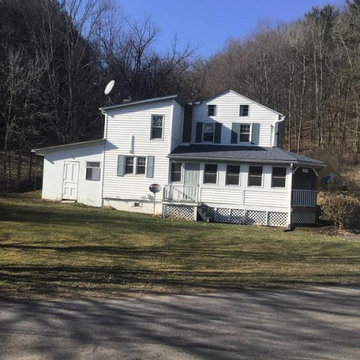
Over the years, the deck of this large executive home had been slowly pulling away from the house. Many of the 2 ft. x 2 ft. masonry support piers had begun to sink and lean in various directions. Unfortunately, the problem wasn’t isolated to just the deck support columns. An inspection of the columns supporting the adjacent Sunroom confirmed that the same structural failures were occurring to all of them.
An excavation of one of the piers and its concrete footer revealed that the Sunroom and half of the Deck columns had been built on soil fill, and were slowly sinking and tilting away from the house. The only permanent solution to keep the Deck and Sunroom from collapsing was to replace the piers and the underlying footers.
The Sunroom and a portion of the Deck were jacked up and supported by wooden cribs until new 2 ft. x 2ft. solid masonry columns could be built to replace the failed ones. In order to create enough bearing support under the footers, galvanized steel helical screws were driven under each column footer to an average depth of 26 feet. Concrete footers were poured on top of the screws, and each footer was tied into the adjacent footer and eventually back into the foundation of the home by a series of stabilizing rebar and concrete cross-tie footers.
Once all 14 of the failed columns were rebuilt, the Sunroom was lowered onto the new support piers. A new deck was built to replace the compromised section, and the rest of the original decking and railings were removed and replaced. After the new wood had been acclimated to weather for several months and allowed to dry out and stabilize, the deck and railings were stained and sealed.
Find the right local pro for your project

 All County Fence & Gate
Do you need to hold back soil surrounding an excavation? Don’t rely on fly-by-nighters: We will build you a retaining wall to support vertical grade changes, prevent soil erosion and downward slope movement, or make landscaping tiers. We use the most common building materials for this application as masonry, interlocking blocks, natural stone, interlocked bricks, reinforced concrete with steel rebars, timber, and steel I beams among other specially designed configurations.
A well planned and executed retaining wall brings the best out of the useful space of your lot. What was once a steep slope can be transformed into a strip of leveled oasis. Call us now and we deal with all the planning, permits, drawings, execution and inspections.
 Paradise Found Construction
Over the years, the deck of this large executive home had been slowly pulling away from the house. Many of the 2 ft. x 2 ft. masonry support piers had begun to sink and lean in various directions. Unfortunately, the problem wasn’t isolated to just the deck support columns. An inspection of the columns supporting the adjacent Sunroom confirmed that the same structural failures were occurring to all of them.
An excavation of one of the piers and its concrete footer revealed that the Sunroom and half of the Deck columns had been built on soil fill, and were slowly sinking and tilting away from the house. The only permanent solution to keep the Deck and Sunroom from collapsing was to replace the piers and the underlying footers.
The Sunroom and a portion of the Deck were jacked up and supported by wooden cribs until new 2 ft. x 2ft. solid masonry columns could be built to replace the failed ones. In order to create enough bearing support under the footers, galvanized steel helical screws were driven under each column footer to an average depth of 26 feet. Concrete footers were poured on top of the screws, and each footer was tied into the adjacent footer and eventually back into the foundation of the home by a series of stabilizing rebar and concrete cross-tie footers.
Once all 14 of the failed columns were rebuilt, the Sunroom was lowered onto the new support piers. A new deck was built to replace the compromised section, and the rest of the original decking and railings were removed and replaced. After the new wood had been acclimated to weather for several months and allowed to dry out and stabilize, the deck and railings were stained and sealed.
 Paradise Found Construction
Over the years, the deck of this large executive home had been slowly pulling away from the house. Many of the 2 ft. x 2 ft. masonry support piers had begun to sink and lean in various directions. Unfortunately, the problem wasn’t isolated to just the deck support columns. An inspection of the columns supporting the adjacent Sunroom confirmed that the same structural failures were occurring to all of them.
An excavation of one of the piers and its concrete footer revealed that the Sunroom and half of the Deck columns had been built on soil fill, and were slowly sinking and tilting away from the house. The only permanent solution to keep the Deck and Sunroom from collapsing was to replace the piers and the underlying footers.
The Sunroom and a portion of the Deck were jacked up and supported by wooden cribs until new 2 ft. x 2ft. solid masonry columns could be built to replace the failed ones. In order to create enough bearing support under the footers, galvanized steel helical screws were driven under each column footer to an average depth of 26 feet. Concrete footers were poured on top of the screws, and each footer was tied into the adjacent footer and eventually back into the foundation of the home by a series of stabilizing rebar and concrete cross-tie footers.
Once all 14 of the failed columns were rebuilt, the Sunroom was lowered onto the new support piers. A new deck was built to replace the compromised section, and the rest of the original decking and railings were removed and replaced. After the new wood had been acclimated to weather for several months and allowed to dry out and stabilize, the deck and railings were stained and sealed.
 Paradise Found Construction
Over the years, the deck of this large executive home had been slowly pulling away from the house. Many of the 2 ft. x 2 ft. masonry support piers had begun to sink and lean in various directions. Unfortunately, the problem wasn’t isolated to just the deck support columns. An inspection of the columns supporting the adjacent Sunroom confirmed that the same structural failures were occurring to all of them.
An excavation of one of the piers and its concrete footer revealed that the Sunroom and half of the Deck columns had been built on soil fill, and were slowly sinking and tilting away from the house. The only permanent solution to keep the Deck and Sunroom from collapsing was to replace the piers and the underlying footers.
The Sunroom and a portion of the Deck were jacked up and supported by wooden cribs until new 2 ft. x 2ft. solid masonry columns could be built to replace the failed ones. In order to create enough bearing support under the footers, galvanized steel helical screws were driven under each column footer to an average depth of 26 feet. Concrete footers were poured on top of the screws, and each footer was tied into the adjacent footer and eventually back into the foundation of the home by a series of stabilizing rebar and concrete cross-tie footers.
Once all 14 of the failed columns were rebuilt, the Sunroom was lowered onto the new support piers. A new deck was built to replace the compromised section, and the rest of the original decking and railings were removed and replaced. After the new wood had been acclimated to weather for several months and allowed to dry out and stabilize, the deck and railings were stained and sealed.
Sponsored
Fredericksburg, OH

High Point Cabinets
Columbus' Experienced Custom Cabinet Builder | 4x Best of Houzz Winner
 Paradise Found Construction
Over the years, the deck of this large executive home had been slowly pulling away from the house. Many of the 2 ft. x 2 ft. masonry support piers had begun to sink and lean in various directions. Unfortunately, the problem wasn’t isolated to just the deck support columns. An inspection of the columns supporting the adjacent Sunroom confirmed that the same structural failures were occurring to all of them.
An excavation of one of the piers and its concrete footer revealed that the Sunroom and half of the Deck columns had been built on soil fill, and were slowly sinking and tilting away from the house. The only permanent solution to keep the Deck and Sunroom from collapsing was to replace the piers and the underlying footers.
The Sunroom and a portion of the Deck were jacked up and supported by wooden cribs until new 2 ft. x 2ft. solid masonry columns could be built to replace the failed ones. In order to create enough bearing support under the footers, galvanized steel helical screws were driven under each column footer to an average depth of 26 feet. Concrete footers were poured on top of the screws, and each footer was tied into the adjacent footer and eventually back into the foundation of the home by a series of stabilizing rebar and concrete cross-tie footers.
Once all 14 of the failed columns were rebuilt, the Sunroom was lowered onto the new support piers. A new deck was built to replace the compromised section, and the rest of the original decking and railings were removed and replaced. After the new wood had been acclimated to weather for several months and allowed to dry out and stabilize, the deck and railings were stained and sealed.
 Paradise Found Construction
Over the years, the deck of this large executive home had been slowly pulling away from the house. Many of the 2 ft. x 2 ft. masonry support piers had begun to sink and lean in various directions. Unfortunately, the problem wasn’t isolated to just the deck support columns. An inspection of the columns supporting the adjacent Sunroom confirmed that the same structural failures were occurring to all of them.
An excavation of one of the piers and its concrete footer revealed that the Sunroom and half of the Deck columns had been built on soil fill, and were slowly sinking and tilting away from the house. The only permanent solution to keep the Deck and Sunroom from collapsing was to replace the piers and the underlying footers.
The Sunroom and a portion of the Deck were jacked up and supported by wooden cribs until new 2 ft. x 2ft. solid masonry columns could be built to replace the failed ones. In order to create enough bearing support under the footers, galvanized steel helical screws were driven under each column footer to an average depth of 26 feet. Concrete footers were poured on top of the screws, and each footer was tied into the adjacent footer and eventually back into the foundation of the home by a series of stabilizing rebar and concrete cross-tie footers.
Once all 14 of the failed columns were rebuilt, the Sunroom was lowered onto the new support piers. A new deck was built to replace the compromised section, and the rest of the original decking and railings were removed and replaced. After the new wood had been acclimated to weather for several months and allowed to dry out and stabilize, the deck and railings were stained and sealed.
 All County Fence & Gate
Do you need to hold back soil surrounding an excavation? Don’t rely on fly-by-nighters: We will build you a retaining wall to support vertical grade changes, prevent soil erosion and downward slope movement, or make landscaping tiers. We use the most common building materials for this application as masonry, interlocking blocks, natural stone, interlocked bricks, reinforced concrete with steel rebars, timber, and steel I beams among other specially designed configurations.
A well planned and executed retaining wall brings the best out of the useful space of your lot. What was once a steep slope can be transformed into a strip of leveled oasis. Call us now and we deal with all the planning, permits, drawings, execution and inspections.
 Greewal
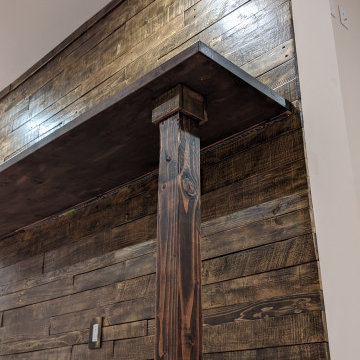
We are a New Jersey based workshop that creates beautiful wall décor planks out of reclaimed pallet wood.
The most beautiful wall planks made out of reclaimed old pallet wood. Our planks are very safe and each plank goes through 5 stages: selection, cleaning, sun drying, cutting and quality inspection. We are very proud of our product and we hope you will see the value in reusing resources and creating quality products out of it!

 My House Design|Build|Team
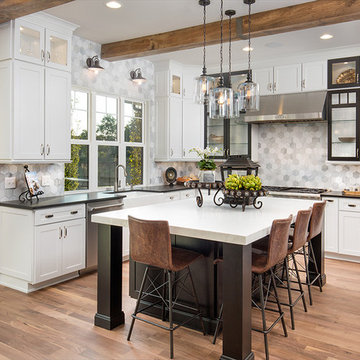
My House Design/Build Team | www.myhousedesignbuild.com | 604-694-6873 | Duy Nguyen Photography -------------------------------------------------------Right from the beginning it was evident that this Coquitlam Renovation was unique. It’s first impression was memorable as immediately after entering the front door, just past the dining table, there was a tree growing in the middle of home! Upon further inspection of the space it became apparent that this home had undergone several alterations during its lifetime... We knew we wanted to transform this central space to be the focal point. The home’s design became based around the atrium and its tile ‘splash’. Other materials in this space that add to this effect are the 3D angular mouldings which flow from the glass ceiling to the floor. As well as the colour variation in the hexagon tile, radiating from light in the center to dark around the perimeter. These high contrast tiles not only draw your eye to the center of the atrium but the flush transition between the tiles and hardwood help connect the atrium with the rest of the home.
 Green Home Systems
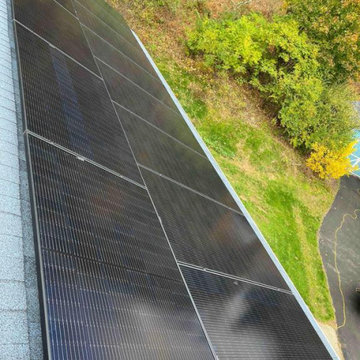
 recently completed a successful solar project in Bloomsburg, PA for Eric M. The project was completed in a few months and consisted of 5.04 kW of solar panels installed on the flat roof of Eric’s home.
Eric chose Green Home Systems for their competitive pricing and wide selection of solar panels. He was also impressed with their warranty and customer service. After researching online, Eric decided to go solar to reduce his utility bill, increase the value of his home, and take advantage of the easy payment terms offered by Green Home Systems.
The installation process began with an inspection of the roof to ensure it was suitable for mounting the solar panels. The inspections revealed that some minor repairs were needed before installation could begin. Green Home Systems team quickly repaired any damage to the roof and got to work installing the panels.
Once the installation was complete, Eric quickly noticed a reduction in his monthly utility bills as well as an increase in the value of his home due to having clean energy sources available. He also was very pleased with how quickly and efficiently Green Home Systems completed the project.
The team at Green Home Systems is dedicated to providing customers with top-notch service and quality products at competitive prices. We strive to make your transition from traditional energy sources to renewable energy sources as smooth as possible by providing support throughout every step of the process. If you're looking for a reliable and cost-effective way to generate clean energy for your home or business, contact us today!

 Cari Schmoock
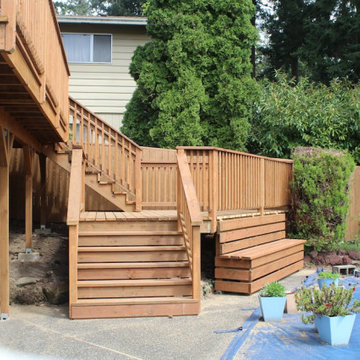
This project involved a complete removal and rebuild of an existing deck and railing system. We demolished the old materials down to the support points, cleared the site, and prepared a solid foundation for the new structure.
From there, we constructed a new code-compliant deck frame using pressure-treated lumber and galvanized hardware, then installed new exterior-grade decking, stairs, and a matching railing system where required by height. The scope did not include permits, inspections/engineering, or staining and finishing unless added separately, and the completed work is backed by a 15-year warranty.
 Green Home Systems
 recently completed a successful solar project in Bloomsburg, PA for Eric M. The project was completed in a few months and consisted of 5.04 kW of solar panels installed on the flat roof of Eric’s home.
Eric chose Green Home Systems for their competitive pricing and wide selection of solar panels. He was also impressed with their warranty and customer service. After researching online, Eric decided to go solar to reduce his utility bill, increase the value of his home, and take advantage of the easy payment terms offered by Green Home Systems.
The installation process began with an inspection of the roof to ensure it was suitable for mounting the solar panels. The inspections revealed that some minor repairs were needed before installation could begin. Green Home Systems team quickly repaired any damage to the roof and got to work installing the panels.
Once the installation was complete, Eric quickly noticed a reduction in his monthly utility bills as well as an increase in the value of his home due to having clean energy sources available. He also was very pleased with how quickly and efficiently Green Home Systems completed the project.
The team at Green Home Systems is dedicated to providing customers with top-notch service and quality products at competitive prices. We strive to make your transition from traditional energy sources to renewable energy sources as smooth as possible by providing support throughout every step of the process. If you're looking for a reliable and cost-effective way to generate clean energy for your home or business, contact us today!
 AmeriTop Roofing Contractors
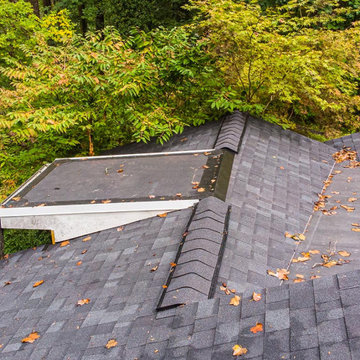
Are you looking for a flat roofing contractor? Want to extend the lifespan of residential or commercial buildings? Then you should invest in the substantial security of your building by selecting an energy-efficient and durable roofing system. Flat roofing can be an ideal choice in this context and will be considered the last investment of time. This is where you need the support of professional flat roofers. Flat roofing not only protects your building assets but also enhances its life, and when you need the support of seasoned contractors, you can come to AmeriTop Roofing Contractors for help. Both commercial and residential buildings require cyclical maintenance.
Growth of mold and mildew represent the common problem found on the flat roofing system due to moisture infiltration. Our expert roofer inspects the property to identify the origin of the damage and possible solution to reduce its severity and chances of reoccurrence when you hire us. At AmeriTop Roofing Contractors, we specialize in flat roof installation, repair, and quick restoration. You can trust us; we evaluate your property then only provide you a fair valuation and necessary suggestions for cost-effective maintenance. We believe roof maintenance can be more effective when spotted early damages; otherwise, it will get worse and more expensive. Apart from offering basic roofing services, you can rely on our contractors for excellent and quick services.

 Shuler Architecture
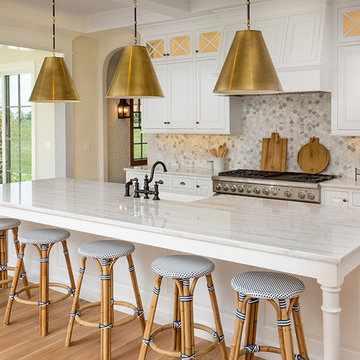
The Owners of this luxurious waterfront estate acquired this property after the previous owners defaulted on their loan and stopped construction. We were initially engaged to inspect and assess the structural integrity of the building shell and work with a geo-technical engineer to evaluate the condition of the site’s soil. Tests determined that the site’s previous use as a sawmill and Native American fishing ground rendered the soil unfit for construction activity. In response to the lack of soil bearing capacity, our solution employs expansive footings supported by hundreds of piles throughout the entire project site.
After completing our inspection of the structure, we were engaged to completely redesigned this home to accommodate our clients’ growing family and extensive art collection. Stylistically, this highly detailed structure borrows from the grand bungalows of the Greene brothers in Pasadena, California while employing sophisticated climate, lighting, AV and security systems. To ensure our clients’ art collection was properly displayed and protected, we worked with specialists from the Seattle Art Museum to develop appropriate lighting and climate control systems. Finally, we engaged the best craftsman we know – general contractor, interior designer, landscape architect, cabinet maker, blacksmith, custom woodworker and stone mason – to execute what ultimately became our clients’ very personal and unique statement for their home.
 Ridhiman Alloys
 is a stand-out best quality Valve manufacturer in India. We use premium materials in our supplied valves. manufactured in a factory using high-quality grades that adhere to AISI and ASTM standards. Consequently, the toughness of the valves increases with the standard. A valve's hardness is increased by the presence of premium steel. Our area of expertise is providing and exporting valves from India. In India, we are well-known for producing high-quality valves.
We are a leading Valve supplier in various industries, including oil and gas, petrochemical, and nuclear.Our commitment to quality is paramount, and we take pride in delivering products that meet or exceed the most stringent international standards. We also produce Butterfly Valves, Gate Valves
A Valve manufacturer continuous support for quality and customer satisfaction forms its foundation. From the selection of raw materials until the completion of a final inspection, the business follows stringent quality control procedures throughout the manufacturing process.
To learn more in detail, visit our website: ridhimanalloys.com
Product source: Valves Supplier in India
 Shuler Architecture
The Owners of this luxurious waterfront estate acquired this property after the previous owners defaulted on their loan and stopped construction. We were initially engaged to inspect and assess the structural integrity of the building shell and work with a geo-technical engineer to evaluate the condition of the site’s soil. Tests determined that the site’s previous use as a sawmill and Native American fishing ground rendered the soil unfit for construction activity. In response to the lack of soil bearing capacity, our solution employs expansive footings supported by hundreds of piles throughout the entire project site.
After completing our inspection of the structure, we were engaged to completely redesigned this home to accommodate our clients’ growing family and extensive art collection. Stylistically, this highly detailed structure borrows from the grand bungalows of the Greene brothers in Pasadena, California while employing sophisticated climate, lighting, AV and security systems. To ensure our clients’ art collection was properly displayed and protected, we worked with specialists from the Seattle Art Museum to develop appropriate lighting and climate control systems. Finally, we engaged the best craftsman we know – general contractor, interior designer, landscape architect, cabinet maker, blacksmith, custom woodworker and stone mason – to execute what ultimately became our clients’ very personal and unique statement for their home.
 Timberline Patio Covers
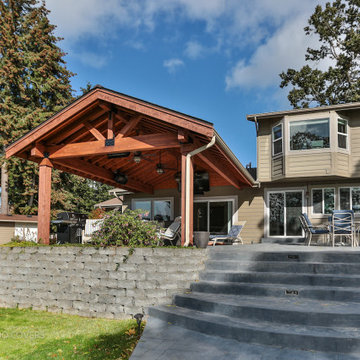
This Lakewood, WA custom outdoor living project transformed the homeowner's backyard with a beautifully crafted covered patio designed to provide year-round protection and enjoyment. The structure features exposed 2x8 framing with clean architectural lines, cedar-wrapped support posts, and a tongue-and-groove wood ceiling with an interior gable for added character. A 3-tab shingle roof complements the home's existing architecture while an engineered gutter system efficiently manages rainwater.
Throughout construction, special attention was given to both craftsmanship and the homeowner's future plans. The roofing was intentionally left partially accessible to allow for electrical wiring, and select tongue-and-groove boards remain removable until final inspection. Cedar post wraps were installed to enhance the natural warmth of the space, with decorative collars to complete the finished look. The exterior wall was also re-sided to create a seamless transition between the new structure and the existing home.
The result is a durable, thoughtfully engineered patio cover that blends beautifully with the home while creating a comfortable outdoor space the family can enjoy for years to come.
2