
Search results for "Inspected" in Home Design Ideas

 Talon Construction Inc.
Designing and building a kitchen addition is a complex process that involves multiple steps and considerations. Here is a general outline to help you get started on your kitchen addition project:
Define Your Goals and Budget:
• Determine the purpose of the kitchen addition. Is it for more cooking space, a dining area, or a combination of both?
• Establish a realistic budget for your project. Consider all costs, including construction, permits, materials, and furnishings.
Hire a Design Professional:
• Seek the services of a design build company who specializes in kitchen additions.
• Discuss your vision, needs, and budget with the design professional to create a design concept.
Site Evaluation:
• Assess the existing space and structural condition of your home to ensure it can support the addition.
• Consider factors like zoning regulations, setbacks, and building codes.
Design Development:
• Collaborate with your design professional to refine the concept, including the layout, size, and architectural style.
• Choose materials, finishes, and fixtures that fit your design and budget.
Obtain Permits:
• Consult with your local design build contractor to determine the necessary permits and approvals.
• Prepare and submit all required documents, including architectural drawings and engineering plans.
Create Construction Documents:
• Work with your design build professional to develop detailed construction drawings and specifications.
• These documents will serve as a guide for contractors during construction.
Hire a design build contractor:
• Check references, credentials, and licenses before selecting a contractor.
• Sign a detailed contract that outlines the scope of work, timeline, and payment schedule.
Construction Phase:
• Demolition: If needed, remove any existing structures or walls.
• Foundation: Construct the foundation for the addition.
• Framing: Build the structural framework of the addition.
• Plumbing, Electrical, and HVAC: Install or update utilities as required.
• Insulation: Ensure proper insulation for energy efficiency.
• Drywall and Finish Work: Complete the walls and ceilings.
• Flooring and Cabinetry: Install flooring and kitchen cabinets.
• Appliances and Fixtures: Add appliances, plumbing fixtures, and lighting.
• Paint and Finish: Apply paint and finishes to achieve the desired look.
• Final Inspection: Schedule inspections to ensure compliance with building codes.
Final Inspections and Approvals:
• Arrange for final inspections to ensure the addition meets all safety and code requirements.
• Obtain any necessary certificates of occupancy or compliance.
Move In and Enjoy:
• Once all inspections and approvals are received, you can move into your new kitchen addition and start enjoying it.
Remember that every kitchen addition project is unique, so adapt this outline to your specific needs and circumstances. Consulting with professionals and obtaining the required permits and inspections is crucial to a successful and safe project.
 Talon Construction Inc.
Designing and building a kitchen addition is a complex process that involves multiple steps and considerations. Here is a general outline to help you get started on your kitchen addition project:
Define Your Goals and Budget:
• Determine the purpose of the kitchen addition. Is it for more cooking space, a dining area, or a combination of both?
• Establish a realistic budget for your project. Consider all costs, including construction, permits, materials, and furnishings.
Hire a Design Professional:
• Seek the services of a design build company who specializes in kitchen additions.
• Discuss your vision, needs, and budget with the design professional to create a design concept.
Site Evaluation:
• Assess the existing space and structural condition of your home to ensure it can support the addition.
• Consider factors like zoning regulations, setbacks, and building codes.
Design Development:
• Collaborate with your design professional to refine the concept, including the layout, size, and architectural style.
• Choose materials, finishes, and fixtures that fit your design and budget.
Obtain Permits:
• Consult with your local design build contractor to determine the necessary permits and approvals.
• Prepare and submit all required documents, including architectural drawings and engineering plans.
Create Construction Documents:
• Work with your design build professional to develop detailed construction drawings and specifications.
• These documents will serve as a guide for contractors during construction.
Hire a design build contractor:
• Check references, credentials, and licenses before selecting a contractor.
• Sign a detailed contract that outlines the scope of work, timeline, and payment schedule.
Construction Phase:
• Demolition: If needed, remove any existing structures or walls.
• Foundation: Construct the foundation for the addition.
• Framing: Build the structural framework of the addition.
• Plumbing, Electrical, and HVAC: Install or update utilities as required.
• Insulation: Ensure proper insulation for energy efficiency.
• Drywall and Finish Work: Complete the walls and ceilings.
• Flooring and Cabinetry: Install flooring and kitchen cabinets.
• Appliances and Fixtures: Add appliances, plumbing fixtures, and lighting.
• Paint and Finish: Apply paint and finishes to achieve the desired look.
• Final Inspection: Schedule inspections to ensure compliance with building codes.
Final Inspections and Approvals:
• Arrange for final inspections to ensure the addition meets all safety and code requirements.
• Obtain any necessary certificates of occupancy or compliance.
Move In and Enjoy:
• Once all inspections and approvals are received, you can move into your new kitchen addition and start enjoying it.
Remember that every kitchen addition project is unique, so adapt this outline to your specific needs and circumstances. Consulting with professionals and obtaining the required permits and inspections is crucial to a successful and safe project.
 Talon Construction Inc.
Designing and building a kitchen addition is a complex process that involves multiple steps and considerations. Here is a general outline to help you get started on your kitchen addition project:
Define Your Goals and Budget:
• Determine the purpose of the kitchen addition. Is it for more cooking space, a dining area, or a combination of both?
• Establish a realistic budget for your project. Consider all costs, including construction, permits, materials, and furnishings.
Hire a Design Professional:
• Seek the services of a design build company who specializes in kitchen additions.
• Discuss your vision, needs, and budget with the design professional to create a design concept.
Site Evaluation:
• Assess the existing space and structural condition of your home to ensure it can support the addition.
• Consider factors like zoning regulations, setbacks, and building codes.
Design Development:
• Collaborate with your design professional to refine the concept, including the layout, size, and architectural style.
• Choose materials, finishes, and fixtures that fit your design and budget.
Obtain Permits:
• Consult with your local design build contractor to determine the necessary permits and approvals.
• Prepare and submit all required documents, including architectural drawings and engineering plans.
Create Construction Documents:
• Work with your design build professional to develop detailed construction drawings and specifications.
• These documents will serve as a guide for contractors during construction.
Hire a design build contractor:
• Check references, credentials, and licenses before selecting a contractor.
• Sign a detailed contract that outlines the scope of work, timeline, and payment schedule.
Construction Phase:
• Demolition: If needed, remove any existing structures or walls.
• Foundation: Construct the foundation for the addition.
• Framing: Build the structural framework of the addition.
• Plumbing, Electrical, and HVAC: Install or update utilities as required.
• Insulation: Ensure proper insulation for energy efficiency.
• Drywall and Finish Work: Complete the walls and ceilings.
• Flooring and Cabinetry: Install flooring and kitchen cabinets.
• Appliances and Fixtures: Add appliances, plumbing fixtures, and lighting.
• Paint and Finish: Apply paint and finishes to achieve the desired look.
• Final Inspection: Schedule inspections to ensure compliance with building codes.
Final Inspections and Approvals:
• Arrange for final inspections to ensure the addition meets all safety and code requirements.
• Obtain any necessary certificates of occupancy or compliance.
Move In and Enjoy:
• Once all inspections and approvals are received, you can move into your new kitchen addition and start enjoying it.
Remember that every kitchen addition project is unique, so adapt this outline to your specific needs and circumstances. Consulting with professionals and obtaining the required permits and inspections is crucial to a successful and safe project.
Find the right local pro for your project
 Talon Construction Inc.
Designing and building a kitchen addition is a complex process that involves multiple steps and considerations. Here is a general outline to help you get started on your kitchen addition project:
Define Your Goals and Budget:
• Determine the purpose of the kitchen addition. Is it for more cooking space, a dining area, or a combination of both?
• Establish a realistic budget for your project. Consider all costs, including construction, permits, materials, and furnishings.
Hire a Design Professional:
• Seek the services of a design build company who specializes in kitchen additions.
• Discuss your vision, needs, and budget with the design professional to create a design concept.
Site Evaluation:
• Assess the existing space and structural condition of your home to ensure it can support the addition.
• Consider factors like zoning regulations, setbacks, and building codes.
Design Development:
• Collaborate with your design professional to refine the concept, including the layout, size, and architectural style.
• Choose materials, finishes, and fixtures that fit your design and budget.
Obtain Permits:
• Consult with your local design build contractor to determine the necessary permits and approvals.
• Prepare and submit all required documents, including architectural drawings and engineering plans.
Create Construction Documents:
• Work with your design build professional to develop detailed construction drawings and specifications.
• These documents will serve as a guide for contractors during construction.
Hire a design build contractor:
• Check references, credentials, and licenses before selecting a contractor.
• Sign a detailed contract that outlines the scope of work, timeline, and payment schedule.
Construction Phase:
• Demolition: If needed, remove any existing structures or walls.
• Foundation: Construct the foundation for the addition.
• Framing: Build the structural framework of the addition.
• Plumbing, Electrical, and HVAC: Install or update utilities as required.
• Insulation: Ensure proper insulation for energy efficiency.
• Drywall and Finish Work: Complete the walls and ceilings.
• Flooring and Cabinetry: Install flooring and kitchen cabinets.
• Appliances and Fixtures: Add appliances, plumbing fixtures, and lighting.
• Paint and Finish: Apply paint and finishes to achieve the desired look.
• Final Inspection: Schedule inspections to ensure compliance with building codes.
Final Inspections and Approvals:
• Arrange for final inspections to ensure the addition meets all safety and code requirements.
• Obtain any necessary certificates of occupancy or compliance.
Move In and Enjoy:
• Once all inspections and approvals are received, you can move into your new kitchen addition and start enjoying it.
Remember that every kitchen addition project is unique, so adapt this outline to your specific needs and circumstances. Consulting with professionals and obtaining the required permits and inspections is crucial to a successful and safe project.
 SUPERIOR CHIMNEY SERVICES CORPORATION
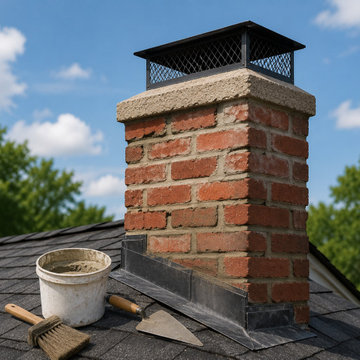
A friend noticed a damp, musty smell coming from her living room fireplace the week after a February thaw. When she called a masonry technician from Superior Chimney, to take a look, and found that water had been working its way behind the bricks for years. What started as a small crack now meant her chimney needed structural repairs before she could safely use it again.
Chimney repairs are any work done to restore the structural and weatherproof condition of a chimney. This can include mortar joint repair, brick replacement, crown repair, flue repair, and cap or flashing replacement. Most Chicagoland homeowners discover the need for chimney repairs often times after winter, when the freeze and thaw cycles have already done its damage. Uncovering the symptoms early is the best way to keep chimney repairs down. Let’s discuss how that can be done.
Why Chicagoland Weather Is Especially Hard on Chimneys
Chicagoland has some of the most polarized weather. One day it’s a blizzard and the next week hot, humid and 100 degrees. That swing in weather conditions and temperatures are the real reasons why chimney repairs are needed.
When moisture from humid and rainy days’ soak into brick and mortar and then freezes, it expands. As it begins to thaw, the materials contract. Repeat that cycle dozens of times in a single Illinois winter and even solid masonry in the chimney starts to crack, spall, and separate from the joints holding it together. This is called the freeze thaw cycle. We’ve talked about it many times over the years, and it continues to be the single biggest reason homes need chimney repairs more often than homes in milder climates.
The Chimney Safety Institute of America (CSIA), the leading nonprofit certifying body for chimney professionals in the United States, notes that water intrusion is one of the most damaging and most preventable problems. If the problem is left to mature, it affects more than the appearance. It compromises the structure itself.
What Do Chimney Repairs Involve?
Not every chimney problem requires the same fix. Chimney repairs generally fall into a few categories. Understanding the difference, helps homeowners have a more informed conversation with the expert technician.
Mortar joint repair or tuckpointing. This involves removing deteriorated mortar between bricks and replacing it with fresh mortar, matched to the original color and texture as closely as possible.
Brick replacement. When individual bricks have spalled, meaning the face has cracked or popped off from trapped moisture, those bricks are removed and replaced.
Crown and cap repair. The crown is the concrete slab at the very top of the chimney. Cracks both big and small let water directly into the chimney flue. Chimney crown repair is often one of the most urgent forms of chimney repairs.
Flashing repair. Flashing is the barrier where the chimney meets the roofline. Loose, damaged or poorly installed flashing is a common source for water leaks. The roof gets the blame as it is the largest piece that covers the house. However, it certainly can be the overlooked chimney.
Flue and liner repair. Cracked flue tiles or damaged liners affect how safely a chimney vents smoke and combustion gases.
When to Know a Chimney Needs Repair
Most chimney damage shows up as small, easy to dismiss way. Let’s take a look at the following list. Be sure to print this out and keep it handy so if/when something happens, you know what to look for.
• Water stains near the fireplace or on the ceiling
• A brownish stain on the wall around your fireplace, or a stain on the ceiling near an exterior chimney. This means water is getting in somewhere it should not.
• Crumbling or missing mortar
• If you can see gaps between bricks, or mortar that flakes off when you touch it
• A leaning or visibly shifting chimney
• A chimney that appears to pull away from the house, even slightly, could indicate a structural issue
• White staining on the brick (efflorescence)
• Chalky white residue left behind as water evaporates out of the masonry. It is a visible sign that moisture is moving through brick
• Rusted damper or firebox components
• Metal parts inside a fireplace that are rusting are a strong indicator that moisture is present
• Debris in the fireplace
• Small chunks of brick, mortar, or tile landing in the firebox
What are the Various Types of Chimney Repair?
This is a compiled list of chimney repairs so you can be aware of what to look for. If you have any questions, contact us directly at 877-244-6349.
Homeowners who schedule chimney repairs at the first sign of trouble typically spend far less than those who wait until water damage reaches the interior of the home. This is a great reason to contact Superior Chimney at 877-244-6349.
Why an Annual Inspection Matters More Than People Think
The CSIA and the National Fire Protection Association both recommend that chimneys, fireplaces, and vents be inspected at least once a year, whether or not the fireplace gets used. This recommendation exists because damage does not take a break just because a chimney sits without any use.
According to data stated by the CSIA, chimney related fires still contribute to tens of thousands of residential fires across the United States each year, and a large share of those incidents can be traced back to deferred maintenance. An annual chimney inspection is what catches the small mortar crack or the hairline crown crack before it turns into a repair bill.
Hiring the Right Company for Chimney Repairs
Not every company who offers chimney repair work has the certified training to diagnose a problem correctly. CSIA certification is the most widely recognized credential in the industry, and it requires technicians to study chimney physics, venting systems, and fire codes. After the studies, the new technician needs to pass an exam and agree to a professional code of ethics.
When you call, be sure to ask:
Are your technicians CSIA certified, and can I verify that certification?
Will you show me photos or video of the damage before starting work?
Does the estimate distinguish between cosmetic repair and structural repair?
At Superior Chimney, we welcome these and other of your questions.
How Chimney Repairs Affect Insurance and Resale
A chimney in poor condition can complicate a home sale or an insurance claim. Home inspectors routinely report on visible mortar loss, leaning chimneys, or missing chimney caps. Some insurers will request proof of repair before renewing a policy on an older home. Addressing chimney repairs proactively protects more than curb appeal. It protects the sale timeline and the claims history associated to the property.
Frequently Asked Questions
How often should a Chicago area chimney be inspected? At least once a year, per CSIA and NFPA guidance, regardless of how often the fireplace is used.
Can chimney repairs be done in winter? Some interior repairs can happen in cold weather, but most masonry repair requires temperatures consistently above freezing. Spring and fall are the most common repair times in the Chicago area.
Is tuckpointing the same thing as chimney repair? Tuckpointing is one type of chimney repair, focused on replacing deteriorated mortar joints.
Does homeowners insurance cover chimney repairs? It depends. Sudden damage from a storm may be covered, while gradual deterioration from lack of maintenance typically is not.
So Finally…
Taking care of your home includes a chimney. Just because you don’t see it every day, doesn’t mean things aren’t happening. Be sure to get a chimney inspection done once per year by a certified and credible company such as Superior Chimney to take care of the issues. Contact us today by calling 877-244-6349.
 Inspector Roofing and Restoration
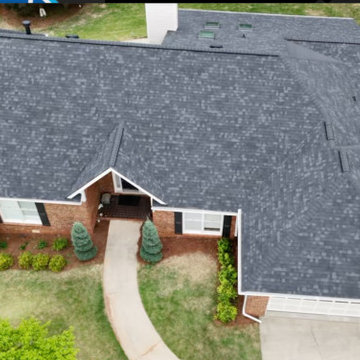
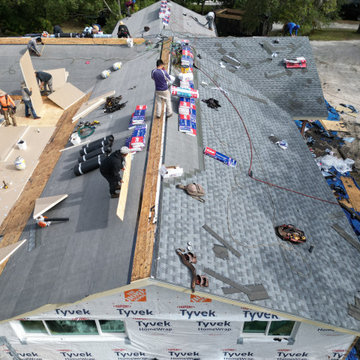
This project began with a roof inspection following reported wind activity in the Alpharetta area.
Using the Inspector Roofing Protocols™, we conducted a structured, inspection-first evaluation to determine whether the roofing system had sustained functional damage. The inspection included slope-by-slope analysis, wide-to-tight photographic documentation, and targeted review of shingles, seal integrity, and uplift patterns consistent with wind-related damage.
The inspection identified wind-driven shingle displacement and seal failure consistent with functional damage rather than normal wear. The documented findings met claim-verifiable thresholds, allowing the condition to be clearly presented and supported.
Based on the inspection and supporting documentation, the claim was reviewed and approved by State Farm, resulting in a full roof replacement.
This project reflects the importance of proper inspection and documentation—where replacement is not assumed, but supported through verifiable evidence and structured evaluation.
 Talon Construction Inc.
Designing and building a kitchen addition is a complex process that involves multiple steps and considerations. Here is a general outline to help you get started on your kitchen addition project:
Define Your Goals and Budget:
• Determine the purpose of the kitchen addition. Is it for more cooking space, a dining area, or a combination of both?
• Establish a realistic budget for your project. Consider all costs, including construction, permits, materials, and furnishings.
Hire a Design Professional:
• Seek the services of a design build company who specializes in kitchen additions.
• Discuss your vision, needs, and budget with the design professional to create a design concept.
Site Evaluation:
• Assess the existing space and structural condition of your home to ensure it can support the addition.
• Consider factors like zoning regulations, setbacks, and building codes.
Design Development:
• Collaborate with your design professional to refine the concept, including the layout, size, and architectural style.
• Choose materials, finishes, and fixtures that fit your design and budget.
Obtain Permits:
• Consult with your local design build contractor to determine the necessary permits and approvals.
• Prepare and submit all required documents, including architectural drawings and engineering plans.
Create Construction Documents:
• Work with your design build professional to develop detailed construction drawings and specifications.
• These documents will serve as a guide for contractors during construction.
Hire a design build contractor:
• Check references, credentials, and licenses before selecting a contractor.
• Sign a detailed contract that outlines the scope of work, timeline, and payment schedule.
Construction Phase:
• Demolition: If needed, remove any existing structures or walls.
• Foundation: Construct the foundation for the addition.
• Framing: Build the structural framework of the addition.
• Plumbing, Electrical, and HVAC: Install or update utilities as required.
• Insulation: Ensure proper insulation for energy efficiency.
• Drywall and Finish Work: Complete the walls and ceilings.
• Flooring and Cabinetry: Install flooring and kitchen cabinets.
• Appliances and Fixtures: Add appliances, plumbing fixtures, and lighting.
• Paint and Finish: Apply paint and finishes to achieve the desired look.
• Final Inspection: Schedule inspections to ensure compliance with building codes.
Final Inspections and Approvals:
• Arrange for final inspections to ensure the addition meets all safety and code requirements.
• Obtain any necessary certificates of occupancy or compliance.
Move In and Enjoy:
• Once all inspections and approvals are received, you can move into your new kitchen addition and start enjoying it.
Remember that every kitchen addition project is unique, so adapt this outline to your specific needs and circumstances. Consulting with professionals and obtaining the required permits and inspections is crucial to a successful and safe project.
 SabaRehman Abdulrehman
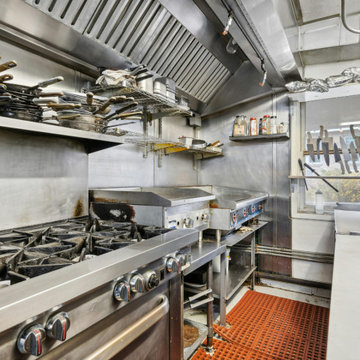
Phoenix's food scene is vibrant and thriving, but also one of the most closely watched in the country. Health inspectors in Maricopa County are strict, and customers expect spotless dining spaces.
To stay competitive, restaurant owners and food vendors must stay on top of evolving health codes, sanitation protocols, and food safety benchmarks. That starts with a firm grip on restaurant cleaning safety standards. Ignoring sanitation rules risks more than bad reviews. It invites citations, customer complaints, and operational shutdowns.
Whether you're operating a food truck or a restaurant, following these Phoenix cleaning standards helps you stay compliant, pass health inspections, and build customer trust.
Importance of a Clean Phoenix Restaurant that Follows Food Health and Safety Standards
The restaurant industry in Phoenix operates under strict oversight. The Maricopa County Environmental Services Department conducts regular inspections, and violations can result in fines or closures. In this climate, restaurant cleaning is not just a hygiene standard. It is a business-critical measure.
Proper food handling and establishment cleaning protocols reduce the risk of foodborne illnesses, control pests, protect equipment, and keep your staff safe. Inconsistent practices, on the other hand, can quickly become liabilities.
Start With the Food Code
Phoenix food vendors must comply with the 2017 FDA Food Code as adopted by Maricopa County. This includes rules on:
- Sanitizing food-contact surfaces after each use
- Maintaining proper water temperatures for dishwashing
- Cleaning restrooms frequently and keeping them stocked
- Storing cleaning chemicals away from prep areas
- Daily: Wipe prep tables, mop floors, clean grills, sanitize cutting boards
- Weekly: Deep clean kitchen hoods, polish cooking equipment, disinfect drains
- Monthly: Check pest control measures, clean freezer coils, and inspect HVAC filters
- Using the right sanitizers and PPE
- Logging cleaning times and who performed the task
- Identifying signs of mold, grease buildup, or rodent activity
- Conducting thorough surface cleaning to ensure all food-contact surfaces are sanitized regularly
- Food-safe and non-corrosive
- Effective against norovirus, salmonella, and E. coli
- Clearly labeled and stored in original containers
- Seal gaps around doors and pipes
- Store dry goods in sealed, elevated containers
- Keep outdoor waste bins locked and distanced from entry points
- Record cleaning completion in real time
- Alert managers when tasks are missed
- Keep a historical record for inspections
- Is certified and understands the Arizona food codes
- Provides documented service reports
- Offers customized cleaning plans
- Offers flexible scheduling around your operating hours
- Cross-contamination prevention: Regularly clean food prep surfaces and tools, and use separate equipment for raw meats, vegetables, and ready-to-eat foods. Proper cleaning prevents any contact with food that could lead to cross-contamination and affects food quality.
- Temperature monitoring: While not directly related to cleaning, maintaining proper food temperature is essential. Hot foods should be stored above 140°F, and cold foods below 40°F. Regularly monitor temperatures and clean temperature gauges to ensure accuracy.
- Proper storage: Use clean storage containers and shelving for food storage, keeping items off the floor. Ensure all food is sealed and labeled to avoid contamination risks and comply with food safety standards.
 SUPERIOR CHIMNEY SERVICES CORPORATION
As the temperatures continue to climb, and we finally get a chance to enjoy some warm weather, we start to walk around the neighborhood, or even our own homes, to find that lots of work needs to be done. Whether it be weed picking or changing bulbs in the light fixtures there’s always something that needs to be done. However, there’s one thing that can’t wait for your attention and that’s chimney tuckpointing. Why is it so important? Let’s take a look.
Weather and Tuckpointing, Not a Good Match
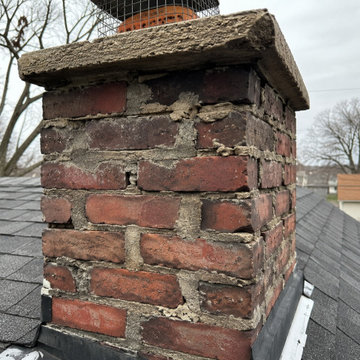
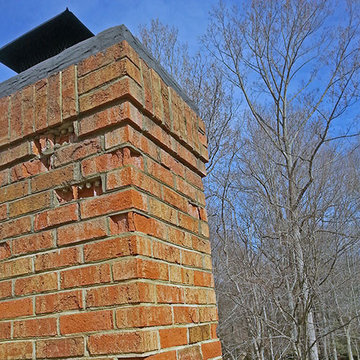
You might have guessed that Chicago and Chicagoland’s weather is brutal on masonry. The city and suburbs average around 35 freeze-thaw cycles every single winter. Every time the cycle occurs, it takes a toll on the chimney's mortar joints. When water gets in and temperatures drop, the water freezes & expands as ice with enough force to crack brick and stone. When Spring comes around, what once was a hairline crack, now gets bigger and allows rain to enter into your home.
This is why the yearly chimney inspection is not optional, according to the CSIA (Chimney Safety Institute of America).
A Little Chicago History
Most homes in neighborhoods like Beverly, Oak Park, Evanston and across the North Shore were built between the 1890s and 1950s. The mortar used in that era had a lifespan of roughly 25–30 years under normal conditions. Under Chicago and Chicagoland conditions? It is reduced. Homeowners buying older properties frequently inherit chimneys that haven't been maintained in a very long time.
When the chimney along with the flashing, bricks, chimney cap and chimney crown are not checked and maintained, loss of structural integrity begins. Water working its way through deteriorated joints reaches the interior of the chimney. This is where it can cause damage to the fire liner while it finds its way into the home. In some situations, compromised masonry near the fireplace can create fire safety concerns.
Getting a Chimney Inspection Early Makes All the Difference
The good news is that chimney tuckpointing, diagnosed early, is simply a repair. The bad news is that homeowners who wait too long can turn the issue into a partial rebuild, or a full chimney rebuild. By the time mortar is visibly crumbling from the street, the damage has already progressed deeper into the chimney structure.
A professional inspection every year is the most cost-effective way to keep the chimney and home heathy. It's often the difference between a few hundred dollars and several thousand.
Not All Tuckpointing Is Equal
One thing worth understanding is that proper tuckpointing requires removing the old mortar to a depth of approximately three-quarters of an inch before new mortar can be applied. Anything less and the new mortar won't bond with longevity / correctly. DIY or companies that just smear new mortar over old joints are doing what's sometimes called "skim coating," and it's essentially cosmetic work that won't hold up.
The type of mortar mix matters too. More modern cement mortars are actually harder than historic brick, which causes the brick itself to absorb, stress and crack rather than the mortar joint. A knowledgeable mason from Superior Chimney will match mortar composition to the brick, only something a real expert can get right.
Contact Superior Chimney today to get a chimney inspection which includes inspecting the exterior chimney today at 877-244-6349.
 SUPERIOR CHIMNEY SERVICES CORPORATION
A Seeping Chimney Can Cause Long-Term Damage
A seeping chimney is a slow, gradual way of water entering into the home and causing damage slowly, steadily and over time. The seeping chimney damage can range from a minor repair to something far more extensive. However, when it comes to water, it certainly doesn’t play nice with the materials your home is made from, including your chimney.
Let’s take a look at some of the various damage that can occur when your chimney leaks and makes its way to the various part of your home.
Wall Damage
One of the most obvious telltale signs of a water leak from the seeping chimney is wall damage. When it reaches your walls, the paint can peel, the wall can little bubbles or even the drywall can begin to chip away. No different if you have crown molding, wood paneling or other decorative aspects to your walls. Water can make the varnish peel and cause discoloration.
When your chimney isn’t inspected each year by a certified technician, these damages can be very expensive to repair.
Mold Growth
Many of us have experienced mold in the bathroom. Why? Because it is a perfect place for mold to grow. You have the perfect main ingredient. Moisture. If a seeping chimney allows for moisture to enter your home, it can create a perfect scenario for mold to grow. Mold can be harmful to your heath, especially if you have health issues such as asthma, allergies or emphysema to name a few.
By maintaining a healthy chimney equipped with a chimney crown, chimney cap and a waterproofing solution called Chimney Saver, you can keep moisture out and your health in good shape.
Soft Wood, Walls & More
When water gets at wood or walls, and it drips over time, the wood and wall material turn soft and falls apart. This rotting makes the wood or walls flaky to the touch and can cause structural damage. There’s another issue that comes with rotting wood or water-logged walls…bugs and pests. This is the perfect vacation spot for bugs and pests. Keeping them out of your home is a top priority.
Keep unwanted visitors out of your home by having an inspection on the chimney, the flue and down to the fireplace completed. Contact us today at 877-244-6349. We’re right here in Lombard, IL, close to where you reside.
What You Can’t See Can Hurt You
One way to ensure wall damage, mold spores and deteriorating wood and walls don’t happen is to get a yearly inspection on the chimney. Whether you have a gas or wood burning fireplace, use it all the time or not, rain water is still active trying to find its way into your home. Don’t give it that chance. Keep on top of it with a yearly inspection.
Contact us today at 877-244-6349 to set an appointment for a fireplace clean and check for a certified chimney inspection.
 Baseline Inspections
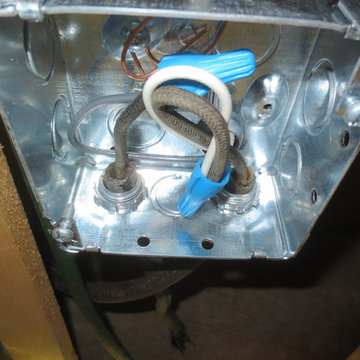
The listing on this home said the electrical had been updated. Our inspection found a new panel and service, but 30-40% of the knob and tube wiring was left in all of the hard to reach spaces. Now this house is a mixture of old and new wiring. An electricians nightmare moving forward! Baseline Inspections
 safe ZOnea
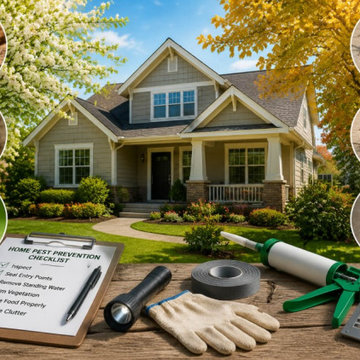
Maintaining a pest-free home requires attention throughout the year. Seasonal changes affect pest behavior, and understanding these patterns can save homeowners from costly damage and health hazards. In this guide, we will explore practical strategies for spring pest prevention tips, ensuring your property stays protected through every season. From spotting early signs to implementing proactive measures, these steps empower homeowners to take control before infestations occur.
Understanding Seasonal Pest Patterns
Pests adapt to changing weather, and knowing their patterns helps prevent infestations effectively.
Spring: Awakening Pests
Spring signals the end of winter dormancy for many pests. Rodents, ants, and termites start seeking food and warmth. Effective spring pest prevention tips include:
● Cleaning gutters and removing debris
● Sealing cracks and gaps in exterior walls
● Inspecting wood piles and compost areas
● Monitoring early signs of termite activity
Pro Tip: Conduct a termite inspection or a professional evaluation to catch infestations early before they spread.
Summer: Peak Pest Season
Warm temperatures accelerate pest breeding cycles. For a comprehensive summer pest prevention guide:
● Maintain lawns and trim vegetation away from homes
● Check window and door screens for tears
● Store food in sealed containers
● Inspect water sources that attract mosquitoes
Do You Know? Mosquitoes can lay eggs in a teaspoon of water. Eliminating stagnant water is crucial to reducing their population.
Fall: Preparing for Winter
As temperatures drop, pests search for warm indoor spaces. Key actions include:
● Inspecting for winter rodent entry points
● Sealing attic vents, crawl spaces, and foundation gaps
● Cleaning storage areas to minimize hiding spots
● Checking chimney and fireplace openings
Quick Fact: Rodents can enter homes through openings as small as ¼ inch.
Seasonal Pest Checklist for Homeowners
Creating a structured seasonal pest checklist simplifies preventive measures and ensures nothing is overlooked.
Season
Key Actions
Spring
Inspect for termites, seal exterior gaps, clean gutters, and check compost
Summer
Repair screens, trim vegetation, remove standing water, and secure food
Fall
Seal entry points, inspect attic/crawlspace, clear debris, and prepare storage
Winter
Monitor indoor activity, keep firewood away from walls, and maintain traps
Inspection & Maintenance Tips
● Schedule annual pest inspections by professional Virginia pest control consultation to detect hidden problems
● Keep a log of pest sightings and treatment dates
● Regularly replace weather stripping and caulk cracks
Note: Even small preventive steps, when consistently applied, drastically reduce infestations.
Common Pests and Their Seasonal Behaviors
Understanding how different pests behave each season helps homeowners take timely action to protect their property.
● Ants and Termites: Ants emerge in spring seeking food, while termites become active and can damage wood unnoticed. Early detection is critical.
● Rodents and Mice: Fall and winter increase rodent intrusions. Block all entry points and keep food sealed.
● Mosquitoes and Flies: Summer creates the ideal breeding environment for mosquitoes. Eliminate standing water and use physical barriers like nets.
● Spiders and Other Insects: Seasonal shifts cause spiders to move indoors. Regular vacuuming and decluttering reduce hiding spots.
Eco-Friendly Prevention Methods
● Use natural repellents like peppermint oil or diatomaceous earth
● Encourage beneficial insects, such as ladybugs, to reduce pest populations
● Plant pest-deterring plants near home boundaries, like marigolds or lavender
Integrated Pest Management (IPM)
Adopt an IPM approach by combining physical barriers, monitoring, and environmentally safe treatments. This minimizes chemical use while maintaining a pest-free home.
Quote: “Prevention is the most effective form of pest control.” – National Pest Management Association
Seasonal Pest Prevention Tools
● Snap traps and humane rodent traps
● Sticky traps for insects
● Outdoor perimeter sprays (eco-friendly)
● Moisture meters to detect early termite or mold problems
Pro Tip: Keep tools organized and accessible to act quickly when pest activity is noticed.
Planning: Annual Pest Calendar
Month
Recommended Action
March-April
Spring pest prevention tips: Inspect, seal, clean gutters
June-July
Summer pest prevention guide: Screens, standing water, food storage
September
Seasonal pest checklist: Seal entries, declutter, prep storage
November
Winter rodent entry points: Monitor indoors, maintain traps
Key Takeaways
● Seasonal awareness prevents infestations and property damage
● Consistent inspections and maintenance are essential
● Simple eco-friendly measures can significantly reduce pests
● Use a structured checklist and calendar for effective prevention
Conclusion
Homeowners who stay proactive and follow spring pest prevention tips, along with year-round monitoring, ensure their properties remain safe and comfortable. Using a summer pest prevention guide, checking winter rodent entry points, and maintaining a seasonal pest checklist ensure your home remains safe and comfortable. Remember to combine inspections, physical barriers, and environmentally friendly methods for the best results.
FAQs
Q1: How often should I perform a termite inspection?
A1: Conduct inspections annually, especially in spring, to detect early signs of termite activity and prevent extensive damage.
Q2: Can pests enter my home during winter?
A2: Yes, rodents and insects seek warmth and shelter indoors. Sealing entry points and monitoring for activity is crucial.
Q3: What is the most effective eco-friendly method for pest prevention?
A3: Using natural repellents, encouraging beneficial insects, and eliminating water sources effectively reduces pest populations without chemicals.
Ensure your home is ready for every season. Schedule a professional Virginia pest control consultation or a termite inspection in Suffolk, VA, today and stay ahead of potential infestations.

 SUPERIOR CHIMNEY SERVICES CORPORATION
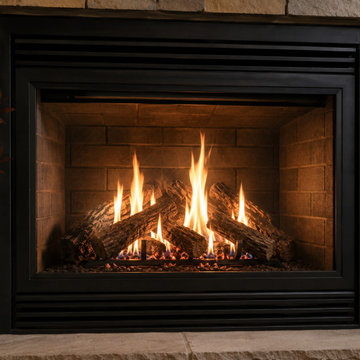
Standard annual or mechanical Chimney cleaning for gas and wood burning fireplaces typically works to remove any type of buildup as well as checking for the structural integrity of the chimney. Maintaining an annual chimney cleaning will meet the national safety standard set by the NFPA, CSIA, IRC and NCSG, helping homeowners avoid chimney fires and blockages.
Why does safety matter? Did you know that there was a chimney fire in Marengo in January? Or a chimney fire at a Peotone home at the end of March? Or a log cabin fire caused by the chimney in June? That’s just a few that happened in the past 7 months.
Why Does a Chimney Cleaning Matter?
Chimney sweeps also known as chimney cleanings, fireplace cleanings, or fireplace sweeps. Regardless of what you call it, it still means the same thing.
Chimney cleaning for gas and wood burning fireplaces serve 3 key purposes:
confirming structural integrity
removing flammable deposits and
obstruction-free assurance.
Homeowners with gas or wood burning fireplaces benefit from each of these safeguards.
The National Fire Protection Association addresses this directly through NFPA 211, a widely recognized fire safety code. The standard states that chimneys, fireplaces, and vents require inspection at least once a year for soundness, free from deposits, and correct clearances, with cleaning, maintenance, and repairs to be done whenever needed.
This annual requirement applies equally to gas and wood burning fireplaces. Organizations including the Chimney Safety Institute of America, the National Chimney Sweep Guild, International Residential code and the National Fire Protection Association each reference this standard as the requirement for home fire safety.
Free 14-Point Certified Written Inspection
Every chimney sweep completed through Superior Chimney includes a complimentary 14-point certified written inspection along with photo documentation delivered to you by email. This documentation gives homeowners a clear visual record of their chimney system.
The written report covers the condition of the flue liner, smoke chamber, smoke shelf, damper, firebox, chimney crown, and chimney cap, among other components examined during a standard visit. Photo documentation captures each area so homeowners can review the findings independently of the technician’s verbal summary. Written inspection reports allow families to track the condition of their fireplace chimney system over time.
Chimney Cleaning and Structural Integrity
A CSIA Certified Chimney Sweep technician, such as Superior Chimney technicians, visually examines the chimney from the top opening to the firebox below, gaining a full evaluation of the interior.
When chimney rods and brushes pass through the chimney system, loose pieces of fire clay tile, damaged tile joints, or crumbling brick sometimes fall down into the fireplace. This debris can mean there is an integrity problem. By knowing this is a problem, will protect families and their homes. Now it’s time to take care of it and call in a certified chimney technician.
Fireplace Cleaning and Creosote Removal
Creosote, is the technical name for soot. Soot forms as a natural byproduct of burning wood. Smoke traveling upward through the chimney and leaves deposits of creosote along the interior walls. With every fire, a little more gets built up.
The issue with creosote is that it is highly flammable and is the leading cause of chimney fires nationwide. Removing the buildup through regular chimney cleanings keeps a fireplace serviceable for continuous use throughout the spring, fall and winter seasons.
Standard and mechanical chimney cleanings pay close attention to the flue liner, smoke chamber, smoke shelf, damper, and firebox in a single service visit. Superior Chimney performs each fireplace chimney inspection using a no-mess process that protects the home during service. This keeps soot contained within specialized equipment rather than the living room.
An Obstruction Free Chimney
Several conditions create blockages within a chimney system. Bird, squirrel, bat and raccoon nesting material, feces, and debris frequently accumulate inside an unprotected flue, especially during spring and summer months when the fireplace sits unused.
Excessive creosote accumulation or a collapsed chimney liner can restrict proper airflow. Homeowners that address obstructions with a chimney inspection will be able to maintain proper draft and ventilation with their gas or wood burning fireplace. This will reduce the risk of smoke backing into the home.
Gas Chimney Cleaning Compared to Wood burning Chimney Cleaning
Gas and wood burning fireplaces share the same annual chimney inspection requirement. Whether you are burning wood, gas or a “pile of shirts” there is still heat and flame that requires worthy firewalls to protect the home from heat transfer. Fire worthiness and checking the firewall integrity is priority.
Wood burning fireplaces generate creosote that builds along the flue liner with every fire. Gas fireplace systems accumulate lighter deposits along with potential venting obstructions, since gas appliances rely heavily on venting for safe combustion byproduct release. Each system accumulates different residues that need attention.
A CSIA Certified Chimney Sweep technician from Superior Chimney adjusts the specific cleaning approach based on fuel type. However, the same core safety elements apply: structural integrity, deposit removal, and clear airflow.
What Happens During a Chimney Cleaning?
A typical chimney inspection begins with a walkthrough of the fireplace and the chimney on top of the roof, allowing the technician to record any visible concerns the homeowner reported in advance as well as any new findings.
The certified technician then covers the immediate hearth area with protective material before setting up specialized equipment designed to contain creosote throughout the cleaning and inspection.
Chimney rods and brushes pass through the flue liner to loosen and remove creosote deposits along the smoke chamber, smoke shelf, and damper. The certified technician inspects each section closely for loose or crumbling firewall, cracked joints, or other signs of weak structural damage.
A final walkthrough of the firebox and chimney completes the visual inspection. Photo documentation captures each component, and the certified written report is sent to the homeowner by email. This consistent process gives homeowners the documentation they need to compare year to year.
Chimney Cleaning Safety Standards
The table below summarizes the organizations that set national chimney safety standards, along with their specific requirements for fireplace chimney sweeps.
NFPA211
National Fire Protection Association
Annual inspection for soundness, deposit buildup, and correct clearances; cleaning and repairs completed as needed
CSIA
Chimney Safety Institute of America
Certifies technicians through testing on chimney and venting system knowledge
NCSG
National Chimney Sweep Guild
Establishes trade standards and best practices for chimney sweep professionals
How Often Should You Schedule a Chimney Cleaning and Inspection?
CSIA recommends scheduling chimney cleaning and inspection annually by CSIA Certified Chimney Sweeps. This recommendation applies to gas and wood burning fireplaces, regardless of how frequently a household uses the fireplace and especially in freeze/thaw geographic areas.
Regular chimney sweeps save lives, since a clean fireplace chimney rarely catches fire. CSIA encourages homeowners to rely on Certified Chimney Sweeps, as these technicians undergo regular testing on the complexities of chimney and venting systems throughout their careers.
Frequently Asked Questions
What is included in a chimney sweep? A chimney sweep includes the flue liner, smoke chamber, smoke shelf, damper, and firebox, removing creosote while checking for obstructions and structural concerns throughout the chimney system (NOT the ashpit).
How often should gas and wood burning fireplaces receive chimney sweeps? CSIA, NFPA, IRC and NCSG guidelines each call for chimney sweeps at least once a year for gas and wood burning fireplace systems.
Why does creosote removal matter for fireplace safety? Creosote is highly flammable and builds along the interior walls of a fireplace chimney with every fire, creating conditions that lead directly to chimney fires when left in place over time. Creosote is unburned particles from the combustion chamber.
Who should perform a fireplace chimney sweep? CSIA Certified Chimney Sweep technicians complete fireplace chimney sweeps after passing regular testing on chimney and venting system knowledge, meeting the certification standard recognized across the industry.
Does a fireplace chimney sweep remove animal nests and debris? No, a fireplace chimney sweep addresses soot and creosote, while significant nesting material, feces, or collapsed liner debris often calls for dedicated obstruction removal alongside the standard service.
What does the free 14-point inspection include? The complimentary 14-point certified written inspection documents the flue liner, smoke chamber, smoke shelf, damper, firebox, crown, and cap through photo evidence delivered directly by email for homeowner records.
Choose Superior Chimney for Your Certified Chimney Inspection
All service technicians completing chimney sweeps through Superior Chimney hold National Certification through the Chimney Safety Institute of America (CSIA), reflecting the training standard recommended by fire safety organizations nationwide.
Scheduling regular chimney sweeps to clean gas and wood burning fireplace systems protects a home from fire risk, preserves the structural integrity of the chimney, and keeps airflow clear for proper, continuous use throughout the year. Contact us today to schedule a chimney inspection at 877-244-6349.

 Tampa Home Inspections
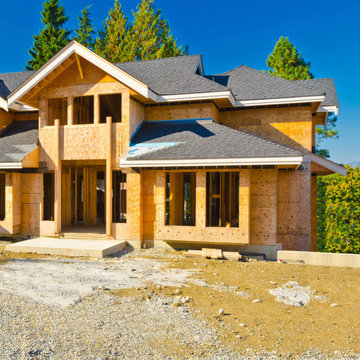
Tampa Home Inspections specializes in home inspection services in Wesley Chapel, FL and the greater Tampa area. Serving all four counties of Hillsborough, Pasco, Hernando, and Pinellas. Our expert team offers a range of services such as Four-Point Inspections, Wind Mitigation Inspections, 11-Month Warranty Inspections, Standard Home Inspections, and Pre-Drywall Inspections. Certified by InterNACHI and highly experienced, we ensure each inspection is conducted with meticulous attention to detail. Whether you're a homeowner seeking peace of mind or a prospective buyer needing a thorough property evaluation, we provide accurate assessments to meet all your inspection needs. Trust us for reliable, efficient, and professional inspection services in the Tampa area.
 Axium Inspections
Axium Home inspection is Colorado’s #1 Rated home inspection company with over 3,000 5-Star Reviews. We are locally owned and operated out of Denver (Home inspection in Denver), Colorado ( Home inspection in Colorado) and have grown into the largest and most referred property inspection company in Colorado. Our certified Home inspector in Denver have been professionally trained by Board Certified Master Inspectors to provide you with the quality home inspections in Denver, CO experience in the industry. We put our clients’ needs first, and we’ll get the results of your inspection back to you as quickly as possible. We'll go out of our way to accommodate your schedule. Above all, we understand our services are essential when completing a real estate (Real Estate inspection Denver) transaction and feeling safe in your home so we make the process as easy and comfortable as possible. We back all of our Residential (Residential Real Estate Inspections Denver) and Commercial inspections (Commercial Real Estate Inspections Denver) with a 100-Day Inspection Guarantee and we will always offer the absolute best home inspection (Colorado) service at the best price. Review our qualifications, certifications, and complete inspection services, and you will see that we are the best choice for all of your inspection needs. Schedule your inspection today and take the first step in protecting the investment in your new home.
Here are some of our qualifications to provide you a top-quality Home Inspection: • Professionally Trained, Certified Home Inspection;
Our quality home inspectors are nationally certified through InterNACHI or ASHI. We have 3 Board Certified Master Inspectors, and our inspectors are trained by a CMI with years of experience. • Flexible Scheduling;
Axium Inspections has customer service (Inspect All services Denver) representatives available 7:00 AM -7:00 PM, 7 days a week eager to handle all of your home inspection scheduling needs. • 110% Best Price Guarantee;
Axium Home Inspections offers the BEST VALUE at the LOWEST PRICE, offering a 110% Price Match Guarantee for all home inspections. If you find a lower quote from a company that has the same credentials as we do, we’ll match their quote then take another 10% off! • Insured and Bonded;
Axium’s home inspectors (licensed real estate home inspectors in Denver) are fully insured and bonded. We carry $2 Million in liability and $1 Million in Errors and Omissions insurance. We are bonded for $25,000, and we are backed by NACHI’s $10,000 honor guarantee for our home inspections.
Axium Home inspection Inspect All services in Denver Co
Axium Promises to Provide You the Best Home Inspection Services:
• Home inspection in Denver Colorado • Radon Testing in Denver Colorado • Real Estate inspection in Denver • Commercial Real Estate Inspections in Denver • Mold Inspection service in Denver Colorado • Infra-red Thermal Inspection Service in Denver • Water quality inspection in Denver Colorado • licensed real estate home inspectors in Denver
So, what are you waiting for? Hurry up Book an appointment at Axium Inspection today if you feel like your home needs our attention. For more information, visit our site (www.axiuminspections.com).
 SUPERIOR CHIMNEY SERVICES CORPORATION
A certified chimney inspection in Illinois is one of the key ‘to-do’s’ for the holidays. The last thing you need are a bunch of complaints because it’s too cold.
There’s a cold draft coming from the fireplace. Or the fire is nice and warm, but the kids playing are starting to cough because there’s a backup of smoke coming into the home. Now you have to open the windows and everyone is cold again. There are enough stresses the host must deal with, do we need to add another one?
What is a Certified Chimney Inspection?
According to the CSIA, a certified chimney inspection is an evaluation of the chimney or venting system to assess its condition and determine if it’s fit for use. Superior Chimney is certified by the CSIA to perform chimney inspections and chimney sweeps as well. What this means for you is that our technicians are trained to adhere to the NFPA 211 standard which states that the chimney and venting systems are to be inspected each year regardless if it’s a woodburning gas or unused fireplace and chimney.
Chimney Inspection Levels
A Level 1 inspection is the minimum required. How do you know this one is for you? A certified chimney inspection is when you have your chimney swept and inspected each year. Nothing has changed, you use it (or don’t use it) any differently than in the past.
A Level 2 inspection is when a change has been made to your system. This can include a change in the type of fuel being used such as changing over from gas to woodburning or from not using the fireplace to using it even if it is only once per year. Another change can also be the change to the shape of the flue or you had a new flue lining installed which is different that what you had prior.
A Level 2 is also necessary if you sold your home or if there’s been a tornado, bad storms or those (once in a few years) earthquakes.
Level 3 inspection is for more serious hazards and issues. The normal technician tools won’t do and they need special tools in order to inspect closed out portions that can’t be viewed easily.
Reason for a Yearly Inspection…
One of the main reason your chimney and fireplace needs an inspection…regardless if you use the fireplace or not…is the winter freeze thaw cycles. This is when the air temperature drops to 32 degrees or below to freeze the rain and/or snow and then goes right back up in temperature for the rain and/or snow to thaw.
As we have all experienced, winter and early spring are the perfect times of year to experience the freeze thaw cycle.
Finally…
Now that you know the stress your chimney and fireplace goes through each year, be sure to get it swept and inspected by a certified chimney technician from Superior Chimney. This will keep the holiday complaints down to a minimum. Contact us today at 877-CHIM-FIX (877-244-6349)
 Code Construction
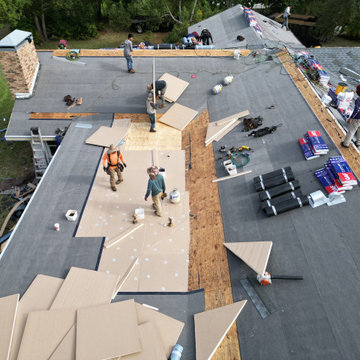
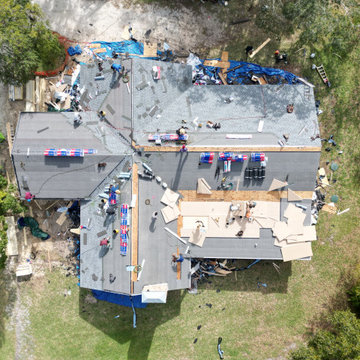
At Code Construction, we utilize advanced drone inspections to ensure the highest level of quality workmanship for your roofing projects. Our drone-assisted roof inspections offer a precise and comprehensive view of your roof, capturing high-resolution images that help identify even the smallest defects or potential issues.
This aerial inspection method allows us to quickly and safely assess the quality of installation, check for proper sealing, flashing, and ensure that all aspects of the roof meet our rigorous standards. By using drones, we minimize the need for physical inspections, reducing risk and enhancing efficiency while providing a more thorough analysis of your roof’s condition.
Whether you're evaluating recent roofing work or conducting a post-construction inspection, our drone roof inspections give you peace of mind by confirming that your roof is built to last.
9