
Search results for "Inspected" in Home Design Ideas
 Senergy360, LLC.
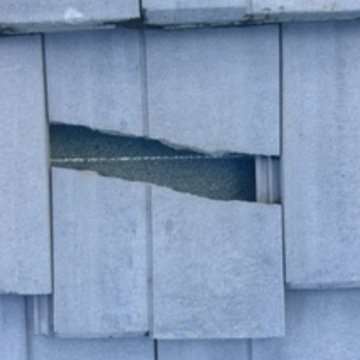
At Senergy360, we specialize in thorough roof inspections, focusing on damaged or broken tiles that can compromise your home's structural integrity. Our expert team examines every aspect of your roofing system to identify potential issues before they escalate into major problems.
To maintain a healthy home environment and prevent mold growth, regular roof maintenance is essential. Even small cracks or damaged areas can allow moisture infiltration, leading to serious issues like toxic mold development, compromised indoor air quality, and reduced energy efficiency. We recommend comprehensive inspections to identify and address these issues early.
Our commitment to healthy home construction extends beyond roof inspections. We understand that a truly healthy home requires proper ventilation, moisture control, and the use of non-toxic building materials. Our expertise helps homeowners create living spaces that promote wellness through:
Smart moisture management systems
Proper attic ventilation design
High-quality, sustainable building materials
Energy-efficient construction methods
Professional drainage solutions
By addressing these crucial elements during construction or renovation, we help create homes that protect your investment and support your family's health and well-being.
 Nest Egg Home Services, LLC
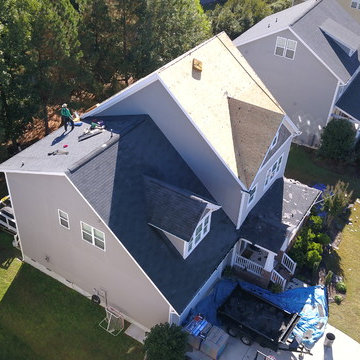
With the help of our drones, we were able to provide this home owner with a thorough inspection of their roof. The results determined that a new roof was needed to prevent further damage to the home. Our drones are used for all roof inspections, and are a part of our comprehensive home inspection as well.
Find the right local pro for your project
 SUPERIOR CHIMNEY SERVICES CORPORATION
Out of sight, out of mind. That’s what happens with the poor chimney. It stands up there, straight and tall, each day taking a beating from the sun, wind, rain, snow and freeze/thaw cycles of winter. Yet, we rely on the chimney each day to take away the smoke and gasses from the fireplace, furnace and water heater appliances.
What can we do as homeowners to ensure it continues to do its job without fail?
Sweep & Check the Chimney and Fireplace
A Certified Technician performs sweep and/or inspection of nearly/over a thousand chimneys annually. You may be familiar with the 14-point certified chimney inspection accompanied by photo documentation - I’ve shown you this graphic before, but it sure is a good one. It gives you the “what and where” of the overall condition of your chimney(s). If you have any questions, you can point to the picture and the certified technician can elaborate on the relative chimney inspection-point results.
Exterior Chimney
Part of the inspection, as you will see in the picture, is to inspect the exterior of the chimney. The Certified Chimney Technician will inspect the full chimney including the chimney flashing, bricks and mortar joints, chimney crown and cap. Let’s take a look at each one.
Chimney Flashing
Chimney flashing plays a vital role to the protection of your home. It’s the piece of material that protects where chimney protrude out of the roof. To prevent water leaks and damage, the technician will inspect for any loose, missing, cracked or damaged flashing.
Brick & Mortar Joints
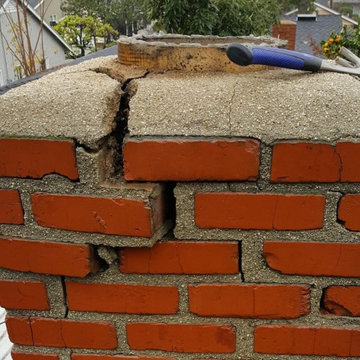
This is key. To prevent any type of major repairs, take care of minor repairs now. The technician will check for loose, cracked or spalling (chipped) bricks. If there are loose bricks and numerous cracks and chips, we’ll inspect further for any type of water leaks or water damage problems.
Chimney Crown
The concrete slab on top of the chimney is the chimney crown. It serves a very important purpose. The concrete slab acts like your chimney’s own personal roof. The technician will check if there are cracks, loose or missing pieces from the crown.
Chimney Cap
Chimney caps are also a critical component of the chimney - Every chimney needs a chimney cap for the same reasons every home needs a roof! It covers the opening of the flue. It prevents animals, debris and water from entering the chimney. The material of a chimney cap is usually made of stainless steel, as it will not rust.
Overall
If you’ve put-off getting the chimney inspected for some time, it’s best to get it checked. We’ve had some challenging weather this summer, and winter is not too far off. Take the time to give us a call and we’ll come out to give you a complete 14-point inspection with supporting photo documentation. If you don’t have a problem, fantastic, you’re ready for winter! If not, get the repairs done now so you don’t experience further damage to the interior or exterior of your home during the high-use months of winter.
Give us a call today at 877-CHIM-FIX (877-244-6349)



 Florida Inspections Unlimited
Florida Inspections Unlimited
3801 SW 117 Ave.#655209
Miami,FL 33175
(305) 910-1171
http://www.homeinspectionsmiamifl.com/services/mold-inspection-miami/
 SUPERIOR CHIMNEY SERVICES CORPORATION
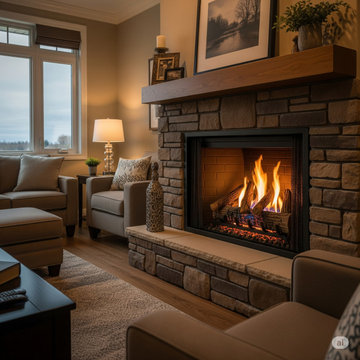
September 21st is the first day of Fall. I know we don’t want to think about it yet, but it is good to prepare and get the chimney swept early. Why? According to the Farmer’s Almanac, they are predicting a colder and snowier Winter. But you say, “eh, I got a gas fireplace.” Better yet, “I don’t use my fireplace, so why should I sweep it, and clean it early?” Let’s discuss why all types of chimneys and fireplaces need to be swept.
Why Do All Types of Chimney’s and Fireplaces Need to Be Swept?
When we think of the fireplace, we picture the real wood burning fireplace with the sounds of crackling wood. With regular use of the wood-burning fireplaces, a byproduct called creosote forms and over time, lines the side of the chimney flue. This needs to be swept at least once per year as creosote is flammable. However, all chimney’s, regardless of whether it burns wood or utilizes gas, needs to be professionally inspected and swept annually.
Many homeowners mistakenly believe that a gas or unused chimney is immune to problems since it doesn't produce a byproduct. However, these chimney systems face their own unique dangers. Gas fireplaces, especially those that are high-efficiency, can lead to the buildup of corrosive deposits. Over time, these deposits can degrade your chimney liner. Getting it inspected by a certified chimney technician will control this issue so it doesn’t turn into a problem.
4 Key Reasons to Prioritize Your Annual Chimney Inspection
The annual chimney inspection is more than just a sweep; it’s a comprehensive health check for your entire chimney system. We call it the 14 Point Inspection. A certified chimney technician will look for:
1. Fire Hazards: Again, for wood-burning chimneys, the removal of creosote is important to prevent a chimney fire. Gas fireplaces release corrosive deposits. If you don’t use the fireplace, you never know what debris may have settled in. If you want to use the fireplace, please be sure to have it professionally inspected and swept before use.
2. Obstructions: There’s a whole world outside of your home, and especially in the Fall, our little friends are searching for a warm place to stay. Your chimney looks pretty good. And, let’s not forget how the wind in the Chicagoland are does a great job of moving debris around that can get up and under the chimney cap or directly into the chimney if you don’t have a cap. These blockages need to be cleared for you and your home’s protection.
3. Structural Damage: A chimney technician will be able to spot cracks, water damage, or deterioration of the chimney and chimney liner that could compromise the system's safety.
4. Ventilation Issues: Ventilation is key for your home to breathe. The certified chimney technician will ensure proper draft and airflow, which is the best way to get rid of toxic gases.
NFPA
Remember, the National Fire Protection Association (NFPA) recommends an annual inspection for all chimney types. This simple, proactive maintenance can save you from costly repairs. Don't wait for a problem to become obvious.
Contact Superior Chimney today at 877-244-6349 to schedule a 14-Point Chimney inspection to ensure your home and family are protected.
 Florida Inspections Unlimited
Florida Inspections Unlimited
3801 SW 117 Ave.#655209
Miami,FL 33175
(305) 910-1171
http://www.homeinspectionsmiamifl.com/services/home-inspection-miami/
 Florida Inspections Unlimited
Florida Inspections Unlimited
3801 SW 117 Ave.#655209
Miami,FL 33175
(305) 910-1171
http://www.homeinspectionsmiamifl.com/services/home-inspection-miami/
 RW Huntley Home Inspection, L.L.C.
Robert W. Huntley
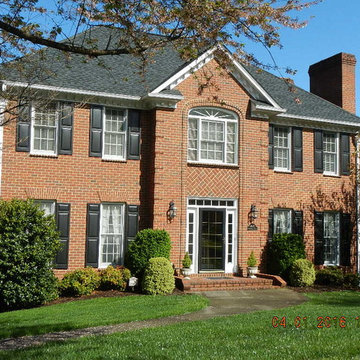
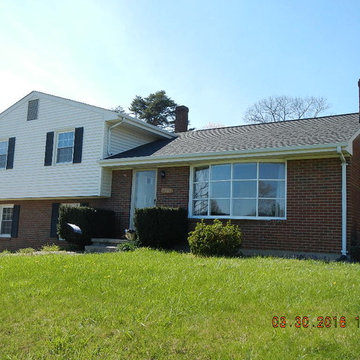
Mid-sized traditional red two-story brick gable roof idea in Other
Mid-sized traditional red two-story brick gable roof idea in Other

 Florida Inspections Unlimited
Florida Inspections Unlimited
3801 SW 117 Ave.#655209
Miami,FL 33175
(305) 910-1171
http://www.homeinspectionsmiamifl.com/services/home-inspection-miami/
 Florida Inspections Unlimited
Florida Inspections Unlimited
3801 SW 117 Ave.#655209
Miami,FL 33175
(305) 910-1171
http://www.homeinspectionsmiamifl.com/services/mold-inspection-miami/
 Therma-Scan
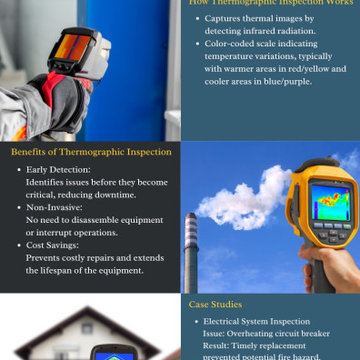
Therma-Scan is an inspection service company specializing in infrared electrical, building, mechanical and roof inspection for commercial, industrial and residential clients nationwide.

 Talon Construction Inc.
Designing and building a kitchen addition is a complex process that involves multiple steps and considerations. Here is a general outline to help you get started on your kitchen addition project:
Define Your Goals and Budget:
• Determine the purpose of the kitchen addition. Is it for more cooking space, a dining area, or a combination of both?
• Establish a realistic budget for your project. Consider all costs, including construction, permits, materials, and furnishings.
Hire a Design Professional:
• Seek the services of a design build company who specializes in kitchen additions.
• Discuss your vision, needs, and budget with the design professional to create a design concept.
Site Evaluation:
• Assess the existing space and structural condition of your home to ensure it can support the addition.
• Consider factors like zoning regulations, setbacks, and building codes.
Design Development:
• Collaborate with your design professional to refine the concept, including the layout, size, and architectural style.
• Choose materials, finishes, and fixtures that fit your design and budget.
Obtain Permits:
• Consult with your local design build contractor to determine the necessary permits and approvals.
• Prepare and submit all required documents, including architectural drawings and engineering plans.
Create Construction Documents:
• Work with your design build professional to develop detailed construction drawings and specifications.
• These documents will serve as a guide for contractors during construction.
Hire a design build contractor:
• Check references, credentials, and licenses before selecting a contractor.
• Sign a detailed contract that outlines the scope of work, timeline, and payment schedule.
Construction Phase:
• Demolition: If needed, remove any existing structures or walls.
• Foundation: Construct the foundation for the addition.
• Framing: Build the structural framework of the addition.
• Plumbing, Electrical, and HVAC: Install or update utilities as required.
• Insulation: Ensure proper insulation for energy efficiency.
• Drywall and Finish Work: Complete the walls and ceilings.
• Flooring and Cabinetry: Install flooring and kitchen cabinets.
• Appliances and Fixtures: Add appliances, plumbing fixtures, and lighting.
• Paint and Finish: Apply paint and finishes to achieve the desired look.
• Final Inspection: Schedule inspections to ensure compliance with building codes.
Final Inspections and Approvals:
• Arrange for final inspections to ensure the addition meets all safety and code requirements.
• Obtain any necessary certificates of occupancy or compliance.
Move In and Enjoy:
• Once all inspections and approvals are received, you can move into your new kitchen addition and start enjoying it.
Remember that every kitchen addition project is unique, so adapt this outline to your specific needs and circumstances. Consulting with professionals and obtaining the required permits and inspections is crucial to a successful and safe project.
 Talon Construction Inc.
Designing and building a kitchen addition is a complex process that involves multiple steps and considerations. Here is a general outline to help you get started on your kitchen addition project:
Define Your Goals and Budget:
• Determine the purpose of the kitchen addition. Is it for more cooking space, a dining area, or a combination of both?
• Establish a realistic budget for your project. Consider all costs, including construction, permits, materials, and furnishings.
Hire a Design Professional:
• Seek the services of a design build company who specializes in kitchen additions.
• Discuss your vision, needs, and budget with the design professional to create a design concept.
Site Evaluation:
• Assess the existing space and structural condition of your home to ensure it can support the addition.
• Consider factors like zoning regulations, setbacks, and building codes.
Design Development:
• Collaborate with your design professional to refine the concept, including the layout, size, and architectural style.
• Choose materials, finishes, and fixtures that fit your design and budget.
Obtain Permits:
• Consult with your local design build contractor to determine the necessary permits and approvals.
• Prepare and submit all required documents, including architectural drawings and engineering plans.
Create Construction Documents:
• Work with your design build professional to develop detailed construction drawings and specifications.
• These documents will serve as a guide for contractors during construction.
Hire a design build contractor:
• Check references, credentials, and licenses before selecting a contractor.
• Sign a detailed contract that outlines the scope of work, timeline, and payment schedule.
Construction Phase:
• Demolition: If needed, remove any existing structures or walls.
• Foundation: Construct the foundation for the addition.
• Framing: Build the structural framework of the addition.
• Plumbing, Electrical, and HVAC: Install or update utilities as required.
• Insulation: Ensure proper insulation for energy efficiency.
• Drywall and Finish Work: Complete the walls and ceilings.
• Flooring and Cabinetry: Install flooring and kitchen cabinets.
• Appliances and Fixtures: Add appliances, plumbing fixtures, and lighting.
• Paint and Finish: Apply paint and finishes to achieve the desired look.
• Final Inspection: Schedule inspections to ensure compliance with building codes.
Final Inspections and Approvals:
• Arrange for final inspections to ensure the addition meets all safety and code requirements.
• Obtain any necessary certificates of occupancy or compliance.
Move In and Enjoy:
• Once all inspections and approvals are received, you can move into your new kitchen addition and start enjoying it.
Remember that every kitchen addition project is unique, so adapt this outline to your specific needs and circumstances. Consulting with professionals and obtaining the required permits and inspections is crucial to a successful and safe project.
 SUPERIOR CHIMNEY SERVICES CORPORATION
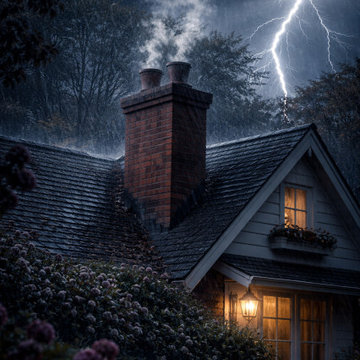
Winter is always tough on your home. This past winter was no picnic with the snow and cold. By the time spring (really) arrives, your chimney has put up with months of freezing temperatures, snow, ice, and the constant freeze-thaw cycle that quietly does damage you can't always see from the outside. That's why a spring chimney inspection isn't just a good idea, it’s essential to have your chimney checked before storm season begins. Here’s why:
Water Is Your Chimney's Worst Enemy
Here's something that most homeowners don’t know: chimney leaks cause more damage to masonry chimneys than fire does. Think about that a moment. While everyone worries about creosote and chimney fires — and rightfully so — water is silently doing just as much, if not more, damage.
Unlike the rest of your home, which is sheltered by your roof and eaves, your chimney stands fully exposed above the roofline. It takes on rain, wind, snow, and every freeze-thaw cycle winter throws at it, all while absorbing moisture into its porous masonry materials. That water expands and contracts, causing cracks, structural stress, and integrity loss that accumulates over time. The worst part? Chimney leaks are often subtle and slow-moving. By the time you notice water damage inside your home, the problem has usually become more serious, and expensive.
What a Spring Inspection Actually Catches
A professional spring chimney inspection, such as Superior Chimney’s, goes well beyond a quick visual check. A CSIA Certified Chimney Sweep technician will evaluate your entire system — inside and out — looking for the most common sources of chimney leaks and damage, including cracked chimney crowns, deteriorated brick and mortar joints, damaged or missing chimney caps, faulty chimney flashing and roof leaks, chimney slab gaps, and flue gas condensation from improperly sized chimney liners.
Any one of these issues left without a proper inspection, heads into spring storm season is an open invitation for water damage. And as Superior Chimney has discussed, masonry water damage is a progressive problem — the longer it goes unrepaired, the costlier the fix becomes.
What You Can Do Right Now
The good news is that most chimney water damage is preventable. The key steps are:
• have a professional-grade chimney cap installed if you don't already have one
• repair or replace a damaged chimney crown
• address any deteriorated brick and mortar
• fix leaky flashing and
• consider having your chimney professionally waterproofed. Waterproofing alone can save you significantly on future repair costs.
What’s Next?
Superior Chimney always includes a free 14-Point Certified Written Inspection with photo documentation via email with every chimney sweep. This helps you to know exactly what condition your chimney is in and what, if anything, needs attention.
Don't wait, have your chimney checked before storm season begins to reveal a problem that's been building all winter.
Schedule your inspection today at 877-244-6349.
 SUPERIOR CHIMNEY SERVICES CORPORATION
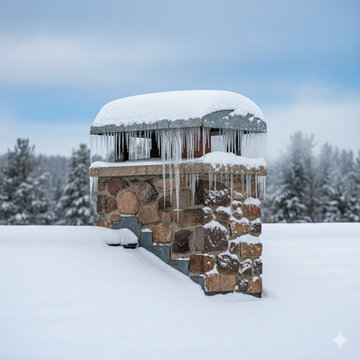
The impact of temperature drop on the chimney can impact the structure and functionality of the chimney. As we have been experiencing in Chicago winters, temperatures have gone from 50 degrees down to 21 degrees during the day, with temperatures falling even further at night. What can you do as a homeowner to watch for, and when to bring in a certified technician from Superior Chimney.
External: Impact of Temperature Drop on the Chimney
Anytime there is a rapid temperature change, it causes the bricks, stones and mortar to expand and contract. These durable materials are still susceptible to thermal shock, especially when it gets wet from ice, rain or melting snow. Because of the drastic change in temperatures, this can cause hairline cracks to begin, and if it goes unnoticed, larger cracks in the masonry will form.
External: Freeze-Thaw Damage
Mortar, bricks and stones are porous materials, meaning that air and water enter the materials. Sometimes, it leaves or dries out, and other times it stays longer. When the temperatures drop below 32 degrees, any of the trapped water freezes and then expands. This can cause small cracks to start, deterioration of the mortar or spalling which is the flaking of the bricks to occur.
External: Ice Build Up on the Chimney Cap or Chimney Crown
When temperatures are 50 degrees and it rains, water accumulates everywhere, including the highest point on your house, the chimney. The chimney cap and chimney crown are always exposed to the harshest elements. When it rains and temperatures drop during the day or night, freezing occurs and can create ice buildup. This can cause the chimney crown to crack or the chimney cap to loosen.
Internal: Chimney Flue Lining
The temperature swing also affects the chimney flue liner. Some chimney flue liners are made from clay. These are especially susceptible to crack forming from the swing in temperatures. But what also happens whether you have a gas or wood burning fireplace is the formation of condensation which can occur when there is fast cooling after the fire in the fireplace is put out or turned off.
Bring out the Sun!
Well, yes, the sunshine melts the ice and snow, but when temperatures go down at night, what remains wet, will refreeze again. The repeated process places stress on the masonry, bricks and stone.
Chimney Inspections Work
A chimney inspection can help with both safety and preserving the structure of the chimney. When a chimney technician conducts an inspection, they will search for cracks in the bricks and mortar, any spalling or deterioration from the thermal shock and freeze thaw cycle. These areas will be marked for repairs if it gets any worse and before it becomes too expensive to repair.
We can’t forget the biggest intruder in the home: water. The chimney technician will also be checking for water leaks from the chimney flashing, the chimney crown, chimney cap or the efflorescence which is the white material that shows up on the chimney or fireplace.
These are just a couple of key areas that a chimney inspection completes. There are numerous other areas, and this can be found on Superior Chimney’s 14-point inspection guide.
Contact us today, and we’ll set you up for a chimney inspection with photo evidence so you have peace of mind with the safety and security of your home.
 Decus Interiors
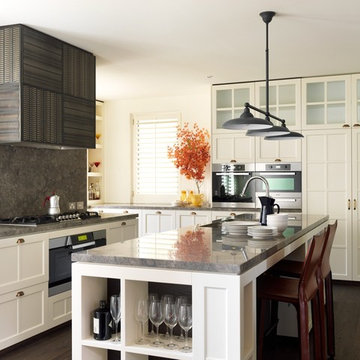
Large transitional galley dark wood floor kitchen photo in Sydney with an undermount sink, white cabinets, marble countertops, stone slab backsplash, stainless steel appliances and an island
8