
Search results for "Inspecting character" in Home Design Ideas
 ALL Renovation & Design LLC
Could a dreadful dishwasher leak be a blessing in disguise?
The Redding kitchen was very odd. The house was a beautiful brick house from the early 1900’s, but the kitchen had been renovated since then with an impractical layout. It worked, but, for as much time as Mr. and Mrs. spend in the kitchen, it left much to be desired. Because they enjoy cooking so much, they dreamed of having a functional kitchen that added to the character of the home and respected the history of it.
So that’s why Mr. and Mrs. went to a Lancaster Home Show where they meet ALL Renovation & Design. They were impressed with our process which guides clients through the design phase in a unique way that guarantees a customized remodel, tailored to their dreams. We really hit it off, but, since they were still in the idea stage, the years passed quickly.
Then one morning they discovered a puddle under the dishwasher. And, as is often the case, the damage had already spread to the surrounding cabinets and a large area of the floor. And upon further inspection, it was discovered that part of the floor was made with asbestos – which would require expert remediation. This was turning into a major rehab project.
That’s when they were faced with a tough call: do they patch it up now and rip it out in a few years when they remodel the entire kitchen, or, do they remodel now? They called ALL Renovation & Design.
First we worked with the insurance company to raise the damage claim to what it would have actually cost to repair the damage done by the leak… several thousand dollars higher than what they had initially appraised it.
Then we guided Mr. and Mrs. through the design process that carefully articulated the goals and vision for the new kitchen. Functionality and complementing the home’s character were top priority. They were extremely pleased with the help we provided in guiding them through the cabinet choices, layout, and color selections.
Communication was key. Especially when we got into the demolition and construction work. One thing you can be sure of when working with older homes is that there are almost always surprises between the walls. For the Redding kitchen it took the form of a steel support beam that we discovered on the second day of demolition. Because it prevented us from opening up the doorway, we had to pivot and adjust the cabinet spacing. Electrical access was also a serious problem that required added creativity to be sure the new space would include all the functionality of a modern kitchen. But all the challenges were overcome through creativity and almost constant communication.
At last, it was complete. Together we transformed the space into a beautiful transitional kitchen that is a joy to work in.
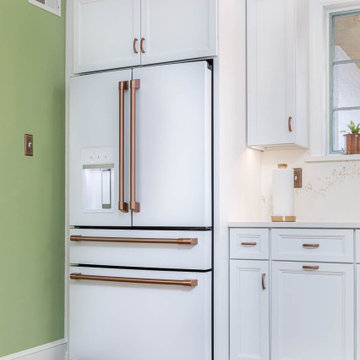
The maple cabinets with full-overlay doors were painted in matte white with copper hardware. The countertop and backsplash were Hanstone Quartz in the Strato color. It included a 30” single-basin sink in 14-gauge hammered copper. For the floor they chose Lauzan Maple Hardwood in the Sahara finish, installed in the herringbone pattern. And to really set off the kitchen, the old appliances were replaced with new GE Café appliances in their classy matte white with brushed copper accents.
 Specialty Home Improvement
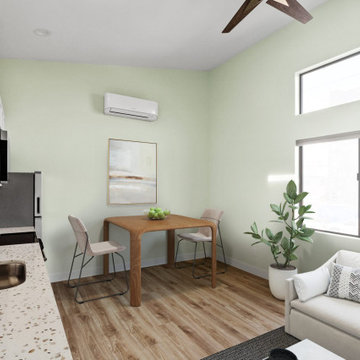
The homeowner on this busy corner in the diverse and eclectic North Park area was seeking to create additional functional living space while also preserving the existing garage. In an area well known for limited parking and smaller lots, only one direction was really available to make this project a success – UP!
The Challenge: Create a modern, functional living space in keeping with the vibrant character of North Park on top of an existing 90 year old, undersized garage.
The Solution: An efficiently designed one bedroom, one bath ADU with a raked roof and ceiling line to enhance the character of the residence on the exterior while creating an expansive feel of space and light inside.
This project was designed, planned, and built by Sheen Fischer and the Specialty Home Improvement team. We handle our projects from the first phone call through the final inspection.
 Specialty Home Improvement
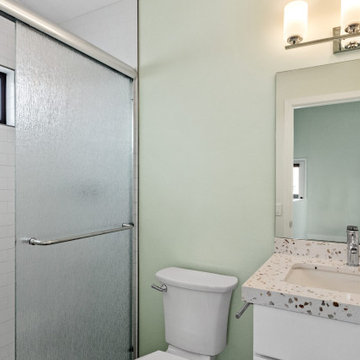
The homeowner on this busy corner in the diverse and eclectic North Park area was seeking to create additional functional living space while also preserving the existing garage. In an area well known for limited parking and smaller lots, only one direction was really available to make this project a success – UP!
The Challenge: Create a modern, functional living space in keeping with the vibrant character of North Park on top of an existing 90 year old, undersized garage.
The Solution: An efficiently designed one bedroom, one bath ADU with a raked roof and ceiling line to enhance the character of the residence on the exterior while creating an expansive feel of space and light inside.
This project was designed, planned, and built by Sheen Fischer and the Specialty Home Improvement team. We handle our projects from the first phone call through the final inspection.
Find the right local pro for your project
 Lolly & Me
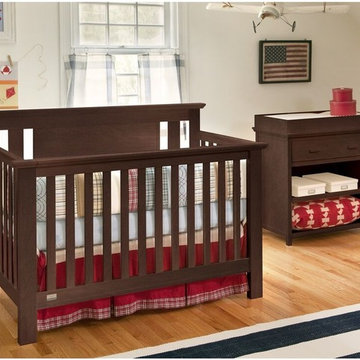
Lolly & Me Delaney Changing Table, White
This versatile changing table adds a touch of Cape Cod's coastal character to your nursery. Built to last your child a lifetime, it features extra thick tops with softly beveled edges and recessed panels. A deep drawer with a reinforced bottom provides sturdy storage, while two open shelves invite easy access to all your diapering needs. The changer includes a safety belt to keep even the most active baby secure. The paint and protective clear coat are applied by hand in three steps for extra durability. Rigorously tested to exceed US-safety standards, it comes with foot levelers and anti-tip hardware. When your toddler has outgrown the changer, its changing kit is easily removed to unveil a practical and stylish nightstand or accent table fit for any room in your home. In white, the Delaney lends a breezy beach air to any room. Pair it with the Delaney 4-in-1 convertible crib to complete the scene. User-friendly instructions eliminate assembly headaches so even the busiest parents can put it together. All our Lolly & Me products are created by two moms, dedicated to dressing up today's nursery with affordable style that's fresh, functional and safe.
- Certifications: JPMA, CPSIA, ASTM; USA-inspected
- Construction: solid New Zealand pine, yellow poplar, 5-ply birch and maple veneers, MDF, formaldehyde-free adhesives
- 3-step finish: hand-applied, rich paint color and protective clear coat
- Removable changer tray fits standard-size changer pad (32' x 16' x 1')
- Assembled dimensions: 33" H x 34.4" W x 17.5" D
- Care: clean with mild soap and water
- Warranty: one year for all manufacturing defects
 Buytilesandmore
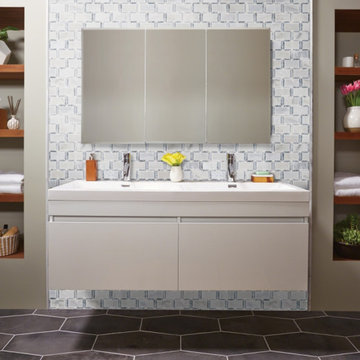
The Framework Polished Marble Mesh-Mounted Mosaic Wall Tile has a soft white color with gray veining and a smooth, polished finish. The 2 in. x 4 in. brick pieces are fashioned with beveled edges on 12 in. x 13.19 in. mesh sheet to add definition to any residential or commercial expanse, certain to infuse your space with visual allure. Boasting random tone variations for extra character, they look particularly stunning as kitchen backsplash or tub/shower surround and also perform splendidly as an accent panel or countertop surface. Note: Inspect all tiles before installation. Natural stone products inherently lack uniformity and are subject to variation in color, shade, finish, etc. It is recommended to blend tiles from different boxes when installing. Natural stones may be characterized by dry seams and pits that are often filled. The filling can work its way out and it may be necessary to refill these voids as part of a normal maintenance procedure. All natural stone products should be sealed with a penetrating sealer.
 Quarry Mill
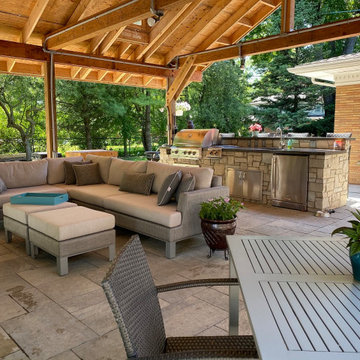
This welcoming outdoor living area with a covered patio and stainless steel outdoor kitchen showcase the Quarry Mill's Stonegate classic buff limestone real thin veneer. Stonegate is a classic and traditional choice for a natural limestone veneer. The stone is neutral and complementary allowing design flexibility with other siding, roofing, and flooring elements. Stonegate is predominantly an off white or buff tone with shades of grey. The stone has a slight amount of natural veining that looks similar to light pencil lines across parts of the stone. The veining is not visible from a distance but its detail and uniqueness are revealed upon close inspection. The depth and character of the veining in Stonegate can only be found in natural stone. Stonegate is considered an ashlar pattern but is on the rougher end as it is created to be less linear and clean-cut than some of our other ashlar options.
 Specialty Home Improvement
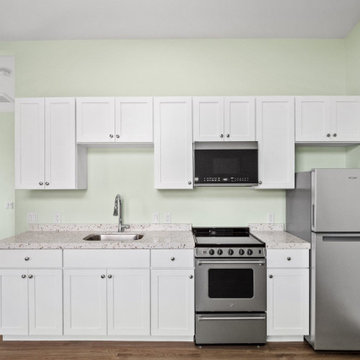
The homeowner on this busy corner in the diverse and eclectic North Park area was seeking to create additional functional living space while also preserving the existing garage. In an area well known for limited parking and smaller lots, only one direction was really available to make this project a success – UP!
The Challenge: Create a modern, functional living space in keeping with the vibrant character of North Park on top of an existing 90 year old, undersized garage.
The Solution: An efficiently designed one bedroom, one bath ADU with a raked roof and ceiling line to enhance the character of the residence on the exterior while creating an expansive feel of space and light inside.
This project was designed, planned, and built by Sheen Fischer and the Specialty Home Improvement team. We handle our projects from the first phone call through the final inspection.
 Specialty Home Improvement
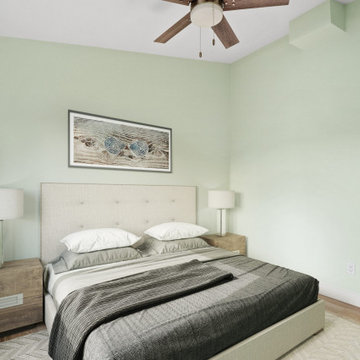
The homeowner on this busy corner in the diverse and eclectic North Park area was seeking to create additional functional living space while also preserving the existing garage. In an area well known for limited parking and smaller lots, only one direction was really available to make this project a success – UP!
The Challenge: Create a modern, functional living space in keeping with the vibrant character of North Park on top of an existing 90 year old, undersized garage.
The Solution: An efficiently designed one bedroom, one bath ADU with a raked roof and ceiling line to enhance the character of the residence on the exterior while creating an expansive feel of space and light inside.
This project was designed, planned, and built by Sheen Fischer and the Specialty Home Improvement team. We handle our projects from the first phone call through the final inspection.
 Rocks & Cornerstones LLC
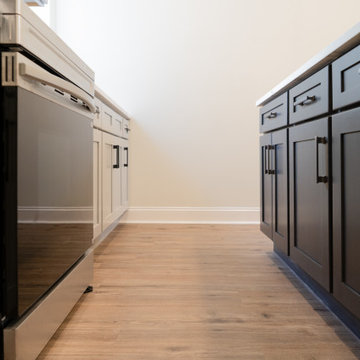
After significant fire damage left this West Philadelphia duplex in need of complete rehabilitation, Rocks + Cornerstones managed the property’s transformation from planning and permitting through construction and final occupancy.
The two-unit property was completely gutted and rebuilt, with each unit featuring two bedrooms, one bathroom, a spacious living area, and an open-concept kitchen. We developed the construction floor plans, coordinated zoning and building permit submissions with Philadelphia L&I, and managed the project through the City's required inspections and final Use & Occupancy approval.
Construction included new plumbing, electrical and HVAC systems with central air; new windows and doors; new kitchens with soft-close cabinetry and quartz countertops; new bathrooms; flooring; lighting; and paint throughout. Where possible, original architectural details—including the fireplaces—were retained to preserve some of the character of the existing property.
The completed duplex passed its required inspections, received its Use & Occupancy approval, and returned to productive use as an occupied rental property.
 RG Painting and Construction Inc.
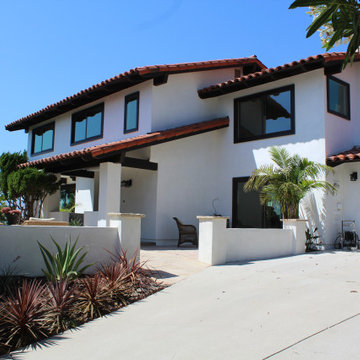
RG Painting & Construction, Inc. is Santa Barbara’s trusted local favorite for warm, high-quality home remodels. As a licensed general contractor with all trades in-house, we help homeowners reimagine their spaces with thoughtful design, durable materials, and craftsmanship that fits the Santa Barbara and Montecito lifestyle. We understand local homes, coastal weather, and the character that makes each property unique, and we remodel with care, intention, and long-lasting quality.
Our home remodeling services include:
• Full home remodels, interior and exterior renovations, and complete property updates
• Kitchen remodeling, layout redesigns, cabinetry, countertops, and custom finishes
• Bathroom remodeling with tile, stone, walk-in showers, and spa-inspired upgrades
• Exterior home remodels, painting, stucco repair, siding, and curb-appeal improvements
• Drywall, carpentry, trim work, and custom wood details
• Lighting upgrades, electrical improvements, and minor plumbing corrections
• Window and door installation, energy-efficient updates, and coastal protection
• Permitting, inspections, project planning, and full remodel management
Why Santa Barbara homeowners feel comfortable choosing us:
• Local, family-run company with roots in the community
• One in-house team handling every step for a smoother, faster remodel
• Warm communication, honest budgeting, and clear expectations
• Meticulous preparation, clean work sites, and respectful crews
• Beautiful, lasting craftsmanship designed for Santa Barbara’s coastal climate
Whether you’re updating an older Santa Barbara home, refreshing a Montecito property, or transforming a space that no longer fits your lifestyle, we approach every remodel with care and pride. Our goal is to make the process feel easy, organized, and enjoyable while delivering a home you love coming back to every day.
Serving Santa Barbara, Montecito, Hope Ranch, Goleta, Mission Canyon, the Riviera, and surrounding neighborhoods.
 Specialty Home Improvement
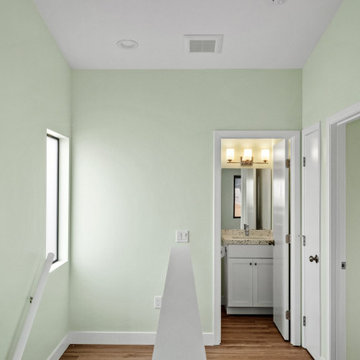
The homeowner on this busy corner in the diverse and eclectic North Park area was seeking to create additional functional living space while also preserving the existing garage. In an area well known for limited parking and smaller lots, only one direction was really available to make this project a success – UP!
The Challenge: Create a modern, functional living space in keeping with the vibrant character of North Park on top of an existing 90 year old, undersized garage.
The Solution: An efficiently designed one bedroom, one bath ADU with a raked roof and ceiling line to enhance the character of the residence on the exterior while creating an expansive feel of space and light inside.
This project was designed, planned, and built by Sheen Fischer and the Specialty Home Improvement team. We handle our projects from the first phone call through the final inspection.
 Timberline Patio Covers
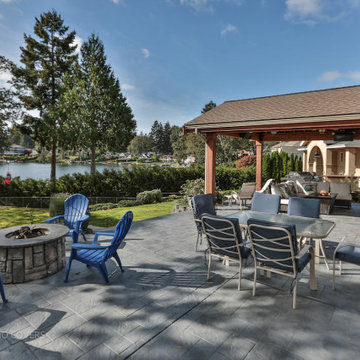
This Lakewood, WA custom outdoor living project transformed the homeowner's backyard with a beautifully crafted covered patio designed to provide year-round protection and enjoyment. The structure features exposed 2x8 framing with clean architectural lines, cedar-wrapped support posts, and a tongue-and-groove wood ceiling with an interior gable for added character. A 3-tab shingle roof complements the home's existing architecture while an engineered gutter system efficiently manages rainwater.
Throughout construction, special attention was given to both craftsmanship and the homeowner's future plans. The roofing was intentionally left partially accessible to allow for electrical wiring, and select tongue-and-groove boards remain removable until final inspection. Cedar post wraps were installed to enhance the natural warmth of the space, with decorative collars to complete the finished look. The exterior wall was also re-sided to create a seamless transition between the new structure and the existing home.
The result is a durable, thoughtfully engineered patio cover that blends beautifully with the home while creating a comfortable outdoor space the family can enjoy for years to come.
 Specialty Home Improvement
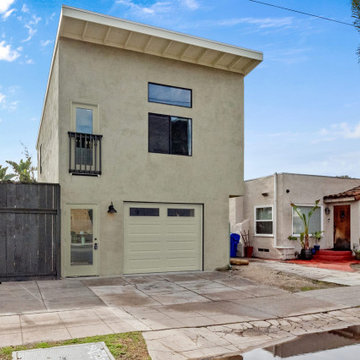
The homeowner on this busy corner in the diverse and eclectic North Park area was seeking to create additional functional living space while also preserving the existing garage. In an area well known for limited parking and smaller lots, only one direction was really available to make this project a success – UP!
The Challenge: Create a modern, functional living space in keeping with the vibrant character of North Park on top of an existing 90 year old, undersized garage.
The Solution: An efficiently designed one bedroom, one bath ADU with a raked roof and ceiling line to enhance the character of the residence on the exterior while creating an expansive feel of space and light inside.
This project was designed, planned, and built by Sheen Fischer and the Specialty Home Improvement team. We handle our projects from the first phone call through the final inspection.
 Do Arch LLC
Our Process
Every siding project we complete follows a structured, detail-focused approach to ensure long-term performance and a clean, high-end finish:
1. Preparation & Protection
We begin by protecting all surrounding areas, including landscaping, walkways, and entry points. This ensures a safe and clean job site from start to finish.
2. Removal of Existing Siding
The old siding is carefully removed and disposed of. During this stage, we inspect the underlying structure for any signs of damage or moisture issues.
3. Surface Inspection & Repairs
We address any compromised sheathing or framing as needed to create a solid, secure base for the new installation.
4. Weather Barrier Installation
A proper moisture barrier is installed to improve energy efficiency and protect the home from water intrusion.
5. Siding Installation
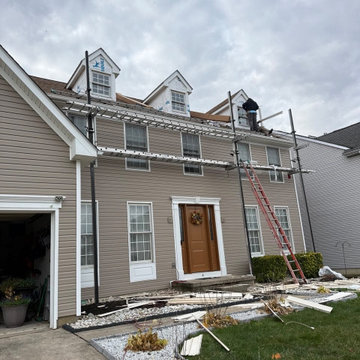
We install Double 4.5" Encore Dutch Lap siding in Natural Clay with precision, ensuring straight lines, tight seams, and consistent spacing throughout.
6. Trim, Shutters & Moldings
All shutters and exterior moldings are carefully reinstalled and aligned, maintaining the home’s original character while enhancing the updated look.
7. Final Detailing & Cleanup
We complete all finishing touches, conduct a full quality check, and leave the property clean and ready to enjoy.

 Tile Doctor Ltd
This detailed Victorian tiled hallway at a property in Camden was overdue some much-needed repair and maintenance. The owners of the property appreciated that original period features like this add a lot of value to a property and asked me to visit the property to quote for renovating it. The property was in a terrace of similar properties most of which appeared to have retained their Victorian character.
I inspected the floor and found there were a couple of loose, cracked, worn and broken tiles that needed to be replaced. In addition, the floor tiles needed a deep clean and then seal to bring back the wow factor. I was confident we could renovate the floor but at that point unsure if we would be able to find exact match replacements for the damaged tiles. Fortunately, Victorian tiles are still in demand and I knew of several companies I could check with so I was confident they could be found.
We discussed how long the work would take and assuming I could source the replacements agreed a price for the full restoration of the floor. After doing some research I managed to find suitable replacements with a company called Original Style and the work was scheduled for the following month.
Firstly, we prepared all areas with protective tapes to threshold edges and skirting.
This was followed by spaying the tiles with a strong dilution of Tile Doctor Remove & Go which is product designed to remove old sealers and coatings. After about ten minutes the tiles were scrubbed with black scrubbing pads and scrubbing brushes. Fresh water was used to rinse the floor and the slurry was extracted using a wet vacuum.
The floor was inspected and then a second clean carried out, this time using Tile Doctor Pro-Clean which is a Tile and Grout cleaning agent. The same process of application was used and after rinsing and extracting the dirt the tiles were given a steam clean. This ensured all the dirt was lifted out of the pores of the tile and the floor was now as clean as it possible could be.
The next step was the remove the loose and cracked tiles using the reclaimed tiles we had sourced earlier. Some cuts were necessary to get the replacements to match the originals but overall the plan worked. A quick drying adhesive was used to secure the tiles so we could apply the grout shortly after. The whole floor was then re-grouted and cleaned off to ensure a good match. The floor was left to dry off overnight, and you could already see it was now looking considerably improved.
Returning the next morning we checked the floor was dry using a moisture meter, this is important as to apply a sealer to damp tiles will lead to a patchy experience. All was well so we were ready to apply the sealer.
To start a single base coat of Tile Doctor Colour Grow sealer was applied to the floor and left to dry. This sealer is an impregnator that protects from within by occupying the pores in the clay tile improving colour in the process. This sealer does leave a matt finish however and the client wanted a subtle shine so one dry it was followed by four coats of Tile Doctor Seal & Go. The combination of the two sealers works really well to add long lasting protection to the tiles and provide the desired finish to the floor.
The floor was much improved, and the client was delighted. The detailed pattern and colours were now much more prominent, and the hallway looked much more inviting for both the owner and their guests. For the aftercare of Victorian tiles, I recommended the use of Tile Doctor Neutral Cleaner which is pH neutral and won’t prematurely erode the life of the sealer.
Nigel Voyce
North London Tile Doctor
 Cross Blinds & Shutters
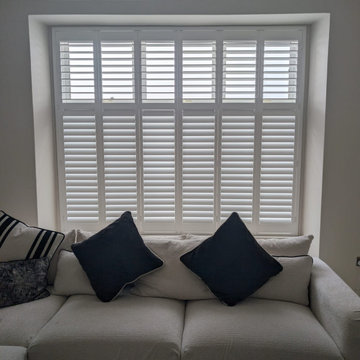
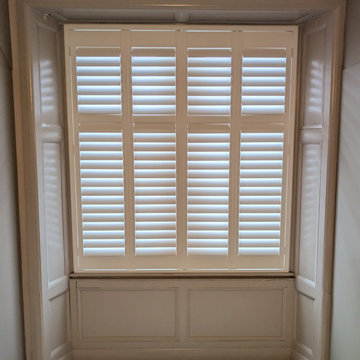
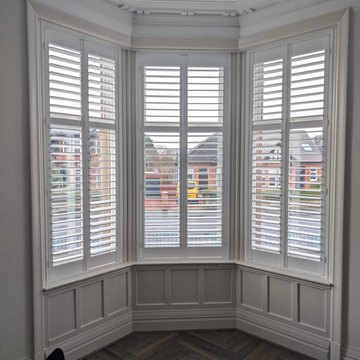
This project involved a full upgrade of window treatments for a traditional sash bay and adjacent tall windows. The goal was to improve light control, thermal performance, and aesthetics by installing made‑to‑measure plantation shutters and bespoke blinds. The result is a cohesive, high‑quality finish that respects the property’s character while adding modern convenience.
Scope of Work
- Full site survey and precise measuring of all windows.
- Manufacture and supply of bespoke plantation shutters for the bay sections.
- Supply and installation of made‑to‑measure roller blinds with blackout lining for tall sash windows.
- Motorisation for long‑drop blinds where required, plus wiring and testing.
- Final adjustments, sealing, and a quality inspection.
Challenges and Solutions
- Long drop blinds: For windows with a 3 m drop we specified reinforced headrails and high‑torque motors to prevent sagging and ensure smooth operation.
- Sash window geometry: Custom shutter panels were designed to fit bay angles and sash reveals, using discreet fixings to preserve original frames.
- Insulation and noise reduction: We selected thicker louvres and lined blinds to improve thermal retention and reduce external noise.
Results and Benefits
- Improved comfort: Noticeable reduction in drafts and better temperature control.
- Enhanced light control: Motorised blinds provide effortless, precise daylight management.
- Aesthetic upgrade: A unified, premium finish that complements the sash architecture.
- Increased property appeal: The upgrade enhances perceived value and homeowner satisfaction.
For a free on‑site measure and quote in Cumbernauld and the greater Glasgow area, contact us to schedule a visit. We document each project with before and after photos to showcase workmanship and results.
 Cross Blinds & Shutters
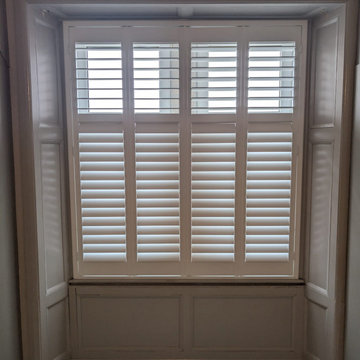
This project involved a full upgrade of window treatments for a traditional sash bay and adjacent tall windows. The goal was to improve light control, thermal performance, and aesthetics by installing made‑to‑measure plantation shutters and bespoke blinds. The result is a cohesive, high‑quality finish that respects the property’s character while adding modern convenience.
Scope of Work
- Full site survey and precise measuring of all windows.
- Manufacture and supply of bespoke plantation shutters for the bay sections.
- Supply and installation of made‑to‑measure roller blinds with blackout lining for tall sash windows.
- Motorisation for long‑drop blinds where required, plus wiring and testing.
- Final adjustments, sealing, and a quality inspection.
Challenges and Solutions
- Long drop blinds: For windows with a 3 m drop we specified reinforced headrails and high‑torque motors to prevent sagging and ensure smooth operation.
- Sash window geometry: Custom shutter panels were designed to fit bay angles and sash reveals, using discreet fixings to preserve original frames.
- Insulation and noise reduction: We selected thicker louvres and lined blinds to improve thermal retention and reduce external noise.
Results and Benefits
- Improved comfort: Noticeable reduction in drafts and better temperature control.
- Enhanced light control: Motorised blinds provide effortless, precise daylight management.
- Aesthetic upgrade: A unified, premium finish that complements the sash architecture.
- Increased property appeal: The upgrade enhances perceived value and homeowner satisfaction.
For a free on‑site measure and quote in Cambernaud and the greater Glasgow area, contact us to schedule a visit. We document each project with before and after photos to showcase workmanship and results.
 Cross Blinds & Shutters
This project involved a full upgrade of window treatments for a traditional sash bay and adjacent tall windows. The goal was to improve light control, thermal performance, and aesthetics by installing made‑to‑measure plantation shutters and bespoke blinds. The result is a cohesive, high‑quality finish that respects the property’s character while adding modern convenience.
Scope of Work
- Full site survey and precise measuring of all windows.
- Manufacture and supply of bespoke plantation shutters for the bay sections.
- Supply and installation of made‑to‑measure roller blinds with blackout lining for tall sash windows.
- Motorisation for long‑drop blinds where required, plus wiring and testing.
- Final adjustments, sealing, and a quality inspection.
Challenges and Solutions
- Long drop blinds: For windows with a 3 m drop we specified reinforced headrails and high‑torque motors to prevent sagging and ensure smooth operation.
- Sash window geometry: Custom shutter panels were designed to fit bay angles and sash reveals, using discreet fixings to preserve original frames.
- Insulation and noise reduction: We selected thicker louvres and lined blinds to improve thermal retention and reduce external noise.
Results and Benefits
- Improved comfort: Noticeable reduction in drafts and better temperature control.
- Enhanced light control: Motorised blinds provide effortless, precise daylight management.
- Aesthetic upgrade: A unified, premium finish that complements the sash architecture.
- Increased property appeal: The upgrade enhances perceived value and homeowner satisfaction.
For a free on‑site measure and quote in Cumbernauld and the greater Glasgow area, contact us to schedule a visit. We document each project with before and after photos to showcase workmanship and results.
 Cross Blinds & Shutters
This project involved a full upgrade of window treatments for a traditional sash bay and adjacent tall windows. The goal was to improve light control, thermal performance, and aesthetics by installing made‑to‑measure plantation shutters and bespoke blinds. The result is a cohesive, high‑quality finish that respects the property’s character while adding modern convenience.
Scope of Work
- Full site survey and precise measuring of all windows.
- Manufacture and supply of bespoke plantation shutters for the bay sections.
- Supply and installation of made‑to‑measure roller blinds with blackout lining for tall sash windows.
- Motorisation for long‑drop blinds where required, plus wiring and testing.
- Final adjustments, sealing, and a quality inspection.
Challenges and Solutions
- Long drop blinds: For windows with a 3 m drop we specified reinforced headrails and high‑torque motors to prevent sagging and ensure smooth operation.
- Sash window geometry: Custom shutter panels were designed to fit bay angles and sash reveals, using discreet fixings to preserve original frames.
- Insulation and noise reduction: We selected thicker louvres and lined blinds to improve thermal retention and reduce external noise.
Results and Benefits
- Improved comfort: Noticeable reduction in drafts and better temperature control.
- Enhanced light control: Motorised blinds provide effortless, precise daylight management.
- Aesthetic upgrade: A unified, premium finish that complements the sash architecture.
- Increased property appeal: The upgrade enhances perceived value and homeowner satisfaction.
For a free on‑site measure and quote in Cumbernauld and the greater Glasgow area, contact us to schedule a visit. We document each project with before and after photos to showcase workmanship and results.
 Tile Doctor Ltd
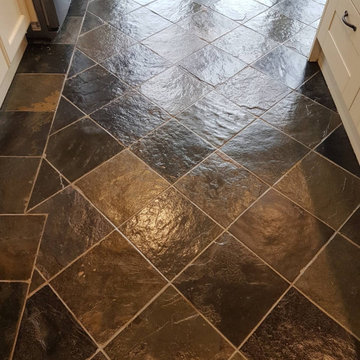
Pictured below is a Slate tiled kitchen floor that had been installed in the kitchen of a property in Harrogate around fifteen years prior. I discovered that the tiles had never been cleaned and resealed since installation and this explained why they were now looking dull and un-interesting. They had lost all character and it wasn’t until I started cleaning them that I realised the must be of the multicoloured Brazilian Slate variety.
As well as looking dull and unattractive, there was also some water damage to some tiles caused by a leak, this had resulted in some shaling and efflorescence staining. This had occurred some time ago and the floor had now dried out fully, so I was not expecting any further efflorescence issues going forward.
Brazil, I understand is the world’s 2nd biggest producer of Slate, it is also exceptionally durable and reasonably priced so its not surprising you see a lot of it over in the UK. Like any natural stone however it is porous and without a sealer to protect it and bring out those natural colours it soon ends up like the example on this pad.
I cleaned the floor with a strong dilution of Tile Doctor Pro-Clean using my usual method of spraying the cleaning solution onto the Slate and grout and then leaving it for a ten minutes to soak in and get to work breaking down the dirt and old sealers. Although I doubted there was much sealer left on the floor after all this time you need to be sure to remove all of it to get the best result. The floor was then scrubbed with a rotary floor buffer fitted with a black scrubbing pad, then after rinsing with water and extracting the soil I inspected the floor.
I detected there was still some sort of sealer present in some of less used parts of the floor, it was proving stubborn to remove so I suspect it may have been an old fashioned wax based product that was used. Not a problem though we Tile Doctors have a solution to every problem, so I spot treated the stubborn areas with Tile Doctor Wax Away to see if I was right. After scrubbing that in followed by another rinse and extraction with the wet vacuum I was pleased to see I was right and was happy all the old seal had now been removed. I gave the floor another rinse at the end of the day and dried it as much as possible with the wet vacuum, then left it to dry off fully overnight.
I came back the next day and checked the floor was dry with a damp meter. The readings were good, so I was able to crack on and seal the tiles using several coats of Tile Doctor Seal and Go. Each coat was applied leaving time to dry between each layer. This gave the floor a uniform appearance which disguised the damaged tiles. It will also help to stop more cracking and reduce the appearance of the efflorescence. The sealer really brought out the natural colours in the Brazilian Slate and the floor looked transformed.
I’m sure you will agree it was a vast improvement, certainly my client was very happy and couldn’t believe the difference I had managed to achieve. Before leaving I recommended, they should invest in some Tile Doctor Neutral Tile Cleaner which would ensure the newly applied seal was prematurely eroded away which is a problem with many of the stronger products you find in supermarkets.
Nigel Stoker
North West Yorkshire Tile Doctor
3