
Search results for "Install install" in Home Design Ideas

 from the ground up inc
marc rose
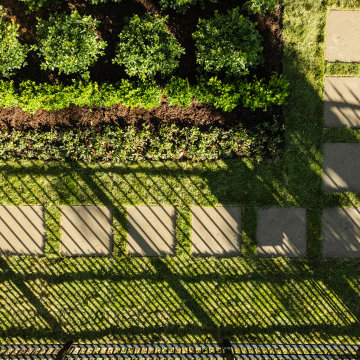
Photo of a mid-sized modern backyard concrete paver landscaping in Orlando with a fire pit.
Photo of a mid-sized modern backyard concrete paver landscaping in Orlando with a fire pit.
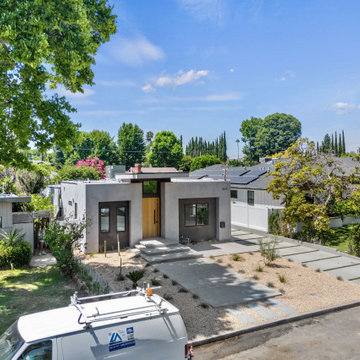
 LA Home Contractor
FULL HOUSE REMODEL – COMPLETE SCOPE OF WORK
1. Pre-Construction Phase
• Initial site inspection and measurements
• Architectural design and layout planning (if required)
• Structural engineering (if load-bearing walls are modified)
• Preparation of plans for city approval
• Permit application and plan check
• Obtain required building permits
• Scheduling of inspections
• Homeowner responsible for permit fees unless otherwise stated.
2. Site Preparation & Protection
• Protect flooring and non-work areas
• Install plastic dust barriers with zipper access
• Cover windows and furniture as needed
• Temporary utility setup if required
• Daily job site cleanup
• Final professional cleaning upon completion
3. Demolition
• Remove existing flooring (tile, wood, carpet, etc.)
• Remove cabinets, countertops, vanities
• Remove interior walls per plans
• Remove drywall where required
• Remove plumbing fixtures
• Remove electrical fixtures
• Haul away all debris
4. Structural & Framing
• Install structural beams if required
• Reframe modified walls
• Install new partitions per approved plans
• Repair or replace damaged framing
• Subfloor repair or replacement as needed
• Install blocking for cabinets and accessories
5. Plumbing (Up to Code)
• Replace old water supply lines (Copper Type L or PEX)
• Replace or modify drain lines (ABS)
• Relocate plumbing fixtures as needed
• Install new shut-off valves and cleanouts
• Water heater replacement if included
• Call for rough and final plumbing inspections
6. Electrical (Up to Code)
• Upgrade electrical panel if required
• Rewire entire house as needed
• Install new outlets and switches
• Install GFCI/AFCI protection per code
• Install recessed lighting and fixtures
• Install smoke and carbon monoxide detectors
• Dedicated circuits for appliances
• Call for rough and final electrical inspections
7. HVAC
• Replace or upgrade HVAC system if included
• Install new ducting and registers
• Install thermostat or mini-split system if applicable
8. Insulation
• Install wall insulation per code requirements
• Install ceiling insulation per code requirements
9. Drywall & Plaster
• Install new drywall
• Tape and mud (Level 4 or 5 finish)
• Texture to match existing or smooth finish
• Patch all affected areas
10. Flooring
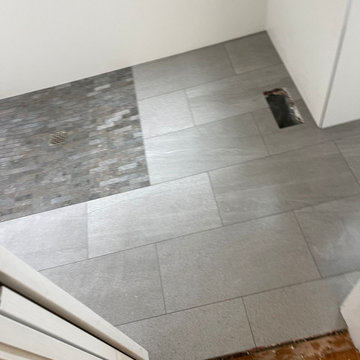
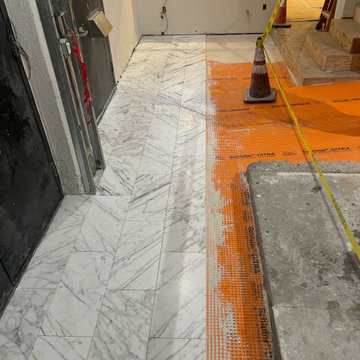
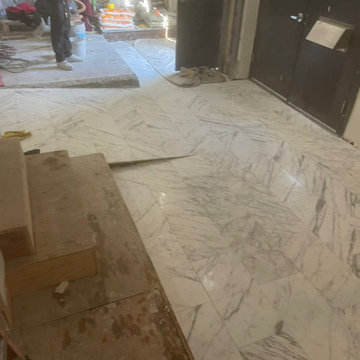
• Install tile flooring
• Install engineered wood / hardwood / laminate / vinyl
• Install baseboards
• Floor leveling if required
11. Kitchen Remodel
• Install new cabinets
• Install countertops
• Install backsplash
• Install sink and faucet
• Install appliances (owner supplied unless specified)
12. Bathroom Remodel(s)
• Install new tub or shower system
• Waterproofing system installation
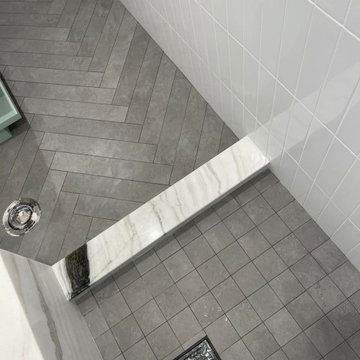
• Install tile on floors and walls
• Install vanity and toilet
• Install shower valve and fixtures
• Install shower glass if included
13. Doors & Windows
• Replace interior and entry doors
• Replace windows if included
• Install hardware
14. Interior & Exterior Paint
• Surface preparation
• Prime and paint walls, ceilings, and trim
• Exterior painting if included
15. Exterior Work (If Included)
• Stucco repair
• Roofing repair or replacement
• Concrete work or pavers
• Drainage improvements
16. Final Phase
• Final inspections
• Punch list completion
• Final cleaning
• Final walk-through with homeowner
Standard California Contract Terms (Summary)
• All work performed in compliance with California Building Code.
• Change orders must be approved in writing.
• Unforeseen conditions may require additional cost.
• One-year labor warranty unless otherwise stated.
• Progress payments per agreed payment schedule.
• Contractor is licensed and insured.
Find the right local pro for your project
 User
Users an expert general contractor, our approach to renovating the kitchen and two bathrooms, including the master bath, is centered on a seamless blend of functionality, aesthetics, and quality craftsmanship.
Kitchen Renovation:
We begin by collaborating closely with the homeowner to understand their vision, needs, and budget for the kitchen renovation.
Our team carefully assesses the existing layout, identifying opportunities to optimize space and improve flow.
We execute a meticulous demolition process, removing old cabinetry, countertops, flooring, and appliances.
With a focus on modernizing the kitchen, we install high-quality materials such as custom cabinetry, granite or quartz countertops, and durable hardwood or tile flooring.
State-of-the-art appliances are integrated seamlessly into the design, ensuring both functionality and style.
We pay attention to details such as lighting fixtures, backsplashes, and hardware to enhance the overall aesthetic appeal of the kitchen.
Bathroom Renovations:
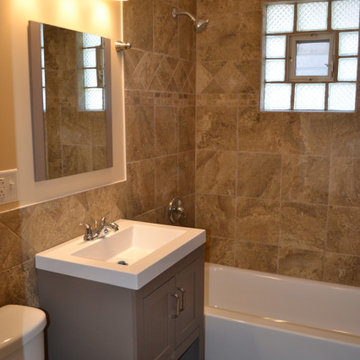
For the two bathrooms and the master bath, we prioritize creating spa-like retreats that offer both comfort and luxury.
Each bathroom renovation begins with a comprehensive assessment of the existing layout and plumbing.
We collaborate closely with the homeowner to select fixtures, finishes, and materials that align with their preferences and lifestyle.
Our skilled craftsmen install new tile flooring, shower surrounds, and vanities, paying careful attention to precision and detail.
In the master bath, we may incorporate additional features such as a spacious walk-in shower, a freestanding soaking tub, or custom-built cabinetry for enhanced storage.
We ensure that each bathroom renovation is completed to the highest standards of quality and craftsmanship, delivering spaces that are not only beautiful but also functional and durable.
Throughout the entire renovation process, our team prioritizes clear communication, attention to detail, and respect for the homeowner's property. We strive to exceed expectations at every step, delivering stunning kitchen and bathroom renovations that enhance the overall value and enjoyment of the home.
 Hi Hat Installations
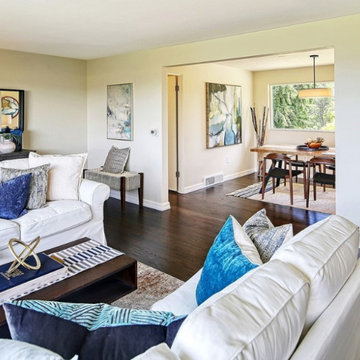
We refinished the existing yellow/gold hardwoods and stained them with a beautiful dark color.
Example of a classic living room design in Other
Example of a classic living room design in Other
 Renovate Paint and Design
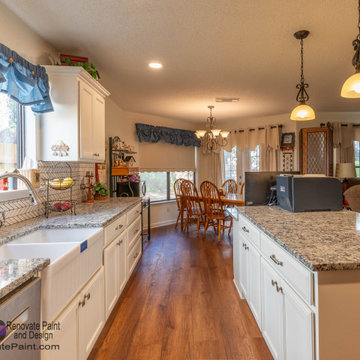
Updating Process:
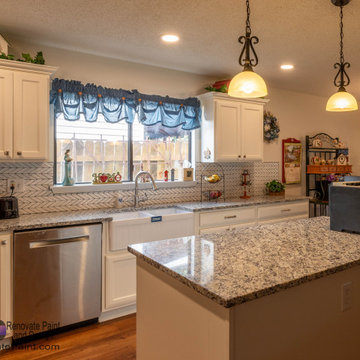
> Prepare/Demo: Protect flooring and furniture with plastic. Remove: flooring, fixtures, countertops and cabinets, vent hood ,stove, ceiling light boxes. Tape, float, and texture area as needed. Haul off all debris.
> Construct, paint, and install new wall, soft-close cabinets. Install door and drawer pulls.
> Construct, paint, and install new island, soft-close cabinets. Install door and drawer pulls.
Kitchen Countertops and Tile Backsplash:
> Install new quartz countertops Level 3 with standard edge profile and cut out for farm house sink.
> Prepare wall surfaces between cabinets for tile backsplash.
> Install and grout tile backsplash.
Kitchen Plumbing and Appliances Installed:
> Install new farm house sink and faucet and connect up plumbing.
> Install stove, vent hood, dishwasher, garbage disposal.
Kitchen Electrical:
> Install 2 pendant lights over bar. Install new switch.
> Install 4 new recess LED lights in front of kitchen cabinets.
Flooring Installed:
> Where flooring was removed prepare concrete surfaces.
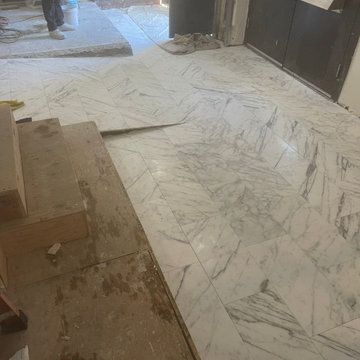
> Install new Luxury Vinyl Floor in kitchen, eating area, laundry room, living space, foyer, and small hall.
> Once flooring is installed, install shoe molding along baseboards. Caulk and fill nail holes.
Additions:
> Install 24 inch new credenza on cabinet wall. Credenza will have two rows of drawers.
> At the end of the island, install new personal desk.
> Prime and paint ceiling light over dining table.

 Renovate Paint and Design
Updating Process:
> Prepare/Demo: Protect flooring and furniture with plastic. Remove: flooring, fixtures, countertops and cabinets, vent hood ,stove, ceiling light boxes. Tape, float, and texture area as needed. Haul off all debris.
> Construct, paint, and install new wall, soft-close cabinets. Install door and drawer pulls.
> Construct, paint, and install new island, soft-close cabinets. Install door and drawer pulls.
Kitchen Countertops and Tile Backsplash:
> Install new quartz countertops Level 3 with standard edge profile and cut out for farm house sink.
> Prepare wall surfaces between cabinets for tile backsplash.
> Install and grout tile backsplash.
Kitchen Plumbing and Appliances Installed:
> Install new farm house sink and faucet and connect up plumbing.
> Install stove, vent hood, dishwasher, garbage disposal.
Kitchen Electrical:
> Install 2 pendant lights over bar. Install new switch.
> Install 4 new recess LED lights in front of kitchen cabinets.
Flooring Installed:
> Where flooring was removed prepare concrete surfaces.
> Install new Luxury Vinyl Floor in kitchen, eating area, laundry room, living space, foyer, and small hall.
> Once flooring is installed, install shoe molding along baseboards. Caulk and fill nail holes.
Additions:
> Install 24 inch new credenza on cabinet wall. Credenza will have two rows of drawers.
> At the end of the island, install new personal desk.
> Prime and paint ceiling light over dining table.

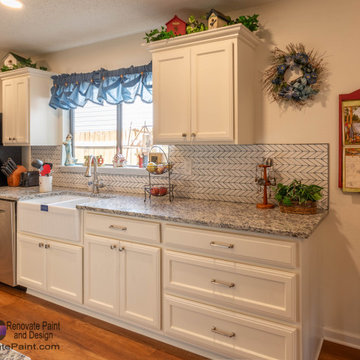 Renovate Paint and Design
Updating Process:
> Prepare/Demo: Protect flooring and furniture with plastic. Remove: flooring, fixtures, countertops and cabinets, vent hood ,stove, ceiling light boxes. Tape, float, and texture area as needed. Haul off all debris.
> Construct, paint, and install new wall, soft-close cabinets. Install door and drawer pulls.
> Construct, paint, and install new island, soft-close cabinets. Install door and drawer pulls.
Kitchen Countertops and Tile Backsplash:
> Install new quartz countertops Level 3 with standard edge profile and cut out for farm house sink.
> Prepare wall surfaces between cabinets for tile backsplash.
> Install and grout tile backsplash.
Kitchen Plumbing and Appliances Installed:
> Install new farm house sink and faucet and connect up plumbing.
> Install stove, vent hood, dishwasher, garbage disposal.
Kitchen Electrical:
> Install 2 pendant lights over bar. Install new switch.
> Install 4 new recess LED lights in front of kitchen cabinets.
Flooring Installed:
> Where flooring was removed prepare concrete surfaces.
> Install new Luxury Vinyl Floor in kitchen, eating area, laundry room, living space, foyer, and small hall.
> Once flooring is installed, install shoe molding along baseboards. Caulk and fill nail holes.
Additions:
> Install 24 inch new credenza on cabinet wall. Credenza will have two rows of drawers.
> At the end of the island, install new personal desk.
> Prime and paint ceiling light over dining table.
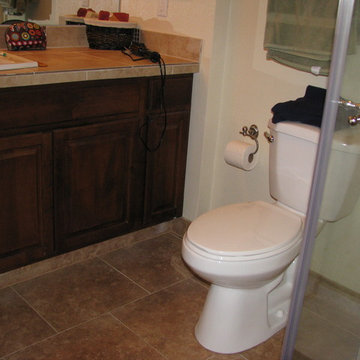
 First Option Design Build LLC
Using the same tile used on the floor but a slightly lighter color for the counter and shower gives the bathroom a consistent look without being all the same tile.
We carried the brick pattern onto the counter and shower from the floor.
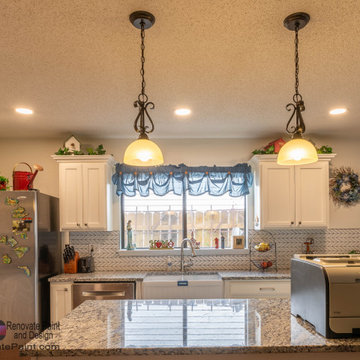 Renovate Paint and Design
Updating Process:
> Prepare/Demo: Protect flooring and furniture with plastic. Remove: flooring, fixtures, countertops and cabinets, vent hood ,stove, ceiling light boxes. Tape, float, and texture area as needed. Haul off all debris.
> Construct, paint, and install new wall, soft-close cabinets. Install door and drawer pulls.
> Construct, paint, and install new island, soft-close cabinets. Install door and drawer pulls.
Kitchen Countertops and Tile Backsplash:
> Install new quartz countertops Level 3 with standard edge profile and cut out for farm house sink.
> Prepare wall surfaces between cabinets for tile backsplash.
> Install and grout tile backsplash.
Kitchen Plumbing and Appliances Installed:
> Install new farm house sink and faucet and connect up plumbing.
> Install stove, vent hood, dishwasher, garbage disposal.
Kitchen Electrical:
> Install 2 pendant lights over bar. Install new switch.
> Install 4 new recess LED lights in front of kitchen cabinets.
Flooring Installed:
> Where flooring was removed prepare concrete surfaces.
> Install new Luxury Vinyl Floor in kitchen, eating area, laundry room, living space, foyer, and small hall.
> Once flooring is installed, install shoe molding along baseboards. Caulk and fill nail holes.
Additions:
> Install 24 inch new credenza on cabinet wall. Credenza will have two rows of drawers.
> At the end of the island, install new personal desk.
> Prime and paint ceiling light over dining table.
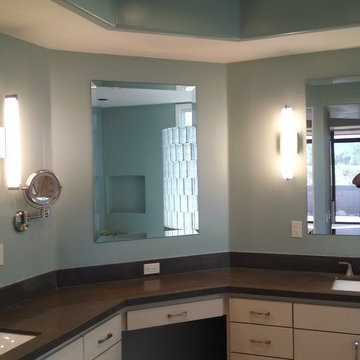 First Option Design Build LLC
paul zimmerman photo...
Her's and His sinks with great sinks and lighting!
The light blue walls are calming and comfortable.
Trendy bathroom photo in Phoenix
Trendy bathroom photo in Phoenix
9