
Search results for "Insulation helps" in Home Design Ideas
 Rodwin Architecture & Skycastle Construction
Rodwin Architecture and Skycastle Homes
Location: Boulder, Colorado, United States
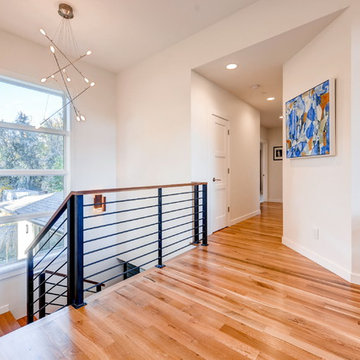
We helped the clients find a beautiful lot in North Boulder, then crafted this modern 3,300 s.f. house to be their dream home.
The clients asked for a warm modern style home, with an open floor plan that connected to the outdoors and took full advantage of the rare lot. We sited and engineered the house for optimal passive solar design, while simultaneously capturing unobstructed panoramic views of the Flatirons from both levels. The home’s simple, clean lines reflect their unpretentious, easy-going character. The gourmet kitchen, dining and Great room are flooded with sunshine from the 9ft high ceilings and walls of glass. A gracious covered west porch flows seamlessly out from the Great room through a giant bank of sliding doors, creating a fantastic opportunity for indoor/outdoor living. The porch has solid cedar columns and Beetle-kill wood on the ceiling to create a warm feeling.
On the ground floor, walk past the front hall to reach a guest suite and a rec room that is divided between a small media room for the boys and a north facing painting studio.
Follow the stair to the second floor where you’ll immediately be presented with a stunning view from the open study and balcony. All the bedrooms get a south facing Flatiron view and the master has its own private balcony.
The owners wanted the HERS 37 house to be as green as possible, and the house has tiny energy and water bills as well as a healthy indoor air environment. It features solar photovoltaic panels, Energy Star fiberglass windows, foam insulation, LED lights, Watersense plumbing fixtures, a 96% efficient furnace & zero-VOC finishes.
Learn more about it and its artistic owners in Boulder Home & Garden Magazine
Built by Skycastle Construction.
 Lux Garage Doors
Please visit our website www.LuxGarageDoors.com - Shipping Nationwide! Factory Direct Prices!
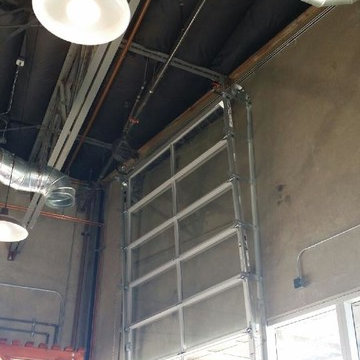
Lux Garage Doors offer a wide variety of name-brand luxury garage door styles from traditional to contemporary at the lowest prices possible! It’s time to add “curb appeal” to your home or business! Our knowledgeable representatives are here ready to help you transform your project with a stunning new look!
Glass garage door, modern garage doors, contemporary garage doors, aluminum glass garage doors, full view glass garage doors, contemporary garage doors residential, wood garage doors, wooden garage, wooden Garage doors, wooden garage doors, Wooden Garage door, garage doors wooden, wood look garage doors, carriage style garage doors, wood garage door, solid Wooden Garage doors, ranch house garage doors, wood garage doors price, modern wood garage door, contemporary garage doors, carriage house garage doors, glass garage doors residential, glass garage doors for sale, glass garage doors cheap, glass garage doors price, glass garage door prices, contemporary garage door, glass garage doors prices, custom glass garage doors, modern garage doors cost, insulated glass garage door, glass garage doors pricing, full view glass garage doors, contemporary garage doors residential, For more information please visit our website www.LuxGarageDoors.com
 Accoya Wood
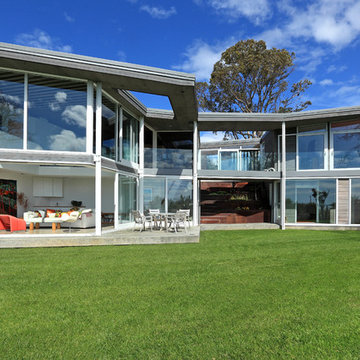
This home built by Wok Stehr and his team in Howick was designed by Daniel Marshall Architects.
The home incorporates stunning Accoya windows and doors that are large and some are raking and meet at obtuse angles.
Accoya with benefits of outstanding durability and stability is able to withstand such design, making it possible to meet the requirements of the build.
Find the right local pro for your project
 Spire Integrated Systems Inc.
Sustainable Design Meets Smart Technology
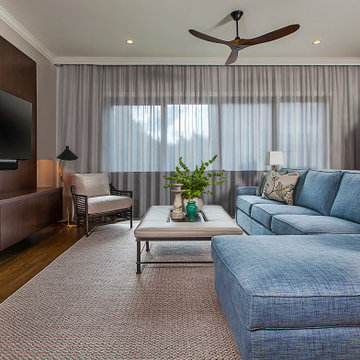
This home featured a request from the client to use as many environmentally friendly materials and fabrics as possible. Many common shade manufacturers use materials with PVC plastic, which is known for off-gassing hazardous chemicals that linger in the air in the home for years. The main floor roller shades met the client’s request for an eco-friendly fabric by utilizing motorized shades with GreenScreen fabric. In other rooms, the designer and client wanted the classic look and soft fabrics with roman shades and drapery tracks on several windows in the house. By partnering with the interior designer and fabric workroom, we were able to provide a custom solution for motorization of roman shades and drapery.
Lighting Control
The client is able control all of the lighting and window treatments in the house with a single control system. This eliminates the need for extra devices on the wall or remote controls that clutter up the space and get lost. By utilizing the custom window treatments, the house is able to conserve energy by keeping the house warmer in the winter, and cooler in the summer by providing insulation and blocking sunlight. The lighting control system further helps to conserve energy by beautifully dimming LED lights as well as using quick buttons that turn off all of the lights in the house, or un-occupied rooms, with the press of a single button.
Motorized Window Treatments
Motorized window treatments add a high level of convenience to any project, especially those with many windows in hard to reach places. The challenge with many manufacturers is a limitation of style and fabric selection, some may be as basic as only roller shades. Often times these come with un-reliable, wireless controls.
On this Birmingham, MI project completed in March 2019, we partnered with the interior designer and drapery workroom to provide a truly unique solution. The homeowner and designer’s requests included many different styles of window treatments including rollers shades, roman shades and motorized draperies. Typically, this would result in a collection of various shade manufacturers with unsightly remotes scattered across each room or stuck to the wall for control. Utilizing standard offerings, coupled with an incredible team effort by the designer and drapery workroom, we provided all of the requested styles of window treatments, and were able to control them all on a single system. This means that each room has a single, elegant keypad built into the wall that controls not only the window treatments, but the lighting as well.
When leaving/entering the home, all of the window coverings can be raised or lowered with a single button press. Shades and draperies can also be set to operate based on the time of day for automatic day-to-day operation using sunlight as a guide. In the end, we achieved convenience, function and sophisticated style.

 Rodwin Architecture & Skycastle Construction
Rodwin Architecture and Skycastle Homes
Location: Boulder, Colorado, United States
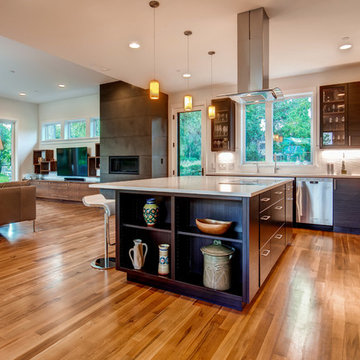
We helped the clients find a beautiful lot in North Boulder, then crafted this modern 3,300 s.f. house to be their dream home.
The clients asked for a warm modern style home, with an open floor plan that connected to the outdoors and took full advantage of the rare lot. We sited and engineered the house for optimal passive solar design, while simultaneously capturing unobstructed panoramic views of the Flatirons from both levels. The home’s simple, clean lines reflect their unpretentious, easy-going character. The gourmet kitchen, dining and Great room are flooded with sunshine from the 9ft high ceilings and walls of glass. A gracious covered west porch flows seamlessly out from the Great room through a giant bank of sliding doors, creating a fantastic opportunity for indoor/outdoor living. The porch has solid cedar columns and Beetle-kill wood on the ceiling to create a warm feeling.
On the ground floor, walk past the front hall to reach a guest suite and a rec room that is divided between a small media room for the boys and a north facing painting studio.
Follow the stair to the second floor where you’ll immediately be presented with a stunning view from the open study and balcony. All the bedrooms get a south facing Flatiron view and the master has its own private balcony.
The owners wanted the HERS 37 house to be as green as possible, and the house has tiny energy and water bills as well as a healthy indoor air environment. It features solar photovoltaic panels, Energy Star fiberglass windows, foam insulation, LED lights, Watersense plumbing fixtures, a 96% efficient furnace & zero-VOC finishes.
Learn more about it and its artistic owners in Boulder Home & Garden Magazine
Built by Skycastle Construction.
 Tom Bassett-Dilley Architect, Ltd.
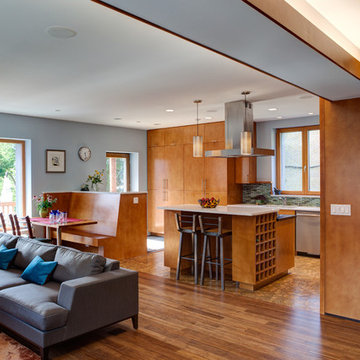
This is the first certified Passive House in the Chicago area, built by Biltmore Insulated Concrete (thermal shell) and Evolutionary Home Builders (GC). TBDA acted as architect and Passive House consultant, performing the rigorous calculations in conjunction with the spatial, structural, mechanical, and esthetic design considerations. Cadmium Interiors selected interior finishes and furniture.
Passive Houses have inherently good indoor air quality due to the continuous ventilation and condensation-proof thermal shell, but we took this to the next level by becoming a pilot project for the Healthy Homes Initiative. All construction materials, finishes, paints, adhesives, caulks, etc., were selected to be non-toxic (i.e., no-added-formaldehyde cabinet construction), using Greenguard as a standard where possible.

Sponsored
Delaware, OH

Buckeye Basements, Inc.
Central Ohio's Basement Finishing ExpertsBest Of Houzz '13-'21
 Rodwin Architecture & Skycastle Construction
Rodwin Architecture and Skycastle Homes
Location: Boulder, Colorado, United States
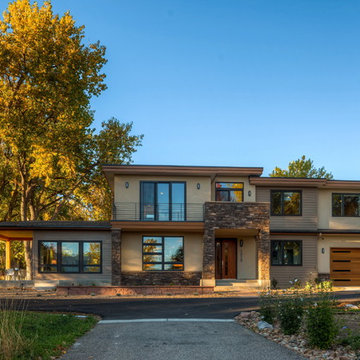
We helped the clients find a beautiful lot in North Boulder, then crafted this modern 3,300 s.f. house to be their dream home.
The clients asked for a warm modern style home, with an open floor plan that connected to the outdoors and took full advantage of the rare lot. We sited and engineered the house for optimal passive solar design, while simultaneously capturing unobstructed panoramic views of the Flatirons from both levels. The home’s simple, clean lines reflect their unpretentious, easy-going character. The gourmet kitchen, dining and Great room are flooded with sunshine from the 9ft high ceilings and walls of glass. A gracious covered west porch flows seamlessly out from the Great room through a giant bank of sliding doors, creating a fantastic opportunity for indoor/outdoor living. The porch has solid cedar columns and Beetle-kill wood on the ceiling to create a warm feeling.
On the ground floor, walk past the front hall to reach a guest suite and a rec room that is divided between a small media room for the boys and a north facing painting studio.
Follow the stair to the second floor where you’ll immediately be presented with a stunning view from the open study and balcony. All the bedrooms get a south facing Flatiron view and the master has its own private balcony.
The owners wanted the HERS 37 house to be as green as possible, and the house has tiny energy and water bills as well as a healthy indoor air environment. It features solar photovoltaic panels, Energy Star fiberglass windows, foam insulation, LED lights, Watersense plumbing fixtures, a 96% efficient furnace & zero-VOC finishes.
Learn more about it and its artistic owners in Boulder Home & Garden Magazine
Built by Skycastle Construction.

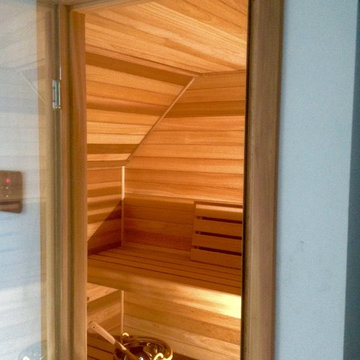
 Warm Timber Saunas & Wine Cellars
This previously unused attic space is now a sauna/yoga room. The left sauna wall follows the attic rafters down diagonally to allow a wider space for leg room on the twin sauna benches.
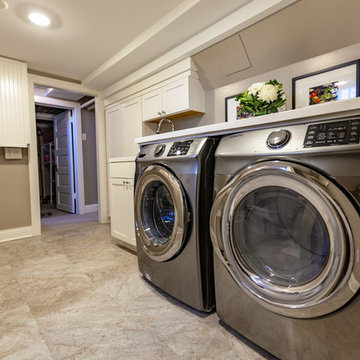
 Castle Building & Remodeling
Tired of doing laundry in an unfinished rugged basement? The owners of this 1922 Seward Minneapolis home were as well! They contacted Castle to help them with their basement planning and build for a finished laundry space and new bathroom with shower.
Changes were first made to improve the health of the home. Asbestos tile flooring/glue was abated and the following items were added: a sump pump and drain tile, spray foam insulation, a glass block window, and a Panasonic bathroom fan.
After the designer and client walked through ideas to improve flow of the space, we decided to eliminate the existing 1/2 bath in the family room and build the new 3/4 bathroom within the existing laundry room. This allowed the family room to be enlarged.
Plumbing fixtures in the bathroom include a Kohler, Memoirs® Stately 24″ pedestal bathroom sink, Kohler, Archer® sink faucet and showerhead in polished chrome, and a Kohler, Highline® Comfort Height® toilet with Class Five® flush technology.
American Olean 1″ hex tile was installed in the shower’s floor, and subway tile on shower walls all the way up to the ceiling. A custom frameless glass shower enclosure finishes the sleek, open design.
Highly wear-resistant Adura luxury vinyl tile flooring runs throughout the entire bathroom and laundry room areas.
The full laundry room was finished to include new walls and ceilings. Beautiful shaker-style cabinetry with beadboard panels in white linen was chosen, along with glossy white cultured marble countertops from Central Marble, a Blanco, Precis 27″ single bowl granite composite sink in cafe brown, and a Kohler, Bellera® sink faucet.
We also decided to save and restore some original pieces in the home, like their existing 5-panel doors; one of which was repurposed into a pocket door for the new bathroom.
The homeowners completed the basement finish with new carpeting in the family room. The whole basement feels fresh, new, and has a great flow. They will enjoy their healthy, happy home for years to come.
Designed by: Emily Blonigen
See full details, including before photos at https://www.castlebri.com/basements/project-3378-1/
 Rodwin Architecture & Skycastle Construction
Rodwin Architecture and Skycastle Homes
Location: Boulder, Colorado, United States
We helped the clients find a beautiful lot in North Boulder, then crafted this modern 3,300 s.f. house to be their dream home.
The clients asked for a warm modern style home, with an open floor plan that connected to the outdoors and took full advantage of the rare lot. We sited and engineered the house for optimal passive solar design, while simultaneously capturing unobstructed panoramic views of the Flatirons from both levels. The home’s simple, clean lines reflect their unpretentious, easy-going character. The gourmet kitchen, dining and Great room are flooded with sunshine from the 9ft high ceilings and walls of glass. A gracious covered west porch flows seamlessly out from the Great room through a giant bank of sliding doors, creating a fantastic opportunity for indoor/outdoor living. The porch has solid cedar columns and Beetle-kill wood on the ceiling to create a warm feeling.
On the ground floor, walk past the front hall to reach a guest suite and a rec room that is divided between a small media room for the boys and a north facing painting studio.
Follow the stair to the second floor where you’ll immediately be presented with a stunning view from the open study and balcony. All the bedrooms get a south facing Flatiron view and the master has its own private balcony.
The owners wanted the HERS 37 house to be as green as possible, and the house has tiny energy and water bills as well as a healthy indoor air environment. It features solar photovoltaic panels, Energy Star fiberglass windows, foam insulation, LED lights, Watersense plumbing fixtures, a 96% efficient furnace & zero-VOC finishes.
Learn more about it and its artistic owners in Boulder Home & Garden Magazine
Built by Skycastle Construction.
 Rodwin Architecture & Skycastle Construction
Rodwin Architecture and Skycastle Homes
Location: Boulder, Colorado, United States
We helped the clients find a beautiful lot in North Boulder, then crafted this modern 3,300 s.f. house to be their dream home.
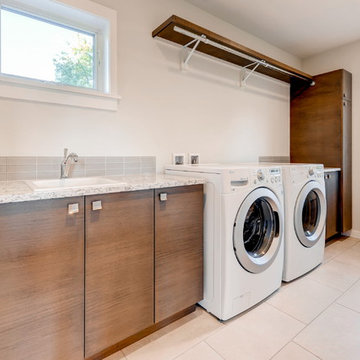
The clients asked for a warm modern style home, with an open floor plan that connected to the outdoors and took full advantage of the rare lot. We sited and engineered the house for optimal passive solar design, while simultaneously capturing unobstructed panoramic views of the Flatirons from both levels. The home’s simple, clean lines reflect their unpretentious, easy-going character. The gourmet kitchen, dining and Great room are flooded with sunshine from the 9ft high ceilings and walls of glass. A gracious covered west porch flows seamlessly out from the Great room through a giant bank of sliding doors, creating a fantastic opportunity for indoor/outdoor living. The porch has solid cedar columns and Beetle-kill wood on the ceiling to create a warm feeling.
On the ground floor, walk past the front hall to reach a guest suite and a rec room that is divided between a small media room for the boys and a north facing painting studio.
Follow the stair to the second floor where you’ll immediately be presented with a stunning view from the open study and balcony. All the bedrooms get a south facing Flatiron view and the master has its own private balcony.
The owners wanted the HERS 37 house to be as green as possible, and the house has tiny energy and water bills as well as a healthy indoor air environment. It features solar photovoltaic panels, Energy Star fiberglass windows, foam insulation, LED lights, Watersense plumbing fixtures, a 96% efficient furnace & zero-VOC finishes.
Learn more about it and its artistic owners in Boulder Home & Garden Magazine
Built by Skycastle Construction.

 Rodwin Architecture & Skycastle Construction
Rodwin Architecture and Skycastle Homes
Location: Boulder, Colorado, United States
We helped the clients find a beautiful lot in North Boulder, then crafted this modern 3,300 s.f. house to be their dream home.
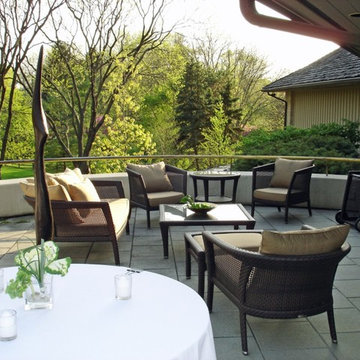
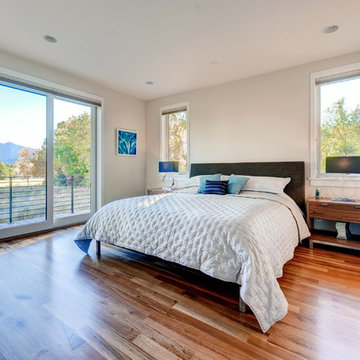
The clients asked for a warm modern style home, with an open floor plan that connected to the outdoors and took full advantage of the rare lot. We sited and engineered the house for optimal passive solar design, while simultaneously capturing unobstructed panoramic views of the Flatirons from both levels. The home’s simple, clean lines reflect their unpretentious, easy-going character. The gourmet kitchen, dining and Great room are flooded with sunshine from the 9ft high ceilings and walls of glass. A gracious covered west porch flows seamlessly out from the Great room through a giant bank of sliding doors, creating a fantastic opportunity for indoor/outdoor living. The porch has solid cedar columns and Beetle-kill wood on the ceiling to create a warm feeling.
On the ground floor, walk past the front hall to reach a guest suite and a rec room that is divided between a small media room for the boys and a north facing painting studio.
Follow the stair to the second floor where you’ll immediately be presented with a stunning view from the open study and balcony. All the bedrooms get a south facing Flatiron view and the master has its own private balcony.
The owners wanted the HERS 37 house to be as green as possible, and the house has tiny energy and water bills as well as a healthy indoor air environment. It features solar photovoltaic panels, Energy Star fiberglass windows, foam insulation, LED lights, Watersense plumbing fixtures, a 96% efficient furnace & zero-VOC finishes.
Learn more about it and its artistic owners in Boulder Home & Garden Magazine
Built by Skycastle Construction.

 Talon Construction Inc.
Designing and building a kitchen addition is a complex process that involves multiple steps and considerations. Here is a general outline to help you get started on your kitchen addition project:
Define Your Goals and Budget:
• Determine the purpose of the kitchen addition. Is it for more cooking space, a dining area, or a combination of both?
• Establish a realistic budget for your project. Consider all costs, including construction, permits, materials, and furnishings.
Hire a Design Professional:
• Seek the services of a design build company who specializes in kitchen additions.
• Discuss your vision, needs, and budget with the design professional to create a design concept.
Site Evaluation:
• Assess the existing space and structural condition of your home to ensure it can support the addition.
• Consider factors like zoning regulations, setbacks, and building codes.
Design Development:
• Collaborate with your design professional to refine the concept, including the layout, size, and architectural style.
• Choose materials, finishes, and fixtures that fit your design and budget.
Obtain Permits:
• Consult with your local design build contractor to determine the necessary permits and approvals.
• Prepare and submit all required documents, including architectural drawings and engineering plans.
Create Construction Documents:
• Work with your design build professional to develop detailed construction drawings and specifications.
• These documents will serve as a guide for contractors during construction.
Hire a design build contractor:
• Check references, credentials, and licenses before selecting a contractor.
• Sign a detailed contract that outlines the scope of work, timeline, and payment schedule.
Construction Phase:
• Demolition: If needed, remove any existing structures or walls.
• Foundation: Construct the foundation for the addition.
• Framing: Build the structural framework of the addition.
• Plumbing, Electrical, and HVAC: Install or update utilities as required.
• Insulation: Ensure proper insulation for energy efficiency.
• Drywall and Finish Work: Complete the walls and ceilings.
• Flooring and Cabinetry: Install flooring and kitchen cabinets.
• Appliances and Fixtures: Add appliances, plumbing fixtures, and lighting.
• Paint and Finish: Apply paint and finishes to achieve the desired look.
• Final Inspection: Schedule inspections to ensure compliance with building codes.
Final Inspections and Approvals:
• Arrange for final inspections to ensure the addition meets all safety and code requirements.
• Obtain any necessary certificates of occupancy or compliance.
Move In and Enjoy:
• Once all inspections and approvals are received, you can move into your new kitchen addition and start enjoying it.
Remember that every kitchen addition project is unique, so adapt this outline to your specific needs and circumstances. Consulting with professionals and obtaining the required permits and inspections is crucial to a successful and safe project.
 Talon Construction Inc.
Designing and building a kitchen addition is a complex process that involves multiple steps and considerations. Here is a general outline to help you get started on your kitchen addition project:
Define Your Goals and Budget:
• Determine the purpose of the kitchen addition. Is it for more cooking space, a dining area, or a combination of both?
• Establish a realistic budget for your project. Consider all costs, including construction, permits, materials, and furnishings.
Hire a Design Professional:
• Seek the services of a design build company who specializes in kitchen additions.
• Discuss your vision, needs, and budget with the design professional to create a design concept.
Site Evaluation:
• Assess the existing space and structural condition of your home to ensure it can support the addition.
• Consider factors like zoning regulations, setbacks, and building codes.
Design Development:
• Collaborate with your design professional to refine the concept, including the layout, size, and architectural style.
• Choose materials, finishes, and fixtures that fit your design and budget.
Obtain Permits:
• Consult with your local design build contractor to determine the necessary permits and approvals.
• Prepare and submit all required documents, including architectural drawings and engineering plans.
Create Construction Documents:
• Work with your design build professional to develop detailed construction drawings and specifications.
• These documents will serve as a guide for contractors during construction.
Hire a design build contractor:
• Check references, credentials, and licenses before selecting a contractor.
• Sign a detailed contract that outlines the scope of work, timeline, and payment schedule.
Construction Phase:
• Demolition: If needed, remove any existing structures or walls.
• Foundation: Construct the foundation for the addition.
• Framing: Build the structural framework of the addition.
• Plumbing, Electrical, and HVAC: Install or update utilities as required.
• Insulation: Ensure proper insulation for energy efficiency.
• Drywall and Finish Work: Complete the walls and ceilings.
• Flooring and Cabinetry: Install flooring and kitchen cabinets.
• Appliances and Fixtures: Add appliances, plumbing fixtures, and lighting.
• Paint and Finish: Apply paint and finishes to achieve the desired look.
• Final Inspection: Schedule inspections to ensure compliance with building codes.
Final Inspections and Approvals:
• Arrange for final inspections to ensure the addition meets all safety and code requirements.
• Obtain any necessary certificates of occupancy or compliance.
Move In and Enjoy:
• Once all inspections and approvals are received, you can move into your new kitchen addition and start enjoying it.
Remember that every kitchen addition project is unique, so adapt this outline to your specific needs and circumstances. Consulting with professionals and obtaining the required permits and inspections is crucial to a successful and safe project.
 Talon Construction Inc.
Designing and building a kitchen addition is a complex process that involves multiple steps and considerations. Here is a general outline to help you get started on your kitchen addition project:
Define Your Goals and Budget:
• Determine the purpose of the kitchen addition. Is it for more cooking space, a dining area, or a combination of both?
• Establish a realistic budget for your project. Consider all costs, including construction, permits, materials, and furnishings.
Hire a Design Professional:
• Seek the services of a design build company who specializes in kitchen additions.
• Discuss your vision, needs, and budget with the design professional to create a design concept.
Site Evaluation:
• Assess the existing space and structural condition of your home to ensure it can support the addition.
• Consider factors like zoning regulations, setbacks, and building codes.
Design Development:
• Collaborate with your design professional to refine the concept, including the layout, size, and architectural style.
• Choose materials, finishes, and fixtures that fit your design and budget.
Obtain Permits:
• Consult with your local design build contractor to determine the necessary permits and approvals.
• Prepare and submit all required documents, including architectural drawings and engineering plans.
Create Construction Documents:
• Work with your design build professional to develop detailed construction drawings and specifications.
• These documents will serve as a guide for contractors during construction.
Hire a design build contractor:
• Check references, credentials, and licenses before selecting a contractor.
• Sign a detailed contract that outlines the scope of work, timeline, and payment schedule.
Construction Phase:
• Demolition: If needed, remove any existing structures or walls.
• Foundation: Construct the foundation for the addition.
• Framing: Build the structural framework of the addition.
• Plumbing, Electrical, and HVAC: Install or update utilities as required.
• Insulation: Ensure proper insulation for energy efficiency.
• Drywall and Finish Work: Complete the walls and ceilings.
• Flooring and Cabinetry: Install flooring and kitchen cabinets.
• Appliances and Fixtures: Add appliances, plumbing fixtures, and lighting.
• Paint and Finish: Apply paint and finishes to achieve the desired look.
• Final Inspection: Schedule inspections to ensure compliance with building codes.
Final Inspections and Approvals:
• Arrange for final inspections to ensure the addition meets all safety and code requirements.
• Obtain any necessary certificates of occupancy or compliance.
Move In and Enjoy:
• Once all inspections and approvals are received, you can move into your new kitchen addition and start enjoying it.
Remember that every kitchen addition project is unique, so adapt this outline to your specific needs and circumstances. Consulting with professionals and obtaining the required permits and inspections is crucial to a successful and safe project.

Sponsored
Sunbury, OH

J.Holderby - Renovations
Franklin County's Leading General Contractors - 2X Best of Houzz!
 Talon Construction Inc.
Designing and building a kitchen addition is a complex process that involves multiple steps and considerations. Here is a general outline to help you get started on your kitchen addition project:
Define Your Goals and Budget:
• Determine the purpose of the kitchen addition. Is it for more cooking space, a dining area, or a combination of both?
• Establish a realistic budget for your project. Consider all costs, including construction, permits, materials, and furnishings.
Hire a Design Professional:
• Seek the services of a design build company who specializes in kitchen additions.
• Discuss your vision, needs, and budget with the design professional to create a design concept.
Site Evaluation:
• Assess the existing space and structural condition of your home to ensure it can support the addition.
• Consider factors like zoning regulations, setbacks, and building codes.
Design Development:
• Collaborate with your design professional to refine the concept, including the layout, size, and architectural style.
• Choose materials, finishes, and fixtures that fit your design and budget.
Obtain Permits:
• Consult with your local design build contractor to determine the necessary permits and approvals.
• Prepare and submit all required documents, including architectural drawings and engineering plans.
Create Construction Documents:
• Work with your design build professional to develop detailed construction drawings and specifications.
• These documents will serve as a guide for contractors during construction.
Hire a design build contractor:
• Check references, credentials, and licenses before selecting a contractor.
• Sign a detailed contract that outlines the scope of work, timeline, and payment schedule.
Construction Phase:
• Demolition: If needed, remove any existing structures or walls.
• Foundation: Construct the foundation for the addition.
• Framing: Build the structural framework of the addition.
• Plumbing, Electrical, and HVAC: Install or update utilities as required.
• Insulation: Ensure proper insulation for energy efficiency.
• Drywall and Finish Work: Complete the walls and ceilings.
• Flooring and Cabinetry: Install flooring and kitchen cabinets.
• Appliances and Fixtures: Add appliances, plumbing fixtures, and lighting.
• Paint and Finish: Apply paint and finishes to achieve the desired look.
• Final Inspection: Schedule inspections to ensure compliance with building codes.
Final Inspections and Approvals:
• Arrange for final inspections to ensure the addition meets all safety and code requirements.
• Obtain any necessary certificates of occupancy or compliance.
Move In and Enjoy:
• Once all inspections and approvals are received, you can move into your new kitchen addition and start enjoying it.
Remember that every kitchen addition project is unique, so adapt this outline to your specific needs and circumstances. Consulting with professionals and obtaining the required permits and inspections is crucial to a successful and safe project.
 Talon Construction Inc.
Designing and building a kitchen addition is a complex process that involves multiple steps and considerations. Here is a general outline to help you get started on your kitchen addition project:
Define Your Goals and Budget:
• Determine the purpose of the kitchen addition. Is it for more cooking space, a dining area, or a combination of both?
• Establish a realistic budget for your project. Consider all costs, including construction, permits, materials, and furnishings.
Hire a Design Professional:
• Seek the services of a design build company who specializes in kitchen additions.
• Discuss your vision, needs, and budget with the design professional to create a design concept.
Site Evaluation:
• Assess the existing space and structural condition of your home to ensure it can support the addition.
• Consider factors like zoning regulations, setbacks, and building codes.
Design Development:
• Collaborate with your design professional to refine the concept, including the layout, size, and architectural style.
• Choose materials, finishes, and fixtures that fit your design and budget.
Obtain Permits:
• Consult with your local design build contractor to determine the necessary permits and approvals.
• Prepare and submit all required documents, including architectural drawings and engineering plans.
Create Construction Documents:
• Work with your design build professional to develop detailed construction drawings and specifications.
• These documents will serve as a guide for contractors during construction.
Hire a design build contractor:
• Check references, credentials, and licenses before selecting a contractor.
• Sign a detailed contract that outlines the scope of work, timeline, and payment schedule.
Construction Phase:
• Demolition: If needed, remove any existing structures or walls.
• Foundation: Construct the foundation for the addition.
• Framing: Build the structural framework of the addition.
• Plumbing, Electrical, and HVAC: Install or update utilities as required.
• Insulation: Ensure proper insulation for energy efficiency.
• Drywall and Finish Work: Complete the walls and ceilings.
• Flooring and Cabinetry: Install flooring and kitchen cabinets.
• Appliances and Fixtures: Add appliances, plumbing fixtures, and lighting.
• Paint and Finish: Apply paint and finishes to achieve the desired look.
• Final Inspection: Schedule inspections to ensure compliance with building codes.
Final Inspections and Approvals:
• Arrange for final inspections to ensure the addition meets all safety and code requirements.
• Obtain any necessary certificates of occupancy or compliance.
Move In and Enjoy:
• Once all inspections and approvals are received, you can move into your new kitchen addition and start enjoying it.
Remember that every kitchen addition project is unique, so adapt this outline to your specific needs and circumstances. Consulting with professionals and obtaining the required permits and inspections is crucial to a successful and safe project.
 Rodwin Architecture & Skycastle Construction
Rodwin Architecture and Skycastle Homes
Location: Boulder, Colorado, United States
We helped the clients find a beautiful lot in North Boulder, then crafted this modern 3,300 s.f. house to be their dream home.
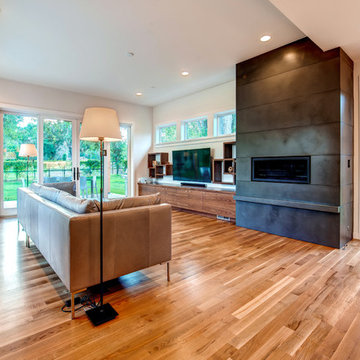
The clients asked for a warm modern style home, with an open floor plan that connected to the outdoors and took full advantage of the rare lot. We sited and engineered the house for optimal passive solar design, while simultaneously capturing unobstructed panoramic views of the Flatirons from both levels. The home’s simple, clean lines reflect their unpretentious, easy-going character. The gourmet kitchen, dining and Great room are flooded with sunshine from the 9ft high ceilings and walls of glass. A gracious covered west porch flows seamlessly out from the Great room through a giant bank of sliding doors, creating a fantastic opportunity for indoor/outdoor living. The porch has solid cedar columns and Beetle-kill wood on the ceiling to create a warm feeling.
On the ground floor, walk past the front hall to reach a guest suite and a rec room that is divided between a small media room for the boys and a north facing painting studio.
Follow the stair to the second floor where you’ll immediately be presented with a stunning view from the open study and balcony. All the bedrooms get a south facing Flatiron view and the master has its own private balcony.
The owners wanted the HERS 37 house to be as green as possible, and the house has tiny energy and water bills as well as a healthy indoor air environment. It features solar photovoltaic panels, Energy Star fiberglass windows, foam insulation, LED lights, Watersense plumbing fixtures, a 96% efficient furnace & zero-VOC finishes.
Learn more about it and its artistic owners in Boulder Home & Garden Magazine
Built by Skycastle Construction.
60