
Search results for "Insulation levels" in Home Design Ideas

 Anderson Sustainable Architecture
Client Needs:
• Empty-Nesters desire to Age in Place and fulfill future accessibility needs.
• Bedroom desired for aging parent.
• Provide for large extended family multiday visits year round.
• Maximize a simple live-work-play experience.
• Owner’s desire to live off the land and grid.
• Cost-conscious Net-Zero Energy Passive House quality required.
• Maximize views from hill over farm land.
• Inexperienced subcontractors to build.
The Solution:
• 1-story slab-on-grade design provides accessible rooms and circulation.
• Matched cost-effective construction and insulation level with room needs.
• High-performing construction at primary living areas meet Passive House standards.
• Lighter insulated, wood stove heated rooms provide for extended 4-season use:
- Glazed Screen Porch: living & sleeping.
- Greenhouse: extended growing season.
- Garage: storage & maintenance work.
• Root Cellar: insulated concrete room stores food and provides storm sheltering.
The Result:
• Each room and the entire house serve the couple, additional parent, and large extended family gatherings well.
• Cook(s) stay engaged with living and dining room guests while cooking in the open kitchen.
• Easy living provided with uniquely placed activity areas and rooms flowing together, allowing circular movement thru the house.
• Sweeping indoor and outdoor views provided.
• Owners self-performed large parts of the construction using the simple building design.
• A ground mounted solar array makes the Passive House home Net-Zero Energy.
• The couple is practically self-sustaining for food, water and energy.

 Mottram Architecture
Michael Eric Berube, Maine Virtual Home ToursTimber frame homes offer unique challenges during a remodel. What often makes them beautiful and attractive to most homeowners, also makes them challenging for space requirements.
Context: The lovely couple that owned this home were struggling with some interesting floor plan challenges that just didn't work for their family. The loved the beautiful timbers and woodwork of their home, but the dramatically sloping ceilings on the second floor, particularly in the bathroom, just didn't work for this 1 1/2 bath home. Needing to use the skylight to approach the toilet was a less then ideal scenario. Although the bathroom footprint was more then adequate, the sloped ceiling only made half of the space useable. Check out the Before/After post on our blog to see the photos of the house pre-renovation. As much as they loved all the wood features in their home, another challenge they had was light. The wood ceiling made everything inside the house darker, even with a fantastic array of south facing windows, there were spaces in the home that felt dark and small. When they contacted us they wanted to know how could they make their brighter and more inviting, were there solutions to the 2nd floor sloped ceiling issues, and if they were going to do all of this work, how could they make their home more comfortable and efficient. A nagging water leak in the upstairs bathroom spurred them into action and here is how we solved their dilemma.
Conclusion: First, we added a little dormer to the rear of the house so we could get full headroom in nearly all of the upstairs bathroom! Then we decided to extend that dormer one more timber bay over to create a walk in closet with natural light and plenty of space. Since we were contemplating energy efficiency, we resolved a nagging issue that is present in a lot of timber frame construction, air tightness. Commonly found in timber frame construction, fiberglass insulation is installed in the rafter bays and board ceilings are installed over top. Unfortunately, board ceilings are anything but air tight, and fiberglass insulation needs to be in an airtight cavity for maximum effectiveness. So we were able to solve two issues at the same time for this homeowner. We removed the board ceiling and fiberglass insulation, we dense packed the rafter bays with cellulose insulation, and installed sheetrock in place of the boards. The boards were salvaged for re-use by the homeowner, and the space and light quality was dramatically improved. Some may think that losing the board ceiling took something away from the space, but what you'll see in the pictures is that it highly accentuates the heavy timbers and really makes them stand out in a beautiful way. Now with this added airtightness, better insulation, and brighter space, the homeowner hardly runs their wood stove, and it's so quiet in the space, an added bonus from changing the insulation. It became necessary to also add a sheetrock ceiling to the living room to hide the plumbing from the new bathroom layout above. Changing this ceiling gave the homeowner some real quality lighting that was lacking in the living room before. The brighter ceiling and new lighting layout completely transforms the living room into a space you want to hang out, even though the layout didn't change at all. When the homeowner saw the finished spaces she said "I can't believe this is my house, I want to live in this house"
Energy Efficiency: I touched a little on the efficiency above, but like all projects done with Mottram Architecture, we always want to leave you with a little extra. Timber frame construction with board ceilings and fiberglass insulation are notoriously leaky! If you want to know what we think about fiberglass insulation, check our our blog post on Why Fiberglass Insulation Sucks. By installing cellulose insulation and covering it with sheetrock we were able to greatly reduce the heat flowing out of this home. It not only improves cashflow it improves the comfort level in the space. Who wants to sit in their living room and feel a draft? Let us remind you, we are not saying cellulose insulation is an air barrier, we use the sheetrock to help with that, but it does significantly reduce the air flow over fiberglass insulation. And when we reduce the airflow, we reduce the heat flow. And when we reduce the heat flow, we reduce the need to re-heat that drafty air from outside. When it comes to energy efficiency the first and best place to start is air infiltration. We greatly reduced the air infiltration with the new insulation, but we also added a hat and warm boots. What I mean by that is, we improved the insulation in the roof, and we installed insulation in the basement. Maybe it's a silly analogy, but when you think about keeping warm, we always start with the hat and boots! With sustainability in mind, the next project will be to add a deck to the front of this house with rain catchment barrels from the metal roof. They are planning to plant a garden in the spring and the rain catchment system will help to irrigate the new garden.
Builder: East Shore Builders
Photographer: Michael Eric Berube

 Albert, Righter & Tittmann Architects, Inc.
This house wraps around two levels of courtyards on one side and looks out over salt marshes to the sound on the other. Its deeply insulated 12” thick walls and roof conserve energy, and heat recovery ventilation ensures a constant cycle of fresh air.
Find the right local pro for your project

 ZeroEnergy Design
CHATHAM MARSHVIEW HOUSE
This Cape Cod green home provides a destination for visiting family, support of a snowbird lifestyle, and an expression of the homeowner’s energy conscious values.
Looking over the salt marsh with Nantucket Sound in the distance, this new home offers single level living to accommodate aging in place, and a strong connection to the outdoors. The homeowners can easily enjoy the deck, walk to the nearby beach, or spend time with family, while the house works to produce nearly all the energy it consumes. The exterior, clad in the Cape’s iconic Eastern white cedar shingles, is modern in detailing, yet recognizable and familiar in form.
MORE: https://zeroenergy.com/chatham-marshview-house
Architecture: ZeroEnergy Design
Construction: Eastward Homes
Photos: Eric Roth Photography
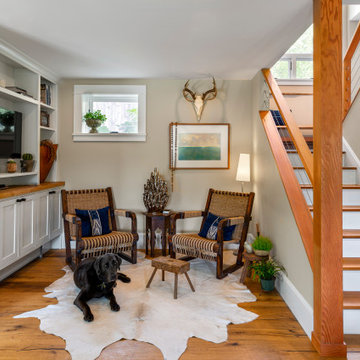
 Newschool Builders LLC
The cobblers kids have no shoes rang true as this builder worked on his own home for many years. Originally a 1980’s split level, this project slowly transformed from a once outdated and run down building into a beautiful contemporary home. Mixing natural wood and stone created a classic, yet contemporary feel throughout the interior and exterior.
A full gut down to the studs allowed the structure to be up fitted with new mechanicals, electrical, insulation, windows and doors. We moved the kitchen to the south side, removed the attic and built full length dormers and a stair tower allowing epic views of cables hump. The interior is built out with custom builtins, cabinets and furniture. The exterior was laid out in a way that makes entertaining a dream. Landscaping and hardscaping tied this whole project together. It feels good to finish building out your own home from a dream all the way through to reality.

 Michael Nash Design, Build & Homes
2011 NARI CAPITAL COTY FINALIST AWARD WINNER/2012 NATIONAL NARI COTY SOUTHEAST REGIONAL AWARD WINNER
This creative design involved converting a plain basement storage space into a wine cellar and tasting room for a couple that is changing their basement over to an adult “play” space. The basement already has a movie theater, exercise room, and a game table. They had been visiting local wineries and collecting for a future wine cellar of their own and now was the time.
The design needed to work around the existing ductwork for the main level, tie into the electrical panel and HVAC system, move the hot water heater and furnace with associated ductwork, and hide the sump pump in the corner. It also included an upgraded look to the cabinetry and shelving. The space needed to be insulated and waterproofed to maintain constant temperature.
The remodel connected to the existing electrical system, adding a split cooling system to their existing HVAC. The HVAC for the cellar has its own ductwork and compressor system, but ties into the existing system for drainage. Cabinetry was modified to conceal the sump pump in the corner, as well as cut to fit around the overhead duct work that cut across the middle of the ceiling. Miniature LED lights were installed along the shelving to give a glow so the labels could be read. The tasting table has a granite top with a barrel curved edge.
Small touches added to the cabinetry and racks make this a custom designed cellar. Textures in the tile pick up on the wood grain of the mahogany racking. The custom insulated door has a frosted design. There are a variety of lights used, all on timer, including the LEDs, recessed and puck lights over the tasting area. The raised tumble limestone and the rest of the design, makes it unique to these homeowners.
 Michael Nash Design, Build & Homes
2011 NARI CAPITAL COTY FINALIST AWARD WINNER
This 1970’s split-level single-family home in an upscale Arlington neighborhood had been neglected for years. With his surrounding neighbors all doing major exterior and interior remodeling, however, the owner decided it was time to renovate his property as well. After several consultation meetings with the design team at Michael Nash Design, Build & Homes, he settled on an exterior layout to create an Art & Craft design for the home.
It all got started by excavating the front and left side of the house and attaching a wrap-around stone porch. Key design attributes include a black metal roof, large tapered columns, blue and grey random style flag stone, beaded stain ceiling paneling and an octagonal seating area on the left side of this porch. The front porch has a wide stairway and another set of stairs leads to the back yard.
All exterior walls of the home were modified with new headers to allow much larger custom-made windows, new front doors garage doors, and French side and back doors. A custom-designed mahogany front door with leaded glass provides more light and offers a wider entrance into the home’s living area.
Design challenges included removing the entire face of the home and then adding new insulation, Tyvek and Hardiplank siding. The use of high-efficiency low-e windows makes the home air tight.
The Arts & Crafts design touches include the front gable over the front porch, the prairie-style grill pattern on the windows and doors, the use of tapered columns sitting over stone columns and the leaded glass front door. Decorative exterior lighting provides the finishing touches to this look.
Inside, custom woodwork, crown molding, custom glass cabinets and interior pillars carry the design. Upon entering the space, visitors face a large partition that separates the living area from a gourmet Arts & Crafts kitchen and dining room.
The home’s signature space, the kitchen offers contrasting dark and light cherry cabinets. Wide plank hard wood floors, exotic granite counters and stainless steel professional-grade appliances make this a kitchen fit for any chef.
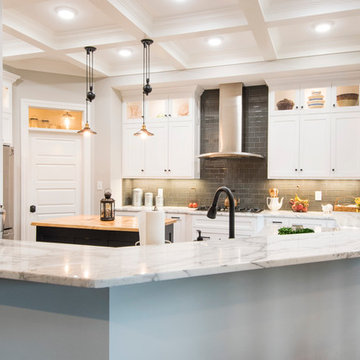


 Rockville Interiors
Blinds - Our carefully curated library of blinds features the industries finest Solar Shades, Silhouette Shades, Wood Blinds, Honeycomb Shades, Woven Woods & more! We only partner with the most fashion-forward fabricators like Hunter Douglas, Conrad Shades, Coulisse & more for gorgeous window fashions that provide industry leading levels of privacy, light control, UV protection and thermal insulation.
 ZeroEnergy Design
CHATHAM MARSHVIEW HOUSE
This Cape Cod green home provides a destination for visiting family, support of a snowbird lifestyle, and an expression of the homeowner’s energy conscious values.
Looking over the salt marsh with Nantucket Sound in the distance, this new home offers single level living to accommodate aging in place, and a strong connection to the outdoors. The homeowners can easily enjoy the deck, walk to the nearby beach, or spend time with family, while the house works to produce nearly all the energy it consumes. The exterior, clad in the Cape’s iconic Eastern white cedar shingles, is modern in detailing, yet recognizable and familiar in form.
MORE: https://zeroenergy.com/chatham-marshview-house
Architecture: ZeroEnergy Design
Construction: Eastward Homes
Photos: Eric Roth Photography

 Bristle Painting Company
Logan Wallace. This project was a personal one and a long time coming. When we bought our house in 2009, we decided to just "deal with it", that is, the nasty outdated upstairs bathroom. As soon as the St. Dominic project finished though, it was time to demo our bathroom. It was a lot of fun and hard work, but the end result is just amazing. Walls were taken down to the studs (plaster and lath removed), insulation installed, tub and toilet removed, plumbing adjusted, walls and floor leveled, tile installed, new tub and toilet and faucet set installed, light/vent moved and replaced with recessed light/vent, cedar plank ceiling installed, door hardware and trim replaced, paint (eggshell), satin poly on ceiling (2 coats), clean and seal all grout and slate floor tile (heated floor), cleanup and hooks, towel bars, under the counter ledge (for toothbrushes, etc.) installed.

 Hudson Place Realty
Property Marketed by Hudson Place Realty - Simply stunning designer duplex in Hoboken’s landmark GREEN /LEED GOLD certified building. With over 3100 sq. ft of interior space & 600 sq. ft. of private outdoor space this Architectural Digest worthy property offers 3 bedrooms, 4 full baths, separate dining room, dedicated media room & separate office. Completely customized with a dramatic floating concrete & glass staircase, Features floor to ceiling windows, a 1st level, professionally maintained, Ipe’ wood deck complete with trees, water & lighting, ELAN whole-home audio/lighting control and touch-pads in all rooms, separate audio/video closet with full rack system. a sleek Italian Valcucine kitchen, SubZero refrigerator, integrated Miele dishwasher, Viking 6 burner range with fully vented hood, Viking wine cooler & tempered glass counters. 2 Master suites with walk in closets & spa baths featuring imported Zen soaking tubs, separate showers, linen closet, Duravit double sinks & Lightolier sconces, Hunter Douglas window treatments, bamboo floors, and custom closets throughout. Concrete sub floors and Quiet Rock insulation for soundproofing. Planted green living roof with residents area featuring fabulous NYC & Hudson views, filtered fresh air system, & bike storage room. Absolutely ideal location, bordered on the western side by the newly established Garden Street Mews pedestrian area.
 Mottram Architecture
Timber frame homes offer unique challenges during a remodel. What often makes them beautiful and attractive to most homeowners, also makes them challenging for space requirements.
Context: The lovely couple that owned this home were struggling with some interesting floor plan challenges that just didn't work for their family. The loved the beautiful timbers and woodwork of their home, but the dramatically sloping ceilings on the second floor, particularly in the bathroom, just didn't work for this 1 1/2 bath home. Needing to use the skylight to approach the toilet was a less then ideal scenario. Although the bathroom footprint was more then adequate, the sloped ceiling only made half of the space useable. Check out the Before/After post on our blog to see the photos of the house pre-renovation. As much as they loved all the wood features in their home, another challenge they had was light. The wood ceiling made everything inside the house darker, even with a fantastic array of south facing windows, there were spaces in the home that felt dark and small. When they contacted us they wanted to know how could they make their brighter and more inviting, were there solutions to the 2nd floor sloped ceiling issues, and if they were going to do all of this work, how could they make their home more comfortable and efficient. A nagging water leak in the upstairs bathroom spurred them into action and here is how we solved their dilemma.
Conclusion: First, we added a little dormer to the rear of the house so we could get full headroom in nearly all of the upstairs bathroom! Then we decided to extend that dormer one more timber bay over to create a walk in closet with natural light and plenty of space. Since we were contemplating energy efficiency, we resolved a nagging issue that is present in a lot of timber frame construction, air tightness. Commonly found in timber frame construction, fiberglass insulation is installed in the rafter bays and board ceilings are installed over top. Unfortunately, board ceilings are anything but air tight, and fiberglass insulation needs to be in an airtight cavity for maximum effectiveness. So we were able to solve two issues at the same time for this homeowner. We removed the board ceiling and fiberglass insulation, we dense packed the rafter bays with cellulose insulation, and installed sheetrock in place of the boards. The boards were salvaged for re-use by the homeowner, and the space and light quality was dramatically improved. Some may think that losing the board ceiling took something away from the space, but what you'll see in the pictures is that it highly accentuates the heavy timbers and really makes them stand out in a beautiful way. Now with this added airtightness, better insulation, and brighter space, the homeowner hardly runs their wood stove, and it's so quiet in the space, an added bonus from changing the insulation. It became necessary to also add a sheetrock ceiling to the living room to hide the plumbing from the new bathroom layout above. Changing this ceiling gave the homeowner some real quality lighting that was lacking in the living room before. The brighter ceiling and new lighting layout completely transforms the living room into a space you want to hang out, even though the layout didn't change at all. When the homeowner saw the finished spaces she said "I can't believe this is my house, I want to live in this house"
Energy Efficiency: I touched a little on the efficiency above, but like all projects done with Mottram Architecture, we always want to leave you with a little extra. Timber frame construction with board ceilings and fiberglass insulation are notoriously leaky! If you want to know what we think about fiberglass insulation, check our our blog post on Why Fiberglass Insulation Sucks. By installing cellulose insulation and covering it with sheetrock we were able to greatly reduce the heat flowing out of this home. It not only improves cashflow it improves the comfort level in the space. Who wants to sit in their living room and feel a draft? Let us remind you, we are not saying cellulose insulation is an air barrier, we use the sheetrock to help with that, but it does significantly reduce the air flow over fiberglass insulation. And when we reduce the airflow, we reduce the heat flow. And when we reduce the heat flow, we reduce the need to re-heat that drafty air from outside. When it comes to energy efficiency the first and best place to start is air infiltration. We greatly reduced the air infiltration with the new insulation, but we also added a hat and warm boots. What I mean by that is, we improved the insulation in the roof, and we installed insulation in the basement. Maybe it's a silly analogy, but when you think about keeping warm, we always start with the hat and boots! With sustainability in mind, the next project will be to add a deck to the front of this house with rain catchment barrels from the metal roof. They are planning to plant a garden in the spring and the rain catchment system will help to irrigate the new garden.
Builder: East Shore Builders
Photographer: Michael Eric Berube
 Mottram Architecture
This half bath was converted into a full bath by adding a shower and changing the location of the existing fixtures. Now these homeowners have a first floor bedroom/bath space.
Timber frame homes offer unique challenges during a remodel. What often makes them beautiful and attractive to most homeowners, also makes them challenging for space requirements.
Context: The lovely couple that owned this home were struggling with some interesting floor plan challenges that just didn't work for their family. The loved the beautiful timbers and woodwork of their home, but the dramatically sloping ceilings on the second floor, particularly in the bathroom, just didn't work for this 1 1/2 bath home. Needing to use the skylight to approach the toilet was a less then ideal scenario. Although the bathroom footprint was more then adequate, the sloped ceiling only made half of the space useable. Check out the Before/After post on our blog to see the photos of the house pre-renovation. As much as they loved all the wood features in their home, another challenge they had was light. The wood ceiling made everything inside the house darker, even with a fantastic array of south facing windows, there were spaces in the home that felt dark and small. When they contacted us they wanted to know how could they make their brighter and more inviting, were there solutions to the 2nd floor sloped ceiling issues, and if they were going to do all of this work, how could they make their home more comfortable and efficient. A nagging water leak in the upstairs bathroom spurred them into action and here is how we solved their dilemma.
Conclusion: First, we added a little dormer to the rear of the house so we could get full headroom in nearly all of the upstairs bathroom! Then we decided to extend that dormer one more timber bay over to create a walk in closet with natural light and plenty of space. Since we were contemplating energy efficiency, we resolved a nagging issue that is present in a lot of timber frame construction, air tightness. Commonly found in timber frame construction, fiberglass insulation is installed in the rafter bays and board ceilings are installed over top. Unfortunately, board ceilings are anything but air tight, and fiberglass insulation needs to be in an airtight cavity for maximum effectiveness. So we were able to solve two issues at the same time for this homeowner. We removed the board ceiling and fiberglass insulation, we dense packed the rafter bays with cellulose insulation, and installed sheetrock in place of the boards. The boards were salvaged for re-use by the homeowner, and the space and light quality was dramatically improved. Some may think that losing the board ceiling took something away from the space, but what you'll see in the pictures is that it highly accentuates the heavy timbers and really makes them stand out in a beautiful way. Now with this added airtightness, better insulation, and brighter space, the homeowner hardly runs their wood stove, and it's so quiet in the space, an added bonus from changing the insulation. It became necessary to also add a sheetrock ceiling to the living room to hide the plumbing from the new bathroom layout above. Changing this ceiling gave the homeowner some real quality lighting that was lacking in the living room before. The brighter ceiling and new lighting layout completely transforms the living room into a space you want to hang out, even though the layout didn't change at all. When the homeowner saw the finished spaces she said "I can't believe this is my house, I want to live in this house"
Energy Efficiency: I touched a little on the efficiency above, but like all projects done with Mottram Architecture, we always want to leave you with a little extra. Timber frame construction with board ceilings and fiberglass insulation are notoriously leaky! If you want to know what we think about fiberglass insulation, check our our blog post on Why Fiberglass Insulation Sucks. By installing cellulose insulation and covering it with sheetrock we were able to greatly reduce the heat flowing out of this home. It not only improves cashflow it improves the comfort level in the space. Who wants to sit in their living room and feel a draft? Let us remind you, we are not saying cellulose insulation is an air barrier, we use the sheetrock to help with that, but it does significantly reduce the air flow over fiberglass insulation. And when we reduce the airflow, we reduce the heat flow. And when we reduce the heat flow, we reduce the need to re-heat that drafty air from outside. When it comes to energy efficiency the first and best place to start is air infiltration. We greatly reduced the air infiltration with the new insulation, but we also added a hat and warm boots. What I mean by that is, we improved the insulation in the roof, and we installed insulation in the basement. Maybe it's a silly analogy, but when you think about keeping warm, we always start with the hat and boots! With sustainability in mind, the next project will be to add a deck to the front of this house with rain catchment barrels from the metal roof. They are planning to plant a garden in the spring and the rain catchment system will help to irrigate the new garden.
Builder: East Shore Builders
Photographer: Michael Eric Berube
Michael Eric Berube, Maine Virtual Home Tours
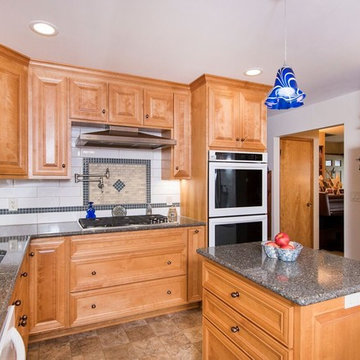
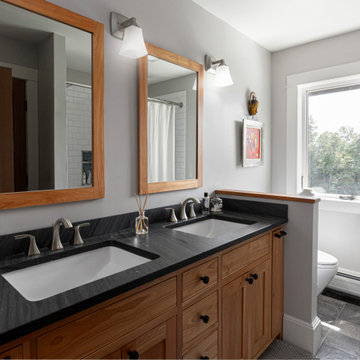 Newschool Builders LLC
The cobblers kids have no shoes rang true as this builder worked on his own home for many years. Originally a 1980’s split level, this project slowly transformed from a once outdated and run down building into a beautiful contemporary home. Mixing natural wood and stone created a classic, yet contemporary feel throughout the interior and exterior.
A full gut down to the studs allowed the structure to be up fitted with new mechanicals, electrical, insulation, windows and doors. We moved the kitchen to the south side, removed the attic and built full length dormers and a stair tower allowing epic views of cables hump. The interior is built out with custom builtins, cabinets and furniture. The exterior was laid out in a way that makes entertaining a dream. Landscaping and hardscaping tied this whole project together. It feels good to finish building out your own home from a dream all the way through to reality.
 Mottram Architecture
Timber frame homes offer unique challenges during a remodel. What often makes them beautiful and attractive to most homeowners, also makes them challenging for space requirements.
Context: The lovely couple that owned this home were struggling with some interesting floor plan challenges that just didn't work for their family. The loved the beautiful timbers and woodwork of their home, but the dramatically sloping ceilings on the second floor, particularly in the bathroom, just didn't work for this 1 1/2 bath home. Needing to use the skylight to approach the toilet was a less then ideal scenario. Although the bathroom footprint was more then adequate, the sloped ceiling only made half of the space useable. Check out the Before/After post on our blog to see the photos of the house pre-renovation. As much as they loved all the wood features in their home, another challenge they had was light. The wood ceiling made everything inside the house darker, even with a fantastic array of south facing windows, there were spaces in the home that felt dark and small. When they contacted us they wanted to know how could they make their brighter and more inviting, were there solutions to the 2nd floor sloped ceiling issues, and if they were going to do all of this work, how could they make their home more comfortable and efficient. A nagging water leak in the upstairs bathroom spurred them into action and here is how we solved their dilemma.
Conclusion: First, we added a little dormer to the rear of the house so we could get full headroom in nearly all of the upstairs bathroom! Then we decided to extend that dormer one more timber bay over to create a walk in closet with natural light and plenty of space. Since we were contemplating energy efficiency, we resolved a nagging issue that is present in a lot of timber frame construction, air tightness. Commonly found in timber frame construction, fiberglass insulation is installed in the rafter bays and board ceilings are installed over top. Unfortunately, board ceilings are anything but air tight, and fiberglass insulation needs to be in an airtight cavity for maximum effectiveness. So we were able to solve two issues at the same time for this homeowner. We removed the board ceiling and fiberglass insulation, we dense packed the rafter bays with cellulose insulation, and installed sheetrock in place of the boards. The boards were salvaged for re-use by the homeowner, and the space and light quality was dramatically improved. Some may think that losing the board ceiling took something away from the space, but what you'll see in the pictures is that it highly accentuates the heavy timbers and really makes them stand out in a beautiful way. Now with this added airtightness, better insulation, and brighter space, the homeowner hardly runs their wood stove, and it's so quiet in the space, an added bonus from changing the insulation. It became necessary to also add a sheetrock ceiling to the living room to hide the plumbing from the new bathroom layout above. Changing this ceiling gave the homeowner some real quality lighting that was lacking in the living room before. The brighter ceiling and new lighting layout completely transforms the living room into a space you want to hang out, even though the layout didn't change at all. When the homeowner saw the finished spaces she said "I can't believe this is my house, I want to live in this house"
Energy Efficiency: I touched a little on the efficiency above, but like all projects done with Mottram Architecture, we always want to leave you with a little extra. Timber frame construction with board ceilings and fiberglass insulation are notoriously leaky! If you want to know what we think about fiberglass insulation, check our our blog post on Why Fiberglass Insulation Sucks. By installing cellulose insulation and covering it with sheetrock we were able to greatly reduce the heat flowing out of this home. It not only improves cashflow it improves the comfort level in the space. Who wants to sit in their living room and feel a draft? Let us remind you, we are not saying cellulose insulation is an air barrier, we use the sheetrock to help with that, but it does significantly reduce the air flow over fiberglass insulation. And when we reduce the airflow, we reduce the heat flow. And when we reduce the heat flow, we reduce the need to re-heat that drafty air from outside. When it comes to energy efficiency the first and best place to start is air infiltration. We greatly reduced the air infiltration with the new insulation, but we also added a hat and warm boots. What I mean by that is, we improved the insulation in the roof, and we installed insulation in the basement. Maybe it's a silly analogy, but when you think about keeping warm, we always start with the hat and boots! With sustainability in mind, the next project will be to add a deck to the front of this house with rain catchment barrels from the metal roof. They are planning to plant a garden in the spring and the rain catchment system will help to irrigate the new garden.
Builder: East Shore Builders
Photographer: Michael Eric Berube

 Zola European Windows
At 1850 square feet, the Prairie Passive is an extremely energy efficient two bedroom, two bathroom home. Designed for aging in place and accessibility, the unique floor plan optimizes views of the harbor despite the narrow lot. Carefully placed windows and a screened outdoor entertaining area with gas fireplace, provide privacy and a place of refuge in the bustling public marina setting. True to the prairie style, the form was kept low and friendly with hipped roofs and broad overhanging eaves.
This ultra energy efficient home relies on extremely high levels of insulation, air-tight detailing and construction, and the implementation of high performance, custom made European windows and doors by Zola Windows ( http://www.zolawindows.com/) . Zola’s Thermo Wood line, which boasts R-11 triple glazing and is thermally broken with a layer of patented German Purenit®, was selected for the project. Natural daylight enters both from the Zola tilt & turn and fixed windows in the living and dining areas, and through the terrace door that leads seamlessly outside
to the natural landscape.
Photographer: Chris DiNottia

 Selle Valley Construction, Inc.
Side view of the exterior of the mountain contemporary hideaway.
The vertical cedar board and batten siding contrast against the gray cultured stone on the entry pillars, chimney, and wainscotting.
Cultured stone is from Mutual Materials, in "Loon Lake" with concrete charcoal colored pier caps on the pillars. Cedar siding is stained with a mixture of 50% clear and 50% woodtech bark.
The double garage doors are custom made with STK rough cedar and 3 pane insulated glass and are stained to match the cedar siding.
Windows are Andersen E-Series with exterior cladding in Seirra Bronze and paint grade wood for in the interiors.
Roofing is GAF Timberline HD in Weathered Wood.
Covered deck (right) uses Zometek Composite Decking in Chestnut and a custom horizontal metal railing in Sierra Bronze to match the exteriors of the windows.
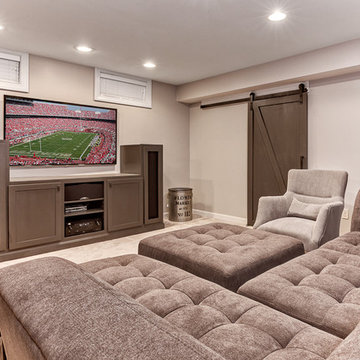
Sponsored
Columbus, OH

Hope Restoration & General Contracting
Columbus Design-Build, Kitchen & Bath Remodeling, Historic Renovations
 Mottram Architecture
Timber frame homes offer unique challenges during a remodel. What often makes them beautiful and attractive to most homeowners, also makes them challenging for space requirements.
Context: The lovely couple that owned this home were struggling with some interesting floor plan challenges that just didn't work for their family. The loved the beautiful timbers and woodwork of their home, but the dramatically sloping ceilings on the second floor, particularly in the bathroom, just didn't work for this 1 1/2 bath home. Needing to use the skylight to approach the toilet was a less then ideal scenario. Although the bathroom footprint was more then adequate, the sloped ceiling only made half of the space useable. Check out the Before/After post on our blog to see the photos of the house pre-renovation. As much as they loved all the wood features in their home, another challenge they had was light. The wood ceiling made everything inside the house darker, even with a fantastic array of south facing windows, there were spaces in the home that felt dark and small. When they contacted us they wanted to know how could they make their brighter and more inviting, were there solutions to the 2nd floor sloped ceiling issues, and if they were going to do all of this work, how could they make their home more comfortable and efficient. A nagging water leak in the upstairs bathroom spurred them into action and here is how we solved their dilemma.
Conclusion: First, we added a little dormer to the rear of the house so we could get full headroom in nearly all of the upstairs bathroom! Then we decided to extend that dormer one more timber bay over to create a walk in closet with natural light and plenty of space. Since we were contemplating energy efficiency, we resolved a nagging issue that is present in a lot of timber frame construction, air tightness. Commonly found in timber frame construction, fiberglass insulation is installed in the rafter bays and board ceilings are installed over top. Unfortunately, board ceilings are anything but air tight, and fiberglass insulation needs to be in an airtight cavity for maximum effectiveness. So we were able to solve two issues at the same time for this homeowner. We removed the board ceiling and fiberglass insulation, we dense packed the rafter bays with cellulose insulation, and installed sheetrock in place of the boards. The boards were salvaged for re-use by the homeowner, and the space and light quality was dramatically improved. Some may think that losing the board ceiling took something away from the space, but what you'll see in the pictures is that it highly accentuates the heavy timbers and really makes them stand out in a beautiful way. Now with this added airtightness, better insulation, and brighter space, the homeowner hardly runs their wood stove, and it's so quiet in the space, an added bonus from changing the insulation. It became necessary to also add a sheetrock ceiling to the living room to hide the plumbing from the new bathroom layout above. Changing this ceiling gave the homeowner some real quality lighting that was lacking in the living room before. The brighter ceiling and new lighting layout completely transforms the living room into a space you want to hang out, even though the layout didn't change at all. When the homeowner saw the finished spaces she said "I can't believe this is my house, I want to live in this house"
Energy Efficiency: I touched a little on the efficiency above, but like all projects done with Mottram Architecture, we always want to leave you with a little extra. Timber frame construction with board ceilings and fiberglass insulation are notoriously leaky! If you want to know what we think about fiberglass insulation, check our our blog post on Why Fiberglass Insulation Sucks. By installing cellulose insulation and covering it with sheetrock we were able to greatly reduce the heat flowing out of this home. It not only improves cashflow it improves the comfort level in the space. Who wants to sit in their living room and feel a draft? Let us remind you, we are not saying cellulose insulation is an air barrier, we use the sheetrock to help with that, but it does significantly reduce the air flow over fiberglass insulation. And when we reduce the airflow, we reduce the heat flow. And when we reduce the heat flow, we reduce the need to re-heat that drafty air from outside. When it comes to energy efficiency the first and best place to start is air infiltration. We greatly reduced the air infiltration with the new insulation, but we also added a hat and warm boots. What I mean by that is, we improved the insulation in the roof, and we installed insulation in the basement. Maybe it's a silly analogy, but when you think about keeping warm, we always start with the hat and boots! With sustainability in mind, the next project will be to add a deck to the front of this house with rain catchment barrels from the metal roof. They are planning to plant a garden in the spring and the rain catchment system will help to irrigate the new garden.
Builder: East Shore Builders
Photographer: Michael Eric Berube

 Spring Creek Design
This old farmhouse (ca. late 18th century) has undergone many renovations over the years. Spring Creek Design added its stamp in 2008, with a small mudroom addition and a complete interior renovation.
The addition encompasses a 1st floor mudroom with extensive cabinetry and closetry. Upon entering the space from the driveway, cabinet and countertop space is provided to accommodate incoming grocery bags. Next in line are a series of “lockers” and cubbies - just right for coats, hats and book bags. Further inside is a wrap-around window seat with cedar shoe racks beneath. A stainless steel dog feeding station rounds out the amenities - all built atop a natural Vermont slate floor.
On the lower level, the addition features a full bathroom and a “Dude Pod” - a compact work and play space for the resident code monkey. Outfitted with a stand-up desk and an electronic drum kit, one needs only emerge for Mountain Dew refills and familial visits.
Within the existing space, we added an ensuite bathroom for the third floor bedroom. The second floor bathroom and first floor powder room were also gutted and remodeled.
The master bedroom was extensively remodeled - given a vaulted ceiling and a wall of floor-to-roof built-ins accessed with a rolling ladder.
An extensive, multi-level deck and screen house was added to provide outdoor living space, with secure, dry storage below.
Design Criteria:
- Update house with a high sustainability standard.
- Provide bathroom for daughters’ third floor bedroom.
- Update remaining bathrooms
- Update cramped, low ceilinged master bedroom
- Provide mudroom/entryway solutions.
- Provide a window seating space with good visibility of back and side yards – to keep an eye on the kids at play.
- Replace old deck with a updated deck/screen porch combination.
- Update sitting room with a wood stove and mantle.
Special Features:
- Insulated Concrete Forms used for Dude Pod foundation.
- Soy-based spray foam insulation used in the addition and master bedroom.
- Paperstone countertops in mudroom.
- Zero-VOC paints and finishes used throughout the project.
- All decking and trim for the deck/screen porch is made from 100% recycled HDPE (milk jugs, soda, water bottles)
- High efficiency combination washer/dryer.
 Landis Architects | Builders
The owners of this stately Adams Morgan rowhouse wanted to reconfigure rooms on the two upper levels to create a primary suite on the third floor and a better layout for the second floor. Our crews fully gutted and reframed the floors and walls of the front rooms, taking the opportunity of open walls to increase energy-efficiency with spray foam insulation at exposed exterior walls.
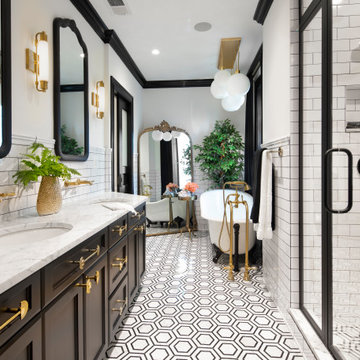
The original third floor bedroom was open to the hallway and had an outdated, odd-shaped bathroom. We reframed the walls to create a suite with a master bedroom, closet and generous bath with a freestanding tub and shower. Double doors open from the bedroom to the closet, and another set of double doors lead to the bathroom. The classic black and white theme continues in this room. It has dark stained doors and trim, a black vanity with a marble top and honeycomb pattern black and white floor tile. A white soaking tub capped with an oversized chandelier sits under a window set with custom stained glass. The owners selected white subway tile for the vanity backsplash and shower walls. The shower walls and ceiling are tiled and matte black framed glass doors seal the shower so it can be used as a steam room. A pocket door with opaque glass separates the toilet from the main bath. The vanity mirrors were installed first, then our team set the tile around the mirrors. Gold light fixtures and hardware add the perfect polish to this black and white bath.
63