
Search results for "Involved removing" in Home Design Ideas

 SKP Design
Located in a wooded setting which backs up to a golf course, The Woods is a vacation condo community in Canadian Lakes, Michigan. The owners asked us to create a comfortable modern design that would appeal to golfers and also families visiting relatives in the area. This complete renovation brought the design from 80's basic to rustic transitional. Colors and design elements echo the natural area surrounding the property.
SKP Design was involved in multiple aspects of this project. Our services included:
space planning for kitchen and both bathrooms
selecting finishes for walls, floors, trim, cabinets and countertops
reviewing construction details and electrical plans
specification of plumbing fixtures, appliances and accent lighting
furniture layout, specification and purchasing
fireplace design and stone selection
reviewing branding and signage ideas
In the great room, wrought iron accents are featured in a new staircase handrail system. Other metal accents are found in the new chandelier, barstools and the legs of the live edge coffee table. An open area under the staircase was enclosed with recessed shelving which gives a focal point to the dinette area. Recessed built-in cabinets near the fireplace store TV technology and accessories. The original tiled hearth was replaced by poured concrete with stone accents.
A queen sleeper sofa from Edgecomb provides additional sleeping. Fabrics and upholstery throughout the condo were selected for durability and cleanability.
Basic white laminate kitchen cabinets were replaced with beautiful dark stained wood. Floor tile is a wood-look porcelain from Daltile called Saddle Brook. Countertops in the kitchen and bathrooms are solid surface Corian Quartz (formerly called DuPont Zodiaq). Broadloom carpet is from Durkan. The first floor bedroom is Mona Vista pattern from Modesto Collection; all other carpet is Inviting Spaces pattern from Timeless Compositions. Walls are painted with Sherwin Williams 7647 Crushed Ice.
The main floor bedroom has a custom headboard mounted on a feature wall with plaid wallcovering. A freestanding vanity with undermount sink was added to the alcove area, creating space for a larger walk-in tiled shower with custom bench. On both levels, backlit mirrors highlight the sink areas. The upstairs bath has a blue tile feature wall and vessel sink.
A fiberglass bathtub surround was removed and replaced by a custom tiled shower. Vinyl wallcovering from D.L. Couch provides a focal point behind the king headboard in the loft bedroom. A twin sleeper chair adds an extra bed.
 SKP Design
Located in a wooded setting which backs up to a golf course, The Woods is a vacation condo community in Canadian Lakes, Michigan. The owners asked us to create a comfortable modern design that would appeal to golfers and also families visiting relatives in the area. This complete renovation brought the design from 80's basic to rustic transitional. Colors and design elements echo the natural area surrounding the property.
SKP Design was involved in multiple aspects of this project. Our services included:
space planning for kitchen and both bathrooms
selecting finishes for walls, floors, trim, cabinets and countertops
reviewing construction details and electrical plans
specification of plumbing fixtures, appliances and accent lighting
furniture layout, specification and purchasing
fireplace design and stone selection
reviewing branding and signage ideas
In the great room, wrought iron accents are featured in a new staircase handrail system. Other metal accents are found in the new chandelier, barstools and the legs of the live edge coffee table. An open area under the staircase was enclosed with recessed shelving which gives a focal point to the dinette area. Recessed built-in cabinets near the fireplace store TV technology and accessories. The original tiled hearth was replaced by poured concrete with stone accents.
A queen sleeper sofa from Edgecomb provides additional sleeping. Fabrics and upholstery throughout the condo were selected for durability and cleanability.
Basic white laminate kitchen cabinets were replaced with beautiful dark stained wood. Floor tile is a wood-look porcelain from Daltile called Saddle Brook. Countertops in the kitchen and bathrooms are solid surface Corian Quartz (formerly called DuPont Zodiaq). Broadloom carpet is from Durkan. The first floor bedroom is Mona Vista pattern from Modesto Collection; all other carpet is Inviting Spaces pattern from Timeless Compositions. Walls are painted with Sherwin Williams 7647 Crushed Ice.
The main floor bedroom has a custom headboard mounted on a feature wall with plaid wallcovering. A freestanding vanity with undermount sink was added to the alcove area, creating space for a larger walk-in tiled shower with custom bench. On both levels, backlit mirrors highlight the sink areas. The upstairs bath has a blue tile feature wall and vessel sink.
A fiberglass bathtub surround was removed and replaced by a custom tiled shower. Vinyl wallcovering from D.L. Couch provides a focal point behind the king headboard in the loft bedroom. A twin sleeper chair adds an extra bed.
 SKP Design
Located in a wooded setting which backs up to a golf course, The Woods is a vacation condo community in Canadian Lakes, Michigan. The owners asked us to create a comfortable modern design that would appeal to golfers and also families visiting relatives in the area. This complete renovation brought the design from 80's basic to rustic transitional. Colors and design elements echo the natural area surrounding the property.
SKP Design was involved in multiple aspects of this project. Our services included:
space planning for kitchen and both bathrooms
selecting finishes for walls, floors, trim, cabinets and countertops
reviewing construction details and electrical plans
specification of plumbing fixtures, appliances and accent lighting
furniture layout, specification and purchasing
fireplace design and stone selection
reviewing branding and signage ideas
In the great room, wrought iron accents are featured in a new staircase handrail system. Other metal accents are found in the new chandelier, barstools and the legs of the live edge coffee table. An open area under the staircase was enclosed with recessed shelving which gives a focal point to the dinette area. Recessed built-in cabinets near the fireplace store TV technology and accessories. The original tiled hearth was replaced by poured concrete with stone accents.
A queen sleeper sofa from Edgecomb provides additional sleeping. Fabrics and upholstery throughout the condo were selected for durability and cleanability.
Basic white laminate kitchen cabinets were replaced with beautiful dark stained wood. Floor tile is a wood-look porcelain from Daltile called Saddle Brook. Countertops in the kitchen and bathrooms are solid surface Corian Quartz (formerly called DuPont Zodiaq). Broadloom carpet is from Durkan. The first floor bedroom is Mona Vista pattern from Modesto Collection; all other carpet is Inviting Spaces pattern from Timeless Compositions. Walls are painted with Sherwin Williams 7647 Crushed Ice.
The main floor bedroom has a custom headboard mounted on a feature wall with plaid wallcovering. A freestanding vanity with undermount sink was added to the alcove area, creating space for a larger walk-in tiled shower with custom bench. On both levels, backlit mirrors highlight the sink areas. The upstairs bath has a blue tile feature wall and vessel sink.
A fiberglass bathtub surround was removed and replaced by a custom tiled shower. Vinyl wallcovering from D.L. Couch provides a focal point behind the king headboard in the loft bedroom. A twin sleeper chair adds an extra bed.
Find the right local pro for your project
 SKP Design
Located in a wooded setting which backs up to a golf course, The Woods is a vacation condo community in Canadian Lakes, Michigan. The owners asked us to create a comfortable modern design that would appeal to golfers and also families visiting relatives in the area. This complete renovation brought the design from 80's basic to rustic transitional. Colors and design elements echo the natural area surrounding the property.
SKP Design was involved in multiple aspects of this project. Our services included:
space planning for kitchen and both bathrooms
selecting finishes for walls, floors, trim, cabinets and countertops
reviewing construction details and electrical plans
specification of plumbing fixtures, appliances and accent lighting
furniture layout, specification and purchasing
fireplace design and stone selection
reviewing branding and signage ideas
In the great room, wrought iron accents are featured in a new staircase handrail system. Other metal accents are found in the new chandelier, barstools and the legs of the live edge coffee table. An open area under the staircase was enclosed with recessed shelving which gives a focal point to the dinette area. Recessed built-in cabinets near the fireplace store TV technology and accessories. The original tiled hearth was replaced by poured concrete with stone accents.
A queen sleeper sofa from Edgecomb provides additional sleeping. Fabrics and upholstery throughout the condo were selected for durability and cleanability.
Basic white laminate kitchen cabinets were replaced with beautiful dark stained wood. Floor tile is a wood-look porcelain from Daltile called Saddle Brook. Countertops in the kitchen and bathrooms are solid surface Corian Quartz (formerly called DuPont Zodiaq). Broadloom carpet is from Durkan. The first floor bedroom is Mona Vista pattern from Modesto Collection; all other carpet is Inviting Spaces pattern from Timeless Compositions. Walls are painted with Sherwin Williams 7647 Crushed Ice.
The main floor bedroom has a custom headboard mounted on a feature wall with plaid wallcovering. A freestanding vanity with undermount sink was added to the alcove area, creating space for a larger walk-in tiled shower with custom bench. On both levels, backlit mirrors highlight the sink areas. The upstairs bath has a blue tile feature wall and vessel sink.
A fiberglass bathtub surround was removed and replaced by a custom tiled shower. Vinyl wallcovering from D.L. Couch provides a focal point behind the king headboard in the loft bedroom. A twin sleeper chair adds an extra bed.

 Benson Homes LLC
When you find a home that meets most of your needs in a neighborhood you love, remodeling to make it more suitable for your family’s lifestyle can make that house your dream home. That’s what happened in this remodeling story. Our clients purchased a home built in 1983 with the plan to remodel the kitchen to suit their needs and tastes.
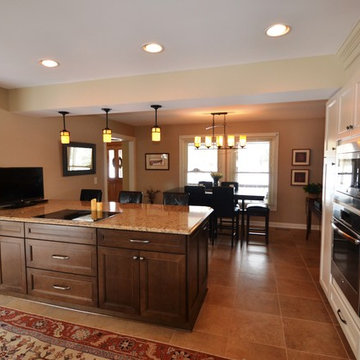
The galley style kitchen was positioned at the center and rear of the main level and had an eat-in area at one end and a pantry at the opposite end. A small pass-through allowed view into the adjacent family room, but otherwise the two spaces were closed off from one another. The existing espresso stained cabinetry was attractive, but it darkened and narrowed the kitchen.
The homeowners wanted the kitchen to feel more connected to the other main level living spaces. Creating more light and improving organization and storage were must haves for the new design. They also requested relocating the pantry from under the stairs and longed for a ventilation system that would vent the cooking smells outdoors rather than throughout the inside of the house.
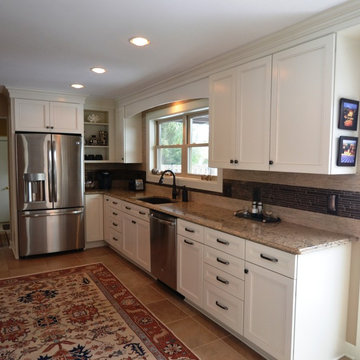
Our design involved removing a portion of wall between the kitchen and living room. This one change made it feel larger, more open and bright. It also connected the kitchen to the living room and allowed the two spaces to flow freely into one another. This new open area allowed us to extend the granite countertop to create a peninsula/bar that provides additional seating. To improve the existing lighting plan, we added new LED recessed lights, under-cabinet lighting, and pendant lighting over the peninsula.
The selections were integral in making the kitchen feel lighter and larger. Our clients chose maple cabinetry with an oak stained tumbleweed finish paired with creamy granite countertops, and a pearl tumbled travertine backsplash. A few standout features include a set of floating shelves, concrete farmhouse sink, and mercury glass pendant lights. Flooring throughout the first floor was updated to an easy to maintain wood-look vinyl plank floor.
Several new storage options were added including new cabinetry where the old pantry used to be, which accommodates the microwave in an upper cabinet as well as storage for small cooking appliances so they don’t take up space on the counters. There’s also a unique angled cabinet right next to the refrigerator.
When the work was complete on this project we were very pleased that the design delivered exactly what the homeowners had envisioned. In addition, we were able to complete the construction without causing too much disturbance or disruption for the homeowners; one works the night shift, and was actually able to sleep during the day, and the other travels frequently for work and felt confident that the project was in good hands.
 Benson Homes LLC
When you find a home that meets most of your needs in a neighborhood you love, remodeling to make it more suitable for your family’s lifestyle can make that house your dream home. That’s what happened in this remodeling story. Our clients purchased a home built in 1983 with the plan to remodel the kitchen to suit their needs and tastes.
The galley style kitchen was positioned at the center and rear of the main level and had an eat-in area at one end and a pantry at the opposite end. A small pass-through allowed view into the adjacent family room, but otherwise the two spaces were closed off from one another. The existing espresso stained cabinetry was attractive, but it darkened and narrowed the kitchen.
The homeowners wanted the kitchen to feel more connected to the other main level living spaces. Creating more light and improving organization and storage were must haves for the new design. They also requested relocating the pantry from under the stairs and longed for a ventilation system that would vent the cooking smells outdoors rather than throughout the inside of the house.
Our design involved removing a portion of wall between the kitchen and living room. This one change made it feel larger, more open and bright. It also connected the kitchen to the living room and allowed the two spaces to flow freely into one another. This new open area allowed us to extend the granite countertop to create a peninsula/bar that provides additional seating. To improve the existing lighting plan, we added new LED recessed lights, under-cabinet lighting, and pendant lighting over the peninsula.
The selections were integral in making the kitchen feel lighter and larger. Our clients chose maple cabinetry with an oak stained tumbleweed finish paired with creamy granite countertops, and a pearl tumbled travertine backsplash. A few standout features include a set of floating shelves, concrete farmhouse sink, and mercury glass pendant lights. Flooring throughout the first floor was updated to an easy to maintain wood-look vinyl plank floor.
Several new storage options were added including new cabinetry where the old pantry used to be, which accommodates the microwave in an upper cabinet as well as storage for small cooking appliances so they don’t take up space on the counters. There’s also a unique angled cabinet right next to the refrigerator.
When the work was complete on this project we were very pleased that the design delivered exactly what the homeowners had envisioned. In addition, we were able to complete the construction without causing too much disturbance or disruption for the homeowners; one works the night shift, and was actually able to sleep during the day, and the other travels frequently for work and felt confident that the project was in good hands.
 SKP Design
Located in a wooded setting which backs up to a golf course, The Woods is a vacation condo community in Canadian Lakes, Michigan. The owners asked us to create a comfortable modern design that would appeal to golfers and also families visiting relatives in the area. This complete renovation brought the design from 80's basic to rustic transitional. Colors and design elements echo the natural area surrounding the property.
SKP Design was involved in multiple aspects of this project. Our services included:
space planning for kitchen and both bathrooms
selecting finishes for walls, floors, trim, cabinets and countertops
reviewing construction details and electrical plans
specification of plumbing fixtures, appliances and accent lighting
furniture layout, specification and purchasing
fireplace design and stone selection
reviewing branding and signage ideas
In the great room, wrought iron accents are featured in a new staircase handrail system. Other metal accents are found in the new chandelier, barstools and the legs of the live edge coffee table. An open area under the staircase was enclosed with recessed shelving which gives a focal point to the dinette area. Recessed built-in cabinets near the fireplace store TV technology and accessories. The original tiled hearth was replaced by poured concrete with stone accents.
A queen sleeper sofa from Edgecomb provides additional sleeping. Fabrics and upholstery throughout the condo were selected for durability and cleanability.
Basic white laminate kitchen cabinets were replaced with beautiful dark stained wood. Floor tile is a wood-look porcelain from Daltile called Saddle Brook. Countertops in the kitchen and bathrooms are solid surface Corian Quartz (formerly called DuPont Zodiaq). Broadloom carpet is from Durkan. The first floor bedroom is Mona Vista pattern from Modesto Collection; all other carpet is Inviting Spaces pattern from Timeless Compositions. Walls are painted with Sherwin Williams 7647 Crushed Ice.
The main floor bedroom has a custom headboard mounted on a feature wall with plaid wallcovering. A freestanding vanity with undermount sink was added to the alcove area, creating space for a larger walk-in tiled shower with custom bench. On both levels, backlit mirrors highlight the sink areas. The upstairs bath has a blue tile feature wall and vessel sink.
A fiberglass bathtub surround was removed and replaced by a custom tiled shower. Vinyl wallcovering from D.L. Couch provides a focal point behind the king headboard in the loft bedroom. A twin sleeper chair adds an extra bed.


 Charlie Allen Renovations, Inc.
We recently enjoyed the opportunity to remodel three floors of a nineteenth-century Cambridge home with our project partners, architect Tom Downer and designer Jayme Kennerknecht/LDa Architects.
.
• The owners – a family of four that includes both a teenager and a toddler - wanted a house better suited to entertaining but also appropriate for family together time. Specific improvements on their wish list included a playroom that could handle differing family needs, a custom bar for entertaining, a new fireplace, and an inviting kitchen that would remain distinct but be better connected to adjoining rooms.
• Adding a fireplace to the living room involved rebuilding the entire back wall of the home. The fireplace mantel was custom designed to match an existing mantel in the nearby dining room, which is original to the home.
• In the playroom, care was taken to create zones for three members of the family: The mother enjoys crafting and now has a station directly below existing skylights, the teenager has a semi-private nook at the back of the space for relaxing, and the youngest in the family can enjoy toys and games placed along one wall alongside a rug for playing on the floor. On the same level, we created a separate guest bedroom with a new closet and a window designed to match other windows throughout the home.
• The kitchen is fully upgraded and custom designed to accommodate the mother’s cooking habits, with specific elements including a farmer’s sink in the island and a stainless steel counter with an integrated sink for food preparation placed behind it on the counter. To improve storage in the much-used room, corner drawer units were installed instead of lazy Susan cabinets. Also, the homeowners were not interested in an open floor plan, but did want to improve access to the living room and yard beyond. This was achieved by expanding the opening between the two rooms allowing the cook to engage with family and guests and have a clear view when children are playing in the yard.
Photo by Shelly Harrison
 Benson Homes LLC
When you find a home that meets most of your needs in a neighborhood you love, remodeling to make it more suitable for your family’s lifestyle can make that house your dream home. That’s what happened in this remodeling story. Our clients purchased a home built in 1983 with the plan to remodel the kitchen to suit their needs and tastes.
The galley style kitchen was positioned at the center and rear of the main level and had an eat-in area at one end and a pantry at the opposite end. A small pass-through allowed view into the adjacent family room, but otherwise the two spaces were closed off from one another. The existing espresso stained cabinetry was attractive, but it darkened and narrowed the kitchen.
The homeowners wanted the kitchen to feel more connected to the other main level living spaces. Creating more light and improving organization and storage were must haves for the new design. They also requested relocating the pantry from under the stairs and longed for a ventilation system that would vent the cooking smells outdoors rather than throughout the inside of the house.
Our design involved removing a portion of wall between the kitchen and living room. This one change made it feel larger, more open and bright. It also connected the kitchen to the living room and allowed the two spaces to flow freely into one another. This new open area allowed us to extend the granite countertop to create a peninsula/bar that provides additional seating. To improve the existing lighting plan, we added new LED recessed lights, under-cabinet lighting, and pendant lighting over the peninsula.
The selections were integral in making the kitchen feel lighter and larger. Our clients chose maple cabinetry with an oak stained tumbleweed finish paired with creamy granite countertops, and a pearl tumbled travertine backsplash. A few standout features include a set of floating shelves, concrete farmhouse sink, and mercury glass pendant lights. Flooring throughout the first floor was updated to an easy to maintain wood-look vinyl plank floor.
Several new storage options were added including new cabinetry where the old pantry used to be, which accommodates the microwave in an upper cabinet as well as storage for small cooking appliances so they don’t take up space on the counters. There’s also a unique angled cabinet right next to the refrigerator.
When the work was complete on this project we were very pleased that the design delivered exactly what the homeowners had envisioned. In addition, we were able to complete the construction without causing too much disturbance or disruption for the homeowners; one works the night shift, and was actually able to sleep during the day, and the other travels frequently for work and felt confident that the project was in good hands.
 Talon Construction Inc.
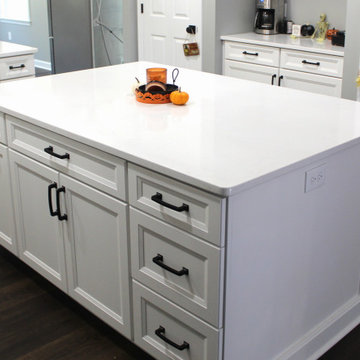
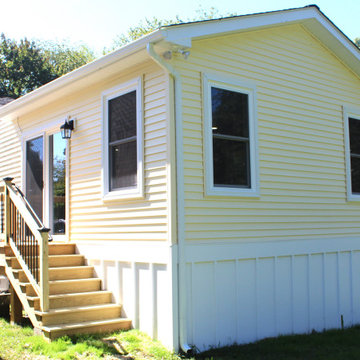
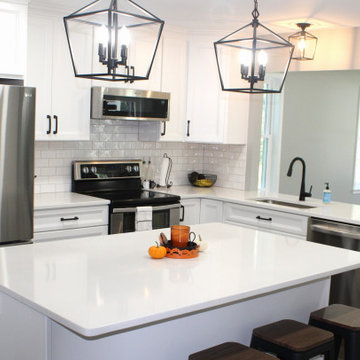
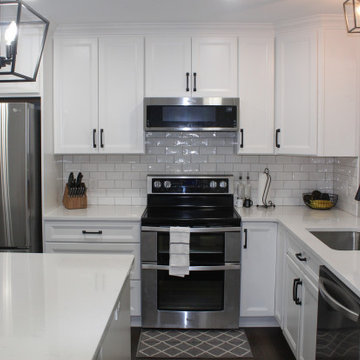
Designing and building a kitchen addition is a complex process that involves multiple steps and considerations. Here is a general outline to help you get started on your kitchen addition project:
Define Your Goals and Budget:
• Determine the purpose of the kitchen addition. Is it for more cooking space, a dining area, or a combination of both?
• Establish a realistic budget for your project. Consider all costs, including construction, permits, materials, and furnishings.
Hire a Design Professional:
• Seek the services of a design build company who specializes in kitchen additions.
• Discuss your vision, needs, and budget with the design professional to create a design concept.
Site Evaluation:
• Assess the existing space and structural condition of your home to ensure it can support the addition.
• Consider factors like zoning regulations, setbacks, and building codes.
Design Development:
• Collaborate with your design professional to refine the concept, including the layout, size, and architectural style.
• Choose materials, finishes, and fixtures that fit your design and budget.
Obtain Permits:
• Consult with your local design build contractor to determine the necessary permits and approvals.
• Prepare and submit all required documents, including architectural drawings and engineering plans.
Create Construction Documents:
• Work with your design build professional to develop detailed construction drawings and specifications.
• These documents will serve as a guide for contractors during construction.
Hire a design build contractor:
• Check references, credentials, and licenses before selecting a contractor.
• Sign a detailed contract that outlines the scope of work, timeline, and payment schedule.
Construction Phase:
• Demolition: If needed, remove any existing structures or walls.
• Foundation: Construct the foundation for the addition.
• Framing: Build the structural framework of the addition.
• Plumbing, Electrical, and HVAC: Install or update utilities as required.
• Insulation: Ensure proper insulation for energy efficiency.
• Drywall and Finish Work: Complete the walls and ceilings.
• Flooring and Cabinetry: Install flooring and kitchen cabinets.
• Appliances and Fixtures: Add appliances, plumbing fixtures, and lighting.
• Paint and Finish: Apply paint and finishes to achieve the desired look.
• Final Inspection: Schedule inspections to ensure compliance with building codes.
Final Inspections and Approvals:
• Arrange for final inspections to ensure the addition meets all safety and code requirements.
• Obtain any necessary certificates of occupancy or compliance.
Move In and Enjoy:
• Once all inspections and approvals are received, you can move into your new kitchen addition and start enjoying it.
Remember that every kitchen addition project is unique, so adapt this outline to your specific needs and circumstances. Consulting with professionals and obtaining the required permits and inspections is crucial to a successful and safe project.
 Tile Doctor Ltd
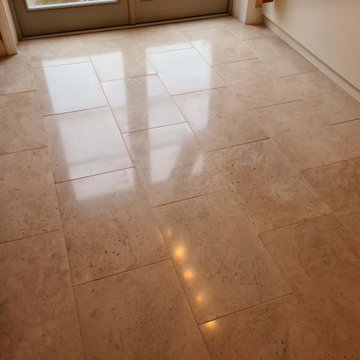
I recently went to survey a floor in Harrogate which I immediately recognised as beige Moleanos Limestone which comes from Portugal. If you have been reading my previous posts you will remember I am not a fan of this type of stone as it is very difficult to clean, polish or seal. This particular floor was laid around 5 years prior and was now looking quite dull and was in need of reviving.
The client didn’t want to spend much so l suggested l could spray burnish the floor to get her shine back again and remove the splash marks. We do this a lot for owners of polished stone floors as part of an annual maintenance package, it is a low cost option that uses a very fine 3,000 grit burnishing pad to renovate the stone and bring up the shine. However, I pointed out to her that this process wouldn’t clean her grout which was making her floor look scruffy.
I priced up the different options and after weighing up the quotes I’m pleased to say she decided to go for a full clean and seal. The full process involves the use of different grades of diamond encrusted burnishing pads from low to very fine grits to renovate the Limestone and also a chemical clean of the grout followed by a fresh seal.
I returned on the scheduled date and after preparing the floor I started cleaning the Limestone by running over the tiles with a 400-grit coarse burnishing pad lubricated with water. The soil was rinsed off with more water and extracted with a wet vacuum. This process was repeated with the 800 and 1500-grit pads which starts to build-up the polish on the stone.
I then turned my attention to the grout with a strong dilution of Tile Doctor Pro-Clean which was left to soak into the grout for ten minutes before scrubbing it by hand with a stiff brush. After a final rinse and extraction with the wet vacuum the tile and grout were looking much cleaner and was left to dry off overnight.
On Day 2 I stated with the application of the 3,000-grit pad which is the last step in the polishing processed and builds up a lovely satin finish on the stone floor. This is done using only a little water and is basically the spray burnish technique I referred to earlier. This process has the added advantage of leaving the floor dry.
With the stone tiles looking lovely and the grout clean the last step was to seal it all in and protect it from dirt and future staining with the application of a sealer. For this I used two coats of Tile Doctor Ultra Seal.
My client was very pleased she had spent the extra money to achieve the floor she had always wanted, apparently it had never looked this good even when new. We discussed the annual maintenance plan to ensure the floor remained looking this good.
Nigel Stoker
North West Yorkshire TIle Doctor
 Talon Construction Inc.
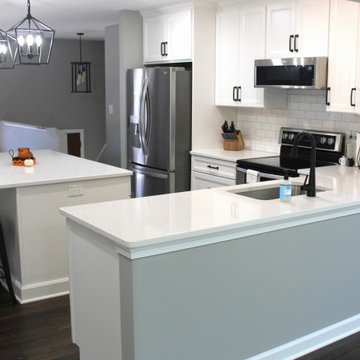
Designing and building a kitchen addition is a complex process that involves multiple steps and considerations. Here is a general outline to help you get started on your kitchen addition project:
Define Your Goals and Budget:
• Determine the purpose of the kitchen addition. Is it for more cooking space, a dining area, or a combination of both?
• Establish a realistic budget for your project. Consider all costs, including construction, permits, materials, and furnishings.
Hire a Design Professional:
• Seek the services of a design build company who specializes in kitchen additions.
• Discuss your vision, needs, and budget with the design professional to create a design concept.
Site Evaluation:
• Assess the existing space and structural condition of your home to ensure it can support the addition.
• Consider factors like zoning regulations, setbacks, and building codes.
Design Development:
• Collaborate with your design professional to refine the concept, including the layout, size, and architectural style.
• Choose materials, finishes, and fixtures that fit your design and budget.
Obtain Permits:
• Consult with your local design build contractor to determine the necessary permits and approvals.
• Prepare and submit all required documents, including architectural drawings and engineering plans.
Create Construction Documents:
• Work with your design build professional to develop detailed construction drawings and specifications.
• These documents will serve as a guide for contractors during construction.
Hire a design build contractor:
• Check references, credentials, and licenses before selecting a contractor.
• Sign a detailed contract that outlines the scope of work, timeline, and payment schedule.
Construction Phase:
• Demolition: If needed, remove any existing structures or walls.
• Foundation: Construct the foundation for the addition.
• Framing: Build the structural framework of the addition.
• Plumbing, Electrical, and HVAC: Install or update utilities as required.
• Insulation: Ensure proper insulation for energy efficiency.
• Drywall and Finish Work: Complete the walls and ceilings.
• Flooring and Cabinetry: Install flooring and kitchen cabinets.
• Appliances and Fixtures: Add appliances, plumbing fixtures, and lighting.
• Paint and Finish: Apply paint and finishes to achieve the desired look.
• Final Inspection: Schedule inspections to ensure compliance with building codes.
Final Inspections and Approvals:
• Arrange for final inspections to ensure the addition meets all safety and code requirements.
• Obtain any necessary certificates of occupancy or compliance.
Move In and Enjoy:
• Once all inspections and approvals are received, you can move into your new kitchen addition and start enjoying it.
Remember that every kitchen addition project is unique, so adapt this outline to your specific needs and circumstances. Consulting with professionals and obtaining the required permits and inspections is crucial to a successful and safe project.
 Benson Homes LLC
When you find a home that meets most of your needs in a neighborhood you love, remodeling to make it more suitable for your family’s lifestyle can make that house your dream home. That’s what happened in this remodeling story. Our clients purchased a home built in 1983 with the plan to remodel the kitchen to suit their needs and tastes.
The galley style kitchen was positioned at the center and rear of the main level and had an eat-in area at one end and a pantry at the opposite end. A small pass-through allowed view into the adjacent family room, but otherwise the two spaces were closed off from one another. The existing espresso stained cabinetry was attractive, but it darkened and narrowed the kitchen.
The homeowners wanted the kitchen to feel more connected to the other main level living spaces. Creating more light and improving organization and storage were must haves for the new design. They also requested relocating the pantry from under the stairs and longed for a ventilation system that would vent the cooking smells outdoors rather than throughout the inside of the house.
Our design involved removing a portion of wall between the kitchen and living room. This one change made it feel larger, more open and bright. It also connected the kitchen to the living room and allowed the two spaces to flow freely into one another. This new open area allowed us to extend the granite countertop to create a peninsula/bar that provides additional seating. To improve the existing lighting plan, we added new LED recessed lights, under-cabinet lighting, and pendant lighting over the peninsula.
The selections were integral in making the kitchen feel lighter and larger. Our clients chose maple cabinetry with an oak stained tumbleweed finish paired with creamy granite countertops, and a pearl tumbled travertine backsplash. A few standout features include a set of floating shelves, concrete farmhouse sink, and mercury glass pendant lights. Flooring throughout the first floor was updated to an easy to maintain wood-look vinyl plank floor.
Several new storage options were added including new cabinetry where the old pantry used to be, which accommodates the microwave in an upper cabinet as well as storage for small cooking appliances so they don’t take up space on the counters. There’s also a unique angled cabinet right next to the refrigerator.
When the work was complete on this project we were very pleased that the design delivered exactly what the homeowners had envisioned. In addition, we were able to complete the construction without causing too much disturbance or disruption for the homeowners; one works the night shift, and was actually able to sleep during the day, and the other travels frequently for work and felt confident that the project was in good hands.
 Benson Homes LLC
When you find a home that meets most of your needs in a neighborhood you love, remodeling to make it more suitable for your family’s lifestyle can make that house your dream home. That’s what happened in this remodeling story. Our clients purchased a home built in 1983 with the plan to remodel the kitchen to suit their needs and tastes.
The galley style kitchen was positioned at the center and rear of the main level and had an eat-in area at one end and a pantry at the opposite end. A small pass-through allowed view into the adjacent family room, but otherwise the two spaces were closed off from one another. The existing espresso stained cabinetry was attractive, but it darkened and narrowed the kitchen.
The homeowners wanted the kitchen to feel more connected to the other main level living spaces. Creating more light and improving organization and storage were must haves for the new design. They also requested relocating the pantry from under the stairs and longed for a ventilation system that would vent the cooking smells outdoors rather than throughout the inside of the house.
Our design involved removing a portion of wall between the kitchen and living room. This one change made it feel larger, more open and bright. It also connected the kitchen to the living room and allowed the two spaces to flow freely into one another. This new open area allowed us to extend the granite countertop to create a peninsula/bar that provides additional seating. To improve the existing lighting plan, we added new LED recessed lights, under-cabinet lighting, and pendant lighting over the peninsula.
The selections were integral in making the kitchen feel lighter and larger. Our clients chose maple cabinetry with an oak stained tumbleweed finish paired with creamy granite countertops, and a pearl tumbled travertine backsplash. A few standout features include a set of floating shelves, concrete farmhouse sink, and mercury glass pendant lights. Flooring throughout the first floor was updated to an easy to maintain wood-look vinyl plank floor.
Several new storage options were added including new cabinetry where the old pantry used to be, which accommodates the microwave in an upper cabinet as well as storage for small cooking appliances so they don’t take up space on the counters. There’s also a unique angled cabinet right next to the refrigerator.
When the work was complete on this project we were very pleased that the design delivered exactly what the homeowners had envisioned. In addition, we were able to complete the construction without causing too much disturbance or disruption for the homeowners; one works the night shift, and was actually able to sleep during the day, and the other travels frequently for work and felt confident that the project was in good hands.
 Talon Construction Inc.
Designing and building a kitchen addition is a complex process that involves multiple steps and considerations. Here is a general outline to help you get started on your kitchen addition project:
Define Your Goals and Budget:
• Determine the purpose of the kitchen addition. Is it for more cooking space, a dining area, or a combination of both?
• Establish a realistic budget for your project. Consider all costs, including construction, permits, materials, and furnishings.
Hire a Design Professional:
• Seek the services of a design build company who specializes in kitchen additions.
• Discuss your vision, needs, and budget with the design professional to create a design concept.
Site Evaluation:
• Assess the existing space and structural condition of your home to ensure it can support the addition.
• Consider factors like zoning regulations, setbacks, and building codes.
Design Development:
• Collaborate with your design professional to refine the concept, including the layout, size, and architectural style.
• Choose materials, finishes, and fixtures that fit your design and budget.
Obtain Permits:
• Consult with your local design build contractor to determine the necessary permits and approvals.
• Prepare and submit all required documents, including architectural drawings and engineering plans.
Create Construction Documents:
• Work with your design build professional to develop detailed construction drawings and specifications.
• These documents will serve as a guide for contractors during construction.
Hire a design build contractor:
• Check references, credentials, and licenses before selecting a contractor.
• Sign a detailed contract that outlines the scope of work, timeline, and payment schedule.
Construction Phase:
• Demolition: If needed, remove any existing structures or walls.
• Foundation: Construct the foundation for the addition.
• Framing: Build the structural framework of the addition.
• Plumbing, Electrical, and HVAC: Install or update utilities as required.
• Insulation: Ensure proper insulation for energy efficiency.
• Drywall and Finish Work: Complete the walls and ceilings.
• Flooring and Cabinetry: Install flooring and kitchen cabinets.
• Appliances and Fixtures: Add appliances, plumbing fixtures, and lighting.
• Paint and Finish: Apply paint and finishes to achieve the desired look.
• Final Inspection: Schedule inspections to ensure compliance with building codes.
Final Inspections and Approvals:
• Arrange for final inspections to ensure the addition meets all safety and code requirements.
• Obtain any necessary certificates of occupancy or compliance.
Move In and Enjoy:
• Once all inspections and approvals are received, you can move into your new kitchen addition and start enjoying it.
Remember that every kitchen addition project is unique, so adapt this outline to your specific needs and circumstances. Consulting with professionals and obtaining the required permits and inspections is crucial to a successful and safe project.
 Talon Construction Inc.
Designing and building a kitchen addition is a complex process that involves multiple steps and considerations. Here is a general outline to help you get started on your kitchen addition project:
Define Your Goals and Budget:
• Determine the purpose of the kitchen addition. Is it for more cooking space, a dining area, or a combination of both?
• Establish a realistic budget for your project. Consider all costs, including construction, permits, materials, and furnishings.
Hire a Design Professional:
• Seek the services of a design build company who specializes in kitchen additions.
• Discuss your vision, needs, and budget with the design professional to create a design concept.
Site Evaluation:
• Assess the existing space and structural condition of your home to ensure it can support the addition.
• Consider factors like zoning regulations, setbacks, and building codes.
Design Development:
• Collaborate with your design professional to refine the concept, including the layout, size, and architectural style.
• Choose materials, finishes, and fixtures that fit your design and budget.
Obtain Permits:
• Consult with your local design build contractor to determine the necessary permits and approvals.
• Prepare and submit all required documents, including architectural drawings and engineering plans.
Create Construction Documents:
• Work with your design build professional to develop detailed construction drawings and specifications.
• These documents will serve as a guide for contractors during construction.
Hire a design build contractor:
• Check references, credentials, and licenses before selecting a contractor.
• Sign a detailed contract that outlines the scope of work, timeline, and payment schedule.
Construction Phase:
• Demolition: If needed, remove any existing structures or walls.
• Foundation: Construct the foundation for the addition.
• Framing: Build the structural framework of the addition.
• Plumbing, Electrical, and HVAC: Install or update utilities as required.
• Insulation: Ensure proper insulation for energy efficiency.
• Drywall and Finish Work: Complete the walls and ceilings.
• Flooring and Cabinetry: Install flooring and kitchen cabinets.
• Appliances and Fixtures: Add appliances, plumbing fixtures, and lighting.
• Paint and Finish: Apply paint and finishes to achieve the desired look.
• Final Inspection: Schedule inspections to ensure compliance with building codes.
Final Inspections and Approvals:
• Arrange for final inspections to ensure the addition meets all safety and code requirements.
• Obtain any necessary certificates of occupancy or compliance.
Move In and Enjoy:
• Once all inspections and approvals are received, you can move into your new kitchen addition and start enjoying it.
Remember that every kitchen addition project is unique, so adapt this outline to your specific needs and circumstances. Consulting with professionals and obtaining the required permits and inspections is crucial to a successful and safe project.
 Talon Construction Inc.
Designing and building a kitchen addition is a complex process that involves multiple steps and considerations. Here is a general outline to help you get started on your kitchen addition project:
Define Your Goals and Budget:
• Determine the purpose of the kitchen addition. Is it for more cooking space, a dining area, or a combination of both?
• Establish a realistic budget for your project. Consider all costs, including construction, permits, materials, and furnishings.
Hire a Design Professional:
• Seek the services of a design build company who specializes in kitchen additions.
• Discuss your vision, needs, and budget with the design professional to create a design concept.
Site Evaluation:
• Assess the existing space and structural condition of your home to ensure it can support the addition.
• Consider factors like zoning regulations, setbacks, and building codes.
Design Development:
• Collaborate with your design professional to refine the concept, including the layout, size, and architectural style.
• Choose materials, finishes, and fixtures that fit your design and budget.
Obtain Permits:
• Consult with your local design build contractor to determine the necessary permits and approvals.
• Prepare and submit all required documents, including architectural drawings and engineering plans.
Create Construction Documents:
• Work with your design build professional to develop detailed construction drawings and specifications.
• These documents will serve as a guide for contractors during construction.
Hire a design build contractor:
• Check references, credentials, and licenses before selecting a contractor.
• Sign a detailed contract that outlines the scope of work, timeline, and payment schedule.
Construction Phase:
• Demolition: If needed, remove any existing structures or walls.
• Foundation: Construct the foundation for the addition.
• Framing: Build the structural framework of the addition.
• Plumbing, Electrical, and HVAC: Install or update utilities as required.
• Insulation: Ensure proper insulation for energy efficiency.
• Drywall and Finish Work: Complete the walls and ceilings.
• Flooring and Cabinetry: Install flooring and kitchen cabinets.
• Appliances and Fixtures: Add appliances, plumbing fixtures, and lighting.
• Paint and Finish: Apply paint and finishes to achieve the desired look.
• Final Inspection: Schedule inspections to ensure compliance with building codes.
Final Inspections and Approvals:
• Arrange for final inspections to ensure the addition meets all safety and code requirements.
• Obtain any necessary certificates of occupancy or compliance.
Move In and Enjoy:
• Once all inspections and approvals are received, you can move into your new kitchen addition and start enjoying it.
Remember that every kitchen addition project is unique, so adapt this outline to your specific needs and circumstances. Consulting with professionals and obtaining the required permits and inspections is crucial to a successful and safe project.
 Benson Homes LLC
When you find a home that meets most of your needs in a neighborhood you love, remodeling to make it more suitable for your family’s lifestyle can make that house your dream home. That’s what happened in this remodeling story. Our clients purchased a home built in 1983 with the plan to remodel the kitchen to suit their needs and tastes.
The galley style kitchen was positioned at the center and rear of the main level and had an eat-in area at one end and a pantry at the opposite end. A small pass-through allowed view into the adjacent family room, but otherwise the two spaces were closed off from one another. The existing espresso stained cabinetry was attractive, but it darkened and narrowed the kitchen.
The homeowners wanted the kitchen to feel more connected to the other main level living spaces. Creating more light and improving organization and storage were must haves for the new design. They also requested relocating the pantry from under the stairs and longed for a ventilation system that would vent the cooking smells outdoors rather than throughout the inside of the house.
Our design involved removing a portion of wall between the kitchen and living room. This one change made it feel larger, more open and bright. It also connected the kitchen to the living room and allowed the two spaces to flow freely into one another. This new open area allowed us to extend the granite countertop to create a peninsula/bar that provides additional seating. To improve the existing lighting plan, we added new LED recessed lights, under-cabinet lighting, and pendant lighting over the peninsula.
The selections were integral in making the kitchen feel lighter and larger. Our clients chose maple cabinetry with an oak stained tumbleweed finish paired with creamy granite countertops, and a pearl tumbled travertine backsplash. A few standout features include a set of floating shelves, concrete farmhouse sink, and mercury glass pendant lights. Flooring throughout the first floor was updated to an easy to maintain wood-look vinyl plank floor.
Several new storage options were added including new cabinetry where the old pantry used to be, which accommodates the microwave in an upper cabinet as well as storage for small cooking appliances so they don’t take up space on the counters. There’s also a unique angled cabinet right next to the refrigerator.
When the work was complete on this project we were very pleased that the design delivered exactly what the homeowners had envisioned. In addition, we were able to complete the construction without causing too much disturbance or disruption for the homeowners; one works the night shift, and was actually able to sleep during the day, and the other travels frequently for work and felt confident that the project was in good hands.
 Talon Construction Inc.
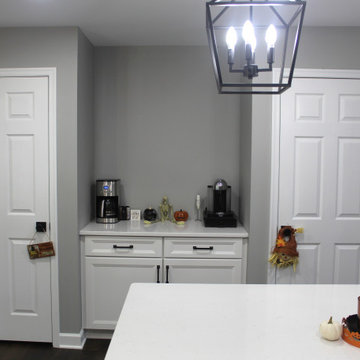
Designing and building a kitchen addition is a complex process that involves multiple steps and considerations. Here is a general outline to help you get started on your kitchen addition project:
Define Your Goals and Budget:
• Determine the purpose of the kitchen addition. Is it for more cooking space, a dining area, or a combination of both?
• Establish a realistic budget for your project. Consider all costs, including construction, permits, materials, and furnishings.
Hire a Design Professional:
• Seek the services of a design build company who specializes in kitchen additions.
• Discuss your vision, needs, and budget with the design professional to create a design concept.
Site Evaluation:
• Assess the existing space and structural condition of your home to ensure it can support the addition.
• Consider factors like zoning regulations, setbacks, and building codes.
Design Development:
• Collaborate with your design professional to refine the concept, including the layout, size, and architectural style.
• Choose materials, finishes, and fixtures that fit your design and budget.
Obtain Permits:
• Consult with your local design build contractor to determine the necessary permits and approvals.
• Prepare and submit all required documents, including architectural drawings and engineering plans.
Create Construction Documents:
• Work with your design build professional to develop detailed construction drawings and specifications.
• These documents will serve as a guide for contractors during construction.
Hire a design build contractor:
• Check references, credentials, and licenses before selecting a contractor.
• Sign a detailed contract that outlines the scope of work, timeline, and payment schedule.
Construction Phase:
• Demolition: If needed, remove any existing structures or walls.
• Foundation: Construct the foundation for the addition.
• Framing: Build the structural framework of the addition.
• Plumbing, Electrical, and HVAC: Install or update utilities as required.
• Insulation: Ensure proper insulation for energy efficiency.
• Drywall and Finish Work: Complete the walls and ceilings.
• Flooring and Cabinetry: Install flooring and kitchen cabinets.
• Appliances and Fixtures: Add appliances, plumbing fixtures, and lighting.
• Paint and Finish: Apply paint and finishes to achieve the desired look.
• Final Inspection: Schedule inspections to ensure compliance with building codes.
Final Inspections and Approvals:
• Arrange for final inspections to ensure the addition meets all safety and code requirements.
• Obtain any necessary certificates of occupancy or compliance.
Move In and Enjoy:
• Once all inspections and approvals are received, you can move into your new kitchen addition and start enjoying it.
Remember that every kitchen addition project is unique, so adapt this outline to your specific needs and circumstances. Consulting with professionals and obtaining the required permits and inspections is crucial to a successful and safe project.
 Talon Construction Inc.
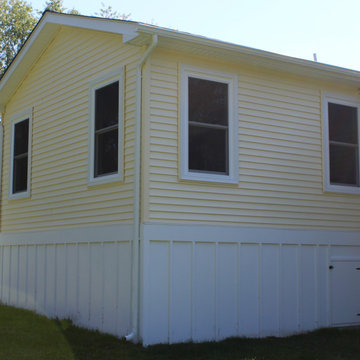
Designing and building a kitchen addition is a complex process that involves multiple steps and considerations. Here is a general outline to help you get started on your kitchen addition project:
Define Your Goals and Budget:
• Determine the purpose of the kitchen addition. Is it for more cooking space, a dining area, or a combination of both?
• Establish a realistic budget for your project. Consider all costs, including construction, permits, materials, and furnishings.
Hire a Design Professional:
• Seek the services of a design build company who specializes in kitchen additions.
• Discuss your vision, needs, and budget with the design professional to create a design concept.
Site Evaluation:
• Assess the existing space and structural condition of your home to ensure it can support the addition.
• Consider factors like zoning regulations, setbacks, and building codes.
Design Development:
• Collaborate with your design professional to refine the concept, including the layout, size, and architectural style.
• Choose materials, finishes, and fixtures that fit your design and budget.
Obtain Permits:
• Consult with your local design build contractor to determine the necessary permits and approvals.
• Prepare and submit all required documents, including architectural drawings and engineering plans.
Create Construction Documents:
• Work with your design build professional to develop detailed construction drawings and specifications.
• These documents will serve as a guide for contractors during construction.
Hire a design build contractor:
• Check references, credentials, and licenses before selecting a contractor.
• Sign a detailed contract that outlines the scope of work, timeline, and payment schedule.
Construction Phase:
• Demolition: If needed, remove any existing structures or walls.
• Foundation: Construct the foundation for the addition.
• Framing: Build the structural framework of the addition.
• Plumbing, Electrical, and HVAC: Install or update utilities as required.
• Insulation: Ensure proper insulation for energy efficiency.
• Drywall and Finish Work: Complete the walls and ceilings.
• Flooring and Cabinetry: Install flooring and kitchen cabinets.
• Appliances and Fixtures: Add appliances, plumbing fixtures, and lighting.
• Paint and Finish: Apply paint and finishes to achieve the desired look.
• Final Inspection: Schedule inspections to ensure compliance with building codes.
Final Inspections and Approvals:
• Arrange for final inspections to ensure the addition meets all safety and code requirements.
• Obtain any necessary certificates of occupancy or compliance.
Move In and Enjoy:
• Once all inspections and approvals are received, you can move into your new kitchen addition and start enjoying it.
Remember that every kitchen addition project is unique, so adapt this outline to your specific needs and circumstances. Consulting with professionals and obtaining the required permits and inspections is crucial to a successful and safe project.
96