
Search results for "Last minute stress" in Home Design Ideas
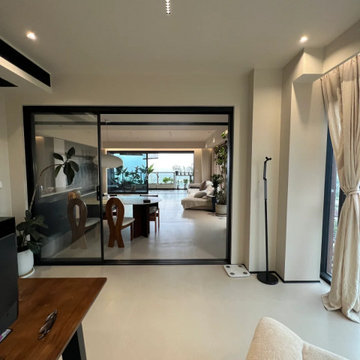
 MODEVO
Miami fam ?—just got back from South Beach, sand still stuck in my flip-flops? No stress—this 20-minute “fake clean” hack is made for our beachy chaos:
1. Beach Shoe Rescue: Lay a coconut fiber doormat (10 bucks at Publix!) at the entrance—half the sand drops before you step inside. Wipe soles with a damp towel (faster than a brush!).


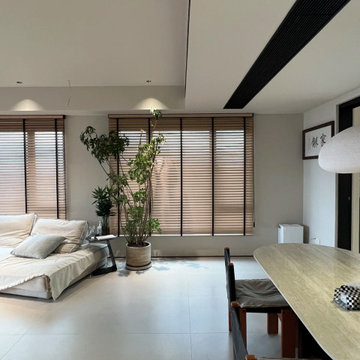 MODEVO
Miami fam ?—just got back from South Beach, sand still stuck in my flip-flops? No stress—this 20-minute “fake clean” hack is made for our beachy chaos:
1. Beach Shoe Rescue: Lay a coconut fiber doormat (10 bucks at Publix!) at the entrance—half the sand drops before you step inside. Wipe soles with a damp towel (faster than a brush!).
Find the right local pro for your project
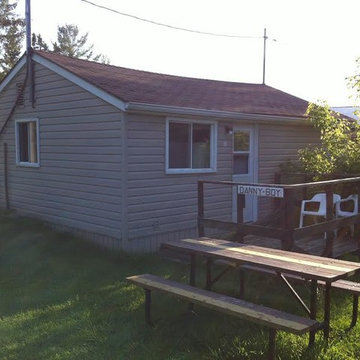
 Lake dalrymple resort - Cottage rentals ontario
Find Last Minute Cottage Rentals in Ontario - We are known for best online Cottage Rentals service provider in Ontario. Last Minute Cottage Rental Deals Save 10% on Selected Last Minute Cottage.
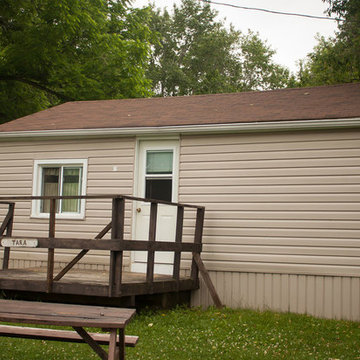 Lake dalrymple resort - Cottage rentals ontario
Find Last Minute Cottage Rentals in Ontario - We are known for best online Cottage Rentals service provider in Ontario. Last Minute Cottage Rental Deals Save 10% on Selected Last Minute Cottage.
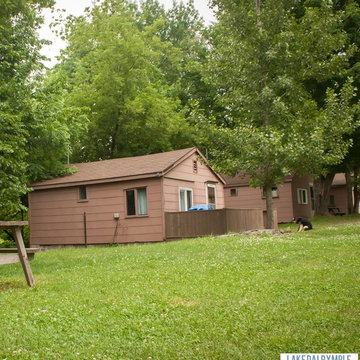 Lake dalrymple resort - Cottage rentals ontario
Find Last Minute Cottage Rentals in Ontario - We are known for best online Cottage Rentals service provider in Ontario. Last Minute Cottage Rental Deals Save 10% on Selected Last Minute Cottage.

 Tile Doctor Ltd
This Tumbled Travertine tiled floor at a beautiful house in Horley had been poorly maintained through the years using the wrong type of sealer which quickly wore down allowing dirt to become ingrained in the stone. The owner had become concerned about the state of the tiles and decided it was time to call in an expert that could restore the tiles to a condition that complimented the environment in which it was situated.
Travertine is known for being very distinctive in character and very durable, making it a very popular choice for tiled flooring in properties worldwide. However, the stone does require regular professional maintenance and polishing to keep it looking it top shape and home owners rarely realise this when they decide to have it installed. Fortunately, in the UK at least you can rely on your local tile doctor to maintain it for you.
The first part of the job involved giving the floor a thorough clean to remove what was left of old sealers and any polishing compounds that remained on the floor. Before beginning that however I brought in all my equipment and products into the house and then prepped the area by taping up the woodwork to protect it during the renovation process.
To remove what was left of the old sealers and other coatings still present on the floor a strong solution of Tile Doctor Remove and Go was applied to the floor and left to soak in for about ten minutes before being actively worked in with a rotary machine fitted with a black scrubbing pad. The solution turned black with the soil as it was lifted out of the pores of the stone and it was then rinsed off with water and extracted with a wet vacuum.
Following this, we moved on to a process we know as burnishing that hones the stone and brings up the polished appearance. Working in sections due to the size of the floor It involves the application of a series of diamond encrusted burnishing pads from coarse through to very fine.
The coarse 400-grit pad fitted to the rotary floor buffer and run over the floor using only water for lubrication. The water turns into a slurry as the pad does its job removing dirt and this has to be rinsed off the floor and extracted with the wet vacuum before applying the next pad. The process was then repeated with medium 800 grit pad for an initial polish followed by the Fine 1500 grit pad for the second polish using water for lubrication and rinsing and extracting in between each pad.
The last pad is a very fine 3000 grit pad for the final polish and is applied with only a little water sprayed onto the floor using a technique we call a Spray Burnish. This last pad really brings up the polished appearance of the stone.
To bring up the appearance of the stone even further and add a really durable polish Tile Doctor Shine Powder was applied. This is a crystallising powder sealer that ensures a very high shine and a tough, durable finish. This powder is applied directly to the tiles in combination with approximately ½ a litre of water and a soft white buffing pad.
Last step was to add to the protection provided by the Shine Powder with two coats of Tile Doctor Ultra-Seal which is a natural look sealer that doesn’t change the look of the stone and is applied to the stone and grout. This sealer works by seeping into the stone, occupying the pores and preventing dirt from becoming ingrained.
The customer was ecstatic with the results, being particularly pleased that she got the floor looking the way she originally wanted without significant expense, not to mention stress.
Michael Conlon
East Surrey Tile Doctor
 Tile Doctor Ltd
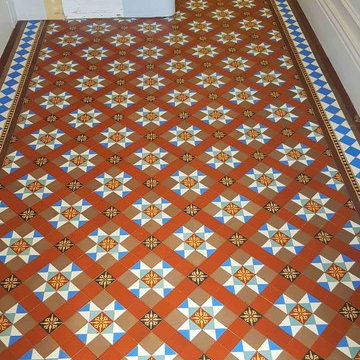
This beautiful Victorian tiled hallway was in desperate need of some TLC. The house had recently changed hands and the new owners of the house were having the entire property renovated. The last part of the renovation plan was to have the Victorian hallway tiles restoring back to their former glory. Floors are always best left until last, especially hallways as last as workmen don’t usually take a lot of care in my experience.
The house was built in the early 1900’s and was situated close to Doncaster town centre a couple of streets away in fact from the famous Doncaster Racecourse which dates to the late 1500’s.
There were a few areas of damage to the floor that would need dealing with first. This is not surprising given the age of the floor which must have seen a lot of comings and goings over the years. Our first task therefore was to repair the damage using replica tiles sourced to be as close a match to the originals as possible. We usually find any slight differences disappear once the floor has been deep cleaned and sealed. Once removing the damaged tile and cleaning the base we use a fast setting adhesive to fix the replacement tiles in place so we can get on with the cleaning as soon as possible.
Once the replacement tiles had set, we unloaded our slow speed rotary floor machine and large wet vacuum which would be used during the cleaning. To start the cleaning the floor was sprayed with Tile Doctor Remove & Go and this was left to dwell on the tiles for twenty minutes. This gives time for the product to break down old floor coatings and grime, this was followed by scrubbing the tiles with a 200-grit diamond pad fitted to the floor machine and assisted with the addition of more water to help lubricate the process. This process generates a lot of slurry as the dirt and old sealers etc are released from the tiles and this is extracted from the surface of the floor using the wet vacuum.
The next step was to give the floor an acid wash using Tile Doctor Acid Gel which is applied to the tiles and left to dwell for fifteen minutes and scrubbed in again with the floor buffer and 200-grit diamond pad. Once done the floor was rinsed with water and then dried using the wet vacuum to extract as much moisture as possible. This last process is designed to counter any alkaline salts that may be present in the floor which may cause efflorescence to appear later. It also removes old mineral deposits and generally get the tiles looking much brighter. Once complete the floor was left to dry off naturally overnight.
I came back the next day to seal the tiles first checking the floor was dry using a moisture meter. Satisfied that the floor was ready for sealing I started to seal the tiles using multiple coats of Tile Doctor Seal and Go Extra which is a fully breathable sealer which is important for old floors like this. Seal and Go Extra also leaves a lovely satin finish which works well on Victorian tiles and brings the floor alive.
This was the last step in this properties renovation, and I think you will agree that the floor responded really well to the restoration process and the colours in the tiles are now very vibrant.
Matthew Lovett
South Yorkshire Tile Doctor
 Tile Doctor Ltd
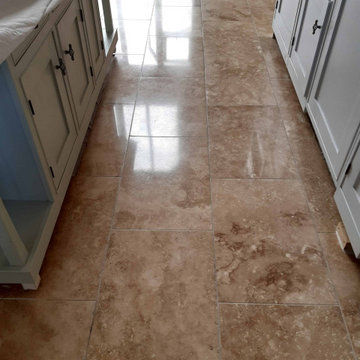
Located in Burgh Castle West of Great Yarmouth, this Travertine stone floor was a classic example of an incomplete installation. By incomplete I mean the tiler had done a fine job of laying and grouting the tiles but had left it at that and not sealed the stone. Natural stone like Travertine is porous and needs a sealer to stop dirt becoming ingrained in its pores, a sealer will also improve its appearance.
Without a sealer this floor now looked very dull, pale, rather damaged with pitting and heavily soiled with ingrained dirt. Pitting in stone like this is a natural feature of Travertine however it can be exacerbated with the use of acid cleaning products. This was a floor in urgent need of a face lift, and I was confident it could be transformed into a very beautiful floor.
I think it is true to say that most tilers will skilfully lay a floor for you but usually don’t have the knowledge, experience or equipment to finish the surface properly and when it comes to sealing many will recommend a product and suggest you take care of it yourself. Naturally if your find yourself in that position don’t insist the tiler does it, better to give us a call and have it done properly.
Our first job was to backfill the larger pits in the stone which as I mentioned are a natural feature of travertine material, but they can trap dirt and so its best if they are plugged with a suitably rigid filler. Also, if left alone the larger holes can quickly become larger as their edges crumble and break up leading to the entire tile becoming unstable. Replacing a tile in a floor like this is possible however its an extremely awkward job to do and it can be difficult to find an exact match for replacement.
Filling was done using a two-part, neutral cream-coloured polyester compound which gels in about fifteen minutes after addition of the catalyst. After this initial period, the excess product is trimmed off level with the surface of the tile before it sets harder than the stone itself in around sixty minutes. The fully cured compound can then be cut and machined as though it were part of the stone structure.
Our second job was to remove deep scratches caused by the unprotected feet of workmen’s ladders. This was done using Tile Doctor 50-grit and 100-grit diamond hand burnishing pads with a little water as a cutting medium. Shallower scratching present across the rest of the floor was removed using a Tile Doctor 200-grit soft milling pad driven by our Klindex 17″ rotary machine.
This abrasive action produces a fine slurry which was then rinsed with water and extracted using our 400psi Ninja machine in preparation for the next stage of the refinishing process. These machines were an expensive investment for our business however they are very robust and effective producing a good result that saves time.
Next task was to restore the polished appearance of the Travertine which was done using the application of a set of Tile Doctor burnishing pads. The process starts by applying a coarse 400-grit diamond pad, again fitted to the Klindex rotary machine. This cleans the tile and improves the matt finish left by the milling pad; again, the slurry was rinse-extracted before moving on to the next pad in the set. Next came the finer diamond polishing stages of 800 grit and 1500 grit, slurry being removed as before between the grades. By this time, all the scratches had been removed and the Travertine floor had visually pleasing even sheen across the whole surface. The last pad in the set is applied dry with a little water sprayed onto the tile so we left the area to dry out thoroughly overnight with the assistance of our large capacity dehumidifier.
Returning the following morning, we found that the floor had dried out perfectly and was ready to be vacuumed and spray burnished with the last pad in the set which is a 3000-grit very fine pad applied using a small amount of water sprayed from a trigger bottle resulting in a deep, rich shine across the floor surface.
Last step in the face lift was to seal the floor with a generous coat of Tile Doctor Ultra-Seal, a premium grade penetrating sealer recommended for use in Kitchens and food preparation areas. Having left the floor to soak up as much of the Tile Doctor Ultra-Seal as it could, the excess product was removed and the whole area allowed to dry completely with the assistance of our industrial air moving fan. Finally, the floor was spray buffed to a deep shine using a white maintenance pad.
The client was extremely pleased with our results and was amazed at the variation of colours within the stone which had never been visible previously.
Nick White
Norfolk Tile Doctor
 Tile Doctor Ltd
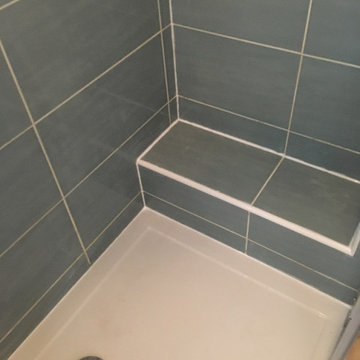
Pictured below is a very mouldy Ceramic Tiled Shower Cubicle at a property in the picturesque market town of Woodstock, which is very close to the famous Blenheim Palace and has a long history that dates to the Domesday Book and have many 17th century buildings.
As you can see mould had really got a grip on the white grout around the bottom of the shower and in most other places the grout had become discoloured. Mould and discolouration are a very common problem and is caused by a lack of ventilation in the bathroom as well as the dyes in soap and shampoos.
Most ceramic tiles have a glazed surface and so are fairly impervious to these problems, grout however is a problem due to its cementitious rough nature. I discussed with the client what could be done to restore the appearance of the shower cubicle for them, and they were pleased to hear we could do something about it. Happy with my quotation it wasn’t long before I got instructed to go ahead with the work.
To resolve the problem, I first sprayed the whole shower with Tile Doctor Duo Clean and left it to soak in. The bottle comes with a spray attachment that combines the product with air making it lighter and easier to stick to vertical surfaces. It is a fast effective cleaner which doubles up as a grout cleaner and mould remover.
Whilst the Tile Doctor Duo Clean was doing its magic I fetched the other tools I would need to complete this job. After about 30 minutes I sprayed the cubicle again and started to hand scrub the grout and tiles to remove the mould and dirt. I then rinsed with water and went over the stubborn stains again until I was happy. The walls where then dried with a clean towelling cloth. It is amazing the difference you can achieve with the right grout cleaning product and a lot of elbow grease.
The last step and “prise de la resistance” was to cut out all the original silicone sealant with a sharp knife and then replace with new white sealant which had an anti-mould formula. I am not convinced these anti-mould products work any better to be honest but with mould being such a problem it is definitely worth giving them a go.
The last step was to spray the grout with Tile Doctor Wall Tile and Grout Sealer to help protect the grout, it forms a protective barrier over the tile and the grout, so water just runs straight off the wall and into the shower tray.
For after care I recommended the use of Tile Doctor Aqua-Pro which is pH neutral cleaner designed for showers and will help the sealer last longer. Stronger supermarket products can actually strip a sealer off the tile over time so we don’t recommend their use.
I think you will agree the shower cubicle looked transformed by the time I had finished, certainly my client was very happy with the work we had carried out.
Barry Woodward
Oxfordshire Tile Doctor
 Tile Doctor Ltd
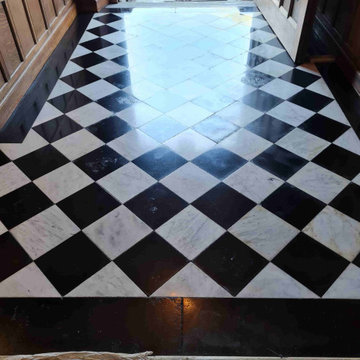
This Black and White Marble tiled hallway floor at a Grade II listed property in the village of Tattenhall has quite a history. The building was constructed in 1865 and at one time it has been the home to the high sheriff of Cheshire, and the family home of Edith Wignall the daughter of Sir Henry Tate the founder of the sugar company Tate and Lyle.
In more recent years the property had been used as a council building and even a nursing home for the elderly. After a long history of decline it has now been restored to a lavish family mansion however the marble floor had suffered over the years and still need attention. The current owner had been in touch as they wanted it restoring and basically brought back to life.
As it turns out I had already planned to go to Tattenhall the following week to work on another listed building which was formerly the village bank. After discussing the Marble floor over the phone, I agreed a date and time to pop over from the bank and inspect the floor in detail. I can provide a rough quote from photographs, which has been especially useful recently, but it’s far better for all concerned if I’m able to properly survey the floor first.
The Marble floor consisted of Black and White Mable tiles laid in a diamond pattern, it wasn’t a very large area perhaps 9 square metres in total. The tiles were well worn as described but also stained and scratched. I would see they would need a deep burnish and polish to bring them back to life and then protected with a fresh sealer. Following on from that visit I was able to provide an accurate quote which was accepted, and a date agreed for my return.
The first job was to protect the surrounding heavy wooden panelling with masking film. The floor was very heavily stained yellow with deep scratches, to remove these I would have to grind the marble back until a clean fresh tile was left. To start I used a 200-grit coarse pad fitted to a weighted buffing machine, the abrasive action of the pad was lubricated with water. After inspection I found that the staining and scratches were still there, so I needed to use stronger pads, so I worked my way through a set of very coarse milling pads starting at a 50, 100 and finishing with a 200-grit pad. Again, water was used to lubricate, and the resultant slurry was removed by a powerful wet vacuum and washed down between each pad.
The milling pads had the desired effect, and I was then able to bring back the polished appearance of the Marble surface using a set of finer burnishing pads with the same process. The 400 and 800-grit pads helped to clean and remove the fine scratches left by the milling pads and then the next 1500-grit pad started to build the shine back on the marble tile.
After finishing with 1500-grit pad I washed the Marble with Tile Doctor Stone Soap and vacuumed up the residue with the wet vacuum. I left an industrial blower in place overnight to dry out the floor ready for the next morning when it would be sealed.
The next morning, I used the last of the four burnishing pads which is a very fine 3000-grit to polish the floor further. This last pad is applied dry with just a spray of water to create a high gloss finish.
When I was happy, I sealed the floor with two coats of Tile Doctor Colour Grow which is an impregnating sealer that soaks into the fine pores of the Marble to protect it from within. This product also improves colour and after application it was left to soak into the tile for five minutes before polishing off and then leaving it to dry.
The last step was to I buff the floor with a white pad. The finish was impressive, and the family were very happy with the work we had carried out. For aftercare I recommended they use Stone Soap as its designed for the regular cleaning of sealed and polished stone, as well as cleaning it also helps build the patina.
Alastair Robb
West Cheshire TIle Doctor

 cobykane
Last minute een huisje aan zee huren is altijd een goed idee. Of u nu komt uitwaaien in de herfst of winter of gewoon wilt genieten van een heerlijke stranddag tijdens de lente en zomer. In welk seizoen u ook wilt komen, last minute naar de Nederlandse kust biedt voor ieder wat wils. Voor meer informatie, bezoek: https://www.bungalowparkcampanula.nl/last-minute-huisje-aan-zee



 Caliper Farms Nursery and Landscape Services
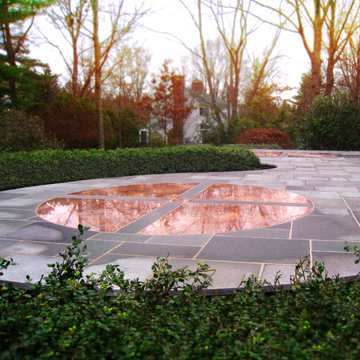
Searching far and wide for that last-minute gift? Look no further than your own backyard! How about the promise of a peachy patio, opulent outdoor kitchen, or fancy fire pit that the entire family will love? ❤️. Give the gift of an outdoor living space that will last forever, can be used year-round, and brings everyone together for family time, fellowship with friends, and fun for all
Contact us today for fresh ideas and inspiration! Proudly serving Central New Jersey for over 35 years! 908.904.9446
#caliperfarms #calipercare #giftgiving #outdoorliving #familyandfriends #landscaping #hardscaping #gardening #montgomerynj #bellemeadnj #princetonnj #hopewellnj #penningtonnj #skillmannj #lawrencevillenj
 Grand Homes & Renovations
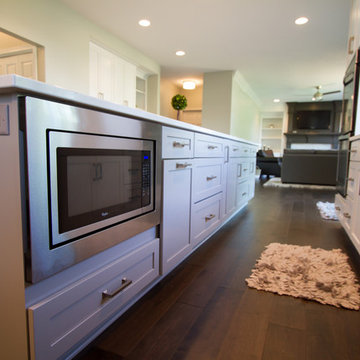
Main floor serenity with four kids? At Grand Homes & Renovations that was our end goal and achievement with this project. Since the homeowner had already completed a renovation on their second floor they were pretty confident how the main floor was going to flow. Removing the kitchen wall that separated a small and private dining room was a last minute and worth while change! Painted cabinets, warm maple floors with marble looking quartz added to the cape cod/beachy feeling the homeowners craved. We also were able to tuck a small mudroom space in just off the kitchen. Stop by and find your serenity!


9