
Search results for "Losing real" in Home Design Ideas
 Vintage Cellars & Saunas
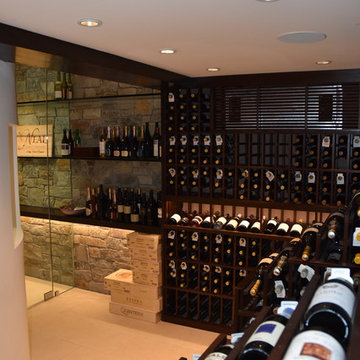
This gorgeous glass front wine cellar was built in a downstairs basement area within this Manhattan Beach, Los Angeles home overlooking the Pacific Ocean. Contemporary Modern architecture with a mix of rustic features line this Los Angeles Home - with this stunning glass wine room riding those same lines. Stone layered walls with dual paned glass windows and front make for a real stunning showpiece of a wine cellar from the outside looking in.
Wine Cellar Design and Wine Cellar Installation come naturally to the Wine Cellar Builders at Vintage Cellars. Wine Rooms consistently include more glass as a design feature in recent years, and this masterpiece is no exception in showing off these magnificient wines on display.
Unique Design features within this Glass wine room include dual waterfall displays, LED lit high reveal display rows, floor to ceiling Horizontal full reveal display, and matching stained ceiling beams.
Modern Wine Cellars incorporating glass should utilize dual paned glass to minimize heat loss. Glass, especially single pane, is not a great insulator and can cause wine cellars to lose cooling ability and force cooling units to run more regularly.
Master Wine Cellar Builders at Vintage Cellars specialize in wine rooms, wine display, wine racking, wine cellar cooling, wine closets, everything else wine cellar related. We do all applications of wine cellars, wine rooms, wine closets in areas spanning San Diego, Los Angeles, Orange County, San Francisco, and Nationwide. Vintage Cellars designs and installs wine cellars in various styles ranging from contemporary and modern to rustic, shabby chic, and classic.
Vintage Cellars has built gorgeous custom wine cellars and wine storage rooms across the United States and World for over 25 years. We are your go-to business for anything wine cellar and wine storage related! Whether you're interested in a wine closet, wine racking, custom wine racks, a custom wine cellar door, or a cooling system for your existing space, Vintage Cellars has you covered!
We carry all kinds of wine cellar cooling and refrigeration systems, incuding: Breezaire, CellarCool, WhisperKool, Wine Guardian, CellarPro and Commercial systems.
We also carry many types of Wine Refrigerators, Wine Cabinets, and wine racking types, including La Cache, Marvel, N'Finity, Transtherm, Vinotheque, Vintage Series, Credenza, Walk in wine rooms, Climadiff, Riedel, Fontenay, and VintageView.
Vintage Cellars also does work in many styles, including Contemporary and Modern, Rustic, Farmhouse, Traditional, Craftsman, Industrial, Mediterranean, Mid-Century, Industrial and Eclectic.
Some locations we cover often include: San Diego, Rancho Santa Fe, Corona Del Mar, Del Mar, La Jolla, Newport Beach, Newport Coast, Huntington Beach, Del Mar, Solana Beach, Carlsbad, Orange County, Beverly Hills, Malibu, Pacific Palisades, Santa Monica, Bel Air, Los Angeles, Encinitas, Cardiff, Coronado, Manhattan Beach, Palos Verdes, San Marino, Ladera Heights, Santa Monica, Brentwood, Westwood, Hancock Park, Laguna Beach, Crystal Cove, Laguna Niguel, Torrey Pines, Thousand Oaks, Coto De Caza, Coronado Island, San Francisco, Danville, Walnut Creek, Marin, Tiburon, Hillsborough, Berkeley, Oakland, Napa, Sonoma, Agoura Hills, Hollywood Hills, Laurel Canyon, Sausalito, Mill Valley, San Rafael, Piedmont, Paso Robles, Carmel, Pebble Beach
Contact Vintage Cellars today with any of your Wine Cellar needs!
(800) 876-8789
Vintage Cellars
904 Rancheros Drive
San Marcos, California 92069
(800) 876-8789
 Mottram Architecture
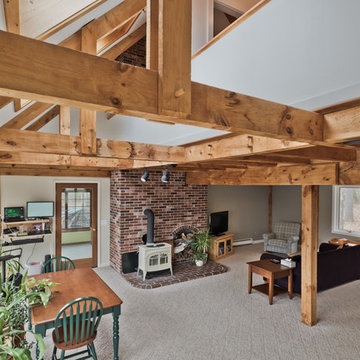
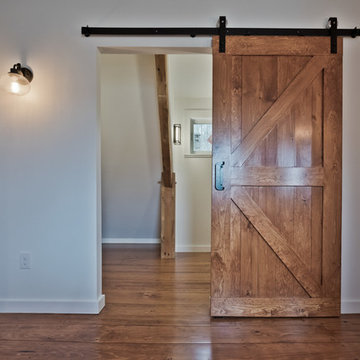
Timber frame homes offer unique challenges during a remodel. What often makes them beautiful and attractive to most homeowners, also makes them challenging for space requirements.
Context: The lovely couple that owned this home were struggling with some interesting floor plan challenges that just didn't work for their family. The loved the beautiful timbers and woodwork of their home, but the dramatically sloping ceilings on the second floor, particularly in the bathroom, just didn't work for this 1 1/2 bath home. Needing to use the skylight to approach the toilet was a less then ideal scenario. Although the bathroom footprint was more then adequate, the sloped ceiling only made half of the space useable. Check out the Before/After post on our blog to see the photos of the house pre-renovation. As much as they loved all the wood features in their home, another challenge they had was light. The wood ceiling made everything inside the house darker, even with a fantastic array of south facing windows, there were spaces in the home that felt dark and small. When they contacted us they wanted to know how could they make their brighter and more inviting, were there solutions to the 2nd floor sloped ceiling issues, and if they were going to do all of this work, how could they make their home more comfortable and efficient. A nagging water leak in the upstairs bathroom spurred them into action and here is how we solved their dilemma.
Conclusion: First, we added a little dormer to the rear of the house so we could get full headroom in nearly all of the upstairs bathroom! Then we decided to extend that dormer one more timber bay over to create a walk in closet with natural light and plenty of space. Since we were contemplating energy efficiency, we resolved a nagging issue that is present in a lot of timber frame construction, air tightness. Commonly found in timber frame construction, fiberglass insulation is installed in the rafter bays and board ceilings are installed over top. Unfortunately, board ceilings are anything but air tight, and fiberglass insulation needs to be in an airtight cavity for maximum effectiveness. So we were able to solve two issues at the same time for this homeowner. We removed the board ceiling and fiberglass insulation, we dense packed the rafter bays with cellulose insulation, and installed sheetrock in place of the boards. The boards were salvaged for re-use by the homeowner, and the space and light quality was dramatically improved. Some may think that losing the board ceiling took something away from the space, but what you'll see in the pictures is that it highly accentuates the heavy timbers and really makes them stand out in a beautiful way. Now with this added airtightness, better insulation, and brighter space, the homeowner hardly runs their wood stove, and it's so quiet in the space, an added bonus from changing the insulation. It became necessary to also add a sheetrock ceiling to the living room to hide the plumbing from the new bathroom layout above. Changing this ceiling gave the homeowner some real quality lighting that was lacking in the living room before. The brighter ceiling and new lighting layout completely transforms the living room into a space you want to hang out, even though the layout didn't change at all. When the homeowner saw the finished spaces she said "I can't believe this is my house, I want to live in this house"
Energy Efficiency: I touched a little on the efficiency above, but like all projects done with Mottram Architecture, we always want to leave you with a little extra. Timber frame construction with board ceilings and fiberglass insulation are notoriously leaky! If you want to know what we think about fiberglass insulation, check our our blog post on Why Fiberglass Insulation Sucks. By installing cellulose insulation and covering it with sheetrock we were able to greatly reduce the heat flowing out of this home. It not only improves cashflow it improves the comfort level in the space. Who wants to sit in their living room and feel a draft? Let us remind you, we are not saying cellulose insulation is an air barrier, we use the sheetrock to help with that, but it does significantly reduce the air flow over fiberglass insulation. And when we reduce the airflow, we reduce the heat flow. And when we reduce the heat flow, we reduce the need to re-heat that drafty air from outside. When it comes to energy efficiency the first and best place to start is air infiltration. We greatly reduced the air infiltration with the new insulation, but we also added a hat and warm boots. What I mean by that is, we improved the insulation in the roof, and we installed insulation in the basement. Maybe it's a silly analogy, but when you think about keeping warm, we always start with the hat and boots! With sustainability in mind, the next project will be to add a deck to the front of this house with rain catchment barrels from the metal roof. They are planning to plant a garden in the spring and the rain catchment system will help to irrigate the new garden.
Builder: East Shore Builders
Photographer: Michael Eric Berube
 UpScapers: Landscape, Elevated
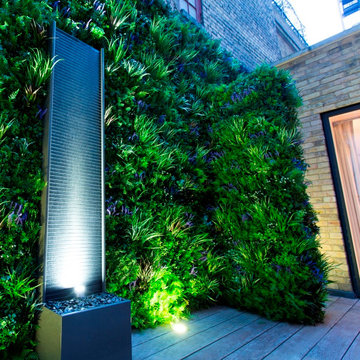
What was once a bare wall in this private courtyard was transformed into an immortal showcase by Vistafolia's attractive artificial green walls. The plain brick wall was gone and instead the client has a completely natural looking green wall that is as close to the real thing as is available.
Our ultra-realistic replica green wall panels, customized with lavender foliage, taken from our range of Color boxes of mixed flowers and plants, created the perfect backdrop to the outstanding water feature and provided a burst of greenery without losing out on space.
Find the right local pro for your project
 Living with Lolo
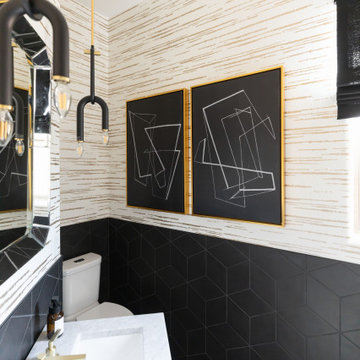
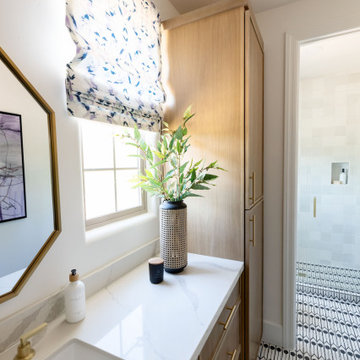
Bathroom in Trailside View | Refined Transitional Home in Scottsdale, AZ |
Room Type: Whole Home Remodel and Furnishings |
Project Name: Trailside View Residence |
Key Feature: A full home remodel and furnishings project anchored by white oak cabinetry and countertops, where the clients gave Living with Lolo real creative freedom to play with bold fabrics, wallpapers, and drapery that most homeowners would talk themselves out of.
Challenge: Transitional design can play it safe by default, neutral palette, inoffensive finishes, nothing that makes you catch your breath. The remodel needed a strong foundation that felt refined and timeless, but the clients wanted more than that. They wanted a home with personality, and the challenge was channeling that creative openness into something cohesive rather than chaotic.
Solution: Living with Lolo used white oak cabinetry and countertops to ground the remodel in warmth and quiet sophistication, then let the soft goods carry the personality. Bold fabric choices, expressive wallpapers, and thoughtful drapery gave each room its own moment without losing the thread that connected the whole home. Because the remodel and furnishings were managed together under one roof, the bolder design choices landed the way they were intended to rather than feeling like afterthoughts layered onto a finished renovation.
Materials: White oak cabinetry, white oak countertops, curated wallpapers, bold upholstery fabrics, custom drapery, and layered accessories sourced through Living with Lolo's trade relationships.
Budget: $250,000 to $550,000 |
Timeline: Approximately 5 to 9 months from design through completion.
 Living with Lolo
Bathroom in Trailside View | Refined Transitional Home in Scottsdale, AZ |
Room Type: Whole Home Remodel and Furnishings |
Project Name: Trailside View Residence |
Key Feature: A full home remodel and furnishings project anchored by white oak cabinetry and countertops, where the clients gave Living with Lolo real creative freedom to play with bold fabrics, wallpapers, and drapery that most homeowners would talk themselves out of.
Challenge: Transitional design can play it safe by default, neutral palette, inoffensive finishes, nothing that makes you catch your breath. The remodel needed a strong foundation that felt refined and timeless, but the clients wanted more than that. They wanted a home with personality, and the challenge was channeling that creative openness into something cohesive rather than chaotic.
Solution: Living with Lolo used white oak cabinetry and countertops to ground the remodel in warmth and quiet sophistication, then let the soft goods carry the personality. Bold fabric choices, expressive wallpapers, and thoughtful drapery gave each room its own moment without losing the thread that connected the whole home. Because the remodel and furnishings were managed together under one roof, the bolder design choices landed the way they were intended to rather than feeling like afterthoughts layered onto a finished renovation.
Materials: White oak cabinetry, white oak countertops, curated wallpapers, bold upholstery fabrics, custom drapery, and layered accessories sourced through Living with Lolo's trade relationships.
Budget: $250,000 to $550,000 |
Timeline: Approximately 5 to 9 months from design through completion.
 Mottram Architecture
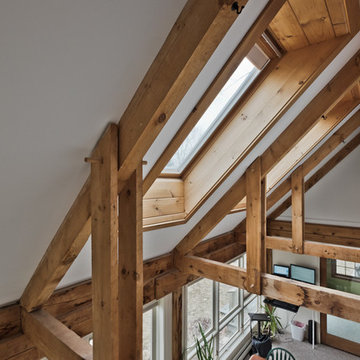
Timber frame homes offer unique challenges during a remodel. What often makes them beautiful and attractive to most homeowners, also makes them challenging for space requirements.
Context: The lovely couple that owned this home were struggling with some interesting floor plan challenges that just didn't work for their family. The loved the beautiful timbers and woodwork of their home, but the dramatically sloping ceilings on the second floor, particularly in the bathroom, just didn't work for this 1 1/2 bath home. Needing to use the skylight to approach the toilet was a less then ideal scenario. Although the bathroom footprint was more then adequate, the sloped ceiling only made half of the space useable. Check out the Before/After post on our blog to see the photos of the house pre-renovation. As much as they loved all the wood features in their home, another challenge they had was light. The wood ceiling made everything inside the house darker, even with a fantastic array of south facing windows, there were spaces in the home that felt dark and small. When they contacted us they wanted to know how could they make their brighter and more inviting, were there solutions to the 2nd floor sloped ceiling issues, and if they were going to do all of this work, how could they make their home more comfortable and efficient. A nagging water leak in the upstairs bathroom spurred them into action and here is how we solved their dilemma.
Conclusion: First, we added a little dormer to the rear of the house so we could get full headroom in nearly all of the upstairs bathroom! Then we decided to extend that dormer one more timber bay over to create a walk in closet with natural light and plenty of space. Since we were contemplating energy efficiency, we resolved a nagging issue that is present in a lot of timber frame construction, air tightness. Commonly found in timber frame construction, fiberglass insulation is installed in the rafter bays and board ceilings are installed over top. Unfortunately, board ceilings are anything but air tight, and fiberglass insulation needs to be in an airtight cavity for maximum effectiveness. So we were able to solve two issues at the same time for this homeowner. We removed the board ceiling and fiberglass insulation, we dense packed the rafter bays with cellulose insulation, and installed sheetrock in place of the boards. The boards were salvaged for re-use by the homeowner, and the space and light quality was dramatically improved. Some may think that losing the board ceiling took something away from the space, but what you'll see in the pictures is that it highly accentuates the heavy timbers and really makes them stand out in a beautiful way. Now with this added airtightness, better insulation, and brighter space, the homeowner hardly runs their wood stove, and it's so quiet in the space, an added bonus from changing the insulation. It became necessary to also add a sheetrock ceiling to the living room to hide the plumbing from the new bathroom layout above. Changing this ceiling gave the homeowner some real quality lighting that was lacking in the living room before. The brighter ceiling and new lighting layout completely transforms the living room into a space you want to hang out, even though the layout didn't change at all. When the homeowner saw the finished spaces she said "I can't believe this is my house, I want to live in this house"
Energy Efficiency: I touched a little on the efficiency above, but like all projects done with Mottram Architecture, we always want to leave you with a little extra. Timber frame construction with board ceilings and fiberglass insulation are notoriously leaky! If you want to know what we think about fiberglass insulation, check our our blog post on Why Fiberglass Insulation Sucks. By installing cellulose insulation and covering it with sheetrock we were able to greatly reduce the heat flowing out of this home. It not only improves cashflow it improves the comfort level in the space. Who wants to sit in their living room and feel a draft? Let us remind you, we are not saying cellulose insulation is an air barrier, we use the sheetrock to help with that, but it does significantly reduce the air flow over fiberglass insulation. And when we reduce the airflow, we reduce the heat flow. And when we reduce the heat flow, we reduce the need to re-heat that drafty air from outside. When it comes to energy efficiency the first and best place to start is air infiltration. We greatly reduced the air infiltration with the new insulation, but we also added a hat and warm boots. What I mean by that is, we improved the insulation in the roof, and we installed insulation in the basement. Maybe it's a silly analogy, but when you think about keeping warm, we always start with the hat and boots! With sustainability in mind, the next project will be to add a deck to the front of this house with rain catchment barrels from the metal roof. They are planning to plant a garden in the spring and the rain catchment system will help to irrigate the new garden.
Builder: East Shore Builders
Photographer: Michael Eric Berube
 Mottram Architecture
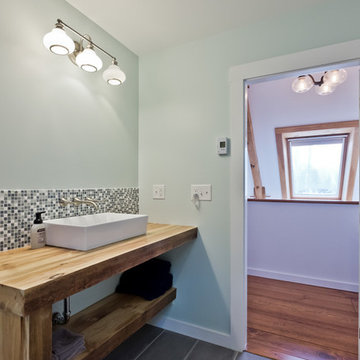
Timber frame homes offer unique challenges during a remodel. What often makes them beautiful and attractive to most homeowners, also makes them challenging for space requirements.
Context: The lovely couple that owned this home were struggling with some interesting floor plan challenges that just didn't work for their family. The loved the beautiful timbers and woodwork of their home, but the dramatically sloping ceilings on the second floor, particularly in the bathroom, just didn't work for this 1 1/2 bath home. Needing to use the skylight to approach the toilet was a less then ideal scenario. Although the bathroom footprint was more then adequate, the sloped ceiling only made half of the space useable. Check out the Before/After post on our blog to see the photos of the house pre-renovation. As much as they loved all the wood features in their home, another challenge they had was light. The wood ceiling made everything inside the house darker, even with a fantastic array of south facing windows, there were spaces in the home that felt dark and small. When they contacted us they wanted to know how could they make their brighter and more inviting, were there solutions to the 2nd floor sloped ceiling issues, and if they were going to do all of this work, how could they make their home more comfortable and efficient. A nagging water leak in the upstairs bathroom spurred them into action and here is how we solved their dilemma.
Conclusion: First, we added a little dormer to the rear of the house so we could get full headroom in nearly all of the upstairs bathroom! Then we decided to extend that dormer one more timber bay over to create a walk in closet with natural light and plenty of space. Since we were contemplating energy efficiency, we resolved a nagging issue that is present in a lot of timber frame construction, air tightness. Commonly found in timber frame construction, fiberglass insulation is installed in the rafter bays and board ceilings are installed over top. Unfortunately, board ceilings are anything but air tight, and fiberglass insulation needs to be in an airtight cavity for maximum effectiveness. So we were able to solve two issues at the same time for this homeowner. We removed the board ceiling and fiberglass insulation, we dense packed the rafter bays with cellulose insulation, and installed sheetrock in place of the boards. The boards were salvaged for re-use by the homeowner, and the space and light quality was dramatically improved. Some may think that losing the board ceiling took something away from the space, but what you'll see in the pictures is that it highly accentuates the heavy timbers and really makes them stand out in a beautiful way. Now with this added airtightness, better insulation, and brighter space, the homeowner hardly runs their wood stove, and it's so quiet in the space, an added bonus from changing the insulation. It became necessary to also add a sheetrock ceiling to the living room to hide the plumbing from the new bathroom layout above. Changing this ceiling gave the homeowner some real quality lighting that was lacking in the living room before. The brighter ceiling and new lighting layout completely transforms the living room into a space you want to hang out, even though the layout didn't change at all. When the homeowner saw the finished spaces she said "I can't believe this is my house, I want to live in this house"
Energy Efficiency: I touched a little on the efficiency above, but like all projects done with Mottram Architecture, we always want to leave you with a little extra. Timber frame construction with board ceilings and fiberglass insulation are notoriously leaky! If you want to know what we think about fiberglass insulation, check our our blog post on Why Fiberglass Insulation Sucks. By installing cellulose insulation and covering it with sheetrock we were able to greatly reduce the heat flowing out of this home. It not only improves cashflow it improves the comfort level in the space. Who wants to sit in their living room and feel a draft? Let us remind you, we are not saying cellulose insulation is an air barrier, we use the sheetrock to help with that, but it does significantly reduce the air flow over fiberglass insulation. And when we reduce the airflow, we reduce the heat flow. And when we reduce the heat flow, we reduce the need to re-heat that drafty air from outside. When it comes to energy efficiency the first and best place to start is air infiltration. We greatly reduced the air infiltration with the new insulation, but we also added a hat and warm boots. What I mean by that is, we improved the insulation in the roof, and we installed insulation in the basement. Maybe it's a silly analogy, but when you think about keeping warm, we always start with the hat and boots! With sustainability in mind, the next project will be to add a deck to the front of this house with rain catchment barrels from the metal roof. They are planning to plant a garden in the spring and the rain catchment system will help to irrigate the new garden.
Builder: East Shore Builders
Photographer: Michael Eric Berube

 Tile Merchant
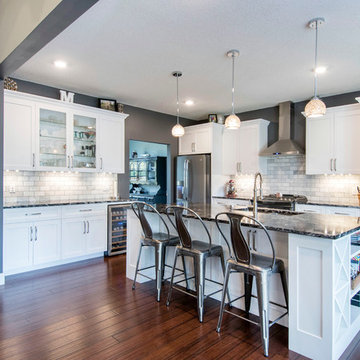
Transforming a modern living room with the ultimate blend of warmth and durability. ✨ Take a look at this stunning, sunlit space featuring the Albany Oak SPC Vinyl flooring.
Lose yourself in the rich, cinnamon swirls of this naturally-grained, oak-effect vinyl flooring. With its beautifully deep hue, these luxury vinyl planks make a bold statement in any high-traffic living room, especially layouts bathed in natural light. Thanks to a transparent double UV layer, the HD quality wood-effect is fully protected from sunlight fading.
Engineered with a solid polymer core (SPC), it delivers 100% waterproof stone-core durability with an affordably luxurious finish. Real wood look, zero wood hassle, and minimal maintenance.
 Mottram Architecture
Timber frame homes offer unique challenges during a remodel. What often makes them beautiful and attractive to most homeowners, also makes them challenging for space requirements.
Context: The lovely couple that owned this home were struggling with some interesting floor plan challenges that just didn't work for their family. The loved the beautiful timbers and woodwork of their home, but the dramatically sloping ceilings on the second floor, particularly in the bathroom, just didn't work for this 1 1/2 bath home. Needing to use the skylight to approach the toilet was a less then ideal scenario. Although the bathroom footprint was more then adequate, the sloped ceiling only made half of the space useable. Check out the Before/After post on our blog to see the photos of the house pre-renovation. As much as they loved all the wood features in their home, another challenge they had was light. The wood ceiling made everything inside the house darker, even with a fantastic array of south facing windows, there were spaces in the home that felt dark and small. When they contacted us they wanted to know how could they make their brighter and more inviting, were there solutions to the 2nd floor sloped ceiling issues, and if they were going to do all of this work, how could they make their home more comfortable and efficient. A nagging water leak in the upstairs bathroom spurred them into action and here is how we solved their dilemma.
Conclusion: First, we added a little dormer to the rear of the house so we could get full headroom in nearly all of the upstairs bathroom! Then we decided to extend that dormer one more timber bay over to create a walk in closet with natural light and plenty of space. Since we were contemplating energy efficiency, we resolved a nagging issue that is present in a lot of timber frame construction, air tightness. Commonly found in timber frame construction, fiberglass insulation is installed in the rafter bays and board ceilings are installed over top. Unfortunately, board ceilings are anything but air tight, and fiberglass insulation needs to be in an airtight cavity for maximum effectiveness. So we were able to solve two issues at the same time for this homeowner. We removed the board ceiling and fiberglass insulation, we dense packed the rafter bays with cellulose insulation, and installed sheetrock in place of the boards. The boards were salvaged for re-use by the homeowner, and the space and light quality was dramatically improved. Some may think that losing the board ceiling took something away from the space, but what you'll see in the pictures is that it highly accentuates the heavy timbers and really makes them stand out in a beautiful way. Now with this added airtightness, better insulation, and brighter space, the homeowner hardly runs their wood stove, and it's so quiet in the space, an added bonus from changing the insulation. It became necessary to also add a sheetrock ceiling to the living room to hide the plumbing from the new bathroom layout above. Changing this ceiling gave the homeowner some real quality lighting that was lacking in the living room before. The brighter ceiling and new lighting layout completely transforms the living room into a space you want to hang out, even though the layout didn't change at all. When the homeowner saw the finished spaces she said "I can't believe this is my house, I want to live in this house"
Energy Efficiency: I touched a little on the efficiency above, but like all projects done with Mottram Architecture, we always want to leave you with a little extra. Timber frame construction with board ceilings and fiberglass insulation are notoriously leaky! If you want to know what we think about fiberglass insulation, check our our blog post on Why Fiberglass Insulation Sucks. By installing cellulose insulation and covering it with sheetrock we were able to greatly reduce the heat flowing out of this home. It not only improves cashflow it improves the comfort level in the space. Who wants to sit in their living room and feel a draft? Let us remind you, we are not saying cellulose insulation is an air barrier, we use the sheetrock to help with that, but it does significantly reduce the air flow over fiberglass insulation. And when we reduce the airflow, we reduce the heat flow. And when we reduce the heat flow, we reduce the need to re-heat that drafty air from outside. When it comes to energy efficiency the first and best place to start is air infiltration. We greatly reduced the air infiltration with the new insulation, but we also added a hat and warm boots. What I mean by that is, we improved the insulation in the roof, and we installed insulation in the basement. Maybe it's a silly analogy, but when you think about keeping warm, we always start with the hat and boots! With sustainability in mind, the next project will be to add a deck to the front of this house with rain catchment barrels from the metal roof. They are planning to plant a garden in the spring and the rain catchment system will help to irrigate the new garden.
Builder: East Shore Builders
Photographer: Michael Eric Berube
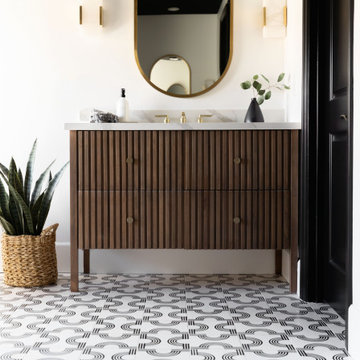 Living with Lolo
Bathroom in Trailside View | Refined Transitional Home in Scottsdale, AZ |
Room Type: Whole Home Remodel and Furnishings |
Project Name: Trailside View Residence |
Key Feature: A full home remodel and furnishings project anchored by white oak cabinetry and countertops, where the clients gave Living with Lolo real creative freedom to play with bold fabrics, wallpapers, and drapery that most homeowners would talk themselves out of.
Challenge: Transitional design can play it safe by default, neutral palette, inoffensive finishes, nothing that makes you catch your breath. The remodel needed a strong foundation that felt refined and timeless, but the clients wanted more than that. They wanted a home with personality, and the challenge was channeling that creative openness into something cohesive rather than chaotic.
Solution: Living with Lolo used white oak cabinetry and countertops to ground the remodel in warmth and quiet sophistication, then let the soft goods carry the personality. Bold fabric choices, expressive wallpapers, and thoughtful drapery gave each room its own moment without losing the thread that connected the whole home. Because the remodel and furnishings were managed together under one roof, the bolder design choices landed the way they were intended to rather than feeling like afterthoughts layered onto a finished renovation.
Materials: White oak cabinetry, white oak countertops, curated wallpapers, bold upholstery fabrics, custom drapery, and layered accessories sourced through Living with Lolo's trade relationships.
Budget: $250,000 to $550,000 |
Timeline: Approximately 5 to 9 months from design through completion.
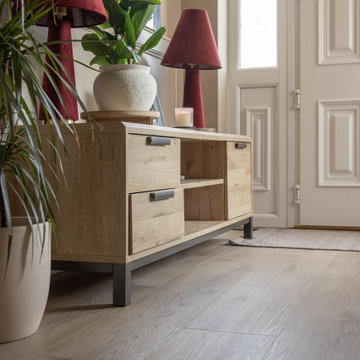 Tile Merchant
Transforming a modern living room with the ultimate blend of warmth and durability. ✨ Take a look at this stunning, sunlit space featuring the Albany Oak SPC Vinyl flooring.
Lose yourself in the rich, cinnamon swirls of this naturally-grained, oak-effect vinyl flooring. With its beautifully deep hue, these luxury vinyl planks make a bold statement in any high-traffic living room, especially layouts bathed in natural light. Thanks to a transparent double UV layer, the HD quality wood-effect is fully protected from sunlight fading.
Engineered with a solid polymer core (SPC), it delivers 100% waterproof stone-core durability with an affordably luxurious finish. Real wood look, zero wood hassle, and minimal maintenance.
 Vintage Cellars & Saunas
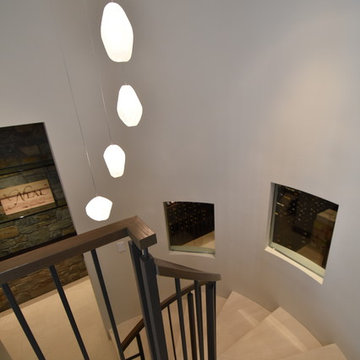
This gorgeous glass front wine cellar was built in a downstairs basement area within this Manhattan Beach, Los Angeles home overlooking the Pacific Ocean. Contemporary Modern architecture with a mix of rustic features line this Los Angeles Home - with this stunning glass wine room riding those same lines. Stone layered walls with dual paned glass windows and front make for a real stunning showpiece of a wine cellar from the outside looking in.
Wine Cellar Design and Wine Cellar Installation come naturally to the Wine Cellar Builders at Vintage Cellars. Wine Rooms consistently include more glass as a design feature in recent years, and this masterpiece is no exception in showing off these magnificient wines on display.
Unique Design features within this Glass wine room include dual waterfall displays, LED lit high reveal display rows, floor to ceiling Horizontal full reveal display, and matching stained ceiling beams.
Modern Wine Cellars incorporating glass should utilize dual paned glass to minimize heat loss. Glass, especially single pane, is not a great insulator and can cause wine cellars to lose cooling ability and force cooling units to run more regularly.
Master Wine Cellar Builders at Vintage Cellars specialize in wine rooms, wine display, wine racking, wine cellar cooling, wine closets, everything else wine cellar related. We do all applications of wine cellars, wine rooms, wine closets in areas spanning San Diego, Los Angeles, Orange County, San Francisco, and Nationwide. Vintage Cellars designs and installs wine cellars in various styles ranging from contemporary and modern to rustic, shabby chic, and classic.
Vintage Cellars has built gorgeous custom wine cellars and wine storage rooms across the United States and World for over 25 years. We are your go-to business for anything wine cellar and wine storage related! Whether you're interested in a wine closet, wine racking, custom wine racks, a custom wine cellar door, or a cooling system for your existing space, Vintage Cellars has you covered!
We carry all kinds of wine cellar cooling and refrigeration systems, incuding: Breezaire, CellarCool, WhisperKool, Wine Guardian, CellarPro and Commercial systems.
We also carry many types of Wine Refrigerators, Wine Cabinets, and wine racking types, including La Cache, Marvel, N'Finity, Transtherm, Vinotheque, Vintage Series, Credenza, Walk in wine rooms, Climadiff, Riedel, Fontenay, and VintageView.
Vintage Cellars also does work in many styles, including Contemporary and Modern, Rustic, Farmhouse, Traditional, Craftsman, Industrial, Mediterranean, Mid-Century, Industrial and Eclectic.
Some locations we cover often include: San Diego, Rancho Santa Fe, Corona Del Mar, Del Mar, La Jolla, Newport Beach, Newport Coast, Huntington Beach, Del Mar, Solana Beach, Carlsbad, Orange County, Beverly Hills, Malibu, Pacific Palisades, Santa Monica, Bel Air, Los Angeles, Encinitas, Cardiff, Coronado, Manhattan Beach, Palos Verdes, San Marino, Ladera Heights, Santa Monica, Brentwood, Westwood, Hancock Park, Laguna Beach, Crystal Cove, Laguna Niguel, Torrey Pines, Thousand Oaks, Coto De Caza, Coronado Island, San Francisco, Danville, Walnut Creek, Marin, Tiburon, Hillsborough, Berkeley, Oakland, Napa, Sonoma, Agoura Hills, Hollywood Hills, Laurel Canyon, Sausalito, Mill Valley, San Rafael, Piedmont, Paso Robles, Carmel, Pebble Beach
Contact Vintage Cellars today with any of your Wine Cellar needs!
(800) 876-8789
Vintage Cellars
904 Rancheros Drive
San Marcos, California 92069
(800) 876-8789
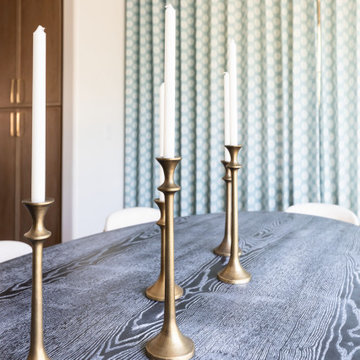 Living with Lolo
Dining Room in Trailside View | Refined Transitional Home in Scottsdale, AZ |
Room Type: Whole Home Remodel and Furnishings |
Project Name: Trailside View Residence |
Key Feature: A full home remodel and furnishings project anchored by white oak cabinetry and countertops, where the clients gave Living with Lolo real creative freedom to play with bold fabrics, wallpapers, and drapery that most homeowners would talk themselves out of.
Challenge: Transitional design can play it safe by default, neutral palette, inoffensive finishes, nothing that makes you catch your breath. The remodel needed a strong foundation that felt refined and timeless, but the clients wanted more than that. They wanted a home with personality, and the challenge was channeling that creative openness into something cohesive rather than chaotic.
Solution: Living with Lolo used white oak cabinetry and countertops to ground the remodel in warmth and quiet sophistication, then let the soft goods carry the personality. Bold fabric choices, expressive wallpapers, and thoughtful drapery gave each room its own moment without losing the thread that connected the whole home. Because the remodel and furnishings were managed together under one roof, the bolder design choices landed the way they were intended to rather than feeling like afterthoughts layered onto a finished renovation.
Materials: White oak cabinetry, white oak countertops, curated wallpapers, bold upholstery fabrics, custom drapery, and layered accessories sourced through Living with Lolo's trade relationships.
Budget: $250,000 to $550,000 |
Timeline: Approximately 5 to 9 months from design through completion.

Sponsored
Sunbury, OH

J.Holderby - Renovations
Franklin County's Leading General Contractors - 2X Best of Houzz!
 TVL Creative Ltd.
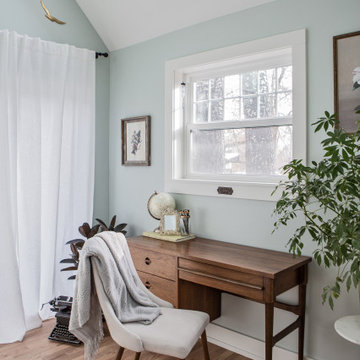
Our client’s charming cottage was no longer meeting the needs of their family. We needed to give them more space but not lose the quaint characteristics that make this little historic home so unique. So we didn’t go up, and we didn’t go wide, instead we took this master suite addition straight out into the backyard and maintained 100% of the original historic façade.
Master Suite
This master suite is truly a private retreat. We were able to create a variety of zones in this suite to allow room for a good night’s sleep, reading by a roaring fire, or catching up on correspondence. The fireplace became the real focal point in this suite. Wrapped in herringbone whitewashed wood planks and accented with a dark stone hearth and wood mantle, we can’t take our eyes off this beauty. With its own private deck and access to the backyard, there is really no reason to ever leave this little sanctuary.
Master Bathroom
The master bathroom meets all the homeowner’s modern needs but has plenty of cozy accents that make it feel right at home in the rest of the space. A natural wood vanity with a mixture of brass and bronze metals gives us the right amount of warmth, and contrasts beautifully with the off-white floor tile and its vintage hex shape. Now the shower is where we had a little fun, we introduced the soft matte blue/green tile with satin brass accents, and solid quartz floor (do you see those veins?!). And the commode room is where we had a lot fun, the leopard print wallpaper gives us all lux vibes (rawr!) and pairs just perfectly with the hex floor tile and vintage door hardware.
Hall Bathroom
We wanted the hall bathroom to drip with vintage charm as well but opted to play with a simpler color palette in this space. We utilized black and white tile with fun patterns (like the little boarder on the floor) and kept this room feeling crisp and bright.
 InnovationLand
This Houston outdoor kitchen and entertaining area offers a modern take on Mediterranean style.
Designed and built by Outdoor Homescapes of Houston, this fully loaded family and entertaining space echoes the stucco, travertine tile patio and Mediterranean style of the existing home while exuding a more modern, transitional style.
“This was a high-profile client – both VPs of different oil and gas companies who entertain affluent guests on a regular basis – so they wanted to make sure they had high-end appliances and all the latest amenities they could order,” says Lisha Maxey, senior designer for Outdoor Homescapes and owner of LGH Design Services in Houston. “They also have two kids, ages 7 and 10, and wanted a family gathering space that better accompanied their new, luxurious pool.”
What really sets apart this outside kitchen design idea, however, is the way the elements are used throughout the space.
“Usually, outdoor kitchen designs for a backyard are grouped into one island or cabinet,” explains Outdoor Homescapes of Houston owner Wayne Franks. “But here, the patio, roof and fireplace were all in place, separated by stucco columns, and the outdoor kitchen elements had to work around them.”
A 14-foot-long cooking island houses a built-in Fire Magic grill with a Magic View Window (allows the chef to check on food without lifting the lid and losing valuable heat). The island, the countertop of which is "Carnaval" granite from Lackstone, also features a Fire Magic power burner, warming drawer and trash drawer. On one side of the fireplace, forming an “L” with the cooking island, sits a built-in Primo ceramic grill.
On the other side of the fireplace is a 3-foot-long cabinet housing a bar with a wine cooler, ice maker and upper cabinet. And finally, just outside the patio door is a 7-foot-long cabinet with a modern Kohler sink with a high-arc Moen faucet (sink and faucet from Faucets Direct), a trash drawer and another upper cabinet.
Outdoor Homescapes of Houston, by the way, outfitted both cabinets with glass inserts, custom pulls and three-way sensor lighting.
“At the beginning, this was basically a blank space with a fireplace in the middle,” says Maxey. So Outdoor Homescapes upgraded the fireplace with Austin Stack Stone in white (No. 401) from Colorstonescreenshot vickers mosaic tile rectangle. "The stone added that pop,” notes Maxey.
The fireplace’s espresso-colored, distressed wood mantel (from Mantels.com) and upper wood cabinets were both stained with the Minwax color Jacobean. The ceiling fans were also updated with ones featuring similarly espresso-colored, wooden fan blades, to match.
The table in the middle - a cast-iron, Mediterranean style gem with hand-forged scrollwork designs from Patio 1 in Houston – seats 10.
“We wanted this kind of Mediterranean feel,” says Maxey. “We wanted rustic, but the appliance package was so new, with all its stainless steel, so we kept a the cabinets and the columns stucco instead of stone for a more clean, modern look and then did the custom tile backsplash and mosaic in more of a rustic, Mediterranean look."
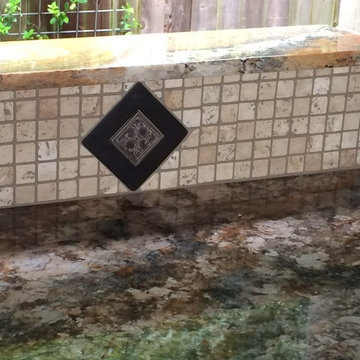
The backsplash is a 1-inch travertine tile background with 4-inch square metallic insets, both from Floor & Decor. The tile for the 18-by-24-inch rectangle mosaic came from Great Britain Tile Co. and included a Dianno Reale tumbled border and background. The bronze, diamond-shaped insets are tumbled Dark Emperdor tile and the scrolls are tumbled Noce tile.
The client, who admits they have high standards, was more than pleased with the project – especially browsing through Outdoor Homescapes’ vast library of patio kitchen design ideas, the 3D virtual video tour that let them preview the project from every angle before construction. They also liked the personalized design consultation.
"OH provides a very neat service where one of their designers will either shop/buy for you or shop with you for the more detailed pieces that will finish your home," reads the client's review on Houzz. "This was a very positive, personalized feature ... Lisha helped narrow down an enormous marketplace of materials and finishes to a few we could choose from."
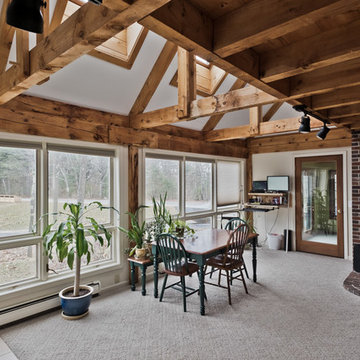 Mottram Architecture
Timber frame homes offer unique challenges during a remodel. What often makes them beautiful and attractive to most homeowners, also makes them challenging for space requirements.
Context: The lovely couple that owned this home were struggling with some interesting floor plan challenges that just didn't work for their family. The loved the beautiful timbers and woodwork of their home, but the dramatically sloping ceilings on the second floor, particularly in the bathroom, just didn't work for this 1 1/2 bath home. Needing to use the skylight to approach the toilet was a less then ideal scenario. Although the bathroom footprint was more then adequate, the sloped ceiling only made half of the space useable. Check out the Before/After post on our blog to see the photos of the house pre-renovation. As much as they loved all the wood features in their home, another challenge they had was light. The wood ceiling made everything inside the house darker, even with a fantastic array of south facing windows, there were spaces in the home that felt dark and small. When they contacted us they wanted to know how could they make their brighter and more inviting, were there solutions to the 2nd floor sloped ceiling issues, and if they were going to do all of this work, how could they make their home more comfortable and efficient. A nagging water leak in the upstairs bathroom spurred them into action and here is how we solved their dilemma.
Conclusion: First, we added a little dormer to the rear of the house so we could get full headroom in nearly all of the upstairs bathroom! Then we decided to extend that dormer one more timber bay over to create a walk in closet with natural light and plenty of space. Since we were contemplating energy efficiency, we resolved a nagging issue that is present in a lot of timber frame construction, air tightness. Commonly found in timber frame construction, fiberglass insulation is installed in the rafter bays and board ceilings are installed over top. Unfortunately, board ceilings are anything but air tight, and fiberglass insulation needs to be in an airtight cavity for maximum effectiveness. So we were able to solve two issues at the same time for this homeowner. We removed the board ceiling and fiberglass insulation, we dense packed the rafter bays with cellulose insulation, and installed sheetrock in place of the boards. The boards were salvaged for re-use by the homeowner, and the space and light quality was dramatically improved. Some may think that losing the board ceiling took something away from the space, but what you'll see in the pictures is that it highly accentuates the heavy timbers and really makes them stand out in a beautiful way. Now with this added airtightness, better insulation, and brighter space, the homeowner hardly runs their wood stove, and it's so quiet in the space, an added bonus from changing the insulation. It became necessary to also add a sheetrock ceiling to the living room to hide the plumbing from the new bathroom layout above. Changing this ceiling gave the homeowner some real quality lighting that was lacking in the living room before. The brighter ceiling and new lighting layout completely transforms the living room into a space you want to hang out, even though the layout didn't change at all. When the homeowner saw the finished spaces she said "I can't believe this is my house, I want to live in this house"
Energy Efficiency: I touched a little on the efficiency above, but like all projects done with Mottram Architecture, we always want to leave you with a little extra. Timber frame construction with board ceilings and fiberglass insulation are notoriously leaky! If you want to know what we think about fiberglass insulation, check our our blog post on Why Fiberglass Insulation Sucks. By installing cellulose insulation and covering it with sheetrock we were able to greatly reduce the heat flowing out of this home. It not only improves cashflow it improves the comfort level in the space. Who wants to sit in their living room and feel a draft? Let us remind you, we are not saying cellulose insulation is an air barrier, we use the sheetrock to help with that, but it does significantly reduce the air flow over fiberglass insulation. And when we reduce the airflow, we reduce the heat flow. And when we reduce the heat flow, we reduce the need to re-heat that drafty air from outside. When it comes to energy efficiency the first and best place to start is air infiltration. We greatly reduced the air infiltration with the new insulation, but we also added a hat and warm boots. What I mean by that is, we improved the insulation in the roof, and we installed insulation in the basement. Maybe it's a silly analogy, but when you think about keeping warm, we always start with the hat and boots! With sustainability in mind, the next project will be to add a deck to the front of this house with rain catchment barrels from the metal roof. They are planning to plant a garden in the spring and the rain catchment system will help to irrigate the new garden.
Builder: East Shore Builders
Photographer: Michael Eric Berube
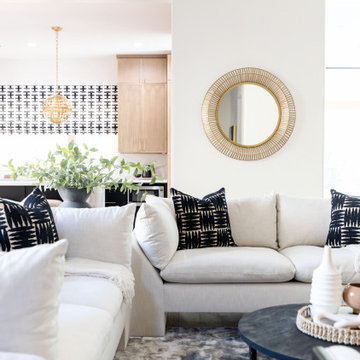 Living with Lolo
Living Room in Trailside View | Refined Transitional Home in Scottsdale, AZ |
Room Type: Whole Home Remodel and Furnishings |
Project Name: Trailside View Residence |
Key Feature: A full home remodel and furnishings project anchored by white oak cabinetry and countertops, where the clients gave Living with Lolo real creative freedom to play with bold fabrics, wallpapers, and drapery that most homeowners would talk themselves out of.
Challenge: Transitional design can play it safe by default, neutral palette, inoffensive finishes, nothing that makes you catch your breath. The remodel needed a strong foundation that felt refined and timeless, but the clients wanted more than that. They wanted a home with personality, and the challenge was channeling that creative openness into something cohesive rather than chaotic.
Solution: Living with Lolo used white oak cabinetry and countertops to ground the remodel in warmth and quiet sophistication, then let the soft goods carry the personality. Bold fabric choices, expressive wallpapers, and thoughtful drapery gave each room its own moment without losing the thread that connected the whole home. Because the remodel and furnishings were managed together under one roof, the bolder design choices landed the way they were intended to rather than feeling like afterthoughts layered onto a finished renovation.
Materials: White oak cabinetry, white oak countertops, curated wallpapers, bold upholstery fabrics, custom drapery, and layered accessories sourced through Living with Lolo's trade relationships.
Budget: $250,000 to $550,000 |
Timeline: Approximately 5 to 9 months from design through completion.
Sponsored
Sunbury, OH
J.Holderby - Renovations
Franklin County's Leading General Contractors - 2X Best of Houzz!
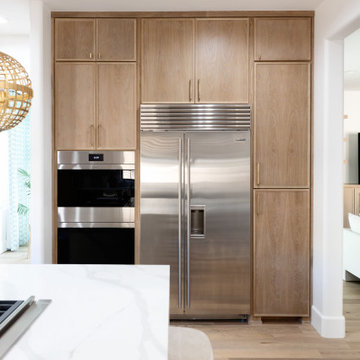 Living with Lolo
Kitchen in Trailside View | Refined Transitional Home in Scottsdale, AZ |
Room Type: Whole Home Remodel and Furnishings |
Project Name: Trailside View Residence |
Key Feature: A full home remodel and furnishings project anchored by white oak cabinetry and countertops, where the clients gave Living with Lolo real creative freedom to play with bold fabrics, wallpapers, and drapery that most homeowners would talk themselves out of.
Challenge: Transitional design can play it safe by default, neutral palette, inoffensive finishes, nothing that makes you catch your breath. The remodel needed a strong foundation that felt refined and timeless, but the clients wanted more than that. They wanted a home with personality, and the challenge was channeling that creative openness into something cohesive rather than chaotic.
Solution: Living with Lolo used white oak cabinetry and countertops to ground the remodel in warmth and quiet sophistication, then let the soft goods carry the personality. Bold fabric choices, expressive wallpapers, and thoughtful drapery gave each room its own moment without losing the thread that connected the whole home. Because the remodel and furnishings were managed together under one roof, the bolder design choices landed the way they were intended to rather than feeling like afterthoughts layered onto a finished renovation.
Materials: White oak cabinetry, white oak countertops, curated wallpapers, bold upholstery fabrics, custom drapery, and layered accessories sourced through Living with Lolo's trade relationships.
Budget: $250,000 to $550,000 |
Timeline: Approximately 5 to 9 months from design through completion.
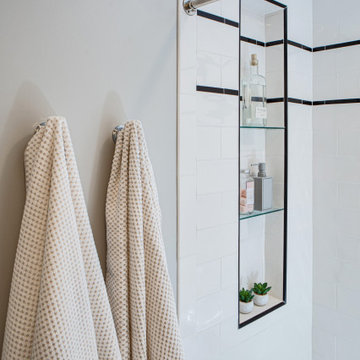 TVL Creative Ltd.
Our client’s charming cottage was no longer meeting the needs of their family. We needed to give them more space but not lose the quaint characteristics that make this little historic home so unique. So we didn’t go up, and we didn’t go wide, instead we took this master suite addition straight out into the backyard and maintained 100% of the original historic façade.
Master Suite
This master suite is truly a private retreat. We were able to create a variety of zones in this suite to allow room for a good night’s sleep, reading by a roaring fire, or catching up on correspondence. The fireplace became the real focal point in this suite. Wrapped in herringbone whitewashed wood planks and accented with a dark stone hearth and wood mantle, we can’t take our eyes off this beauty. With its own private deck and access to the backyard, there is really no reason to ever leave this little sanctuary.
Master Bathroom
The master bathroom meets all the homeowner’s modern needs but has plenty of cozy accents that make it feel right at home in the rest of the space. A natural wood vanity with a mixture of brass and bronze metals gives us the right amount of warmth, and contrasts beautifully with the off-white floor tile and its vintage hex shape. Now the shower is where we had a little fun, we introduced the soft matte blue/green tile with satin brass accents, and solid quartz floor (do you see those veins?!). And the commode room is where we had a lot fun, the leopard print wallpaper gives us all lux vibes (rawr!) and pairs just perfectly with the hex floor tile and vintage door hardware.
Hall Bathroom
We wanted the hall bathroom to drip with vintage charm as well but opted to play with a simpler color palette in this space. We utilized black and white tile with fun patterns (like the little boarder on the floor) and kept this room feeling crisp and bright.
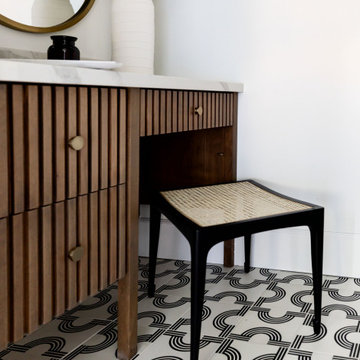 Living with Lolo
Bathroom in Trailside View | Refined Transitional Home in Scottsdale, AZ |
Room Type: Whole Home Remodel and Furnishings |
Project Name: Trailside View Residence |
Key Feature: A full home remodel and furnishings project anchored by white oak cabinetry and countertops, where the clients gave Living with Lolo real creative freedom to play with bold fabrics, wallpapers, and drapery that most homeowners would talk themselves out of.
Challenge: Transitional design can play it safe by default, neutral palette, inoffensive finishes, nothing that makes you catch your breath. The remodel needed a strong foundation that felt refined and timeless, but the clients wanted more than that. They wanted a home with personality, and the challenge was channeling that creative openness into something cohesive rather than chaotic.
Solution: Living with Lolo used white oak cabinetry and countertops to ground the remodel in warmth and quiet sophistication, then let the soft goods carry the personality. Bold fabric choices, expressive wallpapers, and thoughtful drapery gave each room its own moment without losing the thread that connected the whole home. Because the remodel and furnishings were managed together under one roof, the bolder design choices landed the way they were intended to rather than feeling like afterthoughts layered onto a finished renovation.
Materials: White oak cabinetry, white oak countertops, curated wallpapers, bold upholstery fabrics, custom drapery, and layered accessories sourced through Living with Lolo's trade relationships.
Budget: $250,000 to $550,000 |
Timeline: Approximately 5 to 9 months from design through completion.
10