
Search results for "Maintenance schedule" in Home Design Ideas
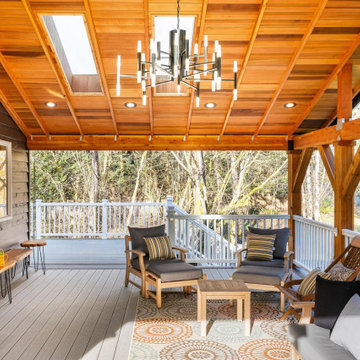
 M3Decks & Outdoor Living
Woodinville WA Phased Farmhouse Transformation Project
Project Overview
In Woodinville, WA, our team at M3Decks & Outdoor Living executed a multi-phase, three-year transformation of a 1970s woody walk-up home, converting it into a stunning farmhouse-style retreat. This project, tailored to the client’s vision, showcases our expertise in custom deck construction, structural enhancements, and outdoor living solutions, with a focus on quality and timeless design.
Project Phases
Phase 1: Deck and Entry Deck (Year 1)
Scope: Designed and constructed a composite deck using premium TimberTech materials, paired with a welcoming entry deck to enhance curb appeal. The decks were built with Fortress Steel Framing for durability, aligning with the farmhouse aesthetic through clean lines and rustic charm.
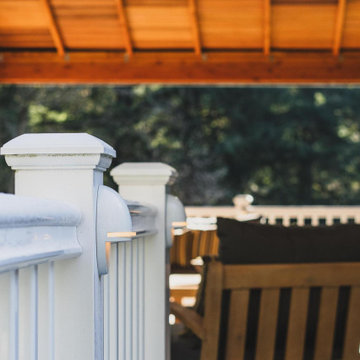
Features: Incorporated a multi-level layout to maximize usable space, with decorative railings and a drink rail cap for functionality and style.
Outcome: The new decks provided a seamless indoor-outdoor flow, transforming the home’s exterior into a functional and inviting space.
Phase 2: Roof Extension and DrySpace Installation (Year 2)
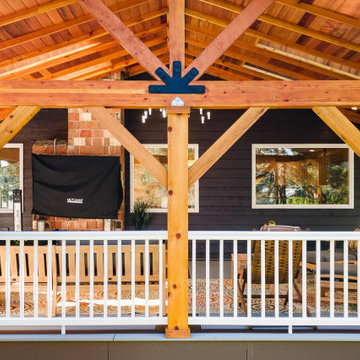
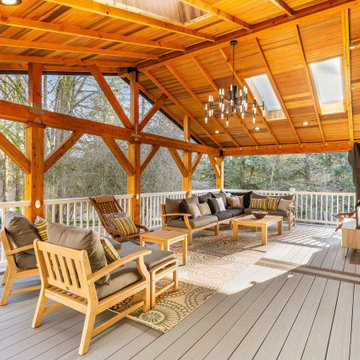
Scope: Extended the roof over the second-story deck and entryway to create a covered outdoor living area. Installed TimberTech DrySpace under the deck to create a dry, usable space below, ideal for a future hot tub.
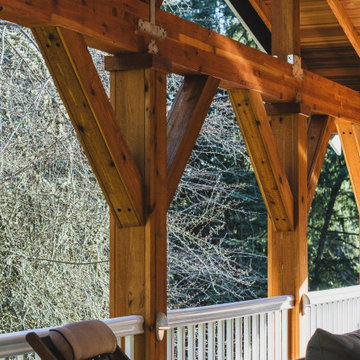
Design Elements: The roof extension featured farmhouse-inspired gabled roofing with exposed beams, complementing the home’s updated aesthetic. The DrySpace system ensured weather protection for the under-deck area.
Outcome: The covered deck became a year-round outdoor oasis, while the DrySpace addition increased the home’s functional space, adding value and versatility.
Phase 3: Hardscaping (Planned for Year 3)
Scope: Scheduled to return for the final phase, which will focus on hardscaping to complete the outdoor transformation. Plans include a stamped concrete patio, planter boxes with Pacific Northwest-native plants, and a fire pit to enhance the farmhouse vibe.
Goals: Create a cohesive outdoor environment that integrates with the existing deck and roof structures, prioritizing biophilic design principles for a natural, inviting space.
Anticipated Outcome: The hardscaping will finalize the property’s evolution into a luxurious, functional outdoor retreat, perfect for entertaining and relaxation.
Key Features
Farmhouse Aesthetic: Rustic yet modern design with TimberTech composite decking, exposed beam roofing, and farmhouse-inspired detailing.
TimberTech DrySpace: Innovative under-deck system to ensure a dry, usable space for future additions like a hot tub.
Durable Materials: Fortress Steel Framing and TimberTech products for low-maintenance, long-lasting results.
Phased Approach: Flexible, client-focused construction timeline to accommodate budget and evolving needs.
Outcome
This phased project transformed a dated 1970s walk-up into a modern farmhouse masterpiece, significantly enhancing the home’s aesthetic and functional value. The deck and roof extensions have already elevated the client’s outdoor living experience, and the upcoming hardscaping phase will complete the vision of a cohesive, luxurious backyard retreat. The project exemplifies our commitment to quality craftsmanship and client satisfaction.
Location
Woodinville, WA
Project Type
Residential Phased Design-Build
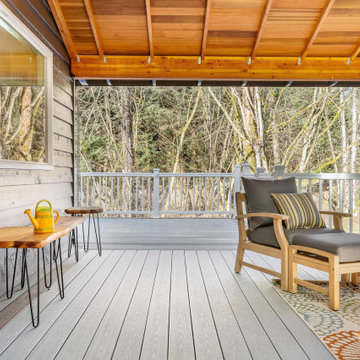 M3Decks & Outdoor Living
Woodinville WA Phased Farmhouse Transformation Project
Project Overview
In Woodinville, WA, our team at M3Decks & Outdoor Living executed a multi-phase, three-year transformation of a 1970s woody walk-up home, converting it into a stunning farmhouse-style retreat. This project, tailored to the client’s vision, showcases our expertise in custom deck construction, structural enhancements, and outdoor living solutions, with a focus on quality and timeless design.
Project Phases
Phase 1: Deck and Entry Deck (Year 1)
Scope: Designed and constructed a composite deck using premium TimberTech materials, paired with a welcoming entry deck to enhance curb appeal. The decks were built with Fortress Steel Framing for durability, aligning with the farmhouse aesthetic through clean lines and rustic charm.
Features: Incorporated a multi-level layout to maximize usable space, with decorative railings and a drink rail cap for functionality and style.
Outcome: The new decks provided a seamless indoor-outdoor flow, transforming the home’s exterior into a functional and inviting space.
Phase 2: Roof Extension and DrySpace Installation (Year 2)
Scope: Extended the roof over the second-story deck and entryway to create a covered outdoor living area. Installed TimberTech DrySpace under the deck to create a dry, usable space below, ideal for a future hot tub.
Design Elements: The roof extension featured farmhouse-inspired gabled roofing with exposed beams, complementing the home’s updated aesthetic. The DrySpace system ensured weather protection for the under-deck area.
Outcome: The covered deck became a year-round outdoor oasis, while the DrySpace addition increased the home’s functional space, adding value and versatility.
Phase 3: Hardscaping (Planned for Year 3)
Scope: Scheduled to return for the final phase, which will focus on hardscaping to complete the outdoor transformation. Plans include a stamped concrete patio, planter boxes with Pacific Northwest-native plants, and a fire pit to enhance the farmhouse vibe.
Goals: Create a cohesive outdoor environment that integrates with the existing deck and roof structures, prioritizing biophilic design principles for a natural, inviting space.
Anticipated Outcome: The hardscaping will finalize the property’s evolution into a luxurious, functional outdoor retreat, perfect for entertaining and relaxation.
Key Features
Farmhouse Aesthetic: Rustic yet modern design with TimberTech composite decking, exposed beam roofing, and farmhouse-inspired detailing.
TimberTech DrySpace: Innovative under-deck system to ensure a dry, usable space for future additions like a hot tub.
Durable Materials: Fortress Steel Framing and TimberTech products for low-maintenance, long-lasting results.
Phased Approach: Flexible, client-focused construction timeline to accommodate budget and evolving needs.
Outcome
This phased project transformed a dated 1970s walk-up into a modern farmhouse masterpiece, significantly enhancing the home’s aesthetic and functional value. The deck and roof extensions have already elevated the client’s outdoor living experience, and the upcoming hardscaping phase will complete the vision of a cohesive, luxurious backyard retreat. The project exemplifies our commitment to quality craftsmanship and client satisfaction.
Location
Woodinville, WA
Project Type
Residential Phased Design-Build
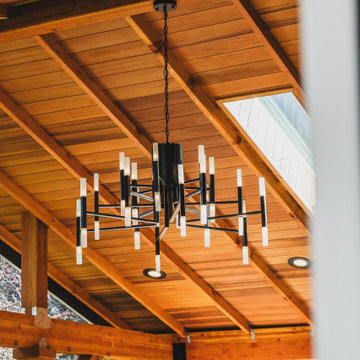 M3Decks & Outdoor Living
Woodinville WA Phased Farmhouse Transformation Project
Project Overview
In Woodinville, WA, our team at M3Decks & Outdoor Living executed a multi-phase, three-year transformation of a 1970s woody walk-up home, converting it into a stunning farmhouse-style retreat. This project, tailored to the client’s vision, showcases our expertise in custom deck construction, structural enhancements, and outdoor living solutions, with a focus on quality and timeless design.
Project Phases
Phase 1: Deck and Entry Deck (Year 1)
Scope: Designed and constructed a composite deck using premium TimberTech materials, paired with a welcoming entry deck to enhance curb appeal. The decks were built with Fortress Steel Framing for durability, aligning with the farmhouse aesthetic through clean lines and rustic charm.
Features: Incorporated a multi-level layout to maximize usable space, with decorative railings and a drink rail cap for functionality and style.
Outcome: The new decks provided a seamless indoor-outdoor flow, transforming the home’s exterior into a functional and inviting space.
Phase 2: Roof Extension and DrySpace Installation (Year 2)
Scope: Extended the roof over the second-story deck and entryway to create a covered outdoor living area. Installed TimberTech DrySpace under the deck to create a dry, usable space below, ideal for a future hot tub.
Design Elements: The roof extension featured farmhouse-inspired gabled roofing with exposed beams, complementing the home’s updated aesthetic. The DrySpace system ensured weather protection for the under-deck area.
Outcome: The covered deck became a year-round outdoor oasis, while the DrySpace addition increased the home’s functional space, adding value and versatility.
Phase 3: Hardscaping (Planned for Year 3)
Scope: Scheduled to return for the final phase, which will focus on hardscaping to complete the outdoor transformation. Plans include a stamped concrete patio, planter boxes with Pacific Northwest-native plants, and a fire pit to enhance the farmhouse vibe.
Goals: Create a cohesive outdoor environment that integrates with the existing deck and roof structures, prioritizing biophilic design principles for a natural, inviting space.
Anticipated Outcome: The hardscaping will finalize the property’s evolution into a luxurious, functional outdoor retreat, perfect for entertaining and relaxation.
Key Features
Farmhouse Aesthetic: Rustic yet modern design with TimberTech composite decking, exposed beam roofing, and farmhouse-inspired detailing.
TimberTech DrySpace: Innovative under-deck system to ensure a dry, usable space for future additions like a hot tub.
Durable Materials: Fortress Steel Framing and TimberTech products for low-maintenance, long-lasting results.
Phased Approach: Flexible, client-focused construction timeline to accommodate budget and evolving needs.
Outcome
This phased project transformed a dated 1970s walk-up into a modern farmhouse masterpiece, significantly enhancing the home’s aesthetic and functional value. The deck and roof extensions have already elevated the client’s outdoor living experience, and the upcoming hardscaping phase will complete the vision of a cohesive, luxurious backyard retreat. The project exemplifies our commitment to quality craftsmanship and client satisfaction.
Location
Woodinville, WA
Project Type
Residential Phased Design-Build
Find the right local pro for your project
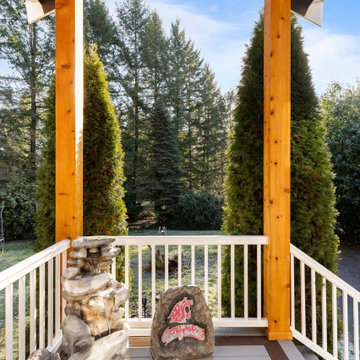 M3Decks & Outdoor Living
Woodinville WA Phased Farmhouse Transformation Project
Project Overview
In Woodinville, WA, our team at M3Decks & Outdoor Living executed a multi-phase, three-year transformation of a 1970s woody walk-up home, converting it into a stunning farmhouse-style retreat. This project, tailored to the client’s vision, showcases our expertise in custom deck construction, structural enhancements, and outdoor living solutions, with a focus on quality and timeless design.
Project Phases
Phase 1: Deck and Entry Deck (Year 1)
Scope: Designed and constructed a composite deck using premium TimberTech materials, paired with a welcoming entry deck to enhance curb appeal. The decks were built with Fortress Steel Framing for durability, aligning with the farmhouse aesthetic through clean lines and rustic charm.
Features: Incorporated a multi-level layout to maximize usable space, with decorative railings and a drink rail cap for functionality and style.
Outcome: The new decks provided a seamless indoor-outdoor flow, transforming the home’s exterior into a functional and inviting space.
Phase 2: Roof Extension and DrySpace Installation (Year 2)
Scope: Extended the roof over the second-story deck and entryway to create a covered outdoor living area. Installed TimberTech DrySpace under the deck to create a dry, usable space below, ideal for a future hot tub.
Design Elements: The roof extension featured farmhouse-inspired gabled roofing with exposed beams, complementing the home’s updated aesthetic. The DrySpace system ensured weather protection for the under-deck area.
Outcome: The covered deck became a year-round outdoor oasis, while the DrySpace addition increased the home’s functional space, adding value and versatility.
Phase 3: Hardscaping (Planned for Year 3)
Scope: Scheduled to return for the final phase, which will focus on hardscaping to complete the outdoor transformation. Plans include a stamped concrete patio, planter boxes with Pacific Northwest-native plants, and a fire pit to enhance the farmhouse vibe.
Goals: Create a cohesive outdoor environment that integrates with the existing deck and roof structures, prioritizing biophilic design principles for a natural, inviting space.
Anticipated Outcome: The hardscaping will finalize the property’s evolution into a luxurious, functional outdoor retreat, perfect for entertaining and relaxation.
Key Features
Farmhouse Aesthetic: Rustic yet modern design with TimberTech composite decking, exposed beam roofing, and farmhouse-inspired detailing.
TimberTech DrySpace: Innovative under-deck system to ensure a dry, usable space for future additions like a hot tub.
Durable Materials: Fortress Steel Framing and TimberTech products for low-maintenance, long-lasting results.
Phased Approach: Flexible, client-focused construction timeline to accommodate budget and evolving needs.
Outcome
This phased project transformed a dated 1970s walk-up into a modern farmhouse masterpiece, significantly enhancing the home’s aesthetic and functional value. The deck and roof extensions have already elevated the client’s outdoor living experience, and the upcoming hardscaping phase will complete the vision of a cohesive, luxurious backyard retreat. The project exemplifies our commitment to quality craftsmanship and client satisfaction.
Location
Woodinville, WA
Project Type
Residential Phased Design-Build
 M3Decks & Outdoor Living
Woodinville WA Phased Farmhouse Transformation Project
Project Overview
In Woodinville, WA, our team at M3Decks & Outdoor Living executed a multi-phase, three-year transformation of a 1970s woody walk-up home, converting it into a stunning farmhouse-style retreat. This project, tailored to the client’s vision, showcases our expertise in custom deck construction, structural enhancements, and outdoor living solutions, with a focus on quality and timeless design.
Project Phases
Phase 1: Deck and Entry Deck (Year 1)
Scope: Designed and constructed a composite deck using premium TimberTech materials, paired with a welcoming entry deck to enhance curb appeal. The decks were built with Fortress Steel Framing for durability, aligning with the farmhouse aesthetic through clean lines and rustic charm.
Features: Incorporated a multi-level layout to maximize usable space, with decorative railings and a drink rail cap for functionality and style.
Outcome: The new decks provided a seamless indoor-outdoor flow, transforming the home’s exterior into a functional and inviting space.
Phase 2: Roof Extension and DrySpace Installation (Year 2)
Scope: Extended the roof over the second-story deck and entryway to create a covered outdoor living area. Installed TimberTech DrySpace under the deck to create a dry, usable space below, ideal for a future hot tub.
Design Elements: The roof extension featured farmhouse-inspired gabled roofing with exposed beams, complementing the home’s updated aesthetic. The DrySpace system ensured weather protection for the under-deck area.
Outcome: The covered deck became a year-round outdoor oasis, while the DrySpace addition increased the home’s functional space, adding value and versatility.
Phase 3: Hardscaping (Planned for Year 3)
Scope: Scheduled to return for the final phase, which will focus on hardscaping to complete the outdoor transformation. Plans include a stamped concrete patio, planter boxes with Pacific Northwest-native plants, and a fire pit to enhance the farmhouse vibe.
Goals: Create a cohesive outdoor environment that integrates with the existing deck and roof structures, prioritizing biophilic design principles for a natural, inviting space.
Anticipated Outcome: The hardscaping will finalize the property’s evolution into a luxurious, functional outdoor retreat, perfect for entertaining and relaxation.
Key Features
Farmhouse Aesthetic: Rustic yet modern design with TimberTech composite decking, exposed beam roofing, and farmhouse-inspired detailing.
TimberTech DrySpace: Innovative under-deck system to ensure a dry, usable space for future additions like a hot tub.
Durable Materials: Fortress Steel Framing and TimberTech products for low-maintenance, long-lasting results.
Phased Approach: Flexible, client-focused construction timeline to accommodate budget and evolving needs.
Outcome
This phased project transformed a dated 1970s walk-up into a modern farmhouse masterpiece, significantly enhancing the home’s aesthetic and functional value. The deck and roof extensions have already elevated the client’s outdoor living experience, and the upcoming hardscaping phase will complete the vision of a cohesive, luxurious backyard retreat. The project exemplifies our commitment to quality craftsmanship and client satisfaction.
Location
Woodinville, WA
Project Type
Residential Phased Design-Build
 M3Decks & Outdoor Living
Woodinville WA Phased Farmhouse Transformation Project
Project Overview
In Woodinville, WA, our team at M3Decks & Outdoor Living executed a multi-phase, three-year transformation of a 1970s woody walk-up home, converting it into a stunning farmhouse-style retreat. This project, tailored to the client’s vision, showcases our expertise in custom deck construction, structural enhancements, and outdoor living solutions, with a focus on quality and timeless design.
Project Phases
Phase 1: Deck and Entry Deck (Year 1)
Scope: Designed and constructed a composite deck using premium TimberTech materials, paired with a welcoming entry deck to enhance curb appeal. The decks were built with Fortress Steel Framing for durability, aligning with the farmhouse aesthetic through clean lines and rustic charm.
Features: Incorporated a multi-level layout to maximize usable space, with decorative railings and a drink rail cap for functionality and style.
Outcome: The new decks provided a seamless indoor-outdoor flow, transforming the home’s exterior into a functional and inviting space.
Phase 2: Roof Extension and DrySpace Installation (Year 2)
Scope: Extended the roof over the second-story deck and entryway to create a covered outdoor living area. Installed TimberTech DrySpace under the deck to create a dry, usable space below, ideal for a future hot tub.
Design Elements: The roof extension featured farmhouse-inspired gabled roofing with exposed beams, complementing the home’s updated aesthetic. The DrySpace system ensured weather protection for the under-deck area.
Outcome: The covered deck became a year-round outdoor oasis, while the DrySpace addition increased the home’s functional space, adding value and versatility.
Phase 3: Hardscaping (Planned for Year 3)
Scope: Scheduled to return for the final phase, which will focus on hardscaping to complete the outdoor transformation. Plans include a stamped concrete patio, planter boxes with Pacific Northwest-native plants, and a fire pit to enhance the farmhouse vibe.
Goals: Create a cohesive outdoor environment that integrates with the existing deck and roof structures, prioritizing biophilic design principles for a natural, inviting space.
Anticipated Outcome: The hardscaping will finalize the property’s evolution into a luxurious, functional outdoor retreat, perfect for entertaining and relaxation.
Key Features
Farmhouse Aesthetic: Rustic yet modern design with TimberTech composite decking, exposed beam roofing, and farmhouse-inspired detailing.
TimberTech DrySpace: Innovative under-deck system to ensure a dry, usable space for future additions like a hot tub.
Durable Materials: Fortress Steel Framing and TimberTech products for low-maintenance, long-lasting results.
Phased Approach: Flexible, client-focused construction timeline to accommodate budget and evolving needs.
Outcome
This phased project transformed a dated 1970s walk-up into a modern farmhouse masterpiece, significantly enhancing the home’s aesthetic and functional value. The deck and roof extensions have already elevated the client’s outdoor living experience, and the upcoming hardscaping phase will complete the vision of a cohesive, luxurious backyard retreat. The project exemplifies our commitment to quality craftsmanship and client satisfaction.
Location
Woodinville, WA
Project Type
Residential Phased Design-Build
 M3Decks & Outdoor Living
Woodinville WA Phased Farmhouse Transformation Project
Project Overview
In Woodinville, WA, our team at M3Decks & Outdoor Living executed a multi-phase, three-year transformation of a 1970s woody walk-up home, converting it into a stunning farmhouse-style retreat. This project, tailored to the client’s vision, showcases our expertise in custom deck construction, structural enhancements, and outdoor living solutions, with a focus on quality and timeless design.
Project Phases
Phase 1: Deck and Entry Deck (Year 1)
Scope: Designed and constructed a composite deck using premium TimberTech materials, paired with a welcoming entry deck to enhance curb appeal. The decks were built with Fortress Steel Framing for durability, aligning with the farmhouse aesthetic through clean lines and rustic charm.
Features: Incorporated a multi-level layout to maximize usable space, with decorative railings and a drink rail cap for functionality and style.
Outcome: The new decks provided a seamless indoor-outdoor flow, transforming the home’s exterior into a functional and inviting space.
Phase 2: Roof Extension and DrySpace Installation (Year 2)
Scope: Extended the roof over the second-story deck and entryway to create a covered outdoor living area. Installed TimberTech DrySpace under the deck to create a dry, usable space below, ideal for a future hot tub.
Design Elements: The roof extension featured farmhouse-inspired gabled roofing with exposed beams, complementing the home’s updated aesthetic. The DrySpace system ensured weather protection for the under-deck area.
Outcome: The covered deck became a year-round outdoor oasis, while the DrySpace addition increased the home’s functional space, adding value and versatility.
Phase 3: Hardscaping (Planned for Year 3)
Scope: Scheduled to return for the final phase, which will focus on hardscaping to complete the outdoor transformation. Plans include a stamped concrete patio, planter boxes with Pacific Northwest-native plants, and a fire pit to enhance the farmhouse vibe.
Goals: Create a cohesive outdoor environment that integrates with the existing deck and roof structures, prioritizing biophilic design principles for a natural, inviting space.
Anticipated Outcome: The hardscaping will finalize the property’s evolution into a luxurious, functional outdoor retreat, perfect for entertaining and relaxation.
Key Features
Farmhouse Aesthetic: Rustic yet modern design with TimberTech composite decking, exposed beam roofing, and farmhouse-inspired detailing.
TimberTech DrySpace: Innovative under-deck system to ensure a dry, usable space for future additions like a hot tub.
Durable Materials: Fortress Steel Framing and TimberTech products for low-maintenance, long-lasting results.
Phased Approach: Flexible, client-focused construction timeline to accommodate budget and evolving needs.
Outcome
This phased project transformed a dated 1970s walk-up into a modern farmhouse masterpiece, significantly enhancing the home’s aesthetic and functional value. The deck and roof extensions have already elevated the client’s outdoor living experience, and the upcoming hardscaping phase will complete the vision of a cohesive, luxurious backyard retreat. The project exemplifies our commitment to quality craftsmanship and client satisfaction.
Location
Woodinville, WA
Project Type
Residential Phased Design-Build
Sponsored
Columbus, OH
Free consultation for landscape design!

Peabody Landscape Group
Columbus' Reliable Landscape Design & Contracting
 M3Decks & Outdoor Living
Woodinville WA Phased Farmhouse Transformation Project
Project Overview
In Woodinville, WA, our team at M3Decks & Outdoor Living executed a multi-phase, three-year transformation of a 1970s woody walk-up home, converting it into a stunning farmhouse-style retreat. This project, tailored to the client’s vision, showcases our expertise in custom deck construction, structural enhancements, and outdoor living solutions, with a focus on quality and timeless design.
Project Phases
Phase 1: Deck and Entry Deck (Year 1)
Scope: Designed and constructed a composite deck using premium TimberTech materials, paired with a welcoming entry deck to enhance curb appeal. The decks were built with Fortress Steel Framing for durability, aligning with the farmhouse aesthetic through clean lines and rustic charm.
Features: Incorporated a multi-level layout to maximize usable space, with decorative railings and a drink rail cap for functionality and style.
Outcome: The new decks provided a seamless indoor-outdoor flow, transforming the home’s exterior into a functional and inviting space.
Phase 2: Roof Extension and DrySpace Installation (Year 2)
Scope: Extended the roof over the second-story deck and entryway to create a covered outdoor living area. Installed TimberTech DrySpace under the deck to create a dry, usable space below, ideal for a future hot tub.
Design Elements: The roof extension featured farmhouse-inspired gabled roofing with exposed beams, complementing the home’s updated aesthetic. The DrySpace system ensured weather protection for the under-deck area.
Outcome: The covered deck became a year-round outdoor oasis, while the DrySpace addition increased the home’s functional space, adding value and versatility.
Phase 3: Hardscaping (Planned for Year 3)
Scope: Scheduled to return for the final phase, which will focus on hardscaping to complete the outdoor transformation. Plans include a stamped concrete patio, planter boxes with Pacific Northwest-native plants, and a fire pit to enhance the farmhouse vibe.
Goals: Create a cohesive outdoor environment that integrates with the existing deck and roof structures, prioritizing biophilic design principles for a natural, inviting space.
Anticipated Outcome: The hardscaping will finalize the property’s evolution into a luxurious, functional outdoor retreat, perfect for entertaining and relaxation.
Key Features
Farmhouse Aesthetic: Rustic yet modern design with TimberTech composite decking, exposed beam roofing, and farmhouse-inspired detailing.
TimberTech DrySpace: Innovative under-deck system to ensure a dry, usable space for future additions like a hot tub.
Durable Materials: Fortress Steel Framing and TimberTech products for low-maintenance, long-lasting results.
Phased Approach: Flexible, client-focused construction timeline to accommodate budget and evolving needs.
Outcome
This phased project transformed a dated 1970s walk-up into a modern farmhouse masterpiece, significantly enhancing the home’s aesthetic and functional value. The deck and roof extensions have already elevated the client’s outdoor living experience, and the upcoming hardscaping phase will complete the vision of a cohesive, luxurious backyard retreat. The project exemplifies our commitment to quality craftsmanship and client satisfaction.
Location
Woodinville, WA
Project Type
Residential Phased Design-Build
 highland
Selling your home can be stressful, particularly if you’re short on time. Many homeowners in Springfield, OH find themselves in situations when the traditional real estate process is too slow, too expensive, or too uncertain. Repairs, showings, agent commissions, buyer financing delays and inspection issues can make a simple sale a long and frustrating experience.
That’s why more homeowners are looking for a faster and easier way to sell. If you need a quick home sale in Springfield, OH, Sell House Now Columbus offers a practical solution for people who want to sell their house fast for cash without the usual problems of listing on the market.
A Quicker Way to Sell Your Springfield, OH Home
The old way of selling takes weeks or months. First, you may need to clean, repair and stage the home. Then you have to wait for buyers, schedule showings, negotiate offers and hope the buyer’s loan gets approved. Even after you’ve accepted an offer, the deal can still fall apart due to inspection results, appraisal problems, or financing issues. This process may not be ideal for homeowners who need speed and certainty. Sell House Now Columbus offers cash for homes in Springfield and the surrounding Ohio areas so homeowners can avoid these delays. Don't have to wait for the perfect buyer; you can work directly with a local cash home buyer who understands your situation and can close on your timeline.
Why Homeowners Prefer to Sell Their Homes for Cash
There are a number of reasons why someone might need to sell fast. Some homeowners are going through foreclosure, divorce, relocation, inherited property, problem tenants, expensive repairs or just a house they don’t want to sit vacant. Other people don’t want to spend money fixing up a property before they sell it; A cash sale can be helpful because it eliminates many common roadblocks. You don't have to wait for bank financing. You do not need to prep your home for open houses. You don’t have to keep paying for repairs, utilities, taxes or maintenance while your home is sitting on the market. Sell House Now Columbus allows homeowners to sell their house as-is. This means that you don’t have to repair the roof, update the kitchen, repaint the walls, replace the flooring or clean out every room before closing. The company buys homes as they are, saving time and money.
Sell Your House As-Is Springfield, OH
One of the biggest advantages to working with a cash buyer is the ability to sell as-is. Many houses need work, and that work can cost a lot of money. A typical buyer may seek repair credits, price reductions, or major upgrades before closing. Sometimes lenders won’t finance a home with serious issues in its condition. Selling as-is provides a simpler path for homeowners. You can still ask for a cash offer whether the property has old plumbing, roof damage, outdated rooms, foundation concerns, fire damage, water damage, or years of deferred maintenance. This is particularly helpful for homeowners who have inherited a property or own a house they no longer live in. Rather than sinking thousands of dollars into a property you don’t want to hold on to, you can sell it directly and move on.
No Listing or Agent Commissions Hassles
When you list a house with a real estate agent, commissions and fees can eat into the amount you take home. You’ll also have to pay for repairs, cleaning, staging, photography, inspections, and closing costs. These costs can add up quickly. Selling it for cash makes the math easier. Sell House Now, Columbus lets homeowners bypass the traditional listing process. No open houses, no weekend showings, no need to keep the place spotless for buyers. Skip the uncertainty of waiting for offers and the stress of strangers walking through your home. Privacy is another important advantage for many sellers. A direct sale might be more discreet than putting a house on the open market.
How It Works
Sell House Now, Columbus makes it easy. First you talk about your house. Next the company reviews the property and puts together a fair cash offer. If the offer sounds good to you, you can choose a completion date to suit your needs. This simple process is helpful for home owners that need to make decisions quickly. There is no pressure of a traditional sale and you don’t have to accept an offer. The goal is to provide you a clear choice to determine what works best for you.
When a Quick Sale is Beneficial
Often a quick home sale in Springfield, OH can come in handy. If you are behind on your mortgage, selling quickly can help you avoid more financial stress. If you’re relocating for work, you probably won’t have months to wait for a buyer. If you are going through a divorce, a quick sale can help both parties move on. A direct cash sale can also be a win for landlords. If you’re tired of working around the tenants, the late rent, the damage, and the constant maintenance calls, selling the property may be a better option than continuing to manage it. Another popular reason people search for cash buyers is inherited homes. Many inherited properties require repairs, have multiple decision-makers or come with emotional stress. A fast cash sale can make the process easier and help families close on the property faster.
Go ahead confidently
Selling a home doesn’t have to be hard. If you want to avoid uncertainty, repairs, commissions and delays, working with a local cash home buyer is a smart move. Selling a House Is Easy With Sell House Now Columbus for homeowners Springfield, OH who want a faster, easier way to sell.
If your house is vacant, old, damaged, rented, inherited or you just don’t need it anymore, you can ask for a fair cash offer and choose the closing timeline that best suits you. Sell House Now Columbus is a convenient solution for homeowners who want speed, convenience, and peace of mind. Selling your house fast in Springfield, OH can be a great way to save time, avoid stress, and move on without the headache of the traditional real estate market.
A Quicker Way to Sell Your Springfield, OH Home
The old way of selling takes weeks or months. First, you may need to clean, repair and stage the home. Then you have to wait for buyers, schedule showings, negotiate offers and hope the buyer’s loan gets approved. Even after you’ve accepted an offer, the deal can still fall apart due to inspection results, appraisal problems, or financing issues. This process may not be ideal for homeowners who need speed and certainty. Sell House Now Columbus offers cash for homes in Springfield and the surrounding Ohio areas so homeowners can avoid these delays. Don't have to wait for the perfect buyer; you can work directly with a local cash home buyer who understands your situation and can close on your timeline.
Why Homeowners Prefer to Sell Their Homes for Cash
There are a number of reasons why someone might need to sell fast. Some homeowners are going through foreclosure, divorce, relocation, inherited property, problem tenants, expensive repairs or just a house they don’t want to sit vacant. Other people don’t want to spend money fixing up a property before they sell it; A cash sale can be helpful because it eliminates many common roadblocks. You don't have to wait for bank financing. You do not need to prep your home for open houses. You don’t have to keep paying for repairs, utilities, taxes or maintenance while your home is sitting on the market. Sell House Now Columbus allows homeowners to sell their house as-is. This means that you don’t have to repair the roof, update the kitchen, repaint the walls, replace the flooring or clean out every room before closing. The company buys homes as they are, saving time and money.
Sell Your House As-Is Springfield, OH
One of the biggest advantages to working with a cash buyer is the ability to sell as-is. Many houses need work, and that work can cost a lot of money. A typical buyer may seek repair credits, price reductions, or major upgrades before closing. Sometimes lenders won’t finance a home with serious issues in its condition. Selling as-is provides a simpler path for homeowners. You can still ask for a cash offer whether the property has old plumbing, roof damage, outdated rooms, foundation concerns, fire damage, water damage, or years of deferred maintenance. This is particularly helpful for homeowners who have inherited a property or own a house they no longer live in. Rather than sinking thousands of dollars into a property you don’t want to hold on to, you can sell it directly and move on.
No Listing or Agent Commissions Hassles
When you list a house with a real estate agent, commissions and fees can eat into the amount you take home. You’ll also have to pay for repairs, cleaning, staging, photography, inspections, and closing costs. These costs can add up quickly. Selling it for cash makes the math easier. Sell House Now, Columbus lets homeowners bypass the traditional listing process. No open houses, no weekend showings, no need to keep the place spotless for buyers. Skip the uncertainty of waiting for offers and the stress of strangers walking through your home. Privacy is another important advantage for many sellers. A direct sale might be more discreet than putting a house on the open market.
How It Works
Sell House Now, Columbus makes it easy. First you talk about your house. Next the company reviews the property and puts together a fair cash offer. If the offer sounds good to you, you can choose a completion date to suit your needs. This simple process is helpful for home owners that need to make decisions quickly. There is no pressure of a traditional sale and you don’t have to accept an offer. The goal is to provide you a clear choice to determine what works best for you.
When a Quick Sale is Beneficial
Often a quick home sale in Springfield, OH can come in handy. If you are behind on your mortgage, selling quickly can help you avoid more financial stress. If you’re relocating for work, you probably won’t have months to wait for a buyer. If you are going through a divorce, a quick sale can help both parties move on. A direct cash sale can also be a win for landlords. If you’re tired of working around the tenants, the late rent, the damage, and the constant maintenance calls, selling the property may be a better option than continuing to manage it. Another popular reason people search for cash buyers is inherited homes. Many inherited properties require repairs, have multiple decision-makers or come with emotional stress. A fast cash sale can make the process easier and help families close on the property faster.
Go ahead confidently
Selling a home doesn’t have to be hard. If you want to avoid uncertainty, repairs, commissions and delays, working with a local cash home buyer is a smart move. Selling a House Is Easy With Sell House Now Columbus for homeowners Springfield, OH who want a faster, easier way to sell.
If your house is vacant, old, damaged, rented, inherited or you just don’t need it anymore, you can ask for a fair cash offer and choose the closing timeline that best suits you. Sell House Now Columbus is a convenient solution for homeowners who want speed, convenience, and peace of mind. Selling your house fast in Springfield, OH can be a great way to save time, avoid stress, and move on without the headache of the traditional real estate market.

 RKD Architects, Inc
Gravity Shots
Example of a minimalist wooden floating open staircase design in Denver
Example of a minimalist wooden floating open staircase design in Denver
 Tile Doctor Ltd
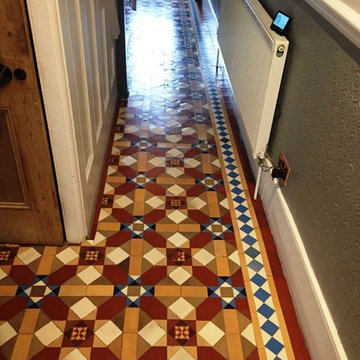
This detailed Victorian tiled hallway at a property in Camden was overdue some much-needed repair and maintenance. The owners of the property appreciated that original period features like this add a lot of value to a property and asked me to visit the property to quote for renovating it. The property was in a terrace of similar properties most of which appeared to have retained their Victorian character.
I inspected the floor and found there were a couple of loose, cracked, worn and broken tiles that needed to be replaced. In addition, the floor tiles needed a deep clean and then seal to bring back the wow factor. I was confident we could renovate the floor but at that point unsure if we would be able to find exact match replacements for the damaged tiles. Fortunately, Victorian tiles are still in demand and I knew of several companies I could check with so I was confident they could be found.
We discussed how long the work would take and assuming I could source the replacements agreed a price for the full restoration of the floor. After doing some research I managed to find suitable replacements with a company called Original Style and the work was scheduled for the following month.
Firstly, we prepared all areas with protective tapes to threshold edges and skirting.
This was followed by spaying the tiles with a strong dilution of Tile Doctor Remove & Go which is product designed to remove old sealers and coatings. After about ten minutes the tiles were scrubbed with black scrubbing pads and scrubbing brushes. Fresh water was used to rinse the floor and the slurry was extracted using a wet vacuum.
The floor was inspected and then a second clean carried out, this time using Tile Doctor Pro-Clean which is a Tile and Grout cleaning agent. The same process of application was used and after rinsing and extracting the dirt the tiles were given a steam clean. This ensured all the dirt was lifted out of the pores of the tile and the floor was now as clean as it possible could be.
The next step was the remove the loose and cracked tiles using the reclaimed tiles we had sourced earlier. Some cuts were necessary to get the replacements to match the originals but overall the plan worked. A quick drying adhesive was used to secure the tiles so we could apply the grout shortly after. The whole floor was then re-grouted and cleaned off to ensure a good match. The floor was left to dry off overnight, and you could already see it was now looking considerably improved.
Returning the next morning we checked the floor was dry using a moisture meter, this is important as to apply a sealer to damp tiles will lead to a patchy experience. All was well so we were ready to apply the sealer.
To start a single base coat of Tile Doctor Colour Grow sealer was applied to the floor and left to dry. This sealer is an impregnator that protects from within by occupying the pores in the clay tile improving colour in the process. This sealer does leave a matt finish however and the client wanted a subtle shine so one dry it was followed by four coats of Tile Doctor Seal & Go. The combination of the two sealers works really well to add long lasting protection to the tiles and provide the desired finish to the floor.
The floor was much improved, and the client was delighted. The detailed pattern and colours were now much more prominent, and the hallway looked much more inviting for both the owner and their guests. For the aftercare of Victorian tiles, I recommended the use of Tile Doctor Neutral Cleaner which is pH neutral and won’t prematurely erode the life of the sealer.
Nigel Voyce
North London Tile Doctor

 SS
Top Real Estate App Development Companies Delivering Smart PropTech Solutions
The real estate industry is experiencing a revolution in technology as there have been developments in the form of mobile applications, which have now become essential tools and prove to be an integral part for buyers and sellers as well as agents and developers in this industry. The application of technology in the form of virtual tours and property recommendations through artificial intelligence and other such technology has brought about a new way of doing real estate business. It has been found out through statistics that the PropTech industry will experience considerable growth in the next decade due to the increased use of smartphones, cloud computing, and artificial intelligence.
Why Real Estate Apps Are Transforming the PropTech Industry
The introduction of digital platforms has revolutionized the way people search for, assess, and buy properties. Modern real estate software ensures easy access to property listings, neighborhood information, mortgage calculators, virtual tours, and direct contact with real estate agents, thus cutting out many of the obstacles that were part of the purchasing process. Real Estate App Development allows companies to manage properties efficiently, automatically generate leads, effectively handle customers, and make informed decisions. The inclusion of artificial intelligence and digital transactions makes the experience of using these apps even more efficient.
List of Top Real Estate App Development Companies in the Global Market
1. Suffescom Solutions
Suffescom Solutions is a mobile app development company specializing in Real Estate App Development for startups, real estate agencies, property management firms, and enterprises. The company develops scalable, feature-rich applications that simplify property discovery, virtual tours, lead management, and secure digital transactions. By integrating advanced technologies such as AI, AR/VR, cloud computing, and location intelligence, Suffescom Solutions helps businesses build intuitive PropTech platforms that enhance customer engagement and operational efficiency. The company also focuses on customization, security, and post-launch support to ensure long-term business success.
Key Features
Custom real estate application development
AI-powered property recommendations
Property listing management
Interactive map integration
Virtual property tours
CRM integration
Secure payment gateway
Multi-platform development
Cloud-native architecture
Maintenance and support
2. RisingMax
RisingMax develops innovative digital solutions for businesses seeking advanced PropTech platforms. Its expertise in Real Estate App Development enables companies to launch scalable property applications equipped with intelligent search capabilities, real-time property updates, and secure communication tools. RisingMax combines modern UI/UX practices with cloud technologies to deliver applications that improve customer engagement and simplify property management.
Key Features
Cross-platform app development
AI-enabled property search
Property management dashboard
Cloud deployment
Push notifications
Digital payment integration
Analytics and reporting
API integration
Secure authentication
Ongoing technical support
3. Ascendix Technologies
Ascendix Technologies is known for developing enterprise-grade PropTech software for commercial and residential real estate businesses. The company focuses on building customized applications that streamline property management, brokerage operations, customer engagement, and business workflows. Its expertise includes CRM development, cloud solutions, and data analytics, enabling businesses to manage property portfolios more efficiently.
Key Features
Enterprise real estate solutions
CRM integration
Commercial property management
Cloud infrastructure
Advanced analytics
Workflow automation
Custom software development
Secure data management
API connectivity
Long-term support
4. WillowTree
WillowTree develops premium mobile applications across various industries, including real estate and digital commerce. The company creates user-centric property applications that emphasize intuitive navigation, personalized property recommendations, and engaging digital experiences. Its development approach combines robust engineering with modern design principles to build scalable PropTech platforms for growing businesses.
Key Features
Mobile-first development
Personalized user experience
Property search optimization
Cloud-native architecture
Interactive UI/UX
Analytics integration
Secure user authentication
Multi-device compatibility
Third-party integrations
Continuous optimization
5. Unico Connect
Unico Connect specializes in delivering customized digital products for startups and enterprises, including Real Estate App Development solutions. The company builds scalable applications that simplify property listings, communication, lead management, and customer engagement while integrating cloud technologies for improved business performance.
Key Features
Custom property applications
Cloud-based infrastructure
Real-time messaging
Lead management system
Property listing platform
API integration
Digital documentation
Performance analytics
Secure payment integration
Ongoing maintenance
6. Trango Tech
Trango Tech develops intelligent mobile solutions that help real estate businesses digitize property management and customer interactions. Its applications support advanced search functionality, location-based services, secure transactions, and AI-powered recommendations. The company focuses on scalable software architecture that supports long-term business growth and operational efficiency.
Key Features
Property marketplace development
AI-powered recommendations
Interactive map integration
GPS-enabled search
Digital document management
User analytics
Cross-platform applications
Secure backend systems
CRM connectivity
Cloud deployment
7. MindInventory
MindInventory is a software development company delivering digital transformation solutions across multiple industries, including real estate. Its Real Estate App Development services include modern property applications that combine intuitive interfaces with advanced technologies such as AI, IoT, and cloud computing. The company focuses on creating engaging user experiences while ensuring scalability, security, and seamless business operations.
Key Features
AI-enabled property applications
Cloud-native development
Property management tools
Interactive dashboards
IoT integration
User engagement features
Third-party API integration
Business intelligence reporting
Secure infrastructure
Continuous technical support
Essential Features Every Modern Real Estate App Should Include
Successful Real Estate App Development requires more than attractive property listings. Modern applications must provide seamless experiences for buyers, sellers, agents, and property managers while simplifying transactions and communication.
• User Registration and Profile Management
Allow buyers, sellers, agents, and administrators to create personalized accounts with secure authentication and profile customization.
• Advanced Property Search
Provide powerful filters based on location, property type, price range, amenities, size, and availability to improve property discovery.
• Interactive Maps
Integrate GPS-enabled maps that display nearby schools, hospitals, transportation hubs, restaurants, and neighborhood information.
• High-Quality Property Listings
Support multiple images, HD videos, floor plans, property specifications, and detailed descriptions for each listing.
• Virtual Tours
Enable immersive 360-degree property walkthroughs using AR/VR technology to improve buyer confidence before physical visits.
• AI-Powered Property Recommendations
Use artificial intelligence to recommend properties based on user preferences, browsing behavior, and previous searches.
• Real-Time Chat and Messaging
Facilitate instant communication between buyers, sellers, and agents for faster inquiry resolution.
• Mortgage Calculator
Help users estimate monthly payments, loan eligibility, and financing options directly within the application.
• Appointment Scheduling
Allow users to schedule property visits, virtual meetings, or consultations with agents through integrated calendars.
• Secure Digital Payments
Support booking fees, deposits, subscription payments, and service charges through encrypted payment gateways.
• Document Management
Store contracts, agreements, ownership documents, inspection reports, and legal paperwork securely within the application.
• Push Notifications
Notify users about new listings, price changes, scheduled visits, document approvals, and promotional offers.
• Admin Dashboard
Provide centralized control over users, listings, transactions, content moderation, analytics, and platform management.
• Analytics and Reporting
Offer detailed insights into customer behavior, listing performance, lead generation, conversions, and revenue growth.
• Strong Security
Implement encrypted communications, secure authentication, role-based access control, data privacy measures, and regulatory compliance.
Emerging Trends Shaping the Future of Real Estate App Development
The future of Real Estate App Development is being driven by intelligent technologies that improve decision-making, customer experiences, and operational efficiency throughout the property lifecycle.
Artificial intelligence is transforming property discovery by delivering personalized recommendations, predictive pricing models, and automated customer support. Machine learning algorithms analyze user preferences and market trends to recommend relevant properties while helping businesses generate qualified leads more effectively.
Augmented reality (AR) and virtual reality (VR) are becoming essential components of digital property experiences. Virtual property tours allow buyers to explore homes remotely, reducing travel time and accelerating purchasing decisions.
Another significant trend is IoT integration within smart properties. Connected devices enable users to monitor energy consumption, security systems, lighting, and climate control directly through mobile applications, enhancing property value and user convenience.
Finally, sustainability is becoming an important focus. Modern real estate platforms increasingly highlight green-certified buildings, energy-efficient homes, and environmentally friendly construction projects to meet changing buyer preferences.
Conclusion
The rapid evolution of the PropTech sector has made Real Estate App Development an essential investment for businesses aiming to deliver seamless, technology-driven property experiences. From AI-powered property recommendations and immersive virtual tours to secure digital transactions and cloud-based management systems, modern applications are transforming every stage of the real estate journey. Selecting an experienced development company with expertise in emerging technologies, scalable architecture, and user-centric design is crucial for building a competitive digital platform. As customer expectations continue to evolve, organizations that invest in innovative real estate applications will be better positioned to improve operational efficiency, strengthen customer relationships, and achieve long-term growth in the digital property marketplace.
FAQs
1. What is Real Estate App Development?
Real Estate App Development involves building mobile or web applications that help users buy, sell, rent, and manage properties through digital platforms.
2. How much does Real Estate App Development cost?
Development costs vary based on features, platforms, integrations, UI/UX complexity, and technology requirements, ranging from basic to enterprise-grade solutions.
3. Which features are essential in a real estate app?
Core features include property listings, advanced search, virtual tours, GPS maps, messaging, appointment scheduling, payment integration, and analytics dashboards.
4. Why should businesses invest in Real Estate App Development?
It enhances customer engagement, streamlines property management, increases lead generation, supports digital transactions, and helps businesses stay competitive in the evolving PropTech market.

 Advance Design Studio, Ltd.
After six years of living in their Huntley IL home, Chris and Meghan were tired of their dark, dingy, outdated kitchen and it was finally time for a long-anticipated change. “The kitchen is the place where we live, it’s where we do everything,” Meghan said. “It was important that it be a space where we wanted to be.” Meghan loves cooking and enjoys including their girls in healthy meal prepping, this led them to want a brighter, more enjoyable kitchen with increased functionality and improved storage.
For Chris especially, the laundry room was an entirely dysfunctional eyesore. “We had a washer and a dryer, but it was all kind-of cobbled together!” Chris said. “There were always laundry piles everywhere, we weren’t really sure what we wanted to do in there, but it was time for us to make a change.” The mess of the space was stressful every time they walked in the door from the garage each day. Kids’ backpacks and shoes piled up haphazardly in the makeshift boot-bench closet left the family feeling disorganized and stressed. They needed space for folding clothes and locker cubbies to help keep the family organized.
Having known Christine and Todd in the Huntley community for years, Chris and Meghan were familiar with their work. “We already trusted them personally and having seen their projects for years we knew they did top notch work. After we reviewed the initial round of designs, we knew that hiring them was definitely the right choice,” Meghan and Chris said. Although Chris had done a lot of work in their home himself, the kitchen and laundry room renovation was such a large undertaking that he didn’t want to steal time away from his family to spend what would surely be many long weekends doing the job himself. “That would not have been a wise choice for us,” Chris laughed.
“Our designer, Michelle was very, very, easy to work with; anything we wanted to see or weren’t sure about, she went above and beyond to make this easy for us. She was easy to get hold of and always quick to respond,” the couple said. Michelle pulled ideas that mirrored the couple’s taste and style and was adept at directing the couple to limited choices that didn’t overwhelm them and kept the process moving. “I have a hard time making decisions. Michelle made the decision-making process so easy. I loved how she listened to what I liked and then presented three great options for me to choose from,” Meghan said.
The main objectives for the kitchen were better storage solutions, they wanted the space to reflect their lifestyle and taste, and they wanted it to last for years with low maintenance. One of the first steps in creating a more functional kitchen was relocating the refrigerator, creating an improved workflow for the busy family.
“We didn’t know that we could even move the refrigerator to a new location where it is now, that was something that we never would have thought of,” Chris said. “The new refrigerator location makes the kitchen feel so much bigger. We didn’t add any space, but our whole kitchen with the new design just seems like it’s so much larger than before!” Meghan said.
The perimeter mist colored cabinets helped warm and brighten the entire room, while the graphite colored cabinets on the island added contrast. Using this fresh, clean color palette satisfied the couple’s desire for a bright space that was the exact opposite of what they had before. Organization accessories were also added to the cabinets such as a spice drawer tray and roll outs to create hidden convenience.
“I absolutely love the hidden spices – it makes cooking so much more enjoyable!” Chris said. “And all the pull outs, and the double trash bin, who would think you could get so excited about organization!” the couple said in unison.
One thing they hated in their original kitchen was how dark the space felt. Added lighting on the ceiling with the new light fixtures combined with the lighter cabinetry colors throughout solved this problem. “Our new kitchen has this warm, almost cozy feeling that our old kitchen never had, it’s just a space that I love spending my time in now,” Meghan said. The light airy feeling was accentuated with the use of floating white shelves on either side of the decorative range hood. “We have so much cabinetry space, the new design is amazing we actually have more storage space than we will ever need,” Meghan said.
The island was extended to create more work surface and added space for stool seating. “The new island changes how we live. Now the kids can be in the kitchen with us, doing homework, eating breakfast, and the three of us have special dinners there when Chris is working late,” Meghan said.
The Carrara Marmi Quartz countertops were chosen because they are, not only beautiful, but are made from hard-working material that doesn’t require maintenance. The white subway tile backsplash that wraps to the ceiling behind the focal point cooktop range/hood compliments the crisp white countertops perfectly, while brushed brass hardware and light fixtures keep the design fresh and new.
The couple had a few fears at the beginning of the project, as most homeowners do. Their biggest fear was being out of their kitchen and laundry room for an extended time. The crew made it very easy for the family to work in a limited space keeping the washer and dryer hooked up the majority of the time, and also getting appliances working with minimal downtime.
“They above and beyond accommodated us to get us through the process,” Meghan said. “They did a great job making sure we were as comfortable as possible throughout the process,” Chris added.
“Our project manager DJ did a great job. He was very good at updating us on schedule changes, getting guys in as quickly as possible. Everyone that stepped in the house was nice and did great work,” said Chris. They thought Advance’s carpenter was phenomenal and were impressed when he took a conceptual idea from a photograph and worked with designer Michelle to create a one of a kind range/hood that has become the topic of conversation with friends and family who visit the new kitchen. “He was in our house literally every day for several weeks. He was easy to work with and good at what he did,” Meghan and Chris said.
The focal point of the kitchen; a hand-crafted, custom-built ventilation hood was clad with handpicked reclaimed barnwood. Advance Design’s carpenter built the framework and the cladding to create a one-of-a-kind design element that the couple loves.
“I think it was especially fun for him to create something unique from scratch, showcasing his talent in this area,” Meghan said. “I love that my kitchen is not like everyone else’s. I got to pick out the wood on my hood and watch it being built and was able to choose what pieces of wood went where on it. It’s totally unique.”
Red Oak flooring was toothed-in throughout the kitchen and the rest of the first floor anywhere changes were made. Then the whole floor was refinished to tone down the orange undertones in the existing floor stain, ultimately changing the color complexion of the entire first floor. The result is a completely new feeling to the entire home.
Renovating the laundry room was extremely important to Meghan and Chris, but they had trouble visualizing what the possibilities were for the seemingly small space. Michelle produced beautiful 3D illustrations that helped them envision the space in a whole new way.
“I must have told Michelle 100 times that I am a visual person, seeing the designs in 3D made it so easy to make decisions and see what we could really do with our space,” Meghan said.
A dividing wall and doorway were removed between the existing laundry room and hallway formerly containing a coat closet, providing space to design specialized graphite colored cabinetry matching the kitchen island to house custom storage cubbies for each family member. Adding the tall utility cabinetry in the new laundry area helped solve the storage issue, tucking away cleaning supplies, household items, and even the cat got its own cubby.
“I love how everything is now hidden in its own space. I can’t tell you how much I hated coming home and seeing everything sitting around on counters,” Chris said.
Electrical outlets were planned for the inside of utility cabinets, so devices could charge in hidden locations. Stacking the washer and dryer allowed for wider countertop space to provide a folding area and a special space for clothes to hang. “The way I do laundry has been completely transformed! I can actually fold clothes and hang them now right out of the washer and dryer,” Meghan said.
“The end result in the kitchen and the laundry/mud room was an updated light and bright space, with a smarter work flow that better meets the needs of this family,” Michelle said.
“I would totally recommend Advance Design,” Meghan said. “Sometimes I sit and just look at my kitchen and laundry room and think ‘Wow, I can’t believe I get to live here!’ It’s an understatement to say we love our new space.”
Sponsored
Columbus, OH
Free consultation for landscape design!
Peabody Landscape Group
Columbus' Reliable Landscape Design & Contracting
 Windy City Painters
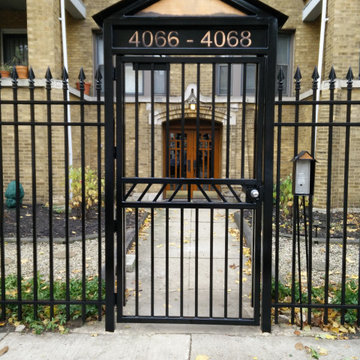
s your ornamental iron fence flaking rust onto the sidewalk every time Chicago wind kicks up? That is not a cosmetic problem - it is a sign that bare metal is exposed to moisture and the corrosion cycle is accelerating. Windy City Painters restores iron fencing on Chicago greystones, two-flats, Victorian brownstones, and courtyard buildings using professional-grade rust conversion and rust-inhibitive systems designed for the Midwest climate.
PROJECT OVERVIEW
Ornamental iron fence painting in Chicago is a multi-stage restoration process, not a simple brush-and-go job. Chicago properties - particularly the dense residential streetscapes of the North Side and Near West Side - feature decorative iron fencing that ranges from simple tubular picket to elaborate spear-top and scroll designs. When paint fails on iron, rust accelerates quickly. Windy City Painters evaluates each fence for structural rust-through, surface rust, and paint adhesion before recommending a scope of work.
MATERIALS AND PRODUCTS
Rust conversion: Ospho (phosphoric acid-based) or Corroseal (latex rust converter) depending on rust severity and surface porosity. Both chemically convert iron oxide into a stable compound that primer bonds to permanently rather than simply coating over active rust.
Primer: Rust-Oleum DTM (Direct to Metal) rust-inhibitive primer or Sherwin-Williams DTM Acrylic Coating primer, both formulated to penetrate weld seams, crevices, and pitted metal surfaces where brush application is essential.
Finish coat: Sherwin-Williams DTM Acrylic in satin or semi-gloss for UV resistance, color retention, and flexibility through freeze-thaw cycles. Two finish coats applied by brush for full coverage on ornamental profiles.
THE PROCESS
Step 1 - Mechanical Preparation: Wire wheel grinding with angle grinders removes loose rust and failing paint across flat rail surfaces. Needle gun descaling reaches weld joints, picket bases, and decorative scroll details where wire wheels cannot access. Windy City Painters inspects for rust-through after mechanical prep and flags any sections needing welding before painting proceeds.
Step 2 - Rust Conversion: Ospho or Corroseal is applied by brush to all remaining rust-affected surfaces. Ospho reacts with iron oxide over 24 hours, converting it to iron phosphate. Corroseal encapsulates and converts simultaneously. Both products create a chemically stable surface that dramatically improves primer adhesion on previously rusted iron fence sections.
Step 3 - Primer Application: Rust-Oleum DTM or Sherwin-Williams DTM rust-inhibitive primer is worked into every joint, crevice, and ornamental detail by brush - never sprayed alone on open ironwork where overspray and thin coverage risk undercutting. Full wet film thickness is verified before drying. Windy City Painters does not rush cure times between coats.
Step 4 - Finish Coats: Two coats of Sherwin-Williams DTM Acrylic topcoat are applied by brush for maximum film build on vertical pickets and horizontal rails. Color is matched to original or updated per homeowner preference. Semi-gloss finish resists dirt accumulation and makes future cleaning easier between repainting cycles.
CHICAGO-SPECIFIC CHALLENGES
Chicago presents iron fence painting conditions that milder climates do not. Road salt spray from city streets migrates onto fence bases through snowplow activity and foot traffic. Freeze-thaw cycling - sometimes occurring 30 or more times per winter - expands and contracts metal faster than paint can flex if film build is inadequate. High summer humidity slows cure times and risks blushing in topcoats applied too early in the morning. Windy City Painters schedules iron fence work during appropriate temperature and humidity windows and never applies coatings when rain is forecast within 24 hours.
WHAT TO EXPECT LONG-TERM
A properly prepped and primed iron fence in Chicago should hold a quality DTM finish for 5-8 years before needing significant maintenance. Annual inspection of base welds and picket bottoms - areas where water pools - catches early rust before it requires full mechanical prep again. Touch-up painting of isolated spots extends coating life significantly.
PRO TIPS
Tip 1: Never let a painter skip straight to topcoat on a rusty fence. Active rust under paint fails within one or two seasons. Ospho or Corroseal conversion is non-negotiable on Chicago iron.
Tip 2: Inspect fence picket bases at ground level every fall. That is where water collects, salt concentrates, and rust begins its worst work. Early touch-up costs far less than full restoration.
Tip 3: Request brush application on ornamental ironwork rather than spray-only. Brush work ensures wet paint is physically worked into every joint and crevice where rust originates.
Ready to restore your iron fence? Visit windypainters.com to schedule a free estimate with Windy City Painters.
Q: What does iron fence painting cost in Chicago? A: Iron fence painting in Chicago typically runs $8-$18 per linear foot. Rust severity, fence height, ornamental detail complexity, and whether welding repairs are needed all affect the final cost for professional iron fence restoration.
Q: How do you treat rust before painting an iron fence? A: Windy City Painters uses Ospho or Corroseal rust converters after mechanical prep. These products chemically neutralize iron oxide, creating a stable surface that rust-inhibitive primer bonds to permanently rather than painting over active corrosion.
Q: What primer is best for painting a rusty iron fence in Chicago? A: Rust-Oleum DTM and Sherwin-Williams DTM rust-inhibitive primers are our go-to products for iron fence painting in Chicago. Both are formulated for direct metal application and resist the moisture and freeze-thaw stress Chicago winters produce.
Q: How long does painted iron fencing last in Chicago? A: A professionally prepped and primed iron fence in Chicago holds a quality DTM finish for 5-8 years. Annual inspection of base welds and low points, with spot touch-up as needed, extends that service life considerably.
Q: Do I need a welder before painting my iron fence? A: If rust has eaten through fence rails or pickets structurally, Windy City Painters will identify those sections during prep and recommend welding before any primer or paint is applied. Painting over structurally failed metal is a waste of money.
Q: Can I paint an iron fence myself? A: DIY iron fence painting without proper rust conversion and DTM primer systems almost always fails within two seasons in Chicago. Professional prep, product selection, and application technique are why Windy City Painters results last 5-8 years.
Q: What neighborhoods does Windy City Painters serve for iron fence work? A: Windy City Painters serves Chicago North Side and Near West Side neighborhoods, working on greystones, two-flats, Victorian brownstones, courtyard buildings, and coach houses throughout the city.
 Advance Design Studio, Ltd.
After six years of living in their Huntley IL home, Chris and Meghan were tired of their dark, dingy, outdated kitchen and it was finally time for a long-anticipated change. “The kitchen is the place where we live, it’s where we do everything,” Meghan said. “It was important that it be a space where we wanted to be.” Meghan loves cooking and enjoys including their girls in healthy meal prepping, this led them to want a brighter, more enjoyable kitchen with increased functionality and improved storage.
For Chris especially, the laundry room was an entirely dysfunctional eyesore. “We had a washer and a dryer, but it was all kind-of cobbled together!” Chris said. “There were always laundry piles everywhere, we weren’t really sure what we wanted to do in there, but it was time for us to make a change.” The mess of the space was stressful every time they walked in the door from the garage each day. Kids’ backpacks and shoes piled up haphazardly in the makeshift boot-bench closet left the family feeling disorganized and stressed. They needed space for folding clothes and locker cubbies to help keep the family organized.
Having known Christine and Todd in the Huntley community for years, Chris and Meghan were familiar with their work. “We already trusted them personally and having seen their projects for years we knew they did top notch work. After we reviewed the initial round of designs, we knew that hiring them was definitely the right choice,” Meghan and Chris said. Although Chris had done a lot of work in their home himself, the kitchen and laundry room renovation was such a large undertaking that he didn’t want to steal time away from his family to spend what would surely be many long weekends doing the job himself. “That would not have been a wise choice for us,” Chris laughed.
“Our designer, Michelle was very, very, easy to work with; anything we wanted to see or weren’t sure about, she went above and beyond to make this easy for us. She was easy to get hold of and always quick to respond,” the couple said. Michelle pulled ideas that mirrored the couple’s taste and style and was adept at directing the couple to limited choices that didn’t overwhelm them and kept the process moving. “I have a hard time making decisions. Michelle made the decision-making process so easy. I loved how she listened to what I liked and then presented three great options for me to choose from,” Meghan said.
The main objectives for the kitchen were better storage solutions, they wanted the space to reflect their lifestyle and taste, and they wanted it to last for years with low maintenance. One of the first steps in creating a more functional kitchen was relocating the refrigerator, creating an improved workflow for the busy family.
“We didn’t know that we could even move the refrigerator to a new location where it is now, that was something that we never would have thought of,” Chris said. “The new refrigerator location makes the kitchen feel so much bigger. We didn’t add any space, but our whole kitchen with the new design just seems like it’s so much larger than before!” Meghan said.
The perimeter mist colored cabinets helped warm and brighten the entire room, while the graphite colored cabinets on the island added contrast. Using this fresh, clean color palette satisfied the couple’s desire for a bright space that was the exact opposite of what they had before. Organization accessories were also added to the cabinets such as a spice drawer tray and roll outs to create hidden convenience.
“I absolutely love the hidden spices – it makes cooking so much more enjoyable!” Chris said. “And all the pull outs, and the double trash bin, who would think you could get so excited about organization!” the couple said in unison.
One thing they hated in their original kitchen was how dark the space felt. Added lighting on the ceiling with the new light fixtures combined with the lighter cabinetry colors throughout solved this problem. “Our new kitchen has this warm, almost cozy feeling that our old kitchen never had, it’s just a space that I love spending my time in now,” Meghan said. The light airy feeling was accentuated with the use of floating white shelves on either side of the decorative range hood. “We have so much cabinetry space, the new design is amazing we actually have more storage space than we will ever need,” Meghan said.
The island was extended to create more work surface and added space for stool seating. “The new island changes how we live. Now the kids can be in the kitchen with us, doing homework, eating breakfast, and the three of us have special dinners there when Chris is working late,” Meghan said.
The Carrara Marmi Quartz countertops were chosen because they are, not only beautiful, but are made from hard-working material that doesn’t require maintenance. The white subway tile backsplash that wraps to the ceiling behind the focal point cooktop range/hood compliments the crisp white countertops perfectly, while brushed brass hardware and light fixtures keep the design fresh and new.
The couple had a few fears at the beginning of the project, as most homeowners do. Their biggest fear was being out of their kitchen and laundry room for an extended time. The crew made it very easy for the family to work in a limited space keeping the washer and dryer hooked up the majority of the time, and also getting appliances working with minimal downtime.
“They above and beyond accommodated us to get us through the process,” Meghan said. “They did a great job making sure we were as comfortable as possible throughout the process,” Chris added.
“Our project manager DJ did a great job. He was very good at updating us on schedule changes, getting guys in as quickly as possible. Everyone that stepped in the house was nice and did great work,” said Chris. They thought Advance’s carpenter was phenomenal and were impressed when he took a conceptual idea from a photograph and worked with designer Michelle to create a one of a kind range/hood that has become the topic of conversation with friends and family who visit the new kitchen. “He was in our house literally every day for several weeks. He was easy to work with and good at what he did,” Meghan and Chris said.
The focal point of the kitchen; a hand-crafted, custom-built ventilation hood was clad with handpicked reclaimed barnwood. Advance Design’s carpenter built the framework and the cladding to create a one-of-a-kind design element that the couple loves.
“I think it was especially fun for him to create something unique from scratch, showcasing his talent in this area,” Meghan said. “I love that my kitchen is not like everyone else’s. I got to pick out the wood on my hood and watch it being built and was able to choose what pieces of wood went where on it. It’s totally unique.”
Red Oak flooring was toothed-in throughout the kitchen and the rest of the first floor anywhere changes were made. Then the whole floor was refinished to tone down the orange undertones in the existing floor stain, ultimately changing the color complexion of the entire first floor. The result is a completely new feeling to the entire home.
Renovating the laundry room was extremely important to Meghan and Chris, but they had trouble visualizing what the possibilities were for the seemingly small space. Michelle produced beautiful 3D illustrations that helped them envision the space in a whole new way.
“I must have told Michelle 100 times that I am a visual person, seeing the designs in 3D made it so easy to make decisions and see what we could really do with our space,” Meghan said.
A dividing wall and doorway were removed between the existing laundry room and hallway formerly containing a coat closet, providing space to design specialized graphite colored cabinetry matching the kitchen island to house custom storage cubbies for each family member. Adding the tall utility cabinetry in the new laundry area helped solve the storage issue, tucking away cleaning supplies, household items, and even the cat got its own cubby.
“I love how everything is now hidden in its own space. I can’t tell you how much I hated coming home and seeing everything sitting around on counters,” Chris said.
Electrical outlets were planned for the inside of utility cabinets, so devices could charge in hidden locations. Stacking the washer and dryer allowed for wider countertop space to provide a folding area and a special space for clothes to hang. “The way I do laundry has been completely transformed! I can actually fold clothes and hang them now right out of the washer and dryer,” Meghan said.
“The end result in the kitchen and the laundry/mud room was an updated light and bright space, with a smarter work flow that better meets the needs of this family,” Michelle said.
“I would totally recommend Advance Design,” Meghan said. “Sometimes I sit and just look at my kitchen and laundry room and think ‘Wow, I can’t believe I get to live here!’ It’s an understatement to say we love our new space.”
 Advance Design Studio, Ltd.
After six years of living in their Huntley IL home, Chris and Meghan were tired of their dark, dingy, outdated kitchen and it was finally time for a long-anticipated change. “The kitchen is the place where we live, it’s where we do everything,” Meghan said. “It was important that it be a space where we wanted to be.” Meghan loves cooking and enjoys including their girls in healthy meal prepping, this led them to want a brighter, more enjoyable kitchen with increased functionality and improved storage.
For Chris especially, the laundry room was an entirely dysfunctional eyesore. “We had a washer and a dryer, but it was all kind-of cobbled together!” Chris said. “There were always laundry piles everywhere, we weren’t really sure what we wanted to do in there, but it was time for us to make a change.” The mess of the space was stressful every time they walked in the door from the garage each day. Kids’ backpacks and shoes piled up haphazardly in the makeshift boot-bench closet left the family feeling disorganized and stressed. They needed space for folding clothes and locker cubbies to help keep the family organized.
Having known Christine and Todd in the Huntley community for years, Chris and Meghan were familiar with their work. “We already trusted them personally and having seen their projects for years we knew they did top notch work. After we reviewed the initial round of designs, we knew that hiring them was definitely the right choice,” Meghan and Chris said. Although Chris had done a lot of work in their home himself, the kitchen and laundry room renovation was such a large undertaking that he didn’t want to steal time away from his family to spend what would surely be many long weekends doing the job himself. “That would not have been a wise choice for us,” Chris laughed.
“Our designer, Michelle was very, very, easy to work with; anything we wanted to see or weren’t sure about, she went above and beyond to make this easy for us. She was easy to get hold of and always quick to respond,” the couple said. Michelle pulled ideas that mirrored the couple’s taste and style and was adept at directing the couple to limited choices that didn’t overwhelm them and kept the process moving. “I have a hard time making decisions. Michelle made the decision-making process so easy. I loved how she listened to what I liked and then presented three great options for me to choose from,” Meghan said.
The main objectives for the kitchen were better storage solutions, they wanted the space to reflect their lifestyle and taste, and they wanted it to last for years with low maintenance. One of the first steps in creating a more functional kitchen was relocating the refrigerator, creating an improved workflow for the busy family.
“We didn’t know that we could even move the refrigerator to a new location where it is now, that was something that we never would have thought of,” Chris said. “The new refrigerator location makes the kitchen feel so much bigger. We didn’t add any space, but our whole kitchen with the new design just seems like it’s so much larger than before!” Meghan said.
The perimeter mist colored cabinets helped warm and brighten the entire room, while the graphite colored cabinets on the island added contrast. Using this fresh, clean color palette satisfied the couple’s desire for a bright space that was the exact opposite of what they had before. Organization accessories were also added to the cabinets such as a spice drawer tray and roll outs to create hidden convenience.
“I absolutely love the hidden spices – it makes cooking so much more enjoyable!” Chris said. “And all the pull outs, and the double trash bin, who would think you could get so excited about organization!” the couple said in unison.
One thing they hated in their original kitchen was how dark the space felt. Added lighting on the ceiling with the new light fixtures combined with the lighter cabinetry colors throughout solved this problem. “Our new kitchen has this warm, almost cozy feeling that our old kitchen never had, it’s just a space that I love spending my time in now,” Meghan said. The light airy feeling was accentuated with the use of floating white shelves on either side of the decorative range hood. “We have so much cabinetry space, the new design is amazing we actually have more storage space than we will ever need,” Meghan said.
The island was extended to create more work surface and added space for stool seating. “The new island changes how we live. Now the kids can be in the kitchen with us, doing homework, eating breakfast, and the three of us have special dinners there when Chris is working late,” Meghan said.
The Carrara Marmi Quartz countertops were chosen because they are, not only beautiful, but are made from hard-working material that doesn’t require maintenance. The white subway tile backsplash that wraps to the ceiling behind the focal point cooktop range/hood compliments the crisp white countertops perfectly, while brushed brass hardware and light fixtures keep the design fresh and new.
The couple had a few fears at the beginning of the project, as most homeowners do. Their biggest fear was being out of their kitchen and laundry room for an extended time. The crew made it very easy for the family to work in a limited space keeping the washer and dryer hooked up the majority of the time, and also getting appliances working with minimal downtime.
“They above and beyond accommodated us to get us through the process,” Meghan said. “They did a great job making sure we were as comfortable as possible throughout the process,” Chris added.
“Our project manager DJ did a great job. He was very good at updating us on schedule changes, getting guys in as quickly as possible. Everyone that stepped in the house was nice and did great work,” said Chris. They thought Advance’s carpenter was phenomenal and were impressed when he took a conceptual idea from a photograph and worked with designer Michelle to create a one of a kind range/hood that has become the topic of conversation with friends and family who visit the new kitchen. “He was in our house literally every day for several weeks. He was easy to work with and good at what he did,” Meghan and Chris said.
The focal point of the kitchen; a hand-crafted, custom-built ventilation hood was clad with handpicked reclaimed barnwood. Advance Design’s carpenter built the framework and the cladding to create a one-of-a-kind design element that the couple loves.
“I think it was especially fun for him to create something unique from scratch, showcasing his talent in this area,” Meghan said. “I love that my kitchen is not like everyone else’s. I got to pick out the wood on my hood and watch it being built and was able to choose what pieces of wood went where on it. It’s totally unique.”
Red Oak flooring was toothed-in throughout the kitchen and the rest of the first floor anywhere changes were made. Then the whole floor was refinished to tone down the orange undertones in the existing floor stain, ultimately changing the color complexion of the entire first floor. The result is a completely new feeling to the entire home.
Renovating the laundry room was extremely important to Meghan and Chris, but they had trouble visualizing what the possibilities were for the seemingly small space. Michelle produced beautiful 3D illustrations that helped them envision the space in a whole new way.
“I must have told Michelle 100 times that I am a visual person, seeing the designs in 3D made it so easy to make decisions and see what we could really do with our space,” Meghan said.
A dividing wall and doorway were removed between the existing laundry room and hallway formerly containing a coat closet, providing space to design specialized graphite colored cabinetry matching the kitchen island to house custom storage cubbies for each family member. Adding the tall utility cabinetry in the new laundry area helped solve the storage issue, tucking away cleaning supplies, household items, and even the cat got its own cubby.
“I love how everything is now hidden in its own space. I can’t tell you how much I hated coming home and seeing everything sitting around on counters,” Chris said.
Electrical outlets were planned for the inside of utility cabinets, so devices could charge in hidden locations. Stacking the washer and dryer allowed for wider countertop space to provide a folding area and a special space for clothes to hang. “The way I do laundry has been completely transformed! I can actually fold clothes and hang them now right out of the washer and dryer,” Meghan said.
“The end result in the kitchen and the laundry/mud room was an updated light and bright space, with a smarter work flow that better meets the needs of this family,” Michelle said.
“I would totally recommend Advance Design,” Meghan said. “Sometimes I sit and just look at my kitchen and laundry room and think ‘Wow, I can’t believe I get to live here!’ It’s an understatement to say we love our new space.”
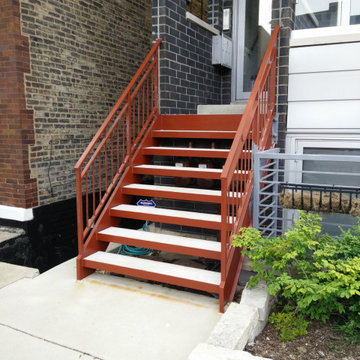 Windy City Painters
Does your iron fence look like Chicago winters have been winning the battle for years? That slow orange spread across pickets and rails is not just an eyesore - it is active corrosion undermining the structural integrity of metalwork that frames some of Chicago's most architecturally significant residential properties. Windy City Painters addresses iron fence rust at the source, using professional-grade rust conversion chemistry and direct-to-metal coatings engineered for the specific abuse Chicago's climate delivers.
PROJECT OVERVIEW
This project involved a heavily rusted ornamental iron fence on a Chicago North Side residential property. Rust had progressed beyond surface oxidation into moderate pitting on lower rails, a pattern Windy City Painters sees frequently on properties within blocks of treated roadways where salt drift accelerates corrosion. The scope included mechanical descaling, chemical rust conversion, DTM priming, and a durable gloss topcoat matched to the original fence color.
MATERIALS AND PRODUCTS
Ospho Rust Converter: A phosphoric acid-based treatment that chemically reacts with iron oxide, converting it to iron phosphate - a stable, paintable compound. Corroseal Water-Based Rust Converter is an alternative for situations requiring lower VOC handling. Rust-Oleum Professional DTM Primer and Sherwin-Williams DTM Acrylic Coating serve as the primary coating system, formulated for direct metal adhesion with built-in rust inhibitors. For structurally compromised sections, welding is coordinated before any chemical or coating work begins.
THE PROCESS
Step 1 - Mechanical Preparation: Wire wheel grinding on an angle grinder removes loose rust scale, mill scale, and flaking paint. For advanced pitting, Windy City Painters deploys a needle gun descaler, which impacts the metal surface thousands of times per minute to drive scale from deep cavities. This step determines whether the fence can be coated or needs welding first.
Step 2 - Chemical Rust Conversion: Ospho or Corroseal is brushed onto all remaining rust surface. These products do not simply seal rust - they react with it. The conversion process takes 24 hours to fully cure before topcoating. Skipping this step is the single most common reason iron fence paint jobs fail prematurely.
Step 3 - DTM Priming: Sherwin-Williams DTM or Rust-Oleum DTM primer is applied by brush to ensure full penetration around decorative elements, picket tips, and weld joints. Spray application is used on open sections for even film build. DTM formulations bond directly to prepared metal without a separate shop primer.
Step 4 - Finish Coating: A DTM topcoat in gloss or semi-gloss provides the final weather barrier. Gloss is preferred for iron fencing because the harder surface sheds water more effectively and resists dirt adhesion between maintenance cycles. Windy City Painters applies two finish coats for maximum film thickness.
CHICAGO-SPECIFIC CHALLENGES
Chicago's freeze-thaw cycle is the primary enemy of iron fence coatings. Water infiltrates micro-cracks in paint film, freezes, expands, and delaminate coating from beneath. Properties on the North Side and Near West Side also contend with lake-effect humidity that keeps metal surfaces damp for extended periods, slowing cure times and promoting under-film corrosion if preparation is inadequate. Greystones and Victorian brownstones typically feature ornate cast iron or wrought iron fencing with complex geometries that trap moisture and demand hand-brush application to fully coat recesses.
WHAT TO EXPECT LONG-TERM
A properly prepared and coated iron fence in Chicago should hold 5-8 years before requiring recoating. Annual inspection of weld joints, picket tips, and base rails closest to grade will identify early rust return. Addressing small spots with touch-up converter and primer extends service life significantly between full recoats.
PRO TIPS
Tip 1: Never pressure wash a rusted iron fence immediately before painting. Water drives moisture into pits and delays the surface drying needed for chemical converter adhesion. Allow 48 hours of dry weather before prep begins.
Tip 2: Picket tips and rail ends are the first failure points. These end-grain equivalent areas on metal concentrate corrosion. Ask your painter to apply an extra brush coat to every tip and terminus.
Tip 3: Black is the traditional and most durable color choice for iron fencing. Dark pigments absorb UV rather than reflecting it, reducing thermal cycling stress on the paint film at color change boundaries.
FAQ
Q: What does iron fence painting cost in Chicago?
A: Most residential iron fence painting in Chicago ranges from $400 to $1,200 depending on linear footage, rust severity, prep method required, and whether structural welding is needed before Windy City Painters can coat the surface.
Q: How do I know if my fence needs a welder before painting?
A: If you can press a screwdriver through a rail or picket, the metal wall has failed. Windy City Painters inspects all fencing before quoting and identifies weld-required sections so repairs happen before any coating investment.
Q: Is Ospho or Corroseal better for my fence?
A: Both convert rust effectively. Ospho is solvent-based and fast-acting, preferred for heavy rust. Corroseal is water-based with lower odor, preferred in enclosed or residential settings where off-gassing is a concern. Windy City Painters selects based on site conditions.
Q: Can iron fence painting be done in winter in Chicago?
A: Application requires temperatures above 50 degrees Fahrenheit for DTM coatings to cure properly. Most iron fence painting in Chicago runs April through October, with scheduling flexibility based on extended warm stretches.
Q: How do I maintain my fence between professional recoats?
A: Inspect annually in spring. Sand any rust spots to bare metal with 80-grit paper, apply Ospho, let cure 24 hours, then spot-prime with DTM primer and touch up with finish coat. Windy City Painters offers maintenance inspections.
Q: Do you paint courtyard building fences and coach house gates?
A: Yes. Multi-unit courtyard buildings and coach houses are common in the North Side neighborhoods Windy City Painters serves. We coordinate with property managers and HOAs for larger perimeter fence projects.
Q: How long after painting can I touch the fence?
A: DTM coatings are typically dry to touch in 2-4 hours and hard dry in 24 hours. Full cure for maximum hardness takes 7 days. Windy City Painters advises against pressure washing or heavy contact during that cure window.
Visit windypainters.com to request your free iron fence assessment and project quote.
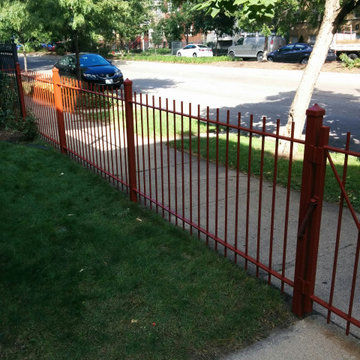 Windy City Painters
Ever notice how your iron fence looks worse every spring after another Chicago winter? That slow deterioration is not cosmetic - it is active metal failure that compounds every freeze-thaw cycle until replacement becomes the only option. Windy City Painters works with homeowners across the Chicago North Side and Near West Side to restore original iron fencing on greystones, two-flats, Victorian brownstones, and coach houses before that point is reached.
PROJECT OVERVIEW
This iron fence restoration involved a classic Chicago residential property with original wrought iron fencing showing surface rust across the majority of pickets, flaking previous paint coats, and localized deep pitting near the base rails. A structural check identified two loose pickets requiring welding before any surface preparation or coating began. Total linear footage fell in the mid-range for a standard Chicago residential lot.
MATERIALS AND PRODUCTS
Windy City Painters selected Ospho rust converter for chemically neutralizing active iron oxide before priming. Ospho reacts with rust to form a stable phosphate compound that stops corrosion progression rather than simply sealing over it. Sherwin-Williams DTM rust-inhibitive primer was applied to all bare and converted surfaces, followed by two finish coats of Rust-Oleum DTM in satin black. DTM - direct to metal - formulas provide corrosion inhibitors built into the coating matrix, which matters significantly in Chicago's climate.
THE PROCESS
Step 1 - Structural Assessment and Welding Coordination. Before any surface preparation begins, Windy City Painters inspects every picket and rail connection for structural integrity. Loose or cracked iron must be welded before coating. Paint applied over a compromised joint will fail within one season as movement continues to break the bond. On this project, two pickets were tack-welded by a coordinating welder before prep started.
Step 2 - Wire Wheel Grinding and Needle Gun Descaling. All rusted sections were ground to bare or near-bare metal using wire wheel attachments and needle gun descaling tools. This step removes loose scale, flaking previous coatings, and surface contamination that would prevent primer adhesion. Skipping mechanical prep is the single most common reason iron fence paint fails prematurely on Chicago properties.
Step 3 - Ospho Rust Converter Application. Ospho was brushed into all pitted and converted areas and allowed to cure fully. The phosphoric acid chemistry converts iron oxide into iron phosphate, arresting active rust and creating a surface that accepts primer more effectively than bare metal alone. Corroseal is an equivalent alternative used on projects with heavier pitting.
Step 4 - DTM Primer and Finish Coat Application. Sherwin-Williams DTM rust-inhibitive primer was applied across all prepared surfaces. Two topcoats of Rust-Oleum DTM in satin black followed after full primer cure. DTM finish coats add a second corrosion-inhibiting layer and provide the UV and weather resistance needed for Chicago exterior iron work.
CHICAGO-SPECIFIC CHALLENGES
Chicago iron fencing faces conditions that accelerate corrosion faster than most US markets. Lake humidity keeps metal surface moisture elevated through much of the year. Road salt splash from winter maintenance reaches fencing along parkways and sidewalk edges, introducing chlorides that aggressively attack iron. Freeze-thaw cycles expand any rust pocket that has formed under paint, lifting coatings from the inside and creating the classic bubbled-paint appearance homeowners notice every spring.
WHAT TO EXPECT LONG-TERM
With Ospho conversion, DTM primer, and two DTM finish coats properly applied over mechanically prepared surfaces, most Chicago residential iron fences hold 5-8 years before needing significant touch-up. Annual visual inspection for any chips or bare spots, with immediate touch-up using Rust-Oleum DTM, extends that window considerably.
PRO TIPS
Tip 1 - Address any bare metal spot the same season you notice it. A pinhole of exposed iron becomes a rust bubble within one Chicago winter and a flaking section by the following spring.
Tip 2 - Never paint over active rust without a converter step. Ospho or Corroseal is inexpensive insurance against a complete repaint two years early.
Tip 3 - Check picket bases at grade level every spring. Ground contact accelerates corrosion at the base faster than anywhere else on the fence. Catching it early keeps welding out of the equation.
Contact Windy City Painters at windypainters.com for a project estimate.
FAQ
Q: What does iron fence painting cost in Chicago? A: Residential iron fence painting with proper rust prep typically runs $300-$900 for standard lot footage. Windy City Painters provides itemized estimates based on linear footage, rust severity, and whether structural welding is required before surface preparation begins.
Q: Do you paint over rust or remove it first? A: Windy City Painters always addresses active rust before priming. Ospho or Corroseal rust converter chemically neutralizes iron oxide, and wire wheel grinding removes loose scale - coating over unaddressed rust guarantees early failure on Chicago iron fences.
Q: When does an iron fence need welding before painting? A: Loose pickets, cracked rails, or connections with visible movement require welding before any coating work begins. Paint cannot stabilize a structural joint - Windy City Painters coordinates with welders when this condition is identified during initial assessment.
Q: How long does iron fence paint last in Chicago? A: With mechanical prep, Ospho conversion, and Sherwin-Williams or Rust-Oleum DTM coatings, properly restored iron fencing holds 5-8 years in Chicago's freeze-thaw climate before needing significant maintenance.
Q: Is Ospho better than Corroseal for Chicago iron fences? A: Both are effective rust converters. Ospho is a liquid phosphoric acid treatment suited for moderate rust and pitting. Corroseal is a latex-based converter-primer hybrid better suited to heavier rust profiles. Windy City Painters selects based on site conditions.
Q: What finish sheen works best on iron fencing? A: Satin or semi-gloss black is the traditional and most durable choice for Chicago greystone and brownstone properties. Satin hides minor surface imperfections better than gloss while still providing adequate UV and moisture resistance.
Q: Can iron fence painting be done in spring or fall in Chicago? A: Yes. Windy City Painters schedules iron fence work in temperatures above 50 degrees Fahrenheit with low ambient humidity - spring and early fall are often ideal windows that avoid both winter cold and peak summer humidity.
 Advance Design Studio, Ltd.
After six years of living in their Huntley IL home, Chris and Meghan were tired of their dark, dingy, outdated kitchen and it was finally time for a long-anticipated change. “The kitchen is the place where we live, it’s where we do everything,” Meghan said. “It was important that it be a space where we wanted to be.” Meghan loves cooking and enjoys including their girls in healthy meal prepping, this led them to want a brighter, more enjoyable kitchen with increased functionality and improved storage.
For Chris especially, the laundry room was an entirely dysfunctional eyesore. “We had a washer and a dryer, but it was all kind-of cobbled together!” Chris said. “There were always laundry piles everywhere, we weren’t really sure what we wanted to do in there, but it was time for us to make a change.” The mess of the space was stressful every time they walked in the door from the garage each day. Kids’ backpacks and shoes piled up haphazardly in the makeshift boot-bench closet left the family feeling disorganized and stressed. They needed space for folding clothes and locker cubbies to help keep the family organized.
Having known Christine and Todd in the Huntley community for years, Chris and Meghan were familiar with their work. “We already trusted them personally and having seen their projects for years we knew they did top notch work. After we reviewed the initial round of designs, we knew that hiring them was definitely the right choice,” Meghan and Chris said. Although Chris had done a lot of work in their home himself, the kitchen and laundry room renovation was such a large undertaking that he didn’t want to steal time away from his family to spend what would surely be many long weekends doing the job himself. “That would not have been a wise choice for us,” Chris laughed.
“Our designer, Michelle was very, very, easy to work with; anything we wanted to see or weren’t sure about, she went above and beyond to make this easy for us. She was easy to get hold of and always quick to respond,” the couple said. Michelle pulled ideas that mirrored the couple’s taste and style and was adept at directing the couple to limited choices that didn’t overwhelm them and kept the process moving. “I have a hard time making decisions. Michelle made the decision-making process so easy. I loved how she listened to what I liked and then presented three great options for me to choose from,” Meghan said.
The main objectives for the kitchen were better storage solutions, they wanted the space to reflect their lifestyle and taste, and they wanted it to last for years with low maintenance. One of the first steps in creating a more functional kitchen was relocating the refrigerator, creating an improved workflow for the busy family.
“We didn’t know that we could even move the refrigerator to a new location where it is now, that was something that we never would have thought of,” Chris said. “The new refrigerator location makes the kitchen feel so much bigger. We didn’t add any space, but our whole kitchen with the new design just seems like it’s so much larger than before!” Meghan said.
The perimeter mist colored cabinets helped warm and brighten the entire room, while the graphite colored cabinets on the island added contrast. Using this fresh, clean color palette satisfied the couple’s desire for a bright space that was the exact opposite of what they had before. Organization accessories were also added to the cabinets such as a spice drawer tray and roll outs to create hidden convenience.
“I absolutely love the hidden spices – it makes cooking so much more enjoyable!” Chris said. “And all the pull outs, and the double trash bin, who would think you could get so excited about organization!” the couple said in unison.
One thing they hated in their original kitchen was how dark the space felt. Added lighting on the ceiling with the new light fixtures combined with the lighter cabinetry colors throughout solved this problem. “Our new kitchen has this warm, almost cozy feeling that our old kitchen never had, it’s just a space that I love spending my time in now,” Meghan said. The light airy feeling was accentuated with the use of floating white shelves on either side of the decorative range hood. “We have so much cabinetry space, the new design is amazing we actually have more storage space than we will ever need,” Meghan said.
The island was extended to create more work surface and added space for stool seating. “The new island changes how we live. Now the kids can be in the kitchen with us, doing homework, eating breakfast, and the three of us have special dinners there when Chris is working late,” Meghan said.
The Carrara Marmi Quartz countertops were chosen because they are, not only beautiful, but are made from hard-working material that doesn’t require maintenance. The white subway tile backsplash that wraps to the ceiling behind the focal point cooktop range/hood compliments the crisp white countertops perfectly, while brushed brass hardware and light fixtures keep the design fresh and new.
The couple had a few fears at the beginning of the project, as most homeowners do. Their biggest fear was being out of their kitchen and laundry room for an extended time. The crew made it very easy for the family to work in a limited space keeping the washer and dryer hooked up the majority of the time, and also getting appliances working with minimal downtime.
“They above and beyond accommodated us to get us through the process,” Meghan said. “They did a great job making sure we were as comfortable as possible throughout the process,” Chris added.
“Our project manager DJ did a great job. He was very good at updating us on schedule changes, getting guys in as quickly as possible. Everyone that stepped in the house was nice and did great work,” said Chris. They thought Advance’s carpenter was phenomenal and were impressed when he took a conceptual idea from a photograph and worked with designer Michelle to create a one of a kind range/hood that has become the topic of conversation with friends and family who visit the new kitchen. “He was in our house literally every day for several weeks. He was easy to work with and good at what he did,” Meghan and Chris said.
The focal point of the kitchen; a hand-crafted, custom-built ventilation hood was clad with handpicked reclaimed barnwood. Advance Design’s carpenter built the framework and the cladding to create a one-of-a-kind design element that the couple loves.
“I think it was especially fun for him to create something unique from scratch, showcasing his talent in this area,” Meghan said. “I love that my kitchen is not like everyone else’s. I got to pick out the wood on my hood and watch it being built and was able to choose what pieces of wood went where on it. It’s totally unique.”
Red Oak flooring was toothed-in throughout the kitchen and the rest of the first floor anywhere changes were made. Then the whole floor was refinished to tone down the orange undertones in the existing floor stain, ultimately changing the color complexion of the entire first floor. The result is a completely new feeling to the entire home.
Renovating the laundry room was extremely important to Meghan and Chris, but they had trouble visualizing what the possibilities were for the seemingly small space. Michelle produced beautiful 3D illustrations that helped them envision the space in a whole new way.
“I must have told Michelle 100 times that I am a visual person, seeing the designs in 3D made it so easy to make decisions and see what we could really do with our space,” Meghan said.
A dividing wall and doorway were removed between the existing laundry room and hallway formerly containing a coat closet, providing space to design specialized graphite colored cabinetry matching the kitchen island to house custom storage cubbies for each family member. Adding the tall utility cabinetry in the new laundry area helped solve the storage issue, tucking away cleaning supplies, household items, and even the cat got its own cubby.
“I love how everything is now hidden in its own space. I can’t tell you how much I hated coming home and seeing everything sitting around on counters,” Chris said.
Electrical outlets were planned for the inside of utility cabinets, so devices could charge in hidden locations. Stacking the washer and dryer allowed for wider countertop space to provide a folding area and a special space for clothes to hang. “The way I do laundry has been completely transformed! I can actually fold clothes and hang them now right out of the washer and dryer,” Meghan said.
“The end result in the kitchen and the laundry/mud room was an updated light and bright space, with a smarter work flow that better meets the needs of this family,” Michelle said.
“I would totally recommend Advance Design,” Meghan said. “Sometimes I sit and just look at my kitchen and laundry room and think ‘Wow, I can’t believe I get to live here!’ It’s an understatement to say we love our new space.”

 Sarah St. Amand Interior Design, Inc.
Photo Credit: Kelly Horkoff; K West Images
Inspiration for a large contemporary living room remodel in Toronto
Inspiration for a large contemporary living room remodel in Toronto
19