
Search results for "Pay per call" in Home Design Ideas
 Tile Doctor Ltd
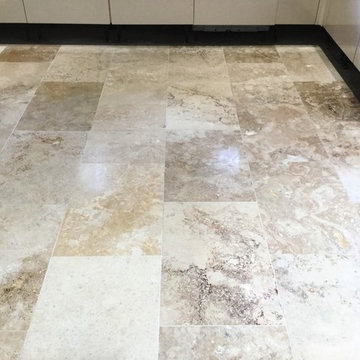
Travertine floor tiles are very appealing and very hardwearing, but without the protection of a sealer to stop dirt becoming ingrained in the pores of the stone their appearance will degrade. Fortunately, this can be remedied as demonstrated in these pictures of a Travertine floor I recently polished at a house in Weston Favell, Northampton.
This owner of the property had called me out as their kitchen floor was looking very sorry for itself and he was concerned that a lot of holes were appearing which was making cleaning the floor difficult as dirt was getting trapped in the holes. I went over and carried out a test clean on two separate tiles in the kitchen and the customer was amazed at how clean they came up and especially the grout.
The kitchen was stunning, but unfortunately the state of the Travertine tiled floor was bringing down its overall appearance. Impressed with the test clean they were keen to get the whole floor renovated so we agreed a price and I scheduled the work in for the following month.
I returned on the agreed data and made a start by protecting the kitchen units by removing the plinths and covering base units and the appliances with a protective film. We then commenced the cleaning process to remove surface dirt by cleaning with Tile Doctor Pro-Clean paying special attention to the grout lines. The holes in the Travertine were filled with a stone resin, mixing it to closely match the colours of the stone.
The resin was allowed to dry before starting to re-polish the Travertine using a set of Tile Doctor Diamond encrusted burnishing pads. These pads are applied individually to each tile in sequence starting with a coarse 400-grit pad before moving onto the 800-grit and finishing with the fine 1500 grit pad. A little water is used to lubricate the process along the way and the floor is rinsed in between each pad with the resulting residue extracted from the floor using a wet vacuum. The process takes some time, but it really brings up the polished appearance of the stone and the results are well worth the effort. After a final rinse the floor was inspected and then left to dry off fully overnight.
When we returned the next day, the floor had dried, and we were able to give the floor a final polish with a very fine 3000-grit burnishing pad applied with a little water sprayed onto the tile. Finally, the floor was then sealed with two coats of Tile Doctor Ultra-Seal which provides excellent protection without changing the colour of the stone to provide a natural look.
The client was over the moon with the outcome and surprised at the improvement. They were left with a floor that would be easy to clean and maintain.
Phil Vissian
Northamptonshire Tile Doctor
 SUPERIOR CHIMNEY SERVICES CORPORATION
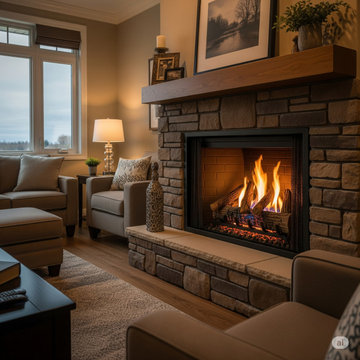
September 21st is the first day of Fall. I know we don’t want to think about it yet, but it is good to prepare and get the chimney swept early. Why? According to the Farmer’s Almanac, they are predicting a colder and snowier Winter. But you say, “eh, I got a gas fireplace.” Better yet, “I don’t use my fireplace, so why should I sweep it, and clean it early?” Let’s discuss why all types of chimneys and fireplaces need to be swept.
Why Do All Types of Chimney’s and Fireplaces Need to Be Swept?
When we think of the fireplace, we picture the real wood burning fireplace with the sounds of crackling wood. With regular use of the wood-burning fireplaces, a byproduct called creosote forms and over time, lines the side of the chimney flue. This needs to be swept at least once per year as creosote is flammable. However, all chimney’s, regardless of whether it burns wood or utilizes gas, needs to be professionally inspected and swept annually.
Many homeowners mistakenly believe that a gas or unused chimney is immune to problems since it doesn't produce a byproduct. However, these chimney systems face their own unique dangers. Gas fireplaces, especially those that are high-efficiency, can lead to the buildup of corrosive deposits. Over time, these deposits can degrade your chimney liner. Getting it inspected by a certified chimney technician will control this issue so it doesn’t turn into a problem.
4 Key Reasons to Prioritize Your Annual Chimney Inspection
The annual chimney inspection is more than just a sweep; it’s a comprehensive health check for your entire chimney system. We call it the 14 Point Inspection. A certified chimney technician will look for:
1. Fire Hazards: Again, for wood-burning chimneys, the removal of creosote is important to prevent a chimney fire. Gas fireplaces release corrosive deposits. If you don’t use the fireplace, you never know what debris may have settled in. If you want to use the fireplace, please be sure to have it professionally inspected and swept before use.
2. Obstructions: There’s a whole world outside of your home, and especially in the Fall, our little friends are searching for a warm place to stay. Your chimney looks pretty good. And, let’s not forget how the wind in the Chicagoland are does a great job of moving debris around that can get up and under the chimney cap or directly into the chimney if you don’t have a cap. These blockages need to be cleared for you and your home’s protection.
3. Structural Damage: A chimney technician will be able to spot cracks, water damage, or deterioration of the chimney and chimney liner that could compromise the system's safety.
4. Ventilation Issues: Ventilation is key for your home to breathe. The certified chimney technician will ensure proper draft and airflow, which is the best way to get rid of toxic gases.
NFPA
Remember, the National Fire Protection Association (NFPA) recommends an annual inspection for all chimney types. This simple, proactive maintenance can save you from costly repairs. Don't wait for a problem to become obvious.
Contact Superior Chimney today at 877-244-6349 to schedule a 14-Point Chimney inspection to ensure your home and family are protected.

 User
Spectacular unobstructed views of the Bay, Bridge, Alcatraz, San Francisco skyline and the rolling hills of Marin greet you from almost every window of this stunning Provençal Villa located in the acclaimed Middle Ridge neighborhood of Mill Valley. Built in 2000, this exclusive 5 bedroom, 5+ bath estate was thoughtfully designed by architect Jorge de Quesada to provide a classically elegant backdrop for today’s active lifestyle. Perfectly positioned on over half an acre with flat lawns and an award winning garden there is unmatched sense of privacy just minutes from the shops and restaurants of downtown Mill Valley.
A curved stone staircase leads from the charming entry gate to the private front lawn and on to the grand hand carved front door. A gracious formal entry and wide hall opens out to the main living spaces of the home and out to the view beyond. The Venetian plaster walls and soaring ceilings provide an open airy feeling to the living room and country chef’s kitchen, while three sets of oversized French doors lead onto the Jerusalem Limestone patios and bring in the panoramic views.
The chef’s kitchen is the focal point of the warm welcoming great room and features a range-top and double wall ovens, two dishwashers, marble counters and sinks with Waterworks fixtures. The tile backsplash behind the range pays homage to Monet’s Giverny kitchen. A fireplace offers up a cozy sitting area to lounge and watch television or curl up with a book. There is ample space for a farm table for casual dining. In addition to a well-appointed formal living room, the main level of this estate includes an office, stunning library/den with faux tortoise detailing, butler’s pantry, powder room, and a wonderful indoor/outdoor flow allowing the spectacular setting to envelop every space.
A wide staircase leads up to the four main bedrooms of home. There is a spacious master suite complete with private balcony and French doors showcasing the views. The suite features his and her baths complete with walk – in closets, and steam showers. In hers there is a sumptuous soaking tub positioned to make the most of the view. Two additional bedrooms share a bath while the third is en-suite. The laundry room features a second set of stairs leading back to the butler’s pantry, garage and outdoor areas.
The lowest level of the home includes a legal second unit complete with kitchen, spacious walk in closet, private entry and patio area. In addition to interior access to the second unit there is a spacious exercise room, the potential for a poolside kitchenette, second laundry room, and secure storage area primed to become a state of the art tasting room/wine cellar.
From the main level the spacious entertaining patio leads you out to the magnificent grounds and pool area. Designed by Steve Stucky, the gardens were featured on the 2007 Mill Valley Outdoor Art Club tour.
A level lawn leads to the focal point of the grounds; the iconic “Crags Head” outcropping favored by hikers as far back as the 19th century. The perfect place to stop for lunch and take in the spectacular view. The Century old Sonoma Olive trees and lavender plantings add a Mediterranean touch to the two lawn areas that also include an antique fountain, and a charming custom Barbara Butler playhouse.
Inspired by Provence and built to exacting standards this charming villa provides an elegant yet welcoming environment designed to meet the needs of today’s active lifestyle while staying true to its Continental roots creating a warm and inviting space ready to call home.
Find the right local pro for your project

 Five Star Tree Care
When you have found the home of your dreams, having a beautiful tree in the yard is simply an added bonus. Many people specifically search for homes that have one or more trees when considering a new property. Trees are an essential part of our environment, but it is important to note that these beautiful living pieces of art can also be dangerous.
Five Star Tree Services has come across quite a few situations where trees have done some incredible damage to homes. So if you have a tree or several trees on your property, it is important to keep a few things in mind to avoid similar accidents.
Mind the Tree Roots
The roots of a tree help it to grow up straight and tall. They also help to anchor it in its position. While the roots are important in keeping the tree firmly in the ground, they are also one of the leading causes of damage. Roots can move the soil and materials of your foundation which can weaken the overall structure of your home. In addition to the foundation, roots have the strength to break underground pipes as well. Many homeowners with leaking water in their basement or puddles in their lower levels can trace the problem back to roots disturbing the plumbing.
In order to repair these issues, you must call a professional tree care company. In some cases, the roots can be moved from around your plumbing or foundations, but in most cases, tree removal is required.
Dead or Dying Trees
Trees that are on the verge of dying or those that have already died need to be removed as soon as possible. It is important to pay attention to the health of your trees to keep your family and your property safe. The biggest sign of a tree that is at risk of falling over is deep cracks in the trunk and branches. The tree may have died due to old age, diseases, or an infestation. The cause could have also been a result of storm damage. Regardless of the cause, dead trees can tip over and fall on your home or even people who happen to be passing by. Instead of risking your family’s health or your property, have ailing trees removed as soon as possible.
Natural Pests
Pest control is important, especially if you have one or more trees on your property. Trees attract critters no matter how well you maintain them, from owls and squirrels to termites and other bugs. Depending on how close the trees in your yard are to your home, you may need to watch out for pests invading your home. Termites are the most harmful, so it is important to have both your trees and your home inspected on a regular basis. The other pests can be controlled with proper pruning and regular maintenance. Squirrels are the second-largest danger. If they can reach your roof from nearby trees, you will have to worry about holes in your roof, insulation, and even in your foundation.
Taking Care of Your Trees
Trees are an important part of our environment and can add beauty and value to any property. With the right care and regular maintenance from Five Star Tree Services, you can enjoy the beauty of your trees while avoiding the dangers. Give us a call at (416) 990-3355 to find out more about our Toronto tree care services.

 Casini Masonry
This is a 50'' Orton Style Rumford Fireplace at my home in Oxford,CT.
A Rumford Firplace is made with either a straight rear wall or a slanted one. The slanted ones are the better heaters and I just proved "the more efficient" as they do not have a bigger throat area than the straight variety. The book "The Forgotten Art of Building a Good Fireplace" written bu Vrest Orton in the late 60's descibes the slanted variety well and that is where they picked up the name. He did not invent them rather he wrote of what he witnessed as being nice enjoyable good heating Rumfords .
It uses my self made damper and burns all winter long with the damper blade at only a 1-3/4'''' gap opening.
This represents a throat area to fireplace opening area of 1 to 30 a achievement that recently left the top authority on Rumford Fireplaces in awe and disbelief as his straight backed Rumfords only get to a 1:20 ratio. Although he remained skeptical and wanting more explicit videos and refusing to sign a nondisclosure agreement, he wanted to know if I could do the same with his chosen styled Rumfords.
With a large or small fire the damper stays fixed.
Weather is a non issue, even foggy drizzly nights do not effect this fireplace. There are videos at FCasini on You Tube showing the 50'' burning along with my basement 36'' Orton which I did experimenting last winter . The basement [never used before] has no face, so I affixed a steel panel on it to see if it could burn at the same ratio as my 50'' which uses my self made 30 year old damper.
Iinstead it has a custom vestal damper which I cut the front off as I occasionally do when the budget is limited.
It burned good at a 1 to 26 ratio which is way above the 1/17 that Straight Back Rumfords normally do although their very best is 1/20 ..both of which depend on the use of the highly suggested Tee Pee Fire which will assist any fireplace in smoke evacuation due to solely emitting the smoke form the high end of the standing logs!
Both of my fireplaces certainly can use this style fire but I enjoy the horizontal log cabin style because of the easy loading and longer lasting fire per load.
This winter I am going to affix a glass panel to get a good look at the throat and inner breast chamber while the fireplace is burning. This will be done in my third [ also un faced like the basement] Rumford. This one uses an outside chimney that is about 18' tall, much shorter than the other two and not as warm an environment being the other two are interior chimneys. I am anxious to see if it will compete with a lesser draft ?
I have been searching the patent data base and to date there is nothing close to even resemble the way I get these slanted fireplaces to pass the smoke through such a ridiculously thin throat which I call "The Gates Of Hell".
The prototype is complete and installed into this fireplace which is in it's second year of performance testing and doing better than I expected, in fact before installing it last week I cleaned the throat and chimney and damper blade which hasn't been done in 6 years. This did help the performance a lot as the passage is so thin any build up greatly slows it down from the added viscosity ie flow drag.
For those that don't understand the benefit of a 1:30 ratio it is half the loss of heated air up the chimney and results in a 50% increase in heat efficiency.
This equals a 100% enjoyment factor for anyone whom takes fireplace burning seriously like have done and do for the past 30 years!
The house doesn't get sucked cold!

 Kathleen Jennison
An Arts & Crafts Bungalow is one of my favorite styles of homes. We have quite a few of them in our Stockton Mid-Town area. And when C&L called us to help them remodel their 1923 American Bungalow, I was beyond thrilled.
As per usual, when we get a new inquiry, we quickly Google the project location while we are talking to you on the phone. My excitement escalated when I saw the Google Earth Image of the sweet Sage Green bungalow in Mid-Town Stockton. "Yes, we would be interested in working with you," I said trying to keep my cool.
But what made it even better was meeting C&L and touring their home, because they are the nicest young couple, eager to make their home period perfect. Unfortunately, it had been slightly molested by some bad house-flippers, and we needed to bring the bathroom back to it "roots."
We knew we had to banish the hideous brown tile and cheap vanity quickly. But C&L complained about the condensation problems and the constant fight with mold. This immediately told me that improper remodeling had occurred and we needed to remedy that right away.
The Before: Frustrations with a Botched Remodel
The bathroom needed to be brought back to period appropriate design with all the functionality of a modern bathroom. We thought of things like marble countertop, white mosaic floor tiles, white subway tile, board and batten molding, and of course a fabulous wallpaper.
This small (and only) bathroom on a tight budget required a little bit of design sleuthing to figure out how we could get the proper look and feel. Our goal was to determine where to splurge and where to economize and how to complete the remodel as quickly as possible because C&L would have to move out while construction was going on.
The Process: Hard Work to Remedy Design and Function
During our initial design study, (which included 2 hours in the owners’ home), we noticed framed images of William Morris Arts and Crafts textile patterns and knew this would be our design inspiration. We presented C&L with three options and they quickly selected the Pimpernel Design Concept.
We had originally selected the Black and Olive colors with a black vanity, mirror, and black and white floor tile. C&L liked it but weren’t quite sure about the black, We went back to the drawing board and decided the William & Co Pimpernel Wallpaper in Bayleaf and Manilla color with a softer gray painted vanity and mirror and white floor tile was more to their liking.
After the Design Concept was approved, we went to work securing the building permit, procuring all the elements, and scheduling our trusted tradesmen to perform the work.
We did uncover some shoddy work by the flippers such as live electrical wires hidden behind the wall, plumbing venting cut-off and buried in the walls (hence the constant dampness), the tub barely balancing on two fence boards across the floor joist, and no insulation on the exterior wall.
All of the previous blunders were fixed and the bathroom put back to its previous glory. We could feel the house thanking us for making it pretty again.
The After Reveal: Cohesive Design Decisions
We selected a simple white subway tile for the tub/shower. This is always classic and in keeping with the style of the house.
We selected a pre-fab vanity and mirror, but they look rich with the quartz countertop. There is much more storage in this small vanity than you would think.
The Transformation: A Period Perfect Refresh
We began the remodel just as the pandemic reared and stay-in-place orders went into effect. As C&L were already moved out and living with relatives, we got the go-ahead from city officials to get the work done (after all, how can you shelter in place without a bathroom?).
All our tradesmen were scheduled to work so that only one crew was on the job site at a time. We stayed on the original schedule with only a one week delay.
The end result is the sweetest little bathroom I've ever seen (and I can't wait to start work on C&L's kitchen next).
Thank you for joining me in this project transformation. I hope this inspired you to think about being creative with your design projects, determining what works best in keeping with the architecture of your space, and carefully assessing how you can have the best life in your home.
 Tile Doctor Ltd
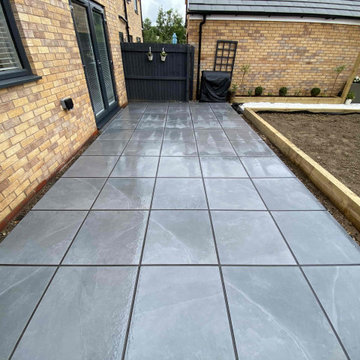
Earlier this summer I was called out to this job in the garden of a house in the city of Ely to inspect a freshly laid porcelain tiled patio with grout haze issues. The builder who had installed the patio hadn’t removed all the grout from the textured surface of the tile before it had dried. This was probably due to the hot weather which reduces drying times and has caught many tilers out. Multiple repeat visits by the builder trying followed who spent countless hours trying to remove the grout haze, unfortunately due to the textured surface of the tile he was unable to remove it and the patio was left looking awful.
Like the builder we are increasingly finding modern grouts, which although more durable, are very difficult to remove. Fortunately belonging to the Tile Doctor network, I had already been made aware of this problem and was able to offer a solution.
I arranged to pay the property a visit to demonstrate a potential solution and quote for resolving the issues. Even though the grout haze was indeed difficult to remove it wasn’t impossible if you know how. The demonstration came out well and relieved that they had finally found a solution to the problem booked me in to get the work carried out.
On my return I started with the application of a strong dilution of Tile Doctor Grout Clean-Up. This product is ideal for removing grout haze or smears as they often referred to; however, being acidic we don’t recommend it for use on every surface so if your using it yourself do check the label first. I left it to soak in for ten minutes before being agitated with a black scrubbing pad fitted to a rotary buffer
The weather was good, so it wasn’t a problem working outside and once all the grout smears were removed, I finished off by giving the whole patio a high-pressure rinse. I use a van mounted rinse/extraction system for this that applies warm water at high pressure onto the patio to dislodge dirt and then extracts the waste into a separate tank in the vehicle. It was an expensive investment but makes light work of jobs like this.
It took around four to five cleans to complete the job, by the late afternoon the grout haze was gone, and the porcelain patio looked completely transformed. It was quite a warm day, so the patio soon dried allowing my client to use it later that day. I should mention that this variety of Porcelain tiles were not the micro porous type and therefore did not need to be sealed.
Relieved the problem was finally resolved and happy with the result my client left the following feedback:
Amazing service, they were able to provide us with a quote and demo before we agreed to work. We are so happy with the results we have as our patio slabs looked ruined to the eye but the Tile Doctor managed to get them looking brand new.
Tom Conlon
Cambridge Tile Doctor

 Clark Design Build, LLC
This home is located on a one acre parcel of land near the banks of the Milwaukee River in the older established subdivision of Sleepy Hollow Estates in Mequon, Wisconsin. The inspiration for this Glen Cove Residence was to bring the desired by many, contemporary and modern lifestyle of a down town loft and establish it in a neighborhood in the suburbs amongst traditional style homes.
Sleepy Hollow Estates like many older established neighborhoods throughout the North shore and Westside communities of Milwaukee had great local architects such as John Randall McDonald and Russell Barr Williamson, who built contemporary master pieces amongst very traditional style homes. This created diversity in the style of homes in these neighborhoods which for the people living in them and the people just passing by, an experience of harmony and cultural lifestyle.
Unfortunately today, many new neighborhood developments lack harmony and cultural lifestyle and don’t allow for homes such as this Glen Cove Residence to be built. And for that matter many of the homes built by John Randall McDonald and Russell Barr Williamson back in the 1950’s. When driving through these new developments, one would experience beautiful traditional style homes, but all the homes tend to look the same. There is no diversity in the styles of homes thus these neighborhoods lack the harmony and a cultural life style for the people who live there or what people are looking for when buying a home that reflects their lifestyle. This Glen Cove Residence is an example that a contemporary home which offers a modern lifestyle that many desires can be established amongst traditional homes while blending in with the neighborhood.
Don’t be fooled by the flat roof of this home, building technology has come a long way since Frank Lloyd Wright! The roof system on this home is more energy efficient than most roof systems builders are putting on traditional homes today and it doesn’t leak! This Glen Cove Residence was built using all traditional building materials that you would see in homes being built in new developments today. There is a misconception out there that modern homes are expensive to build. That is not true! This Glen Cove Residence was built for roughly $130 per square foot which is the same price one would pay for a similar builder’s model traditional style home with the same upgrades.
This Glen Cove Residence consists of three bedrooms and three and one half baths. All bedrooms are located on second floor with laundry, guest bath and a master suite. Located between the first and second floors off of the landing is an office/den space. The first floor is open concept with the kitchen, dining and living areas located at the rear of the home with expansive windows allowing a great connection to back yard area and outdoors. On the back of the home is a covered deck area allowing for outdoor entertaining without the worry of the elements. The first floor also offers a powder room, mudroom and walk-in pantry off the kitchen area. From the mudroom there is access to an attached four car tandem garage. From the first floor to the finished basement is an open stair allowing the basement area to feel as part of the house and not just a basement? The basement consists of a main living area, game area with wet bar, exercise room, kids play room with 14’ ceilings, full bathroom and mechanical room with storage closets throughout.

 Gallery KBNY
This brownstone renovation was a full gut project in every sense of the word. On top of installing new floors, a kitchen and bath renovation, and all the typical restoration and refinishing involved in a brownstone built in 1899, we also completely updated the exterior, constructed a balcony that was not originally there, and converted the space from a single-family home into an an owner’s triplex. A newly separated studio rental on the garden level offers the opportunity for supplemental income, an uncommon and welcome addition to a New York brownstone.
A TRANSITIONAL GEM
The result is a two-family brownstone that perfectly combines classic townhouse living with today’s modern needs, including SmartHome technology that we installed to control Bluetooth speakers, Nest thermostats, and the security system.
The overall aesthetic goal was to pay homage to the historical periods the brownstone has lived through in a cohesive way that is the hallmark of modern transitional style.
In the kitchen, white Shaker-style cabinetry, a subway tile backsplash, and marble rather than quartz countertops bring a classically upscale sensibility. To modernize the space further, we opened up the back wall to create floor-to-ceiling windows that are also doors, opening up into the newly built balcony.
TIMELY TOUCHES
This brownstone renovation included many quintessential elements, such as millwork like the ceiling medallions. We restored some and custom built others, perfectly recreating their original appearance.
The heated master bathroom is now serene, with a walk-in shower featuring a subtly modern linear drain. A herringbone Carrera marble tiled floor and marble slab sink complete the scene. In the powder room, we embraced a contemporary look by pairing dark hexagonal floors with light chevron tiles, accented with dramatic navy blue wallpaper. With its clear-cut 1920s-style, we selected the wall sconce to reference one of the brownstone’s earlier eras.
DESIGN DETAILS
Natural oak herringbone floors we installed throughout the entire home bring a modern yet warm touch. We restored the wood-burning marble fireplace, which is fully functioning. An elegant staircase with a custom-crafted black wooden banister and white balusters winds up and down alongside a real brick interior wall that we restored and refinished.
In this brownstone renovation, we were also able to create ceiling height, an unexpected yet aesthetically pleasing side benefit. When working on the joists and beams to level out the floors (a common issue in pre-war renovations) we added ceiling height in the main parlor floor by taking the second floor and raising the ceiling an entire foot. The end result is a main floor with stunning 9-foot ceilings.
SOME HIGHLIGHTS
- Solid natural oak herringbone floors throughout
- A fully restored, refinished, and functioning wood burning fireplace with a marble mantle
- Complete exterior renovation of the facade, cornices, windows, mouldings, and even the ironwork, including the railings leading up to the stoop and those facing the street
- A brand new central air and heating system with uniquely modern vents – look above the couch in the living room with the fuzzy rug and large painting
Considering a brownstone renovation? Contact us today! We specialize in brownstone renovations in New York as well as all pre-war apartments. When you work with a design-and-build firm like Gallery to renovate your brownstone, you get the full range of our expertise in working with all the finest details and pre-war architectural elements of these classic New York spaces. We also handle every step of the process, from filing permits and organizing schedules to sourcing custom pieces and building entirely new rooms (or even balconies). Call us for a free initial consultation when you’re ready.

 Rudloff Custom Builders
We call this dining room modern-farmhouse-chic! As the focal point of the room, the fireplace was the perfect space for an accent wall. We white-washed the fireplace’s brick and added a white surround and mantle and finished the wall with white shiplap. We also added the same shiplap as wainscoting to the other walls. A special feature of this room is the coffered ceiling. We recessed the chandelier directly into the beam for a clean, seamless look.
This farmhouse style home in West Chester is the epitome of warmth and welcoming. We transformed this house’s original dark interior into a light, bright sanctuary. From installing brand new red oak flooring throughout the first floor to adding horizontal shiplap to the ceiling in the family room, we really enjoyed working with the homeowners on every aspect of each room. A special feature is the coffered ceiling in the dining room. We recessed the chandelier directly into the beams, for a clean, seamless look. We maximized the space in the white and chrome galley kitchen by installing a lot of custom storage. The pops of blue throughout the first floor give these room a modern touch.
Rudloff Custom Builders has won Best of Houzz for Customer Service in 2014, 2015 2016, 2017 and 2019. We also were voted Best of Design in 2016, 2017, 2018, 2019 which only 2% of professionals receive. Rudloff Custom Builders has been featured on Houzz in their Kitchen of the Week, What to Know About Using Reclaimed Wood in the Kitchen as well as included in their Bathroom WorkBook article. We are a full service, certified remodeling company that covers all of the Philadelphia suburban area. This business, like most others, developed from a friendship of young entrepreneurs who wanted to make a difference in their clients’ lives, one household at a time. This relationship between partners is much more than a friendship. Edward and Stephen Rudloff are brothers who have renovated and built custom homes together paying close attention to detail. They are carpenters by trade and understand concept and execution. Rudloff Custom Builders will provide services for you with the highest level of professionalism, quality, detail, punctuality and craftsmanship, every step of the way along our journey together.
Specializing in residential construction allows us to connect with our clients early in the design phase to ensure that every detail is captured as you imagined. One stop shopping is essentially what you will receive with Rudloff Custom Builders from design of your project to the construction of your dreams, executed by on-site project managers and skilled craftsmen. Our concept: envision our client’s ideas and make them a reality. Our mission: CREATING LIFETIME RELATIONSHIPS BUILT ON TRUST AND INTEGRITY.
Photo Credit: Linda McManus Images
 User
Spectacular unobstructed views of the Bay, Bridge, Alcatraz, San Francisco skyline and the rolling hills of Marin greet you from almost every window of this stunning Provençal Villa located in the acclaimed Middle Ridge neighborhood of Mill Valley. Built in 2000, this exclusive 5 bedroom, 5+ bath estate was thoughtfully designed by architect Jorge de Quesada to provide a classically elegant backdrop for today’s active lifestyle. Perfectly positioned on over half an acre with flat lawns and an award winning garden there is unmatched sense of privacy just minutes from the shops and restaurants of downtown Mill Valley.
A curved stone staircase leads from the charming entry gate to the private front lawn and on to the grand hand carved front door. A gracious formal entry and wide hall opens out to the main living spaces of the home and out to the view beyond. The Venetian plaster walls and soaring ceilings provide an open airy feeling to the living room and country chef’s kitchen, while three sets of oversized French doors lead onto the Jerusalem Limestone patios and bring in the panoramic views.
The chef’s kitchen is the focal point of the warm welcoming great room and features a range-top and double wall ovens, two dishwashers, marble counters and sinks with Waterworks fixtures. The tile backsplash behind the range pays homage to Monet’s Giverny kitchen. A fireplace offers up a cozy sitting area to lounge and watch television or curl up with a book. There is ample space for a farm table for casual dining. In addition to a well-appointed formal living room, the main level of this estate includes an office, stunning library/den with faux tortoise detailing, butler’s pantry, powder room, and a wonderful indoor/outdoor flow allowing the spectacular setting to envelop every space.
A wide staircase leads up to the four main bedrooms of home. There is a spacious master suite complete with private balcony and French doors showcasing the views. The suite features his and her baths complete with walk – in closets, and steam showers. In hers there is a sumptuous soaking tub positioned to make the most of the view. Two additional bedrooms share a bath while the third is en-suite. The laundry room features a second set of stairs leading back to the butler’s pantry, garage and outdoor areas.
The lowest level of the home includes a legal second unit complete with kitchen, spacious walk in closet, private entry and patio area. In addition to interior access to the second unit there is a spacious exercise room, the potential for a poolside kitchenette, second laundry room, and secure storage area primed to become a state of the art tasting room/wine cellar.
From the main level the spacious entertaining patio leads you out to the magnificent grounds and pool area. Designed by Steve Stucky, the gardens were featured on the 2007 Mill Valley Outdoor Art Club tour.
A level lawn leads to the focal point of the grounds; the iconic “Crags Head” outcropping favored by hikers as far back as the 19th century. The perfect place to stop for lunch and take in the spectacular view. The Century old Sonoma Olive trees and lavender plantings add a Mediterranean touch to the two lawn areas that also include an antique fountain, and a charming custom Barbara Butler playhouse.
Inspired by Provence and built to exacting standards this charming villa provides an elegant yet welcoming environment designed to meet the needs of today’s active lifestyle while staying true to its Continental roots creating a warm and inviting space ready to call home.
 User
Spectacular unobstructed views of the Bay, Bridge, Alcatraz, San Francisco skyline and the rolling hills of Marin greet you from almost every window of this stunning Provençal Villa located in the acclaimed Middle Ridge neighborhood of Mill Valley. Built in 2000, this exclusive 5 bedroom, 5+ bath estate was thoughtfully designed by architect Jorge de Quesada to provide a classically elegant backdrop for today’s active lifestyle. Perfectly positioned on over half an acre with flat lawns and an award winning garden there is unmatched sense of privacy just minutes from the shops and restaurants of downtown Mill Valley.
A curved stone staircase leads from the charming entry gate to the private front lawn and on to the grand hand carved front door. A gracious formal entry and wide hall opens out to the main living spaces of the home and out to the view beyond. The Venetian plaster walls and soaring ceilings provide an open airy feeling to the living room and country chef’s kitchen, while three sets of oversized French doors lead onto the Jerusalem Limestone patios and bring in the panoramic views.
The chef’s kitchen is the focal point of the warm welcoming great room and features a range-top and double wall ovens, two dishwashers, marble counters and sinks with Waterworks fixtures. The tile backsplash behind the range pays homage to Monet’s Giverny kitchen. A fireplace offers up a cozy sitting area to lounge and watch television or curl up with a book. There is ample space for a farm table for casual dining. In addition to a well-appointed formal living room, the main level of this estate includes an office, stunning library/den with faux tortoise detailing, butler’s pantry, powder room, and a wonderful indoor/outdoor flow allowing the spectacular setting to envelop every space.
A wide staircase leads up to the four main bedrooms of home. There is a spacious master suite complete with private balcony and French doors showcasing the views. The suite features his and her baths complete with walk – in closets, and steam showers. In hers there is a sumptuous soaking tub positioned to make the most of the view. Two additional bedrooms share a bath while the third is en-suite. The laundry room features a second set of stairs leading back to the butler’s pantry, garage and outdoor areas.
The lowest level of the home includes a legal second unit complete with kitchen, spacious walk in closet, private entry and patio area. In addition to interior access to the second unit there is a spacious exercise room, the potential for a poolside kitchenette, second laundry room, and secure storage area primed to become a state of the art tasting room/wine cellar.
From the main level the spacious entertaining patio leads you out to the magnificent grounds and pool area. Designed by Steve Stucky, the gardens were featured on the 2007 Mill Valley Outdoor Art Club tour.
A level lawn leads to the focal point of the grounds; the iconic “Crags Head” outcropping favored by hikers as far back as the 19th century. The perfect place to stop for lunch and take in the spectacular view. The Century old Sonoma Olive trees and lavender plantings add a Mediterranean touch to the two lawn areas that also include an antique fountain, and a charming custom Barbara Butler playhouse.
Inspired by Provence and built to exacting standards this charming villa provides an elegant yet welcoming environment designed to meet the needs of today’s active lifestyle while staying true to its Continental roots creating a warm and inviting space ready to call home.

 FOUR POINT DESIGN BUILD INC
LOFT | Luxury Industrial Loft Makeover Downtown LA | FOUR POINT DESIGN BUILD INC
A gorgeous and glamorous 687 sf Loft Apartment in the Heart of Downtown Los Angeles, CA. Small Spaces...BIG IMPACT is the theme this year: A wide open space and infinite possibilities. The Challenge: Only 3 weeks to design, resource, ship, install, stage and photograph a Downtown LA studio loft for the October 2014 issue of @dwellmagazine and the 2014 @dwellondesign home tour! So #Grateful and #honored to partner with the wonderful folks at #MetLofts and #DwellMagazine for the incredible design project!
Photography by Riley Jamison
#interiordesign #loftliving #StudioLoftLiving #smallspacesBIGideas #loft #DTLA
AS SEEN IN
Dwell Magazine
LA Design Magazine
 SUPERIOR CHIMNEY SERVICES CORPORATION
A friend noticed a damp, musty smell coming from her living room fireplace the week after a February thaw. When she called a masonry technician from Superior Chimney, to take a look, and found that water had been working its way behind the bricks for years. What started as a small crack now meant her chimney needed structural repairs before she could safely use it again.
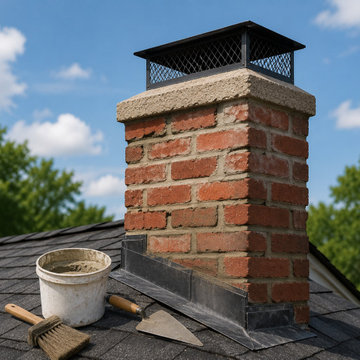
Chimney repairs are any work done to restore the structural and weatherproof condition of a chimney. This can include mortar joint repair, brick replacement, crown repair, flue repair, and cap or flashing replacement. Most Chicagoland homeowners discover the need for chimney repairs often times after winter, when the freeze and thaw cycles have already done its damage. Uncovering the symptoms early is the best way to keep chimney repairs down. Let’s discuss how that can be done.
Why Chicagoland Weather Is Especially Hard on Chimneys
Chicagoland has some of the most polarized weather. One day it’s a blizzard and the next week hot, humid and 100 degrees. That swing in weather conditions and temperatures are the real reasons why chimney repairs are needed.
When moisture from humid and rainy days’ soak into brick and mortar and then freezes, it expands. As it begins to thaw, the materials contract. Repeat that cycle dozens of times in a single Illinois winter and even solid masonry in the chimney starts to crack, spall, and separate from the joints holding it together. This is called the freeze thaw cycle. We’ve talked about it many times over the years, and it continues to be the single biggest reason homes need chimney repairs more often than homes in milder climates.
The Chimney Safety Institute of America (CSIA), the leading nonprofit certifying body for chimney professionals in the United States, notes that water intrusion is one of the most damaging and most preventable problems. If the problem is left to mature, it affects more than the appearance. It compromises the structure itself.
What Do Chimney Repairs Involve?
Not every chimney problem requires the same fix. Chimney repairs generally fall into a few categories. Understanding the difference, helps homeowners have a more informed conversation with the expert technician.
Mortar joint repair or tuckpointing. This involves removing deteriorated mortar between bricks and replacing it with fresh mortar, matched to the original color and texture as closely as possible.
Brick replacement. When individual bricks have spalled, meaning the face has cracked or popped off from trapped moisture, those bricks are removed and replaced.
Crown and cap repair. The crown is the concrete slab at the very top of the chimney. Cracks both big and small let water directly into the chimney flue. Chimney crown repair is often one of the most urgent forms of chimney repairs.
Flashing repair. Flashing is the barrier where the chimney meets the roofline. Loose, damaged or poorly installed flashing is a common source for water leaks. The roof gets the blame as it is the largest piece that covers the house. However, it certainly can be the overlooked chimney.
Flue and liner repair. Cracked flue tiles or damaged liners affect how safely a chimney vents smoke and combustion gases.
When to Know a Chimney Needs Repair
Most chimney damage shows up as small, easy to dismiss way. Let’s take a look at the following list. Be sure to print this out and keep it handy so if/when something happens, you know what to look for.
• Water stains near the fireplace or on the ceiling
• A brownish stain on the wall around your fireplace, or a stain on the ceiling near an exterior chimney. This means water is getting in somewhere it should not.
• Crumbling or missing mortar
• If you can see gaps between bricks, or mortar that flakes off when you touch it
• A leaning or visibly shifting chimney
• A chimney that appears to pull away from the house, even slightly, could indicate a structural issue
• White staining on the brick (efflorescence)
• Chalky white residue left behind as water evaporates out of the masonry. It is a visible sign that moisture is moving through brick
• Rusted damper or firebox components
• Metal parts inside a fireplace that are rusting are a strong indicator that moisture is present
• Debris in the fireplace
• Small chunks of brick, mortar, or tile landing in the firebox
What are the Various Types of Chimney Repair?
This is a compiled list of chimney repairs so you can be aware of what to look for. If you have any questions, contact us directly at 877-244-6349.
Homeowners who schedule chimney repairs at the first sign of trouble typically spend far less than those who wait until water damage reaches the interior of the home. This is a great reason to contact Superior Chimney at 877-244-6349.
Why an Annual Inspection Matters More Than People Think
The CSIA and the National Fire Protection Association both recommend that chimneys, fireplaces, and vents be inspected at least once a year, whether or not the fireplace gets used. This recommendation exists because damage does not take a break just because a chimney sits without any use.
According to data stated by the CSIA, chimney related fires still contribute to tens of thousands of residential fires across the United States each year, and a large share of those incidents can be traced back to deferred maintenance. An annual chimney inspection is what catches the small mortar crack or the hairline crown crack before it turns into a repair bill.
Hiring the Right Company for Chimney Repairs
Not every company who offers chimney repair work has the certified training to diagnose a problem correctly. CSIA certification is the most widely recognized credential in the industry, and it requires technicians to study chimney physics, venting systems, and fire codes. After the studies, the new technician needs to pass an exam and agree to a professional code of ethics.
When you call, be sure to ask:
Are your technicians CSIA certified, and can I verify that certification?
Will you show me photos or video of the damage before starting work?
Does the estimate distinguish between cosmetic repair and structural repair?
At Superior Chimney, we welcome these and other of your questions.
How Chimney Repairs Affect Insurance and Resale
A chimney in poor condition can complicate a home sale or an insurance claim. Home inspectors routinely report on visible mortar loss, leaning chimneys, or missing chimney caps. Some insurers will request proof of repair before renewing a policy on an older home. Addressing chimney repairs proactively protects more than curb appeal. It protects the sale timeline and the claims history associated to the property.
Frequently Asked Questions
How often should a Chicago area chimney be inspected? At least once a year, per CSIA and NFPA guidance, regardless of how often the fireplace is used.
Can chimney repairs be done in winter? Some interior repairs can happen in cold weather, but most masonry repair requires temperatures consistently above freezing. Spring and fall are the most common repair times in the Chicago area.
Is tuckpointing the same thing as chimney repair? Tuckpointing is one type of chimney repair, focused on replacing deteriorated mortar joints.
Does homeowners insurance cover chimney repairs? It depends. Sudden damage from a storm may be covered, while gradual deterioration from lack of maintenance typically is not.
So Finally…
Taking care of your home includes a chimney. Just because you don’t see it every day, doesn’t mean things aren’t happening. Be sure to get a chimney inspection done once per year by a certified and credible company such as Superior Chimney to take care of the issues. Contact us today by calling 877-244-6349.
 Orlando Magic Kingdom Rentals
Many people visit Orlando to watch Disney world in its amazing grandeur however it is important to find vacation homes that will provide appropriate accommodation to them. Prior to the visit, one should log on to the website and book vacation homes online to get the best deals. Villa near the Crescent Lake is a prominent Orlando vacation rental home that would go a long way in providing best results to the users. It is situated two miles south of highway which consists of different restaurants and shops in the close vicinity.
Dwelling unit is equipped with all the modern amenities such as TV, internet, Hot tub and a warm pool where people can relax after a daylong sightseeing. Rooms, kitchens and the bathrooms are spacious so that people could relax without any hassles. Free parking is available along with the Dryer and the DVD players.
Another option is villa number 4 comprising of 2 master bedrooms and large 55 inch TV screen in the lounge. All the rooms are equipped with ceiling fans and air conditioners so that temperature could be regulated according to the requirements and the specifications of the visitors. For kids Nintendo and Play station could become a wonderful distraction after experiencing the ride in the amusement parks located in close vicinity.
A huge lounge and dining area offer amazing comfort to the visitors who can hog onto multiple cuisines as per their demands and preferences. Moreover large patio along with the full equipped modern kitchen will help prepare food of different varieties. Villa occupies a huge area that can accommodate about 16 families. Special facilities for kids like child crib, travel crib and crib bedding help the parents to relax when their children are playing ore sleeping.
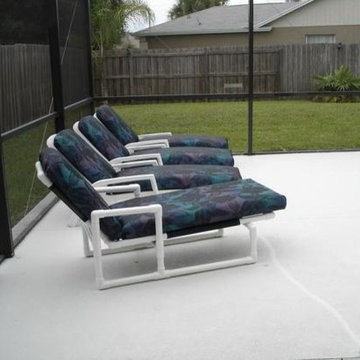
In order to protect kids, Alarms are installed on all the doors leading to the swimming pool. Easy access is provided to the disabled people and telephone facilities allow people to make free local calls. Villa has an inbuilt laundry area that could be used to wash the clothes. Orlando is wonderful city with different sources of entertainment such as Disney world and innumerable clubs to enjoy the night life. Upon arrival to the tourist destination, you can rest in any of the vacation homes and proceed next day for sightseeing. For relaxation near the pool, cushion furniture are provided to the users apart from the Jacuzzi and spa facilities.
 User
Spectacular unobstructed views of the Bay, Bridge, Alcatraz, San Francisco skyline and the rolling hills of Marin greet you from almost every window of this stunning Provençal Villa located in the acclaimed Middle Ridge neighborhood of Mill Valley. Built in 2000, this exclusive 5 bedroom, 5+ bath estate was thoughtfully designed by architect Jorge de Quesada to provide a classically elegant backdrop for today’s active lifestyle. Perfectly positioned on over half an acre with flat lawns and an award winning garden there is unmatched sense of privacy just minutes from the shops and restaurants of downtown Mill Valley.
A curved stone staircase leads from the charming entry gate to the private front lawn and on to the grand hand carved front door. A gracious formal entry and wide hall opens out to the main living spaces of the home and out to the view beyond. The Venetian plaster walls and soaring ceilings provide an open airy feeling to the living room and country chef’s kitchen, while three sets of oversized French doors lead onto the Jerusalem Limestone patios and bring in the panoramic views.
The chef’s kitchen is the focal point of the warm welcoming great room and features a range-top and double wall ovens, two dishwashers, marble counters and sinks with Waterworks fixtures. The tile backsplash behind the range pays homage to Monet’s Giverny kitchen. A fireplace offers up a cozy sitting area to lounge and watch television or curl up with a book. There is ample space for a farm table for casual dining. In addition to a well-appointed formal living room, the main level of this estate includes an office, stunning library/den with faux tortoise detailing, butler’s pantry, powder room, and a wonderful indoor/outdoor flow allowing the spectacular setting to envelop every space.
A wide staircase leads up to the four main bedrooms of home. There is a spacious master suite complete with private balcony and French doors showcasing the views. The suite features his and her baths complete with walk – in closets, and steam showers. In hers there is a sumptuous soaking tub positioned to make the most of the view. Two additional bedrooms share a bath while the third is en-suite. The laundry room features a second set of stairs leading back to the butler’s pantry, garage and outdoor areas.
The lowest level of the home includes a legal second unit complete with kitchen, spacious walk in closet, private entry and patio area. In addition to interior access to the second unit there is a spacious exercise room, the potential for a poolside kitchenette, second laundry room, and secure storage area primed to become a state of the art tasting room/wine cellar.
From the main level the spacious entertaining patio leads you out to the magnificent grounds and pool area. Designed by Steve Stucky, the gardens were featured on the 2007 Mill Valley Outdoor Art Club tour.
A level lawn leads to the focal point of the grounds; the iconic “Crags Head” outcropping favored by hikers as far back as the 19th century. The perfect place to stop for lunch and take in the spectacular view. The Century old Sonoma Olive trees and lavender plantings add a Mediterranean touch to the two lawn areas that also include an antique fountain, and a charming custom Barbara Butler playhouse.
Inspired by Provence and built to exacting standards this charming villa provides an elegant yet welcoming environment designed to meet the needs of today’s active lifestyle while staying true to its Continental roots creating a warm and inviting space ready to call home.
 Gallery KBNY
This brownstone renovation was a full gut project in every sense of the word. On top of installing new floors, a kitchen and bath renovation, and all the typical restoration and refinishing involved in a brownstone built in 1899, we also completely updated the exterior, constructed a balcony that was not originally there, and converted the space from a single-family home into an an owner’s triplex. A newly separated studio rental on the garden level offers the opportunity for supplemental income, an uncommon and welcome addition to a New York brownstone.
A TRANSITIONAL GEM
The result is a two-family brownstone that perfectly combines classic townhouse living with today’s modern needs, including SmartHome technology that we installed to control Bluetooth speakers, Nest thermostats, and the security system.
The overall aesthetic goal was to pay homage to the historical periods the brownstone has lived through in a cohesive way that is the hallmark of modern transitional style.
In the kitchen, white Shaker-style cabinetry, a subway tile backsplash, and marble rather than quartz countertops bring a classically upscale sensibility. To modernize the space further, we opened up the back wall to create floor-to-ceiling windows that are also doors, opening up into the newly built balcony.
TIMELY TOUCHES
This brownstone renovation included many quintessential elements, such as millwork like the ceiling medallions. We restored some and custom built others, perfectly recreating their original appearance.
The heated master bathroom is now serene, with a walk-in shower featuring a subtly modern linear drain. A herringbone Carrera marble tiled floor and marble slab sink complete the scene. In the powder room, we embraced a contemporary look by pairing dark hexagonal floors with light chevron tiles, accented with dramatic navy blue wallpaper. With its clear-cut 1920s-style, we selected the wall sconce to reference one of the brownstone’s earlier eras.
DESIGN DETAILS
Natural oak herringbone floors we installed throughout the entire home bring a modern yet warm touch. We restored the wood-burning marble fireplace, which is fully functioning. An elegant staircase with a custom-crafted black wooden banister and white balusters winds up and down alongside a real brick interior wall that we restored and refinished.
In this brownstone renovation, we were also able to create ceiling height, an unexpected yet aesthetically pleasing side benefit. When working on the joists and beams to level out the floors (a common issue in pre-war renovations) we added ceiling height in the main parlor floor by taking the second floor and raising the ceiling an entire foot. The end result is a main floor with stunning 9-foot ceilings.
SOME HIGHLIGHTS
- Solid natural oak herringbone floors throughout
- A fully restored, refinished, and functioning wood burning fireplace with a marble mantle
- Complete exterior renovation of the facade, cornices, windows, mouldings, and even the ironwork, including the railings leading up to the stoop and those facing the street
- A brand new central air and heating system with uniquely modern vents – look above the couch in the living room with the fuzzy rug and large painting
Considering a brownstone renovation? Contact us today! We specialize in brownstone renovations in New York as well as all pre-war apartments. When you work with a design-and-build firm like Gallery to renovate your brownstone, you get the full range of our expertise in working with all the finest details and pre-war architectural elements of these classic New York spaces. We also handle every step of the process, from filing permits and organizing schedules to sourcing custom pieces and building entirely new rooms (or even balconies). Call us for a free initial consultation when you’re ready.
 Kathleen Jennison
An Arts & Crafts Bungalow is one of my favorite styles of homes. We have quite a few of them in our Stockton Mid-Town area. And when C&L called us to help them remodel their 1923 American Bungalow, I was beyond thrilled.
As per usual, when we get a new inquiry, we quickly Google the project location while we are talking to you on the phone. My excitement escalated when I saw the Google Earth Image of the sweet Sage Green bungalow in Mid-Town Stockton. "Yes, we would be interested in working with you," I said trying to keep my cool.
But what made it even better was meeting C&L and touring their home, because they are the nicest young couple, eager to make their home period perfect. Unfortunately, it had been slightly molested by some bad house-flippers, and we needed to bring the bathroom back to it "roots."
We knew we had to banish the hideous brown tile and cheap vanity quickly. But C&L complained about the condensation problems and the constant fight with mold. This immediately told me that improper remodeling had occurred and we needed to remedy that right away.
The Before: Frustrations with a Botched Remodel
The bathroom needed to be brought back to period appropriate design with all the functionality of a modern bathroom. We thought of things like marble countertop, white mosaic floor tiles, white subway tile, board and batten molding, and of course a fabulous wallpaper.
This small (and only) bathroom on a tight budget required a little bit of design sleuthing to figure out how we could get the proper look and feel. Our goal was to determine where to splurge and where to economize and how to complete the remodel as quickly as possible because C&L would have to move out while construction was going on.
The Process: Hard Work to Remedy Design and Function
During our initial design study, (which included 2 hours in the owners’ home), we noticed framed images of William Morris Arts and Crafts textile patterns and knew this would be our design inspiration. We presented C&L with three options and they quickly selected the Pimpernel Design Concept.
We had originally selected the Black and Olive colors with a black vanity, mirror, and black and white floor tile. C&L liked it but weren’t quite sure about the black, We went back to the drawing board and decided the William & Co Pimpernel Wallpaper in Bayleaf and Manilla color with a softer gray painted vanity and mirror and white floor tile was more to their liking.
After the Design Concept was approved, we went to work securing the building permit, procuring all the elements, and scheduling our trusted tradesmen to perform the work.
We did uncover some shoddy work by the flippers such as live electrical wires hidden behind the wall, plumbing venting cut-off and buried in the walls (hence the constant dampness), the tub barely balancing on two fence boards across the floor joist, and no insulation on the exterior wall.
All of the previous blunders were fixed and the bathroom put back to its previous glory. We could feel the house thanking us for making it pretty again.
The After Reveal: Cohesive Design Decisions
We selected a simple white subway tile for the tub/shower. This is always classic and in keeping with the style of the house.
We selected a pre-fab vanity and mirror, but they look rich with the quartz countertop. There is much more storage in this small vanity than you would think.
The Transformation: A Period Perfect Refresh
We began the remodel just as the pandemic reared and stay-in-place orders went into effect. As C&L were already moved out and living with relatives, we got the go-ahead from city officials to get the work done (after all, how can you shelter in place without a bathroom?).
All our tradesmen were scheduled to work so that only one crew was on the job site at a time. We stayed on the original schedule with only a one week delay.
The end result is the sweetest little bathroom I've ever seen (and I can't wait to start work on C&L's kitchen next).
Thank you for joining me in this project transformation. I hope this inspired you to think about being creative with your design projects, determining what works best in keeping with the architecture of your space, and carefully assessing how you can have the best life in your home.

 Moderne Builders
Gorgeous master bath with dramatic retro "wave" tile. Peak Photography
Example of a 1950s bathroom design in Los Angeles
Example of a 1950s bathroom design in Los Angeles
 User
Spectacular unobstructed views of the Bay, Bridge, Alcatraz, San Francisco skyline and the rolling hills of Marin greet you from almost every window of this stunning Provençal Villa located in the acclaimed Middle Ridge neighborhood of Mill Valley. Built in 2000, this exclusive 5 bedroom, 5+ bath estate was thoughtfully designed by architect Jorge de Quesada to provide a classically elegant backdrop for today’s active lifestyle. Perfectly positioned on over half an acre with flat lawns and an award winning garden there is unmatched sense of privacy just minutes from the shops and restaurants of downtown Mill Valley.
A curved stone staircase leads from the charming entry gate to the private front lawn and on to the grand hand carved front door. A gracious formal entry and wide hall opens out to the main living spaces of the home and out to the view beyond. The Venetian plaster walls and soaring ceilings provide an open airy feeling to the living room and country chef’s kitchen, while three sets of oversized French doors lead onto the Jerusalem Limestone patios and bring in the panoramic views.
The chef’s kitchen is the focal point of the warm welcoming great room and features a range-top and double wall ovens, two dishwashers, marble counters and sinks with Waterworks fixtures. The tile backsplash behind the range pays homage to Monet’s Giverny kitchen. A fireplace offers up a cozy sitting area to lounge and watch television or curl up with a book. There is ample space for a farm table for casual dining. In addition to a well-appointed formal living room, the main level of this estate includes an office, stunning library/den with faux tortoise detailing, butler’s pantry, powder room, and a wonderful indoor/outdoor flow allowing the spectacular setting to envelop every space.
A wide staircase leads up to the four main bedrooms of home. There is a spacious master suite complete with private balcony and French doors showcasing the views. The suite features his and her baths complete with walk – in closets, and steam showers. In hers there is a sumptuous soaking tub positioned to make the most of the view. Two additional bedrooms share a bath while the third is en-suite. The laundry room features a second set of stairs leading back to the butler’s pantry, garage and outdoor areas.
The lowest level of the home includes a legal second unit complete with kitchen, spacious walk in closet, private entry and patio area. In addition to interior access to the second unit there is a spacious exercise room, the potential for a poolside kitchenette, second laundry room, and secure storage area primed to become a state of the art tasting room/wine cellar.
From the main level the spacious entertaining patio leads you out to the magnificent grounds and pool area. Designed by Steve Stucky, the gardens were featured on the 2007 Mill Valley Outdoor Art Club tour.
A level lawn leads to the focal point of the grounds; the iconic “Crags Head” outcropping favored by hikers as far back as the 19th century. The perfect place to stop for lunch and take in the spectacular view. The Century old Sonoma Olive trees and lavender plantings add a Mediterranean touch to the two lawn areas that also include an antique fountain, and a charming custom Barbara Butler playhouse.
Inspired by Provence and built to exacting standards this charming villa provides an elegant yet welcoming environment designed to meet the needs of today’s active lifestyle while staying true to its Continental roots creating a warm and inviting space ready to call home.
36