
Search results for "Physically challenged" in Home Design Ideas


 Truitt and White Window and Door Showroom
Julian Hodges - Featured Project of the Month by Truitt & White
This month featured project brings you beautifully crafted gates and entryways from local craftsman Julian Hodges. For over 35 years, Mr. Hodges has been designing and crafting custom wooden gates in Berkeley and the greater Bay Area.
His projects mainly feature old growth, vertical grained redwood or western red cedar which is air or kiln dried. The gates are fully mortised and tenoned (male / female joints) and a very powerful epoxy is used to glue the parts together. Wherever a floating panel rides in a dado, drainage is provided in the form of several holes that are out of sight that allow any rain water to be ushered out at the bottom of the gate enabling the gate to dry itself rather than staying damp which otherwise could lead to long term decomposition of the wood.
Adding to the unique feel of each gate, Julian creates his own custom hardware from heavy gauge steel, which also provides a pleasing solid sound as it operates.
All gates are then finished in a penetrating oil seal which optimizes the longevity and good appearance of the gates.
For more information on Julian Hodges' work, visit www.julianhodges.com.

 Wood Products Inc
Bowed and flared stained hard maple treads/ poplar risers and stringers. Painted custom oversized newel posts with painted square top turned balusters.
Find the right local pro for your project

 Peacock Pavers
Ann
Example of a mid-sized mountain style backyard concrete paver patio kitchen design in Miami with a roof extension
Example of a mid-sized mountain style backyard concrete paver patio kitchen design in Miami with a roof extension

 Jim Quigley Custom Homes LLC
Example of a mid-sized transitional wooden straight staircase design in Oklahoma City with painted risers

 Brittany Kiecker
This client didn't have any built in shelves for Shampoo bottles and other shower necessities. Also, the client wanted to replace the existing bench because of issues they had with the existing grout and tile. Rather than redoing the tiled bench, I selected a slab of travertine to match the existing tile. We also added the stone shelves you see on the wall to make the space more functional.

 SLJ Paint and Decorative Finishes
A close up shot of the tone on tone texture with a hint of pearl in the background.
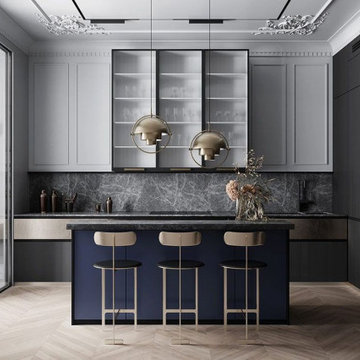


 Crystal Kitchen + Bath
Objectives
· 55+ living with future aging in place requirements
· One bathroom on this level of home for both guests and clients
· Lots of storage and lighting
Design Challenges
· This room was a bedroom, all mechanicals needed to be moved or added. The soil stack could only be in one location. Could not move the window
· Client wanted a large roll in shower
· Contemporary styling with walnut , white and marble
Design Solutions
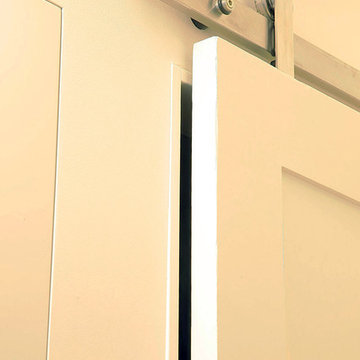
· 2-Pocket doors were added, from hallway and to master bedroom. this also helped with floor space and door swing with aging-in place
· Large curb less shower with trench drain, bench, 2-grab bars, heated tile floor, niche, hand-held shower head and heavy clear glass shower door. Everything accessible for aging-in-place
· Long vanity with 2 sinks. Height of vanity was to be under the window trim. Taller and deeper toe kicks for better wheelchair access. Vanity looks like all drawers-but the 2 sink cabinets are doors.
· Ample Storage: each drawer has a drawer with in the drawer (extra 6 drawers), wall cabinets next to each vanity, 3 recess medicine cabinets, tall linen cabinet (open shelves below because the doors would hit the toilet and a place to store scale on bottom)
· Toilet has a washlet to help with clean-up in the future and grab paper holder
Special Features
· Heated towel bar
· Heated floors
· Marble tile on floor and walls of shower and vanity mirror surround
· Niche under recess medicine cabinets
Lighting: Thin wall sconces, decorative ceiling fan and puck light

 EAST SIDE CONSTRUCTION INC
Mid-sized elegant master white tile and subway tile ceramic tile alcove shower photo in Providence with shaker cabinets, white cabinets, marble countertops, a two-piece toilet, an undermount sink and blue walls


 Liza Phillips Design
Alto Steps Far Reach design featuring 6 different patterns with curved lines. Easy DIY installation. Pet friendly: prevents slipping on polished wood stairs. Adhesive mesh will not hurt the wood finish. Hand knotted in Nepal at 80 knots per inch, in pure wool. Adhesive mesh is provided with each order.
12 steps for 1,060.
singles for 93.

 Maynard Studios
Detail of custom outdoor fireplace screen, hand hammered and made by the blacksmiths at Maynard Studios. Photo by Rideout Photography.
Modern exterior home idea in Louisville
Modern exterior home idea in Louisville

 MDA Mexicana de Arquitectura
Staircase with a garden view, glass banisters, steel structure and wood steps
Example of a mid-sized trendy metal straight staircase design with wooden risers
Example of a mid-sized trendy metal straight staircase design with wooden risers

 Riverdell Construction, Inc.
Tyler Maddox of Maddox Productions
Inspiration for a rustic family room remodel in Portland
Inspiration for a rustic family room remodel in Portland

 Valley Hardwood Inc.
Valley Hardwood
Mid-sized transitional medium tone wood floor living room photo in Seattle with gray walls
Mid-sized transitional medium tone wood floor living room photo in Seattle with gray walls


 CYAN Horticulture
Dave Demers - CYAN Horticulture
Photo of a small contemporary backyard stone landscaping in Vancouver.
Photo of a small contemporary backyard stone landscaping in Vancouver.
 Tile Doctor Ltd
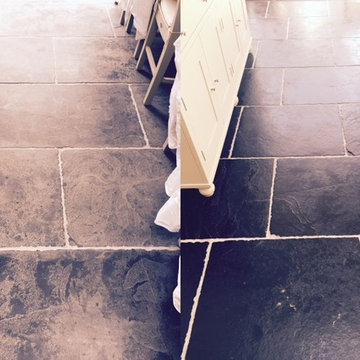
I was recently asked to this property in Wimbledon in to see if there was anything we could do to resolve the problem with a recently laid Black Limestone tiled floor. The builders that had laid the Limestone did not cover or clean the tiles prior to sealing with an impregnating seal thereby trapping in all the dirt from the building works. They then grouted the tiles but didn’t clean the grout off the surface before putting on another two coats of sealer all of which resulted in a very poor finish.
Naturally the customer was not happy so called them back to rectify the problem and so they came back and tried to strip the sealer off with cloths and a chemical stripper. Then without rinsing the stone to remove the chemicals they added another two coats of sealer; in desperation the lady gave up with them and called me in.
To resolve I tried all the sealant strippers available to me but couldn’t budge the mess effectively. The only other option available was to diamond grind the surface so I discussed this with the customer and she agreed to this and left me to carry on.
Initially I started with a coarse 400 grit diamond pad but even that wasn’t having much effect so in the end I had to cut back the surface using a 100 grit pad moving up to 200 grit, then 400 before finally stopping at 800. To lubricate the process you need to use a little water and then rinse away the resultant soil after each pad. If this was a polished stone surface I would have continued with finer and finer grits to restore the surface polish however these tiles were rough limestone and I needed to leave it as near to how it should be.
Once all the Limestone had been stripped back the stone turned an uninviting grey colour, so to bring it back to black I applied two coats of Tile Doctor Stone Oil which enhanced the colour.
I left the floor overnight to allow the Stone Oil to dry out and then returned to seal the Limestone using two coats of Tile Doctor Colour Grow which is an impregnating sealer that enhances the colour in the stone and will protect it from staining going forward.
When the customer saw the final result she was overwhelmed and said she felt like crying with relief, because the floor now looked how she had imagined it to be. It was a great feeling for me to know that I had solved the problems for her.

 Zito Landscape Design, Inc.
This is an example of a large tropical partial sun backyard stone formal garden in Miami for summer.


23