
Search results for "Piece problem" in Home Design Ideas

 J. Stewart Interiors
Main House: Hallway. Client had a difficult time deciding what to put in this wall nook. We tried various pieces but they did not look right underneath the spotlight. We finally settled on this miniature Chinese warrior statue because the lighting highlighted his face. Problem: he was the same tone as the walls and blended in. Solution: I had my handyman create a padded board that I covered with a red/gold weave silk fabric from Duralee, which accented the statue like a museum piece, and gave some 3-D dimension behind it.. It really makes the inset nook and statue "pop" out of the beige walls.
 Lagois Design Build Renovate
New windows, floors, powder room and basement:
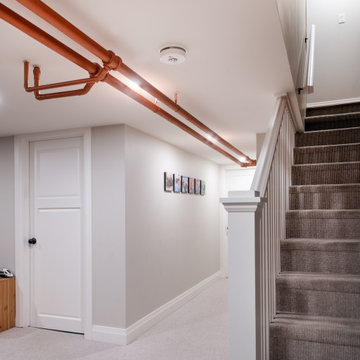
We gave the home new windows, new hardwood floors, and paint throughout. We created a new main floor powder room and a new finished basement containing a living area, three-piece bathroom and new bedroom with egress (tilt and turn) windows.
Flipped around and redesigned kitchen:
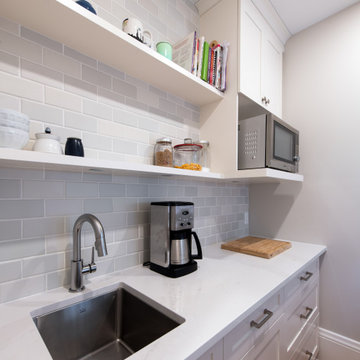
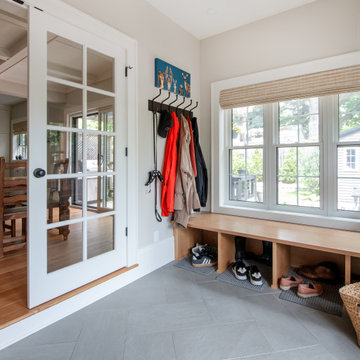
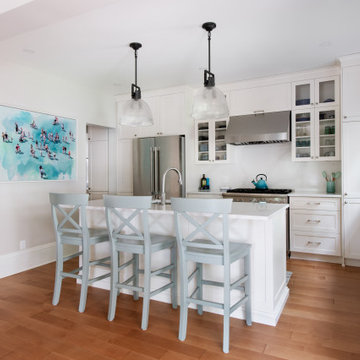
We created a new kitchen. The footprint of the kitchen stayed the same, but we flipped it around and redesigned it. Now it has a walk-in pantry area and more floorspace going in and out, which optimized the flow of traffic. We replaced the old non-functioning mudroom with a new one.
Disappearing balcony and drafty door:
To create a new space using a balcony in a bedroom, we extended the second storey out to line up with the first floor, and this increased the square footage. In that room we turned a drafty door into a window.
We reinstated the rear deck, using as many of the original pieces as we could:
There was a leaking roof problem because the original roof pitches were causing ice damming. We designed a new roof to prevent that in the future.
New windows, stucco, and the challenge of asbestos:
Another challenge was installing new windows in the original stucco finish, which contained asbestos. We waterproofed those properly, future proofing them from leaks.
We solved the situation by installing a 5-inch trim around the perimeter of the window. Specialists cut the asbestos back (we had to set up a containment perimeter around each window), and then we placed windows that are five inches wider than the window frames. We used special flashing tapes and sealed them all up behind the stucco.
 Annie Santulli Designs
We completely remade this luxury home’s interior by tearing everything down to its studs and rebuilding it to create soft, contemporary spaces throughout that invite and fascinate.
This space was filled with heavy ornate architectural features inside and outside, including a dated chunky wooden staircase that weighed down the entire front of the home. By reformatting and replacing the fully exposed staircase and loft railing with glass, we were able to open the space and brighten the two-story living room. The oversized diamond-dropping chandelier over the entry doesn’t hurt either! The dining area appears much larger and contemporary with squared-off moldings, metallic wallpaper, unique light fixture, and bold artwork.
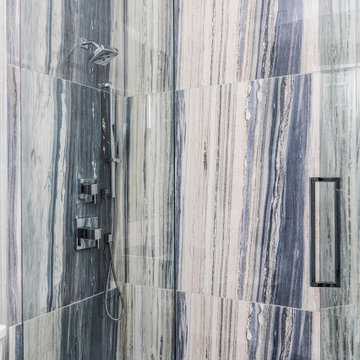
Bold exciting choices were made in both bathrooms when choosing tiles and slabs. These stone pieces are focal points and statement pieces garnering attention from everyone who enters. And, speaking of bold stone choices, the 10ft. book-matched porcelain slab installation in the living room is nothing less than a striking work of art.
Our client gave us a 7-month deadline. No problem we love a challenge and as you can see, we delivered and on budget!
Find the right local pro for your project
 Lagois Design Build Renovate
New windows, floors, powder room and basement:
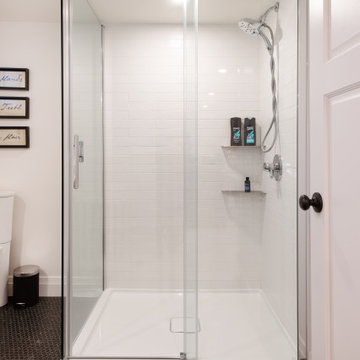
We gave the home new windows, new hardwood floors, and paint throughout. We created a new main floor powder room and a new finished basement containing a living area, three-piece bathroom and new bedroom with egress (tilt and turn) windows.
Flipped around and redesigned kitchen:
We created a new kitchen. The footprint of the kitchen stayed the same, but we flipped it around and redesigned it. Now it has a walk-in pantry area and more floorspace going in and out, which optimized the flow of traffic. We replaced the old non-functioning mudroom with a new one.
Disappearing balcony and drafty door:
To create a new space using a balcony in a bedroom, we extended the second storey out to line up with the first floor, and this increased the square footage. In that room we turned a drafty door into a window.
We reinstated the rear deck, using as many of the original pieces as we could:
There was a leaking roof problem because the original roof pitches were causing ice damming. We designed a new roof to prevent that in the future.
New windows, stucco, and the challenge of asbestos:
Another challenge was installing new windows in the original stucco finish, which contained asbestos. We waterproofed those properly, future proofing them from leaks.
We solved the situation by installing a 5-inch trim around the perimeter of the window. Specialists cut the asbestos back (we had to set up a containment perimeter around each window), and then we placed windows that are five inches wider than the window frames. We used special flashing tapes and sealed them all up behind the stucco.
 Annie Santulli Designs
We completely remade this luxury home’s interior by tearing everything down to its studs and rebuilding it to create soft, contemporary spaces throughout that invite and fascinate.
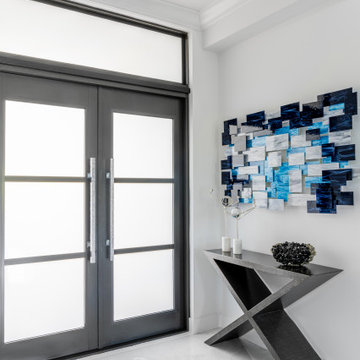
This space was filled with heavy ornate architectural features inside and outside, including a dated chunky wooden staircase that weighed down the entire front of the home. By reformatting and replacing the fully exposed staircase and loft railing with glass, we were able to open the space and brighten the two-story living room. The oversized diamond-dropping chandelier over the entry doesn’t hurt either! The dining area appears much larger and contemporary with squared-off moldings, metallic wallpaper, unique light fixture, and bold artwork.
Bold exciting choices were made in both bathrooms when choosing tiles and slabs. These stone pieces are focal points and statement pieces garnering attention from everyone who enters. And, speaking of bold stone choices, the 10ft. book-matched porcelain slab installation in the living room is nothing less than a striking work of art.
Our client gave us a 7-month deadline. No problem we love a challenge and as you can see, we delivered and on budget!
 Decorating Den Interiors-Barbara Tabak
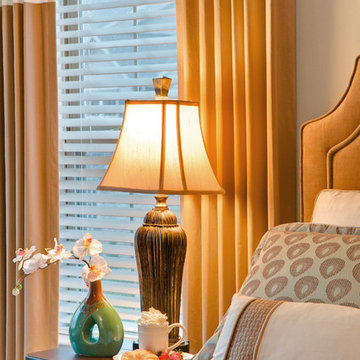
The client’s goal for this makeover was to create a clean style with a contemporary vibe in her cold empty bedroom. The client’s main focus for the design was to block the morning sun that woke her up long before she wanted to begin her day.
Problem(s) addressed:
The room was void of furnishings, bedding and accessories. The décor consisted of a mattress, box spring, jewelry chest and an old comforter, and therefore had no inspirational piece from which to begin the design. We were literally starting from scratch. As for the morning sun dilemma, I was excited to come up with a better solution to the sun challenge than her temporary solution of stacking towels in the arch window.
Solution provided:
Furnishings were the first priority. Rich espresso-stained contemporary dresser, gentleman’s chest and nightstands began the design. Next, a leopard print upholstered chaise was selected to sit in front of the double arched window providing a place to read, work on a laptop, and listen to music or just lounge. Two faux leather ottomans were selected to perch at the end of the bed.
Custom bedding and color scheme was next on the list. The client had requested a restful color palette, which fell into place when we found the perfect heather-gray, gold and cream hued bed ensemble. With the bedding selected, a coordinating wall paint and gold velvet fabric was chosen for the upholstered headboard.
To solve the clients early morning wake up call, traversing draperies that are installed above the window arch were designed to shut out the morning sun. The inverted French pleat draperies, with their color block design, enhance the room’s clean contemporary style. Brushed silver hardware with cracked crystal finials coordinated the furniture hardware and added a touch of sophistication.
Finally, a combination of elegant lighting, mixed media art, an area rug and accessories finish the room’s contemporary design.
 Lagois Design Build Renovate
New windows, floors, powder room and basement:
We gave the home new windows, new hardwood floors, and paint throughout. We created a new main floor powder room and a new finished basement containing a living area, three-piece bathroom and new bedroom with egress (tilt and turn) windows.
Flipped around and redesigned kitchen:
We created a new kitchen. The footprint of the kitchen stayed the same, but we flipped it around and redesigned it. Now it has a walk-in pantry area and more floorspace going in and out, which optimized the flow of traffic. We replaced the old non-functioning mudroom with a new one.
Disappearing balcony and drafty door:
To create a new space using a balcony in a bedroom, we extended the second storey out to line up with the first floor, and this increased the square footage. In that room we turned a drafty door into a window.
We reinstated the rear deck, using as many of the original pieces as we could:
There was a leaking roof problem because the original roof pitches were causing ice damming. We designed a new roof to prevent that in the future.
New windows, stucco, and the challenge of asbestos:
Another challenge was installing new windows in the original stucco finish, which contained asbestos. We waterproofed those properly, future proofing them from leaks.
We solved the situation by installing a 5-inch trim around the perimeter of the window. Specialists cut the asbestos back (we had to set up a containment perimeter around each window), and then we placed windows that are five inches wider than the window frames. We used special flashing tapes and sealed them all up behind the stucco.

 Sheila Rich Interiors, LLC
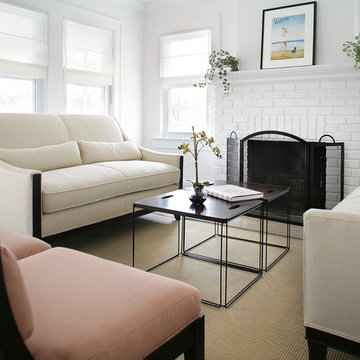
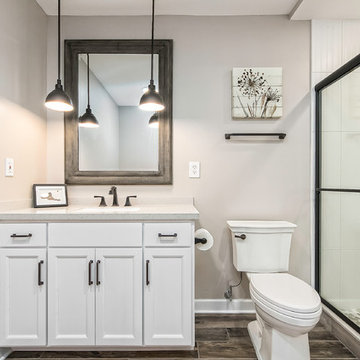
A crisp and consistent color scheme and composition creates an airy, unified mood throughout the diminutive 13' x 13' living room. Dark hardwood floors add warmth and contrast. We added thick moldings to architecturally enhance the house.
Gauzy cotton Roman shades dress new hurricane-proof windows and coax additional natural light into the home. Because of their versatility, pairs of furniture instead of single larger pieces are used throughout the home. This helps solve the space problem because these smaller pieces can be moved and stored easily.
Photography Peter Rymwid
 Lagois Design Build Renovate
New windows, floors, powder room and basement:
We gave the home new windows, new hardwood floors, and paint throughout. We created a new main floor powder room and a new finished basement containing a living area, three-piece bathroom and new bedroom with egress (tilt and turn) windows.
Flipped around and redesigned kitchen:
We created a new kitchen. The footprint of the kitchen stayed the same, but we flipped it around and redesigned it. Now it has a walk-in pantry area and more floorspace going in and out, which optimized the flow of traffic. We replaced the old non-functioning mudroom with a new one.
Disappearing balcony and drafty door:
To create a new space using a balcony in a bedroom, we extended the second storey out to line up with the first floor, and this increased the square footage. In that room we turned a drafty door into a window.
We reinstated the rear deck, using as many of the original pieces as we could:
There was a leaking roof problem because the original roof pitches were causing ice damming. We designed a new roof to prevent that in the future.
New windows, stucco, and the challenge of asbestos:
Another challenge was installing new windows in the original stucco finish, which contained asbestos. We waterproofed those properly, future proofing them from leaks.
We solved the situation by installing a 5-inch trim around the perimeter of the window. Specialists cut the asbestos back (we had to set up a containment perimeter around each window), and then we placed windows that are five inches wider than the window frames. We used special flashing tapes and sealed them all up behind the stucco.
 Lagois Design Build Renovate
New windows, floors, powder room and basement:
We gave the home new windows, new hardwood floors, and paint throughout. We created a new main floor powder room and a new finished basement containing a living area, three-piece bathroom and new bedroom with egress (tilt and turn) windows.
Flipped around and redesigned kitchen:
We created a new kitchen. The footprint of the kitchen stayed the same, but we flipped it around and redesigned it. Now it has a walk-in pantry area and more floorspace going in and out, which optimized the flow of traffic. We replaced the old non-functioning mudroom with a new one.
Disappearing balcony and drafty door:
To create a new space using a balcony in a bedroom, we extended the second storey out to line up with the first floor, and this increased the square footage. In that room we turned a drafty door into a window.
We reinstated the rear deck, using as many of the original pieces as we could:
There was a leaking roof problem because the original roof pitches were causing ice damming. We designed a new roof to prevent that in the future.
New windows, stucco, and the challenge of asbestos:
Another challenge was installing new windows in the original stucco finish, which contained asbestos. We waterproofed those properly, future proofing them from leaks.
We solved the situation by installing a 5-inch trim around the perimeter of the window. Specialists cut the asbestos back (we had to set up a containment perimeter around each window), and then we placed windows that are five inches wider than the window frames. We used special flashing tapes and sealed them all up behind the stucco.
 User
UserThis amazing über contemporary loft space is located in the heart of the very trendy and oh so upscale Yonge and Eglinton district.
This loft oozes style and epitomizes the uptown lifestyle. It's raw industrial look really resonates with the uptown crowd.
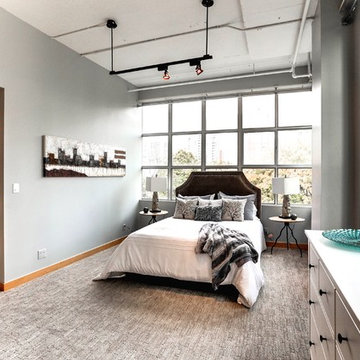
The polished concrete floors, exposed sprinklers. ductwork and huge 9ft barn doors all helped to set the stage.
There was only one problem......it didn't sell!
We were called in by the Realtor to give this loft and urban trendy vibe.
We encouraged the clients to repaint utilizing a more current, trending palette. We choose a pallet of several grey tones.
Our list of suggested updates included, switching out the light fixtures, replacing old worn carpeting with a Berber and staging utilizing key pieces one would expect with the loft look. We brought in contemporary furnishings and decor pieces including a live edge coffee table and a cowhide rug. All of these updates translated to SOLD within weeks of staging! Another successful transformation.
 Lagois Design Build Renovate
New windows, floors, powder room and basement:
We gave the home new windows, new hardwood floors, and paint throughout. We created a new main floor powder room and a new finished basement containing a living area, three-piece bathroom and new bedroom with egress (tilt and turn) windows.
Flipped around and redesigned kitchen:
We created a new kitchen. The footprint of the kitchen stayed the same, but we flipped it around and redesigned it. Now it has a walk-in pantry area and more floorspace going in and out, which optimized the flow of traffic. We replaced the old non-functioning mudroom with a new one.
Disappearing balcony and drafty door:
To create a new space using a balcony in a bedroom, we extended the second storey out to line up with the first floor, and this increased the square footage. In that room we turned a drafty door into a window.
We reinstated the rear deck, using as many of the original pieces as we could:
There was a leaking roof problem because the original roof pitches were causing ice damming. We designed a new roof to prevent that in the future.
New windows, stucco, and the challenge of asbestos:
Another challenge was installing new windows in the original stucco finish, which contained asbestos. We waterproofed those properly, future proofing them from leaks.
We solved the situation by installing a 5-inch trim around the perimeter of the window. Specialists cut the asbestos back (we had to set up a containment perimeter around each window), and then we placed windows that are five inches wider than the window frames. We used special flashing tapes and sealed them all up behind the stucco.
 Annie Santulli Designs
We completely remade this luxury home’s interior by tearing everything down to its studs and rebuilding it to create soft, contemporary spaces throughout that invite and fascinate.
This space was filled with heavy ornate architectural features inside and outside, including a dated chunky wooden staircase that weighed down the entire front of the home. By reformatting and replacing the fully exposed staircase and loft railing with glass, we were able to open the space and brighten the two-story living room. The oversized diamond-dropping chandelier over the entry doesn’t hurt either! The dining area appears much larger and contemporary with squared-off moldings, metallic wallpaper, unique light fixture, and bold artwork.
Bold exciting choices were made in both bathrooms when choosing tiles and slabs. These stone pieces are focal points and statement pieces garnering attention from everyone who enters. And, speaking of bold stone choices, the 10ft. book-matched porcelain slab installation in the living room is nothing less than a striking work of art.
Our client gave us a 7-month deadline. No problem we love a challenge and as you can see, we delivered and on budget!
Sponsored
Sunbury, OH

J.Holderby - Renovations
Franklin County's Leading General Contractors - 2X Best of Houzz!
 Pathway Design & Construction
Water leaks can be frustrating and happen often unexpectedly… especially when the water is coming from your upstairs neighbor!
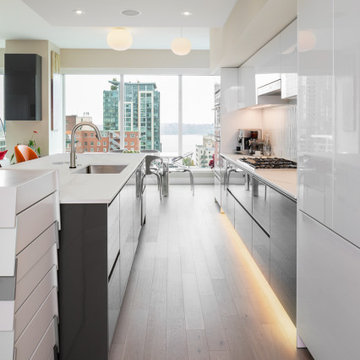
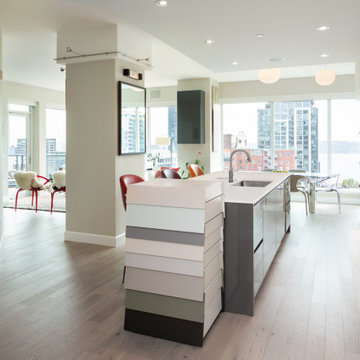
Once the leak occurred, the homeowners decided that it was the perfect opportunity to create their dream kitchen and entryway. The decision was made and the homeowners went shopping to purchase materials for their renovation. One problem; they hadn’t hired a contractor yet. They quickly discovered they would need help building their dream kitchen and entryway which is where we came in.
Scope:
Create a versatile space that reflects the homeowners’ vibrant personalities where they could cook, work, relax and entertain.
Desired features include:
Color changing LED tape lighting was essential to help create ambiance.
Smaller can lights with updated trim to modernize the lighting.
Disguising a “workspace” into the island design.
Installing a compost bin that doubles as a wine chiller for entertaining.
Separate wine bar.
Installing an intricate piece of mirror art and lighting in the entryway.
Installing custom waved back splash tile.
Challenges:
Creating a working set of construction plans from cabinet drawings was a challenge. The process entailed continuous communication with the clients including several walkthroughs before final installation of each aspect throughout the project.
Incorporating high-gloss and muted surfaces into the space without creating glare from the natural light coming in from many existing windows.
Wavy tile became difficult to install with the desired layout of backsplash outlet style and locations.
Solutions:
The core design issues were resolved with exceptional communication between our field team and the homeowners.
Satin finish countertops and matte paint offset the high gloss cabinetry and backsplash.
Because of the size of tiles in the space, the outlets needed to be cut in the center of the tile to look uniform. Time and a steady hand made this possible for the best visual result.
Result:
Thoughtful execution helped to create a versatile dream kitchen and entry way that also provides an at-home workspace. This now versatile space is useful and aesthetically pleasing, exceeding the homeowners’ vision. The small details ranging from accent lighting to the compost bin turned wine chiller make this a luxurious statement piece.
 Pathway Design & Construction
Water leaks can be frustrating and happen often unexpectedly… especially when the water is coming from your upstairs neighbor!
Once the leak occurred, the homeowners decided that it was the perfect opportunity to create their dream kitchen and entryway. The decision was made and the homeowners went shopping to purchase materials for their renovation. One problem; they hadn’t hired a contractor yet. They quickly discovered they would need help building their dream kitchen and entryway which is where we came in.
Scope:
Create a versatile space that reflects the homeowners’ vibrant personalities where they could cook, work, relax and entertain.
Desired features include:
Color changing LED tape lighting was essential to help create ambiance.
Smaller can lights with updated trim to modernize the lighting.
Disguising a “workspace” into the island design.
Installing a compost bin that doubles as a wine chiller for entertaining.
Separate wine bar.
Installing an intricate piece of mirror art and lighting in the entryway.
Installing custom waved back splash tile.
Challenges:
Creating a working set of construction plans from cabinet drawings was a challenge. The process entailed continuous communication with the clients including several walkthroughs before final installation of each aspect throughout the project.
Incorporating high-gloss and muted surfaces into the space without creating glare from the natural light coming in from many existing windows.
Wavy tile became difficult to install with the desired layout of backsplash outlet style and locations.
Solutions:
The core design issues were resolved with exceptional communication between our field team and the homeowners.
Satin finish countertops and matte paint offset the high gloss cabinetry and backsplash.
Because of the size of tiles in the space, the outlets needed to be cut in the center of the tile to look uniform. Time and a steady hand made this possible for the best visual result.
Result:
Thoughtful execution helped to create a versatile dream kitchen and entry way that also provides an at-home workspace. This now versatile space is useful and aesthetically pleasing, exceeding the homeowners’ vision. The small details ranging from accent lighting to the compost bin turned wine chiller make this a luxurious statement piece.
 Harmonic Horticulture and Construction
I think that many carpenters today consider nails and screws to be what holds a structure together. As a result, I think that many structures today are held together by little more than nails and screws. I often see knee braces bolted to the side of a post for a pergola when they should be positioned between the post and beam to take the load directly. Fasteners should not be load-bearing! They should be used to pin a piece of lumber into a position that allows it to shoulder the load directly.
Nails and screws are fast. When used appropriately, they can keep costs down by reducing the time it takes to build something. But they are not the answer to everything. Joist hangars do little to stop a deck from pulling away from a house, just as nailing from the side is not a replacement for putting a post directly under a beam.
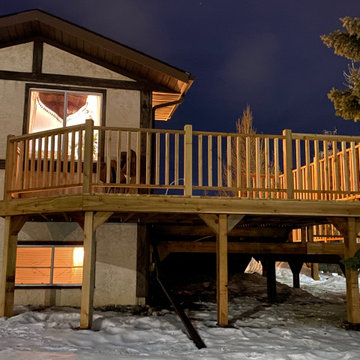
On more than one occasion I've solved a challenging framing problem by employing lap-joints. I've used lap-jointed framing to build curves without having to bend wood, and in the example shown I've used them simply to avoid having to look at an unsightly beam underneath a raised section of deck.
I cut notches half way through my beam where the joists will go, then I cut a corresponding notch into each joist that allows it to fit into the notch in the beam. This allows the joists to cantilever 'through' the beam, which gives me a number of advantages. Using this technique, I can build deck frames tight to the ground without having to rim the structure with joist-hangared beams. I can also use the cantilever to sculpt the edge of the deck into nearly any shape.
As the lumber is locked in from every direction, it is also a far stronger joint than a joist-hangared butt-end, as it resists pulling away, and it is stronger than joist-on-beam because it does not allow for any twisting or 'flopping' of the joists. The beam and joist are locked together, and they each replace the missing pieces of one another, so there is no strength lost in either member.
-Tyler Collins, Operations Manager
 Fresh Coat Painters of Monrovia
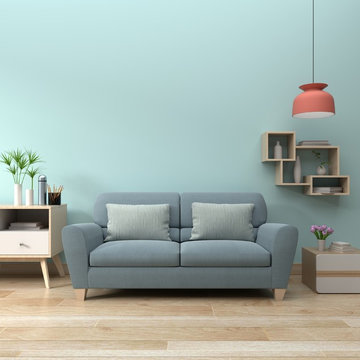
Want an HGTV Styled Room? Get an Accent Wall
If you’re moving into a new apartment/home or you’re finally getting to that laundry list of renovations;
here’s one statement piece that will set your place apart from the rest: an accent wall. An accent wall is
simply a wall that features a color that's different from the rest of the walls. It could be a green wall
along the sea of beige walls or a peach wall amongst a palette of white walls. It serves as an eye-opener
for guests entering the room, delivering an upbeat, fresh tone in your house.
Still need more convincing on why you need an accent wall? Here's a list of how accent walls are an
absolute game-changer for your place:
It gives your room personality. This rule is pretty straightforward. Add a bright or even neutral color to
just one wall, and it will make any room pop. The key is to select colors that play up a specific area in
your home. If you have a girl nursery room, you can paint one wall cotton candy pink to highlight the
plush toys and brightly colored crib. To make your office space look more "official," emphasize your
creative zone with a black, front-facing accent wall that shows off your flashy accessories and computers
while giving you the perfect color to concentrate in.
It modernizes your place without serious renovations. Since most homes typically have similarly
painted walls and tones, and accent wall gives off a modern, almost futuristic vibe. Accent walls
naturally draw in our eyes, and its color distinction causes objects in the room to take a unique form.
Instead of budgeting funds for new furniture, hone in a cool bohemian look with a cinnamon brown
accent wall. To play up the bohemian vibes, you can add wooden accessories like tables, picture frames,
vases, or compliment the brown with some colorful green houseplants!
Accent walls also work as an accessory. Living in a minimalist space? No problem! An accent wall with a
bright, unique hue will doll up your area without you having to add more objects. A burnt orange accent
wall is the perfect look for a living room space accompanied by a tall plant, rug, sofa, and coffee table.
The burnt orange opens up the room, drawing all eyes to the playful contrast of the plant’s green
against the orange while balancing the place out with a neutral rug and a wooden coffee table to play up
earthy tones. People will think you spent all day decorating your room when in reality you only painted
one wall.
You can manipulate your room to look bigger or smaller. Accent walls have a science behind them
depending on what color palette you select. If you’re rooming in a small space, to make it look bigger
use bright colors like lemon yellow or French roses pink to make your room more reflective, maximizing
all the natural light coming in. This will leave your room feeling open and breezy. On the contrast, if you
are stuck with too much space, or want to minimize a corner as a small reading nook, use dark colors
like seaweed green to absorb light and tighten up the space.
Hopefully, this list was able to get you excited to kick-off your new (or next set) of accent walls. Feel free
to marathon HGTV while you paint or wait for the painters to arrive. Stay tuned for future pieces on how
to accentuate and best practices for painting!
Sponsored
Sunbury, OH
J.Holderby - Renovations
Franklin County's Leading General Contractors - 2X Best of Houzz!
 Decorating Den Interiors-Barbara Tabak
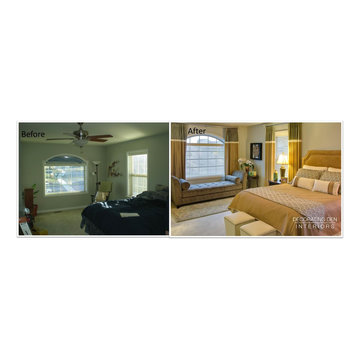
The client’s goal for this makeover was to create a clean style with a contemporary vibe in her cold empty bedroom. The client’s main focus for the design was to block the morning sun that woke her up long before she wanted to begin her day.
Problem(s) addressed:
The room was void of furnishings, bedding and accessories. The décor consisted of a mattress, box spring, jewelry chest and an old comforter, and therefore had no inspirational piece from which to begin the design. We were literally starting from scratch. As for the morning sun dilemma, I was excited to come up with a better solution to the sun challenge than her temporary solution of stacking towels in the arch window.
Solution provided:
Furnishings were the first priority. Rich espresso-stained contemporary dresser, gentleman’s chest and nightstands began the design. Next, a leopard print upholstered chaise was selected to sit in front of the double arched window providing a place to read, work on a laptop, and listen to music or just lounge. Two faux leather ottomans were selected to perch at the end of the bed.
Custom bedding and color scheme was next on the list. The client had requested a restful color palette, which fell into place when we found the perfect heather-gray, gold and cream hued bed ensemble. With the bedding selected, a coordinating wall paint and gold velvet fabric was chosen for the upholstered headboard.
To solve the clients early morning wake up call, traversing draperies that are installed above the window arch were designed to shut out the morning sun. The inverted French pleat draperies, with their color block design, enhance the room’s clean contemporary style. Brushed silver hardware with cracked crystal finials coordinated the furniture hardware and added a touch of sophistication.
Finally, a combination of elegant lighting, mixed media art, an area rug and accessories finish the room’s contemporary design.
 Annie Santulli Designs
We completely remade this luxury home’s interior by tearing everything down to its studs and rebuilding it to create soft, contemporary spaces throughout that invite and fascinate.
This space was filled with heavy ornate architectural features inside and outside, including a dated chunky wooden staircase that weighed down the entire front of the home. By reformatting and replacing the fully exposed staircase and loft railing with glass, we were able to open the space and brighten the two-story living room. The oversized diamond-dropping chandelier over the entry doesn’t hurt either! The dining area appears much larger and contemporary with squared-off moldings, metallic wallpaper, unique light fixture, and bold artwork.
Bold exciting choices were made in both bathrooms when choosing tiles and slabs. These stone pieces are focal points and statement pieces garnering attention from everyone who enters. And, speaking of bold stone choices, the 10ft. book-matched porcelain slab installation in the living room is nothing less than a striking work of art.
Our client gave us a 7-month deadline. No problem we love a challenge and as you can see, we delivered and on budget!
 RelaxMod
Make the Smart Choice!
Smart people pay attention to what matters. When people visit your home they won’t be impressed as easily, but they will notice shoddy furniture immediately. It’s human nature to find flaws and problems quicker than solutions.
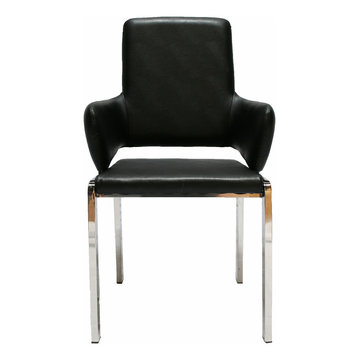
Whenever you enter a home, you look at the furniture. Sadly people often overlook a key piece which is dining chairs. And this thing can be a big problem once you actually sit on the chair. Most chairs look good but when you sit on them, they are actually quite uncomfortable. Imagine having guests over. They love your home and compliment you on your fine taste. When it comes to dinner, they approach the dining table and take their seats. And bam, they start fidgeting in their chairs. Uncomfortable dining chairs can ruin the best dinners and make your home look dull.
With these fine dining chairs, you can avoid both a dull look and uncomfortable seats. Designed with a combo of stainless steel and bi-cast leather, these dining chairs provide an interesting design with the incorporation of arm rests. The chairs have a modern look over all and will definitely look great with any modern artsy looking dining table.
45