
Search results for "Pitfalls" in Home Design Ideas
 S & S Homes, Inc.
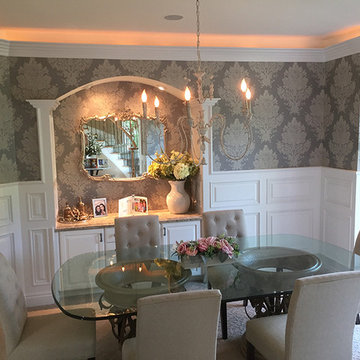
This room encompasses one of the most technical examples of woodwork we’ve seen in a long time. Normally, to create a raised panel wainscot wall, pieces of 1x wood are cut and used to create the boxes, and panel moldings are installed inside the frames to finish off the look. This can be done by typical finish carpenters. The problem is that over time, the numerous joints separate and look bad. In the case of this project, we wanted to avoid that pitfall and do something exquisite AND long-lasting. Over several days, each section of the wall was laid out to determine the appropriate size of each panel. Electrical outlets or switch plates that weren’t centered were moved. Each panel was then specially made at the shop out of 3/4” MDF because its smooth surface is ideal for painting. The raised panels (the pieces that go into each square opening) as well as the panel mouldings (the pieces that frame out each interior panel) were fabricated off site at the shop. Between the set-up, fabrication and the installation, two skilled craftsmen required three solid weeks to make each aspect absolutely perfect. Other finishing details including using a “Back Band” moulding to cap the top of the wainscot and using matching moldings (base, window casings and crown moldings) in areas that needed it for continuity of design.
This room’s woodwork is an exquisite example of true craftsmanship. Words and pictures cannot describe the level of skill required for this project. Once everything was completed, it was sprayed with white enamel paint and wallpaper was installed above the wood wainscot to finish off the room. In a nutshell, each wall panel was constructed like a custom made high end cabinet. Literally.

 Irene Designs
This dream bathroom has everything one can wish for an ideal bathroom escape. It doesn’t just look fabulous – it works well and it is built to stand the test of time.
This bathroom was designed as a private oasis, a place to relax and unwind. Spa-like environment is created by expansive double-sink custom vanity, an elegant free standing tub, and a spacious two-person barrier-free shower with a floating bench. Toilet is concealed within a separate nook behind a pocket door.
Main bathroom area is outlined by a tray ceiling perimeter. The room looks open, airy and spacious. Nothing interferes with the ceiling design and overall space configuration. It hasn’t always been that way. Former layout had serious pitfalls that made the room look much smaller. The shower concealed behind solid walls protruded into the main area clashing with the tray ceiling geometry. Massive shower stall took up significant amount of the room leaving no continuous wall space for a double sink vanity. There were two separate vanities with a dead corner space between them. At the same time, the toilet room was quite spacious with just one fixture in the far end.
New layout not only looks better, it allows for a better functionality and fully reveals the space potential. The toilet was relocated to occupy the former linen closet space slightly expanded into adjacent walk-in closet. Shower was moved into the bigger alcove, away from the tray ceiling area. It opened up the room while giving space for a gorgeous wall-to-wall vanity. Having a full glass wall, the shower extends the space even further. Sparkling glass creates no barrier to the eyesight. The room feels clean, breezy and extra spacious. Gorgeous frameless shower enclosure with glass-to-glass clamps and hinges shows off premium tile designs of the accent shower wall.
Free standing tub remained in its original place in front of the window. With no solid shower walls nearby, it became a focal point adorned with the new crystal chandelier above it. This two-tier gorgeous chandelier makes the bathroom feel incredibly grand. A touch of luxury is showing up in timeless polished chrome faucet finish selections as well.
New expansive custom vanity has his and her full height linen towers, his and her sink cabinets with two individual banks of drawers on the sides and one shared drawer cabinet in the middle containing a charging station in the upper drawer.
Vanity counter tops and floating shower seat top are made of high-end quartz.
Vessel sinks resemble the shape and style of the free-standing tub.
To make the room feel even more spacious and to showcase the shower area in the reflection, a full size mirror is installed over the vanity. Crystal sconces are installed directly into the mirror.
Crisp classic white tile gives the room a timeless sense of polish and luxury. Walls around the perimeter of the entire bathroom are tiled half way. Three rows of 12”x 24” porcelain tile resembling white marble are crowned with a thin row of intricate glass tiles with marble accents, and a chair rail tile.
Tile design flows into a spacious barrier-free two-person walk-in shower. Two more tile patterns of the same tile collection are brought into play. Rear wall is adorned with a picture frame made out of 12”x12” tiles laid at 45 degree angle within the same chair rail and glass tile border. Shower floor is made of small hexagon tiles for proper drainage.
Shower area has two hidden from plain sight niches to contain shampoo bottles and toiletries. The rear side of the niches is made of glass mosaics for a waterfall effect.
To showcase the picture frame inside the shower, the accent shower wall is washed with cascading light from a discrete LED strip tucked in a cove behind “floating” shower ceiling platform.
Multiple shower heads (two ceiling-mount rain heads, one multi-functional wall mount shower head, and a handheld shower) are able to provide a fully customizable shower experience.
Despite of many hard surfaces and shiny finishes, which can sometimes lead to a cold impersonal feeling, this bathroom is cozy and truly welcoming. This sense of warms is maintained by exclusive multi-functional layered lighting. Carefully designed groups of lights (all having a dimmer control) can be used simultaneously, in various combinations, or separately to create numerous different effects and perfect atmosphere for every mood and occasion. Some lights have smart controls and can be operated remotely.
Amazing effect can be achieved by dimmable toe kick perimeter lighting. With the ceiling lights turned off, the vanity looks as if it is floating in the air. Multifaceted crystal fixtures produce cascades of sparkling rainbow reflections dancing around the room and creating an illusion of a starry sky.
Programmable radiant heating floor offers additional warmth and comfort to the room.
This bathroom is well suited for either a quick morning shower or a night in for ultimate relaxation with a champagne toast and a long soak in the freestanding tub.
 S & S Homes, Inc.
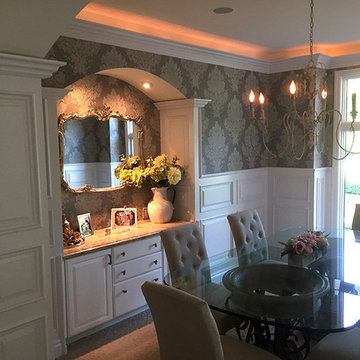
This room encompasses one of the most technical examples of woodwork we’ve seen in a long time. Normally, to create a raised panel wainscot wall, pieces of 1x wood are cut and used to create the boxes, and panel moldings are installed inside the frames to finish off the look. This can be done by typical finish carpenters. The problem is that over time, the numerous joints separate and look bad. In the case of this project, we wanted to avoid that pitfall and do something exquisite AND long-lasting. Over several days, each section of the wall was laid out to determine the appropriate size of each panel. Electrical outlets or switch plates that weren’t centered were moved. Each panel was then specially made at the shop out of 3/4” MDF because its smooth surface is ideal for painting. The raised panels (the pieces that go into each square opening) as well as the panel mouldings (the pieces that frame out each interior panel) were fabricated off site at the shop. Between the set-up, fabrication and the installation, two skilled craftsmen required three solid weeks to make each aspect absolutely perfect. Other finishing details including using a “Back Band” moulding to cap the top of the wainscot and using matching moldings (base, window casings and crown moldings) in areas that needed it for continuity of design.
This room’s woodwork is an exquisite example of true craftsmanship. Words and pictures cannot describe the level of skill required for this project. Once everything was completed, it was sprayed with white enamel paint and wallpaper was installed above the wood wainscot to finish off the room. In a nutshell, each wall panel was constructed like a custom made high end cabinet. Literally.
Find the right local pro for your project
 KohlMark Architects and Builders
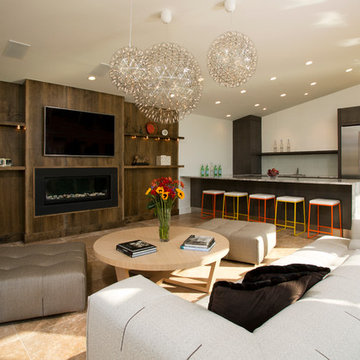
Modernism and traditionalism are just steps away from each other at this Vienna Virginia pool house. The main house, built by a national homebuilder, draws upon tradition, but the pool house, speaks the language of contemporary minimalism. It presents clean lines and a soaring roofline overhanging tall glass doors and clerestory windows. Great design, careful attention to detail, first-rate materials and impeccable craftsmanship have yielded a spectacular solution for outdoor entertaining. With a fireplace and every conceivable convenience under roof, this pool house might just be the perfect escape for inclement weather as well.
Photography by Greg Hadley http://www.greghadleyphotography.com
 User
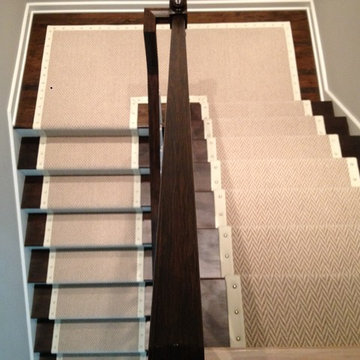
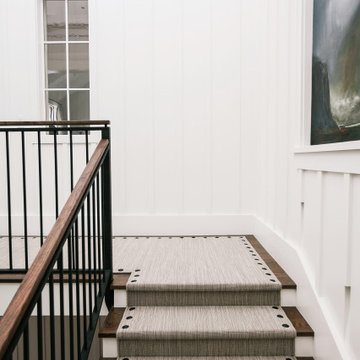
UserWool Patterned Field Carpet with Linen Wide Binding & Chrome Upholstery Nails
Mid-sized transitional carpeted u-shaped staircase photo in Chicago with carpeted risers
Mid-sized transitional carpeted u-shaped staircase photo in Chicago with carpeted risers
 Shayla Twit, Realtor at Coldwell Banker
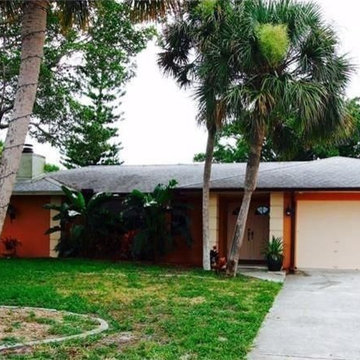
JUST SOLD: $600,000 short sale within walking distance of Siesta Key Beach
This 5 bedroom, 3 bath home within minutes from the beautiful Siesta Key Beach just closed at the price of $600,000. This was a short sale transaction, which presented some typical challenges along the way, but closed with the satisfaction of all parties involved.
A Short Sale transaction means that this is a sale for less than what is owed on the home. The bank must approve the seller to sell this way, as they have to provide evidence that they cannot pay off the note and not all of these transactions are approved. Once a contract is submitted, it typically takes an average of 3-6 months from contract to closing but they vary greatly. The majority of short-sales that Shayla has handled have fallen into the 3-6 month category with many these days closing in 90 days!
Both Buyers and Sellers face difficult and unique problems when dealing with a short-sale. As long as each party is educated by their agents and know what pitfalls and hurdles could come their way, the process isn't as painful as it could be. Unfortunately there are no set guidelines that fit every transaction. You should always expect delays with a short sale and having a professional agent to guide you is crucial. There are different reasons why the transaction may be delayed. Some of the most common are: the buyer not wanting to wait for a reply from the lienholder; the seller not wanting to move out or in denial that the have to sell their home this way; paperwork issues; loan delays; etc.
If you are considering entering a short sale transaction as a buyer, you should know that just because you offer full price does not ensure acceptance by the bank. They can counter any of the terms presented in the initial contract that is signed by both the buyer and seller. With the changes in the local market, lenders are looking at prices closer to market value whereas during the Recession, they were willing to accept lower offers. These are changes an experienced realtor is aware of and will consider when advising you on a short sale transaction!
In close, despite it's name, a "short sale" is NEVER short. They should deem them the "long sale." So working with a seasoned Realtor who is an expert in the distressed property transactions will save you a lot of grey hairs and stress along the way!



 Prestige Custom Building & Construction, Inc.
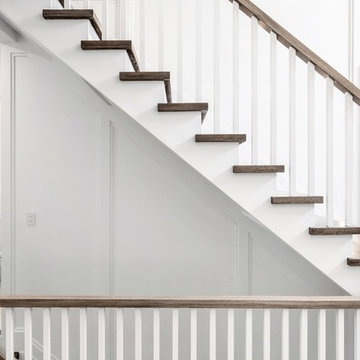
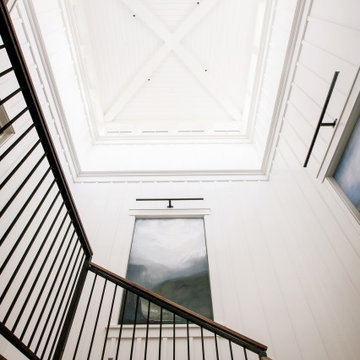
Staircase - mid-sized traditional wooden straight wood railing staircase idea in New York with painted risers
 MODIVO LIGHT
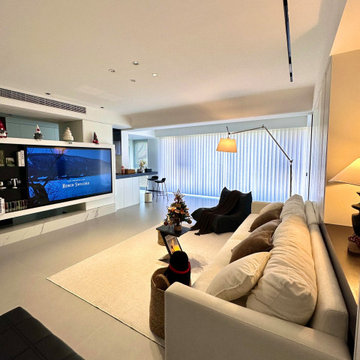
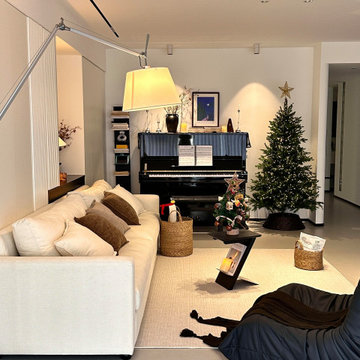
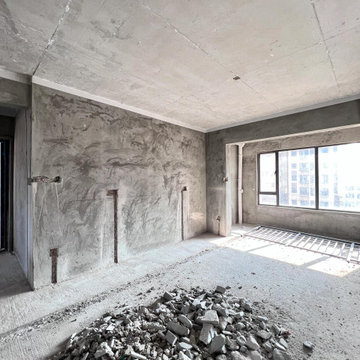
This is our first time decorating a house. Starting from knowing nothing at all to now having the hard decoration completed, we have experienced every emotion along the way—anxiety, doubt, tiredness, hesitation, joy, satisfaction, and touch. We learned and explored on our own, and bit by bit, we finished decorating our home. We’ve accumulated so much experience in this process, and now we want to share it, hoping it can be of a little help to all of you who are doing your own home decoration.
Preparations in Advance
1、Clarify your own ideas: Whether you are looking online, talking to designers, or copying ideas from friends' homes, you should have a clear vision of what your home should look like before designing—such as the style, color scheme, and elements to be used... It is crucial to avoid wanting to install everything that looks good in others' homes in your own. This way, you can clearly put forward your requirements during the design and decoration process, and also avoid frequent revisions to the plan, which may lead to unnecessary rework.
2、Understand your own needs: You need to first figure out the needs of your family, such as how many people live in the house permanently, how many rooms are needed, everyone's living habits, and daily preferences... A home is always for living in, so functionality is always the most important. It is best to list these needs and give priority to meeting them during the design and decoration. This way, you won't find out after decoration that many necessary things are missing, while a bunch of installed things are useless.
3、Determine your budget: There are ways to decorate with more money, and also ways to do it with less. No matter how much money you have, the decorated house can be both beautiful and practical. Therefore, it is essential to decide exactly how much you want to spend on decoration. In every link, such as designing the plan, making a budget table, selecting materials, and construction, you should act in accordance with your own budget.
4、Understand the advantages and disadvantages of your house: There is no perfect house in the world, and every house has its pros and cons. Your design plan should avoid its shortcomings and amplify its advantages. I once wrote an article about the drawbacks of my house ("My house is not perfect, but I still want to find ways to save it"), so we figured out solutions to these problems during the decoration.
5、Learn as much decoration knowledge as possible in advance: Although you can pick up this knowledge in the subsequent decoration process, it is better to learn more beforehand. This will make you much more calm when facing problems.
6、Know your strengths: Before decoration, you must be clear about what you are good at and what you are not. If you are good at design, do the design yourself; if you are skilled at bargaining, go buy building materials on your own; if you have strong hands-on ability, you can even do the decoration and repairs yourself... During the decoration process, you should focus on what you are good at, and leave what you are not good at to others.

 MODIVO LIGHT
This is our first time decorating a house. Starting from knowing nothing at all to now having the hard decoration completed, we have experienced every emotion along the way—anxiety, doubt, tiredness, hesitation, joy, satisfaction, and touch. We learned and explored on our own, and bit by bit, we finished decorating our home. We’ve accumulated so much experience in this process, and now we want to share it, hoping it can be of a little help to all of you who are doing your own home decoration.
Preparations in Advance
1、Clarify your own ideas: Whether you are looking online, talking to designers, or copying ideas from friends' homes, you should have a clear vision of what your home should look like before designing—such as the style, color scheme, and elements to be used... It is crucial to avoid wanting to install everything that looks good in others' homes in your own. This way, you can clearly put forward your requirements during the design and decoration process, and also avoid frequent revisions to the plan, which may lead to unnecessary rework.
2、Understand your own needs: You need to first figure out the needs of your family, such as how many people live in the house permanently, how many rooms are needed, everyone's living habits, and daily preferences... A home is always for living in, so functionality is always the most important. It is best to list these needs and give priority to meeting them during the design and decoration. This way, you won't find out after decoration that many necessary things are missing, while a bunch of installed things are useless.
3、Determine your budget: There are ways to decorate with more money, and also ways to do it with less. No matter how much money you have, the decorated house can be both beautiful and practical. Therefore, it is essential to decide exactly how much you want to spend on decoration. In every link, such as designing the plan, making a budget table, selecting materials, and construction, you should act in accordance with your own budget.
4、Understand the advantages and disadvantages of your house: There is no perfect house in the world, and every house has its pros and cons. Your design plan should avoid its shortcomings and amplify its advantages. I once wrote an article about the drawbacks of my house ("My house is not perfect, but I still want to find ways to save it"), so we figured out solutions to these problems during the decoration.
5、Learn as much decoration knowledge as possible in advance: Although you can pick up this knowledge in the subsequent decoration process, it is better to learn more beforehand. This will make you much more calm when facing problems.
6、Know your strengths: Before decoration, you must be clear about what you are good at and what you are not. If you are good at design, do the design yourself; if you are skilled at bargaining, go buy building materials on your own; if you have strong hands-on ability, you can even do the decoration and repairs yourself... During the decoration process, you should focus on what you are good at, and leave what you are not good at to others.
 Platinum Poolcare
Request Free Quote
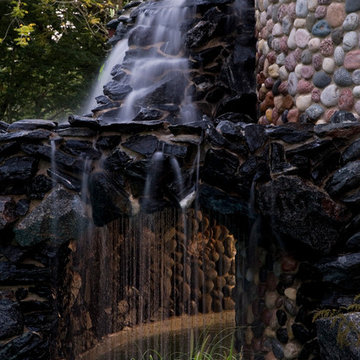
This amazing estate project has so many features it is quite difficult to list all of them. Set on 150 Acres, this sprawling project features an Indoor Oval Pool that connects to an outdoor swimming pool with a 65'0" lap lane. The pools are connected by a moveable swimming pool door that actuates with the turn of a key. The indoor pool house also features an indoor spa and baby pool, and is crowned at one end by a custom Oyster Shell. The Indoor sauna is connected to both main pool sections, and is accessible from the outdoor pool underneath the swim-up grotto and waterfall. The 25'0" vanishind edge is complemented by the hand-made ceramic tiles and fire features on the outdoor pools. Outdoor baby pool and spa complete the vessel count. Photos by Outvision Photography

 Complete Ponds
25' Pondless waterfall stream
Inspiration for a large traditional partial sun backyard stone water fountain landscape in Sacramento.
Inspiration for a large traditional partial sun backyard stone water fountain landscape in Sacramento.
 Root Design Company.com
 Landscape & Pool Design: Root Design Company
Photo credits: Jessica Carr
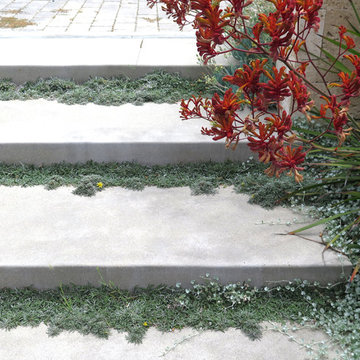
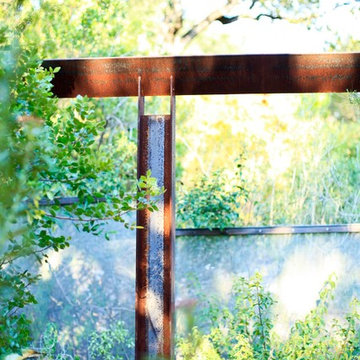
Design ideas for a mediterranean landscaping in Austin.
Design ideas for a mediterranean landscaping in Austin.
 MODIVO LIGHT
This is our first time decorating a house. Starting from knowing nothing at all to now having the hard decoration completed, we have experienced every emotion along the way—anxiety, doubt, tiredness, hesitation, joy, satisfaction, and touch. We learned and explored on our own, and bit by bit, we finished decorating our home. We’ve accumulated so much experience in this process, and now we want to share it, hoping it can be of a little help to all of you who are doing your own home decoration.
Preparations in Advance
1、Clarify your own ideas: Whether you are looking online, talking to designers, or copying ideas from friends' homes, you should have a clear vision of what your home should look like before designing—such as the style, color scheme, and elements to be used... It is crucial to avoid wanting to install everything that looks good in others' homes in your own. This way, you can clearly put forward your requirements during the design and decoration process, and also avoid frequent revisions to the plan, which may lead to unnecessary rework.
2、Understand your own needs: You need to first figure out the needs of your family, such as how many people live in the house permanently, how many rooms are needed, everyone's living habits, and daily preferences... A home is always for living in, so functionality is always the most important. It is best to list these needs and give priority to meeting them during the design and decoration. This way, you won't find out after decoration that many necessary things are missing, while a bunch of installed things are useless.
3、Determine your budget: There are ways to decorate with more money, and also ways to do it with less. No matter how much money you have, the decorated house can be both beautiful and practical. Therefore, it is essential to decide exactly how much you want to spend on decoration. In every link, such as designing the plan, making a budget table, selecting materials, and construction, you should act in accordance with your own budget.
4、Understand the advantages and disadvantages of your house: There is no perfect house in the world, and every house has its pros and cons. Your design plan should avoid its shortcomings and amplify its advantages. I once wrote an article about the drawbacks of my house ("My house is not perfect, but I still want to find ways to save it"), so we figured out solutions to these problems during the decoration.
5、Learn as much decoration knowledge as possible in advance: Although you can pick up this knowledge in the subsequent decoration process, it is better to learn more beforehand. This will make you much more calm when facing problems.
6、Know your strengths: Before decoration, you must be clear about what you are good at and what you are not. If you are good at design, do the design yourself; if you are skilled at bargaining, go buy building materials on your own; if you have strong hands-on ability, you can even do the decoration and repairs yourself... During the decoration process, you should focus on what you are good at, and leave what you are not good at to others.




3