
Search results for "Postcode" in Home Design Ideas



 Griffin Design
Designed By: Robby & Lisa Griffin Photos by: Desired Photo
Example of a mid-sized transitional master gray tile and porcelain tile porcelain tile and gray floor alcove shower design in Houston with raised-panel cabinets, white cabinets, gray walls, an undermount sink, granite countertops and a hinged shower door
Example of a mid-sized transitional master gray tile and porcelain tile porcelain tile and gray floor alcove shower design in Houston with raised-panel cabinets, white cabinets, gray walls, an undermount sink, granite countertops and a hinged shower door

Find the right local pro for your project

 Mod Paint Works
master bedroom wall and ceiling angles with incredibly straight paint lines
Mid-sized trendy home design photo in Denver
Mid-sized trendy home design photo in Denver




 Custom Edge, LLC
Mid-sized trendy u-shaped ceramic tile open concept kitchen photo in Miami with a single-bowl sink, raised-panel cabinets, white cabinets, granite countertops, stainless steel appliances and an island

 CKBR
Wide White Slate Flooring
Inspiration for a modern slate floor kitchen remodel in Phoenix with flat-panel cabinets, gray cabinets, quartz countertops, gray backsplash, glass tile backsplash and an island
Inspiration for a modern slate floor kitchen remodel in Phoenix with flat-panel cabinets, gray cabinets, quartz countertops, gray backsplash, glass tile backsplash and an island



 Olivia Atherton Decorative Painting & Design
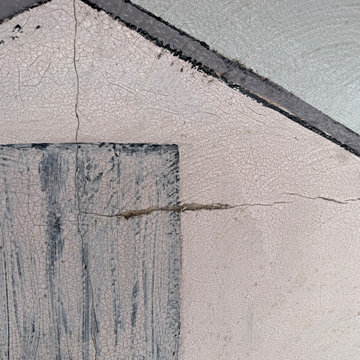
A faux panel - the door came next. OA
Mid-sized elegant entryway photo in Portland Maine
Mid-sized elegant entryway photo in Portland Maine


 Fisher Custom Homes
With a wavy ceiling detail in the foyer, this design flows and leads guests from the entry deeper into the home where amazement awaits them.
Southwest hallway photo in Phoenix with beige walls
Southwest hallway photo in Phoenix with beige walls

 Roe Anne White Photography
VITAL - Westmont Ridley-Tree Museum of Art - 2015 -- © Roe Anne White Photography . a variety of sizes, framed and unframed, is available . editions of 10.
w a v e @ p o r c h . sept 7 - oct 31, 2018 . opening reception sept 8 from 3:00 - 5:00 . 3823 santa claus lane . carpinteria, ca


 Cabinet Innovations
Kitchen island features all drawer storage. All cabinets are Brookhaven and display the Colony door style on Cherry with a Dark Lager finish. Granite countertops and wood floors throughout.


 Timber Couture
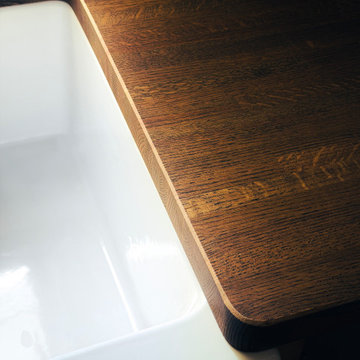
Red Oak Butcher Block wood
Walnut stain with Matte 2K Finish
Mitered Corner Joint
Contoured Bevel - Our Signature move
Apron Sink from Sinkology
Inspiration for a mid-sized farmhouse l-shaped kitchen remodel with a farmhouse sink, wood countertops and brown countertops
Inspiration for a mid-sized farmhouse l-shaped kitchen remodel with a farmhouse sink, wood countertops and brown countertops
 Tile Doctor Ltd
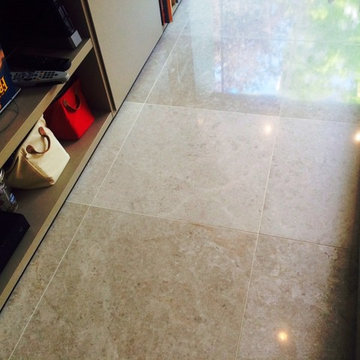
I was recently engaged to refresh the Limestone tiled floor at a house in St. John’s Wood, which is a very affluent area and apparently has the 5th most expensive postcode in London so as you can imagine this was a very expensive floor. The client had requested an improvement condition of the Limestone tiles in the living room and a thorough clean, polishing and seal was required. Over time, the floor in this busy living room – which was also used as a play area for young children – had become dirty and certainly worse for wear with all the use it had been getting. So, I set about my work to get this floor back to looking its best.
Cleaning and burnishing a Limestone floor
My initial task before beginning the cleaning process was to remove any furniture (as well as toys) from the room so I would have a clear area to work in. I then applied a layer of Tile Doctor Pro-Clean cleaner, diluted with water, to the floor. Pro-Clean is also suitable for use on other natural stone floors such as Slate, Granite and Travertine.
After leaving the solution to dwell for a period of a few minutes, I began to scrub the floor with a stiff hand brush. Whilst helping to remove a lot of the built up dirt on the surface of the tiles, the product also stripped off the old sealer and polish. Following this, I paid special attention to the dirty grout lines, cleaning them with Tile Doctor Oxy-Pro, a powerful, high-alkaline cleaner.
After completing the cleaning, I rinsed the floor with clean water to remove any excess cleaning products. I then began to burnish the floor using Tile Doctor Diamond encrusted burnishing pads. This was done in four steps, as I used four different pads (coarse, medium, fine and very fine) rinsing the floor with water between each pad. I would recommend using this setup of four pads for restoring the appearance of polished stone floors; you starting with a coarse pad and the gradually work your way up to the very fine pad achieving a high polish finish in the process. I finished of the process with a quick rinse and a buffing pad to give the floor a final polish before I commenced the sealing.
Sealing a Limestone floor
My choice of sealer was Tile Doctor Colour Grow, which is specifically designed to not only provide durable surface protection, but also to intensify the colour of the tiles. The sealer penetrates deep into the pores of the stone, providing water resistance and long-term protection from ingrained dirt and stains. As you can see from the photos, the sealer really helped to accentuate the fantastic natural colours in the Limestone.
My client was very pleased with the final result, and was amazed by how quickly I had been able to improve the state of her floor which, with a colourful and shiny finish, has really brightened up the living room.
77