
Search results for "Potential issues" in Home Design Ideas
 E_ Designs
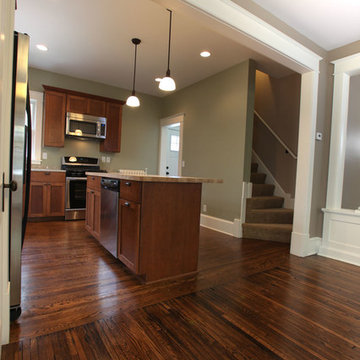
This home is Castle’s first Save a Castle. It was purchased in early 2013 and completed by end of Spring. When Castle first purchased this home, it was in terrible shape. The copper pipes had been stolen, there were major structural issues, the porch ceiling had collapsed, and the house had been trashed but there was potential. On the main floor a wall between the dining room and kitchen was removed to create a more open floor plan. The kitchen was completely transformed with new custom cabinetry and updated stainless steel appliances in place, as well as recycled glass countertops and butcher block countertops. On the second floor the bathroom was updated with new tile and glass block window and the bedrooms were made over to match the charm of the home. This home received new Kolbe windows and the hardwood floors were re-sanded and stained dark to compliment the white woodwork. The existing porch felt outdated and did not fit with the rest of the home so it was opened up to create a more inviting porch. Finally the yard also received a makeover with new sod, bushes, and mulch. While the house originally looked as though it hadn’t been taken care of in years this Castle is now ready for another 100 years.
Photographer: Hannah Lloyd
 E_ Designs
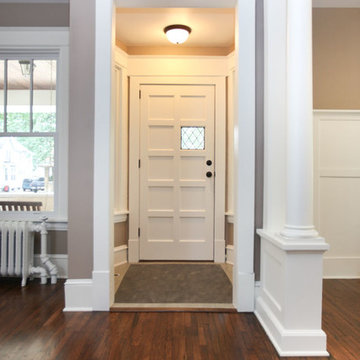
This home is Castle’s first Save a Castle. It was purchased in early 2013 and completed by end of Spring. When Castle first purchased this home, it was in terrible shape. The copper pipes had been stolen, there were major structural issues, the porch ceiling had collapsed, and the house had been trashed but there was potential. On the main floor a wall between the dining room and kitchen was removed to create a more open floor plan. The kitchen was completely transformed with new custom cabinetry and updated stainless steel appliances in place, as well as recycled glass countertops and butcher block countertops. On the second floor the bathroom was updated with new tile and glass block window and the bedrooms were made over to match the charm of the home. This home received new Kolbe windows and the hardwood floors were re-sanded and stained dark to compliment the white woodwork. The existing porch felt outdated and did not fit with the rest of the home so it was opened up to create a more inviting porch. Finally the yard also received a makeover with new sod, bushes, and mulch. While the house originally looked as though it hadn’t been taken care of in years this Castle is now ready for another 100 years.
Photographer: Hannah Lloyd
 E_ Designs
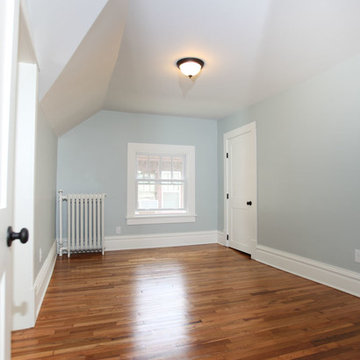
This home is Castle’s first Save a Castle. It was purchased in early 2013 and completed by end of Spring. When Castle first purchased this home, it was in terrible shape. The copper pipes had been stolen, there were major structural issues, the porch ceiling had collapsed, and the house had been trashed but there was potential. On the main floor a wall between the dining room and kitchen was removed to create a more open floor plan. The kitchen was completely transformed with new custom cabinetry and updated stainless steel appliances in place, as well as recycled glass countertops and butcher block countertops. On the second floor the bathroom was updated with new tile and glass block window and the bedrooms were made over to match the charm of the home. This home received new Kolbe windows and the hardwood floors were re-sanded and stained dark to compliment the white woodwork. The existing porch felt outdated and did not fit with the rest of the home so it was opened up to create a more inviting porch. Finally the yard also received a makeover with new sod, bushes, and mulch. While the house originally looked as though it hadn’t been taken care of in years this Castle is now ready for another 100 years.
Photographer: Hannah Lloyd
Find the right local pro for your project
 E_ Designs
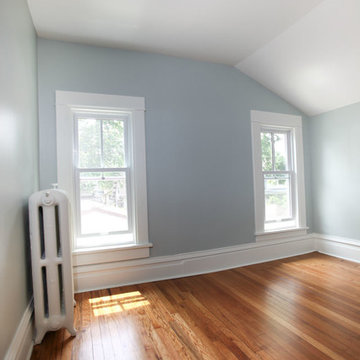
This home is Castle’s first Save a Castle. It was purchased in early 2013 and completed by end of Spring. When Castle first purchased this home, it was in terrible shape. The copper pipes had been stolen, there were major structural issues, the porch ceiling had collapsed, and the house had been trashed but there was potential. On the main floor a wall between the dining room and kitchen was removed to create a more open floor plan. The kitchen was completely transformed with new custom cabinetry and updated stainless steel appliances in place, as well as recycled glass countertops and butcher block countertops. On the second floor the bathroom was updated with new tile and glass block window and the bedrooms were made over to match the charm of the home. This home received new Kolbe windows and the hardwood floors were re-sanded and stained dark to compliment the white woodwork. The existing porch felt outdated and did not fit with the rest of the home so it was opened up to create a more inviting porch. Finally the yard also received a makeover with new sod, bushes, and mulch. While the house originally looked as though it hadn’t been taken care of in years this Castle is now ready for another 100 years.
Photographer: Hannah Lloyd
 E_ Designs
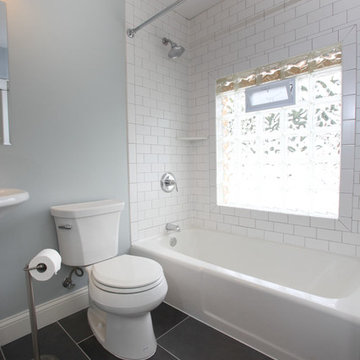
This home is Castle’s first Save a Castle. It was purchased in early 2013 and completed by end of Spring. When Castle first purchased this home, it was in terrible shape. The copper pipes had been stolen, there were major structural issues, the porch ceiling had collapsed, and the house had been trashed but there was potential. On the main floor a wall between the dining room and kitchen was removed to create a more open floor plan. The kitchen was completely transformed with new custom cabinetry and updated stainless steel appliances in place, as well as recycled glass countertops and butcher block countertops. On the second floor the bathroom was updated with new tile and glass block window and the bedrooms were made over to match the charm of the home. This home received new Kolbe windows and the hardwood floors were re-sanded and stained dark to compliment the white woodwork. The existing porch felt outdated and did not fit with the rest of the home so it was opened up to create a more inviting porch. Finally the yard also received a makeover with new sod, bushes, and mulch. While the house originally looked as though it hadn’t been taken care of in years this Castle is now ready for another 100 years.
Photographer: Hannah Lloyd
 E_ Designs
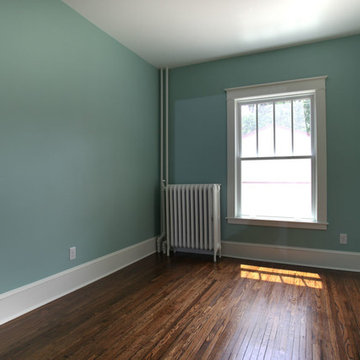
This home is Castle’s first Save a Castle. It was purchased in early 2013 and completed by end of Spring. When Castle first purchased this home, it was in terrible shape. The copper pipes had been stolen, there were major structural issues, the porch ceiling had collapsed, and the house had been trashed but there was potential. On the main floor a wall between the dining room and kitchen was removed to create a more open floor plan. The kitchen was completely transformed with new custom cabinetry and updated stainless steel appliances in place, as well as recycled glass countertops and butcher block countertops. On the second floor the bathroom was updated with new tile and glass block window and the bedrooms were made over to match the charm of the home. This home received new Kolbe windows and the hardwood floors were re-sanded and stained dark to compliment the white woodwork. The existing porch felt outdated and did not fit with the rest of the home so it was opened up to create a more inviting porch. Finally the yard also received a makeover with new sod, bushes, and mulch. While the house originally looked as though it hadn’t been taken care of in years this Castle is now ready for another 100 years.
Photographer: Hannah Lloyd
 E_ Designs
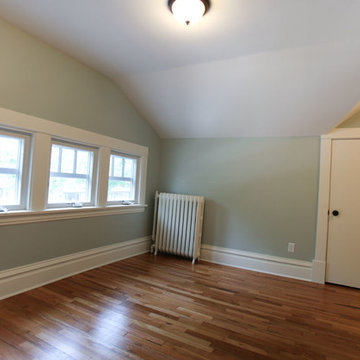
This home is Castle’s first Save a Castle. It was purchased in early 2013 and completed by end of Spring. When Castle first purchased this home, it was in terrible shape. The copper pipes had been stolen, there were major structural issues, the porch ceiling had collapsed, and the house had been trashed but there was potential. On the main floor a wall between the dining room and kitchen was removed to create a more open floor plan. The kitchen was completely transformed with new custom cabinetry and updated stainless steel appliances in place, as well as recycled glass countertops and butcher block countertops. On the second floor the bathroom was updated with new tile and glass block window and the bedrooms were made over to match the charm of the home. This home received new Kolbe windows and the hardwood floors were re-sanded and stained dark to compliment the white woodwork. The existing porch felt outdated and did not fit with the rest of the home so it was opened up to create a more inviting porch. Finally the yard also received a makeover with new sod, bushes, and mulch. While the house originally looked as though it hadn’t been taken care of in years this Castle is now ready for another 100 years.
Photographer: Hannah Lloyd
Sponsored
Delaware, OH

Buckeye Basements, Inc.
Central Ohio's Basement Finishing ExpertsBest Of Houzz '13-'21
 E_ Designs
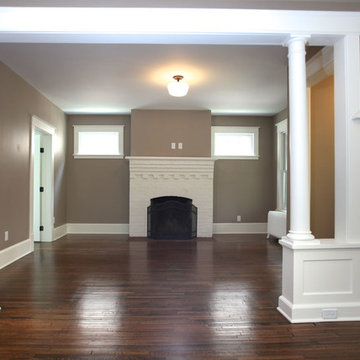
This home is Castle’s first Save a Castle. It was purchased in early 2013 and completed by end of Spring. When Castle first purchased this home, it was in terrible shape. The copper pipes had been stolen, there were major structural issues, the porch ceiling had collapsed, and the house had been trashed but there was potential. On the main floor a wall between the dining room and kitchen was removed to create a more open floor plan. The kitchen was completely transformed with new custom cabinetry and updated stainless steel appliances in place, as well as recycled glass countertops and butcher block countertops. On the second floor the bathroom was updated with new tile and glass block window and the bedrooms were made over to match the charm of the home. This home received new Kolbe windows and the hardwood floors were re-sanded and stained dark to compliment the white woodwork. The existing porch felt outdated and did not fit with the rest of the home so it was opened up to create a more inviting porch. Finally the yard also received a makeover with new sod, bushes, and mulch. While the house originally looked as though it hadn’t been taken care of in years this Castle is now ready for another 100 years.
Photographer: Hannah Lloyd
 E_ Designs
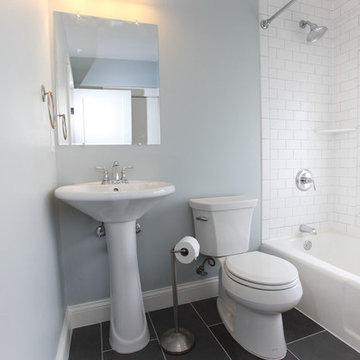
This home is Castle’s first Save a Castle. It was purchased in early 2013 and completed by end of Spring. When Castle first purchased this home, it was in terrible shape. The copper pipes had been stolen, there were major structural issues, the porch ceiling had collapsed, and the house had been trashed but there was potential. On the main floor a wall between the dining room and kitchen was removed to create a more open floor plan. The kitchen was completely transformed with new custom cabinetry and updated stainless steel appliances in place, as well as recycled glass countertops and butcher block countertops. On the second floor the bathroom was updated with new tile and glass block window and the bedrooms were made over to match the charm of the home. This home received new Kolbe windows and the hardwood floors were re-sanded and stained dark to compliment the white woodwork. The existing porch felt outdated and did not fit with the rest of the home so it was opened up to create a more inviting porch. Finally the yard also received a makeover with new sod, bushes, and mulch. While the house originally looked as though it hadn’t been taken care of in years this Castle is now ready for another 100 years.
Photographer: Hannah Lloyd
 E_ Designs
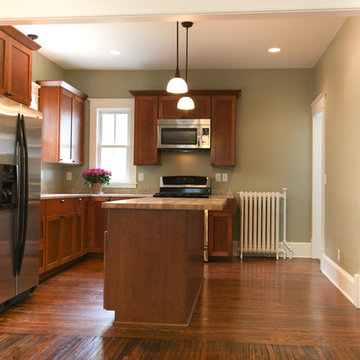
This home is Castle’s first Save a Castle. It was purchased in early 2013 and completed by end of Spring. When Castle first purchased this home, it was in terrible shape. The copper pipes had been stolen, there were major structural issues, the porch ceiling had collapsed, and the house had been trashed but there was potential. On the main floor a wall between the dining room and kitchen was removed to create a more open floor plan. The kitchen was completely transformed with new custom cabinetry and updated stainless steel appliances in place, as well as recycled glass countertops and butcher block countertops. On the second floor the bathroom was updated with new tile and glass block window and the bedrooms were made over to match the charm of the home. This home received new Kolbe windows and the hardwood floors were re-sanded and stained dark to compliment the white woodwork. The existing porch felt outdated and did not fit with the rest of the home so it was opened up to create a more inviting porch. Finally the yard also received a makeover with new sod, bushes, and mulch. While the house originally looked as though it hadn’t been taken care of in years this Castle is now ready for another 100 years.
Photographer: Hannah Lloyd
 E_ Designs
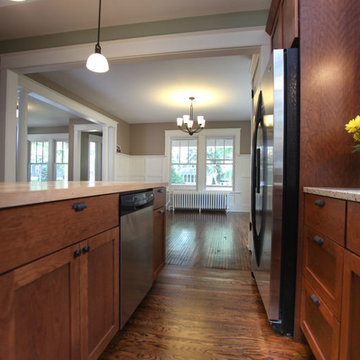
This home is Castle’s first Save a Castle. It was purchased in early 2013 and completed by end of Spring. When Castle first purchased this home, it was in terrible shape. The copper pipes had been stolen, there were major structural issues, the porch ceiling had collapsed, and the house had been trashed but there was potential. On the main floor a wall between the dining room and kitchen was removed to create a more open floor plan. The kitchen was completely transformed with new custom cabinetry and updated stainless steel appliances in place, as well as recycled glass countertops and butcher block countertops. On the second floor the bathroom was updated with new tile and glass block window and the bedrooms were made over to match the charm of the home. This home received new Kolbe windows and the hardwood floors were re-sanded and stained dark to compliment the white woodwork. The existing porch felt outdated and did not fit with the rest of the home so it was opened up to create a more inviting porch. Finally the yard also received a makeover with new sod, bushes, and mulch. While the house originally looked as though it hadn’t been taken care of in years this Castle is now ready for another 100 years.
Photographer: Hannah Lloyd

 U.S. Wildlife Removal Service
As a 23 year professional in wildlife control, I see hundreds of situations every month with nuisance animals going into places that they don't belong. Some of those places are more common than others. I recently addressed a skunk infestation for a residence in Glen Ellyn, IL. The challenge involved a family of skunks that had taken residence under the front concrete stoop. Concrete and skunks are never a good mix because concrete is porous, when a skunk sprays the odors penetrate and will permeate for months and months as the weather gets warm or humidity rises.
My approach was methodical and focused on humane Glen Ellyn skunk removal.
The process began with the strategic placement of live traps near the stoop, ensuring minimal distress to the animals. These traps are industry standard, designed to safely contain the skunks without harm. Regular monitoring of these traps was a critical part of the process, ensuring the skunks were not confined for an extended period.
Upon successful capture, the skunks were removed and the animal proofing work was next on the list.
Skunk exclusion work, is a critical component in preventing future infestations of skunks, raccoons or opossums. This involved a thorough inspection and sealing of potential entry points with steel mesh buried underground at a specific depth and angle. Skunk-proofing is a vital step in ensuring long-term resolution to wildlife intrusions.
Once the skunks were gone and the area was sealed, we performed an ozone treatment to the basement with a special filter to sub the air, destroying the skunk spray's odor molecules from the air. Typically the reason people discover skunks under the stoop to begin with is because the odor from spraying.
For residents in and around Glen Ellyn experiencing similar issues, we offer humane, effective, and affordable wildlife control solutions. Expertise in skunk removal and exclusion is just a call away!
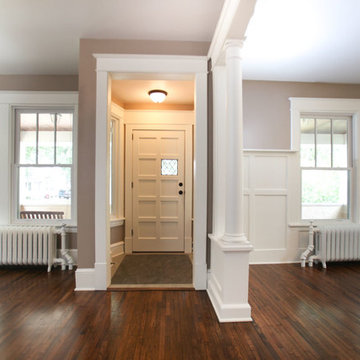 E_ Designs
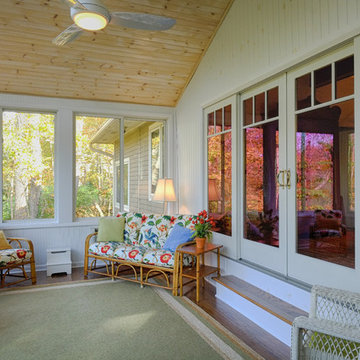
This home is Castle’s first Save a Castle. It was purchased in early 2013 and completed by end of Spring. When Castle first purchased this home, it was in terrible shape. The copper pipes had been stolen, there were major structural issues, the porch ceiling had collapsed, and the house had been trashed but there was potential. On the main floor a wall between the dining room and kitchen was removed to create a more open floor plan. The kitchen was completely transformed with new custom cabinetry and updated stainless steel appliances in place, as well as recycled glass countertops and butcher block countertops. On the second floor the bathroom was updated with new tile and glass block window and the bedrooms were made over to match the charm of the home. This home received new Kolbe windows and the hardwood floors were re-sanded and stained dark to compliment the white woodwork. The existing porch felt outdated and did not fit with the rest of the home so it was opened up to create a more inviting porch. Finally the yard also received a makeover with new sod, bushes, and mulch. While the house originally looked as though it hadn’t been taken care of in years this Castle is now ready for another 100 years.
Photographer: Hannah Lloyd
Sponsored
Westerville, OH

Custom Home Works
Franklin County's Award-Winning Design, Build and Remodeling Expert
 Paradox Interior Design Inc.
Challenge:
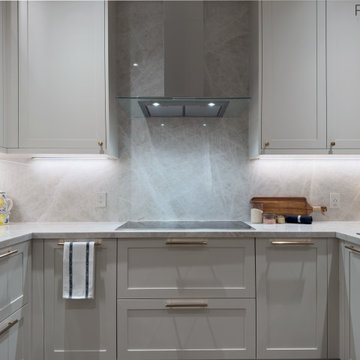
This prestigious Bridle Path kitchen suffered from poor lighting and functionality issues that prevented it from reaching its full potential. Our clients desired a luxury kitchen that would serve as both a functional workspace and an elegant entertaining hub, requiring us to address the lighting deficiencies while creating a sophisticated aesthetic worthy of this upscale neighborhood.
Solution:
We transformed this space into a luxury kitchen that balances exceptional functionality with breathtaking beauty. The design centers around the stunning Taj Mahal quartzite, whose naturally elegant patterns became the foundation for all other design decisions. By addressing the lighting challenges and incorporating warm finishes throughout, we created a space that feels both inviting and sophisticated.
Highlights:
• Taj Mahal quartzite countertops and backsplash - the jewel of the space with naturally beautiful and elegant patterns
• Custom millwork cabinetry designed for both beauty and optimal functionality
• High-end appliances seamlessly integrated into the sophisticated design
• Warm finishes throughout that complement the quartzite's natural beauty
• Expert craftsmanship by skilled local fabricators ensuring flawless installation
Results:
The transformed kitchen now serves as a stunning centerpiece of this Bridle Path home, where the Taj Mahal quartzite's natural elegance takes center stage. This project demonstrates our ability to solve functional challenges while creating luxury spaces that celebrate exceptional materials, proving that sometimes the most beautiful design solutions let natural beauty shine without unnecessary embellishment.
 Thaddeus Drew Remodeling
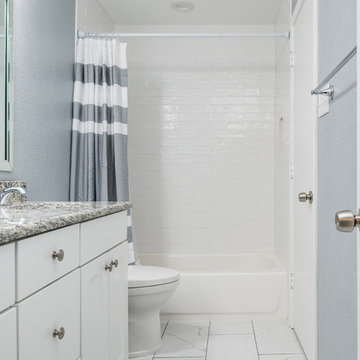
Simple yet beautiful hallway bathroom.
Small trendy 3/4 gray tile porcelain tile and white floor alcove bathtub photo in Dallas with flat-panel cabinets, white cabinets, a one-piece toilet, blue walls, an undermount sink and quartzite countertops
Small trendy 3/4 gray tile porcelain tile and white floor alcove bathtub photo in Dallas with flat-panel cabinets, white cabinets, a one-piece toilet, blue walls, an undermount sink and quartzite countertops
 Green Gorge Construction
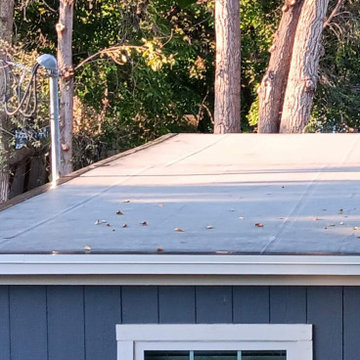
Due to its deteriorating condition, the asphalt roll roofing on this ADU required replacement before the Fall rains. Asphalt roll roofing generally lasts only 5-10 years, leading to ongoing maintenance challenges. The original 1×10 sheathing showed significant sagging in several spots, resulting in standing water not suitable for asphalt. Additionally, there was a complete absence of ventilation after improper installation of R-21 fiberglass insulation, leaving no air gap between the sheathing and insulation. A noticeable hump along the center of the roof indicated that the load-bearing wall had been supporting that section since construction, contributing to light sagging between the walls.
The old roof was completely removed down to the joists, revealing a solid base for the new installation. The central hump was eliminated by shaving the high point along that line. 2×6 beams were ripped in half then nailed on top of the existing joists, creating a 1.5″ gap for insulation and providing strong attachment points for the OSB sheathing, which was secured with screws to prevent any potential issues with nail heads popping through over the roof’s expected lifespan of over 50 years. The EPDM membrane was then adhered using glue and contact cement along the edges of each sheet, with the ends folded over the roof edges and secured with termination bars. Drip edge flashing was added and taped to ensure a water-tight seal, and EPDM-safe caulking was applied over the seams for additional protection. Finally, all exposed wood was primed and painted.
The new roof features a 60mil commercial-grade EPDM rubber membrane, offering a lifespan exceeding 50 years, in stark contrast to the 5-10 year lifespan of asphalt roll roofing.
Using two sheets of EPDM for installation streamlined the process, resulting in one single seam across the entire roof, compared to the asphalt roll’s dimensions of 3 feet wide by 33 feet long, which created 8 vertical seams and 9 horizontal seams—significantly increasing the risk of leakage and failure. Wrapping the rubber over the edge of the roof effectively addressed concerns about water infiltration at the edges, an issue prevalent with the asphalt and drip edge interface.
Another benefit to removing the splitting 1×10 decking and replacing it with OSB sheathing is the increase in structural integrity, moisture resistance, longevity and consistency.
The project successfully transformed the ADU’s roof from a maintenance-prone asphalt roll system to a highly durable 60mil EPDM rubber membrane. By addressing critical structural issues, including sagging sheathing and inadequate ventilation, the team ensured that the new roof not only offers superior water resistance and longevity but also meets higher performance standards for insulation and durability. The replacement process eliminated common weak points, such as numerous seams and poor edge sealing, which were vulnerabilities in the old roofing system. The result is a streamlined, secure installation that provides peace of mind and long-term value, with a lifespan extending well beyond the original roof.
 Total System Service
As a manager of a building or property, you quickly learn the art of mediation. One minute you may be working with a vendor to keep the building’s operating system running efficient and smooth; the next moment you may be calming a tenant down after finding the change in the system disrupted his office’s workflow. Give and take; it’s the only way to make sure every day runs perfectly.
Overall, you have two goals to strive for in everything you do.
1. Keep the building running properly, upgrading systems as appropriate, and striving to do all you can on a pre-established budget.
2. Keep the building occupants happy, with as little disruption as possible.
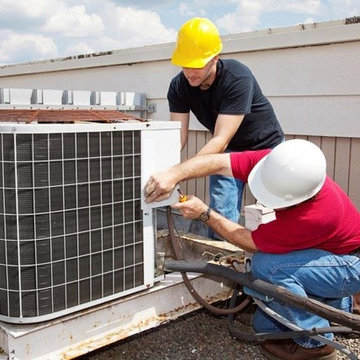
While some changes are minor, barely registering on a building occupant’s mind, with HVAC challenges, that’s rarely the case. If a HVAC contractor is replacing an air handler, for instance, and disconnects one and moves to the next unit, it may cause major disruptions to sensitive areas of a building. And if the occupant wasn’t prepared for the disruption, you can have a mighty unhappy customer on your hand.
Anytime you are working on HVAC projects throughout your building, there are strategies you can put into place to keep things running smooth.
Communicate with occupants
Communication is key to any good relationship, and as a property manager, this rule is a great place to start. If you will be working with the HVAC equipment, block out the timeframe for work to be done, and understand the potential consequences of the process. Then communicate this process with every point of contact you have throughout the building. The more detail you can provide, the less surprises you’ll have throughout the process. You can also work with your building’s occupants before the process begins, finding out if there are better timeframes than others.
Establish a realistic schedule
As a property manager, its easy to provide your expectations for the HVAC project at hand, and request that the proposal be written in such a way that work is completed on your timeframe. Unfortunately, many contractors want your business and will agree to anything upfront in order to win the bid, knowing full well the work will take longer than specified. Instead of projecting your timeframes into the proposal process, ask for HVAC project bids to establish realistic schedules of how long the process will take, and what areas of your property will be most effected throughout the schedule. This will help you avoid crises between you and the contractor, and you and your tenants.
Plan for the whole system
If one small piece of your HVAC system is weak, its easy to fix that one small piece. But how will that impact your overall system? Will it cause weak spots in different parts of the building – maybe a corner office will have reduced air flow, and therefore be colder in the winter and warmer in the summer? When retrofitting new pieces with older existing systems, its easy to reduce the efficiency of your entire system. Before agreeing to certain repairs, make sure you understand how it will impact your entire system overall. An easy way of handling this problem is by working with the same HVAC contractor again and again, He will understand your system’s potential, and know when to make repairs, and when to replace.
Have points of contact available for immediate assistance
In many cases, problems arise because connections can’t be made. Can the HVAC contractor get a hold or you or another person that can make decisions at a moments notice if a problem arises? Do you have access to decision makers throughout the building that may be impacted by this change? Many projects have been put on hold simply because a person in authority can’t be found to give the go-ahead to move forward. If you have access to these people during the time of the project, you’ll be able to complete the project in record time.
Test
Finally, if you can test things in stages, or test when the potential for problems is the smallest, you reduce the chances of bigger emergency issues falling into your lap. If you’ll be installing a new terminal unit, can you make the switch on a Saturday morning when the building is largely unoccupied? If you’re replacing a large system, can you replace and test in phases so the entire project isn’t released at once?
Most issues can be avoided with just a little strategy from the beginning. If you’ve never had a HVAC maintenance team to help you stay on track with your building’s heating and cooling, now may be the time to find out how easy a team approach makes the process.

 Stebnitz Builders, Inc.
This East Troy home on Booth Lake had a few drainage issues that needed to be resolved, but one thing was clear, the homeowners knew with the proper design features, their property had amazing potential to be a fixture on the lake.
Starting with a redesign of the backyard, including retaining walls and other drainage features, the home was then ready for a radical facelift. We redesigned the entry of the home with a timber frame portico/entryway. The entire portico was built with the old-world artistry of a mortise and tenon framing method. We also designed and installed a new deck and patio facing the lake, installed an integrated driveway and sidewalk system throughout the property and added a splash of evening effects with some beautiful architectural lighting around the house.
A Timber Tech deck with Radiance cable rail system was added off the side of the house to increase lake viewing opportunities and a beautiful stamped concrete patio was installed at the lower level of the house for additional lounging.
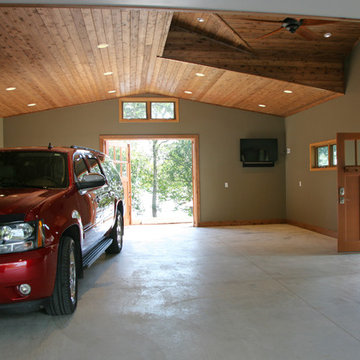
Lastly, the original detached garage was razed and rebuilt with a new design that not only suits our client’s needs, but is designed to complement the home’s new look. The garage was built with trusses to create the tongue and groove wood cathedral ceiling and the storage area to the front of the garage. The secondary doors on the lakeside of the garage were installed to allow our client to drive his golf cart along the crushed granite pathways and to provide a stunning view of Booth Lake from the multi-purpose garage.
Photos by Beth Welsh, Interior Changes
 Arkin Tilt Architects
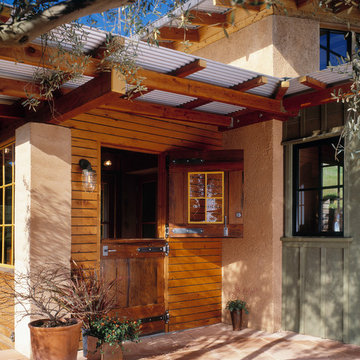
A dutch door marks the front entry of the home, located off a terrace constructed of site built pavers made of stabilized earth.
Photography ©Edward Caldwell
 Tile Doctor Ltd
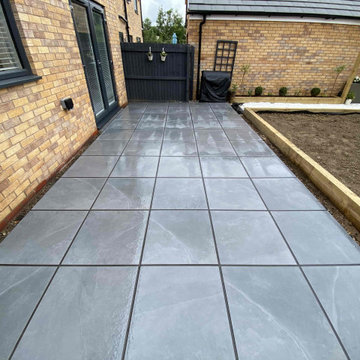
Earlier this summer I was called out to this job in the garden of a house in the city of Ely to inspect a freshly laid porcelain tiled patio with grout haze issues. The builder who had installed the patio hadn’t removed all the grout from the textured surface of the tile before it had dried. This was probably due to the hot weather which reduces drying times and has caught many tilers out. Multiple repeat visits by the builder trying followed who spent countless hours trying to remove the grout haze, unfortunately due to the textured surface of the tile he was unable to remove it and the patio was left looking awful.
Like the builder we are increasingly finding modern grouts, which although more durable, are very difficult to remove. Fortunately belonging to the Tile Doctor network, I had already been made aware of this problem and was able to offer a solution.
I arranged to pay the property a visit to demonstrate a potential solution and quote for resolving the issues. Even though the grout haze was indeed difficult to remove it wasn’t impossible if you know how. The demonstration came out well and relieved that they had finally found a solution to the problem booked me in to get the work carried out.
On my return I started with the application of a strong dilution of Tile Doctor Grout Clean-Up. This product is ideal for removing grout haze or smears as they often referred to; however, being acidic we don’t recommend it for use on every surface so if your using it yourself do check the label first. I left it to soak in for ten minutes before being agitated with a black scrubbing pad fitted to a rotary buffer
The weather was good, so it wasn’t a problem working outside and once all the grout smears were removed, I finished off by giving the whole patio a high-pressure rinse. I use a van mounted rinse/extraction system for this that applies warm water at high pressure onto the patio to dislodge dirt and then extracts the waste into a separate tank in the vehicle. It was an expensive investment but makes light work of jobs like this.
It took around four to five cleans to complete the job, by the late afternoon the grout haze was gone, and the porcelain patio looked completely transformed. It was quite a warm day, so the patio soon dried allowing my client to use it later that day. I should mention that this variety of Porcelain tiles were not the micro porous type and therefore did not need to be sealed.
Relieved the problem was finally resolved and happy with the result my client left the following feedback:
Amazing service, they were able to provide us with a quote and demo before we agreed to work. We are so happy with the results we have as our patio slabs looked ruined to the eye but the Tile Doctor managed to get them looking brand new.
Tom Conlon
Cambridge Tile Doctor
19