
Search results for "Predictive machine learning" in Home Design Ideas
 Sweet Smiling Landscape Design
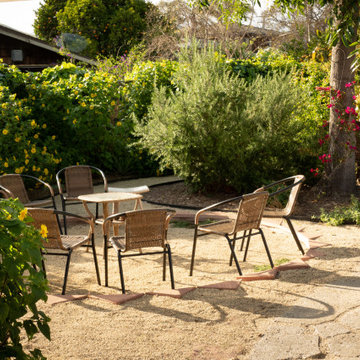
This very social couple were tying the knot and looking to create a space to host their friends and community, while also adding much needed living space to their 900 square foot cottage. The couple had a strong emphasis on growing edible and medicinal plants. With many friends from a community garden project they were involved in and years of learning about permaculture, they wanted to incorporate many of the elements that the permaculture movement advocates for.
We came up with a California native and edible garden that incorporates three composting systems, a gray water system, rain water harvesting, a cob pizza oven, and outdoor kitchen. A majority of the materials incorporated into the hardscape were found on site or salvaged within 20-mile of the property. The garden also had amenities like an outhouse and shower for guests they would put up in the converted garage.
Coming into this project there was and An old clawfoot bathtub on site was used as a worm composting bin, and for no other reason than the cuteness factor, the bath tub composter had to stay. Added to that was a compost tumbler, and last but not least we erected an outhouse with a composting toilet system (The Nature's Head Composting Toilet).
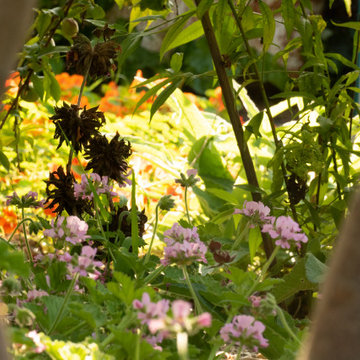
We developed a gray water system incorporating the water that came out of the washing machine and from the outdoor shower to help water bananas, gingers, and canailles. All the down spouts coming off the roof were sent into depressions in the front yard. The depressions were planted with carex grass, which can withstand, and even thrive on, submersion in water that rain events bring to the swaled-out area. Aesthetically, carex reads as a lawn space in keeping with the cottage feeling of the home.
As with any full-fledged permaculture garden, an element of natural building needed to be incorporated. So, the heart and hearth of the garden is a cob pizza oven going into an outdoor kitchen with a built-in bench. Cob is a natural building technique that involves sculpting a mixture of sand, soil, and straw around an internal structure. In this case, the internal structure is comprised of an old built-in brick incinerator, and rubble collected on site.
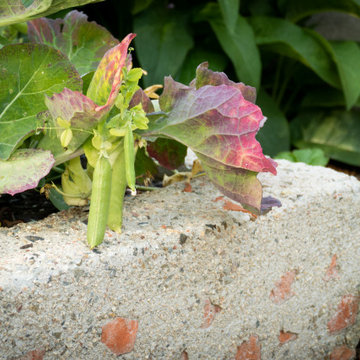
Besides using the collected rubble as a base for the cob structure, other salvaged elements comprise major features of the project: the front fence was reconstructed from the preexisting fence; a majority of the stone edging was created by stones found while clearing the landscape in preparation for construction; the arbor was constructed from old wash line poles found on site; broken bricks pulled from another project were mixed with concrete and cast into vegetable beds, creating durable insulated planters while reducing the amount of concrete used ( and they also just have a unique effect); pathways and patio areas were laid using concrete broken out of the driveway and previous pathways. (When a little more broken concrete was needed, we busted out an old pad at another project a few blocks away.)
Far from a perfectly polished garden, this landscape now serves as a lush and inviting space for my clients, their friends and family to gather and enjoy each other’s company. Days after construction was finished the couple hosted their wedding reception in the garden—everyone danced, drank and celebrated, christening the garden and the union!
 Sweet Smiling Landscape Design
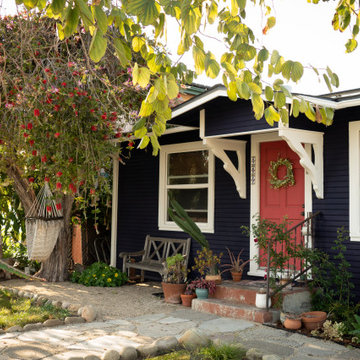
This very social couple were tying the knot and looking to create a space to host their friends and community, while also adding much needed living space to their 900 square foot cottage. The couple had a strong emphasis on growing edible and medicinal plants. With many friends from a community garden project they were involved in and years of learning about permaculture, they wanted to incorporate many of the elements that the permaculture movement advocates for.
We came up with a California native and edible garden that incorporates three composting systems, a gray water system, rain water harvesting, a cob pizza oven, and outdoor kitchen. A majority of the materials incorporated into the hardscape were found on site or salvaged within 20-mile of the property. The garden also had amenities like an outhouse and shower for guests they would put up in the converted garage.
Coming into this project there was and An old clawfoot bathtub on site was used as a worm composting bin, and for no other reason than the cuteness factor, the bath tub composter had to stay. Added to that was a compost tumbler, and last but not least we erected an outhouse with a composting toilet system (The Nature's Head Composting Toilet).
We developed a gray water system incorporating the water that came out of the washing machine and from the outdoor shower to help water bananas, gingers, and canailles. All the down spouts coming off the roof were sent into depressions in the front yard. The depressions were planted with carex grass, which can withstand, and even thrive on, submersion in water that rain events bring to the swaled-out area. Aesthetically, carex reads as a lawn space in keeping with the cottage feeling of the home.
As with any full-fledged permaculture garden, an element of natural building needed to be incorporated. So, the heart and hearth of the garden is a cob pizza oven going into an outdoor kitchen with a built-in bench. Cob is a natural building technique that involves sculpting a mixture of sand, soil, and straw around an internal structure. In this case, the internal structure is comprised of an old built-in brick incinerator, and rubble collected on site.
Besides using the collected rubble as a base for the cob structure, other salvaged elements comprise major features of the project: the front fence was reconstructed from the preexisting fence; a majority of the stone edging was created by stones found while clearing the landscape in preparation for construction; the arbor was constructed from old wash line poles found on site; broken bricks pulled from another project were mixed with concrete and cast into vegetable beds, creating durable insulated planters while reducing the amount of concrete used ( and they also just have a unique effect); pathways and patio areas were laid using concrete broken out of the driveway and previous pathways. (When a little more broken concrete was needed, we busted out an old pad at another project a few blocks away.)
Far from a perfectly polished garden, this landscape now serves as a lush and inviting space for my clients, their friends and family to gather and enjoy each other’s company. Days after construction was finished the couple hosted their wedding reception in the garden—everyone danced, drank and celebrated, christening the garden and the union!
 Sweet Smiling Landscape Design
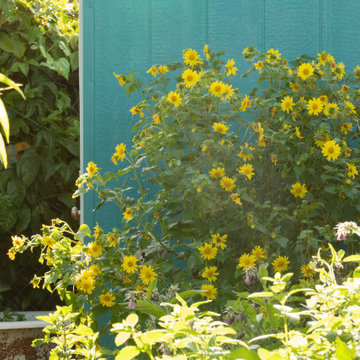
This very social couple were tying the knot and looking to create a space to host their friends and community, while also adding much needed living space to their 900 square foot cottage. The couple had a strong emphasis on growing edible and medicinal plants. With many friends from a community garden project they were involved in and years of learning about permaculture, they wanted to incorporate many of the elements that the permaculture movement advocates for.
We came up with a California native and edible garden that incorporates three composting systems, a gray water system, rain water harvesting, a cob pizza oven, and outdoor kitchen. A majority of the materials incorporated into the hardscape were found on site or salvaged within 20-mile of the property. The garden also had amenities like an outhouse and shower for guests they would put up in the converted garage.
Coming into this project there was and An old clawfoot bathtub on site was used as a worm composting bin, and for no other reason than the cuteness factor, the bath tub composter had to stay. Added to that was a compost tumbler, and last but not least we erected an outhouse with a composting toilet system (The Nature's Head Composting Toilet).
We developed a gray water system incorporating the water that came out of the washing machine and from the outdoor shower to help water bananas, gingers, and canailles. All the down spouts coming off the roof were sent into depressions in the front yard. The depressions were planted with carex grass, which can withstand, and even thrive on, submersion in water that rain events bring to the swaled-out area. Aesthetically, carex reads as a lawn space in keeping with the cottage feeling of the home.
As with any full-fledged permaculture garden, an element of natural building needed to be incorporated. So, the heart and hearth of the garden is a cob pizza oven going into an outdoor kitchen with a built-in bench. Cob is a natural building technique that involves sculpting a mixture of sand, soil, and straw around an internal structure. In this case, the internal structure is comprised of an old built-in brick incinerator, and rubble collected on site.
Besides using the collected rubble as a base for the cob structure, other salvaged elements comprise major features of the project: the front fence was reconstructed from the preexisting fence; a majority of the stone edging was created by stones found while clearing the landscape in preparation for construction; the arbor was constructed from old wash line poles found on site; broken bricks pulled from another project were mixed with concrete and cast into vegetable beds, creating durable insulated planters while reducing the amount of concrete used ( and they also just have a unique effect); pathways and patio areas were laid using concrete broken out of the driveway and previous pathways. (When a little more broken concrete was needed, we busted out an old pad at another project a few blocks away.)
Far from a perfectly polished garden, this landscape now serves as a lush and inviting space for my clients, their friends and family to gather and enjoy each other’s company. Days after construction was finished the couple hosted their wedding reception in the garden—everyone danced, drank and celebrated, christening the garden and the union!
Find the right local pro for your project
 Sweet Smiling Landscape Design
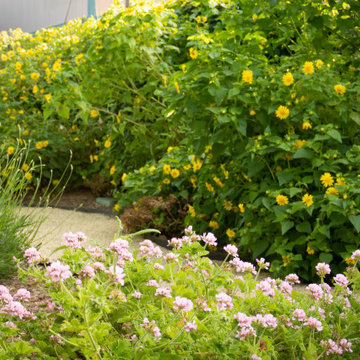
This very social couple were tying the knot and looking to create a space to host their friends and community, while also adding much needed living space to their 900 square foot cottage. The couple had a strong emphasis on growing edible and medicinal plants. With many friends from a community garden project they were involved in and years of learning about permaculture, they wanted to incorporate many of the elements that the permaculture movement advocates for.
We came up with a California native and edible garden that incorporates three composting systems, a gray water system, rain water harvesting, a cob pizza oven, and outdoor kitchen. A majority of the materials incorporated into the hardscape were found on site or salvaged within 20-mile of the property. The garden also had amenities like an outhouse and shower for guests they would put up in the converted garage.
Coming into this project there was and An old clawfoot bathtub on site was used as a worm composting bin, and for no other reason than the cuteness factor, the bath tub composter had to stay. Added to that was a compost tumbler, and last but not least we erected an outhouse with a composting toilet system (The Nature's Head Composting Toilet).
We developed a gray water system incorporating the water that came out of the washing machine and from the outdoor shower to help water bananas, gingers, and canailles. All the down spouts coming off the roof were sent into depressions in the front yard. The depressions were planted with carex grass, which can withstand, and even thrive on, submersion in water that rain events bring to the swaled-out area. Aesthetically, carex reads as a lawn space in keeping with the cottage feeling of the home.
As with any full-fledged permaculture garden, an element of natural building needed to be incorporated. So, the heart and hearth of the garden is a cob pizza oven going into an outdoor kitchen with a built-in bench. Cob is a natural building technique that involves sculpting a mixture of sand, soil, and straw around an internal structure. In this case, the internal structure is comprised of an old built-in brick incinerator, and rubble collected on site.
Besides using the collected rubble as a base for the cob structure, other salvaged elements comprise major features of the project: the front fence was reconstructed from the preexisting fence; a majority of the stone edging was created by stones found while clearing the landscape in preparation for construction; the arbor was constructed from old wash line poles found on site; broken bricks pulled from another project were mixed with concrete and cast into vegetable beds, creating durable insulated planters while reducing the amount of concrete used ( and they also just have a unique effect); pathways and patio areas were laid using concrete broken out of the driveway and previous pathways. (When a little more broken concrete was needed, we busted out an old pad at another project a few blocks away.)
Far from a perfectly polished garden, this landscape now serves as a lush and inviting space for my clients, their friends and family to gather and enjoy each other’s company. Days after construction was finished the couple hosted their wedding reception in the garden—everyone danced, drank and celebrated, christening the garden and the union!
 Sweet Smiling Landscape Design
This very social couple were tying the knot and looking to create a space to host their friends and community, while also adding much needed living space to their 900 square foot cottage. The couple had a strong emphasis on growing edible and medicinal plants. With many friends from a community garden project they were involved in and years of learning about permaculture, they wanted to incorporate many of the elements that the permaculture movement advocates for.
We came up with a California native and edible garden that incorporates three composting systems, a gray water system, rain water harvesting, a cob pizza oven, and outdoor kitchen. A majority of the materials incorporated into the hardscape were found on site or salvaged within 20-mile of the property. The garden also had amenities like an outhouse and shower for guests they would put up in the converted garage.
Coming into this project there was and An old clawfoot bathtub on site was used as a worm composting bin, and for no other reason than the cuteness factor, the bath tub composter had to stay. Added to that was a compost tumbler, and last but not least we erected an outhouse with a composting toilet system (The Nature's Head Composting Toilet).
We developed a gray water system incorporating the water that came out of the washing machine and from the outdoor shower to help water bananas, gingers, and canailles. All the down spouts coming off the roof were sent into depressions in the front yard. The depressions were planted with carex grass, which can withstand, and even thrive on, submersion in water that rain events bring to the swaled-out area. Aesthetically, carex reads as a lawn space in keeping with the cottage feeling of the home.
As with any full-fledged permaculture garden, an element of natural building needed to be incorporated. So, the heart and hearth of the garden is a cob pizza oven going into an outdoor kitchen with a built-in bench. Cob is a natural building technique that involves sculpting a mixture of sand, soil, and straw around an internal structure. In this case, the internal structure is comprised of an old built-in brick incinerator, and rubble collected on site.
Besides using the collected rubble as a base for the cob structure, other salvaged elements comprise major features of the project: the front fence was reconstructed from the preexisting fence; a majority of the stone edging was created by stones found while clearing the landscape in preparation for construction; the arbor was constructed from old wash line poles found on site; broken bricks pulled from another project were mixed with concrete and cast into vegetable beds, creating durable insulated planters while reducing the amount of concrete used ( and they also just have a unique effect); pathways and patio areas were laid using concrete broken out of the driveway and previous pathways. (When a little more broken concrete was needed, we busted out an old pad at another project a few blocks away.)
Far from a perfectly polished garden, this landscape now serves as a lush and inviting space for my clients, their friends and family to gather and enjoy each other’s company. Days after construction was finished the couple hosted their wedding reception in the garden—everyone danced, drank and celebrated, christening the garden and the union!
 Sweet Smiling Landscape Design
This very social couple were tying the knot and looking to create a space to host their friends and community, while also adding much needed living space to their 900 square foot cottage. The couple had a strong emphasis on growing edible and medicinal plants. With many friends from a community garden project they were involved in and years of learning about permaculture, they wanted to incorporate many of the elements that the permaculture movement advocates for.
We came up with a California native and edible garden that incorporates three composting systems, a gray water system, rain water harvesting, a cob pizza oven, and outdoor kitchen. A majority of the materials incorporated into the hardscape were found on site or salvaged within 20-mile of the property. The garden also had amenities like an outhouse and shower for guests they would put up in the converted garage.
Coming into this project there was and An old clawfoot bathtub on site was used as a worm composting bin, and for no other reason than the cuteness factor, the bath tub composter had to stay. Added to that was a compost tumbler, and last but not least we erected an outhouse with a composting toilet system (The Nature's Head Composting Toilet).
We developed a gray water system incorporating the water that came out of the washing machine and from the outdoor shower to help water bananas, gingers, and canailles. All the down spouts coming off the roof were sent into depressions in the front yard. The depressions were planted with carex grass, which can withstand, and even thrive on, submersion in water that rain events bring to the swaled-out area. Aesthetically, carex reads as a lawn space in keeping with the cottage feeling of the home.
As with any full-fledged permaculture garden, an element of natural building needed to be incorporated. So, the heart and hearth of the garden is a cob pizza oven going into an outdoor kitchen with a built-in bench. Cob is a natural building technique that involves sculpting a mixture of sand, soil, and straw around an internal structure. In this case, the internal structure is comprised of an old built-in brick incinerator, and rubble collected on site.
Besides using the collected rubble as a base for the cob structure, other salvaged elements comprise major features of the project: the front fence was reconstructed from the preexisting fence; a majority of the stone edging was created by stones found while clearing the landscape in preparation for construction; the arbor was constructed from old wash line poles found on site; broken bricks pulled from another project were mixed with concrete and cast into vegetable beds, creating durable insulated planters while reducing the amount of concrete used ( and they also just have a unique effect); pathways and patio areas were laid using concrete broken out of the driveway and previous pathways. (When a little more broken concrete was needed, we busted out an old pad at another project a few blocks away.)
Far from a perfectly polished garden, this landscape now serves as a lush and inviting space for my clients, their friends and family to gather and enjoy each other’s company. Days after construction was finished the couple hosted their wedding reception in the garden—everyone danced, drank and celebrated, christening the garden and the union!
 Sweet Smiling Landscape Design
This very social couple were tying the knot and looking to create a space to host their friends and community, while also adding much needed living space to their 900 square foot cottage. The couple had a strong emphasis on growing edible and medicinal plants. With many friends from a community garden project they were involved in and years of learning about permaculture, they wanted to incorporate many of the elements that the permaculture movement advocates for.
We came up with a California native and edible garden that incorporates three composting systems, a gray water system, rain water harvesting, a cob pizza oven, and outdoor kitchen. A majority of the materials incorporated into the hardscape were found on site or salvaged within 20-mile of the property. The garden also had amenities like an outhouse and shower for guests they would put up in the converted garage.
Coming into this project there was and An old clawfoot bathtub on site was used as a worm composting bin, and for no other reason than the cuteness factor, the bath tub composter had to stay. Added to that was a compost tumbler, and last but not least we erected an outhouse with a composting toilet system (The Nature's Head Composting Toilet).
We developed a gray water system incorporating the water that came out of the washing machine and from the outdoor shower to help water bananas, gingers, and canailles. All the down spouts coming off the roof were sent into depressions in the front yard. The depressions were planted with carex grass, which can withstand, and even thrive on, submersion in water that rain events bring to the swaled-out area. Aesthetically, carex reads as a lawn space in keeping with the cottage feeling of the home.
As with any full-fledged permaculture garden, an element of natural building needed to be incorporated. So, the heart and hearth of the garden is a cob pizza oven going into an outdoor kitchen with a built-in bench. Cob is a natural building technique that involves sculpting a mixture of sand, soil, and straw around an internal structure. In this case, the internal structure is comprised of an old built-in brick incinerator, and rubble collected on site.
Besides using the collected rubble as a base for the cob structure, other salvaged elements comprise major features of the project: the front fence was reconstructed from the preexisting fence; a majority of the stone edging was created by stones found while clearing the landscape in preparation for construction; the arbor was constructed from old wash line poles found on site; broken bricks pulled from another project were mixed with concrete and cast into vegetable beds, creating durable insulated planters while reducing the amount of concrete used ( and they also just have a unique effect); pathways and patio areas were laid using concrete broken out of the driveway and previous pathways. (When a little more broken concrete was needed, we busted out an old pad at another project a few blocks away.)
Far from a perfectly polished garden, this landscape now serves as a lush and inviting space for my clients, their friends and family to gather and enjoy each other’s company. Days after construction was finished the couple hosted their wedding reception in the garden—everyone danced, drank and celebrated, christening the garden and the union!

 KraftMaster Renovations
Details - Hand polished corners in natural marble
Photos by Blackstock Photography
Example of a large classic master gray tile and stone tile marble floor freestanding bathtub design in New York with an undermount sink, furniture-like cabinets, white cabinets, marble countertops, a two-piece toilet and white walls
Example of a large classic master gray tile and stone tile marble floor freestanding bathtub design in New York with an undermount sink, furniture-like cabinets, white cabinets, marble countertops, a two-piece toilet and white walls

 User
Think of the Noon Starter Kit as mission control center, but for your house. Play music, and even control your lighting with your voice using Amazon Alexa or Google Assistant.

 Jack Calderone
This bedroom and full bathroom are part of an adventuresome project my wife and I embarked upon to create a complete apartment in the basement of our townhouse. We designed a floor plan that creatively and efficiently used all of the 385-square-foot-space, without sacrificing beauty, comfort or function – and all without breaking the bank! To maximize our budget, we did the work ourselves and added everything from thrift store finds to DIY wall art to bring it all together.
A partial double closet bar adds a little extra space while still leaving room for longer hanging clothes.

 OKLAHOMA SHUTTERS
Benefits of Plantation Shutters
Plantation shutters offer advantages and benefits to homeowners over other window coverings including:
• A permanent addition to a house: While they don't add much to the sale price and don't guarantee a return on investment, the curb appeal helps the house sell faster. The permanency of plantation shutters allows them to be included in appraisals.
• Versatility: Many have the ability to open only halfway if desired. If you want to let in all the light, plantation shutters swing away from the window to grant an unobstructed view.
• Insulation: When all louvers are closed, a good insulating barrier is created, trapping unwanted temperatures and saving you money on your energy bill.
• Easy maintenance: With wide louvers, a simple wipe-down is often all that's needed. Vinyl shutters can be taken off their hinges and sprayed off for a major cleaning.
• Elegance: The classic, yet modern look conveys a permanency like no other window dressing can. Whether painted or natural wood, they all have a look that says; welcome home.
Wood vs. Faux Wood
It's not hard to argue that natural wood is more appealing than vinyl or PVC. However, "faux wood," as it's sometimes called, has some advantages:
• Price -- Faux wood shutters are often lower in price than real wood.
• Weight -- Because some shutters are made "hollow core" (as opposed to vinyl-wrapped medium density fiberboard, MDF), they can be significantly lighter.
• Moisture Resistance -- If you live in an area with high humidity, hollow faux wood or aluminum core will resist expanding and sagging. (MDF core louvers will tend to expand and crack as the material swells with moisture.)
Natural wood is the choice for those who have a very healthy budget or for whom a specific appearance is a must. Among the advantages are:
• Size -- Because wood plantation shutters are made of hardwood, they can be quite a bit larger than plastic or vinyl. Vinyl shutters larger than 29 inches may be prone to sag, so they need divider rails or other supports which can destroy the traditional look of a plantation shutter.
• Natural -- While vinyl or plastic shutters can be painted to match any color scheme, the natural shades and finishes of the various species of wood have something for every look.
• Classic -- While many plastic shutters can be made to look like real wood, the faux wood finishes can vary significantly depending on manufacturer and model. Up close, it can be easy to tell they're plastic. The warmth of natural wood is a classic feel that's impossible to beat.
Popular Plantation Shutter Brands
When you go to purchase your plantation shutters, brands names may offer a good representation of high-, mid-, and low-cost range of what's available. Which one you choose depends on your budget and your tastes. Hunter-Douglas and Norman Shutters produce three lines of plantation shutters in both real wood and faux wood styles. A higher-end product, Hunter-Douglas may be worth the cost for beauty and quality of workmanship. The Window Outfitters and Sunland produce a mid-cost line of shutters. The mid-range pricing may be for those who are balancing aesthetics with a budget. National franchise and or box stores may not offer an in-house expert or designer. Look to local companies that specialize in plantation shutters looking online may offer a low-cost brand for budget-minded DIYers. Available in both faux and real wood, the affordability combines with the visual appeal to make this a very popular choice for plantation shutters. Regardless of which line you go with, be sure to ask about frames. Generally all manufactures offer frame choices and may add to the cost, but they add an unsurpassed beauty and warmth to a room with plantation shutters.
Plantation shutters look like similar to wooden blinds, but there are significant differences. Blinds are often narrow, made of aluminum or vinyl, and the slats tilt based on a gear and pulley mechanism and they hang in the window with cords. By contrast, plantation shutters have wide compound louvers that fit into a frame and are controlled by way of a wooden rod running up the middle. When not needed, they can be manufactured to swing back onto the wall. Options to are available to build a more contemporary look with a larger view with a “hidden tilt” feature.
Cost of Plantation Shutters
Nationally, the cost of plantation shutters, depending on their size and the material, whether or not they are custom arches and colors or stains, may vary. Most manufacturers want their shutters to be professionally installed to keep the warranty intact which is a benefit to the customer in the long run. They will usually have a limited lifetime warranty.
Cost of Installation
Costs for having plantation shutters installed by a contractor are a bit more predictable. Contractors who have installed plantation shutters before can quickly get accurate measurements and suggest which materials would work best in different rooms. For example, while natural wood may look beautiful in your living room, it might not be so practical in a bathroom where moisture will cause the wood to warp. The size, material, and quality of the shutter will have a significant effect on the cost. Contractors usually go through a shutter supplier and can get various sizes that are not normally available at home improvement stores. Hiring a professional team of knowledgeable suppliers and installers is a good choice.
Here are some sample prices of the shutters most contractors use for standard-sized windows: In general, plantation shutters should cost approximately $20 to $26 per square foot. Labor costs depend on factors such as the contractor's workload, remoteness of the location, environment, and the contractor's overhead. Labor generally runs about $100 per hour and will be added to the shutter cost.
• 16x20 -- Faux wood $120. Real wood $156
• 24x50 -- Faux wood $160. Real wood $208
• 36x54 -- Faux wood $270. Real wood $351
• 36x60 -- Faux wood $300 Real wood $390
• 42x72 -- Faux wood $420. Real wood $546
• 48x82 -- Faux wood $550. Real wood $715
DIY
Plantation shutters can be purchased and installed by the homeowners. How much they cost will depend on size and material. Faux wood shutter’s cost depends on size and wooden shutter’s cost will depend on size and whether or not they are painted or stained.
• Natural wood is $90-$600 depending on size. Many companies offer standard stained selection but custom color matching may be available from $175 -$250.
• Faux wood will be from $120-$500.
• Additional tools include: Hang Strips $4-$15 and about $4 for mounting hardware. Locks or closures can cost up to $15 for each shutter.
Finally, if you order them online, you can expect to pay $30-$70 shipping per shutter or per set of shutters per window depending on the supplier. Keep in mind that even if you're handy with tools, installing shutters can be time-consuming if you've never done it before there is defiantly a learning curve.


 Bay Area Kitchens
Angled power strips are concealed below the upper cabinets provide ample power outlets. Under-cabinet lighting keeps workspaces well illuminated.
Inspiration for a transitional kitchen remodel in Houston with quartz countertops, white backsplash and subway tile backsplash
Inspiration for a transitional kitchen remodel in Houston with quartz countertops, white backsplash and subway tile backsplash

 Budget Blinds of Cedar Falls / Waterloo, IA
Budget Blinds blackout roller shades, photo credit installer Adam Brannick
Example of a mid-sized transitional guest bedroom design in Cedar Rapids with gray walls and no fireplace
Example of a mid-sized transitional guest bedroom design in Cedar Rapids with gray walls and no fireplace

 Stonebridge Mosaics
A beautiful design of Thassos and Mother of Pearl in a very unique shade of blue!
Minimalist bathroom photo in New York
Minimalist bathroom photo in New York
 PropertyLark
The Pros and Cons of Fix and Flip Real Estate Investment
Last week, we covered The Pros and Cons of Buy and Hold Real Estate Investment for rental property investors. This week, we want to talk about the other most common type of real estate investment: “fix and flip.”
The Appeal of House Flipping
We all love the house flipping shows on HGTV and other reality channels. They’re great and they make the prospect of buying, renovating and flipping homes for big profits seem super sexy and fun. However, any experienced real estate investor will tell you it’s not quite as easy as they make it look. There’s a lot of work that goes into a successful fix and flip investment.
The basic premise of a fix and flip investment is pretty simple. You buy a property, usually one that needs some work and is available at a great price. You renovate the property, making the necessary repairs and upgrades to maximize its resale value. Then, you sell the property on the open market for the highest possible price. You get in and out as quickly as possible. Full-time flippers will move from property to property or will have multiple properties being worked on at the same time. Rather than the “buy and hold” strategy where you keep the house while earning rental income and equity over time, you are looking for the quick sale to earn your profits.
If you are going to explore house flipping—whether as a full-time career or just a side hustle—you will want to know exactly what you are getting into. That is why we are going to cover the pros and cons of fix and flip real estate investment in this article.
The Pros of Fix and Flip
Here are some of the pros of fix and flip investing:
Faster Return on Investment—The biggest appeal of fix and flip investing is that it gives you a quicker return on investment. Buy and hold will take you longer to see your ROI. House flipping allows you to see your full profit (hopefully) as soon as the house sells. The average house flip for an experienced investor is around six months. It may take longer for a first-timer who is just learning how to do certain things.
Fairly Safe Investment—As long as you do all your projections and calculations carefully and avoid any major problems along the way, house flipping is a relatively safe investment strategy compared to something as turbulent as the stock market. Real estate markets are generally predictable and the short time frame of a flip helps you avoid losses if the property happens to depreciate over a longer period of time.
Exciting—There is a reason why there are so many reality shows based around flipping and none based on buy and hold investing. It’s an exciting process to buy a home, gut it and completely renovate it. Then, you get the ultimate reward of selling it and collecting the profits—as long as you do things right.
The Cons of Fix and Flip
Here are some of the cons of fix and flip investing:
Upfront Expenses—A house flip will require a lot of upfront expenses. We’re not only talking about financing the house itself, but all the renovation costs and other expenses involved in the flip. You are laying out all that money at the beginning and only seeing your returns when the property sells. This can create cash flow issues and stress if you fall being schedule or go above your initial budget.
Taxes—House flips will usually create dramatic swings in income year over year, and that can increase your tax bill. You have to pace things correctly to take advantage of specific capital gains tax rules. Capital gains taxes are higher on any property owned less than a year, so you have to find that balance of how long you own any specific investment properties and how long it takes to complete the renovation and sale. Before you get too deep into fix and flip investing, you will want to talk with your tax advisor to make sure you have the right plan in place.
Surprises—All real estate investment is susceptible to surprises. You don’t always know what lies behind the walls until you start the renovation process. You cannot plan for everything as a real estate investor, but you have to be prepared for anything. It is a good idea to add some wiggle room in your budget and overestimate your renovation expenses/timeline to cover any surprises that may come up.
These are some of the biggest pros and cons of fix and flip real estate investment. Of course, there are other things you need to know as an investor, so be sure and do your homework in order to get the most out of your investment portfolio. Both fix and flip and buy and hold strategies can be highly lucrative if you do things right. There are no wrong answers, but there are wrong ways of doing things if you truly want to be successful in this field.
If you are looking for great investment properties to fix and flip, join the exclusive PropertyLark home buyers’ network. If you qualify, you’ll have access to our exclusive off-market deals and analytics tools that will help you identify the best investments and get the highest possible ROI. Fill out the contact form and questionnaire on the PropertyLark buyer’s site to apply!

 DANE AUSTIN INTERIOR DESIGN Boston & Cambridge
This chic couple from Manhattan requested for a fashion-forward focus for their new Boston condominium. Textiles by Christian Lacroix, Faberge eggs, and locally designed stilettos once owned by Lady Gaga are just a few of the inspirations they offered.
Project designed by Boston interior design studio Dane Austin Design. They serve Boston, Cambridge, Hingham, Cohasset, Newton, Weston, Lexington, Concord, Dover, Andover, Gloucester, as well as surrounding areas.
For more about Dane Austin Design, click here: https://daneaustindesign.com/
To learn more about this project, click here:
https://daneaustindesign.com/seaport-high-rise


 The Bodily Works
Example of a mid-sized transitional enclosed carpeted and beige floor home theater design in Salt Lake City with gray walls and a wall-mounted tv

 Universal Appliance and Kitchen Center
Miele Ranges at Universal Appliance and Kitchen Center
26767 Agoura Road, Calabasas, CA 91302
Phone 818.880.0011 Fax 818.880.0411
12050 Ventura Blvd.,Studio City, CA 91604
Phone 818.755.1111 Fax 818.755.9111
www.uakc.com
Miele focuses on delivering precise, reliable, gourmet cooking results – compromise is simply not an option when it comes to performance. Miele ranges offering different size configurations (30", 36" and 48") and power configurations (dual fuel, gas, electric and induction). All aligning perfectly with Miele Generation 6000 built-in appliances in terms of design, function and user interface.
Key Features of Miele ranges:
M Touch
Miele's new M Touch controls are both easy-to-operate and navigate. An intuitive swipe of the screen will quickly lead you to your desired selection. Whether choosing an automatic Chicken program or calling up one of your Favorites, the screen with provide a pleasing visual with easy to read touch controls.
M Pro Dual Stacked Burner System
The M Pro Dual Stacked Burner System enables each of the burners on a Miele Range or Rangetop to both simmer and sear. Regular burners reaching up to 19,000 BTUs and the True Simmer burner reaching a maximum of 12,000 BTU, offers a wide range of precision temperatures for any recipe.
Moisture Plus
Increasing the humidity in the oven optimizes the cooking of a variety of foods: soft bread with a shiny, appetizing crust; dinner rolls and croissants as if from the local baker; succulent, tender meat with a nicely browned crust, perfect casseroles, delicious pastries and so much more.
MasterChef and MasterChef Plus
Both found in the Gourmet Center, MasterChef allows you to choose from over 100 easy-to-use programs for items such as baked goods, pizza, turkey and much more making preparation a breeze. Miele will deliver menu options that guide you step by step to the desired oven mode and temperature to create the perfect dish. MasterChef Plus Programs feature 15 Automatic bread programs bake as if from a bakery, guiding you to the correct mode, temperature, time and integration of Moisture Plus to create the perfect bread.
Wireless Roast Probe
Enjoy individualized and accurate roasting of meat, fish and poultry with the wireless roast probe, which measures the core temperature and displays the time remaining. No need to monitor the cooking process. Easy to use - and great for poultry, fish and roasts.
8