
Search results for "Preparation" in Home Design Ideas

Small trendy backyard and 3/4 stamped concrete, rectangular, white tile and subway tile aboveground, concrete floor, gray floor and single-sink corner shower photo in Salt Lake City with open cabinets, medium tone wood cabinets, white walls, a vessel sink, a hinged shower door, white countertops and a freestanding vanity
 Kaminski + Pew
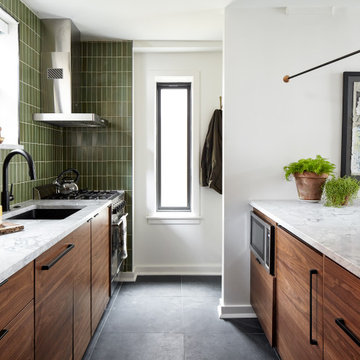
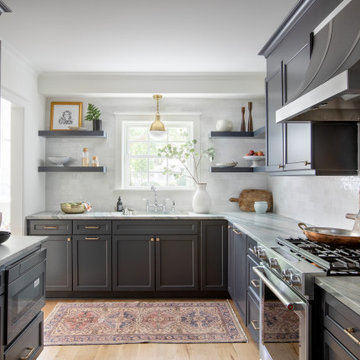
Compact galley kitchen. All appliances are under-counter. Slate tile flooring, hand-glazed ceramic tile backsplash, custom walnut cabinetry, and quartzite countertop.

 Nanette Wong
Photo: Nanette Wong © 2014 Houzz
Example of a transitional kids' room design in San Francisco
Example of a transitional kids' room design in San Francisco
Find the right local pro for your project
 Equilibrium Interior Design Inc
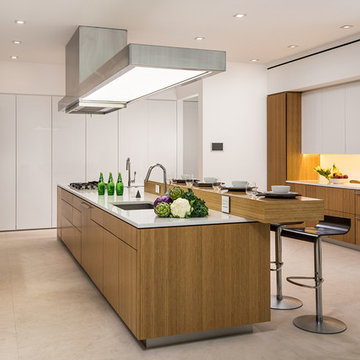
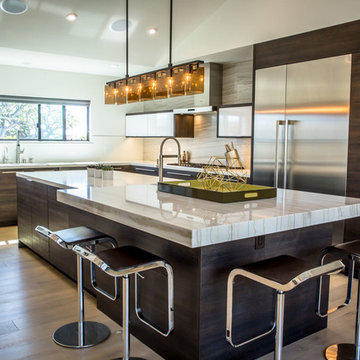
While this client is not on the road, he loves to cook for his family and closest friends. This is why this kitchen has the top of the line modern appliances, gas cooktop, and a whole back up pantry storage around the corner with full size refrigerator, freezer, and a wine fridge.
Client asked us for a sleek and functional kitchen that has a dual purpose: it acts as an every day kitchen for the family, and it can be closed off from the areas of the house with hidden doors to become a catering kitchen for the parties.
In lieu of traditional hood and pendants, we designed an incredible stainless steel hood that supports cantilevered structure with LED panel providing functional lighting over the island. This design was inspired by a fashion runway show catwalk and this kitchen certainly is a show stage for culinary excellence.
The sleek design allows you to move around the kitchen without protruding catching handles. The doors and drawers incorporate state of the art technology allowing for simple tap or push on the surface for the cabinetry to open. This is especially useful when your hands have food on them when you’re cooking as you are able to use your knee or thigh to activate doors to open. Even refrigerator and freezer have a fully integrated hidden custom pull handle that looks like a vertical reveal – this allows for good grip to pull the heavy doors with suction, and the white acrylic panels are very easy to keep clean.
Positions of two sinks on the island were specifically placed in the locations to facilitate the steps in food preparation - having them both on a single working surface makes it easier to work between them without dropping food or dripping water on the floors while preparing for cooking. Island incorporates a tall counter to sit at for a quick bite or just to stand around with you friends as you are preparing a meal. . This island truly is the heart of the kitchen and the heart of this home.
Photography: Craig Denis

 Jeff Herr Photography
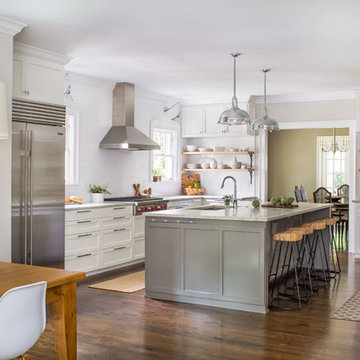
Eat-in kitchen - transitional l-shaped dark wood floor eat-in kitchen idea in Atlanta with an undermount sink, open cabinets, white backsplash, subway tile backsplash, stainless steel appliances and an island
 Eco Minded Solutions
A gourmet kitchen boasts stylish cabinets, granite counters and top-of-the-line appliances which opens onto the living area. The living room features wood floors, which complement the stone veneered fireplace as the focal point of this great room.


 Space Intervention
Example of a transitional medium tone wood floor, brown floor, coffered ceiling, tray ceiling, wall paneling and wallpaper enclosed dining room design in Los Angeles with beige walls and no fireplace

 Jay Sifford
Acer palmatum (Japanese Maple) 'Shirazz'. Photo by Jay Sifford.
Example of an eclectic home design design in Charlotte
Example of an eclectic home design design in Charlotte
 HA Architecture
Photo by: Leonid Furmansky
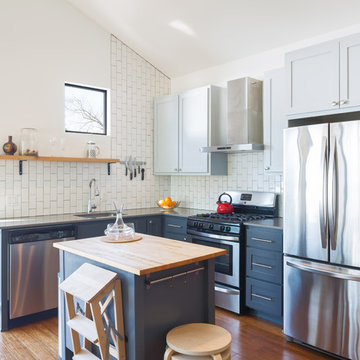
Kitchen - small transitional l-shaped medium tone wood floor and orange floor kitchen idea in Austin with an undermount sink, soapstone countertops, white backsplash, subway tile backsplash, stainless steel appliances, an island, shaker cabinets and blue cabinets
Kitchen - small transitional l-shaped medium tone wood floor and orange floor kitchen idea in Austin with an undermount sink, soapstone countertops, white backsplash, subway tile backsplash, stainless steel appliances, an island, shaker cabinets and blue cabinets
 Lisa Tharp Design
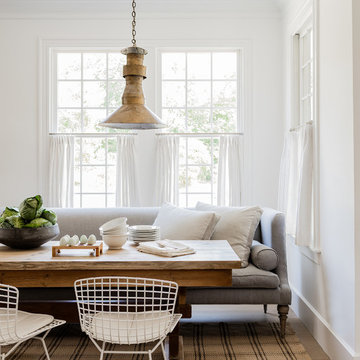
Governor's House Breakfast Nook by Lisa Tharp. 2019 Bulfinch Award - Interior Design. Photo by Michael J. Lee
Dining room - coastal light wood floor dining room idea with shaker cabinets, white cabinets, granite countertops, white backsplash, marble backsplash, stainless steel appliances, an island, black countertops and white walls
Dining room - coastal light wood floor dining room idea with shaker cabinets, white cabinets, granite countertops, white backsplash, marble backsplash, stainless steel appliances, an island, black countertops and white walls

 John
JohnCoco coir is a versatile and sustainable growing medium that is gaining popularity among gardeners. Made from the fibrous husk of coconuts, it’s an eco-friendly alternative to peat moss and can greatly enhance the quality of your soil. In gardening, it is often utilized in systems like Coco Coir Hydroponic, where it helps create an efficient water and nutrient delivery system.
What is Coco Coir?
Coco coir is a natural fiber extracted from coconut husks. It has a neutral pH, excellent water retention, and is reusable, making it a favorite among gardeners who prefer organic and sustainable practices. It is available in different forms such as blocks, bricks, or loose coir, each requiring some preparation before use in gardening.
Benefits of Using Coco Coir in Gardening
Coco coir offers several advantages for gardening. Here are the benefits of using coco coir in gardening:
Holds up to 10 times its weight in water, ensuring plants have consistent moisture.
Promotes oxygen flow to plant roots, leading to healthier root systems.
Coco coir is a renewable and eco-friendly alternative to peat moss.
It can be washed, rehydrated, and reused, reducing waste.
Naturally pH neutral, making it suitable for various plants without major adjustments.
Enhances the texture and moisture retention of garden soil.
How to Prepare Coco Coir for Planting
Preparing coco coir for planting involves a few essential steps. First, you need to hydrate the coir block, as it typically comes in a compressed form. Place the block in a large container and add warm water, allowing the block to expand and absorb the water. Once fully expanded, the coir should be fluffed up by breaking it apart with your hands or a tool to ensure it becomes loose and airy. After the coir has been fluffed, it is important to drain any excess water, as overly wet coir can lead to root suffocation. Finally, since coco coir is inert and does not contain nutrients, it’s a good idea to add organic compost or liquid fertilizer to enrich the coir before planting.
Do You Need to Soak Coco Coir Before Planting?
Yes, soaking coco coir before planting is necessary. Since it comes in a compressed form, it needs to be broken down and hydrated for proper use. The soaking process allows the coir to expand and release the fibers, making it usable as a growing medium. After soaking, the coir should be fluffed to ensure the water is evenly distributed. Draining any excess water is crucial because overly wet coir may impede plant root health.
How to Prepare Coco Peat for Planting
Coco peat, a fine, powdery form of coco coir, is highly beneficial for seed starting and improving water retention in soil. To prepare coco peat, it first needs to be hydrated, similar to how you prepare coir blocks. Slowly add water to the peat in a container and allow it to absorb and fluff up. Once hydrated, coco peat can be used on its own or mixed with other growing media such as perlite or vermiculite for added aeration and drainage. It is advisable to check the pH level of your final mix, as coco peat generally has a neutral pH, but adjustments may be necessary depending on the plants being grown.
Can You Use Just Coco Coir for Plants?
Yes, coco coir can be used by itself to grow plants, especially in hydroponic systems or as a seed-starting medium. However, because coco coir does not naturally contain nutrients, you will need to provide regular fertilizer to support plant growth. This makes it particularly suitable for plants grown in controlled environments, such as hydroponics, where nutrient solutions can be carefully managed. In traditional soil-based gardening, mixing coco coir with other organic materials like compost is recommended to provide essential nutrients and improve the overall soil structure.
How to Use Coco Coir in Hydroponics
Coco coir is widely used in hydroponic systems due to its water retention and aeration properties. To use coco coir in hydroponics, it first needs to be soaked and hydrated, as discussed earlier. Once the coir is fully prepared, it can be placed in the hydroponic system. Since coco coir does not contain natural nutrients, you will need to supply a balanced nutrient solution tailored for hydroponic plants. Regular monitoring of water and nutrient levels is essential to prevent nutrient imbalances or root rot. One of the benefits of coco coir in hydroponics is its reusability. After completing a growing cycle, the coir can be washed, rehydrated, and used again in future plantings.
Using Coco Coir as a Soil Amendment
Coco coir is also an excellent soil amendment, as it improves the texture and moisture retention of garden soil. To use coco coir in this way, mix loose coir with your existing garden soil at a ratio of one part coco coir to two parts soil. This will help retain moisture without compacting the soil, improving both water drainage and root growth. For optimal results, you can also add organic compost to the mix, ensuring that the nutrient levels are sufficient for plant growth. Coco coir works particularly well in raised beds, where it helps maintain proper soil structure over time.
Advantages of Using Coco Coir Over Peat Moss
While peat moss has been traditionally used as a growing medium, coco coir offers several advantages over it. Coco coir is a renewable resource, as it is a byproduct of coconut processing, while peat moss is harvested from peat bogs that take centuries to regenerate. Coco coir is also more durable, as it can be reused multiple times without breaking down, while peat moss disintegrates after a single use. Another key benefit is its neutral pH, whereas peat moss is more acidic and may require balancing to meet the needs of specific plants.
Conclusion
Coco coir is a highly versatile and sustainable growing medium that benefits both novice and experienced gardeners alike. Whether you are using it for hydroponics, as a soil amendment, or as a standalone medium for growing plants, knowing how to properly prepare and use it is key to maximizing its benefits. By following the steps detailed above, you can improve water retention, aeration, and overall plant health in your garden, all while contributing to eco-friendly gardening practices.
 User
UserStacy Zarin Photography
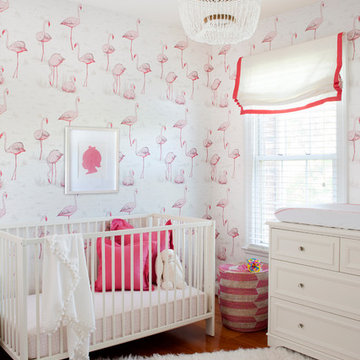
Inspiration for a mid-sized transitional girl medium tone wood floor nursery remodel in New York with multicolored walls
Inspiration for a mid-sized transitional girl medium tone wood floor nursery remodel in New York with multicolored walls
 Windy City Painters
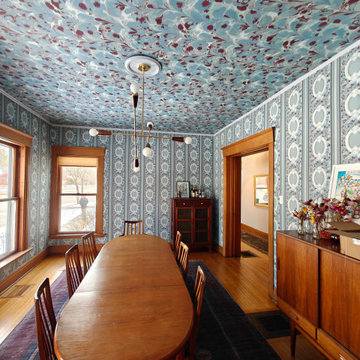
Professional wallpaper installation Chicago dining room showcases expert craftsmanship in this stunning transformation that perfectly complements the home's architectural character.
## Project Overview
This comprehensive wallpaper installation project involved both walls and ceiling application in a formal dining room within a vintage Chicago greystone. The intricate pattern required precise alignment and professional techniques to achieve seamless results that honor the home's historic charm while adding contemporary elegance.
## Materials and Products
We utilized premium wallpaper adhesive specifically formulated for Chicago's climate variations, along with professional-grade smoothing tools and precision cutting equipment. High-quality primer ensured optimal surface preparation for lasting adhesion across both vertical and horizontal applications.
## Installation Process
First, comprehensive surface preparation included removing existing materials and repairing any imperfections. Second, application of specialized primer designed for wallpaper adhesion. Third, precise measurement and cutting with careful attention to pattern alignment. Finally, professional installation with meticulous corner work and ceiling transitions.
## Chicago-Specific Challenges
Chicago homes present unique wallpaper installation challenges including settling foundations that affect wall surfaces, humidity fluctuations impacting adhesive performance, and older plaster surfaces requiring specialized preparation techniques. Additionally, vintage buildings often have irregular walls demanding expert adjustment skills.
## Results and Quality
The completed wallpaper installation creates a sophisticated dining environment that seamlessly integrates with the home's architectural character. Perfect pattern matching across walls and ceiling demonstrates the precision possible with professional installation techniques.
## Professional Tips
Before starting wallpaper installation, always test adhesion in inconspicuous areas first. Maintain consistent room temperature throughout the process. Choose quality materials designed for Chicago's climate. Plan pattern layout carefully to minimize waste and ensure optimal visual flow.
See more work and request free estimate at windypainters.com - Windy City Painters delivers exceptional results.
Q: How long does wallpaper installation take?
A: Professional wallpaper installation typically requires 1-2 days depending on room size, pattern complexity, and surface preparation needs.
Q: Can you install wallpaper on textured walls?
A: Yes, textured wall wallpaper installation requires proper surface preparation and specialized techniques for optimal adhesion results.
Q: Do you remove old wallpaper first?
A: Complete old wallpaper removal is essential before new wallpaper installation to ensure proper adhesion and smooth finish.
Q: What about ceiling wallpaper installation?
A: Ceiling wallpaper installation requires specialized equipment and techniques - Windy City Painters handles this expertly and safely.
Q: How do you ensure pattern matching?
A: Professional wallpaper installation includes precise measuring, cutting, and alignment techniques for seamless pattern matching throughout the space.
Q: Can wallpaper installation work in humid areas?
A: Proper wallpaper installation with quality adhesives designed for humidity variations ensures lasting results in Chicago's climate.
Q: What surfaces accept wallpaper installation?
A: Most properly prepared surfaces including drywall, plaster, and previously painted walls can accept professional wallpaper installation successfully.
Q: Do you handle corner installations?
A: Corner wallpaper installation requires specialized techniques for inside and outside corners - we ensure perfect alignment.
Q: What's included in the service?
A: Complete wallpaper installation service includes surface preparation, removal if needed, professional application, cleanup, and quality guarantee.
Q: How do you prepare surfaces?
A: Surface preparation for wallpaper installation includes cleaning, repairing imperfections, priming, and ensuring optimal conditions for adhesion.
 HP Rovinelli Architects
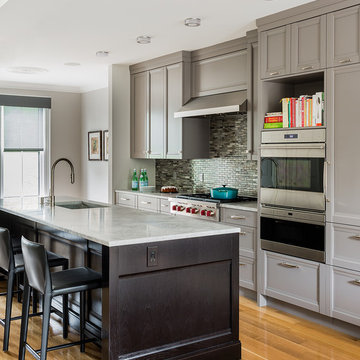
As part of the renovations of an entire townhouse in one of Boston's historic neighborhoods, we opened up one floor from end to end and placed the kitchen in the center, between the dining area and a sitting room.
Michael J. Lee Photography

 TANGERINEdesign, Jill C. Finn Assoc. AIA
Design, Material choices and Photos by: TANGERINEdesign. Clean, fresh Kitchen remodel on a tight budget. Includes granite counter-tops, stainless steel appliances, under-mount sink, engineered flooring, subway tile, and more!

 Greig Design & Construction
Tara Pearce
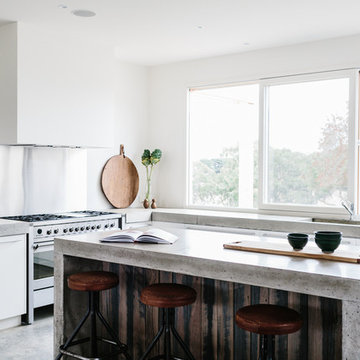
Example of a trendy concrete floor kitchen design in Geelong with an integrated sink, flat-panel cabinets, white cabinets, concrete countertops, stainless steel appliances and an island
Example of a trendy concrete floor kitchen design in Geelong with an integrated sink, flat-panel cabinets, white cabinets, concrete countertops, stainless steel appliances and an island
 Novell Design Build & Novella Outdoors
Janis Nicolay
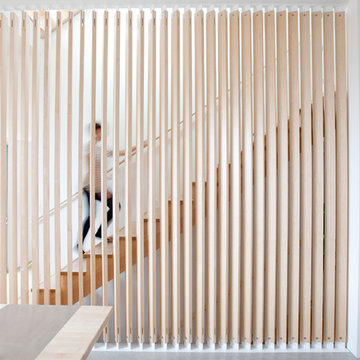
Example of a trendy wooden straight staircase design in Vancouver with wooden risers
Example of a trendy wooden straight staircase design in Vancouver with wooden risers
2