
Search results for "Preparing household" in Home Design Ideas
 Sandra Howie
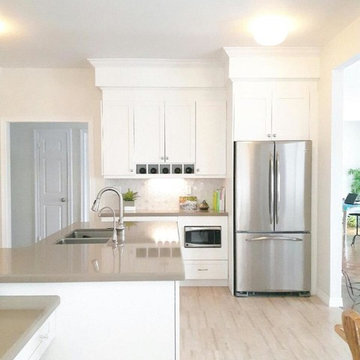
The homeowners came to me looking for a way to upgrade their builder kitchen in every sense, improving aesthetics, function, storage, and usable counter space.
The layout was expanded with the addition of a full secondary wall of cabinetry, bringing balance to the room while significantly increasing everyday function. A peninsula was introduced to extend the workspace, providing generous prep area along with integrated storage.
A custom millwork detail carries the upper cabinetry through the existing bulkhead, allowing it to remain while creating a more cohesive, built-in look. A small desk area was also incorporated to support daily household tasks.
Material selections were chosen to bring warmth and softness to the space, including a solid taupe quartz countertop paired with a glass and marble hexagon mosaic backsplash that adds subtle texture and light.
The peninsula also provides a comfortable seating position, creating a place for connection during meal preparation. The result is a well considered kitchen that supports the rhythm of everyday living.
 Millbank Family Furniture & Custom Kitchens
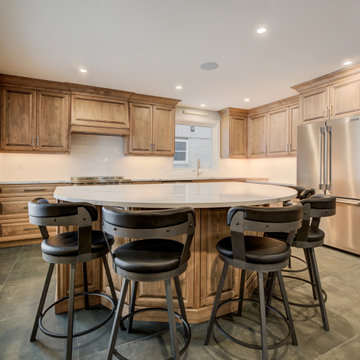
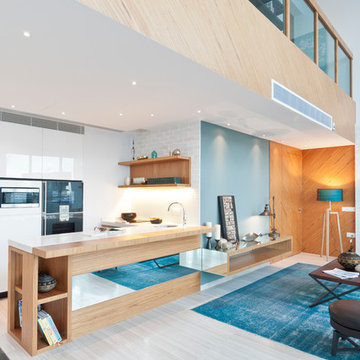
Seating for the whole family is found around the uniquely shaped island. Perfect for a busy household where the children can sit and have an afternoon snack or work on homework while the parents prepare meals.
 Tile Doctor Ltd
Here’s a job I completed just before Christmas last year, at a house in Northampton which has a rich history and mix of architectural styles. The run up to Christmas is always popular as people try to get their household projects finished off in time for celebrating the festive season with family so this is always a busy time for Tile Doctor.
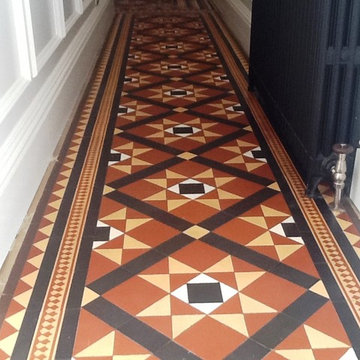
The photos below show a neglected Victorian Quarry tiled floor in need of repair, with cracked tiles along the edges. These were caused by somebody in the past using brute force to remove carpet gripper rods which had been glued to the tiles. These cracks were present around the edges of the entire hallway, however; this particular type of tile is very hard to get hold of. Furthermore, it is a costly process to replace the tiles as the skirting boards would have had to have been removed.
As well as the physical issues the floor had a dull appearance due to the build-up of builder’s dust and the general wearing down of the paintwork over time. I agreed with the client that the best course of action would be to fill the tiles, and paint the damaged tiles using a colour that matched as close as possible. Many of my Tile Doctor colleagues would disagree with this approach opting to source the correct tile and rebuild the damaged section however unfortunately in this case we didn’t have the time or the budget.
My first action was to use a brush and vacuum to remove as much loose debris and dust as possible. I followed this by agitating the tiles with a dilution of Tile Doctor Pro Clean which is a strong alkaline product and safe to use on tile and stone. I use a combination of a coarse burnishing pad fitted to a rotary machine and hand held brushes, in order to get the floor clean. The resulting slurry was then rinsed and removed using a wet vacuum. This process was repeated twice followed by a thorough rinse to ensure any trace of cleaning agent had been removed and the floor neutralised.
As this was such an old property, I then used a steamer to heat up the tiles in order to draw out any contaminants and assist with the drying process. I installed a fan to dry the floor before starting repairs, mixing up some coloured grout and filling all holes and cracks along the edges, including the doormat area.
I allowed the coloured grout to dry overnight, before hand painting the black and Terracotta tiles. These were then given time to dry (about a couple of hours). Following this, I carefully painted in the other colours: brown and cream. The overall effect was quite convincing and you had to look very closely to notice.
Due to the fact that there were other tradesmen working in the house at the time, the floors were sheeted up to protect from additional dust and muck. I then left the house for a week, allowing the floor ample time to dry completely in preparation for sealing.
Upon my return, I took damp meter readings, and once satisfied with the dryness of the tiles, I began the sealing process with the impregnating, colour-enhancing sealer Tile Doctor Colour Grow. The sealer provides both durable surface protection and an aesthetically pleasing matte finish.
The below photos show how the product has enriched the colours with the two coats applied.
The process of restoring this wonderful Victorian Quarry tiled floor was certainly time consuming, but very rewarding. I am exceptionally pleased with the results myself, and my client couldn’t have been happier and I’m sure the newly revitalised hallway will have been a talking point for all their visitors during the Christmas break.
Phil Vissian
Northamptonshire Tile Doctor
Find the right local pro for your project


 Robeson Design
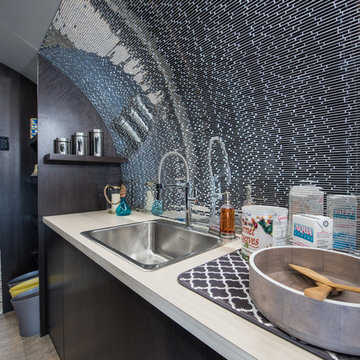
Designing a completely round home is challenging! Add to that, the two tubes are merely 8' wide. This requires EVERY piece of furniture to be custom built to fit the continuous rounding walls, floors and ceiling. We used every possible inch to provide storage for our clients personal belongings and household needs... sustainable for 3 years!
Solid walnut wood paneling and custom built shelving was used throughout as well as tons of hidden storage... in, under and atop every possible inch of this project was locate and utilized! Backsplash above the Kitchen sink is super thinly cut mosaic tile made out of MIRROR! It's reflective, creates an illusion of space and light, It sparkles and looks AMAZING!
MMM Photography
 The Decorating Therapist
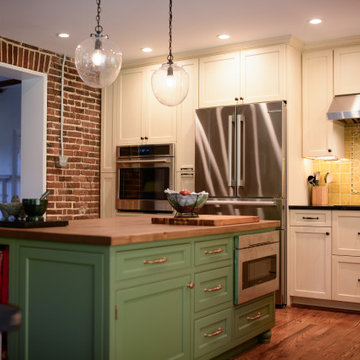
The center island was custom designed to reflect both the homeowners' lifestyle and the historic character of the home. Intentionally built 4 inches lower than the perimeter countertops, it provides a more ergonomic work surface tailored to the owners' height, making food preparation, baking, and everyday tasks more comfortable without compromising the functionality of the surrounding kitchen.
Painted in a rich grass-green finish, the island was crafted to resemble a freestanding furniture piece rather than conventional built-in cabinetry. Decorative corner feet, furniture-inspired detailing, and artisan craftsmanship reinforce the kitchen's timeless, collected aesthetic, while a premium walnut butcher block countertop adds warmth, natural texture, and a durable work surface that develops even more character with age.
Although the island has the appearance of fine furniture, practical living was never overlooked. A recessed toe kick was thoughtfully incorporated to prevent cat toys and household items from disappearing beneath the cabinetry—a subtle but meaningful detail that reflects the homeowners' daily life. This balance of historic inspiration, personalized ergonomics, handcrafted detailing, and pet-friendly functionality exemplifies luxury kitchen design that is both beautiful and deeply livable.
4