
Search results for "Preventing deterioration" in Home Design Ideas
 From House To Home
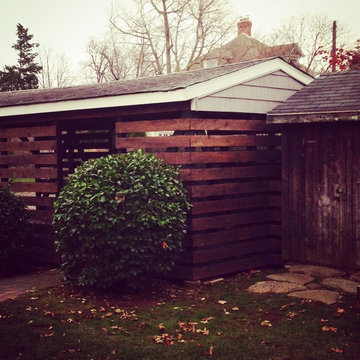
This was a renovation project. Existing lattice was in deteriorated condition and was removed and replaced with 6" cedar boards. Structural elements were also repaired or replaced. The boards were stained in Cabot's Exterior Wood Stain in Cordovan Brown. The structural elements were stained black to offer contrast.
Additionally, the existing cedar shed was moved and repositioned to better align with the carport. The siding of the carport was extended to prevent the owner's dog from exploring behind the shed. Better photos to come!
 Three Tree Roofing
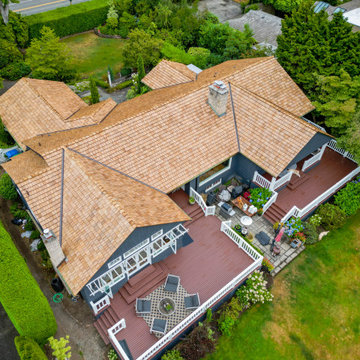
This impressive cedar shake shingle roof, prized for its beauty and sustainability, is located in Shoreline, Washington. Over time, the old cedar shake shingle roof had deteriorated, birds had begun to peck holes in it, and little critters had started to burrow and build nests in the wood. We removed the old cedar shake shingle roof, recycled it, and installed a premium three-quarter hand split cedar shake shingle roof. It’s a beautiful and environmentally friendly wood that comes with a 50-year CCA-treated warranty. The CCA treatment for longevity means the wood is injected with a treatment that prevents insects from growing into the wood which is a very important step. This treatment step is often omitted much of the time on lower quality wood leading to a very short life span of the cedar shake itself.
Three Tree Roofing uses quality wood that will last a very long time. When we install cedar shake shingles, it’s important to use stainless steel fasteners. The reason we use steel fasteners is that the CCA treatment will eat through all other metal fasteners. We use stainless steel so that doesn’t happen. We have an expert roofing crew that specializes in cedar shake shingle installs. It’s a skill that our highly dedicated crew uses every day. If you have any questions about residential or commercial roofing, feel free to contact us for your new roof or give us a call at 206-312-7663 (ROOF)!
 Pennsylvania Landscape & Nursery Association
Kimicata Brothers, INC http://www.kimicatabrothers.com
Project Entry: Johnson
2014 PLNA Awards for Landscape Excellence Winner
Category: Hardscaping-Residential $30,000-$60,000
Award Level: Honorable Mention
Photo Description:
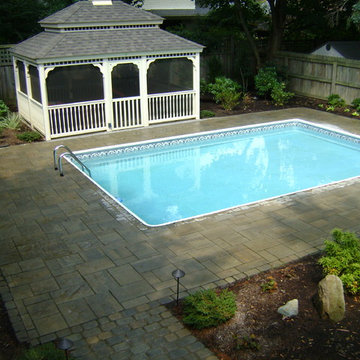
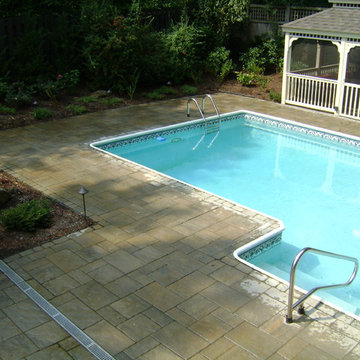
We were contacted by the Johnson’s to update their backyard fenced in pool area in the summer of 2012. Over the years the deck around the pool had deteriorated and the plants had become over grown and made walking around the deck difficult. The old concrete patio was small and only lit by bright 120 volt spot lights. What made this job difficult was the access to the backyard was limited to using a neighbor’s backyard for the project. We had to bring all debris out and materials in from a neighboring street, down the neighbor’s driveway, across the backyard, through an 8’ section that was in the far corner of the neighbor’s yard that corresponded to the entrance to Johnson’s backyard. They had a plan that they wanted to work from. Since access was a problem, we had to secure permission from the neighbor before we could consider bidding the job. After the neighbor’s permission was obtained we discussed materials for the drawing they had. It only included the hardscape and gazebo. Other difficulties included not damaging lighting and plumbing for the pool during excavation and construction. Also the ladders into the pool fit into cups screwed to the deck. These had to be replaced with precisely placed pipes mounted into the base for stability. Care had to be taken to make sure water would not drain from the deck into the pool. So we had to place channel drains between the patio area and pool deck area. A channel drain was placed between the exposed aggregate finished slab for the gazebo and the pool deck. This allowed for proper sloping of the hardscape to provide the drains to move rain away from the pool. We used polymeric sand in the paver joints to prevent breakdown of the installation and avoid wind and water moving sand into the pool. The slab for the gazebo was an exposed aggregate finish that measured 12’ 6” x 16’ 6”. The pagoda style roof for the gazebo and screening make it attractive and functional as a bug free area to entertain in. We discussed adding low voltage lighting, 120 volt plugs and drip irrigation early on so we could place conduits during the construction. After the hardscape installation we installed the low voltage lighting. We installed a transformer with a timer and an optional dusk to dawn photocell. The Johnsons did not like the old 120 volt spot light to light the back, they wanted something softer. We installed 20 path lights to illuminate the hardscape and 3 wall wash lights to add evening depth to the yard. We installed the plantings and Hunter drip irrigation system in the spring of 2013. It was easy to convince them that the drip system was the proper way to irrigate the area. There would be no spray to blow onto patio furniture or into the gazebo. Also drip irrigation uses less water so they are economical to operate. This gave them a low maintenance yard, a nice finished look and something blooming throughout the growing season. The Johnsons have been very happy with the look and the functionality of the pool deck, patio, lights, irrigation and gazebo.
Find the right local pro for your project
 Florida Lanai Curtains LLC
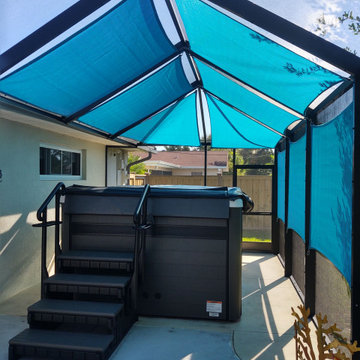
Shade sails provide shade from the hot Florida sun allowing homeowners to enjoy their hot tubs comfortably no matter what time of day. The sails also prevent the hot tub surfaces from being ruined constant exposure to destructive UV rays. Sails are especially good for protecting those with sun sensitivities.
 SUPERIOR CHIMNEY SERVICES CORPORATION
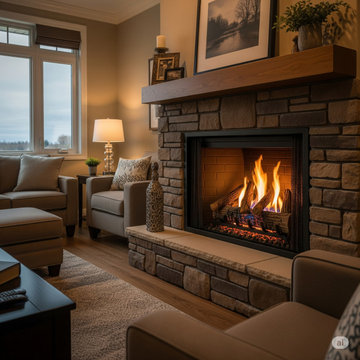
September 21st is the first day of Fall. I know we don’t want to think about it yet, but it is good to prepare and get the chimney swept early. Why? According to the Farmer’s Almanac, they are predicting a colder and snowier Winter. But you say, “eh, I got a gas fireplace.” Better yet, “I don’t use my fireplace, so why should I sweep it, and clean it early?” Let’s discuss why all types of chimneys and fireplaces need to be swept.
Why Do All Types of Chimney’s and Fireplaces Need to Be Swept?
When we think of the fireplace, we picture the real wood burning fireplace with the sounds of crackling wood. With regular use of the wood-burning fireplaces, a byproduct called creosote forms and over time, lines the side of the chimney flue. This needs to be swept at least once per year as creosote is flammable. However, all chimney’s, regardless of whether it burns wood or utilizes gas, needs to be professionally inspected and swept annually.
Many homeowners mistakenly believe that a gas or unused chimney is immune to problems since it doesn't produce a byproduct. However, these chimney systems face their own unique dangers. Gas fireplaces, especially those that are high-efficiency, can lead to the buildup of corrosive deposits. Over time, these deposits can degrade your chimney liner. Getting it inspected by a certified chimney technician will control this issue so it doesn’t turn into a problem.
4 Key Reasons to Prioritize Your Annual Chimney Inspection
The annual chimney inspection is more than just a sweep; it’s a comprehensive health check for your entire chimney system. We call it the 14 Point Inspection. A certified chimney technician will look for:
1. Fire Hazards: Again, for wood-burning chimneys, the removal of creosote is important to prevent a chimney fire. Gas fireplaces release corrosive deposits. If you don’t use the fireplace, you never know what debris may have settled in. If you want to use the fireplace, please be sure to have it professionally inspected and swept before use.
2. Obstructions: There’s a whole world outside of your home, and especially in the Fall, our little friends are searching for a warm place to stay. Your chimney looks pretty good. And, let’s not forget how the wind in the Chicagoland are does a great job of moving debris around that can get up and under the chimney cap or directly into the chimney if you don’t have a cap. These blockages need to be cleared for you and your home’s protection.
3. Structural Damage: A chimney technician will be able to spot cracks, water damage, or deterioration of the chimney and chimney liner that could compromise the system's safety.
4. Ventilation Issues: Ventilation is key for your home to breathe. The certified chimney technician will ensure proper draft and airflow, which is the best way to get rid of toxic gases.
NFPA
Remember, the National Fire Protection Association (NFPA) recommends an annual inspection for all chimney types. This simple, proactive maintenance can save you from costly repairs. Don't wait for a problem to become obvious.
Contact Superior Chimney today at 877-244-6349 to schedule a 14-Point Chimney inspection to ensure your home and family are protected.
 SUPERIOR CHIMNEY SERVICES CORPORATION
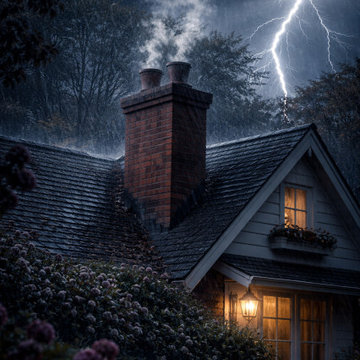
Winter is always tough on your home. This past winter was no picnic with the snow and cold. By the time spring (really) arrives, your chimney has put up with months of freezing temperatures, snow, ice, and the constant freeze-thaw cycle that quietly does damage you can't always see from the outside. That's why a spring chimney inspection isn't just a good idea, it’s essential to have your chimney checked before storm season begins. Here’s why:
Water Is Your Chimney's Worst Enemy
Here's something that most homeowners don’t know: chimney leaks cause more damage to masonry chimneys than fire does. Think about that a moment. While everyone worries about creosote and chimney fires — and rightfully so — water is silently doing just as much, if not more, damage.
Unlike the rest of your home, which is sheltered by your roof and eaves, your chimney stands fully exposed above the roofline. It takes on rain, wind, snow, and every freeze-thaw cycle winter throws at it, all while absorbing moisture into its porous masonry materials. That water expands and contracts, causing cracks, structural stress, and integrity loss that accumulates over time. The worst part? Chimney leaks are often subtle and slow-moving. By the time you notice water damage inside your home, the problem has usually become more serious, and expensive.
What a Spring Inspection Actually Catches
A professional spring chimney inspection, such as Superior Chimney’s, goes well beyond a quick visual check. A CSIA Certified Chimney Sweep technician will evaluate your entire system — inside and out — looking for the most common sources of chimney leaks and damage, including cracked chimney crowns, deteriorated brick and mortar joints, damaged or missing chimney caps, faulty chimney flashing and roof leaks, chimney slab gaps, and flue gas condensation from improperly sized chimney liners.
Any one of these issues left without a proper inspection, heads into spring storm season is an open invitation for water damage. And as Superior Chimney has discussed, masonry water damage is a progressive problem — the longer it goes unrepaired, the costlier the fix becomes.
What You Can Do Right Now
The good news is that most chimney water damage is preventable. The key steps are:
• have a professional-grade chimney cap installed if you don't already have one
• repair or replace a damaged chimney crown
• address any deteriorated brick and mortar
• fix leaky flashing and
• consider having your chimney professionally waterproofed. Waterproofing alone can save you significantly on future repair costs.
What’s Next?
Superior Chimney always includes a free 14-Point Certified Written Inspection with photo documentation via email with every chimney sweep. This helps you to know exactly what condition your chimney is in and what, if anything, needs attention.
Don't wait, have your chimney checked before storm season begins to reveal a problem that's been building all winter.
Schedule your inspection today at 877-244-6349.

 Boyd's Custom Masonry LLC
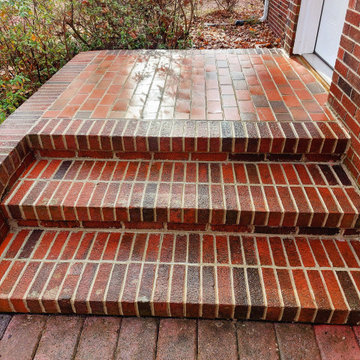
✨ BEFORE & AFTER -- Step Repair ?
☎ Call Mike Boyd at 757-412-5630 to discuss your next masonry project.
The square pavers on the landing were removed and replaced with Brookstown Full Range Modular Pavers from Pine Hall Brick Company, Inc. These traditional wire-cut, square-edge clay pavers complement the existing brick beautifully. The old, deteriorating mortar joints were ground out and filled with new mortar (Workrite 2906 N Old Colonial from York Building Products). After that, the area was cleaned using an acid wash designed for brick (@Prosoco SureKlean 600), which effectively dissolves mortar smears and construction dirt without causing acid burns or streaks. Repointing rejuvenates the old brick's appearance and helps prevent water from seeping into the joints.
✨ Want to restore your entryway? Give us a call! ☎ 757-412-5630 ? Now scheduling for MARCH 2025 for projects in Virginia Beach, Norfolk & Chesapeake, Virginia.
#brick #bricklayer #brickmason #masonry #inspiration #skilledtrades #skills
 Pennsylvania Landscape & Nursery Association
Kimicata Brothers, INC http://www.kimicatabrothers.com
Project Entry: Johnson
2014 PLNA Awards for Landscape Excellence Winner
Category: Hardscaping-Residential $30,000-$60,000
Award Level: Honorable Mention
Photo Description:
We were contacted by the Johnson’s to update their backyard fenced in pool area in the summer of 2012. Over the years the deck around the pool had deteriorated and the plants had become over grown and made walking around the deck difficult. The old concrete patio was small and only lit by bright 120 volt spot lights. What made this job difficult was the access to the backyard was limited to using a neighbor’s backyard for the project. We had to bring all debris out and materials in from a neighboring street, down the neighbor’s driveway, across the backyard, through an 8’ section that was in the far corner of the neighbor’s yard that corresponded to the entrance to Johnson’s backyard. They had a plan that they wanted to work from. Since access was a problem, we had to secure permission from the neighbor before we could consider bidding the job. After the neighbor’s permission was obtained we discussed materials for the drawing they had. It only included the hardscape and gazebo. Other difficulties included not damaging lighting and plumbing for the pool during excavation and construction. Also the ladders into the pool fit into cups screwed to the deck. These had to be replaced with precisely placed pipes mounted into the base for stability. Care had to be taken to make sure water would not drain from the deck into the pool. So we had to place channel drains between the patio area and pool deck area. A channel drain was placed between the exposed aggregate finished slab for the gazebo and the pool deck. This allowed for proper sloping of the hardscape to provide the drains to move rain away from the pool. We used polymeric sand in the paver joints to prevent breakdown of the installation and avoid wind and water moving sand into the pool. The slab for the gazebo was an exposed aggregate finish that measured 12’ 6” x 16’ 6”. The pagoda style roof for the gazebo and screening make it attractive and functional as a bug free area to entertain in. We discussed adding low voltage lighting, 120 volt plugs and drip irrigation early on so we could place conduits during the construction. After the hardscape installation we installed the low voltage lighting. We installed a transformer with a timer and an optional dusk to dawn photocell. The Johnsons did not like the old 120 volt spot light to light the back, they wanted something softer. We installed 20 path lights to illuminate the hardscape and 3 wall wash lights to add evening depth to the yard. We installed the plantings and Hunter drip irrigation system in the spring of 2013. It was easy to convince them that the drip system was the proper way to irrigate the area. There would be no spray to blow onto patio furniture or into the gazebo. Also drip irrigation uses less water so they are economical to operate. This gave them a low maintenance yard, a nice finished look and something blooming throughout the growing season. The Johnsons have been very happy with the look and the functionality of the pool deck, patio, lights, irrigation and gazebo.
 AJM Construction & Repairs
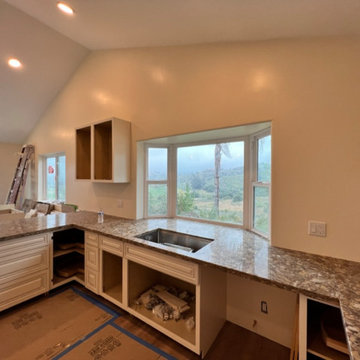
We started as a kitchen remodel but discovered there was mold in the majority of the exterior walls as well as the attic. The mold was caused by a number of problems but namely because the waterproof paper wrap on the house had deteriorated and was moisture to pass through the stucco and into the wood framing. In addition there was a leaking air conditioner condenser in the attic that was draining saturating the wood above the master bedroom. The mold was causing health problems it became clear we needed to replace a large majority of the framing and prevent future problems.
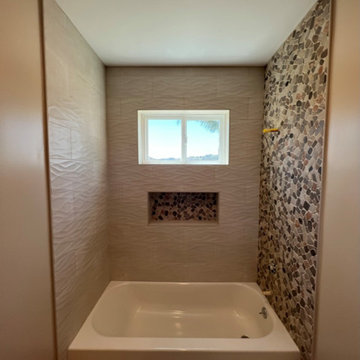
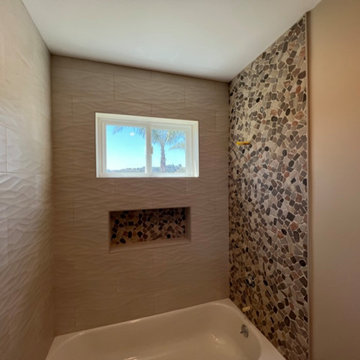
So we went from a kitchen addition/remodel to rebuilding the majority of the home and adding 800sqft; including a new bedroom, expanding the master bedroom and bath as well as a walk-in closet.
In anticipating for aging in place, we installed a walk-in shower with a bench and grab bars to allow for future wheelchair access and reduce trip hazards.
 AJM Construction & Repairs
We started as a kitchen remodel but discovered there was mold in the majority of the exterior walls as well as the attic. The mold was caused by a number of problems but namely because the waterproof paper wrap on the house had deteriorated and was moisture to pass through the stucco and into the wood framing. In addition there was a leaking air conditioner condenser in the attic that was draining saturating the wood above the master bedroom. The mold was causing health problems it became clear we needed to replace a large majority of the framing and prevent future problems.
So we went from a kitchen addition/remodel to rebuilding the majority of the home and adding 800sqft; including a new bedroom, expanding the master bedroom and bath as well as a walk-in closet.
In anticipating for aging in place, we installed a walk-in shower with a bench and grab bars to allow for future wheelchair access and reduce trip hazards.
 AJM Construction & Repairs
We started as a kitchen remodel but discovered there was mold in the majority of the exterior walls as well as the attic. The mold was caused by a number of problems but namely because the waterproof paper wrap on the house had deteriorated and was moisture to pass through the stucco and into the wood framing. In addition there was a leaking air conditioner condenser in the attic that was draining saturating the wood above the master bedroom. The mold was causing health problems it became clear we needed to replace a large majority of the framing and prevent future problems.
So we went from a kitchen addition/remodel to rebuilding the majority of the home and adding 800sqft; including a new bedroom, expanding the master bedroom and bath as well as a walk-in closet.
In anticipating for aging in place, we installed a walk-in shower with a bench and grab bars to allow for future wheelchair access and reduce trip hazards.
 Dallas Builders Association
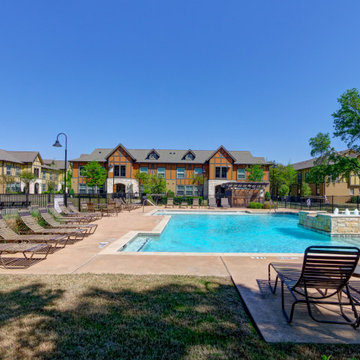
Britain Way Apartments, located at 333 Lane St. in Irving, has reborn with a fresh rejuvenated appeal. Built in 1962, the original development structure had been noticeably deteriorating in recent years. It had limited amenities, 17 repetitive, monotonous buildings with dull colors and obsolete mansard roofs in dilapidated condition. There was poor on-site drainage and lighting, no perimeter fencing, and several city code violations were recorded in prior years. The Developer’s mission was to convert this dated project into a high quality, eco-friendly, modern, and affordable housing community for the citizens of Irving.
After the remodel was completed, enhanced features include visually pleasing facades using heavy stone accents and sloping roofs, and lush landscaping distributed throughout the site. Additional improvements include expanded kitchen areas with upgraded interior amenities and energy efficient appliances; second bathrooms added to select two- and three-bedroom units; a brand-new spacious clubhouse and community center was provided; pool and picnic areas and an on-site resident activities coordinator to lead an abundance of community services provided to residents at no extra cost. Strategic partnerships, with community-based organizations, local volunteer groups and non-profits offer lifestyle and learning activities such as arts and crafts and after-school reading and tutoring for children, computer classes, lifestyle enrichment classes, nutrition classes and aquatic activities for children and adults.
Britain Way is the first LEED Gold Certified affordable multifamily community in the city of Irving. LEED certification ensures the property will be healthier and safer for residents in addition to providing lower utility expenses, as well as, conserving energy and water. Obtaining LEED Gold Certification for a 60-year-old project was a herculean effort.
Further enhancing the project’s resident quality of life initiatives, the new, stylish Britain Way is designed per implementing “Crime Prevention Through Environmental Design” (CPTED) requirements. Among several other updates, the property was made safer by adding perimeter fencing and increasing lighting levels throughout the site.
To tour Britain Way or for more information on availability of this apartment community or any other available properties, please visit www.omhousing.com or https://www.britainwayapts.com/
This Home of the Week is presented by the Dallas Builders Association. For information on the Association please visit www.dallasbuilders.com.
 Three Tree Roofing
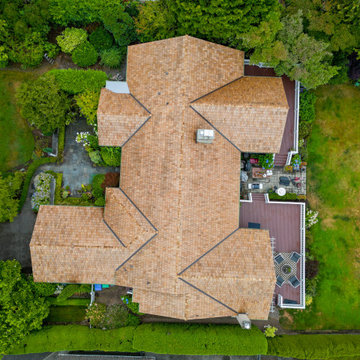
This impressive cedar shake shingle roof, prized for its beauty and sustainability, is located in Shoreline, Washington. Over time, the old cedar shake shingle roof had deteriorated, birds had begun to peck holes in it, and little critters had started to burrow and build nests in the wood. We removed the old cedar shake shingle roof, recycled it, and installed a premium three-quarter hand split cedar shake shingle roof. It’s a beautiful and environmentally friendly wood that comes with a 50-year CCA-treated warranty. The CCA treatment for longevity means the wood is injected with a treatment that prevents insects from growing into the wood which is a very important step. This treatment step is often omitted much of the time on lower quality wood leading to a very short life span of the cedar shake itself.
Three Tree Roofing uses quality wood that will last a very long time. When we install cedar shake shingles, it’s important to use stainless steel fasteners. The reason we use steel fasteners is that the CCA treatment will eat through all other metal fasteners. We use stainless steel so that doesn’t happen. We have an expert roofing crew that specializes in cedar shake shingle installs. It’s a skill that our highly dedicated crew uses every day. If you have any questions about residential or commercial roofing, feel free to contact us for your new roof or give us a call at 206-312-7663 (ROOF)!
 AJM Construction & Repairs
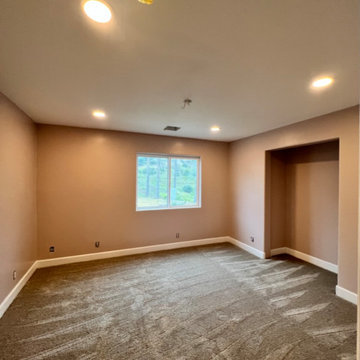
We started as a kitchen remodel but discovered there was mold in the majority of the exterior walls as well as the attic. The mold was caused by a number of problems but namely because the waterproof paper wrap on the house had deteriorated and was moisture to pass through the stucco and into the wood framing. In addition there was a leaking air conditioner condenser in the attic that was draining saturating the wood above the master bedroom. The mold was causing health problems it became clear we needed to replace a large majority of the framing and prevent future problems.
So we went from a kitchen addition/remodel to rebuilding the majority of the home and adding 800sqft; including a new bedroom, expanding the master bedroom and bath as well as a walk-in closet.
In anticipating for aging in place, we installed a walk-in shower with a bench and grab bars to allow for future wheelchair access and reduce trip hazards.
 Deskins Group LLC
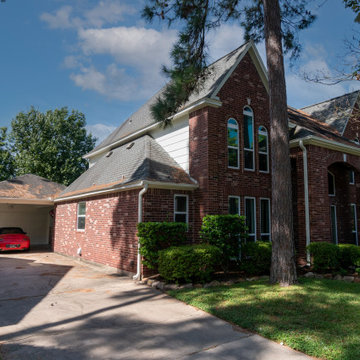
The original siding on this house started showing wear in a few places. We patched the siding where needed and repainted the entire house with Sherwin Williams Latitude paint to prevent further deterioration.
 AJM Construction & Repairs
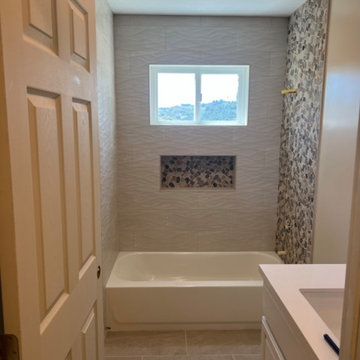
We started as a kitchen remodel but discovered there was mold in the majority of the exterior walls as well as the attic. The mold was caused by a number of problems but namely because the waterproof paper wrap on the house had deteriorated and was moisture to pass through the stucco and into the wood framing. In addition there was a leaking air conditioner condenser in the attic that was draining saturating the wood above the master bedroom. The mold was causing health problems it became clear we needed to replace a large majority of the framing and prevent future problems.
So we went from a kitchen addition/remodel to rebuilding the majority of the home and adding 800sqft; including a new bedroom, expanding the master bedroom and bath as well as a walk-in closet.
In anticipating for aging in place, we installed a walk-in shower with a bench and grab bars to allow for future wheelchair access and reduce trip hazards.
 Boyd's Custom Masonry LLC
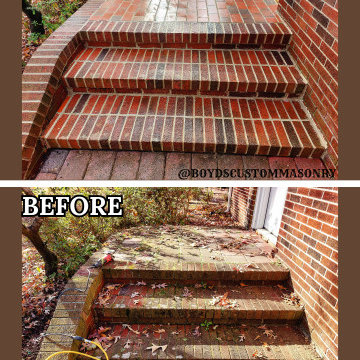
✨ BEFORE & AFTER -- Step Repair ?
☎ Call Mike Boyd at 757-412-5630 to discuss your next masonry project.
The square pavers on the landing were removed and replaced with Brookstown Full Range Modular Pavers from Pine Hall Brick Company, Inc. These traditional wire-cut, square-edge clay pavers complement the existing brick beautifully. The old, deteriorating mortar joints were ground out and filled with new mortar (Workrite 2906 N Old Colonial from York Building Products). After that, the area was cleaned using an acid wash designed for brick (@Prosoco SureKlean 600), which effectively dissolves mortar smears and construction dirt without causing acid burns or streaks. Repointing rejuvenates the old brick's appearance and helps prevent water from seeping into the joints.
✨ Want to restore your entryway? Give us a call! ☎ 757-412-5630 ? Now scheduling for MARCH 2025 for projects in Virginia Beach, Norfolk & Chesapeake, Virginia.
#brick #bricklayer #brickmason #masonry #inspiration #skilledtrades #skills
 Allman Remodeling Contractors
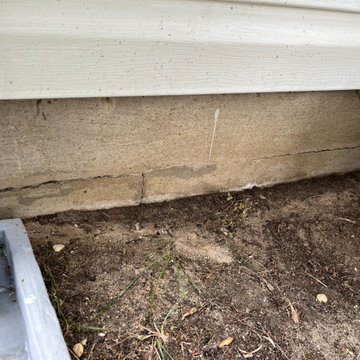
 Foundation & Masonry Repairs Complete! ?
We recently tackled a project repairing cracked and deteriorating masonry around the foundation, steps, and entryways. The results? Stronger, cleaner, and longer-lasting protection against the elements.
✔️ Repaired cracked foundations
✔️ Restored damaged steps and landings
✔️ Repointed brickwork for a fresh, solid finish
Protecting your home’s foundation isn’t just about looks—it’s about structural integrity and preventing bigger issues down the road.
 SacPlacer Painting
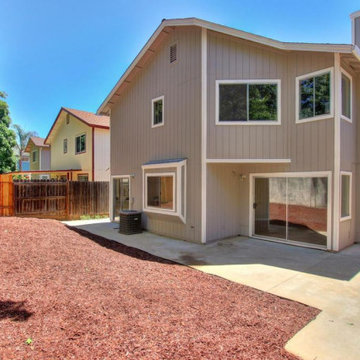
Exterior repaint in Antelope, Ca. Customer was grateful that SacPlacer Painting had been able to rearrange the schedule to and meet the customers deadline to put the house on the market.
On this particular home the sun facing side had been badly weathered, but by using a combination of primer and an elastomeric coating we were able to save the underlying T1-11 Siding and prevent any further deterioration, saving the homeowner and future homeowners costly repairs on siding replacement.
2