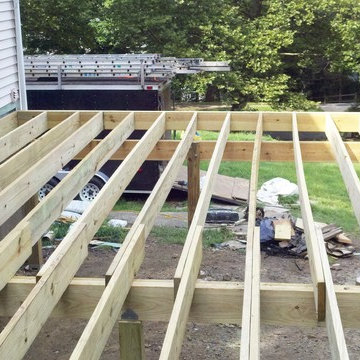
Search results for "Process" in Home Design Ideas
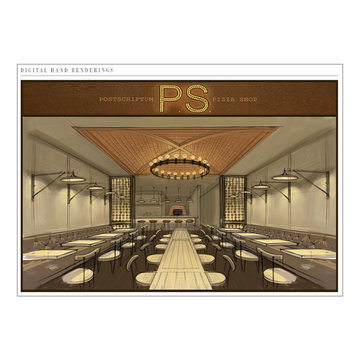
This stunning modern lookout features VIOSKI Tre II Sofas. With their modern charisma and clean lines, the Tre II Sofas add elegance and simplicity. They are the smallest of the VIOSKI Sofa Collection and can be customized to fit any space. Masterfully handcrafted in California. Extraordinary quality and comfort.

Luxury – Prestige – Status
KEY FEATURES
Hand Made in Europe
Hand-Made by 3rd. generation of Aydin family.
Premium Quality
Hand lined bottom
Hand stitching
100% genuine cowhide leather
European (Balkan) breed animals
Each product is BRANDED with serial number and Craftsmanship seal.
Hides used for making Patchworks are sourced ethically and humanely and 100% as byproduct of meat production
Animals are free-range raised, sustainable sourced mainly on mountain pastures of Eastern Europe.
Animal skins are endemic to breeds specific for Eastern European region.
Skins ARE NOT processed by mass processing facility, but rather family owned business with "Old Craft" certificate. This means that such business falls in "Traditional" category of business.
All skins are hand processed using solutions with the P.H value of drinking water.
Skins are processed in small batches, usually 5-10 at the time, in order for skin to preserve, to the greatest extend, its natural distinctions and quality.
NOTE: The photo on this page represents design and style of this rug and IT IS AN IMAGE OF ACTUAL product you will receive. All rug sizes are approximate. Due to the difference of monitor colors, some rug colors may vary slightly.
NOTE: Few products may contain some natural flaws due to conditions inherent to natural animal products (scratches, insect bites, wrinkles, cuts, etc.) that will be discretely repaired. Please note that we do not wedge our cowhides but we rather discretely stitch and repair. Such flaws are acceptable for this type of product, since it represents the life of the animal to the fullest possible extent.

Expert Kitchen Remodel Services by Construction and More Las Vegas
At Construction and More Las Vegas, we know that the kitchen is the heart of your home. It’s where you gather with family, entertain guests, and create delicious meals. That’s why we’re dedicated to providing expert kitchen remodel services that transform your kitchen into a functional, stylish, and inviting space. Serving homeowners throughout Las Vegas and the surrounding areas, including Summerlin, Henderson, Paradise, Spring Valley, and Boulder City, we offer personalized solutions tailored to your unique needs and preferences.
Why Choose Construction and More Las Vegas for Your Kitchen Remodel?
Expertise and Experience
With years of experience in kitchen remodeling, our team possesses the knowledge and skills to handle projects of all sizes and complexities. We stay up-to-date with the latest design trends and technologies to ensure that your kitchen remodel not only meets but exceeds your expectations.
Customized Solutions
Every kitchen remodel is unique. We tailor our services to meet your specific needs and preferences, creating a custom kitchen design that reflects your personal style and complements your home’s aesthetic. From cabinets to countertops, every element is chosen with your vision in mind.
Quality Craftsmanship
Our commitment to quality craftsmanship ensures that your kitchen renovation stands the test of time. We use only the highest quality materials and employ precise techniques to deliver a finished product that is both beautiful and durable.
Comprehensive Services
Our comprehensive kitchen remodeling services cover everything from initial design and planning to final installation and finishing touches. Whether you need a full kitchen renovation or a simple makeover, we provide a seamless and stress-free experience.
Our Kitchen Remodeling Process
Initial Consultation and Planning
The process begins with a detailed consultation to understand your vision, needs, and budget. We provide expert advice on design, layout, and materials to create a plan that enhances both the functionality and aesthetics of your kitchen.
3D Design and Visualization
Using state-of-the-art 3D design software, we create realistic renderings of your proposed kitchen remodel. This allows you to visualize the space and make adjustments before construction begins, ensuring that every detail aligns with your vision.
Custom Cabinets and Storage Solutions
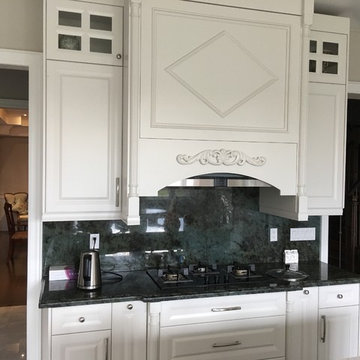
Custom cabinets are a cornerstone of any kitchen remodel. Our skilled craftsmen design and build cabinets that maximize storage and reflect your style. Whether you prefer modern sleek designs or traditional classic looks, we create cabinets that are both functional and beautiful.
Countertops and Backsplashes
The choice of countertops and backsplashes significantly impacts the look and feel of your kitchen. We offer a wide range of materials, including granite, quartz, and marble, to suit your style and budget. Our team helps you select the perfect combination that adds elegance and durability to your kitchen.
Lighting and Fixtures
Proper lighting is essential for both functionality and ambiance in your kitchen. We design and install lighting solutions that highlight key areas, such as task lighting, under-cabinet lighting, and ambient lighting. Our selection of fixtures includes a variety of styles to match your kitchen design.
Appliance Installation
Modern appliances are integral to a functional and efficient kitchen. We guide you in selecting high-quality, stylish options that meet your needs and complement your kitchen design. Our team ensures seamless installation for a cohesive and polished look.
Flooring and Finishes
The right flooring enhances the beauty and practicality of your kitchen. We offer a variety of flooring options, including tile, hardwood, and luxury vinyl, to suit your preferences. Our team ensures professional installation and finishes that withstand the rigors of daily use while adding elegance to your space.
Construction and Project Management
Once the design and materials are finalized, our experienced construction team takes over. We manage the entire remodeling process, from demolition to final touches, with meticulous attention to detail. Our project managers coordinate all aspects of the remodel, ensuring that the work is completed on time and within budget. We keep you informed throughout the process, addressing any concerns and ensuring your satisfaction.
Kitchen Renovation in Las Vegas and Surrounding Areas
If you’re searching for “kitchen renovation in my area,” look no further than Construction and More Las Vegas. We proudly serve Las Vegas and the surrounding communities, including Summerlin, Henderson, Paradise, Spring Valley, and Boulder City. Our local expertise and commitment to customer satisfaction make us the go-to choice for all your kitchen remodeling needs.
Why Kitchen Remodeling Matters
Enhanced Functionality
A well-designed kitchen maximizes space and improves functionality. Whether it’s adding more storage, upgrading appliances, or reconfiguring the layout, our remodels ensure that your kitchen works better for your daily routine and entertaining needs.
Increased Home Value
A kitchen remodel is one of the best investments you can make in your home. An updated, modern kitchen increases your property’s value and appeals to potential buyers if you decide to sell.
Improved Aesthetics
Our remodels transform outdated kitchens into beautiful, contemporary spaces. From luxurious finishes to modern fixtures, we create a kitchen that is both stylish and inviting.
Energy Efficiency
Upgrading to energy-efficient appliances and fixtures can reduce your utility bills and environmental footprint. We offer a range of eco-friendly options that save energy and water without compromising on performance or style.
Our Commitment to Sustainability
At Construction and More Las Vegas, we are committed to sustainable practices in our kitchen remodels. We source eco-friendly materials and prioritize energy-efficient fixtures to reduce environmental impact. Our team is dedicated to creating beautiful, functional kitchens that are also kind to the planet.
Testimonials and Case Studies
Our satisfied clients speak to the quality and reliability of our services. We have successfully completed numerous kitchen remodels, each tailored to meet the unique needs and preferences of our clients. Visit our website to read testimonials and view case studies of our work.
Contact Us Today
Ready to start your kitchen remodel? Contact Construction and More Las Vegas for expert kitchen remodeling services that combine functionality, beauty, and quality. Our experienced team is here to bring your vision to life, creating a kitchen that meets your needs and exceeds your expectations. Call us today for a free consultation and let us help you create the kitchen of your dreams. Whether you need a complete kitchen renovation or a custom kitchen makeover, Construction and More Las Vegas is your trusted partner for exceptional kitchen transformation services.
Find the right local pro for your project
This Limestone tiled floor had been installed in the kitchen of a property in Teddington three years before and due to the use of the wrong cleaning product was now stripped of its protective sealer. Limestone like any natural stone is porous and without a sealer in place dirt becomes trapped in the stone making it very difficult to keep clean. The property was close to Bushy Park situated in South West London on the North bank of the Thames which is only about seven miles from my base in Shepperton.
I discovered all of this after visiting the property to quote for deep cleaning and resealing the floor. It turns out they have been using Flash multi-surface & floor cleaner which has an acidic pH of 10.3, compare this to Tile Doctor Remove and Go which we use to strip sealers off floors and has a pH of 12. Needless to say, this was not the right product to use and the old sealer had been completely stripped off the floor and probably within the first few months.
On top of this our customer had 3 children and a dog running in and out of the garden and was therefore transferring quite a lot of dirt into the stone. After surveying the floor, I discussed the renovation process with the customer which would take two days and include a deep clean of the Limestone followed by the application of a sealer to ensure it did not hold onto the dirt. They were after a sheen finish for the floor and were keen to have natural brown and cream variations in the stone highlighted. We agreed a price for the work and booked a date for the work to start.
To start with, we machine scrubbed the floor with Tile Doctor Pro-Clean to break down the dirt and release it from the stone. We find the best process is to spray the Pro-Clean onto the floor first and then leave to dwell for ten minutes before scrubbing. It’s not long before the cleaning solution turns dark with the dirt released from the pores of the stone and this soil is then rinsed with water and vacuumed off the floor with a low-pressure hard floor cleaning machine.
Following the cleaning, we honed the Limestone using a sequence of 800, 1500 and finally 3000-grit Tile Doctor Burnishing Pads. The pads are applied with water to lubricate and the slurry generated is rinsed off the floor as before. This burnishing process brings up the natural sheen of the stone and tightens up its pores prior to sealing. I left the floor overnight to allow it to dry out.
The next day I returned to the property and checked the floor for moisture using a damp meter. The readings were fine, so I proceeded with the application of the sealer for which I used two coats of Tile Doctor Colour Grow. This is an impregnating sealer that enhances the colours and contrast on the stone while protecting it against future soiling and spillages. It gave a lovely sheen finish to the floor as requested by the customer.
As you can see from the pictures the process made a huge difference to the floor which now looks lighter and brighter, certainly the customer was more than happy. Before leaving I recommended, they should clean the floor using Tile Doctor Stone Soap, this is a pH neutral product that will ensure the seal does not get broken down like it previously had using the household cleaners. It is gentle enough to use every day if you wish is designed to help maintain the patina of the burnished stone.
Jonathan Oldham
South Middlesex Tile Doctor

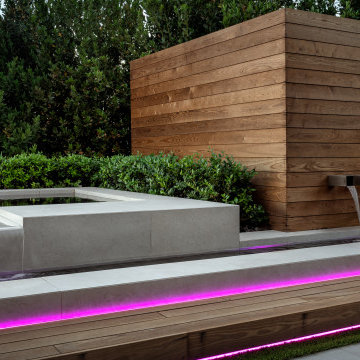
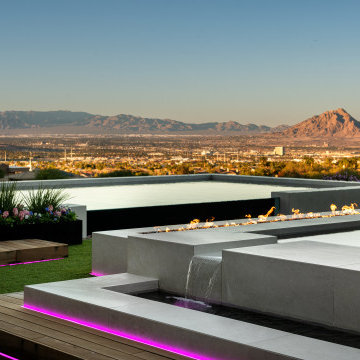
Ocean Blue Pools LLC is widely recognized for extravagant swimming pool construction and unmatched customer service.
Our specialties include custom designed swimming pools, spas, beautiful rock and stone water features and astounding outdoor kitchens and living spaces.
The designing process incorporates classic principles, proportioned balance and expert design in accordance with your topography and space. We strive to make your outdoor living space as user friendly as it is beautiful.
With profound focus on our client’s needs, we will design around your unique lifestyle and taste and create a space that is inviting, comfortable, safe, and engages the senses.
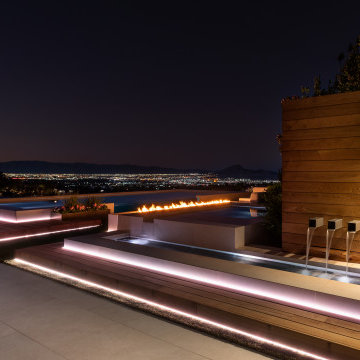
Your swimming pool, which becomes the focal point, is just one component of the backyard. The landscape, lighting, water features, fire pit or outdoor kitchen will define your pool and evoke emotion.
Our design team will offer several feature choices to create the most exciting and relaxing outdoor environment using the harmony of these elements.
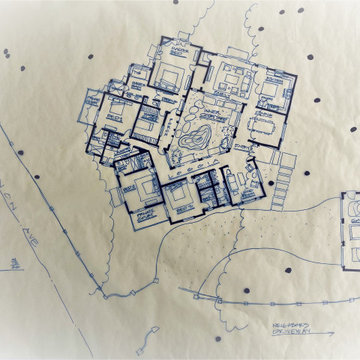
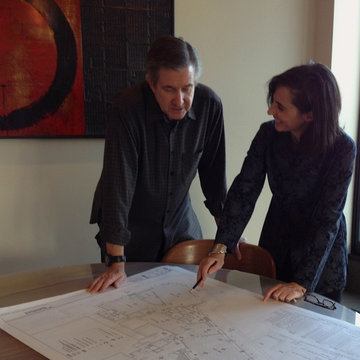
The design process begins with a consultation to understand your lifestyle and vision for your new outdoor living space. We will inquire about your usage plans and the vision you would like to achieve. We take into consideration, location of views, site conditions and accessibility. We will examine your homes existing architectural design to ensure continuity and flow from your home into to your new outdoor living space.
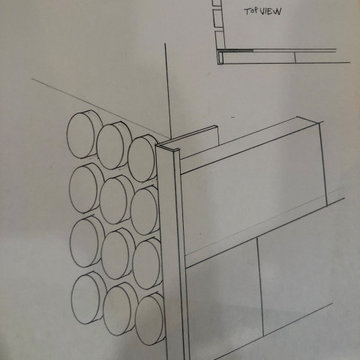
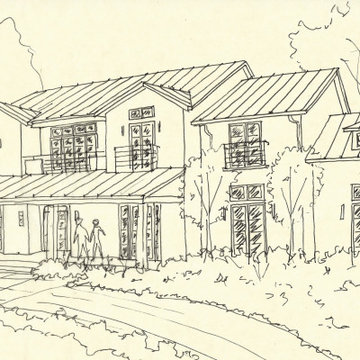
Our design team and graphic artists will then transform your vision into conceptual drawings and renderings. A visual presentation will also be prepared to convey the look and feel of the proposed project.
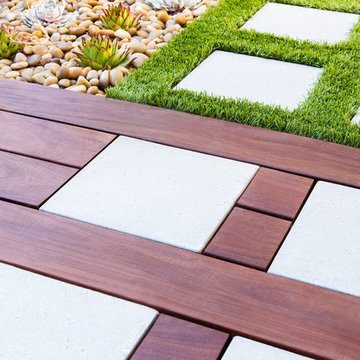
Under the design process, materials will be recommended which may include: pavers, travertine, glass tile, stone veneer, precast concrete, landscape and lighting. The final design drawings will provide an accurate representation of your new outdoor living space.
Once the design process is complete, we will construct your project to the exact vision of the original design concept. We will maintain relentless attention to detail with our latest innovations and technology.
All projects are managed from decades of experience by our trained superintendent who will manage timeframes, quality, and most of all, the client’s expectations. Our goal is to exceed your expectations.
Randall Schmidt / Design and Construction

Home > Products
Crystallized Glass,Crystallized stone 6
Crystallized Glass,Crystallized stone,Crystallized glass panel
Marmoglass,Nanoglass,Marmoglass Composite Collectively referred to as Crystallized Glass
Crystallized Glass Application:
1). Interior & external wall cladding
2). Flooring Tile, Stair, Column cladding
3). Basin, Countertop, Table, Bar
4). bath, Kitchen, any tops, round pillar and furniture decoration etc .
Crystal white is a kind of artificial stone . It is made of glass ,which should be burned in the oven for two days under the more than 1000C temperature . It is much different from natural stone from all sides.
1. Natural and soft texture,
2. Varied colors such white, beige, carrara white
3. Good weather resisting property and durability
4. Zero percent of water absorption , not be polluted easily
5. Green environmental building material
6. High-intensity, light weight
7. Bending formation, economical, time saving
8. scratch resistant ,withstand high-heat .
More details about it :
1. There are more than 10 colors of crystallized glass panel products available: Pure white, yellow, silver yellow, silver grey, grey in white, grey spot white, USA grey spot white, yellow in white….
2. Panel thickness: 10-30MM
3. Normal specifications (mm):
1800*3000*18 1200*2400*18 600*600*18 1200*1200*18
1600*2400*18 1800*3000*30 800*800*18 1000*1000*18
Thin tiles:
305*305*12mm, 450*450*12mm
457*457*12mm, 400*400*12mm
600*600*12mm 1200*2400*12mm
4. Material: crystal quartz sand
5. Packaging: Fumigated wooden crates, Bundles,foam
6. Brand name: China Marmoglass / Nanoglass
7. Place of origin: Xiamen, Fujian ,China
8. Model NO.: GS001, SN002, NANO2009, NNAO2011
9. Supply ability: 20000M2/MONTH, 30TON/DAY
10. Delivery time: generally within 10 days, after the order confirmed and the deposit received
11. Arc panel specifications (mm):
Thickness: 18-30mm
Diameter : 30cm-120cm
1.What is crystallized glass stone(Marmoglass SN002 )?
The micro crystal stone is an innovative product designed as a substitute for the rare natural white marble. It is superior to the natural white marble in terms of characteristics, where the micro crystal stone possesses extreme density making it anti-breakage, giving it zero water absorption qualities, and making it resistant to acidic and alkaline substances. at the pace that mankind is consuming the natural resources in today’s world, the micro crystal stone is the ultimate solution, the superior alternative for the external and internal applications. It is certainly a revolutionary product and the finest construction material of the 21st century.
2.Why choose crystallized glass stone(Marmoglass SN002)?
The micro-crystal stone, also known as the micro-crystal glass, Marmoglass, is a new type of high-level decoration material. It is derived from natural inorganic material through a high temperature process, and it possesses excellent characteristics including the followings:
1. High Performance
The micro-crystal stone has even texture and high density, which makes it crush resistant, anti-bending and high resistant resulting its performance being higher than natural stone. It can be used for long period with minimal damage.
2. Acid-proof alkalinity and anti-corrosion
Not only does the micro-crystal stone posses special micro-crystal characteristics, it also has special glass features such as a fine texture, shiny surface and light reflection effect.
3. Fine Texture
We have the flexibility to manufacture any colors as per customer requirements while also making up the defect of color differences, which exists in natural stone. While the product is widely used for interior and interior decoration of star-level hotels, subways, local landmark buildings, airports, and office building etc, it is more suitable for high-level home decoration.
4. Pollution-resistance and easy maintenance
The micro-crystal is a kind of inorganic crystalline material with stable chemical characteristics. Its acid proof alkalinity and anti-corrosion nature are superior to nature stone, specifically its anti-weather characteristics whereby it is unaffected by the wind or sunlight.
5.A wide application range
The water absorption rare of micro-crystal is quite low, close to zero. Several types of dirty pulps and dyed solution have difficulty in penetrating it. Any dirt on the surface is easily cleaned and it is convenient to mankind.
6. Heat-bend reformation
With the heating method, the micro-crystal can be made into various arched profiles and arched slabs. the process is simple and it allows us to save time, cost, material and resources.
7. No radioactive elements
In the process of manufacturing the micro-crystal stone, we have integrated the elimination of all the harmful radioactive elements that are found in natural stone from its components. It is therefore the safest and most environmentally friendly building material in our modern world.
Crystallized glass can be processed into slab, tile, countertop, column and vanity top, wash basin and etc. It is applicable for flooring, interior and exterior wall cladding, stairs and table. Contributed to the character of no color difference, so it is widely used for top grade hotel, business building shopping mall and such great construction.
Physical Parameter
Density
2.70 g/cm
Water Absorption
0.01%
Compressive Strength
126 Mpa
Radioactive
Class A (Suitable for indoor and outdoor)
Size
Slabs
2400/2600/2800/3000 x 1800/1600/1400/1500mm
Cut-to-size Tiles
30 / 40 / 50 / 60 / 80 / 100cm X 30 /40/50 /60/80 /100cm
12"x12", 24"X12", 24"x24" or customized size
Thickness
1.2cm,1.8cm (3/4'), 2.0cm, 2.5cm, 3.0cm,
Finishing
Polished, honed
Usage
Flooring, Walls, Stairs / Steps, Counter tops, Vanity, Paving / Curbstone, Pillar, Column, Border, Skirting, Window Sills
Quality Control
Thickness Tolerance
+- 1mm;
Polishing Grade
above 100 degree
Crack / Spot
EU / US Standard: zero
QC Standard
AQL2.5/4.0 ITS
Certificate
CE, ISO, GB/T19001-2008
Advantage
1. Own factory with stable supply;
2. Factory direct with good price and prompt delivery;
3. Good Management System for good quality;
4. Value-added service.
large glass white artificial stone of Packing
Inner Packing
Cover with foam and plastic film, corner paper board protection
Individual Carton
Individual carton packing with trademark is available upon request
Outer Packing
Plastic tapes in 6 sides, further strengthened with iron sheet in the corner
Shipping Mark
OEM
Port of Loading
Xiamen Port of China
Delivery Lead Time
Normally 10-15 days for one 20’ GP, faster delivery is available upon confirmation
Trade Term
FOB, CFR, CIF, etc.
Loading Info.
Thickness
Qty per pallet
Pallets per 20ft container
QTY per 20ft container
Square Meter per 20ft container
Weight per 20ft container
Big slab size
3000*1200mm
12mm
25pcs
7
175pcs
600-900 m2
21000kgs
3000*1400mm
15mm
20pcs
7
175pcs
500-700 m2
21000kgs
3000*1600mm
20mm
15pcs
7
105pcs
350-500 m2
21000kgs
3200*1600mm
30mm
10pcs
7
70pcs
250-358 m2
21000kgs
Installation Recommendations
Wall Cladding
1.Wall should be leveled and cleaned,
2.Fix the panel on the wall with wire and expansion screw tightly,
3.Fill the space between the panel and the wall with cement mortar of ratio 1:3,
4.Clean the extra mortar and dirt on the surface.
Floor Installation
1.Mark out the baseline of gound level,
2.Mix the mortar with ratio of 1 cement to 4 sand to have semi-day mortar,
3.Lay the mixed mortar in level with a layer of 3-4cm thickness,place the tile over the mortar and adjust the height properly to be leveled,
4.Remove the tile after level adjustment.Put a thin layer of cement powder on the mortar and add water on it to become wet,
5.Put the tile on top and gently knock with rubber hammer until it sealed with the mortar properly. Make sure the tile is leveled and has the same space between each other. Those tiles which are not leveled with others should be removed and repeat the leveling procedure in step 4.Genetally,the space between two tiles should be 2mm for water evaporation and normal expansion.
Daily maintenance of Micro Crystal Stone
1.The laying area of micro crystal stone can only be opened for use or stacking any item on top after at least 24 hours of filling the gap,
2.The ground must be covered with plywood or carpet for protection in case of doing other decoration work after the installation of micro crystal stone floor,
3.In areas like exit and entrance, the surface of micro crystal stone floor should be covered by carpet or plywood to protect it from the damage of abrasion of sand or other hard material.
4.Do not use general floor wax on micro crystal stone,General floor wax is an oil-based wax which is easily stuck to dust.
5.Please use rubber wheels for shopping cart and trolley on micro crystal stone floor, for the hard wheel may scratch and damage the surface,
6.Regular care and maintenance is the key for long lasting of micro crystal stone’s high glossy and reflection.
Important Notice
1.Make sure the ground of laying area is dry and clean before laying mortar. The ratio 1:3(volume ratio) must be strictly followed and no extra water added during the installation progress
2.In the choice of using white cement as the filling material, the strength and quality of the cement must be checked properly.
3.It is not recommended to store micro crystal stone outdoor for long time. It should be covered with rock wool in winter and moved into indoor 2 hours in advance before installation. It also needs to be covered with waterproof cloth when installing during the rainy days outdoor,
4.When using micro crystal stone as ground floor,2mm wild gap must be left between the joints for the benefit of the water vaporization and physical expansion. In the case of large-scale installation, it is recommended to leave an 8mm expansion joint,
5.It is recommended that the area of micro crystal stone to remain-not used-for at least 24 hours and kept 2-3 days before passing or storing items on top.
Marmoglass Polished Edge, Shining !
China Marmoglass SN002 Slabs Packing and Ready for ship
We not only make Slabs, we also can make:
- Project Tiles
- Countertop
- Tabletop
- Vanitytop
- Column
Tags: Marmoglass, Crystallized glass panel, nano crystallized glass panel, pore marmoglass, pore crystallized glass panel, Artificial Stone, Hole-Free Micro Crystal Stone, Pure white stone, Crystallized glass tile, Crystal glass tile, pure white artificial white marble, Marmo Glass, Glass Marble, White Marble, Marmoglass, nano marmoglass, no pore marmoglass, non-pore crystallized glass panel, glass marble, white marble, crystal white marble, white stone, white marble tile, Micro-crystal stone, Crystallized glass, Crystallized White Stone, Crystallized White Stone, Micro-crystallized composite tile, Hole-Free Micro Crystal Stone, Micro-crystallized composite tile, White Marble Tiles, pure white marble
China Marmoglass SN002 Strong Packing Crates
China Marmoglass SN002 and Nanoglass NANO3 Container Loading
Welcome to our product page of China Marmoglass, in which you can find detailed information of Marmoglass. China Marmoglass Co.,Limited offer Crystallized White Marmoglass is good in quality and competitive in price. China Marmoglass Co.,Limited is the manufacturer and supplier of Marmoglass,White Crystallized Glass Panel,Nanoglass. Crystallized Glass Stone,Crystallized Glass Panel,Crystallized Glass Stone Tile,Crystallized Glass Stone Countertop,Marmoglass also known as Nanoglass and White Crystallized Glass,Marmoglass, Crystallized Glasss is the popular materials for interior and exterior applications, including kitchen countertops, bathroom vanities, commercial foyer wall claddings, etc. China Marmoglass Co.,Limited is the Manufacturer and export Crystallized Glass and Crystallized Glass products. Crystallized Glass can be used Interior & external wall cladding, Flooring Tile, Stair, Column cladding, Basin, Countertop, Table, Bar, bath, Kitchen, any tops, round pillar and furniture decoration etc. Super White Nanoglass Slab, You Can Buy Various High Quality Super White Nanoglass Slab Products from Super White Nanoglass Slab Suppliers and Super White Nanoglass Slab Manufacturers at Chinamarmoglass.com

Luxury – Prestige – Status
KEY FEATURES
Hand Made in Europe
Hand-Made by 3rd. generation of Aydin family.
Premium Quality
Hand lined bottom
Hand stitching
100% genuine cowhide leather
European (Balkan) breed animals
Each product is BRANDED with serial number and Craftsmanship seal.
Hides used for making Patchworks are sourced ethically and humanely and 100% as byproduct of meat production
Animals are free-range raised, sustainable sourced mainly on mountain pastures of Eastern Europe.
Animal skins are endemic to breeds specific for Eastern European region.
Skins ARE NOT processed by mass processing facility, but rather family owned business with "Old Craft" certificate. This means that such business falls in "Traditional" category of business.
All skins are hand processed using solutions with the P.H value of drinking water.
Skins are processed in small batches, usually 5-10 at the time, in order for skin to preserve, to the greatest extend, its natural distinctions and quality.
NOTE: The photo on this page represents design and style of this rug and IT IS AN IMAGE OF ACTUAL product you will receive. All rug sizes are approximate. Due to the difference of monitor colors, some rug colors may vary slightly.
NOTE: Few products may contain some natural flaws due to conditions inherent to natural animal products (scratches, insect bites, wrinkles, cuts, etc.) that will be discretely repaired. Please note that we do not wedge our cowhides but we rather discretely stitch and repair. Such flaws are acceptable for this type of product, since it represents the life of the animal to the fullest possible extent.

Richard and Monica of Huntley, IL, needed to make better use of their kitchen as well as more storage for pots, pans, and countertop appliances. Their space was laid out unconventionally, making cooking a challenge. A triangular nook held their refrigerator, hard-to-reach cabinets, and a cramped pantry. They needed to find a solution, so they searched Facebook for home remodeling companies in their area. Soon they found Advance Design Studio’s profile and were immediately impressed.
“Advance Design was the first and last studio I contacted,” Richard said.
Richard called Advance Design and felt an immediate connection with Project Designer Nicole. She was knowledgeable and thorough and offered many unique solutions to their kitchen layout problem.
A week later, Nicole came out to their home to meet the couple. They talked about their kitchen remodeling project and told Nicole what they wanted in their dream kitchen. Nicole saw that the kitchen had weird angles that hindered the cabinets you could use. She knew that designing a space that met both the client’s needs and dreams would be challenging.
Nicole worked with Richard and Monica to create an innovative design. When the couple came out to Advance Design Studio in Gilberts, they were blown away by the 3D illustrations Nicole showed them.
“I incorporated a hidden pantry cabinet to not only be a cool feature but also allowed me to square off the walls to gain more cabinet space,” Nicole said.
The hidden pantry added storage and squared off the strange triangular nook, creating a more traditional and functional kitchen layout. With the layout problems solved, they worked together to select materials. Richard and Monica wanted something brighter than their previous dark brown kitchen. They chose a combination of blue and white cabinetry with a white subway tile backsplash and white quartz countertops. The design was finalized, the materials were selected. It was time to begin construction.
One fear most homeowners have when beginning a home remodel is dust. Advance Design uses BuildClean HEPA filters to eliminate dust throughout the house while construction is going on. Project Manager Jason and his crew created temporary walls and cleaned up after every day of work.
“We were very impressed with how clean and organized the crew kept things while the remodeling process was underway,” Richard said.
The result is just what Richard and Monica envisioned when they began the process. Richard’s love for cooking can be explored through all-new Thermador appliances, featuring an easy-to-use induction cooktop, built-in double oven, and spacious refrigerator. Matte black hardware contrasts the bright white backsplash, countertops, and cabinets, while the stunning blue cabinets complement the dark hardwood floor and stainless-steel appliances. The dual pendant light fixtures over the reconfigured island are eye-catching and add necessary lighting.
This Huntley kitchen renovation turned out better than Richard and Monica hoped. Their experience with Advance Design’s Common Sense Remodeling process has them thinking about other projects they could do in the future.
Our award-winning design team would love to create a beautiful, functional, and spacious place for you and your family. With our “Common Sense Remodeling” approach, the process of renovating your home has never been easier. Contact us today at 847-665-1711 or schedule an appointment.

Luxury – Prestige – Status
KEY FEATURES
Hand Made in Europe
Hand-Made by 3rd. generation of Aydin family.
Premium Quality
Hand lined bottom
Hand stitching
100% genuine cowhide leather
European (Balkan) breed animals
Each product is BRANDED with serial number and Craftsmanship seal.
Hides used for making Patchworks are sourced ethically and humanely and 100% as byproduct of meat production
Animals are free-range raised, sustainable sourced mainly on mountain pastures of Eastern Europe.
Animal skins are endemic to breeds specific for Eastern European region.
Skins ARE NOT processed by mass processing facility, but rather family owned business with "Old Craft" certificate. This means that such business falls in "Traditional" category of business.
All skins are hand processed using solutions with the P.H value of drinking water.
Skins are processed in small batches, usually 5-10 at the time, in order for skin to preserve, to the greatest extend, its natural distinctions and quality.
NOTE: The photo on this page represents design and style of this rug and IT IS AN IMAGE OF ACTUAL product you will receive. All rug sizes are approximate. Due to the difference of monitor colors, some rug colors may vary slightly.
NOTE: Few products may contain some natural flaws due to conditions inherent to natural animal products (scratches, insect bites, wrinkles, cuts, etc.) that will be discretely repaired. Please note that we do not wedge our cowhides but we rather discretely stitch and repair. Such flaws are acceptable for this type of product, since it represents the life of the animal to the fullest possible extent.

Richard and Monica of Huntley, IL, needed to make better use of their kitchen as well as more storage for pots, pans, and countertop appliances. Their space was laid out unconventionally, making cooking a challenge. A triangular nook held their refrigerator, hard-to-reach cabinets, and a cramped pantry. They needed to find a solution, so they searched Facebook for home remodeling companies in their area. Soon they found Advance Design Studio’s profile and were immediately impressed.
“Advance Design was the first and last studio I contacted,” Richard said.
Richard called Advance Design and felt an immediate connection with Project Designer Nicole. She was knowledgeable and thorough and offered many unique solutions to their kitchen layout problem.
A week later, Nicole came out to their home to meet the couple. They talked about their kitchen remodeling project and told Nicole what they wanted in their dream kitchen. Nicole saw that the kitchen had weird angles that hindered the cabinets you could use. She knew that designing a space that met both the client’s needs and dreams would be challenging.
Nicole worked with Richard and Monica to create an innovative design. When the couple came out to Advance Design Studio in Gilberts, they were blown away by the 3D illustrations Nicole showed them.
“I incorporated a hidden pantry cabinet to not only be a cool feature but also allowed me to square off the walls to gain more cabinet space,” Nicole said.
The hidden pantry added storage and squared off the strange triangular nook, creating a more traditional and functional kitchen layout. With the layout problems solved, they worked together to select materials. Richard and Monica wanted something brighter than their previous dark brown kitchen. They chose a combination of blue and white cabinetry with a white subway tile backsplash and white quartz countertops. The design was finalized, the materials were selected. It was time to begin construction.
One fear most homeowners have when beginning a home remodel is dust. Advance Design uses BuildClean HEPA filters to eliminate dust throughout the house while construction is going on. Project Manager Jason and his crew created temporary walls and cleaned up after every day of work.
“We were very impressed with how clean and organized the crew kept things while the remodeling process was underway,” Richard said.
The result is just what Richard and Monica envisioned when they began the process. Richard’s love for cooking can be explored through all-new Thermador appliances, featuring an easy-to-use induction cooktop, built-in double oven, and spacious refrigerator. Matte black hardware contrasts the bright white backsplash, countertops, and cabinets, while the stunning blue cabinets complement the dark hardwood floor and stainless-steel appliances. The dual pendant light fixtures over the reconfigured island are eye-catching and add necessary lighting.
This Huntley kitchen renovation turned out better than Richard and Monica hoped. Their experience with Advance Design’s Common Sense Remodeling process has them thinking about other projects they could do in the future.
Our award-winning design team would love to create a beautiful, functional, and spacious place for you and your family. With our “Common Sense Remodeling” approach, the process of renovating your home has never been easier. Contact us today at 847-665-1711 or schedule an appointment.

The owner of this recently purchased property in the Berkshire village of Twyford had inherited a Jerusalem limestone floor that had been installed throughout the ground floor including the Kitchen. The previous owner hadn’t maintained the stone floor very well and as a result it had become dull, patchy and the new owner was finding it impossible to keep clean. The floor was becoming a problem for them and they had been considering ripping it all up and getting it replaced. However due to the size of the floor and potential cost of replacing it they searched for other solutions and contacted Tile Doctor to see if it could be renovated.
I scheduled an appointment with the owners to survey the floor and it wasn’t long before I realised that we could achieve a great result by polishing the Limestone using a set of diamond burnishing pads. To prove how well I thought the floor would clean up I offered to complete a demo within the small utility room. This was arranged and completed a week later, as I expected once I had finished the demo the floor looked fantastic, more importantly the client was ecstatic with the results and couldn’t wait to book us in to complete the rest of the house.
It was a large floor so I estimated the process would take 4-5 days to complete and would need to work in sections starting with the kitchen then progressing into the study and cloakroom, dining room and finishing off with the entrance hall. Thankfully I had an empty house to work in which helped as I could start sealing the area I worked on the prior day.
The limestone had become quite pitted in the high traffic area, these pits had filled up with soil and become unsightly. My first task was to deep clean the dirt filled pits and grout, to do this I used a strong dilution of Tile Doctor Pro Clean and a stiff nylon brush making sure I could get into the pits releasing the dirt, then vacuuming up all the chemical slurry as I went along.
The next task was to fill these pits I used a two-part epoxy filler that matched the colour of the stone. Once the filler had dried, I worked through the hand burnishing blocks from 100 grit to 400 and I smoothed out the areas that had been filled.
Now the holes/pits had been filled I continued with the restoration of the floor by moving onto the burnishing process using diamond encrusted floor burnishing pads. This involves honing the Limestone with a set of burnishing pads starting at 400-grit. The pads are applied to the floor with a heavy floor buffing machine using water to lubricate the process. The pad is run over each tile around three times and the fine slurry this process generates is rinsed off afterwards with water and then extracted with a wet vacuum. You then move onto the 800-grit and then 1500-grit slowly building back the appearance of the stone.
As I had worked in sections/rooms at a time I was able to allow a full day drying time before sealing. Happy with the depth of colour from the pad system I opted to seal the floor with two coats of Tile Doctor Ultra-Seal. I had a range of sealers to choose from an in this case I felt Ultra-Seal would be most suited as it doesn’t change the natural appearance of the Limestone yet will provide years of protection and make it much easier to keep clean.
The owners were over the moon with how the limestone now looked and relieved that their problem floor had been restored. For aftercare cleaning I recommended Tile Doctor Stone Soap which is designed for maintaining the patina on polished stone floors.
Dennis Buckland
Berkshire Tile Doctor

This beautiful Victorian tiled hallway was in desperate need of some TLC. The house had recently changed hands and the new owners of the house were having the entire property renovated. The last part of the renovation plan was to have the Victorian hallway tiles restoring back to their former glory. Floors are always best left until last, especially hallways as last as workmen don’t usually take a lot of care in my experience.
The house was built in the early 1900’s and was situated close to Doncaster town centre a couple of streets away in fact from the famous Doncaster Racecourse which dates to the late 1500’s.
There were a few areas of damage to the floor that would need dealing with first. This is not surprising given the age of the floor which must have seen a lot of comings and goings over the years. Our first task therefore was to repair the damage using replica tiles sourced to be as close a match to the originals as possible. We usually find any slight differences disappear once the floor has been deep cleaned and sealed. Once removing the damaged tile and cleaning the base we use a fast setting adhesive to fix the replacement tiles in place so we can get on with the cleaning as soon as possible.
Once the replacement tiles had set, we unloaded our slow speed rotary floor machine and large wet vacuum which would be used during the cleaning. To start the cleaning the floor was sprayed with Tile Doctor Remove & Go and this was left to dwell on the tiles for twenty minutes. This gives time for the product to break down old floor coatings and grime, this was followed by scrubbing the tiles with a 200-grit diamond pad fitted to the floor machine and assisted with the addition of more water to help lubricate the process. This process generates a lot of slurry as the dirt and old sealers etc are released from the tiles and this is extracted from the surface of the floor using the wet vacuum.
The next step was to give the floor an acid wash using Tile Doctor Acid Gel which is applied to the tiles and left to dwell for fifteen minutes and scrubbed in again with the floor buffer and 200-grit diamond pad. Once done the floor was rinsed with water and then dried using the wet vacuum to extract as much moisture as possible. This last process is designed to counter any alkaline salts that may be present in the floor which may cause efflorescence to appear later. It also removes old mineral deposits and generally get the tiles looking much brighter. Once complete the floor was left to dry off naturally overnight.
I came back the next day to seal the tiles first checking the floor was dry using a moisture meter. Satisfied that the floor was ready for sealing I started to seal the tiles using multiple coats of Tile Doctor Seal and Go Extra which is a fully breathable sealer which is important for old floors like this. Seal and Go Extra also leaves a lovely satin finish which works well on Victorian tiles and brings the floor alive.
This was the last step in this properties renovation, and I think you will agree that the floor responded really well to the restoration process and the colours in the tiles are now very vibrant.
Matthew Lovett
South Yorkshire Tile Doctor

The Basic Cabinet Renewal proces leaves no dust, mess or odor and in many cases the job is completed in just one day. We remove the grease and dirt build up that can make wood look flat and lifeless over time. The renewal process thoroughly cleans the surface, removes old coatings, repairs damaged areas with less mess and applies an elegant finish. At 1/3rd the cost of refacing and 1/5th the cost of replacement, you'll love the brilliant results and the cost savings.
All of our processes use our Lightspeed Plus® refinishing process which cures instantly with a powerful U.V. light. Our process requires no sanding and all our solutions are virtually odorless – so there’s No Dust. No Mess. No Odor®. With Lightspeed, expect a beautifully refinished kitchen with little to no down time.

Richard and Monica of Huntley, IL, needed to make better use of their kitchen as well as more storage for pots, pans, and countertop appliances. Their space was laid out unconventionally, making cooking a challenge. A triangular nook held their refrigerator, hard-to-reach cabinets, and a cramped pantry. They needed to find a solution, so they searched Facebook for home remodeling companies in their area. Soon they found Advance Design Studio’s profile and were immediately impressed.
“Advance Design was the first and last studio I contacted,” Richard said.
Richard called Advance Design and felt an immediate connection with Project Designer Nicole. She was knowledgeable and thorough and offered many unique solutions to their kitchen layout problem.
A week later, Nicole came out to their home to meet the couple. They talked about their kitchen remodeling project and told Nicole what they wanted in their dream kitchen. Nicole saw that the kitchen had weird angles that hindered the cabinets you could use. She knew that designing a space that met both the client’s needs and dreams would be challenging.
Nicole worked with Richard and Monica to create an innovative design. When the couple came out to Advance Design Studio in Gilberts, they were blown away by the 3D illustrations Nicole showed them.
“I incorporated a hidden pantry cabinet to not only be a cool feature but also allowed me to square off the walls to gain more cabinet space,” Nicole said.
The hidden pantry added storage and squared off the strange triangular nook, creating a more traditional and functional kitchen layout. With the layout problems solved, they worked together to select materials. Richard and Monica wanted something brighter than their previous dark brown kitchen. They chose a combination of blue and white cabinetry with a white subway tile backsplash and white quartz countertops. The design was finalized, the materials were selected. It was time to begin construction.
One fear most homeowners have when beginning a home remodel is dust. Advance Design uses BuildClean HEPA filters to eliminate dust throughout the house while construction is going on. Project Manager Jason and his crew created temporary walls and cleaned up after every day of work.
“We were very impressed with how clean and organized the crew kept things while the remodeling process was underway,” Richard said.
The result is just what Richard and Monica envisioned when they began the process. Richard’s love for cooking can be explored through all-new Thermador appliances, featuring an easy-to-use induction cooktop, built-in double oven, and spacious refrigerator. Matte black hardware contrasts the bright white backsplash, countertops, and cabinets, while the stunning blue cabinets complement the dark hardwood floor and stainless-steel appliances. The dual pendant light fixtures over the reconfigured island are eye-catching and add necessary lighting.
This Huntley kitchen renovation turned out better than Richard and Monica hoped. Their experience with Advance Design’s Common Sense Remodeling process has them thinking about other projects they could do in the future.
Our award-winning design team would love to create a beautiful, functional, and spacious place for you and your family. With our “Common Sense Remodeling” approach, the process of renovating your home has never been easier. Contact us today at 847-665-1711 or schedule an appointment.

Ocean Blue Pools LLC is widely recognized for extravagant swimming pool construction and unmatched customer service.
Our specialties include custom designed swimming pools, spas, beautiful rock and stone water features and astounding outdoor kitchens and living spaces.
The designing process incorporates classic principles, proportioned balance and expert design in accordance with your topography and space. We strive to make your outdoor living space as user friendly as it is beautiful.
With profound focus on our client’s needs, we will design around your unique lifestyle and taste and create a space that is inviting, comfortable, safe, and engages the senses.
Your swimming pool, which becomes the focal point, is just one component of the backyard. The landscape, lighting, water features, fire pit or outdoor kitchen will define your pool and evoke emotion.
Our design team will offer several feature choices to create the most exciting and relaxing outdoor environment using the harmony of these elements.
The design process begins with a consultation to understand your lifestyle and vision for your new outdoor living space. We will inquire about your usage plans and the vision you would like to achieve. We take into consideration, location of views, site conditions and accessibility. We will examine your homes existing architectural design to ensure continuity and flow from your home into to your new outdoor living space.
Our design team and graphic artists will then transform your vision into conceptual drawings and renderings. A visual presentation will also be prepared to convey the look and feel of the proposed project.
Under the design process, materials will be recommended which may include: pavers, travertine, glass tile, stone veneer, precast concrete, landscape and lighting. The final design drawings will provide an accurate representation of your new outdoor living space.
Once the design process is complete, we will construct your project to the exact vision of the original design concept. We will maintain relentless attention to detail with our latest innovations and technology.
All projects are managed from decades of experience by our trained superintendent who will manage timeframes, quality, and most of all, the client’s expectations. Our goal is to exceed your expectations.
Randall Schmidt / Design and Construction

Expert Kitchen Remodel Services by Construction and More Las Vegas
At Construction and More Las Vegas, we know that the kitchen is the heart of your home. It’s where you gather with family, entertain guests, and create delicious meals. That’s why we’re dedicated to providing expert kitchen remodel services that transform your kitchen into a functional, stylish, and inviting space. Serving homeowners throughout Las Vegas and the surrounding areas, including Summerlin, Henderson, Paradise, Spring Valley, and Boulder City, we offer personalized solutions tailored to your unique needs and preferences.
Why Choose Construction and More Las Vegas for Your Kitchen Remodel?
Expertise and Experience
With years of experience in kitchen remodeling, our team possesses the knowledge and skills to handle projects of all sizes and complexities. We stay up-to-date with the latest design trends and technologies to ensure that your kitchen remodel not only meets but exceeds your expectations.
Customized Solutions
Every kitchen remodel is unique. We tailor our services to meet your specific needs and preferences, creating a custom kitchen design that reflects your personal style and complements your home’s aesthetic. From cabinets to countertops, every element is chosen with your vision in mind.
Quality Craftsmanship
Our commitment to quality craftsmanship ensures that your kitchen renovation stands the test of time. We use only the highest quality materials and employ precise techniques to deliver a finished product that is both beautiful and durable.
Comprehensive Services
Our comprehensive kitchen remodeling services cover everything from initial design and planning to final installation and finishing touches. Whether you need a full kitchen renovation or a simple makeover, we provide a seamless and stress-free experience.
Our Kitchen Remodeling Process
Initial Consultation and Planning
The process begins with a detailed consultation to understand your vision, needs, and budget. We provide expert advice on design, layout, and materials to create a plan that enhances both the functionality and aesthetics of your kitchen.
3D Design and Visualization
Using state-of-the-art 3D design software, we create realistic renderings of your proposed kitchen remodel. This allows you to visualize the space and make adjustments before construction begins, ensuring that every detail aligns with your vision.
Custom Cabinets and Storage Solutions
Custom cabinets are a cornerstone of any kitchen remodel. Our skilled craftsmen design and build cabinets that maximize storage and reflect your style. Whether you prefer modern sleek designs or traditional classic looks, we create cabinets that are both functional and beautiful.
Countertops and Backsplashes
The choice of countertops and backsplashes significantly impacts the look and feel of your kitchen. We offer a wide range of materials, including granite, quartz, and marble, to suit your style and budget. Our team helps you select the perfect combination that adds elegance and durability to your kitchen.
Lighting and Fixtures
Proper lighting is essential for both functionality and ambiance in your kitchen. We design and install lighting solutions that highlight key areas, such as task lighting, under-cabinet lighting, and ambient lighting. Our selection of fixtures includes a variety of styles to match your kitchen design.
Appliance Installation
Modern appliances are integral to a functional and efficient kitchen. We guide you in selecting high-quality, stylish options that meet your needs and complement your kitchen design. Our team ensures seamless installation for a cohesive and polished look.
Flooring and Finishes
The right flooring enhances the beauty and practicality of your kitchen. We offer a variety of flooring options, including tile, hardwood, and luxury vinyl, to suit your preferences. Our team ensures professional installation and finishes that withstand the rigors of daily use while adding elegance to your space.
Construction and Project Management
Once the design and materials are finalized, our experienced construction team takes over. We manage the entire remodeling process, from demolition to final touches, with meticulous attention to detail. Our project managers coordinate all aspects of the remodel, ensuring that the work is completed on time and within budget. We keep you informed throughout the process, addressing any concerns and ensuring your satisfaction.
Kitchen Renovation in Las Vegas and Surrounding Areas
If you’re searching for “kitchen renovation in my area,” look no further than Construction and More Las Vegas. We proudly serve Las Vegas and the surrounding communities, including Summerlin, Henderson, Paradise, Spring Valley, and Boulder City. Our local expertise and commitment to customer satisfaction make us the go-to choice for all your kitchen remodeling needs.
Why Kitchen Remodeling Matters
Enhanced Functionality
A well-designed kitchen maximizes space and improves functionality. Whether it’s adding more storage, upgrading appliances, or reconfiguring the layout, our remodels ensure that your kitchen works better for your daily routine and entertaining needs.
Increased Home Value
A kitchen remodel is one of the best investments you can make in your home. An updated, modern kitchen increases your property’s value and appeals to potential buyers if you decide to sell.
Improved Aesthetics
Our remodels transform outdated kitchens into beautiful, contemporary spaces. From luxurious finishes to modern fixtures, we create a kitchen that is both stylish and inviting.
Energy Efficiency
Upgrading to energy-efficient appliances and fixtures can reduce your utility bills and environmental footprint. We offer a range of eco-friendly options that save energy and water without compromising on performance or style.
Our Commitment to Sustainability
At Construction and More Las Vegas, we are committed to sustainable practices in our kitchen remodels. We source eco-friendly materials and prioritize energy-efficient fixtures to reduce environmental impact. Our team is dedicated to creating beautiful, functional kitchens that are also kind to the planet.
Testimonials and Case Studies
Our satisfied clients speak to the quality and reliability of our services. We have successfully completed numerous kitchen remodels, each tailored to meet the unique needs and preferences of our clients. Visit our website to read testimonials and view case studies of our work.
Contact Us Today
Ready to start your kitchen remodel? Contact Construction and More Las Vegas for expert kitchen remodeling services that combine functionality, beauty, and quality. Our experienced team is here to bring your vision to life, creating a kitchen that meets your needs and exceeds your expectations. Call us today for a free consultation and let us help you create the kitchen of your dreams. Whether you need a complete kitchen renovation or a custom kitchen makeover, Construction and More Las Vegas is your trusted partner for exceptional kitchen transformation services.

Richard and Monica of Huntley, IL, needed to make better use of their kitchen as well as more storage for pots, pans, and countertop appliances. Their space was laid out unconventionally, making cooking a challenge. A triangular nook held their refrigerator, hard-to-reach cabinets, and a cramped pantry. They needed to find a solution, so they searched Facebook for home remodeling companies in their area. Soon they found Advance Design Studio’s profile and were immediately impressed.
“Advance Design was the first and last studio I contacted,” Richard said.
Richard called Advance Design and felt an immediate connection with Project Designer Nicole. She was knowledgeable and thorough and offered many unique solutions to their kitchen layout problem.
A week later, Nicole came out to their home to meet the couple. They talked about their kitchen remodeling project and told Nicole what they wanted in their dream kitchen. Nicole saw that the kitchen had weird angles that hindered the cabinets you could use. She knew that designing a space that met both the client’s needs and dreams would be challenging.
Nicole worked with Richard and Monica to create an innovative design. When the couple came out to Advance Design Studio in Gilberts, they were blown away by the 3D illustrations Nicole showed them.
“I incorporated a hidden pantry cabinet to not only be a cool feature but also allowed me to square off the walls to gain more cabinet space,” Nicole said.
The hidden pantry added storage and squared off the strange triangular nook, creating a more traditional and functional kitchen layout. With the layout problems solved, they worked together to select materials. Richard and Monica wanted something brighter than their previous dark brown kitchen. They chose a combination of blue and white cabinetry with a white subway tile backsplash and white quartz countertops. The design was finalized, the materials were selected. It was time to begin construction.
One fear most homeowners have when beginning a home remodel is dust. Advance Design uses BuildClean HEPA filters to eliminate dust throughout the house while construction is going on. Project Manager Jason and his crew created temporary walls and cleaned up after every day of work.
“We were very impressed with how clean and organized the crew kept things while the remodeling process was underway,” Richard said.
The result is just what Richard and Monica envisioned when they began the process. Richard’s love for cooking can be explored through all-new Thermador appliances, featuring an easy-to-use induction cooktop, built-in double oven, and spacious refrigerator. Matte black hardware contrasts the bright white backsplash, countertops, and cabinets, while the stunning blue cabinets complement the dark hardwood floor and stainless-steel appliances. The dual pendant light fixtures over the reconfigured island are eye-catching and add necessary lighting.
This Huntley kitchen renovation turned out better than Richard and Monica hoped. Their experience with Advance Design’s Common Sense Remodeling process has them thinking about other projects they could do in the future.
Our award-winning design team would love to create a beautiful, functional, and spacious place for you and your family. With our “Common Sense Remodeling” approach, the process of renovating your home has never been easier. Contact us today at 847-665-1711 or schedule an appointment.

This customer from the historic city of Cardiff was keen to see what Tile Doctor could do to put some life back into their treasured Limestone kitchen floor that was laid in 2008. My first observations were mainly centred on the horrific condition of the surface which although adequately sealed initially the floor had not received any subsequent maintenance and its condition had deteriorated over time. The light shining in from the patio doors highlighted all the imperfections in the floor caused by surface wear and tear commonly seen in high traffic areas such as a kitchen.
Upon closer inspection, there were further problems: the floor was stained and scuffed, and in most places the sealer had worn off completely allowing the dirt to become ingrained into the pores of the Limestone. Additionally the grout was recessed but was now flush with the tile surface due to dirt build-up. There were also areas contaminated with grease and kitchen cooking oil.
The Limestone floor tiles were 20mm thick French Limestone, and had been laid very well so there was no requirement to do any tile or grout repairs however to get this floor back to its original condition the surface would need to be reconditioned using the Tile Doctor four stage burnishing system.
I started by giving the floor a wash with a medium dilution of Tile Doctor Pro-Clean, focusing mainly on the grout lines in order to remove the muck that had built-up there. I used a special stiff grout brush for this activity; it’s quite narrow and ideal for grout scrubbing.
This worked well, but the significant build-up of dirt along some of the grout lines meant more work was required. I tackled this problem with a hand scraper assisted with steam. At the end of this process, the whole floor was then rinsed down with water to remove any soil and the resulting slurry was then extracted using a wet vacuum.
The next step was to start the burnishing process, which basically involves applying four diamond encrusted floor pads in sequence over the floor. Each pad is a different grade, starting with the most abrasive coarse pad and moving through to the finer grades using a little water to lubricate and rinsing away any slurry between each pad.
I eventually finished with the extra fine pad which builds up shine and lustre on the tile; it had taken two days to clean the grout and burnish the Limestone but the floor was much improved and so after a final rinse down I left the floor to dry off overnight with the aid of the underfloor heating.
During this time, I also addressed the stained Limestone in the area of the kitchen where the dustbin was situated. This had been a major upset for the customer and I’m happy to report I managed to deal with it. However, it was quite an involved process, so I’ll write about this in a separate post.
On the third day I came back to seal the floor, checking first that it had dried sufficiently with a damp meter. Fortunately, the underfloor heating had done a great job of drying the stone and I was able to seal the floor using three coats of Tile Doctor Colour Grow sealant. This sealant not only provides a durable seal but also penetrates deep into the pores of the stone protecting it from within and enhancing the natural colours of the Limestone in the process.
After the final layer of sealant, I worked over the floor again with the extra fine burnishing pad both to add shine again following sealing, and to ensure that no smear marks were visible as the lighting conditions were unforgiving and highlighted any imperfections.
The customer was delighted with the results: so much so, in fact, that they booked me in to restore their Victorian hallway floor as well but that’s a story for another time!
Julian Iancono
SE Wales Tile Doctor
27