
Search results for "Producing cleaning" in Home Design Ideas

 Tile Doctor Ltd
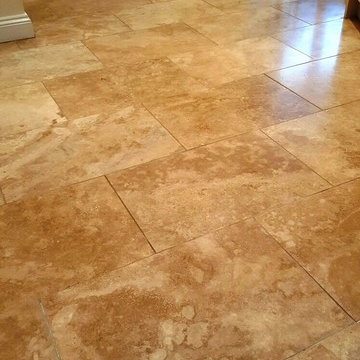
This fantastic Travertine tiled kitchen floor was in a bad way. Not only had it not been treated to a proper clean and seal in a long while, but it has also suffered from natural pitting, leaving lots of little holes that damaged the overall appearance of the floor. Travertine is very aesthetic, but suffers from the drawback of being quite soft compared to other types of stone (typically it sits between 3-4 on the Moh’s scale of mineral hardness).
The customer, who lives in the town of Sleaford a small Lincolnshire market town, was keen to have the situation remedied through a complete restoration. This would need to include small repairs, along with a deep clean and a fresh seal.
My first job was to deep clean the whole area, which I did using a solution of Tile Doctor Pro Clean and clean water. Pro Clean is a strong alkaline product which has a long history of producing reliable results of a wide range of natural stone floors, including Travertine, Granite, Limestone, and Slate. I applied the solution to both the tiles and the grout lines, and proceeded to scrub it in using a scrubbing pad fitted to a rotary floor machine.
This left the floor fresh and clean, but I would also need to restore the polish to the Travertine to really take its appearance to the next level. To do this I used the process known as burnishing, which essentially involves the consecutive application of different gritted pads to achieve a high quality polish on tiles. Our burnishing system, which consists of four pads, achieves fantastic results on high-end polished stone like Limestone, Marble and, of course, Travertine. I started by applying the Coarse grit burnishing pad, before gradually working my way through to the Medium, Fine, and finally Very Fine pads to achieve a brilliant shine and light reflection finish.
To round off the first day of the restoration, I used a flexible matching filler to fill up any pitted holes present on the surface of the tiles. Following this, I installed a turbo dryer to make sure the floor would dry fully overnight, and be ready to seal the following day.
The next day I returned to the property and proceeded to seal the Travertine tiles using several costs of Tile Doctor Colour Grow sealer to protect the tiles and also really enhance the natural colours in the stone. As an impregnating sealer, Colour Grow penetrates into the stone and fills its pores to safeguard it against ingrained dirt and stains from within.
As you can see from the photographs, the combination of a deep clean, high quality polish and fresh seal really transformed the appearance of the floor from dull and lifeless to a really asset to the kitchen. The customer was absolutely delighted with the results, leaving the following feedback: “Very good job – delighted! Thank you Phil!”
Phil Barrs
Lincolnshire Tile Doctor
 Tile Doctor Ltd
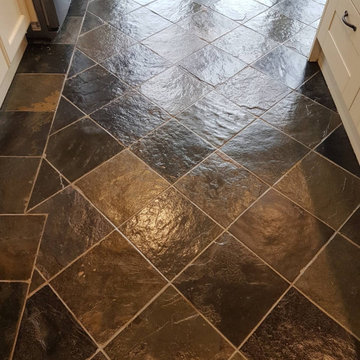
Pictured below is a Slate tiled kitchen floor that had been installed in the kitchen of a property in Harrogate around fifteen years prior. I discovered that the tiles had never been cleaned and resealed since installation and this explained why they were now looking dull and un-interesting. They had lost all character and it wasn’t until I started cleaning them that I realised the must be of the multicoloured Brazilian Slate variety.
As well as looking dull and unattractive, there was also some water damage to some tiles caused by a leak, this had resulted in some shaling and efflorescence staining. This had occurred some time ago and the floor had now dried out fully, so I was not expecting any further efflorescence issues going forward.
Brazil, I understand is the world’s 2nd biggest producer of Slate, it is also exceptionally durable and reasonably priced so its not surprising you see a lot of it over in the UK. Like any natural stone however it is porous and without a sealer to protect it and bring out those natural colours it soon ends up like the example on this pad.
I cleaned the floor with a strong dilution of Tile Doctor Pro-Clean using my usual method of spraying the cleaning solution onto the Slate and grout and then leaving it for a ten minutes to soak in and get to work breaking down the dirt and old sealers. Although I doubted there was much sealer left on the floor after all this time you need to be sure to remove all of it to get the best result. The floor was then scrubbed with a rotary floor buffer fitted with a black scrubbing pad, then after rinsing with water and extracting the soil I inspected the floor.
I detected there was still some sort of sealer present in some of less used parts of the floor, it was proving stubborn to remove so I suspect it may have been an old fashioned wax based product that was used. Not a problem though we Tile Doctors have a solution to every problem, so I spot treated the stubborn areas with Tile Doctor Wax Away to see if I was right. After scrubbing that in followed by another rinse and extraction with the wet vacuum I was pleased to see I was right and was happy all the old seal had now been removed. I gave the floor another rinse at the end of the day and dried it as much as possible with the wet vacuum, then left it to dry off fully overnight.
I came back the next day and checked the floor was dry with a damp meter. The readings were good, so I was able to crack on and seal the tiles using several coats of Tile Doctor Seal and Go. Each coat was applied leaving time to dry between each layer. This gave the floor a uniform appearance which disguised the damaged tiles. It will also help to stop more cracking and reduce the appearance of the efflorescence. The sealer really brought out the natural colours in the Brazilian Slate and the floor looked transformed.
I’m sure you will agree it was a vast improvement, certainly my client was very happy and couldn’t believe the difference I had managed to achieve. Before leaving I recommended, they should invest in some Tile Doctor Neutral Tile Cleaner which would ensure the newly applied seal was prematurely eroded away which is a problem with many of the stronger products you find in supermarkets.
Nigel Stoker
North West Yorkshire Tile Doctor
Find the right local pro for your project
 Tile Doctor Ltd
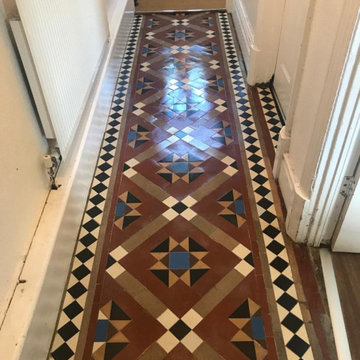
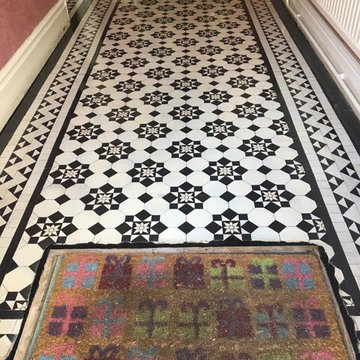
I recently worked on the restoration of a Victorian tiled hallway in Cwmbran Wales which is six miles North of Newport. As you can see from the photographs the floor was in quite a neglected dirty state and many of the the black and white border tiles needed removing and replacing. The worst part was the area by the front door where most of the tiles had been removed and then backfilled with concrete. I can only assume at some point in the past it was deemed to difficult or expensive to restore the floor, so they simply covered it up.
After visiting to survey the floor I did offer to source replacements for the concreted section and restore that as part of the work however my client’s budget would not stretch to that at the time. My quote was therefore focused on the main section of flooring and included replacing border tiles, deep cleaning the whole floor and then sealing the tiles to add protection. Although I did need to check that I could indeed source the replacement tiles before being able to provide the quote which as it turned out would not be an issue.
They were happy to go ahead and we arranged a suitable time to carry out the work which would enable me to work in the property whilst minimising contact with the owners due to the Covid-19 situation.
I spend the first day sorting out the black and white border tiles which needed to be gently prised out of position without upsetting the main part of the floor. The exposed subfloor was then cleaned up to remove old adhesive and replacements were fitted where required and secured into place. The floor would need to be solid before cleaning so that was left for day two so the new adhesive could go off overnight.
On day two I gave the floor an initial clean using a combination of Tile Doctor Pro-Clean and Remove and Go diluted with water. This produces a strong cleaner/stripper that will tackle dirt and remove coatings such as previous sealers. The old tiles had accumulated years of ingrained dirt, so I needed this extra power to remove the years of dirt and contaminates from the tile. It was sprayed onto the tiles and then left to soak in for ten minutes before being actively scrubbed into the tile using a rotary machine fitted with a black scrubbing pad. The soil was then rinsed off with water and extracted with a wet vacuum. The floor was inspected, and the process repeated on the tough stains until I was satisfied all the dirt had been removed.
Next the floor was treated to an acid wash using Tile Doctor Acid Gel using a similar method as before. This is an important treatment for these old Victorian floors that have no damp proof course as it neutralises efflorescent salts trapped in the tile which can appear as white salt deposits later. Once I was happy with the condition of the floor it was given a final rinse and left to dry off. I use a wet vacuum to remove liquids from the floor and on this last extraction I spent extra time to remove as much moisture from the tiles as possible.
I came back a few days later and after checking the tiles were dry using a damp meter, I started the application of the sealer. For this floor I applied seven coats of Tile Doctor Seal and Go for a satin finish. Tile Doctor Seal and Go is a specially formulated water-based sealer that provides both stain resistance and a durable low-sheen finish. It is perfect on a floor of this age where it leaves a lovely finish and will remain durable in what is a essentially a high traffic area.
Although we didn’t manage to sort out the area by the front door the client managed to fit a made to measure coir door mat along with carpet bar which was quite practical and looked fine so they were able to resolve that problem without blowing their budget.
The client was over the moon with results, the floor had a lovely pattern and the colours now shone through. I suggested the use of Tile Doctor Neutral Tile Cleaner to keep the floor clean and in good condition. It is neutral in pH so will ensure that the newly applied sealer stays in place and will ensure maintenance is nice and easy for them.
Paul Wales
Monmouthshire Tile Doctor
 Tile Doctor Ltd
I was contacted by a professional couple who were despairing over the state of their Victorian tiled hallway floor which was dull and uninviting. The property was in Newport which is on the south east side of Wales around twelve miles east of the bustling city of Cardiff.
I went over to visit the property which was a beautiful Victorian period terrace house nestled amongst other properties of a similar age properties. The couple wanted their Victorian hallway floor to be brought back to life, so I demonstrated the cleaning process I intended to use on a small part of the floor. Immediately it had the desired effect and the floor looked much cleaner. I could see that there were no structural issues with the floor and the test clean proved it was just ingrained dirt that was the problem. The clients were happy with the result of the demonstration and subsequent quote, so we arranged a suitable date to come back and complete the work.
When I arrived, I started by protecting the skirting boards with tape and then set about giving the Victorian tiles a deep clean. I applied a combination of Tile Doctor Pro-Clean and Remove and Go leaving it to dwell for a short time to allow the products to soak into the pores of the tiles and start breaking down the ingrained dirt. After about ten minutes I scrubbed the floor with black scrubbing pad attached to a rotary floor buffer which released the years of grime and dirt. The floor was then rinsed with water and the soil removed using a wet vacuum. I repeated the process to ensure the floor was as clean as possible.
A further inspection of the Victorian tiles revealed a few stubborn marks which were dealt with using handheld diamond burnishing blocks. These are also handy for getting into the corners of the floor which were difficult to reach with the rotary machine. The floor was then left overnight to dry out.
The following day I returned, and I checked the floor was dry using a moisture meter to ensure it was dry. Once I was happy, I started to seal the floor with Tile Doctor Seal & Go which is a water-based sealer that works well on Victorian tiles. Several coats were applied building up layers to produce a stunning satin finish.
Once I had finished the floor was looking so much cleaner and brighter and the addition of the sealer will protect the floor from dirt and keep it looking good for some time to come. My clients were over the moon with the floor!
For aftercare I recommend Tile Doctor Neutral Tile Cleaner, which unlike the stronger products you find in supermarkets is ideal for cleaning sealed floors and will ensure the sealer stays in good condition.
Paul Wales
Monmouthshire Tile Doctor
 Tile Doctor Ltd
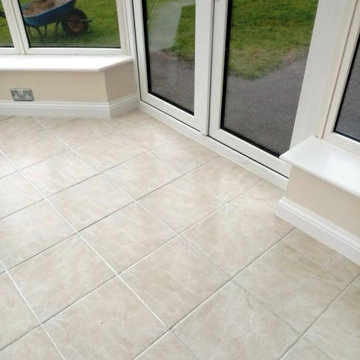
This customer from Stroud was soon to be re-letting her house but the Ceramic tiled floor and especially the grout had been left in a poor and dirty condition by the previous tenant. The ceramic tiled floor was installed throughout the Kitchen and through into the adjacent conservatory. Conscious this would affect future lettings she contacted Tile Doctor to see if we could help.
I paid a visit to the property to survey the floor and discuss how we would restore the Ceramic tiles and get them looking clean again. She was happy to hear we could help and agreed to my quote and we booked the work in for the following week. It would only take a day which suited her perfectly as she was keen to get the property back on the market.
Stroud is a lovely market town and in the centre of Gloucestershire. It is the main town in Stroud District and forms the centre for numerous surrounding market towns.
The Cotswold Area of Outstanding Natural Beauty surrounds the town, and the Cotswold Way path passes by it to the west, so it really is a desirable place to live with lots of lovely walks.
The first job was to protect all the walls and units to ensure they did not get splashed by the products we would be using. I then sprayed Tile Doctor Remove and Go all over the floor and the grout lines, this was left for a short time to dwell and get to work breaking down the dirt. The floor was then scrubbed using a black buffing pad fitted to a buffing machine finishing off by scrubbing the grout lines with a stiff brush. The soil released from the floor was then rinsed off with water and extracted with a wet vacuum. Once I was happy with the result the floors were speed dried with a blow heater. The alternative was to leave the floor overnight, but as time was of the essence speed drying was the best option.
Later that day the floor was dry, and I was able to seal the grout lines with Tile Doctor Ultra Seal. I used a pipette to apply the sealer directly to the grout to ensure maximum coverage. The tiles themselves did not require any sealant as ceramic tiles are sealed at the factory when they are produced. Grout being cementitious however does attract dirt and so sealing it will keep it looking fresh for some time to come and make it easier to clean.
The client was very pleased with the results and relieved she could re-let the house again. Now the floor was clean and much more attractive it would ensure she could achieve the best rental value.
I suggested she left a bottle of Tile Doctor Neutral Tile Cleaner for the new tenants as this would be the best product to keep the floor clean moving forward, you only need a small amount to dilute and it has a pleasant fresh fragrance. At least if the product is on site the tenant is more likely to keep the floor looking good and not resort to everyday household cleaners which eventually break down the grout and its’ seal. She thought this was a great idea.
Malcolm Crowther
Gloucester Tile Doctor
 Get My Rugs LLC
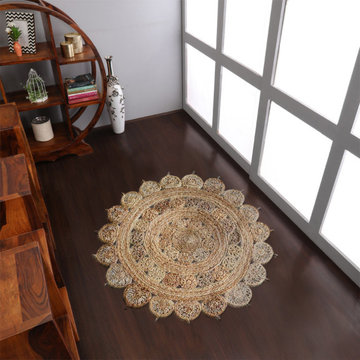
Transform your space with our handmade braided area rugs, a perfect blend of traditional and vintage charm. these medium-sized round rugs in a timeless beige hue add a touch of elegance to any living room, bedroom, or dining room. expertly hand knotted and crocheted with scalloped edges, each rug reflects meticulous craftsmanship and an oriental flair. crafted from a mix of natural fibers including jute, sisal, and sea grass, these rugs are durable and eco-friendly, suitable for both indoor and outdoor use. the low, thin pile offers a sleek, modern look while ensuring easy maintenance and comfort. ideal for adding a stylish accent during the Christmas season or throughout the year, these rugs are currently available at clearance prices, combining classic design with practical functionality to elevate your home decor.
[FEATURES]
*PATTERN - Oriental
*COLOR - Beige
*MATERIAL - Jute
*MATERIAL COMPOSITION - 80% Jute; 20% Cotton
*CONSTRUCTION - Handmade
*WEAVE - Hand Woven
*COUNTRY OF ORIGIN - India
*BRAND - RUGSOTIC CARPETS
*MANUFACTURER - GET MY RUGS LLC
*SHIPPING - Free Shipping
*OCCASION - All
*ROOM TYPE - Living Room, Bed Room, Study Room, Guest Room, Kids Room, Office
*CARE INSTRUCTION - Vacuum Cleaning
*ECO-FRIENDLY - Yes
*NATURAL FIBRE - Yes
*PILE - High Pile
*PILE HEIGHT - 0.75 Inches
*BACK MATERIAL - Cotton
*USAGE - Indoor
*DURABLE - Yes
*ANTI-SKID - Yes
*Order Handling Time - 2 Business days
*Washable - No
*RUG PAD NEEEDED - No
*ITEM CONDITION - New
*REVERSIBLE - No
*[WEAVE / CONSTRUCTION] Woven area rugs frequently hold cultural and historical importance, featuring traditional patterns and techniques handed down through generations. Woven area rug weaving is a complex and traditional method used to produce durable and decorative area rugs. This process involves intertwining warp and weft threads to create a flat and sturdy textile.
*[MATERIAL] Jute is one of the most affordable natural & eco-friendly fibers in existence and also used for weaving area rugs. The jute material is strong enough to tolerate the large footfall without much cleaning on daily basis and can be used both indoor and outdoor. The cost of such area rugs is reasonable.
*[PATTERN] This oriental jute area rugs with traditional design enhances the elegance of your living space and beautifully complement a variety of home décor styles.
*[ECO-FRIENDLY] By selecting this handmade area rug, woven with eco-friendly natural fibers and crafted without the use of harmful chemicals, you demonstrate your commitment to a healthier environment and your support for traditional craftsmanship. Additionally, using jute as a raw material makes the area rug more eco-friendly and conducive to nature.
*[DURABLE & EASY CARE] Crafted with meticulous precision and using top-quality materials, these area rugs boast unparalleled durability, making them suitable for high-traffic areas while providing exceptional underfoot comfort. Moreover, they require minimal maintenance, needing only occasional vacuuming to keep them looking their best.
*[USAGE AREA] Area rugs are versatile decor elements that can elevate the ambiance and functionality of any room in your home. From the living room to the bedroom, and even outdoor spaces, study rooms, runway, dining room and office room here's how you can make the most of area rugs throughout your home.
*[SERVICES] Free Shipping | Quick Order Dispatch | Easy Return | Accessible Customer Support - With quality product we deliver exceptional services to customers.
*[BRAND] RUGSOTIC CARPETS is a name synonymous with quality area rugs, rooted in decades of manufacturing expertise. Our commitment to excellence extends beyond product quality to supporting thousands of skilled weavers and artisans. We prioritize environmental friendliness and climate sustainability in our weaving processes, while also fostering the continuous skill development of our weavers through training initiatives. From spinning and dyeing yarn with natural ingredients in our in-house units to the meticulous weaving of our area rugs, quality checks at every stage ensure the delivery of products that uphold high moral values and exceed customer expectations.
*[SHAPE & SIZE] This Round area rug is of 4'x4' size. Ensure that the area rug is the appropriate size and shape for the space, considering the furniture arrangement and the room's dimensions.I
*[SHIPPING & RETURN POLICY] Free shipping across USA (except Puerto Rico, Alaska & Hawaii). Easy 30 days free returns. In case of damaged or wrong product delivered, the return shipment cost will be borne by us, in any other case, it will be paid by the customer.
*[WEAVE DESCRIPTION] Woven rugs often carry significant cultural and historical value, showcasing traditional patterns and techniques that have been passed down through generations. These area rugs are not just decorative pieces but are also embodiments of heritage and craftsmanship. The art of weaving them is a detailed and time-honored method that requires skill and precision to produce area rugs that are both durable and aesthetically pleasing. This intricate process involves the careful interlacing of warp and weft threads on a loom to create a flat and sturdy textile. The durability of these area rugs ensures they can withstand heavy use, making them practical as well as beautiful additions to any space.
*[MATERIAL DESCRIPTION] Jute is one of the most affordable and eco-friendly natural fibers available, commonly used for weaving area rugs. This material is exceptionally strong and durable, capable of withstanding heavy foot traffic with minimal daily cleaning, making it suitable for both indoor and outdoor use. Additionally, the cost of jute area rugs is quite reasonable, making them an economical choice for consumers seeking sustainable and practical flooring solutions. The use of jute as a raw material not only enhances the rug's durability but also contributes to environmental sustainability, as jute is biodegradable and renewable
*[PROPER SET UP & CARE] The area rug is weaved by the expert artisans with high density for its unmatched durability. It can be placed on high traffic areas with proper care. It can be installed over any kind of surface and creases can be removed just by rolling up the rug in reverse order.
*[FLOOR PROTECTION] For floor protection, this area rug can be used with pads that keep the safety of the floor intact. Be it the stone flooring, wooden or tile flooring, the rug pads will be the best for protection.
*[CLEANING METHODS] To effectively remove dust from jute area rugs, the vacuum cleaning method is recommended. However, for stains or heavy dust accumulation, a gentle wash can be employed to restore the rug's cleanliness. After washing, it's important to ensure thorough drying of the area rug, preferably under sunlight, as this helps it regain its natural sheen and freshness.

Sponsored
Columbus, OH

Hope Restoration & General Contracting
Columbus Design-Build, Kitchen & Bath Remodeling, Historic Renovations
 Tile Doctor Ltd
I was contacted about a Georgian property in the Kent village of Leeds , to see if I could do anything to improve a Travertine tiled floor. The use of Travertine was extensive and had been installed throughout the ground floor including the kitchen, dining room, utility and bathroom WC. Travertine is probably my favourite stone, but it is acid sensitive and attracts dirt easily, due to its ‘holey’ composition.
Initially we discussed the floor over the phone where I got to know about the issues they were experiencing, and I detailed the renovation process I normally use to restore it including the products and timelines. Naturally they wanted to me to provide a quote for the work however its tricky to do that accurately without seeing the floor, so I arranged a date to pop over.
Upon arriving I could see the tiles and the wide grout joints had extensive, ingrained dirt indicating the previous sealer had long since worn away. This is a common issue with stone floors, and to re-assure myself and the client it could be resolved I cleaned a small area in the utility room with pleasing results!
This test clean helped me to understand which products and methods would work best on the floor and later that day I emailed over a detailed quote for the renovation. Happy with the quote I received a reply the same day asking when I could start.
My colleague and I arrived on the agreed date and work started with adding protection to all areas that required it. We use a lot of water during the cleaning process and some materials such as MDF can become damaged with water ingress, so it makes sense to do this.
To get the floor clean, a coarse Carbide Brush fitted to a rotary machine was run over the Travertine tiles to scrub in a strong solution of Tile Doctor Pro-Clean. This process generates a lot of slurry as the dirt was washed out of the stone and grout which is extracted with a wet vacuum as we progressed.
Next it was on hands and knees with more Tile Doctor Pro-Clean and handheld brushes run over stubborn areas and along the grout lines to take them from 80% up to 100%.
Happy with the results, the next step was to renovate the stone using a series of diamond encrusted burnishing pads. Using only water for lubrication this process starts with the application of a coarse 400-grit burnishing pad attached to the floor buffer. This produces a lot of slurry which again was removed with a wet vacuum.
This left the Travertine clean, but the pores of the stone had been opened giving the floor a matt finish and more absorbent than it was originally. To further refine the appearance of the stone the next two burnishing pads were applied which are 800 and 1500-grit. These pads polish the stone and close the pores, restoring the natural sheen in the process. After each pad was applied the slurry was rinsed off the floor with water and extracted with the wet vacuum. Once complete the floor was left to dry off fully overnight.
I arrived the next day and took several moisture readings from the floor to check that it had dried off sufficiently overnight. The results were good, so work moved onto sealing the Travertine with two coats of Tile Doctor Ultra Seal which is a natural look impregnating sealer. It works by soaking into the stone, occupying the pores and thereby preventing dirt from becoming ingrained there. This ensures dirt remains on the surface where it is easily cleaned away.
The final step in the floor’s renovation was to apply the last of the diamond polishing pads which is a very fine 3000-grit. This pad further improves the polished appearance of the stone resulting in a satisfying sheen.
The work made a massive difference to the floor, and I received an email the next day from one of the owners who was really pleased with the transformation:
”Floors look brilliant. Very pleased.”
For the care and maintenance of polished sealed floors I recommend the use of Tile Doctor’s Stone Soap which is a gentle but effective cleaning product that won’t impact the sealer and contains a patina enhancer. When it comes to sealed floors my mantra is:
“If you look after the sealer, the sealer will look after the floor!”
Graham Davis
North Kent Tile Doctor
 Tile Doctor Ltd
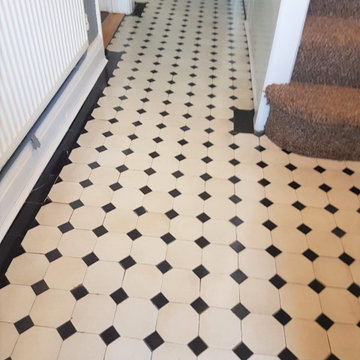
This enquiry from Neath came from an elderly gentleman who was moving into a care home in the near future and wanted his Victorian tiled hallway renovated before the property went on the market. He mentioned he didn’t think it was that dirty however it could do with a clean and reseal.
We arranged to call in one morning and take a look at the tiles and whilst there we completed a test clean so we could provide an accurate price for renovating the floor. For the clean I applied Tile Doctor Pro-Clean, the purpose of this was to see whether and how fast the dirt would shift and also to get an idea of the condition of the floor beneath the layer of dirt.
The test clean went well and the owner was happy to accept our price and suggested that as we had already made a start we might as well continue. Fortunately, there were two of us that day and I only had a couple of other quotes in the area, so I was able to crack on. I should mention this work was done at the beginning of 2020 before the COVID-19 lockdown.
All sorts of detritus gets walked into hallways so we began by using a hand held scraper to take off any anything that sat upon/above the floors surface. This also makes the cleaning process that little bit easier for us. The earlier test clean had enabled us to establish which cleaning methods and products would work best on the floor so it was just a question of putting the plan into action.
The process involved applying a strong dilution of Tile Doctor Pro-Clean to the floor, leaving it to soak in for ten minutes and then working it with a coarse 400-grit diamond pad fitted to a rotary buffer. More water was applied for lubrication where required and the soil produced afterwards was rinsed off and extracted with a wet vacuum. The pad is encrusted with industrial diamonds and cuts into the tile and removes a very thin layer leaving the tile very clean.
After extracting the soil, the floor was inspected, and we noticed that there were a few tiles throughout the floor that needed more work. To deal with these we used hand-held diamond blocks of varying grits to remove the ingrained dirt and bring the tiles back to life.
The client was over the moon with the results of the cleaning and we scheduled a date of the following week to come back and seal the tiles. We also discussed sealers and he had asked if we could leave the floor with a shiny finish. With that in mind we recommended Tile Doctors Seal and Go which works really well on Victorian tiles. It is also water based and so doesn’t produce a smell as it dries.
On our return the floor was given a quick wipe down and once dry sealed with four coats of Tile Doctor Seal and Go which will add protection and make them easy to keep clean.
Once complete the floor looked great and very welcoming, just what you need when selling a property as initial impressions always count.
Adrian Iacono
Swansea Tile Doctor

 Valcourt
The US Environmental Protection Agency (EPA) initiated a voluntary program for manufacturers of decorative wood burning fireplaces to encourage them to produce clean wood-burning appliances that reduce air pollution.
Dare to design... the fireplace of your dreams, while being environmentally friendly.
The FP7-LM Antoinette wood fireplace already qualifies for phase II of that program which aims emission levels at or below the target of 5.1 g/kg (approximately 70 percent cleaner than unqualified models). Thus, you can benefit from a product with low particulate emissions.
Moreover, another advantage of this Valcourt fireplace is its guillotine door that disappears to allow you to load wood on the fire or relax with the crackle of the open fireplace.
The fire screen is also on a guillotine mechanism so you can close it when the ceramic glass door is open. Why Antoinette? Finally, a positive historical reference to the guillotine! The guillotine door and clean front gives you the flexibility to design your fireplace in any way that suits you.
The Antoinette is a truly versatile fireplace and is all about giving you the ability to design your dreaming fireplace.
 NanaWall
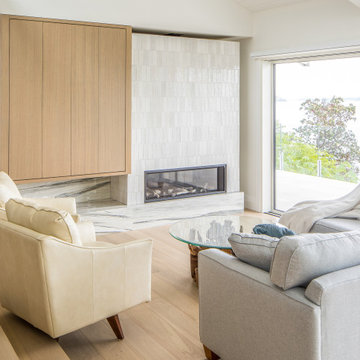
Cero is the minimal framed large panel sliding glass wall by NanaWall—simple in form yet engineered to perfection. Producing clean, uniform, and ultra-thin lines for maximum light filled spaces that connect the interior to the exterior.
A Floor-to-Ceiling Lens to the Out.
 Lisa Robazza Design
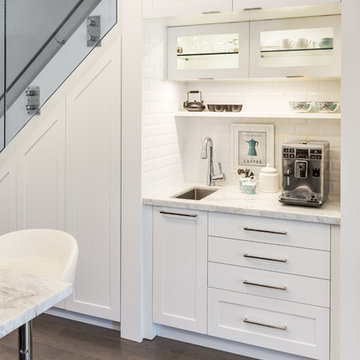
The space under the stairs was made useful as a coffee bar and for overflow storage. Ample lighting and a sink make it useful for entertaining as well.
Photos: Dave Remple
 Soda Pop Design Inc.
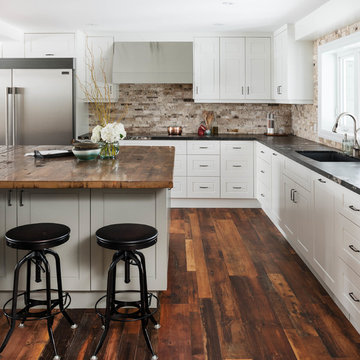
Custom design by Cynthia Soda of Soda Pop Design Inc. in Toronto, Canada. Photography by Stephani Buchman Photography.
Open concept kitchen - large transitional l-shaped dark wood floor open concept kitchen idea in Toronto with white cabinets, an island, recessed-panel cabinets, beige backsplash, stone tile backsplash and stainless steel appliances
Open concept kitchen - large transitional l-shaped dark wood floor open concept kitchen idea in Toronto with white cabinets, an island, recessed-panel cabinets, beige backsplash, stone tile backsplash and stainless steel appliances

Sponsored
Columbus, OH
Hope Restoration & General Contracting
Columbus Design-Build, Kitchen & Bath Remodeling, Historic Renovations
 Laura Garner
Photo: Laura Garner Design & Realty © 2016 Houzz
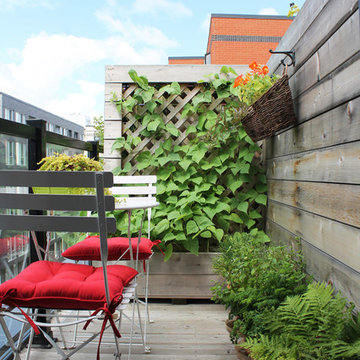
Deck - mid-sized contemporary side yard deck idea in Montreal with no cover
Deck - mid-sized contemporary side yard deck idea in Montreal with no cover
 Nathalie Priem Photography
Nathalie Priem
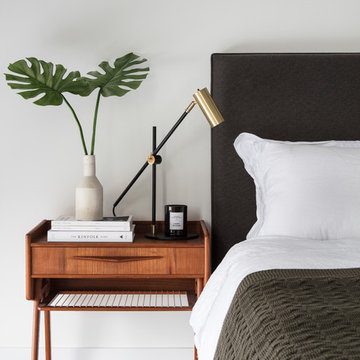
Mid-sized 1950s master carpeted and gray floor bedroom photo in London with white walls
Mid-sized 1950s master carpeted and gray floor bedroom photo in London with white walls


 elena del bucchia DESIGN
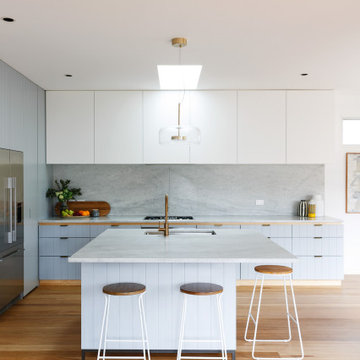
Modern Rustic home with Scandinavian inspired design, architecture & heritage of the home owners.
This particular image shows a family room with custom furniture, floor to ceiling windows and custom art.
Photo: Martin Tessler




 Novell Design Build & Novella Outdoors
Janis Nicolay
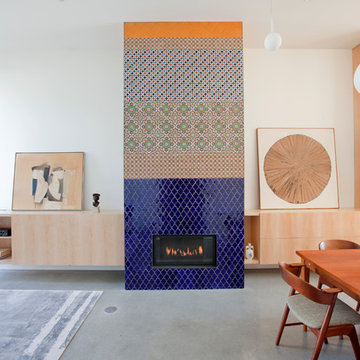
Inspiration for a large contemporary concrete floor living room remodel in Vancouver
Inspiration for a large contemporary concrete floor living room remodel in Vancouver

 Toronto Interior Design Group
Gillian Jackson
Inspiration for a small contemporary l-shaped dark wood floor and brown floor open concept kitchen remodel in Toronto with an undermount sink, flat-panel cabinets, gray cabinets, quartz countertops, stainless steel appliances, no island and black backsplash
Inspiration for a small contemporary l-shaped dark wood floor and brown floor open concept kitchen remodel in Toronto with an undermount sink, flat-panel cabinets, gray cabinets, quartz countertops, stainless steel appliances, no island and black backsplash
9