
Search results for "Proper care" in Home Design Ideas
 Edgewater Design Group
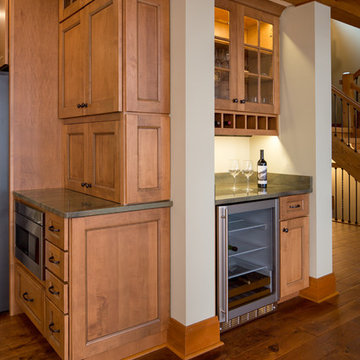
Our clients already had a cottage on Torch Lake that they loved to visit. It was a 1960s ranch that worked just fine for their needs. However, the lower level walkout became entirely unusable due to water issues. After purchasing the lot next door, they hired us to design a new cottage. Our first task was to situate the home in the center of the two parcels to maximize the view of the lake while also accommodating a yard area. Our second task was to take particular care to divert any future water issues. We took necessary precautions with design specifications to water proof properly, establish foundation and landscape drain tiles / stones, set the proper elevation of the home per ground water height and direct the water flow around the home from natural grade / drive. Our final task was to make appealing, comfortable, living spaces with future planning at the forefront. An example of this planning is placing a master suite on both the main level and the upper level. The ultimate goal of this home is for it to one day be at least a 3/4 of the year home and designed to be a multi-generational heirloom.
- Jacqueline Southby Photography
 Edgewater Design Group
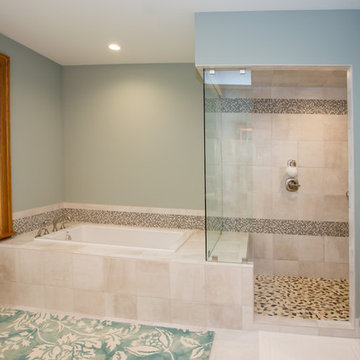
Our clients already had a cottage on Torch Lake that they loved to visit. It was a 1960s ranch that worked just fine for their needs. However, the lower level walkout became entirely unusable due to water issues. After purchasing the lot next door, they hired us to design a new cottage. Our first task was to situate the home in the center of the two parcels to maximize the view of the lake while also accommodating a yard area. Our second task was to take particular care to divert any future water issues. We took necessary precautions with design specifications to water proof properly, establish foundation and landscape drain tiles / stones, set the proper elevation of the home per ground water height and direct the water flow around the home from natural grade / drive. Our final task was to make appealing, comfortable, living spaces with future planning at the forefront. An example of this planning is placing a master suite on both the main level and the upper level. The ultimate goal of this home is for it to one day be at least a 3/4 of the year home and designed to be a multi-generational heirloom.
- Jacqueline Southby Photography
 Edgewater Design Group
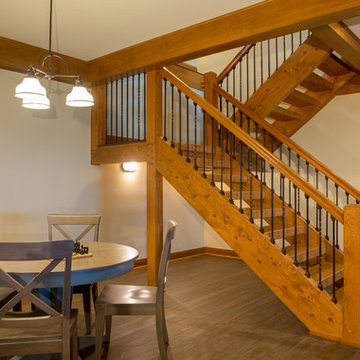
Our clients already had a cottage on Torch Lake that they loved to visit. It was a 1960s ranch that worked just fine for their needs. However, the lower level walkout became entirely unusable due to water issues. After purchasing the lot next door, they hired us to design a new cottage. Our first task was to situate the home in the center of the two parcels to maximize the view of the lake while also accommodating a yard area. Our second task was to take particular care to divert any future water issues. We took necessary precautions with design specifications to water proof properly, establish foundation and landscape drain tiles / stones, set the proper elevation of the home per ground water height and direct the water flow around the home from natural grade / drive. Our final task was to make appealing, comfortable, living spaces with future planning at the forefront. An example of this planning is placing a master suite on both the main level and the upper level. The ultimate goal of this home is for it to one day be at least a 3/4 of the year home and designed to be a multi-generational heirloom.
- Jacqueline Southby Photography
Find the right local pro for your project
 Edgewater Design Group
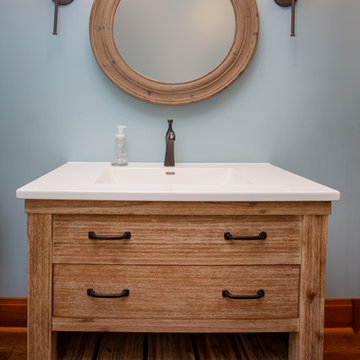
Our clients already had a cottage on Torch Lake that they loved to visit. It was a 1960s ranch that worked just fine for their needs. However, the lower level walkout became entirely unusable due to water issues. After purchasing the lot next door, they hired us to design a new cottage. Our first task was to situate the home in the center of the two parcels to maximize the view of the lake while also accommodating a yard area. Our second task was to take particular care to divert any future water issues. We took necessary precautions with design specifications to water proof properly, establish foundation and landscape drain tiles / stones, set the proper elevation of the home per ground water height and direct the water flow around the home from natural grade / drive. Our final task was to make appealing, comfortable, living spaces with future planning at the forefront. An example of this planning is placing a master suite on both the main level and the upper level. The ultimate goal of this home is for it to one day be at least a 3/4 of the year home and designed to be a multi-generational heirloom.
- Jacqueline Southby Photography
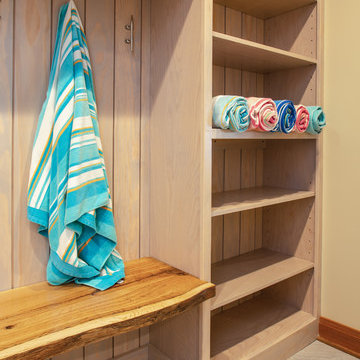 Edgewater Design Group
Our clients already had a cottage on Torch Lake that they loved to visit. It was a 1960s ranch that worked just fine for their needs. However, the lower level walkout became entirely unusable due to water issues. After purchasing the lot next door, they hired us to design a new cottage. Our first task was to situate the home in the center of the two parcels to maximize the view of the lake while also accommodating a yard area. Our second task was to take particular care to divert any future water issues. We took necessary precautions with design specifications to water proof properly, establish foundation and landscape drain tiles / stones, set the proper elevation of the home per ground water height and direct the water flow around the home from natural grade / drive. Our final task was to make appealing, comfortable, living spaces with future planning at the forefront. An example of this planning is placing a master suite on both the main level and the upper level. The ultimate goal of this home is for it to one day be at least a 3/4 of the year home and designed to be a multi-generational heirloom.
- Jacqueline Southby Photography
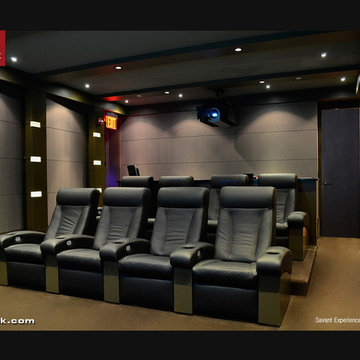
 CINEAK luxury seating
REDEFINING CUSTOM THEATER SEATING
The FORTUNY theater chair was created for the most luxurious home theater. It’s concept is unique in many aspects and the design combines leather upholstery, varying stitching finishes, ergonomic contours, real wood veneer and an independently controlled reclining mechanism. The chair was designed by the Mitra Theaters team
as a seating solution for their exclusive high-end home theater projects.
Careful attention has been paid to the overall comfort of this chair. Ergonomics have been thorougly studied during the design and development process. High quality foam with different densities in combination with zigzag seating support and webbed backrest support are used to create a comfortable and soft feel which maintains a proper balance for ones body.
A steel frame and mechanism ensures a smooth operation now and in the future. The independently controlled reclining mechanism allows the user to adjust the backrest independently from the footrest, giving the user full freedom and the ability to adjust the chair to a position that fits one’s body structure. The articulating headrest is a feature which ensures ultimate comfort while viewing a movie in the reclined position. It gives the proper neck support needed and guarantees the perfect viewing in relation to the film screen.
The Fortuny is also available as a fixed chair and in a manually operated reclining version.
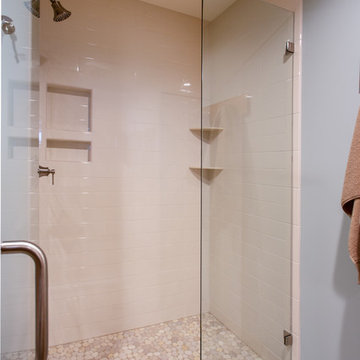 Edgewater Design Group
Our clients already had a cottage on Torch Lake that they loved to visit. It was a 1960s ranch that worked just fine for their needs. However, the lower level walkout became entirely unusable due to water issues. After purchasing the lot next door, they hired us to design a new cottage. Our first task was to situate the home in the center of the two parcels to maximize the view of the lake while also accommodating a yard area. Our second task was to take particular care to divert any future water issues. We took necessary precautions with design specifications to water proof properly, establish foundation and landscape drain tiles / stones, set the proper elevation of the home per ground water height and direct the water flow around the home from natural grade / drive. Our final task was to make appealing, comfortable, living spaces with future planning at the forefront. An example of this planning is placing a master suite on both the main level and the upper level. The ultimate goal of this home is for it to one day be at least a 3/4 of the year home and designed to be a multi-generational heirloom.
- Jacqueline Southby Photography
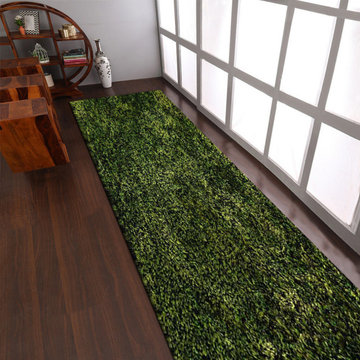
 Get My Rugs LLC
"Tremendousness is redefined by this hand tufted polyester rug which spread the prosperity in your home in the shade of green color. The solid pattern of this shag rug elaborates its beauty very well and fuels it with a much bolder look. Needless to say.
Product Features:-
Construction: Handmade
Technique: Hand Tufted shag
Shape: Runner
Color: Green
Pile: 1.5 inches
Pattern: Solid
Material: Polyester
Weight: 11.35 lbs
Origin of Manufacturing: India
Recommended Use: Indoor
Eco-Friendly: Yes
Shipping: Free Shipping
Handmade by skilled artisans enhancing in-depth color and product durabilitySolid designed and weaved by hand tufted technique.Soft polyester yarn with ultra-plush pile height of 1.5 inches for underfoot comfortSolid area rugs perfect for Living Room, Bedroom, Study Room, Dinning Room, Foyer.Free shipping and quick order dispatch. With quality product we deliver quality services to customers
Weave:- Weaving of a hand tufted shag rug is relatively easier than compared to other weaving techniques. The design is first sketched on a canvas and then material is made into it as per the design. The pile is kept very high to give it a furry look. Hand tufted rugs are very soft on face and are great for underfoot comfort. The rugs are very eye pleasing and the cost is very economical.
Material:- Polyester, an artificial fabric, have gained much popularity as rug weaving material. The polyester material rugs are highly sturdy and have gain acceptance due to its qualities like shine, wear & fade resistance, comfort, non-allergenic, moisture resistance, ease of cleaning, moth-proof, etc.
Pile:- Enjoy the high pile of this rug and place it at high footfall areas in your home, providing great underfoot comfort. This high pile rug is ideal one for the buyers who wants to place it on the flooring for the soft and cozy feel.
Proper Set Up & Care:- Hand Tufted rugs are heavy rugs and fits well with any kind of flooring. Unlike rugs of other weave the hand tufted rugs have a cotton backing which makes it anti-skid. These rugs are very durable if maintained properly.
Floor Protection:- Though hand tufted rugs have cotton backing which makes it anti-skid and harmless to the floor but you can always use a high quality rug pad to provide an extra level for floor protection.
Cleaning Methods:- For hand tufted shag rugs we recommend to go for gentle vacuum cleaning. For any stain, the users can opt for professional dry cleaning method."
 kul grilles
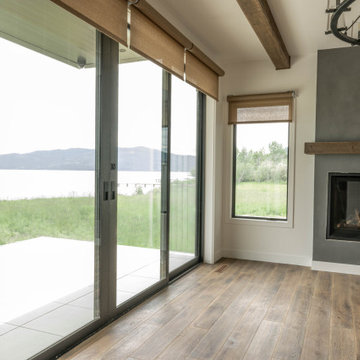
In this image, we are introduced to a remarkable Base Camp Design build that has been thoughtfully crafted to optimize natural light and showcase the beauty of the outdoor landscape throughout every season. The residence stands as a testament to the harmonious integration of architecture and nature, offering breathtaking views of Lake Pend Oreille and the awe-inspiring snow-covered mountains in the distance.
As we step inside, we immediately notice the abundance of natural light that fills each room, casting a warm and inviting glow. The design concept aims to create a serene and minimalistic atmosphere, allowing the surrounding scenery to take center stage. The interior is adorned with clean lines and a neutral color palette, providing a calm and uncluttered ambiance.
Among the carefully selected design elements, the kul grilles vent covers make a subtle yet significant contribution to the overall aesthetic. With their sleek and refined appearance, these vent covers seamlessly blend into the space, maintaining the home's clean and tranquil environment. The kul grilles vent covers serve as functional elements, ensuring proper air circulation while adding a touch of sophistication to the interior design.
The home strikes a perfect balance between form and function, where every detail has been carefully considered to create a space that is both visually stunning and supremely livable. As we gaze out the windows, we are treated to captivating vistas of the shimmering Lake Pend Oreille, framed by the majestic snow-capped mountains in the distance. This Base Camp Design build is a true sanctuary, where the beauty of nature and the elegance of architectural design come together in perfect harmony.
 Crystal Kitchen + Bath
The goal for this 1939 Tudor-style story-and-a-half home was to create a kitchen that offered the conveniences, storage, and performance of a modern workspace while preserving the warmth, craftsmanship, and vintage charm that made the home special. The client, an avid home cook, wanted the room to feel as though it had always belonged to the house, with thoughtful upgrades that respected the original architecture rather than competing with it. Just as important, she needed a more efficient layout with enough storage for small appliances, so everyday cooking would no longer require carrying items up from the lower level.
Several existing conditions shaped the design approach. The kitchen retained original, amber-stained birch woodwork that the client wished to keep, and the compact footprint was interrupted by six doorways and two windows, none of which were to be moved, altered, or replaced. A previous flooring update had left the door casings undercut too short, creating visible gaps where the casing met the floor. The existing vintage 40-inch range also lacked proper ventilation, yet the client wished to accommodate a refrigerator, dishwasher, cooktop, double ovens, built-in microwave, and effective venting above the cooktop into the new kitchen layout.
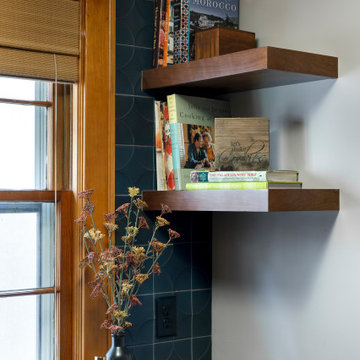
To honor the original millwork, beaded inset-style cherry cabinetry was selected in a soft, hand-rubbed finish that will deepen over time and develop a natural patina. Charcoal-gray soapstone countertops complement the cabinetry while reinforcing the historic character of the home with an organic, timeworn texture. The former breakfast nook was transformed into a butler’s pantry, adding valuable base cabinet storage and expanded work surfaces for frequently used small appliances. Also in the butler’s pantry, a single upper cabinet was paired with open shelves to give an open, airy feeling while adding character and practical storage. A classic single-bowl apron-front workstation sink contributes both period-appropriate character and practical prep and cleanup function.
Because the home’s openings were such a defining feature, the design worked within the existing architecture instead of altering it. Custom plinth blocks were created for each doorway to extend the original casing gracefully down to the new natural red oak flooring, resolving the earlier construction issue while adding a detail that feels authentic to the age of the house. Despite the number of door and window openings, the new layout provides a significantly more functional, built-in kitchen with an improved work triangle for serious cooking.
Appliance placement was carefully planned to deliver the requested performance without overwhelming the small room. Three cooking functions (double ovens & microwave) were consolidated into one location with a GE Café double oven featuring Advantium Technology, while the client’s compact 31-inch refrigerator was reused to preserve space. A sleek 30-inch induction cooktop provides efficient cooking, and a Vent-A-Hood ARS ductless vent hood supplies needed ventilation without requiring a duct run to the exterior.
The finish palette balances richness, texture, and historical sensitivity. A deeply textured navy backsplash tile adds depth and dramatic shadow play against the soapstone, while wallpaper in the back entry echoes the tile’s geometric pattern to visually connect the adjoining spaces. Oil-rubbed bronze cabinet hardware and light fixtures enhance the warmth of the cherry cabinetry and complete the antique-inspired feel.
Lighting was layered to make the compact kitchen brighter, more useful, and more inviting. Vintage-style semi-flush ceiling fixtures establish the overall tone, while dimmable puck lights highlight select areas and undercabinet task lighting keeps work surfaces well illuminated.
The completed kitchen now feels both highly functional and deeply rooted in the home’s history. Rich cherry cabinetry, velvety soapstone, natural red oak flooring, navy tile, bronze accents, and carefully preserved birch trim work together to create a warm, cohesive space that celebrates timeless craftsmanship. By increasing storage, improving workflow, integrating modern appliances, and respecting the Tudor home’s original character, the design achieves the client’s vision: a kitchen that feels personal, practical, historically appropriate, and as though it has always been there.
 Outdoor Creations Landscape & Design Inc.
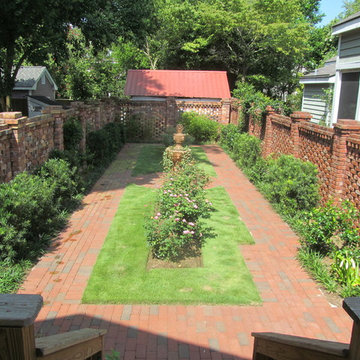
This is a few months after. Everything starting to grow. We utilized both, cultural or mechanical methods applied through best management practices. Recommended mowing heights on turf. Proper water practices. Proper fertilizer used based on soil analysis.
 Do Arch LLC
Our Process
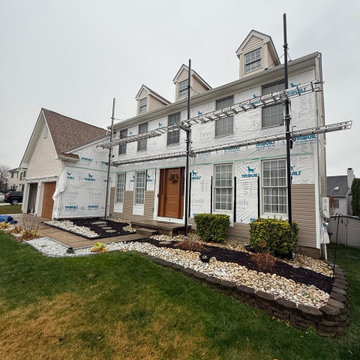
Every siding project we complete follows a structured, detail-focused approach to ensure long-term performance and a clean, high-end finish:
1. Preparation & Protection
We begin by protecting all surrounding areas, including landscaping, walkways, and entry points. This ensures a safe and clean job site from start to finish.
2. Removal of Existing Siding
The old siding is carefully removed and disposed of. During this stage, we inspect the underlying structure for any signs of damage or moisture issues.
3. Surface Inspection & Repairs
We address any compromised sheathing or framing as needed to create a solid, secure base for the new installation.
4. Weather Barrier Installation
A proper moisture barrier is installed to improve energy efficiency and protect the home from water intrusion.
5. Siding Installation
We install Double 4.5" Encore Dutch Lap siding in Natural Clay with precision, ensuring straight lines, tight seams, and consistent spacing throughout.
6. Trim, Shutters & Moldings
All shutters and exterior moldings are carefully reinstalled and aligned, maintaining the home’s original character while enhancing the updated look.
7. Final Detailing & Cleanup
We complete all finishing touches, conduct a full quality check, and leave the property clean and ready to enjoy.
 BMR BelMax Remodeling
Luxury Bathroom Remodeling in Langhorne, PA – A Stunning Transformation by BMR Belmax Remodeling
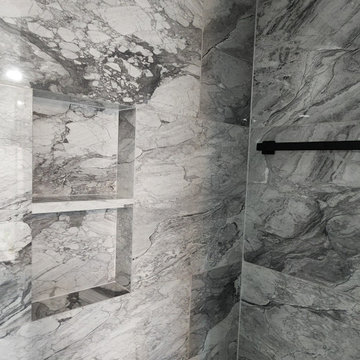
At BMR Belmax Remodeling, we take pride in transforming bathrooms into elegant, functional, and modern spaces. Our latest bathroom remodeling in Langhorne, PA is a testament to high-quality craftsmanship and attention to detail. This project was about creating a luxurious retreat, where aesthetics meet functionality. From a spacious walk-in shower to a sleek freestanding tub, black fixtures, and marble-inspired finishes, this bathroom is truly a piece of art.
The Challenge: A Bathroom in Need of Modernization
Our client in Langhorne, PA, wanted a bathroom renovation that would maximize space, enhance functionality, and create a modern, elegant atmosphere. The existing bathroom lacked the cohesive design and luxury finishes that the homeowner desired. They envisioned a spacious walk-in shower, stylish vanity, elegant tiling, and a freestanding bathtub that would bring a spa-like feel to their home.
BMR Belmax Remodeling was up to the challenge. We focused on layout optimization, high-end finishes, and sophisticated black fixtures to create a space that exudes timeless elegance and modern convenience.
The Transformation: A Spacious & Elegant Bathroom Design
Our remodeling team executed a complete renovation, incorporating top-tier materials, innovative design elements, and seamless craftsmanship. The result? A stunning, spa-like master bathroom that exceeds expectations.
1. Walk-In Shower with Premium Features
Built a spacious 68” x 36” walk-in shower, offering comfort and luxury.
Installed beautiful marble-look tiles on the shower walls, adding a sophisticated and timeless aesthetic.
Used mosaic tiles for the shower base, enhancing texture, durability, and slip-resistance.
Integrated a sleek black shower fixture, creating a striking contrast with the light-colored tiles.
Installed a recessed shower light, ensuring proper illumination for a relaxing shower experience.
2. Stunning Marble-Effect Tile Work
The entire bathroom features marble-look tiles, creating a high-end and cohesive design.
Used white marble-look tiles for the bathroom floor, complementing the shower walls while enhancing the sense of space and brightness.
3. Elegant Freestanding Tub as the Centerpiece
Installed a modern black-and-white freestanding bathtub, adding a luxurious spa-like feel to the space.
Positioned the tub near the newly painted black-framed windows, creating a stunning visual contrast.
Added a sleek black floor-mounted tub filler, blending perfectly with the overall design.
4. Custom Wall-Mounted Double Vanity & Mirrors
Installed a double vanity, reconfiguring all plumbing to allow for a floating, wall-mounted design.
The wall-mounted vanity enhances floor space and gives the bathroom a modern, airy look.
Added matching lighted mirrors, providing both functionality and style.
5. Thoughtful Lighting & Black Accents
Installed recessed lighting throughout the bathroom, creating a bright and inviting atmosphere.
Added an additional light in the shower, ensuring proper visibility and ambiance.
Painted all bathroom doors black, complementing the black fixtures and window frames.
Installed all bathroom fixtures in black, creating a bold contrast against the marble-inspired tile work.
6. New Windows for a Balanced Aesthetic
Installed five new windows, painted black inside and white outside, enhancing both exterior curb appeal and interior elegance.
The black window frames create a striking contrast against the light-colored tile walls.
The Result: A Luxurious and Functional Bathroom Retreat
The completed bathroom renovation in Langhorne, PA, is a stunning masterpiece, blending modern sophistication with timeless luxury. The spacious walk-in shower, freestanding tub, and floating vanity contribute to an elegant, spa-like environment.
The combination of marble-look tiles, black fixtures, recessed lighting, and high-end finishes creates a harmonious and visually stunning space. Every design choice was carefully planned and executed to maximize comfort, elegance, and functionality.
Our client was extremely happy with the outcome, describing the bathroom as a true work of art. They particularly loved how the black fixtures and accents contrast beautifully with the marble-inspired tiles, giving the bathroom a sophisticated and high-end feel.
Why Choose BMR Belmax Remodeling?
This bathroom remodeling in Langhorne, PA reflects the quality, creativity, and dedication we bring to every project. Homeowners trust BMR Belmax Remodeling because we offer:
✅ High-End Custom Designs – Tailored solutions that meet unique preferences and styles.
✅ Premium Materials & Finishes – Using only the best materials for durability and beauty.
✅ Expert Craftsmanship – Attention to detail and quality workmanship in every aspect.
✅ Seamless Project Management – From planning to completion, we ensure a stress-free renovation experience.
✅ Client-Focused Service – We prioritize homeowner satisfaction and deliver beyond expectations.
Upgrade Your Bathroom with BMR Belmax Remodeling
If you’re considering a bathroom renovation in Langhorne, PA, trust BMR Belmax Remodeling to bring your dream bathroom to life. Whether you want a spacious walk-in shower, a freestanding bathtub, modern lighting, or custom fixtures, we have the expertise to deliver stunning results.
Contact us today to schedule a consultation and start transforming your bathroom into a luxurious retreat!
 Octagon Construction & Energy
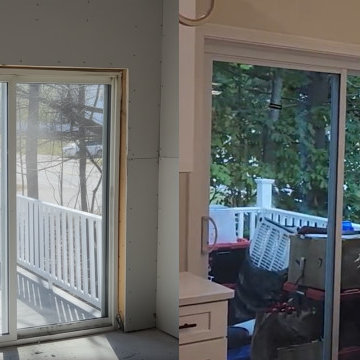
This project involved upgrading an existing sliding door along with completing the surrounding interior wall. The original setup included an unfinished opening and an older installation that required proper preparation before replacement.
A new sliding door was installed with attention to alignment, sealing, and structural integration. The interior was then finished to create a clean and functional transition between the indoor space and the exterior deck.
Projects like this require careful installation to ensure long term performance, especially in areas affected by seasonal changes. Homeowners considering similar upgrades can learn more from Octagon Construction & Energy about proper installation and structural considerations.
 lavish
When a professional office space needs to make a lasting impression on clients and create an inspiring environment for staff, the design details matter just as much as they do at home. This thoughtful commercial interior refresh transformed a dated, purely functional office into a warm, sophisticated, and beautifully layered space — one that feels more like a high-end boutique or luxury residence than a typical workplace.
The guiding philosophy throughout was clear: every space, no matter how utilitarian its purpose, deserves intentional design. From the reception corridor to the staff break room, from the client restrooms to the storage corridor, each area received careful attention to finish, color, and texture.
Restrooms Reimagined
The two client-facing restrooms were the most dramatic transformations in the project. Rather than the builder-grade wallpaper and basic fixtures typically found in commercial spaces, both were treated as true design moments.
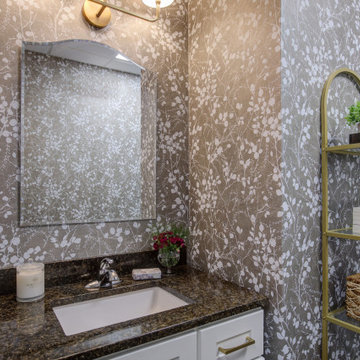
The first features floor-to-ceiling wallpaper in a rich taupe with a delicate white botanical branch pattern, creating an immersive, jewel-box feel. A white shaker vanity with dark granite countertop grounds the space, while an arched frameless mirror and brushed gold wall sconce add glamour. A tall gold and glass etagere serves as both decorative storage and a sculptural element, styled with woven baskets, greenery, and stacked accessories. Framed landscape watercolor art adds a serene, organic note, and a freestanding brass toilet paper holder elevates a typically overlooked detail.
The second restroom takes an entirely different but equally compelling direction — soft, dusty blue-grey grasscloth-style wallpaper printed with a tone-on-tone chevron leaf stripe wraps every wall, creating a calm, spa-like atmosphere. A weathered wood console provides casual charm beneath a large-scale botanical tulip artwork in sage and cream. The wall-mount sink with exposed plumbing adds an intentional, editorial touch. An arched mirror with a sleek multi-bulb bar sconce in brushed nickel completes the look, while a pair of sculptural brass branch wall sculptures mounted directly to the wallpaper serve as unexpected, memorable art.
Storage Made Beautiful
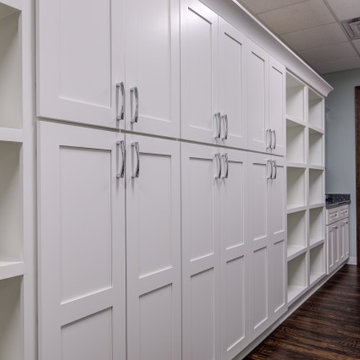
The internal storage corridor received a full wall of custom floor-to-ceiling white shaker cabinetry with chrome pulls, flanked by open shelving sections for accessible display and storage. Clean, crisp, and highly organized — this space proves that even a purely functional corridor can be architectural and refined.
The Break Room & Kitchenette
The staff break room was updated with white shaker cabinetry, light speckled granite countertops, stainless appliances — including a French door refrigerator, dishwasher, and over-counter microwave — and warm sage green walls that bring a restful, refreshing energy to the space. Dark hardwood luxury vinyl plank flooring runs throughout the room, warming the look considerably. A round walnut dining table with upholstered chairs creates a proper gathering space for the team, and framed landscape oil art in an ornate gold frame adds a touch of collected character to the room.
Reception & Corridor Details
The reception and corridor spaces were treated with deep navy blue paint — bold, sophisticated, and unexpected in a commercial setting. A large abstract landscape painting in warm blues, blush, and gold hangs in a gilded frame against the navy wall, making an immediate statement. A brass and lucite table lamp sits on a floating brass-trimmed shelf alongside a sculptural art object, creating a vignette that communicates creativity and intentionality from the moment clients arrive.
The result is a professional environment that communicates confidence, taste, and care — one that clients will remember long after their visit, and one that staff will genuinely enjoy working in every day.
 lavish
When a professional office space needs to make a lasting impression on clients and create an inspiring environment for staff, the design details matter just as much as they do at home. This thoughtful commercial interior refresh transformed a dated, purely functional office into a warm, sophisticated, and beautifully layered space — one that feels more like a high-end boutique or luxury residence than a typical workplace.
The guiding philosophy throughout was clear: every space, no matter how utilitarian its purpose, deserves intentional design. From the reception corridor to the staff break room, from the client restrooms to the storage corridor, each area received careful attention to finish, color, and texture.
Restrooms Reimagined
The two client-facing restrooms were the most dramatic transformations in the project. Rather than the builder-grade wallpaper and basic fixtures typically found in commercial spaces, both were treated as true design moments.
The first features floor-to-ceiling wallpaper in a rich taupe with a delicate white botanical branch pattern, creating an immersive, jewel-box feel. A white shaker vanity with dark granite countertop grounds the space, while an arched frameless mirror and brushed gold wall sconce add glamour. A tall gold and glass etagere serves as both decorative storage and a sculptural element, styled with woven baskets, greenery, and stacked accessories. Framed landscape watercolor art adds a serene, organic note, and a freestanding brass toilet paper holder elevates a typically overlooked detail.
The second restroom takes an entirely different but equally compelling direction — soft, dusty blue-grey grasscloth-style wallpaper printed with a tone-on-tone chevron leaf stripe wraps every wall, creating a calm, spa-like atmosphere. A weathered wood console provides casual charm beneath a large-scale botanical tulip artwork in sage and cream. The wall-mount sink with exposed plumbing adds an intentional, editorial touch. An arched mirror with a sleek multi-bulb bar sconce in brushed nickel completes the look, while a pair of sculptural brass branch wall sculptures mounted directly to the wallpaper serve as unexpected, memorable art.
Storage Made Beautiful
The internal storage corridor received a full wall of custom floor-to-ceiling white shaker cabinetry with chrome pulls, flanked by open shelving sections for accessible display and storage. Clean, crisp, and highly organized — this space proves that even a purely functional corridor can be architectural and refined.
The Break Room & Kitchenette
The staff break room was updated with white shaker cabinetry, light speckled granite countertops, stainless appliances — including a French door refrigerator, dishwasher, and over-counter microwave — and warm sage green walls that bring a restful, refreshing energy to the space. Dark hardwood luxury vinyl plank flooring runs throughout the room, warming the look considerably. A round walnut dining table with upholstered chairs creates a proper gathering space for the team, and framed landscape oil art in an ornate gold frame adds a touch of collected character to the room.
Reception & Corridor Details
The reception and corridor spaces were treated with deep navy blue paint — bold, sophisticated, and unexpected in a commercial setting. A large abstract landscape painting in warm blues, blush, and gold hangs in a gilded frame against the navy wall, making an immediate statement. A brass and lucite table lamp sits on a floating brass-trimmed shelf alongside a sculptural art object, creating a vignette that communicates creativity and intentionality from the moment clients arrive.
The result is a professional environment that communicates confidence, taste, and care — one that clients will remember long after their visit, and one that staff will genuinely enjoy working in every day.

 safe ZOnea
If you’re active on GardenWeb sharing plant photos, asking for advice, tracking seasonal progress you already understand how much detail goes into gardening. Soil pH, rainfall, emerging leaves, bloom counts, fertilizer schedules it adds up fast. But all that rich information often remains buried in posts, lists or memory. What if you could visualize that data and turn it into clear quick insights? That’s where a graph maker becomes a game-changer for your gardening workflow.
1. Why garden data belongs on a graph
On GardenWeb, you’ll find forums for everything from perennial care, vegetable gardening, patios, herbs, even cooking and craft projects. While plant lovers share observations and ask questions, many track progress manually in spreadsheets or memory. A graph maker flips that around:
Instead of a list of numbers (e.g., “Soil test: pH 6.4 in May, 6.1 in October”), you get a line graph showing the decline over time.
Instead of guessing which plant bloomed most, you see a bar chart comparing counts across plants.
Instead of manually calculating average rainfall effect, you plot scatter points of bloom count vs. rainfall.
By turning your data into visuals, you’re not just recording—you’re analysing, learning and improving. For GardenWeb users this means smarter decisions: Which fertilizer actually improves bloom count? Which shady spot recovers slower? A graph maker gives clarity.
2. What is a graph maker and how to use one
A graph maker is a web tool or software that lets you input raw data (numbers, dates, categories) and output visual charts like line graphs, bar charts, scatter plots, etc. It might allow you to import a spreadsheet, select chart type, customize colours, label axes, and export the image for your blog, forum post or personal log.
Here’s how you could apply it for gardening:
Log blooms per week for each rose plant.
Using the graph maker, choose line graph to track changes over weeks.
Label your y-axis “Number of Blooms”, x-axis “Week of Year”.
Add colour lines for each plant for easy comparison.
Export as PNG and embed it in a GardenWeb forum post: “See bloom trend for my ‘Peace’ vs ‘Knock Out’ roses”.
This isn’t just pretty-to-look-at: it makes the trend obvious, invites discussion (“Hey, your ‘Knock Out’ line dips after week 28—what changed?”) and helps you refine your routine.
3. Use these specific scenarios on GardenWeb
A. Soil pH and plant health tracking
After multiple tests you have pH values over time and bloom results. Upload both datasets into the graph maker, produce a dual-axis line graph: soil pH on one axis, bloom count on the other. Post your findings in the “Soil, Fertility & Nutrients” forum and get feedback.
B. Seasonal pest or disease appearance
Record number of aphids spotted each month and whether you used treatment. A bar chart via the graph maker can show pre- and post-treatment figures. Then ask the “Insect & Disease Control” forum for advice based on your visual data.
C. Yield comparison between varieties
You grow two zucchini varieties. You keep weekly yield in pounds. Use the graph maker for a side-by-side bar chart. Share in the “Vegetable Gardening” forum: “Which was better this year? See the chart”.
D. Rainfall vs growth rate
You log weekly rainfall and growth (in cm) of your tomato plants. Use scatter plot in graph maker. If a pattern emerges, you’re ready to post: “Is my growth plateau due to drought? Chart shows a clear correlation.”
4. Why this elevates your GardenWeb contributions
When you post with a chart made by a graph maker, you’re doing more than asking or showing off. You’re investigating. You’re analysing. You invite the community to give feedback on data, not just anecdotes. That elevates the discussion. Instead of “My plant died, any ideas?” you post “See this graph of pH drop and bloom count—what might be the limiting factor?” High-quality visuals raise your post’s value and garner more thoughtful responses.
Plus, your posts become useful references for others: someone else can say, “Cool graphic, can you share your data sheet?” You build credibility and help the forum become a learning hub—not just a Q&A board.
5. Tips for using a graph maker effectively in the GardenWeb context
Keep it simple: One chart, one insight. Don’t overcrowd.
Label clearly: Titles, axis labels, units (e.g., cm/week, mg/L, °F).
Use readable colours: Avoid faint tones that vanish on mobile.
Annotate when needed: Add notes like “Fertiliser switched week 12” or “Shade cloth added”.
Provide context in your post: Don’t leave the chart alone—write a few sentences explaining what it shows and what you’re seeking.
Embed carefully: Make sure your image displays properly in GardenWeb; check mobile view.
Share raw data: If possible link to your spreadsheet so others can replicate or comment.
Be open to feedback: The chart invites questions; embrace them.
6. Possible pitfalls and how to avoid them
Bad data = bad chart: If your measurements aren’t consistent, your graph will mislead. Use standardized data collection.
Too much complexity: Multi-axis charts, too many variables—confusing. Stick to one or two variables.
Overlooking mobile viewers: Many GardenWeb users browse via phones. Use large fonts and simple visuals.
Ignoring the narrative: Chart alone won’t answer. Explain what it means and what you need.
Outdated charts: If you update your data annually, keep your visuals current or label them clearly as “2024 data”.
7. Final thoughts
On GardenWeb you’ll find a vibrant community of gardeners, DIYers, cooks and design lovers.Using a graph maker for your posts and progress turns your experience from casual hobby-logging into smart data-driven gardening. You’ll not only learn more—your peers will learn more, too.
So next time you log your plant growth, record your yield, test your soil or track pests—don’t just note it. Plot it. Use a graph maker. Share it in the forum. Let your garden tell the story, and let the community help you write the next chapter.
 MBG Services
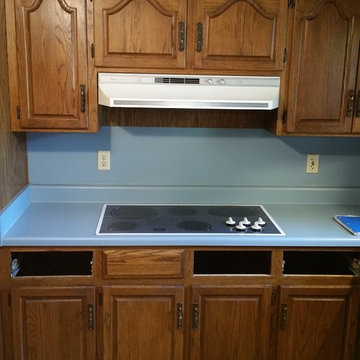
Preparation for the project will deal with determining the exact placement of the center line for the new appliance. This will determine where the face frames, cabinet floor, and other components will be cut. This project had the built in place cabinetry common to older homes. This required that consideration be taken to brace the cabinet floors at the points where there new end panels will be installed. As with any project, very careful planning and layout is vital. Small details not taken into account can add considerable time, expense, and frustration to account for. Here, the run of cabinets will have 3/4 end panels installed on each side of the range opening. Measurements not properly verified will leave you in a situation in which the raw end of the plywood end panel would be visible. The other challenge here is the size difference between the 36" cooktop and the standard 30" common range to replace it. Carefully remove the center stile and make clean square cuts on the rails so the removed material can be utilized when/if needed.
Johnnie McCormick
 kul grilles
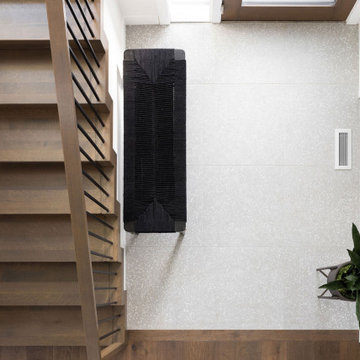
The kul grilles vent cover showcased in the image is a [erfectly chosen finishing touch chosen by Alloy Homes, a prestigious design-build firm based in Calgary, Alberta. Known for their exceptional expertise, Alloy Homes specializes in creating dream homes by overseeing every aspect of the design and construction process, from start to finish.
With a comprehensive range of services, Alloy Homes stands out among its competitors. They go beyond traditional design-build firms by offering an extensive array of services to meet all their clients' needs. Whether you're in search of the perfect property or require assistance with architectural and interior design, construction management, post-occupancy care, or concierge services, Alloy Homes has you covered.
The vent cover featured in the image is just one example of the meticulous attention to detail and quality craftsmanship that Alloy Homes brings to every aspect of their work. Designed to seamlessly integrate into their homes' overall aesthetic, this vent cover by kul grilles exemplifies the firm's commitment to both functionality and style.
By incorporating the kul grilles vent cover in Glacier Frost into their designs, Alloy Homes showcases their ability to combine beauty and practicality. The cover not only serves its primary purpose of allowing proper air circulation but also enhances the visual appeal of the space. Its polished surface and rectangular shape with rounded corners reflect the firm's dedication to modern and sophisticated design principles.
Alloy Homes' exceptional expertise and comprehensive range of services make them a sought-after design-build firm in the Calgary area. From real estate services to architectural and interior design, construction management, post-occupancy care, and concierge services, they are equipped to handle every aspect of bringing your dream home to life. With their commitment to quality and attention to detail, Alloy Homes sets the standard for excellence in the industry.

 Microworks Handyman
**Concrete Step Restoration & Your Entire To-Do List Done! ???️**
Start by fixing those crumbling, cracked, or settling concrete steps that have become an eyesore and a dangerous tripping hazard, and let us take care of the rest in one seamless visit. With our Ultimate Handyman Block, your professional will kick off the day with a quick property walkthrough to prioritize your exact needs. We will dive straight into carefully chipping away the loose debris, properly prepping the surface, and flawlessly applying high-strength concrete patch or resurfacer so your entryway or walkway is safe, rock-solid, and looks freshly poured. Once your concrete steps are perfectly restored, we will use the rest of your reserved session to tackle whatever else is weighing on your mind—from mounting heavy TVs and patching drywall to upgrading door hardware and repairing fences. Professional-grade consumables are fully included in the service, and if your project requires specialty masonry bonding agents, specific non-slip concrete sealers, or custom decorative caps, we source them for you and pass the items on with zero markup. It is the ultimate, stress-free way to finally catch up on those nagging repairs and get your property back to 100% in a single day.
.
.
.
.
.
Consumables Included:
High-strength concrete patch & resurfacer | Masonry bonding adhesive | Standard structural fasteners
#MicroworksHandyman #BurnabyHandyman #VancouverHandyman #NorthVancouverHandyman #WestVancouverHandyman #CoquitlamHandyman #ConcreteRepair #StepRestoration #HomeMaintenance #VancouverContractor #HandymanServices #PropertyMaintenance #HoneyDoList #HomeRepairs #MasonryRepair
27