
Search results for "Proper tools" in Home Design Ideas

 Tile Doctor Ltd
I was recently asked to survey an unusual stone floor at a house in in Harrogate comprising of Slate inlaid with Granite. The client advised that it had not been cleaned properly for 20 years and wanted it renovating! It was now definitely overdue a deep clean and professional attention. Fortunately, having worked on these floors for many years I knew I could make a substantial impact and transform its appearance. Fossilized slate is a beautiful stone when cleaned and sealed correctly.
The owner confessed they had actually been sealing the floor every two years but without a deep clean first, so they were effectively sealing in the dirt each time. I discussed with them the process I would use to clean and re-seal the floor and we agreed a price to carry to out the work.
To remove the layers of old sealer and dirt used a set of Tile Doctor Diamond Burnishing pads. The pads are attached to a rotary floor machine starting with the coarse 400-grit pad which was lubricated with a dilution of Tile Doctor Remove and Go to help strip the floor of dirt and layers of sealer. After rinsing and extracting the soil I worked through the different grades of pads in sequence finishing with the 1500-grit and this time using just water for lubrication.
A set of diamond handheld burnishing blocks were then used to clean up the edges and corners where the large 17” pads struggle to reach. This ensures all areas are treated and free of dirt and old sealer.
The floor was then rinsed and extracted again to remove the remaining soil. I find a wet vacuum is an invaluable tool for this. The floor was then left to dry out overnight ready for sealing the next day.
I returned the next day to seal the floor, first checking with a damp meter that the floor was dry, and the moisture reading was below the acceptable level. These results were fine, so I had a green light to continue and seal the stone.
The customer wanted a shine on the floor so rather than apply a satin sealer which I felt wouldn’t adhere to the stone properly I decided to polish the floor further with a the last of the four burnishing pads which is a very fine 3000-grit pad. You don’t need to use a lot of water with this last pad just a small amount sprayed onto the floor using a technique we refer to as a ‘Spray Burnish’.
To seal the floor, two coats of Tile Doctor Colour Grow were applied. This is an impregnating matt sealer which intensifies the natural colours of this beautiful stone and provides long lasting durable protection.
Even I was impressed with the finished result but more importantly the client was over the moon. To keep the floor looking its best I recommended they use Tile Doctor Stone Soap which is pH neutral. You should always read the label in detail when choosing a floor cleaning product as many are too strong and not recommended for sealed stone surfaces as they will prematurely erode the sealer.
Nigel Stoker
North West Yorkshire Tile Doctor
 Tile Doctor Ltd
When you discover an old Victorian tiled floor underneath carpet, the first question that will probably pop into your mind is: can it be restored?
The answer, in the majority of cases, is yes. In fact, Tile Doctor has completed hundreds of Victorian tiled floor restorations. Victorian tiles have a timeless quality about them and are still popular for residential use even in the twenty first century.
What you can usually expect upon lifting your carpet is for the tiles to be covered in carpet adhesives and grippers, as was the case with this particular example of a Victorian Tiles hallway floor at a property in Bedford. Sometimes you might also find paint splashes or other staining left over from decoration work. And, of course, the tiles will be dirty and in much need of a deep clean. These issues spoil the original appearance of the tiles, but with the right methods and products, a complete restoration can be achieved quickly and cost-effectively.
My first task upon arriving at the proper was to carry out a site survey to address the condition of the tiles, before running a quick test clean on a small area of the floor. The result was good and so I was confident that I could achieve a high-quality restoration for the client.
A quote was issued and accepted, and the work was booked in at a date that was convenient for the customer.
Returning to the property, my first course of action was to mix a strong dilution of Tile Doctor Pro Clean, which is a powerful alkaline cleaner safe to use on natural stone, with hot water. This cleaning solution was sprayed along all edges of the floor loosen the glue securing the carpet grippers. I then successfully removed the adhesive carefully using handheld tools to avoid damaging any tiles.
Once this was done, I applied Tile Doctor Remove and Go, scrubbing it into the tiles with a rotary machine. This product is designed to remove heavy soiling, paint splashes and old waxes and sealers. The soiled solution was then extracted using a wet vacuum and stubborn areas re-treated until I was satisfied the floor was clean.
The entire floor was then given a thorough rinse with water to remove any trace of cleaning products and extracted using a wet vax machine.
The floor was allowed to dry for several days before I was able to return to seal the tiles. It’s always important to leave significant time for the floor to dry because any moisture left over can impact the performance of the sealer.
The choice of sealer was Tile Doctor Seal and Go Extra, which provides robust protection against dirt and stains, with a light sheen finish. I chose this sealer not only because the customer wanted a light sheen finish, but also because this particular sealer is fully breathable. Dampness can sometimes be an issue with old Victorian and Quarry tiles which were installed before damp proof membranes became standard.
The transformation achieved within the space of a week was quite incredible and the colours in the tile have really come through.
Another satisfied customer!
David Vissian
Bedfordshire Tile Doctor
 VA Electric Ltd
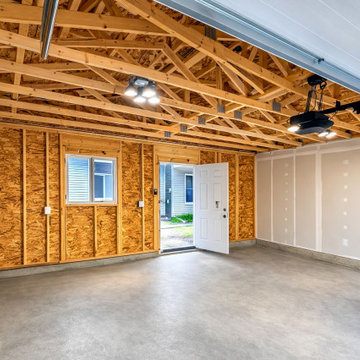
This project involved a complete electrical upgrade in a residential garage in Calgary, transforming the space into a clean, functional, and well-lit environment.
We installed new LED lighting to provide bright, even coverage throughout the garage, along with additional receptacles to support tools, equipment, and future use such as a home gym or workspace. The layout was designed to improve usability and eliminate dark areas, making the space more practical for everyday use.
The electrical system was upgraded to safely handle increased demand, with proper circuit distribution and code-compliant installation throughout.
Whether used for storage, projects, or additional living space, this garage is now fully equipped with reliable, modern electrical infrastructure.
Find the right local pro for your project
 Five Star Tree Care
There are a few reasons why it is critical that your trees have a regular schedule for pruning and maintenance. Pruning helps trees to maintain a tree’s health as well as form it to a pleasing aesthetic shape. Furthermore, pests and diseases are also controlled by regular pruning and care. When pruning is properly performed, your trees will be healthy and attractive all year long. Five Star Tree Services has put together a list of seven things you should keep in mind regarding your tree pruning.
Tree Inspection
Before any tree pruning job, the tree should be properly inspected. This will allow you or our tree care service team to determine which branches should be cut. It will also allow any diseases or pests to be identified and dealt with.
Remove Dead, Weak & Crossed Branches
Dead and weak branches are a hazard to your property and those who happen to walk or lounge under the tree. They also suck vital nutrients away from healthy branches and the tree trunk. Removing them will prevent accidents and allow your tree to thrive. Crossed branches can also cause problems later down the line. They affect the airflow to the crown and can also prevent sunlight from passing through the tree.
Pay Attention to Spacing
It’s important to pay attention to branch spacing when pruning your tree. Lateral branches should be spaced evenly, especially when pruning trees that have yet to mature.
Follow the Basic Pruning Rules
It’s important that the 1/4th and 1/3rd rules of pruning are followed. This means that you should never cut more than a third of the total height of the tree. This length is measured from the bottom up. You should also only cut 1/4th or less of a tree’s crown when you prune at any one time.
Get Your Tools Ready
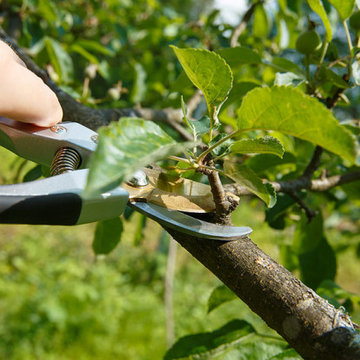
The tools you use to prune should be ready well before you make the first cut. You should start your project equipped with a pole pruner, pruning saws, hedge shears, loppers, and pruning shears. They also need to be properly sharpened before you start your pruning project. Each of these tools will allow you to reach different parts of the tree and prune them in a safe manner. If your tools are dull, they can damage the tree or even cause accidents when you attempt to cut.
Prune on Schedule
There are schedules for pruning that should be followed according to the type of tree you are caring for. Summer blooming trees should be pruned in early spring while evergreens and hedges should be taken care of in the early part of summer. Fruit-bearing trees should be pruned late in winter ahead of the frost. If there is damage to your tree, it doesn’t matter what time of year it may be, correct the problem as soon as possible.
Avoid Protecting Post-Pruning
Pruning leaves behind wounds, but they will heal. Though they may be unsightly for a while, the marks will heal and return back to its natural beauty. Don’t paint the pruning wounds to protect the tree, it actually has no effect on decay prevention. Painting may even trigger diseases or encourage pests to take up residence.
How We Can Help
Tree pruning is a complication job, but with our tips, you can do it right. It is always a good idea to leave the job to the professionals here at Five Star Tree Services instead. Our Toronto tree care experts have the tools, experience, and skills to get the job done right the first time. Get in touch with us at (416) 990-3355 today for more information.
 Five Star Tree Care
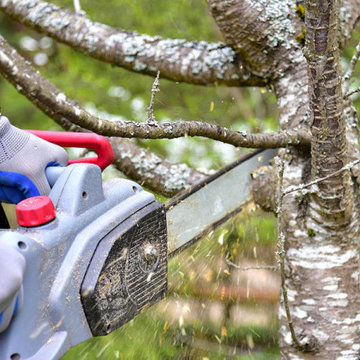
Using a chainsaw is a quick way to make work of fallen branches, damaged trees, and more. However, unless you have been plenty of experience, you may not be able to use this tool safely. For those who have never used a chainsaw before, it is a good idea to start with a lighter saw to prevent injury. It is also a good idea to enroll in a training course. If you plan to use a chainsaw in a professional company, it is even mandatory. Five Star Tree Services has created a quick guide that will help you decide if using a chainsaw is the best option for you.
Chainsaw Maintenance
Before you start using a chainsaw, you need to know if the blades are properly sharpened. Dull blades can cause jagged cuts or even cause injury. A sharp blade allows the saw to cut smoothly and produce straight cuts. The next step is to review is the cutting chain. It should be adjusted to the right tension, so the chain doesn’t move when the engine is idle. Make sure there are no loose screws and that the chain brake is in proper working order.
Operating a Chainsaw
Once you ensure that the chainsaw is safe to operate, it is time to get it started. Do you know the right amount of throttle and pressure to use? What about which cut would be best for your current project? Each type of cut will affect the wood differently, so it is important to keep these factors in mind when using a chainsaw. Situational awareness is also an important part of chainsaw use. No one should be within 10 feet while you are cutting. Also, avoid getting distracted by people seeking your attention since it only takes a second for a grave mistake to occur.
Protection During Chainsaw Operation
Proper protection is essential when operating machinery. When using a chainsaw, you should have on personal protection equipment such as; chainsaw pants, steel toe boots, gloves, ear protection, high visibility clothing, a helmet, and eye protection. All of these items should be in good working order and made from high-quality materials. Protecting your face, neck, chest, and abdomen is critical when working with any type of cutting tool.
The best way to keep yourself protected while wearing your personal protective equipment (PPE) is to maintain control over the chainsaw. Gloves may reduce control for many people, but a firm stance and proper balance can work wonders for maintaining control. PPE usage is very important, but it is equally important not to get lulled into a false sense of security by wearing it.
Practice Makes Perfect
It is best to practice using your chainsaw before taking on big projects. This will help you learn to move your body and your head in a safe way and a way that supports a clean cut. Most often, work with chainsaws is completed on ground that is uneven or covered in obstacles. Practicing will ensure that you can adapt to your environment without risking damage to your property or bodily harm.
How We Can Help
Working with chainsaws can make tree care simpler, but without the proper training and protection, it can be hazardous. Instead of taking the risk, hire the professionals here at Five Star Tree Services for all of your Richmond Hill tree removal and tree care needs. Give us a call at (416) 990-3355 to find out more about our rates and services.

 Free Lancing
Effective residential construction project management is crucial in today’s fast-moving building industry. It means overseeing every step of building a home, from planning to finishing, to ensure projects are completed time, within budget, and with high quality. Unlike commercial projects, residential projects require special attention to meet homeowners' unique needs and wishes, requiring a customized approach from the beginning to the end.
In 2025, the construction sector will use advanced technologies like AI and integrated project delivery (IPD) to streamline processes and improve stakeholder collaboration. However, project managers face significant challenges, including managing risks, maintaining quality control, and ensuring effective communication among team members.
A WIP Report (Work-in-Progress Report) is a key tool that helps track a project's budget, progress, and resource use. It provides clear insights, making managing costs easier, avoiding delays, and making informed decisions.
By adopting best practices and using modern construction management tools, project managers can overcome these challenges and deliver successful residential construction projects that meet client expectations and contribute to a sustainable future.
This article provides a brief overview of residential construction project management, highlights its importance, and touches on the challenges faced by project managers while incorporating the latest trends and technologies in the field.
Types of Residential Construction Management
Here are the different types of Residential Construction Management:
Single-Family Homes: These are standalone houses built for individual families. Managing these projects involves overseeing construction from planning to completion, ensuring that the home meets the owner's preferences and budget.
Multi-Family Housing: This includes apartments, condominiums, and townhouses. Projects of this type require managing multiple units, often with shared facilities, and ensuring compliance with local building codes.
Custom Home Building: This involves constructing homes tailored to specific client needs. Close collaboration with architects and designers is required to ensure the house reflects the owner's personality and preferences.
Home Renovation and Remodeling: These projects focus on updating or expanding existing homes. They often involve working with subcontractors for specialized tasks like electrical or plumbing work.
Components of Residential Construction Project Management
Managing a residential construction project requires carefully coordinating people, materials, and timelines. A well-structured approach ensures efficiency, cost control, and high-quality results.
Roles and Responsibilities
A project manager plays a vital role in residential construction. They oversee every step from planning to completion and ensure the project stays on schedule, within budget, and meets quality standards.
Project Manager’s Role in Home Construction
The project manager is responsible for organizing tasks, managing resources, and solving problems that arise during construction. They coordinate between different teams, track progress, and ensure safety regulations are followed.
Collaboration with Contractors, Architects, and Stakeholders
Successful residential construction requires teamwork. Project managers work closely with architects to bring designs to new heights, coordinate with contractors to manage labor and materials, and keep stakeholders (such as homeowners and investors) informed about project updates.
Client Communication and Expectations Management
Clear communication with clients is essential. The project manager keeps homeowners updated on timelines, changes, and challenges. Setting realistic expectations and providing regular updates, they help avoid misunderstandings and keep the project running smoothly.
Project Scope & Planning
Practical project planning sets the foundation for a successful residential construction project. It ensures clear goals, minimizes risks, and keeps the project on track.
Defining Project Objectives and Deliverables:
Clearly outlining what needs to be done and what the final result should look like is essential. This involves setting specific, measurable goals that align with the homeowner's vision and budget.
Managing Homeowner Expectations and Scope Creep:
Homeowners often have changing needs or ideas. Effective project managers must manage these expectations to prevent "scope creep," which can delay projects and increase costs. This involves open communication and setting clear boundaries.
Ensuring Compliance with Zoning Laws and Permits:
Before construction begins, it's crucial to ensure that all necessary permits are obtained and that the project complies with local zoning laws. This step avoids costly fines and delays, ensuring the project moves forward smoothly.
Budgeting & Cost Control
Proper budgeting is essential for keeping residential construction projects financially viable. Effective cost management prevents overspending and ensures profitability.
Accurate Cost Estimation for Residential Projects
A precise cost estimate considers labor, materials, permits, and unexpected expenses. Using historical data and Sage 300 CRE for financial management improves accuracy and helps set realistic budgets.
Budget Allocation and Tracking
Allocating funds efficiently ensures that each phase of the project receives the necessary resources. Tracking expenses through Construction & Financial Dashboards allows for real-time monitoring and early detection of budget deviations.
Preventing Budget Overruns
Uncontrolled costs can derail a project. Regular financial reviews, automated alerts for overspending, and contingency planning help keep expenses in check and prevent financial strain.
Scheduling & Timeline Management
Timely project completion is crucial in residential construction. Effective scheduling minimizes delays and ensures a smooth workflow.
Creating Detailed Project Schedules
A structured schedule outlines all tasks, deadlines, and dependencies. Breaking down the project into phases, planning, execution, and finishing, helps maintain order and clarity.
Preventing Delays & Meeting Deadlines
Delays can result from labor shortages, weather conditions, or supply chain issues. To avoid problems, it’s good to check for risks ahead of time, add extra time to schedules, and keep everyone on the same page.
Using Gantt Charts and Critical Path Methods
CPM for Construction helps identify critical activities that directly impact project completion, while Gantt charts provide a visual timeline of tasks. Both tools optimize scheduling and improve efficiency.
Residential Construction Project Management Phases
Managing a residential construction project effectively requires a structured approach through various phases. Each phase plays a critical role in ensuring the project's success, from initial planning to completion.
Pre-Construction Phase
The pre-construction phase sets the foundation for a smooth and efficient building process. Proper planning at this stage helps prevent costly changes and delays later.
Site Analysis & Approvals: A thorough site analysis assesses soil conditions, topography, and environmental factors. Feasibility studies evaluate project viability, including costs and regulatory compliance. Obtaining zoning approvals, permits, and other legal clearances is crucial before breaking ground.
Selecting Materials and Procurement Strategies: Choosing the right materials impacts durability, sustainability, and cost efficiency. A well-planned procurement strategy, including bulk purchasing and reliable supplier partnerships, ensures timely delivery and cost savings. Using Sage 300 CRE for procurement management helps streamline material sourcing and financial planning.
Construction Phase
The construction phase transforms plans into reality. Effective coordination and strict quality control ensure a successful build.
Resource Allocation and Workflow Coordination: Efficiently managing labor, equipment, and materials is key to maintaining progress. Using CPM for Construction, project managers can allocate resources strategically, prevent bottlenecks, and optimize workflows for timely completion.
Project Closeout & Handover
The final phase of residential construction project management is crucial for ensuring a smooth transition from construction to occupancy. Proper closeout procedures guarantee quality, client satisfaction, and long-term project success.
Final Inspections and Quality Assurance: Before finishing the project, a final inspection checks that everything meets safety rules and quality standards. Any problems need to be fixed quickly. Using Procore helps make inspections and tracking issues easier, ensuring a high-quality final product.
Client Walkthrough and Support: A final check helps homeowners see the finished work, ask questions, and make sure it meets their expectations. This is also a chance to explain important home features and maintenance tips. Good communication here builds trust and strengthens relationships.
Warranty Management and Feedback: Efficient warranty management ensures clients get quick help for any issues after construction. A clear process for tracking requests and keeping in touch with homeowners boosts satisfaction. Collecting feedback helps improve future projects. Using S-Curve Forecasting tracks performance trends and refines management strategies.
Software for Residential Construction Project Management
The integration of technology in residential construction project management has revolutionized the way projects are planned, executed, and monitored. Digital tools streamline operations, reduce costs, and improve communication, making them essential for modern construction firms.
Importance of Digital Tools
Investing in digital tools is crucial for construction firms as it transforms the industry by enhancing efficiency, accuracy, and collaboration across the entire project lifecycle. They also improve project management by streamlining processes, automating tasks, and facilitating real-time stakeholder communication.
Top Construction Management Software for Residential Projects
Several software solutions are available for managing residential construction projects:
Procore: Known for its comprehensive project management features, including document management and collaboration tools.
Sage 300 CRE: Offers robust accounting and financial management capabilities, ideal for large-scale construction projects.
Buildertrend: Specializes in residential construction, providing tools for project scheduling, budgeting, and client communication.
CoConstruct: Focuses on custom home building and remodeling, offering features for estimating, scheduling, and project management.
WIP Reports: Useful for tracking work-in-progress and managing project finances effectively.
Features Comparison and Best Use Cases:
Procore: Best for large projects requiring extensive collaboration and document management.
Sage 300 CRE: Ideal for firms needing robust financial management.
Buildertrend: Suitable for residential builders focusing on client communication and project scheduling.
CoConstruct: Perfect for custom home builders who need detailed estimating and scheduling tools.
WIP Reports: Useful for firms needing to track project finances closely.
How Software Improves Project Efficiency
Construction management software significantly enhances project efficiency in several ways:
Automating Accounting and Job Costing: Software like Sage 300 CRE automates financial tasks, reducing manual errors and improving budget tracking.
Streamlining Document Management and Communication: Tools like Procore centralize documents and facilitate real-time communication among team members, reducing misunderstandings and delays.
Mobile-Friendly Solutions for Real-Time Tracking: Mobile apps from platforms like Buildertrend allow for on-site access to project data, enabling real-time tracking and decision-making.
These digital tools and software solutions are essential for modern residential construction project management, offering benefits such as improved efficiency, enhanced collaboration, and better financial control.
Challenges in Residential Construction Project Management
Residential construction projects face a variety of challenges that can impact their success. Here are some of the key issues project managers encounter:
Managing Subcontractors and Labor Shortages
One of the biggest challenges in residential construction is managing subcontractors and dealing with labor shortages. Subcontractors often have their own schedules and priorities, which can lead to delays if not coordinated properly. Additionally, labor shortages can slow down projects and increase costs due to the need for overtime or hiring temporary workers.
Budget Overruns and Unexpected Costs
Budget overruns are common in residential construction due to factors like material price fluctuations, unexpected site conditions, or changes in project scope. Effective budget management involves regularly monitoring expenses and having contingency plans for unexpected costs.
Changing Construction and Eco Rules
Construction and Eco Rules are always changing, so project managers need to keep up with the latest regulations. This involves following guidelines for saving energy, protecting the environment, and ensuring safety. Ignoring these rules can lead to fines, delays, or even stopping the project.
Best Practices
To ensure your residential construction projects run smoothly and successfully, follow these essential best practices:
Setting Clear Project Goals and Milestones
Clearly defining what you want to achieve is the first step to success. Set specific, measurable, achievable, relevant, and time-bound (SMART) goals. This helps everyone involved understand what needs to be done and by when. For example, instead of saying "build a house," say "build a house with three bedrooms and two bathrooms within the next nine months."
Stakeholder Collaboration
Good communication is key to keeping everyone on the same page. Regular meetings with contractors, suppliers, and homeowners help prevent misunderstandings and ensure that everyone knows what's happening and what's next. This open dialogue also helps resolve issues quickly, preventing small problems from becoming big delays.
Using Data-Driven Insights for Decision-Making
Making decisions based on facts rather than guesses is crucial. Use data and analytics to understand project progress, identify potential issues early, and make informed decisions. For instance, if data shows that a particular material is consistently causing delays, you can plan ahead to avoid those delays in the future.
Proactive Risk Management Strategies
Things don't always go as planned, so being prepared is essential. Identify potential risks early and have a plan to manage them. This might include having backup suppliers, planning for weather conditions, or setting aside extra funds for unexpected expenses. Being proactive can prevent small issues from turning into major problems.
Conclusion
Effective residential construction project management requires careful planning, clear communication, and the right digital tools. From single-family homes to multi-family housing and custom projects, managing timelines, budgets, and quality is essential for success.
By following best practices, using project management software, and staying ahead of industry trends, project managers can ensure smooth execution and client satisfaction despite challenges like labor shortages, budget overruns, and regulatory compliance; modern technology and strategic planning help mitigate risks.
Construction firms can improve efficiency, enhance collaboration, and maintain financial control by adopting advanced tools like Procore, Sage 300 CRE, and Buildertrend. A well-managed project delivers a quality home and builds trust and long-term success in the industry.
FAQs
What is residential construction project management?
It involves overseeing all aspects of building residential properties, from initial planning and design to construction and completion, ensuring projects are completed on time, within budget, and to the desired quality standards.
How can I prevent budget overruns in my construction project?
Accurate cost estimation, continuous budget tracking, and having contingency plans for unexpected expenses are key strategies to prevent budget overruns.
What are the main stages of a residential construction project?
The primary stages include design, pre-construction, procurement, and construction.
How does construction management software improve project efficiency?
It streamlines processes like scheduling, budgeting, and communication, providing real-time data access and collaboration among stakeholders, which enhances overall project efficiency.
How can I ensure my project complies with local building codes and regulations?
Engage professionals familiar with local laws, obtain all necessary permits before starting, and conduct regular inspections to ensure adherence to building codes and regulations.
 Five Star Tree Care
Owning a property with beautiful trees is a blessing, especially when those trees are more than a decade old. Established trees are often a selling point due to their aesthetic appeal and natural environmental benefits. Not only will trees create a sense of serenity, but they will also offer privacy for your family in the form of green foliage. Trees can do a lot for your property, but it is really important to invest in tree care to ensure that they thrive. Hiring the professionals here at Five Star Tree Services will keep your trees healthy and well pruned, and here are a few reasons why.
Professional Tree Care Advantages
There are various species of trees all of which need specialized care. Some may thrive in full sun while others need partial or full shade. Moisture needs will vary from season to season in addition to species to species. Even the age of a tree can dictate the type of care it needs to thrive. Professional tree care services are able to properly care for your trees in a way that ensures they get the best care possible. Tree care specialists are trained in the care of hundreds if not thousands of tree species which gives them the knowledge to offer customized services for every yard.
Professional Tree Care Equipment
A professional tree service will also have all of the right tools needed to get the job done. Equipping your shed for proper tree care can get expensive, and chances are you won’t have the right skills required to operate all of the equipment needed for professional tree care. Hiring the professionals will ensure that the right tools and the right knowledge is used to care for the trees on your property.
Consistent Maintenance
As we already mentioned, different types of trees need different care. They also need their care to be administered on a regular basis. Homeowners no matter how well-meaning can become lax on regular maintenance, but with a professional service, you never have to worry. Tree care services can come out on a set schedule to prune, water, feed, and care for your trees. This will ensure they are always healthy and will better enable you to spot problems that develop before they are too serious to treat. Your trees will also get trimmed properly and on schedule which will add to the overall aesthetic appeal of your yard.
Neat Yard
Keeping your yard neat and tidy is very important. It will help reduce the chance of pests hanging out on your property and increase the curb appeal of your home. Working with a professional company gives you years worth of experience that will come into play when landscaping and shaping the look of your yard.
Safe Tree Care
Trimming a tree and other tree care can be dangerous if you don’t know what you are doing. Not only can you get hurt in a fall, but improper tool operation can also result in injuries. A professional tree care company will have the training and the safety equipment needed to minimize the risks while caring for the trees on your property. If you are in need of Tree Care in Toronto, a specialist here at Five Star Tree Services can help. Give us a call at (416) 990-3355 to find out more today.

Sponsored
Delaware, OH

Buckeye Basements, Inc.
Central Ohio's Basement Finishing ExpertsBest Of Houzz '13-'21

 Kiwi Audio Visual
Please RSVP early for our last LUNCH & LEARN in 2016. This marks Kiwi’s 10th CEU Class we have taught over
the last four years. Counting for 1 CEU Credit, there are 15 spots available. (now only 8 spots left…also welcome to bring a
colleague to event. Please include in your RSVP. )
Reserve your spot now. Here are the details-
What: CONTROLLING AND ISOLATING SOUND WITH
DESIGN AND CONSTRUCTION
Lunch will be catered. This is also a networking event for architects and interior designers.
KIWI AUDIO VISUAL’S 10TH Lunch & Learn!
When: Thursday, NOVEMBER 17 from 11 AM until 1 PM
10:45 a.m. - check-in
11-12-COURSE- CEU Course
12-1 Lunch & Networking
1:00 p.m. end
Where: Kiwi Audio Visual
1950 Kellogg Avenue
Carlsbad, CA 92008 Map of Location Cost: It's free.
Who?: Interior Designers and Residential Architects & Custom home builders/supers, too!
15 SPOTS ONLY- PLEASE RSVP as soon as you can. ~Click link- or email- MShull@kiwiav.com
CEU CLASS DESCRIPTION:
LEARNING OBJECTIVES of “Controlling and Isolating Sound with Design & Construction”
• Define the importance of controlling sound.
• Define how much sound isolation is required in various circumstances.
• List the three tools: mass, absorption, and mechanical isolation and the role of each tool.
• Outline design considerations related to the construction of specialty rooms.
Controlling and Isolating Sound is tricky—without the correct tools, the right people, and the proper design, the results are often
disastrous. Participants in this course will review the needs for creating sound for isolated specialty spaces and discuss how much
sound isolation is needed in varying circumstances. In addition, attendees will dive into the three tools of sound isolation—mass, absorption and
mechanical isolation and the role of each in the design/build process, while discussing the process of designing and constructing the specialty space.
This course will also outline the benefits of working as a team with other trades to provide the client the expertise bringing about a well-designed and functional space.
ASSOCIATION- AIA, AIBD, IDCEC, NARI
Credit: 1.0 LU/HSW, l.0 CEU, 0.1 CEU, 1.0 CEU
COURSE NUMBER: CO1O50 –AIA & 5.1-IDEC
Designations: Health, Safety, and Welfare

 Evergreen Construction
The damaged wall is a sore in the eye and also it can cause future problems. To avoid it, it is advisable to seek repair as soon as you can. We believe that with proper tools, training, and materials we can get the job done right.

 Flourish Interiors by Vanessa C Smith
Experience the true essence of luxury design, where stunning aesthetics meet practicality, especially in the heart of the home—the kitchen. It's all about discovering ingenious life hacks that bring more joy to our surroundings, saving time and hassle while enhancing our overall experience. One delightful touch we incorporate whenever possible is the addition of a pot filler. Beyond its timeless visual appeal, it proves to be an invaluable tool.
⠀⠀⠀⠀⠀⠀⠀⠀⠀
By providing a direct water hook-up, this little luxury eliminates the mess and streamlines the process of filling up your cookware. No more lugging heavy pots to the sink! With a pot filler, you can effortlessly add water as needed, even when your pots are already hot. To enjoy this convenience, a bit of extra planning during construction is required. Work closely with your designer, builder, or contractors to ensure proper plumbing in advance.

 Les Arbres Tree Service & Fine Gardening
Apple Pruning Post-Pruning just before bloom. Branches are properly guided going into the spring growing season. Pruning is done in dormancy (winter months).


 Windy City Painters
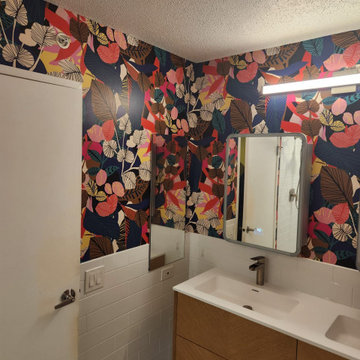
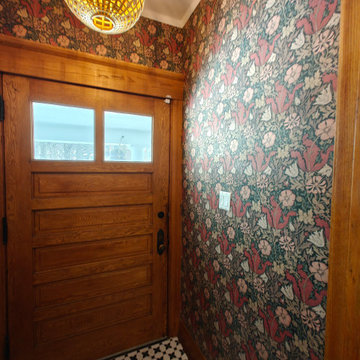
Expert wallpaper installer Lakeview services transform Chicago homes with precision and style. This stunning project showcases our commitment to quality craftsmanship in one of Chicago's most desirable neighborhoods.
Project Overview and Architecture
This beautiful Lakeview greystone required careful wallpaper installation that would complement the home's original architectural details. The vintage building's unique character demanded specialized techniques to ensure perfect results while preserving the historic charm that makes these homes so special.
Materials and Products
We utilized premium wallpaper adhesive, professional smoothing tools, and high-quality materials specifically chosen for Chicago's climate conditions. Our team selected products that work exceptionally well with the plaster walls common in vintage Lakeview homes.
Installation Process
First, we thoroughly prepared surfaces by repairing imperfections and priming walls. Next, we precisely measured and cut each strip, ensuring perfect pattern alignment. Then, we applied adhesive evenly and positioned wallpaper with expert precision. Finally, we eliminated bubbles, trimmed edges, and completed finishing touches.
Chicago Home Challenges
Lakeview's vintage homes present unique challenges including uneven plaster walls, settling issues, and temperature fluctuations. Our wallpaper installer Lakeview expertise addresses these concerns with specialized preparation techniques and climate-appropriate materials that ensure lasting results.
Results and Quality
The finished installation showcases flawless pattern matching, smooth surfaces, and crisp edges that enhance the room's architectural features. This wallpaper installer Lakeview project demonstrates our commitment to excellence and attention to detail.
Professional Tips
Homeowners should always hire experienced professionals for wallpaper installation. Proper surface preparation is crucial for longevity. Additionally, choosing quality materials appropriate for Chicago's climate ensures your investment lasts for years.
See more work and request free estimate at windypainters.com.
Q: Why choose professional wallpaper installer Lakeview services over DIY? / A: Professional installation prevents costly mistakes, ensures proper adhesion, and guarantees beautiful results that enhance your home's value and appearance.
Q: How do you handle vintage Lakeview home challenges? / A: Our wallpaper installer Lakeview team addresses plaster walls, settling issues, and architectural details with specialized techniques and appropriate materials.
Q: What preparation is required before wallpaper installation? / A: We repair wall imperfections, apply primer, ensure smooth surfaces, and address any moisture issues for optimal wallpaper installer Lakeview results.
Q: How long does professional wallpaper installation take? / A: Most rooms require 1-2 days depending on complexity, though our wallpaper installer Lakeview team works efficiently while maintaining quality standards.
Q: Can you work with designer or specialty wallpapers? / A: Absolutely, our wallpaper installer Lakeview experts handle luxury papers, grasscloth, murals, and specialty materials with appropriate techniques and care.
Q: Do you remove existing wallpaper before installation? / A: Yes, we provide complete removal services using safe methods that protect your walls and prepare surfaces for new wallpaper installer Lakeview projects.
Q: How do you ensure pattern alignment and matching? / A: Our wallpaper installer Lakeview professionals use precise measuring, professional tools, and years of experience to achieve perfect pattern continuity.
Q: What types of walls can accommodate wallpaper? / A: We install wallpaper on various surfaces including drywall, plaster, and painted walls after proper preparation for wallpaper installer Lakeview projects.
Q: How do you handle corners and trim work? / A: Our wallpaper installer Lakeview team uses specialized techniques for inside corners, outside corners, and detailed trim work ensuring professional results.
Q: What warranty do you provide on installation? / A: Windy City Painters guarantees our wallpaper installer Lakeview work with comprehensive warranty coverage protecting your investment and ensuring satisfaction.
 Windy City Painters
PREPARATION AND PLANNING
First, we assessed existing wall conditions and repaired minor imperfections. Next, surfaces were thoroughly cleaned and primed for maximum adhesion. Then, precise measurements ensured perfect pattern alignment throughout the space.
INSTALLATION PROCESS
Subsequently, we carefully cut each strip accounting for pattern matching. Moreover, professional installation techniques eliminated bubbles and ensured seamless seams. Finally, detailed finishing work created flawless edges and corners.
CHICAGO-SPECIFIC CHALLENGES
Furthermore, older Chicago buildings present unique challenges including settling walls, vintage plaster surfaces, and lead paint considerations. Therefore, proper preparation becomes crucial for long-lasting results that withstand seasonal temperature fluctuations.
RESULTS AND QUALITY
Consequently, the finished installation showcases perfect pattern alignment and professional craftsmanship. The wallpaper enhances the entry hall's architectural character while providing durability for high-traffic use.
PROFESSION AL TIPS
Homeowners should always hire experienced installers for complex patterns. Additionally, investing in quality primer saves money long-term by ensuring proper adhesion and easier future removal.
See more work and request free estimate at windypainters.com.
Q: How long does wallpaper installation take? / A: Most entry halls require one to two days depending on pattern complexity, surface preparation needs, and room size for professional wallpaper installation.
Q: Can you install over existing wallpaper? / A: We recommend removing old wallpaper first for best adhesion, though some situations allow installation over existing wallpaper after proper preparation and assessment.
Q: What wallpaper works best in Chicago? / A: Vinyl and fabric-backed wallpapers handle Chicago's climate changes best, providing durability against humidity fluctuations and temperature variations throughout seasons.
Q: Do you guarantee installation work? / A: Yes, Windy City Painters provides comprehensive warranties covering wallpaper installation craftsmanship and adhesion for specified warranty periods on all projects.
Q: How do you handle pattern matching? / A: We carefully measure walls, calculate pattern repeats, and plan installation sequence to ensure perfect wallpaper installation pattern alignment throughout the space.
Q: Can wallpaper work in vintage buildings? / A: Absolutely, we specialize in wallpaper installation for older Chicago homes, understanding unique challenges like settling walls and vintage plaster surfaces.
Q: What preparation is required? / A: Proper wallpaper installation requires surface assessment, repairs, thorough cleaning, appropriate priming, and climate control for optimal adhesion and lasting results.
Q: Do you remove old wallpaper? / A: Yes, we provide professional wallpaper removal services using safe techniques that protect underlying wall surfaces during the wallpaper installation preparation process.
Q: How much does installation cost? / A: Wallpaper installation costs vary based on room size, pattern complexity, surface preparation needs, and wallpaper selection - contact for detailed estimates.
Q: What tools do professionals use? / A: Professional wallpaper installation requires specialized smoothing tools, precision cutting equipment, quality brushes, and professional-grade adhesives for optimal results and longevity.
 Les Arbres Tree Service & Fine Gardening
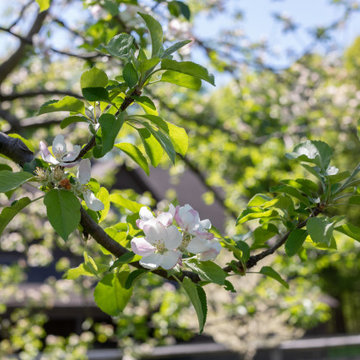
Apple Pruning Post-Pruning in bloom. Branches are properly guided going into the spring growing season. Pruning is done in dormancy (winter months).
This is an example of a large farmhouse full sun backyard landscaping in New York for spring.
This is an example of a large farmhouse full sun backyard landscaping in New York for spring.

 Industrial Projects
Creating a comfortable outdoor living space is a priority for many homeowners and DIY enthusiasts. With rising summer temperatures, installing a shade tarp in your backyard offers an affordable and effective solution for sun protection. We’ve developed this detailed, step-by-step guide to help you confidently install a shade tarp that not only shields you from the sun but also adds aesthetic appeal to your outdoor area.
Benefits of Installing a Backyard Shade Tarp
Before diving into the installation process, let’s explore the key benefits of having a backyard shade tarp:
Provides UV Protection: Keeps your family and guests safe from harmful sun exposure.
Reduces Outdoor Temperatures: Creates a cooler, more enjoyable outdoor space.
Protects Outdoor Furniture: Extends the life of patio furniture by reducing sun damage.
Enhances Outdoor Aesthetics: Adds a modern, stylish look to your yard.
Budget-Friendly: More affordable compared to permanent structures like pergolas.
Materials and Tools You’ll Need
To begin your DIY backyard shade project, gather the following materials and tools:
Materials:
Shade tarp (UV-resistant and breathable)
Sturdy posts or existing structures (trees, fences, walls)
Mounting hardware (eye bolts, D-rings, turnbuckles, snap hooks)
Nylon or polyester rope, or stainless-steel wire
Concrete (if installing new posts)
Tools:
Power drill
Measuring tape
Level
Ladder
Wrench or adjustable spanner
Post hole digger (if installing new posts)
Step 1: Plan Your Shade Tarp Layout
The first step in installing your backyard shade tarp is careful planning. Take time to assess your outdoor area and answer these key questions:
Where is the sun’s path throughout the day?
What size and shape of tarp best suits your space?
Will you anchor the tarp to existing structures or install new posts?
What height do you want the tarp to sit at for maximum shade and airflow?
Pro Tip: Use string or garden hoses to visualize the tarp layout on the ground before making permanent decisions.
Step 2: Measure and Mark Anchor Points
Once you’ve determined the tarp’s location and orientation:
Measure the tarp dimensions.
Mark the exact points where each corner of the tarp will be anchored.
Ensure that the anchor points are at least 5–10% longer than the tarp size to allow for tensioning and slight adjustments.
Consider slope angles for water runoff. Aim for at least a 20-degree angle to prevent water pooling on the tarp.
Step 3: Install Support Posts (If Necessary)
If your backyard lacks existing anchor points like trees or fences, you’ll need to install sturdy support posts:
Dig post holes at least 24 inches deep and 8-12 inches wide for stability.
Set posts in concrete, making sure they remain plumb and level.
Allow the concrete to cure for at least 24–48 hours before applying tension from the tarp.
We recommend using pressure-treated wood, galvanized steel poles, or aluminum posts for longevity and strength.
Step 4: Install Mounting Hardware
With your anchor points ready, it’s time to install the necessary hardware:
Attach eye bolts or pad eyes securely into walls, posts, or other fixed structures.
For added flexibility and adjustability, install turnbuckles or tensioners to fine-tune the tarp’s tightness.
Connect snap hooks, D-rings, or carabiners to make assembly and disassembly easier.
Make sure all hardware is rated for outdoor use to prevent rust and corrosion.
Step 5: Attach and Tension the Shade Tarp
Now it’s time for the most satisfying part—mounting the shade tarp:
Begin by attaching one corner of the tarp to an anchor point.
Gradually attach the remaining corners, moving diagonally for even tension.
Adjust each connection point using your turnbuckles, ropes, or cables.
Pull the tarp tight enough to avoid sagging, but not so tight that it risks tearing.
Check that the tarp maintains the desired slope for rainwater runoff and adjust tension as needed.
Step 6: Final Adjustments and Safety Check
Before enjoying your new shaded area:
Inspect all anchor points and hardware for stability.
Test the tarp’s tension and make adjustments for even distribution.
Ensure that no sharp edges or loose connections remain that could damage the tarp or pose a safety hazard.
Confirm that the tarp is secure in windy conditions by giving it a gentle tug.
If you live in an area with frequent high winds, consider removing the tarp during storms to prevent damage.
Step 7: Enjoy Your Shaded Backyard Oasis
Once installed, your backyard shade tarp provides a comfortable and protective space for outdoor gatherings, relaxation, or family activities. You can decorate underneath with outdoor furniture, string lights, or potted plants to create a personalized outdoor retreat.
Maintenance Tips for Long-Lasting Shade Tarp Performance
To extend the life of your shade tarp, follow these maintenance guidelines:
Regularly check for wear and tear, especially around anchor points and seams.
Clean the tarp periodically with mild soap and water to prevent mildew buildup.
Store the tarp indoors during harsh weather seasons if it's not designed for year-round use.
Tighten hardware as needed to maintain proper tension and avoid sagging.
By following these simple care steps, your shade tarp will continue to deliver years of sun protection and outdoor comfort.
Conclusion: Upgrade Your Outdoor Space with a DIY Shade Tarp
Installing a shade tarp in your backyard is a cost-effective and rewarding DIY project. With careful planning, quality materials, and proper installation techniques, you’ll enjoy cool, shaded outdoor living all season long. This step-by-step guide ensures your project goes smoothly from start to finish.
 Les Arbres Tree Service & Fine Gardening
Apple Pruning Post-Pruning before bloom. Branches are properly guided going into the spring growing season. Pruning is done in dormancy (winter months).

 Renovisions
These Hanover, MA clients came to Renovisions as they wanted a local design-build company to rework and expand their small and outdated 1980’s colonial kitchen.
We collaborated and created an expanded 12’x15’ addition space to accommodate a newly designed kitchen which is now 21’x15’. Before we began with the construction process, proper structural engineering presented a challenge as the property was built on ledge. As expected, we determined that several concrete supports were necessary and needed to be built to support the expanded structure.
Our plan included both creative aesthetic and functional layout modifications to transform this ordinary kitchen into a spacious, well-lit, highly functional, stylish and welcoming space to cook, gather and entertain. The bump-out allowed for more functional cabinetry and a dining table which before was placed in a corner of the previous cramped kitchen. Now, there is a wide open space from the adjacent living room and a clear path to a 5’ French door opening to the pool deck. The homeowners also elected for us to extend a new roof over their existing deck creating a nice shaded space to entertain guests.
The island, which serves as the central gathering spot. is eye catching with contrasting dark cocoa colored cabinets and stunning natural looking Cambria quartz countertops. Large, easily accessible deep drawers provide much needed storage for pots, pans and lids as well as expansive countertop space for everyday prep and family get-togethers.
Overall, the clients were thrilled with their Renovision and cannot wait to throw a party to show off their stunning kitchen.
“There is not a single choice we aren’t happy with; it is so us! I love all of the storage and I have a feeling we are going to do a lot of entertaining this summer.”
“Dear Cathy and Ed, We are abundantly grateful for the entire Renovisions Team that have provided us with a beautiful kitchen and porch to enjoy. We will continue to make family memories for many years to come with this new addition. From the first time we met with you at the showroom, we were confident that high quality workmanship would go into our new construction. Mike, Brad, and Tom were very trustworthy and worked very hard every day they were on the job site. They were very flexible and always put the homeowners safety first. They even offered a bit of comic relief! Every night the site was cleaned meticulously, never leaving tools or sharp edges of any sort in the open space. We were also very pleased with the help offered when designing and choosing cabinets, tile and other finishes. Liz was always very helpful and patient to answer questions when we came by the showroom. We are extremely pleased with all the choices and on a daily basis we enjoy the warmth and amazing space it provides.
We recently hosted a retirement party for 70 people and it never felt crowed! We relax under the covered porch in the morning for coffee, the afternoon for lunch and to watch the grandkids in the pool. And of course in the evening while we read or catch up on emails. It is an amazing space! Thank you all again, for your hard work and passion for your craftsmanship. We will be in touch soon to set up a date for you all to drop by to see the finishing touches and to enjoy refreshments.”
- Paul & Beth H. (Hanover)
 Windy City Painters
Painter Near Me Chicago - Professional Painting Services by Windy City Painters
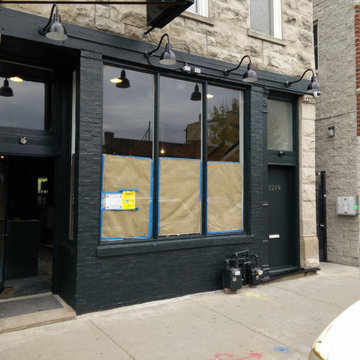
Finding a skilled painter near me in Chicago is easier when you know what to look for, and Windy City Painters delivers the craftsmanship Chicago homeowners trust for greystones, vintage two-flats, classic bungalows, and modern condos throughout the city.
Project Overview
This project showcases Windy City Painters completing professional interior and exterior painting services for a Chicago-area client. The building's vintage character called for careful color selection and precise application to honor original architectural details while refreshing every surface.
Materials and Products Used
Windy City Painters selects premium paints from trusted manufacturers including Sherwin-Williams and Benjamin Moore, chosen specifically for Chicago's climate demands. Primers, fillers, and caulks are all professional-grade for lasting adhesion and durability.
Our Step-by-Step Process
Step 1 - Prep and Repairs: All surfaces are cleaned, sanded, and patched. Cracks in plaster or drywall are filled and feathered smooth before any painting begins.
Step 2 - Priming: A quality primer is applied to ensure proper adhesion, uniform sheen, and long-term durability across all surfaces.
Step 3 - Paint Application: Multiple coats are applied using the right tools for each surface - brushes, rollers, and sprayers where appropriate.
Step 4 - Final Inspection: Windy City Painters conducts a detailed walkthrough with the homeowner to confirm every detail meets our high standard.
Chicago-Specific Challenges
Older Chicago homes present unique challenges including lead paint layers, aging horsehair plaster, moisture from harsh winters, and intricate vintage millwork. Windy City Painters is trained to handle all of these safely and professionally.
Results
Clients consistently report dramatic improvements in curb appeal, interior atmosphere, and overall home value after working with Windy City Painters.
Pro Tips Before You Start
Always test for lead paint in homes built before 1978. Budget for surface prep - it determines final quality. Choose paints rated for Chicago's freeze-thaw cycles for exterior projects.
See more work and request a free estimate at windypainters.com.
Frequently Asked Questions
Q: How do I find a reliable painter near me in Chicago? / A: Look for licensed, insured contractors with strong local reviews. Windy City Painters is a trusted painter near me in Chicago with a proven track record serving greystones, bungalows, and vintage buildings throughout the city.
Q: What surfaces can a painter near me in Chicago handle? / A: Windy City Painters handles drywall, plaster, wood trim, cabinets, brick, and metal surfaces, making us a comprehensive painter near me in Chicago for any project large or small.
Q: How important is surface preparation? / A: Proper preparation is the foundation of any quality paint job. As your painter near me in Chicago, Windy City Painters dedicates significant time to prep work ensuring flawless, long-lasting results every time.
Q: Do you handle lead paint safely in older Chicago homes? / A: Yes, Windy City Painters follows all safety protocols for lead paint in older homes, making us the responsible painter near me in Chicago for vintage and pre-1978 buildings.
Q: What paint brands does Windy City Painters recommend? / A: As a professional painter near me in Chicago, Windy City Painters recommends Sherwin-Williams and Benjamin Moore for their durability, color accuracy, and performance in Chicago's demanding climate.
Q: Can you paint exterior surfaces in Chicago winters? / A: Exterior painting requires temperatures above 50 degrees Fahrenheit. Windy City Painters, your painter near me in Chicago, schedules exterior projects during appropriate seasonal windows for best results.
Q: How many coats of paint are typically needed? / A: Most projects require two finish coats over primer. Your painter near me in Chicago at Windy City Painters assesses each surface individually to determine the right number of coats.
Q: Do you offer color consultation services? / A: Yes, Windy City Painters provides color guidance as part of our painter near me in Chicago service, helping you select shades that complement your home's architecture and style.
Q: Can Windy City Painters match existing paint colors? / A: Absolutely, as your skilled painter near me in Chicago, Windy City Painters uses professional color-matching technology to seamlessly blend new paint with existing finishes throughout your home.
Q: How do I get a free estimate from a painter near me in Chicago? / A: Simply visit windypainters.com or call us directly. Windy City Painters makes it easy to connect with a professional painter near me in Chicago for a no-obligation estimate.
 Corts Family Construction, LLC
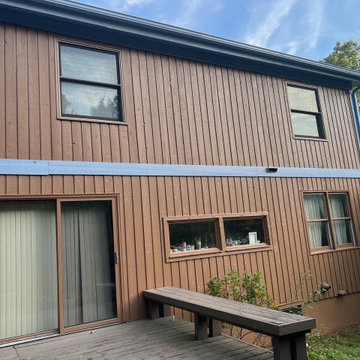
This project involved a full exterior repaint of a two-story home, including siding, trim, fascia, and accent details. The exterior was properly prepped and coated to refresh the home’s appearance while providing long-lasting protection from the elements. The updated color scheme enhances curb appeal and gives the home a clean, cohesive finish.
9