
Search results for "Recommend risking" in Home Design Ideas
 Eurodale Developments Inc
Andrew Snow Photography
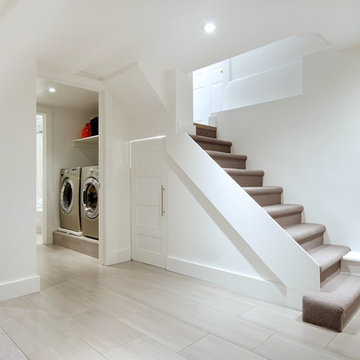
Example of a small trendy look-out porcelain tile basement design in Toronto with white walls
Example of a small trendy look-out porcelain tile basement design in Toronto with white walls
 Mayflower Construction Group
How Planning Leads to Successful Construction
Construction projects, whether small residential jobs or large commercial builds, require more than just skilled labor and high-quality materials. The foundation of a successful project lies in effective planning. Proper planning ensures efficiency, minimizes risks, and keeps the project within budget and on schedule. Here’s how thorough planning leads to successful construction:
1. Clear Project Scope and Objectives
Defining the project scope early on helps prevent scope creep and miscommunication. Establishing clear goals, deliverables, and timelines ensures that everyone involved understands the expectations. This prevents delays and unnecessary changes during construction.
2. Accurate Budgeting and Cost Control
A well-planned project includes a detailed cost estimation. This accounts for labor, materials, permits, and unexpected contingencies. Without proper budgeting, costs can spiral out of control, leading to financial strain and potential project failure.
3. Efficient Resource Management
Proper planning helps allocate resources effectively, including manpower, equipment, and materials. Scheduling workers and ordering materials at the right time avoids delays caused by shortages or logistical issues.
4. Risk Identification and Mitigation
Every construction project comes with risks—weather delays, supply chain issues, safety hazards, or regulatory compliance concerns. Planning ahead allows for risk assessment and the implementation of strategies to mitigate potential problems before they occur.
5. Compliance with Regulations and Permits
Failing to secure the necessary permits or adhere to building codes can halt a project indefinitely. Planning ensures that all legal requirements are met in advance, avoiding costly fines and legal complications.
6. Seamless Communication and Coordination
A structured plan includes clear communication protocols between contractors, architects, engineers, and clients. When everyone is on the same page, mistakes are reduced, and the workflow remains smooth.
7. Improved Project Scheduling
A construction schedule outlines each phase of the project, from site preparation to finishing touches. A well-planned schedule helps keep tasks on track, prevents unnecessary delays, and ensures timely project completion.
8. Higher Quality Workmanship
Planning allows for a structured approach to quality control. By setting benchmarks, conducting inspections, and using the right materials, projects meet industry standards and client expectations.
9. Better Client Satisfaction
When a project is completed on time, within budget, and meets quality expectations, client satisfaction increases. A satisfied client is more likely to recommend your services and return for future projects.
Conclusion
In construction, planning isn’t just a step—it’s the backbone of success. From budgeting and resource management to compliance and scheduling, thorough planning prevents costly errors, improves efficiency, and ensures a high-quality outcome. Whether you're working on a small driveway installation or a large-scale commercial project, investing time in planning will always pay off in the long run.
Do you need expert concrete construction services that prioritize planning and quality? Contact us today!
 LEDVANS
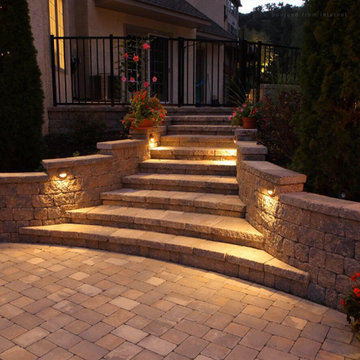
Stair lights can enhance safety, making it easier to identify stairs at night and reduce the risk of falling; at the same time, they add a decorative effect, beautifying the space; LED stair lights are energy-saving, environmentally friendly, with a long lifespan, and are simple and practical. Overall, the installation of stair lights not only improves comfort and safety, but also has the advantages of beautifying space, energy efficiency, and environmental protection, making it an ideal lighting choice.
Find the right local pro for your project

 Industrial Projects
Creating a comfortable outdoor living space is a priority for many homeowners and DIY enthusiasts. With rising summer temperatures, installing a shade tarp in your backyard offers an affordable and effective solution for sun protection. We’ve developed this detailed, step-by-step guide to help you confidently install a shade tarp that not only shields you from the sun but also adds aesthetic appeal to your outdoor area.
Benefits of Installing a Backyard Shade Tarp
Before diving into the installation process, let’s explore the key benefits of having a backyard shade tarp:
Provides UV Protection: Keeps your family and guests safe from harmful sun exposure.
Reduces Outdoor Temperatures: Creates a cooler, more enjoyable outdoor space.
Protects Outdoor Furniture: Extends the life of patio furniture by reducing sun damage.
Enhances Outdoor Aesthetics: Adds a modern, stylish look to your yard.
Budget-Friendly: More affordable compared to permanent structures like pergolas.
Materials and Tools You’ll Need
To begin your DIY backyard shade project, gather the following materials and tools:
Materials:
Shade tarp (UV-resistant and breathable)
Sturdy posts or existing structures (trees, fences, walls)
Mounting hardware (eye bolts, D-rings, turnbuckles, snap hooks)
Nylon or polyester rope, or stainless-steel wire
Concrete (if installing new posts)
Tools:
Power drill
Measuring tape
Level
Ladder
Wrench or adjustable spanner
Post hole digger (if installing new posts)
Step 1: Plan Your Shade Tarp Layout
The first step in installing your backyard shade tarp is careful planning. Take time to assess your outdoor area and answer these key questions:
Where is the sun’s path throughout the day?
What size and shape of tarp best suits your space?
Will you anchor the tarp to existing structures or install new posts?
What height do you want the tarp to sit at for maximum shade and airflow?
Pro Tip: Use string or garden hoses to visualize the tarp layout on the ground before making permanent decisions.
Step 2: Measure and Mark Anchor Points
Once you’ve determined the tarp’s location and orientation:
Measure the tarp dimensions.
Mark the exact points where each corner of the tarp will be anchored.
Ensure that the anchor points are at least 5–10% longer than the tarp size to allow for tensioning and slight adjustments.
Consider slope angles for water runoff. Aim for at least a 20-degree angle to prevent water pooling on the tarp.
Step 3: Install Support Posts (If Necessary)
If your backyard lacks existing anchor points like trees or fences, you’ll need to install sturdy support posts:
Dig post holes at least 24 inches deep and 8-12 inches wide for stability.
Set posts in concrete, making sure they remain plumb and level.
Allow the concrete to cure for at least 24–48 hours before applying tension from the tarp.
We recommend using pressure-treated wood, galvanized steel poles, or aluminum posts for longevity and strength.
Step 4: Install Mounting Hardware
With your anchor points ready, it’s time to install the necessary hardware:
Attach eye bolts or pad eyes securely into walls, posts, or other fixed structures.
For added flexibility and adjustability, install turnbuckles or tensioners to fine-tune the tarp’s tightness.
Connect snap hooks, D-rings, or carabiners to make assembly and disassembly easier.
Make sure all hardware is rated for outdoor use to prevent rust and corrosion.
Step 5: Attach and Tension the Shade Tarp
Now it’s time for the most satisfying part—mounting the shade tarp:
Begin by attaching one corner of the tarp to an anchor point.
Gradually attach the remaining corners, moving diagonally for even tension.
Adjust each connection point using your turnbuckles, ropes, or cables.
Pull the tarp tight enough to avoid sagging, but not so tight that it risks tearing.
Check that the tarp maintains the desired slope for rainwater runoff and adjust tension as needed.
Step 6: Final Adjustments and Safety Check
Before enjoying your new shaded area:
Inspect all anchor points and hardware for stability.
Test the tarp’s tension and make adjustments for even distribution.
Ensure that no sharp edges or loose connections remain that could damage the tarp or pose a safety hazard.
Confirm that the tarp is secure in windy conditions by giving it a gentle tug.
If you live in an area with frequent high winds, consider removing the tarp during storms to prevent damage.
Step 7: Enjoy Your Shaded Backyard Oasis
Once installed, your backyard shade tarp provides a comfortable and protective space for outdoor gatherings, relaxation, or family activities. You can decorate underneath with outdoor furniture, string lights, or potted plants to create a personalized outdoor retreat.
Maintenance Tips for Long-Lasting Shade Tarp Performance
To extend the life of your shade tarp, follow these maintenance guidelines:
Regularly check for wear and tear, especially around anchor points and seams.
Clean the tarp periodically with mild soap and water to prevent mildew buildup.
Store the tarp indoors during harsh weather seasons if it's not designed for year-round use.
Tighten hardware as needed to maintain proper tension and avoid sagging.
By following these simple care steps, your shade tarp will continue to deliver years of sun protection and outdoor comfort.
Conclusion: Upgrade Your Outdoor Space with a DIY Shade Tarp
Installing a shade tarp in your backyard is a cost-effective and rewarding DIY project. With careful planning, quality materials, and proper installation techniques, you’ll enjoy cool, shaded outdoor living all season long. This step-by-step guide ensures your project goes smoothly from start to finish.
6