
Search results for "Reduce after school" in Home Design Ideas

 Mottram Architecture
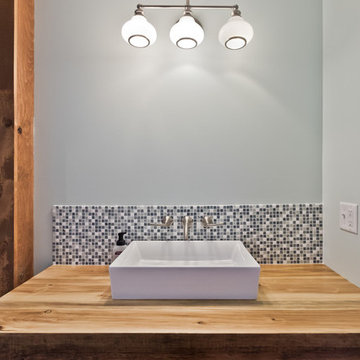
Timber frame homes offer unique challenges during a remodel. What often makes them beautiful and attractive to most homeowners, also makes them challenging for space requirements.
Context: The lovely couple that owned this home were struggling with some interesting floor plan challenges that just didn't work for their family. The loved the beautiful timbers and woodwork of their home, but the dramatically sloping ceilings on the second floor, particularly in the bathroom, just didn't work for this 1 1/2 bath home. Needing to use the skylight to approach the toilet was a less then ideal scenario. Although the bathroom footprint was more then adequate, the sloped ceiling only made half of the space useable. Check out the Before/After post on our blog to see the photos of the house pre-renovation. As much as they loved all the wood features in their home, another challenge they had was light. The wood ceiling made everything inside the house darker, even with a fantastic array of south facing windows, there were spaces in the home that felt dark and small. When they contacted us they wanted to know how could they make their brighter and more inviting, were there solutions to the 2nd floor sloped ceiling issues, and if they were going to do all of this work, how could they make their home more comfortable and efficient. A nagging water leak in the upstairs bathroom spurred them into action and here is how we solved their dilemma.
Conclusion: First, we added a little dormer to the rear of the house so we could get full headroom in nearly all of the upstairs bathroom! Then we decided to extend that dormer one more timber bay over to create a walk in closet with natural light and plenty of space. Since we were contemplating energy efficiency, we resolved a nagging issue that is present in a lot of timber frame construction, air tightness. Commonly found in timber frame construction, fiberglass insulation is installed in the rafter bays and board ceilings are installed over top. Unfortunately, board ceilings are anything but air tight, and fiberglass insulation needs to be in an airtight cavity for maximum effectiveness. So we were able to solve two issues at the same time for this homeowner. We removed the board ceiling and fiberglass insulation, we dense packed the rafter bays with cellulose insulation, and installed sheetrock in place of the boards. The boards were salvaged for re-use by the homeowner, and the space and light quality was dramatically improved. Some may think that losing the board ceiling took something away from the space, but what you'll see in the pictures is that it highly accentuates the heavy timbers and really makes them stand out in a beautiful way. Now with this added airtightness, better insulation, and brighter space, the homeowner hardly runs their wood stove, and it's so quiet in the space, an added bonus from changing the insulation. It became necessary to also add a sheetrock ceiling to the living room to hide the plumbing from the new bathroom layout above. Changing this ceiling gave the homeowner some real quality lighting that was lacking in the living room before. The brighter ceiling and new lighting layout completely transforms the living room into a space you want to hang out, even though the layout didn't change at all. When the homeowner saw the finished spaces she said "I can't believe this is my house, I want to live in this house"
Energy Efficiency: I touched a little on the efficiency above, but like all projects done with Mottram Architecture, we always want to leave you with a little extra. Timber frame construction with board ceilings and fiberglass insulation are notoriously leaky! If you want to know what we think about fiberglass insulation, check our our blog post on Why Fiberglass Insulation Sucks. By installing cellulose insulation and covering it with sheetrock we were able to greatly reduce the heat flowing out of this home. It not only improves cashflow it improves the comfort level in the space. Who wants to sit in their living room and feel a draft? Let us remind you, we are not saying cellulose insulation is an air barrier, we use the sheetrock to help with that, but it does significantly reduce the air flow over fiberglass insulation. And when we reduce the airflow, we reduce the heat flow. And when we reduce the heat flow, we reduce the need to re-heat that drafty air from outside. When it comes to energy efficiency the first and best place to start is air infiltration. We greatly reduced the air infiltration with the new insulation, but we also added a hat and warm boots. What I mean by that is, we improved the insulation in the roof, and we installed insulation in the basement. Maybe it's a silly analogy, but when you think about keeping warm, we always start with the hat and boots! With sustainability in mind, the next project will be to add a deck to the front of this house with rain catchment barrels from the metal roof. They are planning to plant a garden in the spring and the rain catchment system will help to irrigate the new garden.
Builder: East Shore Builders
Photographer: Michael Eric Berube
 Mottram Architecture
Timber frame homes offer unique challenges during a remodel. What often makes them beautiful and attractive to most homeowners, also makes them challenging for space requirements.
Context: The lovely couple that owned this home were struggling with some interesting floor plan challenges that just didn't work for their family. The loved the beautiful timbers and woodwork of their home, but the dramatically sloping ceilings on the second floor, particularly in the bathroom, just didn't work for this 1 1/2 bath home. Needing to use the skylight to approach the toilet was a less then ideal scenario. Although the bathroom footprint was more then adequate, the sloped ceiling only made half of the space useable. Check out the Before/After post on our blog to see the photos of the house pre-renovation. As much as they loved all the wood features in their home, another challenge they had was light. The wood ceiling made everything inside the house darker, even with a fantastic array of south facing windows, there were spaces in the home that felt dark and small. When they contacted us they wanted to know how could they make their brighter and more inviting, were there solutions to the 2nd floor sloped ceiling issues, and if they were going to do all of this work, how could they make their home more comfortable and efficient. A nagging water leak in the upstairs bathroom spurred them into action and here is how we solved their dilemma.
Conclusion: First, we added a little dormer to the rear of the house so we could get full headroom in nearly all of the upstairs bathroom! Then we decided to extend that dormer one more timber bay over to create a walk in closet with natural light and plenty of space. Since we were contemplating energy efficiency, we resolved a nagging issue that is present in a lot of timber frame construction, air tightness. Commonly found in timber frame construction, fiberglass insulation is installed in the rafter bays and board ceilings are installed over top. Unfortunately, board ceilings are anything but air tight, and fiberglass insulation needs to be in an airtight cavity for maximum effectiveness. So we were able to solve two issues at the same time for this homeowner. We removed the board ceiling and fiberglass insulation, we dense packed the rafter bays with cellulose insulation, and installed sheetrock in place of the boards. The boards were salvaged for re-use by the homeowner, and the space and light quality was dramatically improved. Some may think that losing the board ceiling took something away from the space, but what you'll see in the pictures is that it highly accentuates the heavy timbers and really makes them stand out in a beautiful way. Now with this added airtightness, better insulation, and brighter space, the homeowner hardly runs their wood stove, and it's so quiet in the space, an added bonus from changing the insulation. It became necessary to also add a sheetrock ceiling to the living room to hide the plumbing from the new bathroom layout above. Changing this ceiling gave the homeowner some real quality lighting that was lacking in the living room before. The brighter ceiling and new lighting layout completely transforms the living room into a space you want to hang out, even though the layout didn't change at all. When the homeowner saw the finished spaces she said "I can't believe this is my house, I want to live in this house"
Energy Efficiency: I touched a little on the efficiency above, but like all projects done with Mottram Architecture, we always want to leave you with a little extra. Timber frame construction with board ceilings and fiberglass insulation are notoriously leaky! If you want to know what we think about fiberglass insulation, check our our blog post on Why Fiberglass Insulation Sucks. By installing cellulose insulation and covering it with sheetrock we were able to greatly reduce the heat flowing out of this home. It not only improves cashflow it improves the comfort level in the space. Who wants to sit in their living room and feel a draft? Let us remind you, we are not saying cellulose insulation is an air barrier, we use the sheetrock to help with that, but it does significantly reduce the air flow over fiberglass insulation. And when we reduce the airflow, we reduce the heat flow. And when we reduce the heat flow, we reduce the need to re-heat that drafty air from outside. When it comes to energy efficiency the first and best place to start is air infiltration. We greatly reduced the air infiltration with the new insulation, but we also added a hat and warm boots. What I mean by that is, we improved the insulation in the roof, and we installed insulation in the basement. Maybe it's a silly analogy, but when you think about keeping warm, we always start with the hat and boots! With sustainability in mind, the next project will be to add a deck to the front of this house with rain catchment barrels from the metal roof. They are planning to plant a garden in the spring and the rain catchment system will help to irrigate the new garden.
Builder: East Shore Builders
Photographer: Michael Eric Berube
Michael Eric Berube, Maine Virtual Home Tours
 Northwest Outdoor Lighting
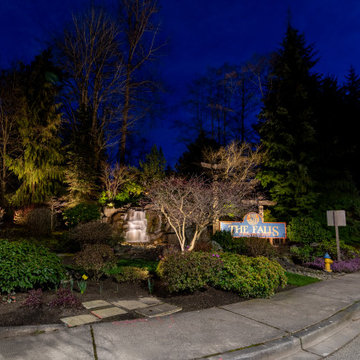
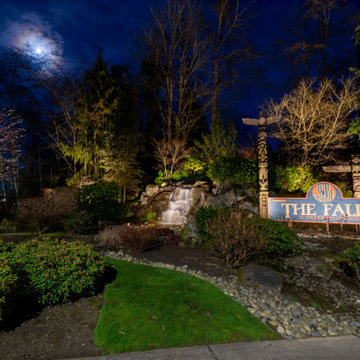
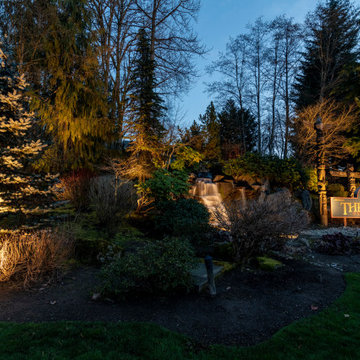
“The Falls” at Snohomish Cascade, located in Snohomish, Washington, is a planned community of three divisions that was developed by Donald Leavitt from March 2, 1988 – August 9, 1989. The community is a family friendly neighborhood with cul-de-sacs, a waterfall, parks, trails, Totem Falls Elementary School, and nearby shopping.
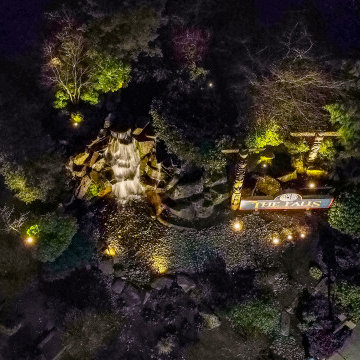
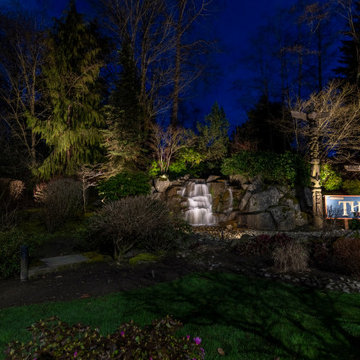
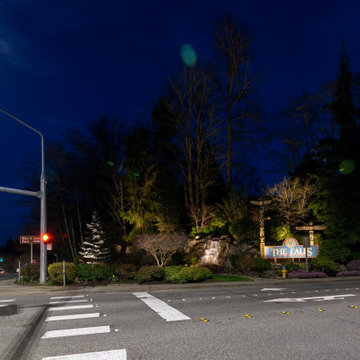
The HOA contacted Northwest Outdoor Lighting in the fall of 2019 for a landscape lighting quote. They had old lighting that was constantly being damaged or buried under foliage. After renovating their electrical and signage, they finally called to say they were ready for the new outdoor lighting we quoted. We installed 6w LED uplights and washes with all wiring in conduit. We highlighted the totem poles, trees and the new sign for easy visibility at night. The water fall falls 15-20 feet from top.
It took our team one day to complete the lighting installation and now the whole street corner is welcoming and bright!
Find the right local pro for your project

 Signature Kitchen & Bath Design Inc.
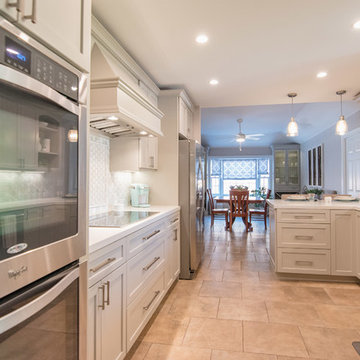
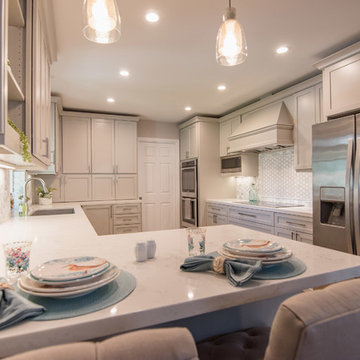
This 1970’s kitchen had been well used for decades and was due for an update when this retired couple started hosting a new generation with the birth of their grandchildren. Dark slab wood cabinets were replaced with off-white shaker style cabinets. Pretty details like the range hood cover, bookcase cabinets, and appliance garage helps add beautiful yet function details to their new space. By removing the wall separating the dining room and kitchen and adding built-in buffet cabinets we were able to open up the spaces without loosing any storage. Their favorite part is the stools at the peninsula where their grandchildren can sit after school, play games, and enjoy a weekend breakfast with them.
Interior Design by Bennett Design Co.
Heartwood Residential
Photo by Mischa Montagna
 Northwest Outdoor Lighting
“The Falls” at Snohomish Cascade, located in Snohomish, Washington, is a planned community of three divisions that was developed by Donald Leavitt from March 2, 1988 – August 9, 1989. The community is a family friendly neighborhood with cul-de-sacs, a waterfall, parks, trails, Totem Falls Elementary School, and nearby shopping.
The HOA contacted Northwest Outdoor Lighting in the fall of 2019 for a landscape lighting quote. They had old lighting that was constantly being damaged or buried under foliage. After renovating their electrical and signage, they finally called to say they were ready for the new outdoor lighting we quoted. We installed 6w LED uplights and washes with all wiring in conduit. We highlighted the totem poles, trees and the new sign for easy visibility at night. The water fall falls 15-20 feet from top.
It took our team one day to complete the lighting installation and now the whole street corner is welcoming and bright!
 Signature Kitchen & Bath Design Inc.
This 1970’s kitchen had been well used for decades and was due for an update when this retired couple started hosting a new generation with the birth of their grandchildren. Dark slab wood cabinets were replaced with off-white shaker style cabinets. Pretty details like the range hood cover, bookcase cabinets, and appliance garage helps add beautiful yet function details to their new space. By removing the wall separating the dining room and kitchen and adding built-in buffet cabinets we were able to open up the spaces without loosing any storage. Their favorite part is the stools at the peninsula where their grandchildren can sit after school, play games, and enjoy a weekend breakfast with them.
Interior Design by Bennett Design Co.
Heartwood Residential
Photo by Mischa Montagna
 Signature Kitchen & Bath Design Inc.
This 1970’s kitchen had been well used for decades and was due for an update when this retired couple started hosting a new generation with the birth of their grandchildren. Dark slab wood cabinets were replaced with off-white shaker style cabinets. Pretty details like the range hood cover, bookcase cabinets, and appliance garage helps add beautiful yet function details to their new space. By removing the wall separating the dining room and kitchen and adding built-in buffet cabinets we were able to open up the spaces without loosing any storage. Their favorite part is the stools at the peninsula where their grandchildren can sit after school, play games, and enjoy a weekend breakfast with them.
Interior Design by Bennett Design Co.
Heartwood Residential
Photo by Mischa Montagna


 Northwest Outdoor Lighting
“The Falls” at Snohomish Cascade, located in Snohomish, Washington, is a planned community of three divisions that was developed by Donald Leavitt from March 2, 1988 – August 9, 1989. The community is a family friendly neighborhood with cul-de-sacs, a waterfall, parks, trails, Totem Falls Elementary School, and nearby shopping.
The HOA contacted Northwest Outdoor Lighting in the fall of 2019 for a landscape lighting quote. They had old lighting that was constantly being damaged or buried under foliage. After renovating their electrical and signage, they finally called to say they were ready for the new outdoor lighting we quoted. We installed 6w LED uplights and washes with all wiring in conduit. We highlighted the totem poles, trees and the new sign for easy visibility at night. The water fall falls 15-20 feet from top.
It took our team one day to complete the lighting installation and now the whole street corner is welcoming and bright!
 Northwest Outdoor Lighting
“The Falls” at Snohomish Cascade, located in Snohomish, Washington, is a planned community of three divisions that was developed by Donald Leavitt from March 2, 1988 – August 9, 1989. The community is a family friendly neighborhood with cul-de-sacs, a waterfall, parks, trails, Totem Falls Elementary School, and nearby shopping.
The HOA contacted Northwest Outdoor Lighting in the fall of 2019 for a landscape lighting quote. They had old lighting that was constantly being damaged or buried under foliage. After renovating their electrical and signage, they finally called to say they were ready for the new outdoor lighting we quoted. We installed 6w LED uplights and washes with all wiring in conduit. We highlighted the totem poles, trees and the new sign for easy visibility at night. The water fall falls 15-20 feet from top.
It took our team one day to complete the lighting installation and now the whole street corner is welcoming and bright!
 Northwest Outdoor Lighting
“The Falls” at Snohomish Cascade, located in Snohomish, Washington, is a planned community of three divisions that was developed by Donald Leavitt from March 2, 1988 – August 9, 1989. The community is a family friendly neighborhood with cul-de-sacs, a waterfall, parks, trails, Totem Falls Elementary School, and nearby shopping.
The HOA contacted Northwest Outdoor Lighting in the fall of 2019 for a landscape lighting quote. They had old lighting that was constantly being damaged or buried under foliage. After renovating their electrical and signage, they finally called to say they were ready for the new outdoor lighting we quoted. We installed 6w LED uplights and washes with all wiring in conduit. We highlighted the totem poles, trees and the new sign for easy visibility at night. The water fall falls 15-20 feet from top.
It took our team one day to complete the lighting installation and now the whole street corner is welcoming and bright!

 Urban Oasis Design & Construction LLC
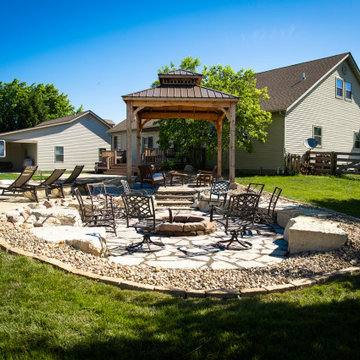
This family was interested in adding another living space to their home. After designing several options, this large, composite deck with gas fireplace and louvered cover rose to the top. The louvers open to let light in or close to keep rain out. Infratech heaters compliment the warmth given by the new gas fireplace creating a cozy space for dining and entertaining almost year-round.
The spaces around the deck feature lawn for the dog, a modern bluestone stepping stone pathway, new privacy fencing, plantings and a fun recirculating water feature.
Photos by William Wright Photography
 Signature Kitchen & Bath Design Inc.
This 1970’s kitchen had been well used for decades and was due for an update when this retired couple started hosting a new generation with the birth of their grandchildren. Dark slab wood cabinets were replaced with off-white shaker style cabinets. Pretty details like the range hood cover, bookcase cabinets, and appliance garage helps add beautiful yet function details to their new space. By removing the wall separating the dining room and kitchen and adding built-in buffet cabinets we were able to open up the spaces without loosing any storage. Their favorite part is the stools at the peninsula where their grandchildren can sit after school, play games, and enjoy a weekend breakfast with them.
Interior Design by Bennett Design Co.
Heartwood Residential
Photo by Mischa Montagna

 Northwest Outdoor Lighting
“The Falls” at Snohomish Cascade, located in Snohomish, Washington, is a planned community of three divisions that was developed by Donald Leavitt from March 2, 1988 – August 9, 1989. The community is a family friendly neighborhood with cul-de-sacs, a waterfall, parks, trails, Totem Falls Elementary School, and nearby shopping.
The HOA contacted Northwest Outdoor Lighting in the fall of 2019 for a landscape lighting quote. They had old lighting that was constantly being damaged or buried under foliage. After renovating their electrical and signage, they finally called to say they were ready for the new outdoor lighting we quoted. We installed 6w LED uplights and washes with all wiring in conduit. We highlighted the totem poles, trees and the new sign for easy visibility at night. The water fall falls 15-20 feet from top.
It took our team one day to complete the lighting installation and now the whole street corner is welcoming and bright!

 Irons Brothers Construction Inc
A retired couple desired a valiant master suite in their “forever home”. After living in their mid-century house for many years, they approached our design team with a concept to add a 3rd story suite with sweeping views of Puget sound. Our team stood atop the home’s rooftop with the clients admiring the view that this structural lift would create in enjoyment and value. The only concern was how they and their dear-old dog, would get from their ground floor garage entrance in the daylight basement to this new suite in the sky?
Our CAPS design team specified universal design elements throughout the home, to allow the couple and their 120lb. Pit Bull Terrier to age in place. A new residential elevator added to the westside of the home. Placing the elevator shaft on the exterior of the home minimized the need for interior structural changes.
A shed roof for the addition followed the slope of the site, creating tall walls on the east side of the master suite to allow ample daylight into rooms without sacrificing useable wall space in the closet or bathroom. This kept the western walls low to reduce the amount of direct sunlight from the late afternoon sun, while maximizing the view of the Puget Sound and distant Olympic mountain range.
The master suite is the crowning glory of the redesigned home. The bedroom puts the bed up close to the wide picture window. While soothing violet-colored walls and a plush upholstered headboard have created a bedroom that encourages lounging, including a plush dog bed. A private balcony provides yet another excuse for never leaving the bedroom suite, and clerestory windows between the bedroom and adjacent master bathroom help flood the entire space with natural light.
The master bathroom includes an easy-access shower, his-and-her vanities with motion-sensor toe kick lights, and pops of beachy blue in the tile work and on the ceiling for a spa-like feel.
Some other universal design features in this master suite include wider doorways, accessible balcony, wall mounted vanities, tile and vinyl floor surfaces to reduce transition and pocket doors for easy use.
A large walk-through closet links the bedroom and bathroom, with clerestory windows at the high ceilings The third floor is finished off with a vestibule area with an indoor sauna, and an adjacent entertainment deck with an outdoor kitchen & bar.
 Thyme & Place Design LLC
When my client had to move from her company office to work at home, she set up in the dining room. Despite her best efforts, this was not the long-term solution she was looking for. My client realized she needed a dedicated space not on the main floor of the home. On one hand, having your office space right next to the kitchen is handy. On the other hand, it made separating work and home life was not that easy.
The house was a ranch. In essence, the basement would run entire length of the home. As we came down the steps, we entered a time capsule. The house was built in the 1950’s. The walls were covered with original knotty pine paneling. There was a wood burning fireplace and considering this was a basement, high ceilings. In addition, there was everything her family could not store at their own homes. As we wound though the space, I though “wow this has potential”, Eventually, after walking through the laundry room we came to a small nicely lit room. This would be the office.
My client looked at me and asked what I thought. Undoubtedly, I said, this can be a great workspace, but do you really want to walk through this basement and laundry to get here? Without reservation, my client said where do we start?
Once the design was in place, we started the renovation. The knotty pine paneling had to go. Specifically, to add some insulation and control the dampness and humidity. The laundry room wall was relocated to create a hallway to the office.
At the far end of the room, we designated a workout zone. Weights, mats, exercise bike and television are at the ready for morning or afternoon workouts. The space can be concealed by a folding screen for party time. Doors to an old closet under the stairs were relocated to the workout area for hidden storage. Now we had nice wall for a beautiful console and mirror for storage and serving during parties.
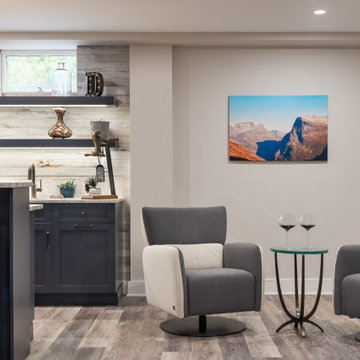
In order to add architectural details, we covered the old ugly support columns with simple recessed millwork panels. This detail created a visual division between the bar area and the seating area in front of the fireplace. The old red brick on the fireplace surround was replaced with stack stone. A mantle was made from reclaimed wood. Additional reclaimed wood floating shelves left and right of the fireplace provides decorative display while maintaining a rustic element balancing the copper end table and leather swivel rocker.
We found an amazing rug which tied all of the colors together further defining the gathering space. Russet and burnt orange became the accent color unifying each space. With a bit of whimsy, a rather unusual light fixture which looks like roots from a tree growing through the ceiling is a conversation piece.
The office space is quite and removed from the main part of the basement. There is a desk large enough for multiple screens, a small bookcase holding office supplies and a comfortable chair for conference calls. Because working from home requires many online meetings, we added a shiplap wall painted in Hale Navy to contrast with the orange fabric on the chair. We finished the décor with a painting from my client’s father. This is the background online visitors will see.
The last and best part of the renovation is the beautiful bar. My client is an avid collector of wine. She already had the EuroCave refrigerator, so I incorporated it into the design. The cabinets are painted Temptation Grey from Benjamin Moore. The counter tops are my favorite hard working quartzite Brown Fantasy. The backsplash is a combination of rustic wood and old tin ceiling like porcelain tiles. Together with the textures of the reclaimed wood and hide poofs balanced against the smooth finish of the cabinets, we created a comfortable luxury for relaxing.
There is ample storage for bottles, cans, glasses, and anything else you can think of for a great party. In addition to the wine storage, we incorporated a beverage refrigerator, an ice maker, and a sink. Floating shelves with integrated lighting illuminate the back bar. The raised height of the front bar provides the perfect wine tasting and paring spot. I especially love the pendant lights which look like wine glasses.
Finally, I selected carpet for the stairs and office. It is perfect for noise reduction. Meanwhile for the overall flooring, I specifically selected a high-performance vinyl plank floor. We often use this product as it is perfect to install on a concrete floor. It is soft to walk on, easy to clean and does not reduce the overall height of the space.
 Irons Brothers Construction Inc
A retired couple desired a valiant master suite in their “forever home”. After living in their mid-century house for many years, they approached our design team with a concept to add a 3rd story suite with sweeping views of Puget sound. Our team stood atop the home’s rooftop with the clients admiring the view that this structural lift would create in enjoyment and value. The only concern was how they and their dear-old dog, would get from their ground floor garage entrance in the daylight basement to this new suite in the sky?
Our CAPS design team specified universal design elements throughout the home, to allow the couple and their 120lb. Pit Bull Terrier to age in place. A new residential elevator added to the westside of the home. Placing the elevator shaft on the exterior of the home minimized the need for interior structural changes.
A shed roof for the addition followed the slope of the site, creating tall walls on the east side of the master suite to allow ample daylight into rooms without sacrificing useable wall space in the closet or bathroom. This kept the western walls low to reduce the amount of direct sunlight from the late afternoon sun, while maximizing the view of the Puget Sound and distant Olympic mountain range.
The master suite is the crowning glory of the redesigned home. The bedroom puts the bed up close to the wide picture window. While soothing violet-colored walls and a plush upholstered headboard have created a bedroom that encourages lounging, including a plush dog bed. A private balcony provides yet another excuse for never leaving the bedroom suite, and clerestory windows between the bedroom and adjacent master bathroom help flood the entire space with natural light.
The master bathroom includes an easy-access shower, his-and-her vanities with motion-sensor toe kick lights, and pops of beachy blue in the tile work and on the ceiling for a spa-like feel.
Some other universal design features in this master suite include wider doorways, accessible balcony, wall mounted vanities, tile and vinyl floor surfaces to reduce transition and pocket doors for easy use.
A large walk-through closet links the bedroom and bathroom, with clerestory windows at the high ceilings The third floor is finished off with a vestibule area with an indoor sauna, and an adjacent entertainment deck with an outdoor kitchen & bar.

 ArtCraft Homes LLC
A total gut-to-the-studs and rebuild within the shell of a vintage 1931 Spanish bungalow in the Echo Park neighborhood of Los Angeles by Tim Braseth of ArtCraft Homes. Every space was reconfigured and the floorplan flipped to accommodate 3 bedrooms and 2 bathrooms, a dining room and expansive kitchen which opens out to a full backyard patio and deck with views of the L.A. skyline. Remodel by ArtCraft Homes. Staging by ArtCraft Collection. Photography by Larry Underhill.

 Jessica Cain
Vivi's Bedroom
Photo: Jessica Cain © 2017 Houzz
Inspiration for a bedroom eclectic girl carpeted and gray floor kids' bedroom remodel in Kansas City with gray walls
Inspiration for a bedroom eclectic girl carpeted and gray floor kids' bedroom remodel in Kansas City with gray walls

 Reader & Swartz Architects, P.C.
Photography by Nathan Webb, AIA
Example of a classic blue two-story wood gable roof design in DC Metro
Example of a classic blue two-story wood gable roof design in DC Metro
75